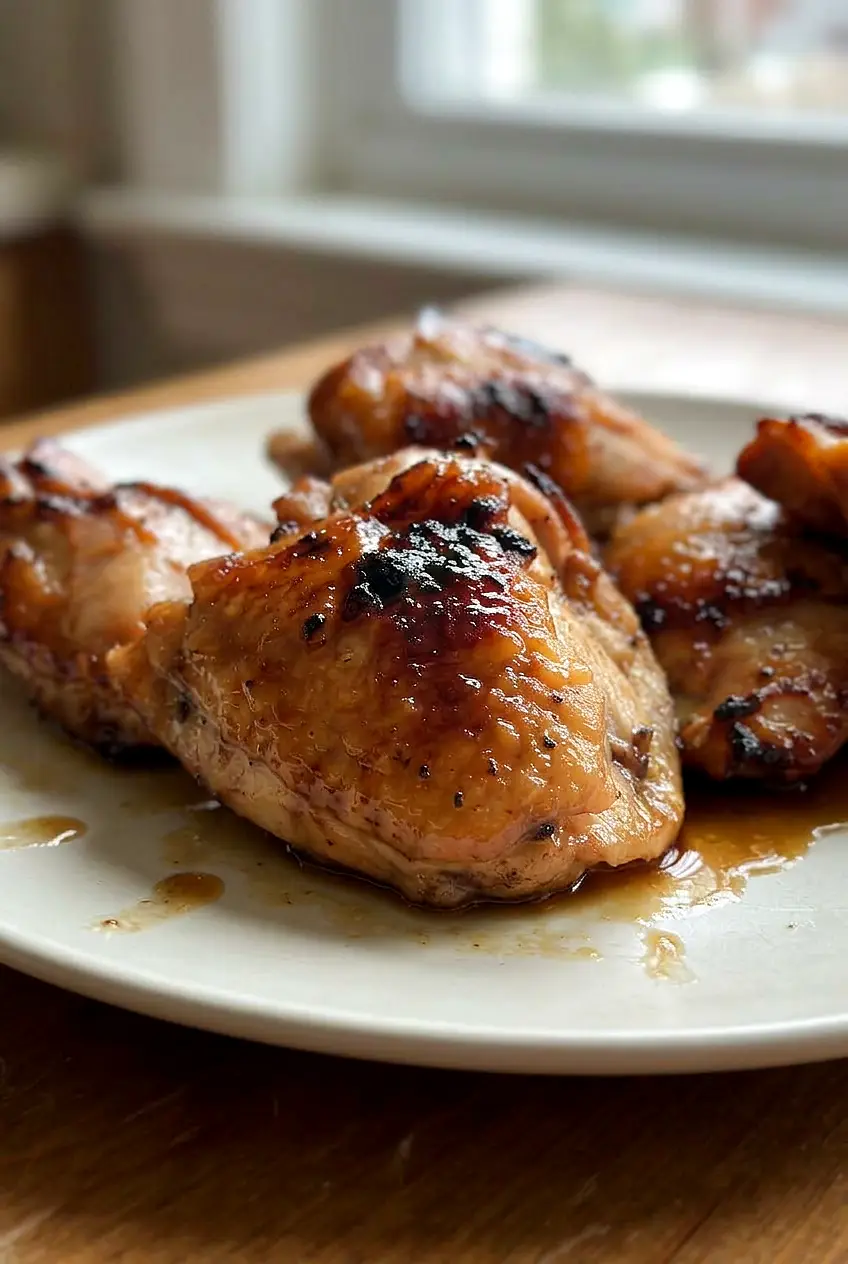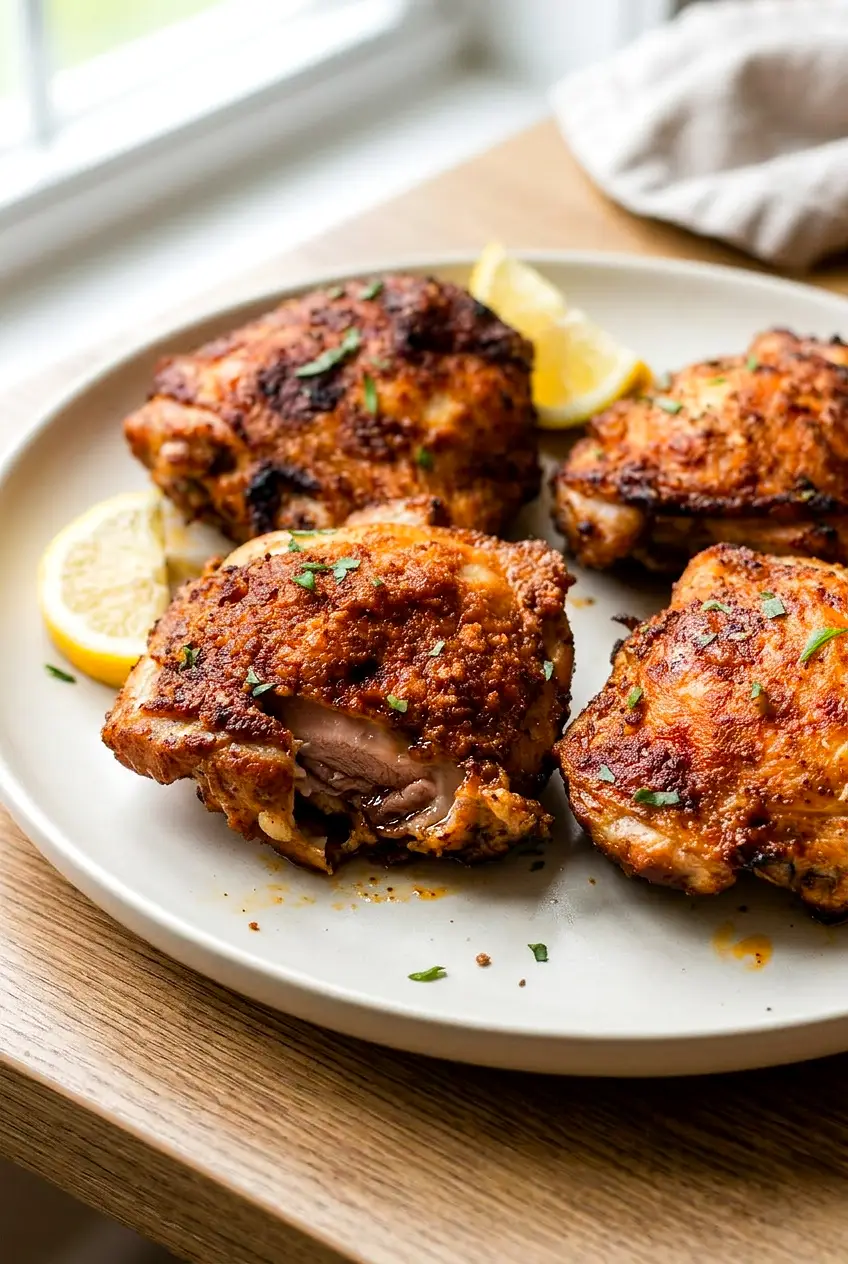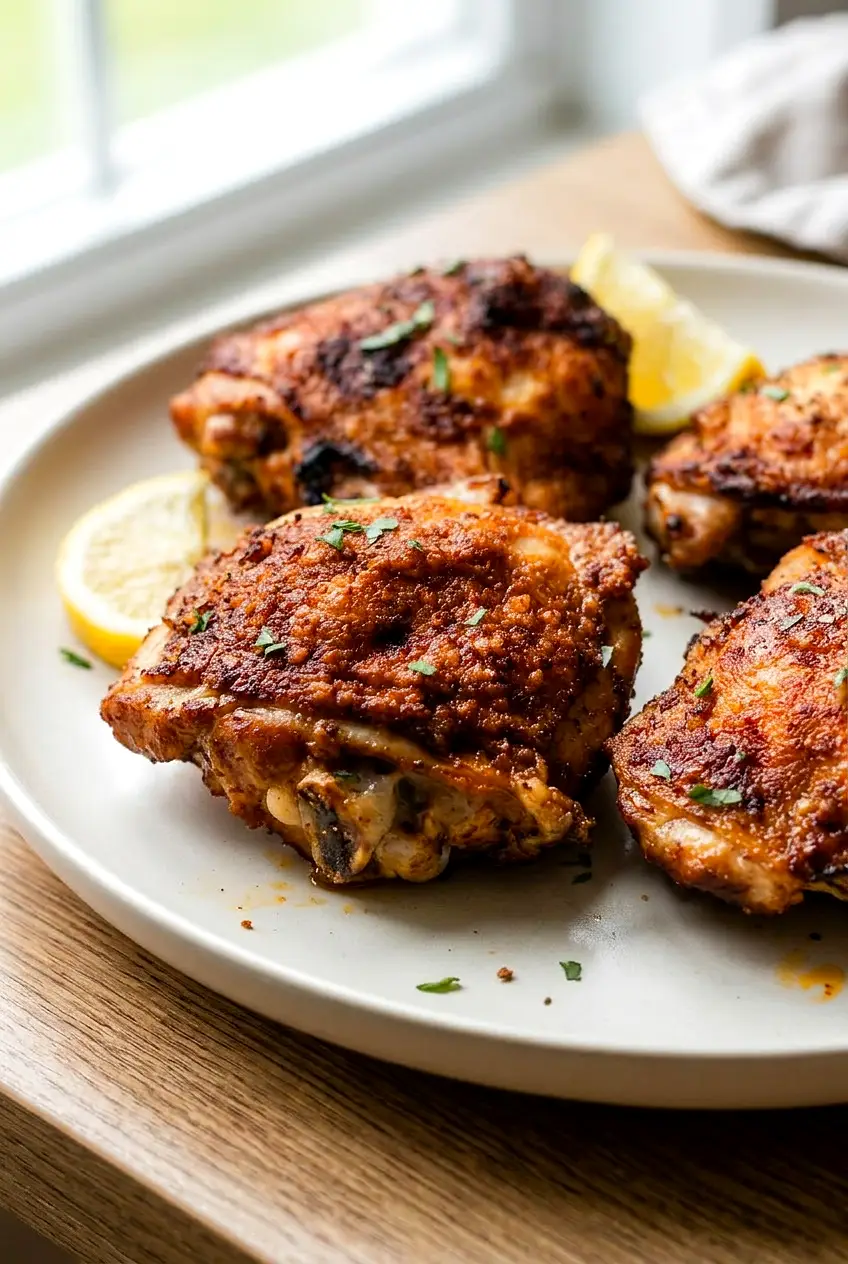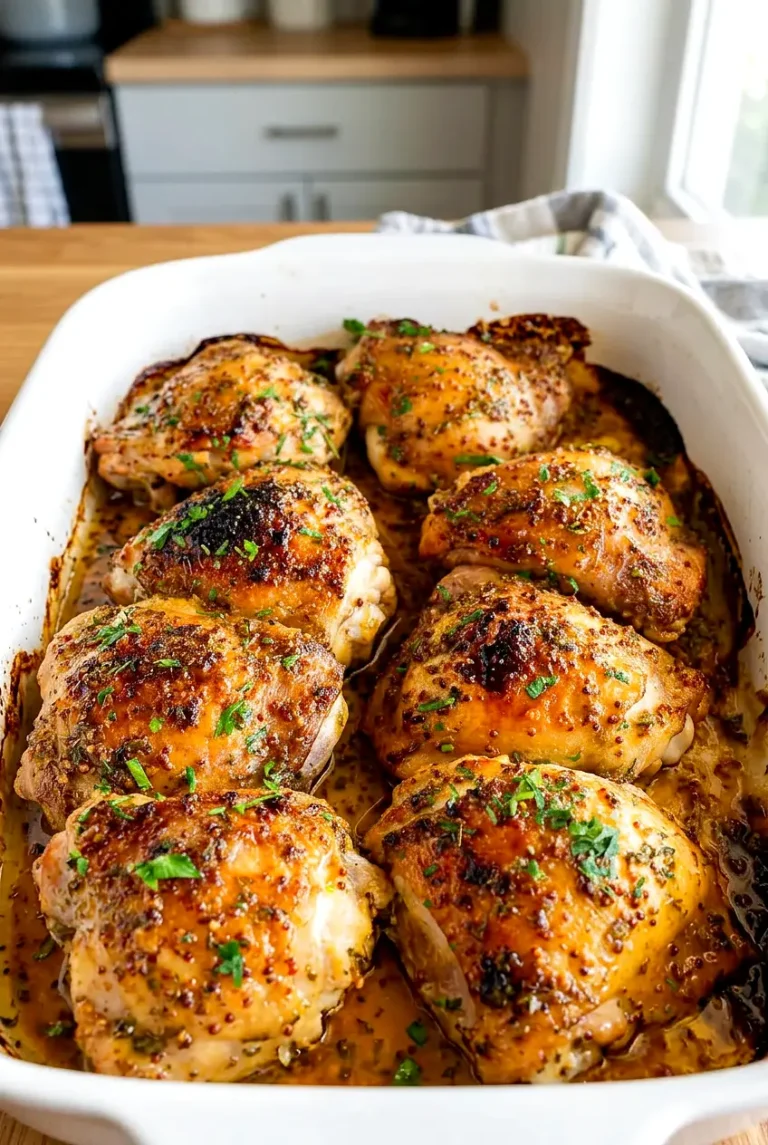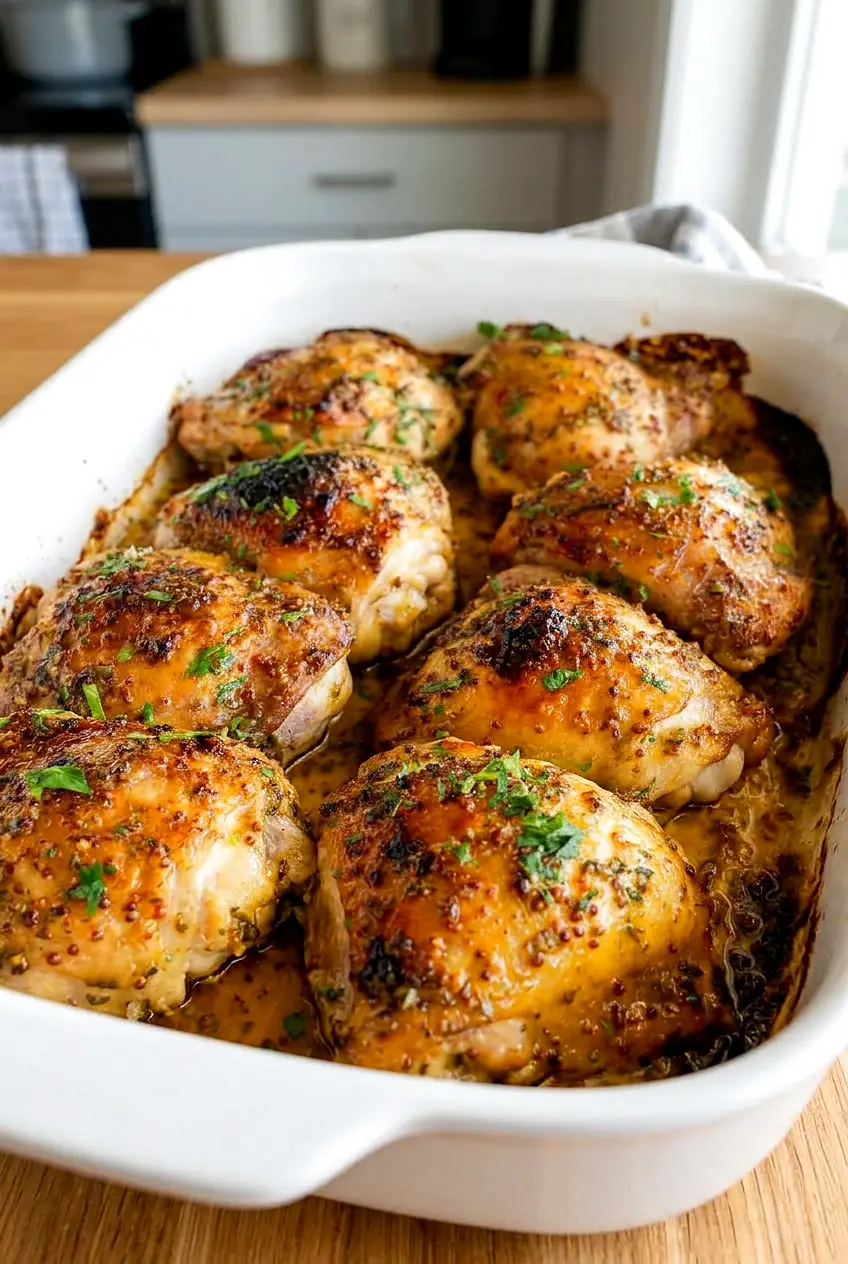
Author

Julia

Browsing

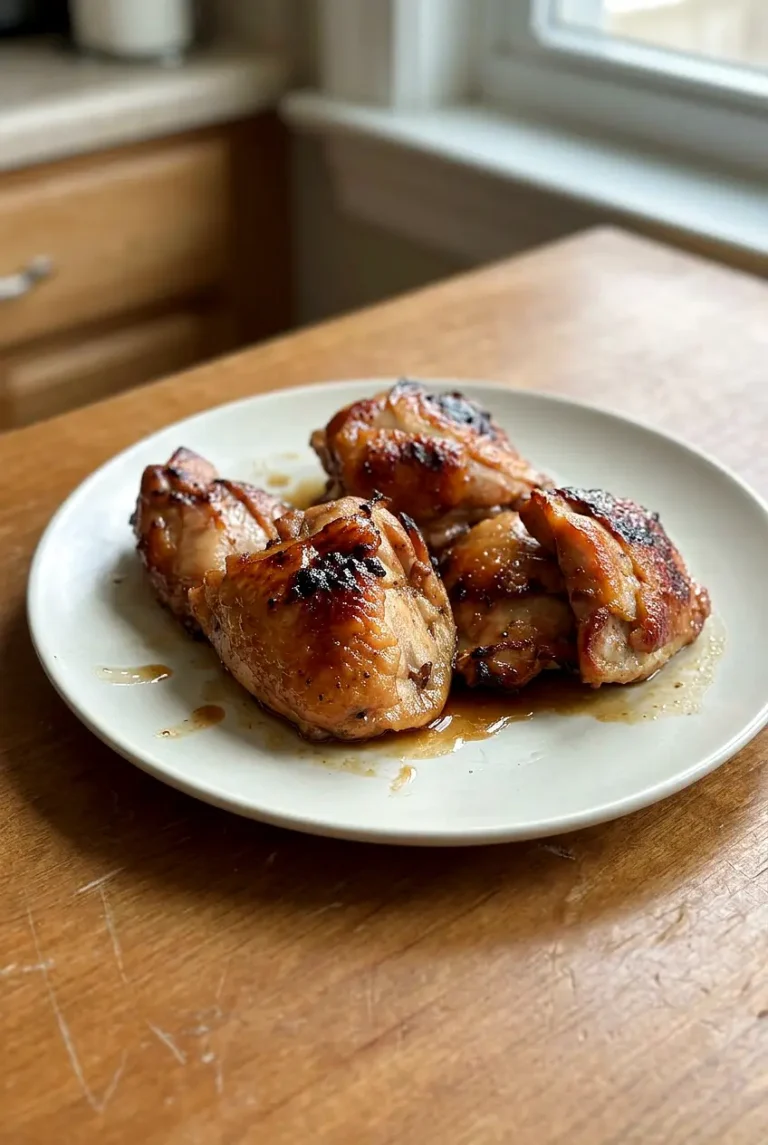
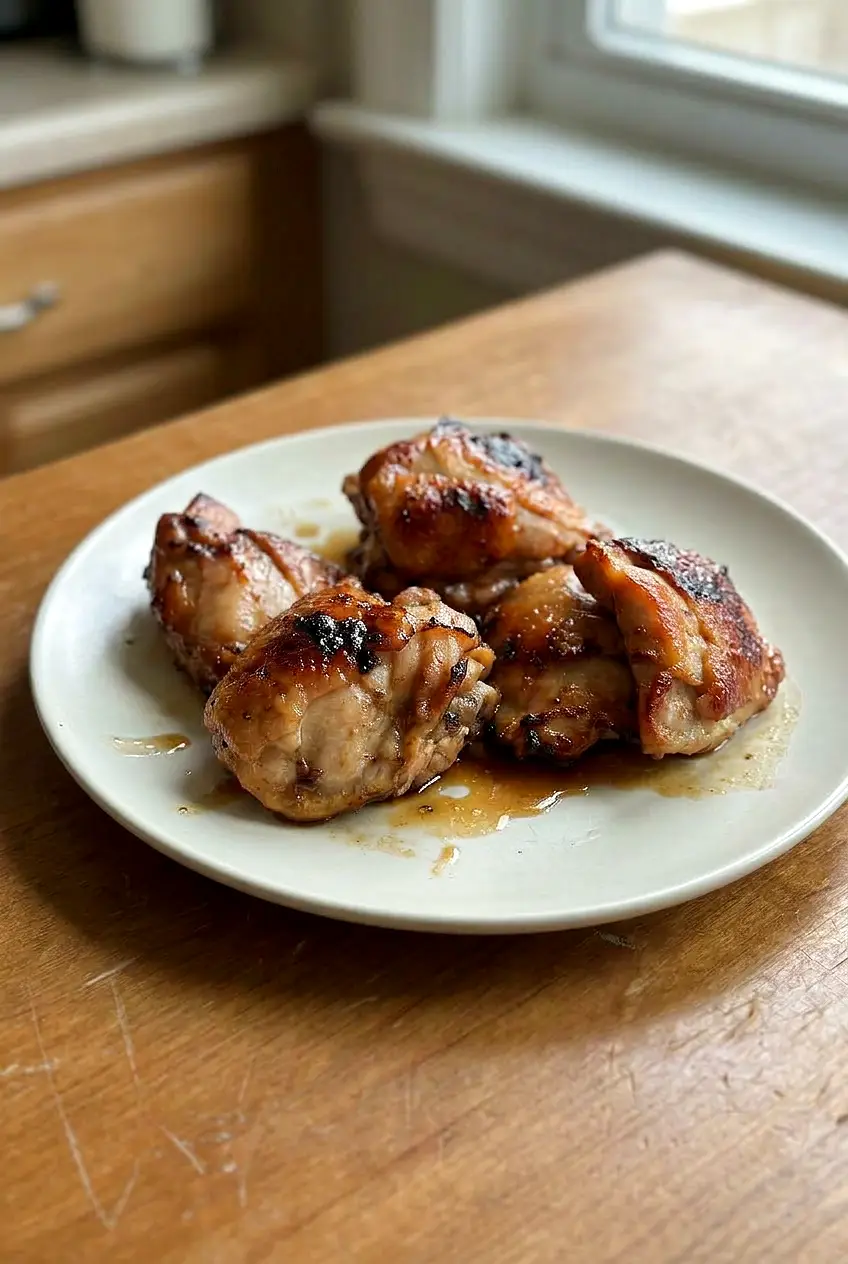
Garlic Miso Chicken

Garlic miso chicken is a simple roasted chicken dinner with a savory-sweet glaze, tender shallots, and enough pan juices to spoon over rice. White miso keeps the flavor mellow, while garlic, soy sauce, and a little vinegar balance the sweetness.

The method is straightforward: coat the chicken, spread it out on a pan, and roast until browned and cooked through. The main thing to watch is spacing the thighs well so they roast instead of steam, and keeping an eye on the glaze near the end since miso and sugar can darken quickly.

Ingredients for Garlic Miso Chicken
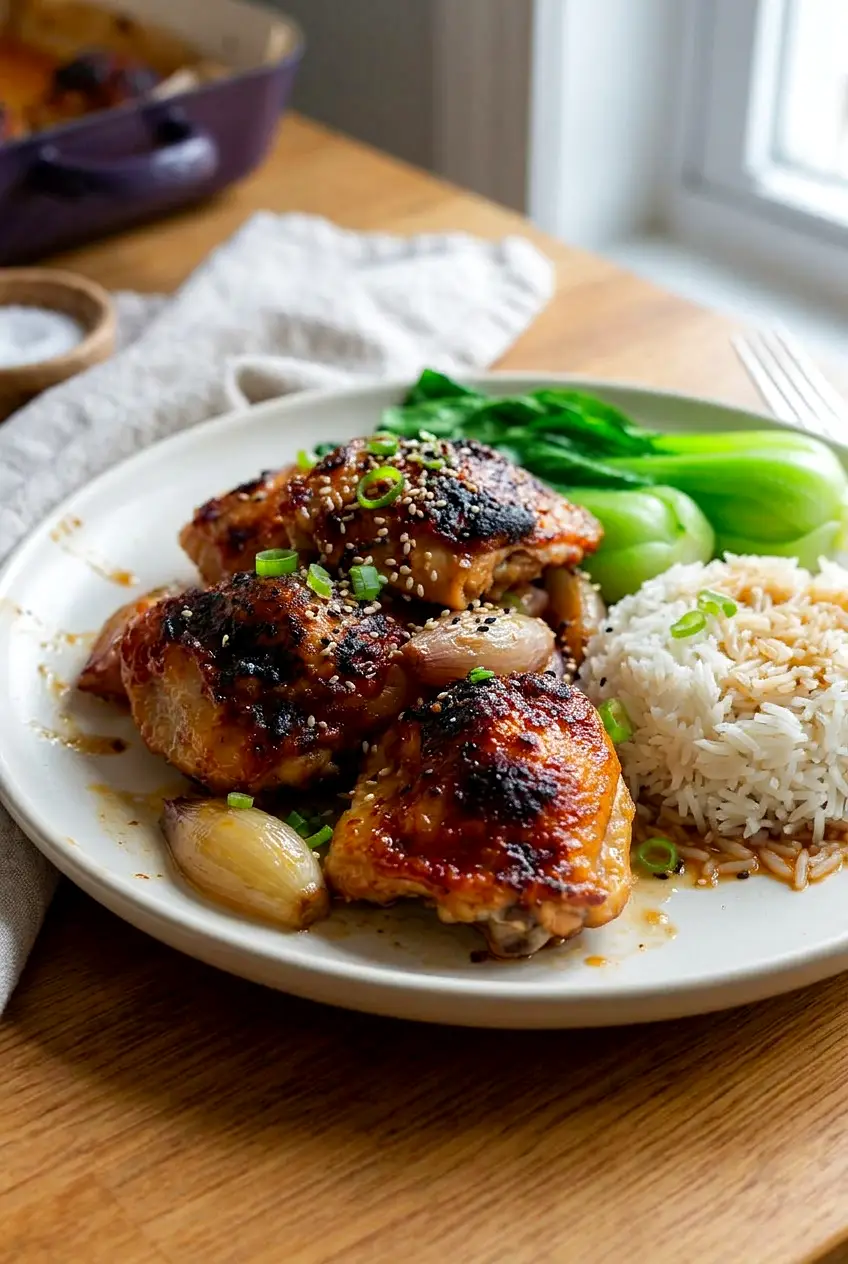
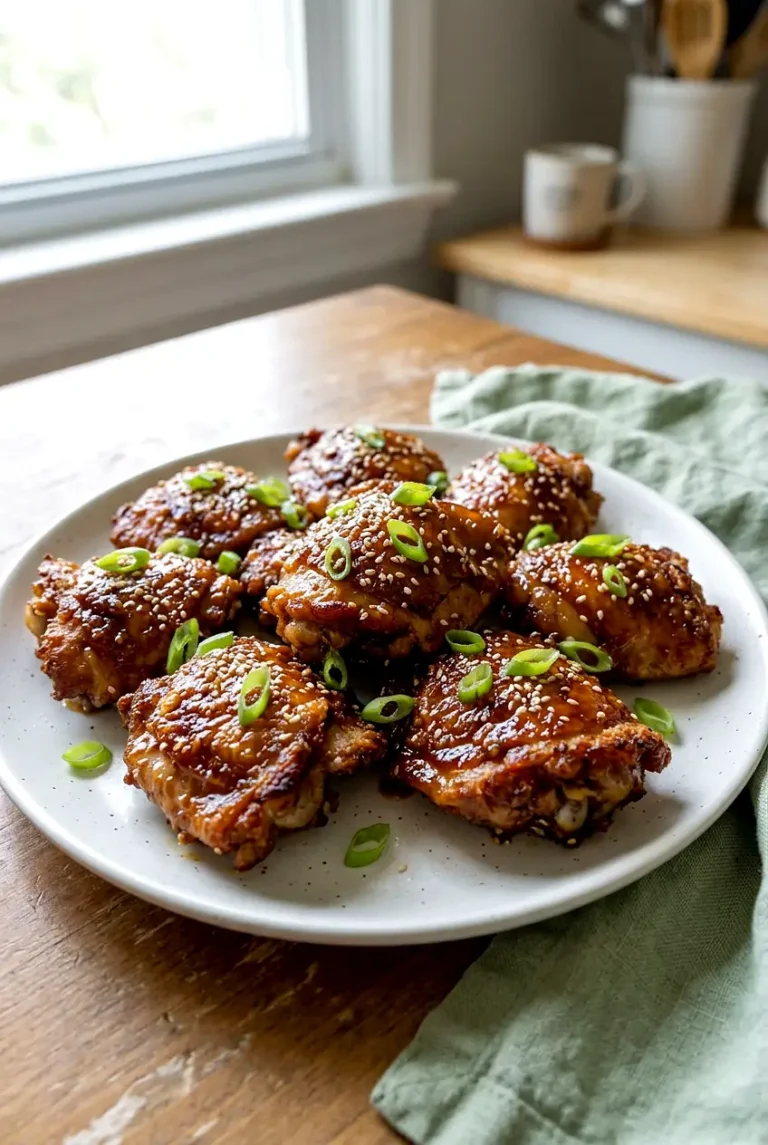
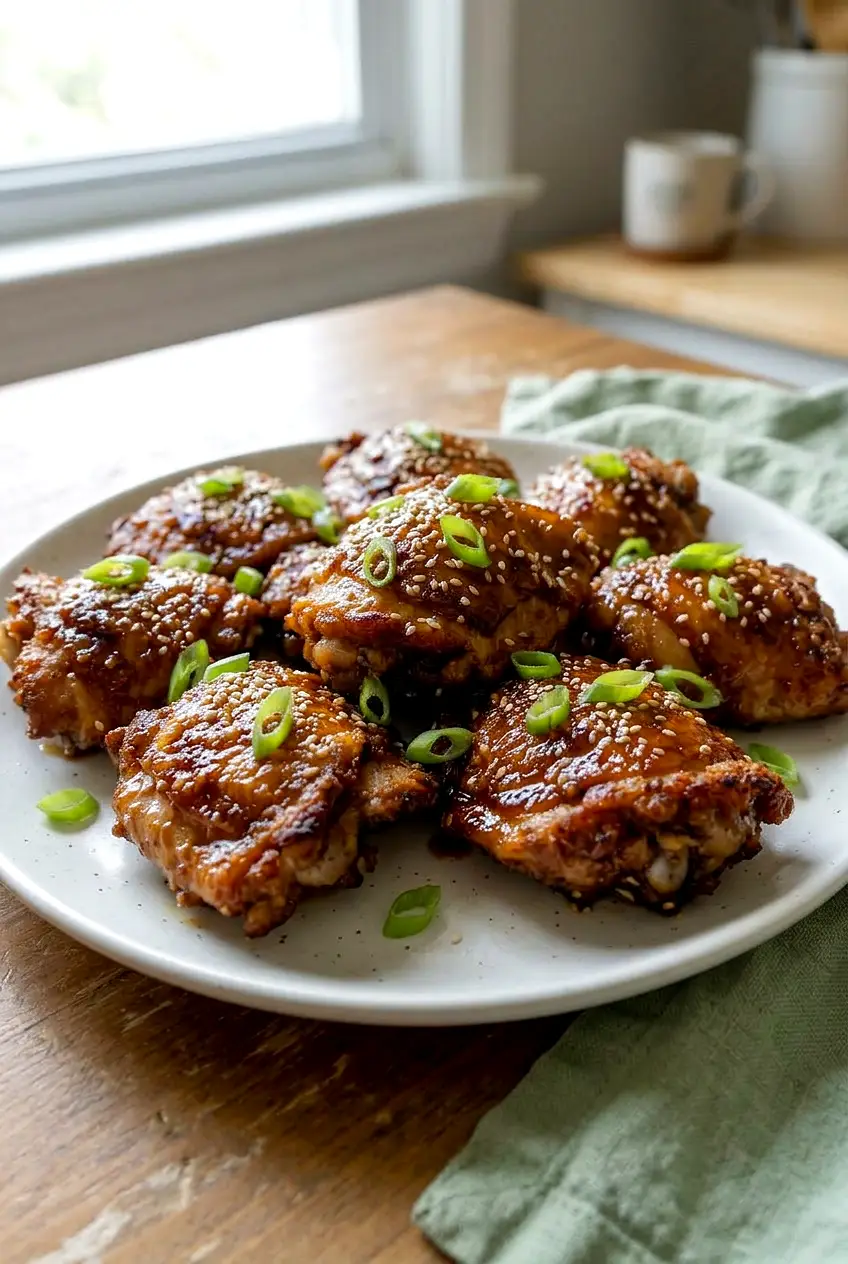
Side angle of garlic miso chicken thighs over rice with sesame seeds on top
  • 8 bone-in, skin-on chicken thighs (about 2 1/2 to 3 pounds, or 1,150g to 1,350g)
  • 3 tablespoons white miso paste (about 55g)
  • 3 tablespoons light soy sauce
  • 2 tablespoons rice vinegar
  • 4 garlic cloves, minced
  • 2 tablespoons brown sugar or maple syrup (about 25g)
  • 3 to 4 shallots, peeled and halved (about 120g)
  • Black pepper, to taste
  • Salt, only if needed
  • Cooked basmati rice, for serving
  • Steamed bok choy, for serving
  • 1 to 2 teaspoons sesame seeds, for garnish

White miso works best here because it is milder than red miso and keeps the glaze balanced. Since both miso and soy sauce are salty, wait to add extra salt until the chicken is cooked.

If you do not have rice vinegar, white vinegar or apple cider vinegar will work in the same amount. If shallots are unavailable, use thick slices of yellow onion so they roast in the pan instead of cooking down too quickly.

How to Make Garlic Miso Chicken
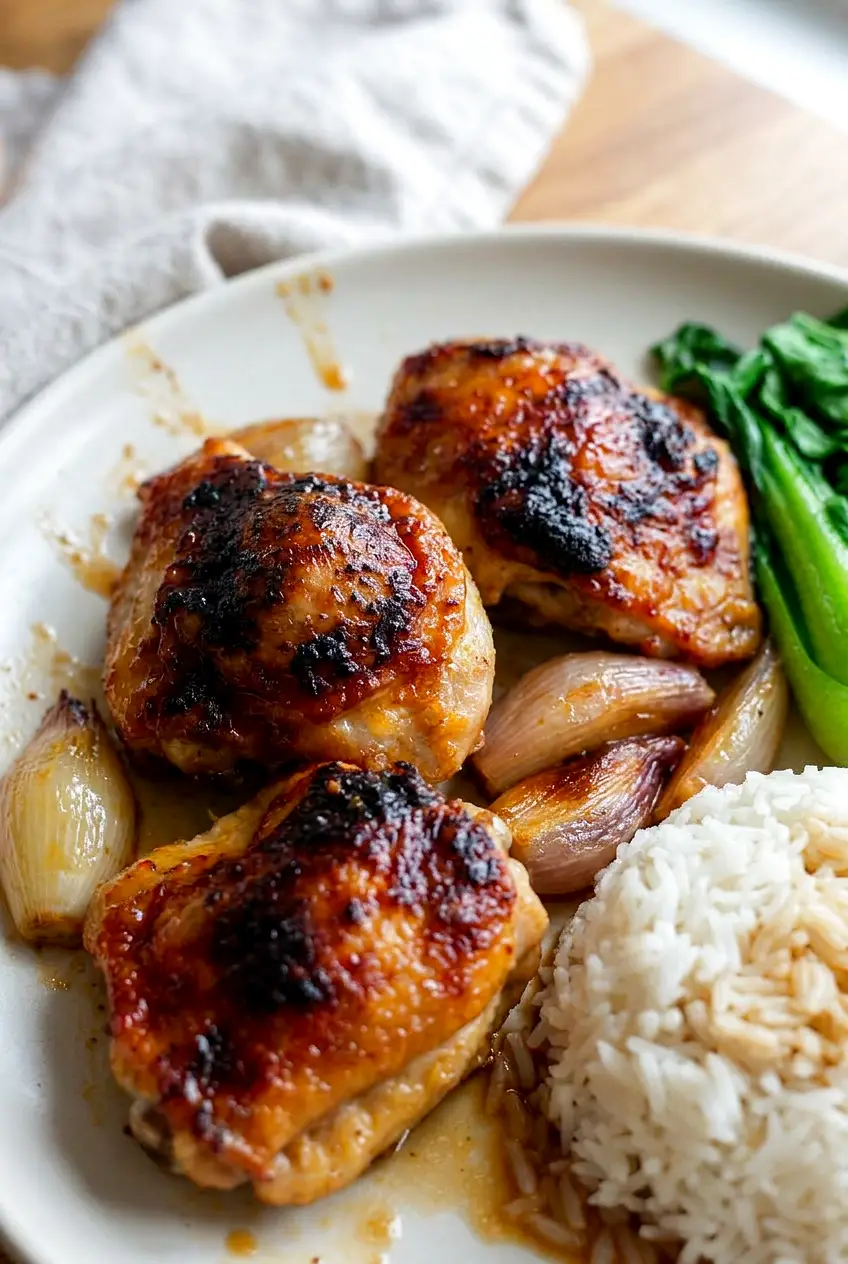
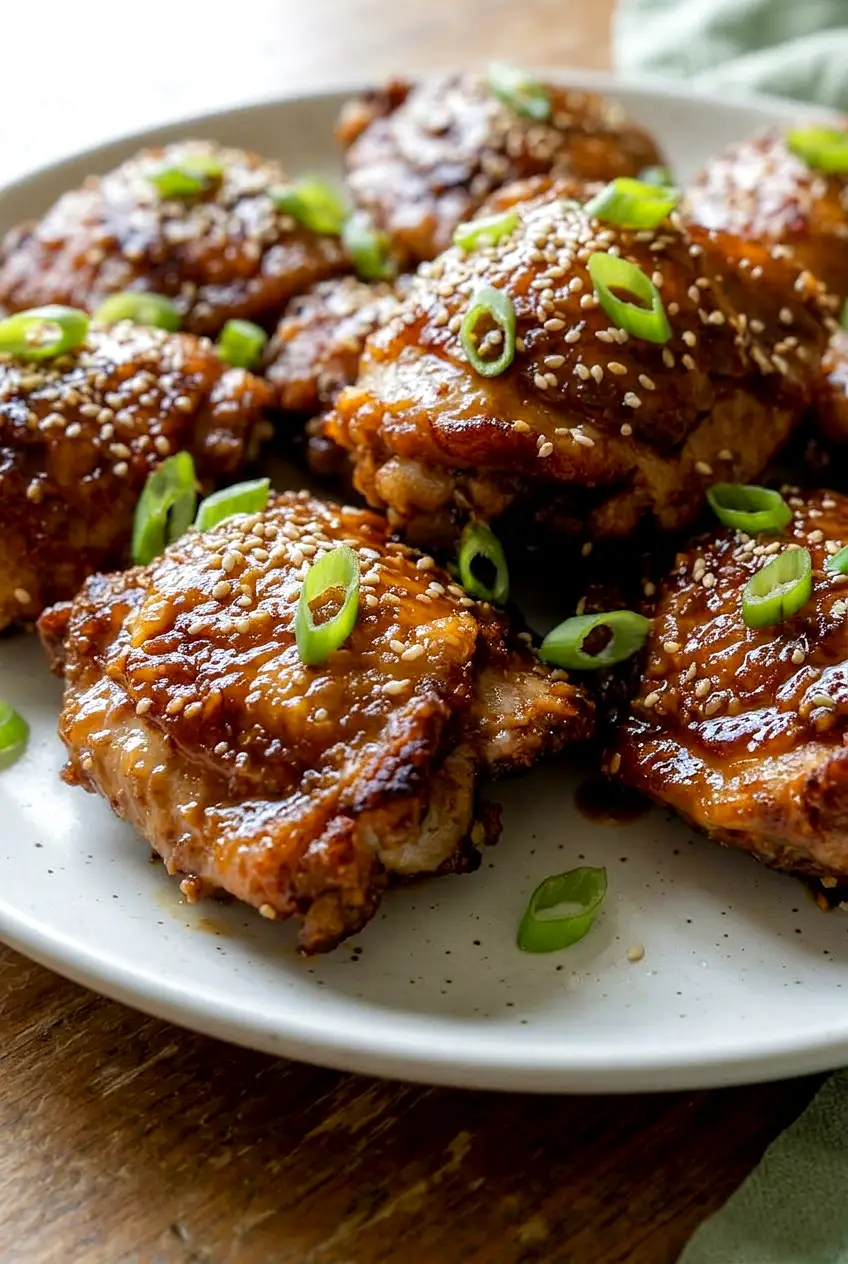
Close view of garlic miso chicken with glossy browned skin and caramelized shallots
  1. Make the glaze: In a small bowl, whisk together the miso, soy sauce, rice vinegar, garlic, and brown sugar or maple syrup until smooth. Keep whisking until no large streaks of miso remain.
  2. Coat the chicken: Pat the chicken thighs dry, then coat them all over with the glaze. Season lightly with black pepper. Let the chicken sit for 10 to 15 minutes while the oven heats, or cover and refrigerate for several hours or overnight. If marinating longer than 30 minutes, keep it chilled.
  3. Heat the oven and pan: Heat the oven to 425°F. Lightly oil a large rimmed baking sheet or roasting pan if needed. Scatter the shallots in the pan, then arrange the chicken skin-side up over or beside them with space between each piece.
  4. Roast the chicken: Roast for 25 to 35 minutes. Leave the chicken undisturbed at first so the skin can brown. If the tops are darkening too quickly, rotate the pan or flip the chicken once halfway through. If the surface looks dry near the end, spoon on a little glaze, but not so much that the skin turns soft.
  5. Check for doneness: Start checking early since thigh size and ovens vary. The chicken is done when the tops are browned, the shallots are tender and lightly caramelized, the juices run clear near the bone, and the thickest part of the chicken reaches 165°F.
  6. Rest: Let the chicken rest for 5 to 10 minutes before serving so the juices settle.
  7. Cook the sides: While the chicken roasts, cook the basmati rice and steam the bok choy until tender-crisp or just tender, depending on how you like it.
  8. Serve: Spoon rice onto plates or into bowls. Top with the chicken and roasted shallots, add bok choy on the side, and finish with sesame seeds.

How to Keep the Glaze from Burning

Use a large pan and avoid crowding the chicken. When the pieces are too close together, they release steam and the glaze stays wet instead of turning lightly sticky and browned.

Keep an eye on the pan in the last part of roasting. A little caramelization is good, but if the tops start getting too dark before the chicken is cooked through, rotate the pan or turn the pieces once to slow the browning.

Why Chicken Thighs Work Well

Bone-in, skin-on chicken thighs are a good fit for this glaze because they stay juicy and hold up well to high-heat roasting. The skin also gives the glaze more surface to brown on top. Since thigh sizes vary, use the color and internal temperature more than the clock when deciding if they are done.

What to Serve With Garlic Miso Chicken

Basmati rice is an easy base because it catches the extra glaze and pan juices without competing with the chicken. Steamed bok choy keeps the meal simple and cooks quickly while the chicken is in the oven.

If you want another dinner with a similar flavor profile, try these Honey Soy Chicken Thighs.

For another savory chicken dinner, see these Korean Soy Garlic Chicken Thighs.

If you want a brighter chicken thigh dinner, try these Crispy Cilantro Lime Chicken Thighs.

How to Store and Reheat Garlic Miso Chicken

Let the chicken cool, then refrigerate it in an airtight container for up to 3 to 4 days. If possible, store the rice and bok choy separately so they reheat more evenly.

Reheat the chicken gently in the oven or microwave until hot all the way through. Reheat only until warmed through so the meat does not dry out. If the rice has dried out in the refrigerator, add a small splash of water before reheating.

For make-ahead prep, you can marinate the chicken earlier in the day or overnight and roast it when you are ready to cook dinner.

Nutrition

Nutrition is approximate and will vary based on ingredient brands, exact amounts, and serving size. These numbers are for the chicken, glaze, and shallots only, not the rice or bok choy.

  • Serving size: 2 chicken thighs with shallots
  • Calories: about 540
  • Protein: 39g
  • Fat: 35g
  • Carbohydrates: 15g
  • Per 100g: about 220 calories, 16g protein, 14g fat, 6g carbohydrates

Garlic Miso Chicken

Roasted bone-in, skin-on chicken thighs glazed with a savory-sweet white miso and garlic mixture, served with roasted shallots and pan juices for rice.
Course: Main Course
Cuisine: Asian
Prep: 15 min
Cook: 35 min
Total: 60 min
Servings: 4 Calories: about 540 kcal

Equipment

  • rimmed baking sheet or roasting pan
  • small bowl
  • whisk
  • tongs
  • instant-read thermometer
  • knife
  • cutting board

Ingredients

Chicken and glaze

  • 8 bone-in, skin-on chicken thighs (about 2 1/2 to 3 pounds / 1,150–1,350 g)
  • 3 tablespoons white miso paste (about 55 g)
  • 3 tablespoons light soy sauce
  • 2 tablespoons rice vinegar
  • 4 garlic cloves, minced
  • 2 tablespoons brown sugar or maple syrup (about 25 g)
  • Black pepper, to taste
  • Salt, if needed

Vegetables and garnish

  • 3 to 4 shallots, peeled and halved (about 120 g)
  • 1 to 2 teaspoons sesame seeds, for garnish (optional)

To serve

  • Cooked basmati rice
  • Steamed bok choy

Instructions

  1. Preheat the oven to 425°F (218°C).
  2. Whisk together the miso, soy sauce, rice vinegar, minced garlic, and brown sugar or maple syrup in a small bowl until smooth and no large streaks of miso remain.
  3. Pat the chicken thighs dry and coat them all over with the glaze; season lightly with black pepper.
  4. Let the coated chicken sit for 10 to 15 minutes while the oven heats, or cover and refrigerate if marinating longer (keep chilled if over 30 minutes).
  5. Lightly oil a large rimmed baking sheet or roasting pan if needed and scatter the halved shallots in the pan.
  6. Arrange the chicken skin-side up on the pan with space between each piece so they roast instead of steam.
  7. Roast for 25 to 35 minutes, leaving the chicken undisturbed at first so the skin can brown; rotate the pan or turn pieces once if the tops are darkening too quickly.
  8. Near the end of roasting, spoon a little extra glaze on any dry spots if needed, but avoid adding so much that the skin softens.
  9. Check doneness with an instant-read thermometer — the thickest part should reach 165°F (74°C) — and ensure the shallots are tender and lightly caramelized.
  10. Let the chicken rest for 5 to 10 minutes before serving so the juices settle.
  11. Cook the basmati rice and steam the bok choy while the chicken roasts.
  12. Serve the chicken and roasted shallots over rice with bok choy on the side and finish with sesame seeds.

Tips

  • Space the thighs well on the pan so they roast instead of steaming.
  • Watch the glaze near the end of roasting; miso and sugar can darken quickly.
  • Use white miso for a milder, balanced glaze.
  • Wait to add extra salt until after cooking since miso and soy are already salty.
  • If the tops brown too fast, rotate the pan or turn pieces once to slow browning.

Variations

  • Maple Miso Chicken: Use maple syrup instead of brown sugar for a slightly different sweet note and deeper flavor.
  • Roasted Onion Version: Substitute thick slices of yellow onion for the shallots so the onion roasts without cooking down too quickly.
Notes

Refrigerate cooled chicken in an airtight container for 3 to 4 days; store rice and bok choy separately. Reheat gently in the oven or microwave until hot, and ensure the thickest part of chicken reaches 165°F (74°C) when reheating.

Nutrition

Calories: about 540 kcal | Protein: 39 g | Fat: 35 g | Carbohydrates: 15 g | Per100g: about 220 kcal, 16 g protein, 14 g fat, 6 g carbohydrates

Honey Soy Chicken Thighs

These honey soy chicken thighs come out glossy, browned, and lightly sticky, with a simple sweet-salty glaze from soy sauce, honey, garlic, and ginger. They are easy to serve with rice, noodles, or a quick vegetable side.

The method is straightforward: mix the marinade, coat the chicken, and bake in a hot 425°F oven until the thickest piece reaches 165°F. Give the thighs a little space on the pan so they brown instead of steam, and keep an eye on the glaze near the end since honey darkens quickly.

Ingredients for Honey Soy Chicken Thighs

Honey soy chicken thigh with sticky glaze and pan-browned finish from the side
  • 2 to 2 1/2 pounds chicken thighs (about 1.1kg), bone-in or boneless
  • 1/4 cup soy sauce (60g)
  • 3 tablespoons honey (65g)
  • 2 tablespoons olive oil
  • 3 garlic cloves, minced, or 1 teaspoon garlic powder
  • 1 teaspoon ground ginger
  • 1/2 teaspoon salt, or to taste
  • 1/4 teaspoon black pepper
  • 1 teaspoon sesame oil

If your soy sauce is especially salty, start with a little less salt. If the chicken is very wet, pat it dry first so it browns better.

Optional: 1 to 2 teaspoons rice vinegar or apple cider vinegar for a sharper glaze, 1 to 2 teaspoons lemon or lime juice for brightness, 1/4 to 1/2 teaspoon red pepper flakes for heat, and sesame seeds or sliced green onions for garnish.

How to Make Honey Soy Chicken Thighs

Close-up of honey soy chicken thighs showing the glossy glaze and browned edges
  1. Mix the marinade: In a bowl, whisk together the soy sauce, honey, olive oil, garlic, ginger, salt, pepper, and sesame oil until smooth. If using vinegar or citrus juice, whisk it in here.
  2. Coat the chicken: Add the chicken thighs and turn to coat well. Let them sit for 15 to 30 minutes if you have time, or bake right away.
  3. Preheat the oven and arrange the chicken: Heat the oven to 425°F. Arrange the chicken in a single layer on a rimmed baking sheet or in a shallow baking dish, leaving space between the pieces. If using skin-on thighs, place them skin side up.
  4. Bake the first side: Bake for 12 to 18 minutes, until the edges begin to brown and the pan juices are bubbling.
  5. Flip and finish: Turn the thighs over, or rotate the pan if your oven browns unevenly, and bake for 10 to 15 minutes more. Near the end, spoon a little of the pan juices over the top if you want a glossier finish. Start checking early, especially with boneless thighs, and cook until the thickest part reaches 165°F.
  6. Rest before serving: Let the chicken rest for 5 minutes before serving so the juices settle and the glaze clings a little better.

Use only enough marinade to coat the chicken well. Too much liquid in the pan can slow browning and thin the glaze.

How to Keep the Glaze From Burning

Honey helps the chicken brown, but it can go from golden to too dark quickly in the last several minutes. If the tops are coloring too fast before the chicken is done, rotate the pan and watch the edges closely.

Spacing also matters. Crowded thighs release more moisture, which can leave the glaze thin at first and then cause uneven browning as the liquid cooks down.

Serving Ideas

Serve the chicken with steamed rice, jasmine rice, noodles, or vegetables that can catch the pan juices. Broccoli, green beans, or a simple salad all work well on the side.

If you like this flavor profile, try these Korean Soy Garlic Chicken Thighs next. For a brighter chicken dinner, you may also like these Crispy Cilantro Lime Chicken Thighs. If you want another simple chicken dinner idea, check out these Mediterranean Chicken Thighs.

Easy Variations

Honey Soy Grilled Chicken Thighs

Use the same marinade, then grill the thighs over medium-high heat. Turn them carefully and move them to cooler heat if needed, since the honey can scorch faster on the grill than in the oven.

Sheet Pan Honey Soy Chicken Thighs

Bake the chicken with a simple vegetable such as broccoli or green beans for a one-pan dinner. Leave enough space on the pan so both the chicken and vegetables can brown properly.

How to Store and Reheat Honey Soy Chicken Thighs

Let the chicken cool before storing, then refrigerate it in an airtight container for up to 3 to 4 days. If possible, store extra pan juices separately so the chicken does not get too soft.

Reheat gently in the microwave or in a low oven until warmed through. If the glaze has thickened too much in the refrigerator, add a spoonful of water or a little extra sauce while reheating. The chicken is good for meal prep, but the skin will soften after storage.

You can also marinate the chicken ahead of time, then bake it later. A short marinating time is enough for good flavor, so there is no need to leave it much longer.

Nutrition

Nutrition is approximate and will vary based on ingredient brands, exact amounts, and whether you use bone-in or boneless thighs.

  • Serving size: 1/4 of recipe
  • Calories: about 410
  • Protein: 31g
  • Fat: 26g
  • Carbohydrates: 12g
  • Per 100g: about 180 calories, 13g protein, 12g fat, 5g carbohydrates

Honey Soy Chicken Thighs

Bone-in or boneless chicken thighs baked in a glossy honey-soy garlic-ginger glaze.
Course: Main Course
Cuisine: Global
Prep: 15 min
Cook: 30 min
Total: 50 min
Servings: 4 Calories: about 410 kcal

Equipment

  • mixing bowl
  • whisk
  • rimmed baking sheet or shallow baking dish
  • tongs
  • meat thermometer

Ingredients

Chicken

  • 2 to 2 1/2 pounds chicken thighs (about 1.1 kg), bone-in or boneless

Marinade

  • 1/4 cup soy sauce (60 g)
  • 3 tablespoons honey (65 g)
  • 2 tablespoons olive oil
  • 3 garlic cloves, minced (or 1 teaspoon garlic powder)
  • 1 teaspoon ground ginger
  • 1/2 teaspoon salt (or to taste)
  • 1/4 teaspoon black pepper
  • 1 teaspoon sesame oil
  • Optional: 1 to 2 teaspoons rice vinegar or apple cider vinegar
  • Optional: 1 to 2 teaspoons lemon or lime juice
  • Optional: 1/4 to 1/2 teaspoon red pepper flakes
  • Optional: sesame seeds or sliced green onions for garnish

Instructions

  1. Whisk together the soy sauce, honey, olive oil, garlic, ground ginger, salt, pepper, and sesame oil until smooth; add vinegar or citrus juice if using.
  2. Add the chicken thighs to the bowl and turn to coat well; let sit 15 to 30 minutes if time allows or proceed to bake immediately.
  3. Preheat the oven to 425°F (218°C). Arrange the chicken in a single layer on a rimmed baking sheet or in a shallow baking dish, leaving space between pieces; place skin side up if using skin-on thighs.
  4. Bake for 12 to 18 minutes, until the edges begin to brown and the pan juices are bubbling.
  5. Turn the thighs over or rotate the pan and bake 10 to 15 minutes more; near the end spoon pan juices over the tops for a glossier finish and cook until the thickest part reaches 165°F (74°C).
  6. Let the chicken rest 5 minutes before serving so the juices settle and the glaze clings.

Tips

  • Pat very wet chicken dry before marinating to help it brown.
  • Leave space between thighs on the pan so they brown instead of steam.
  • Watch the glaze in the last minutes because honey can darken quickly; rotate the pan if needed.
  • Store extra pan juices separately to avoid softening the chicken when refrigerated.

Variations

  • Honey Soy Grilled Chicken Thighs: Use the same marinade, then grill over medium-high heat, moving thighs to cooler spots if the honey begins to scorch.
  • Sheet Pan Honey Soy Chicken Thighs: Bake the chicken with broccoli or green beans on the same pan for a one-pan dinner, leaving enough space for browning.

Notes

Refrigerate cooled leftovers in an airtight container for 3 to 4 days; reheat gently in a low oven or microwave and add a splash of water or reserved pan juices if the glaze has thickened. Cook to an internal temperature of 165°F (74°C).

Nutrition

Calories: about 410 kcal | Protein: 31 g | Fat: 26 g | Carbohydrates: 12 g

Air Fryer Korean Soy Garlic Chicken Thighs

These air fryer Korean soy garlic chicken thighs come out juicy inside with browned, lightly crisp edges and a glossy soy garlic sauce added at the end. The flavor is savory, a little sweet, and bold enough to serve with plain rice and simple vegetables.

The method stays straightforward: coat the chicken lightly with starch and seasonings, air fry until cooked through, then toss with a quick sauce on the stovetop. Keeping the pieces in a single layer helps them brown instead of steam.

Ingredients for Air Fryer Korean Soy Garlic Chicken Thighs

Side view of sauced Korean chicken thighs with sesame seeds and green onions on a simple plate
  • 1 1/2 to 2 pounds chicken thighs (about 675g to 900g), boneless skinless or bone-in
  • 2 to 3 tablespoons cornstarch or potato starch
  • 1 teaspoon garlic powder
  • 1 teaspoon onion powder
  • 1/4 to 1/2 teaspoon black pepper, divided
  • Salt to taste, or about 1/2 teaspoon if needed
  • 1 to 2 teaspoons neutral oil or oil spray
  • 1/4 cup soy sauce
  • 2 to 3 tablespoons brown sugar
  • 1 tablespoon rice wine vinegar
  • 2 to 4 tablespoons water
  • 1 tablespoon toasted sesame seeds
  • 2 green onions, sliced

Optional: 1 to 2 cloves minced garlic for a fresher garlic flavor, 1/4 to 1/2 teaspoon red pepper flakes or gochugaru for mild heat, or 1 teaspoon sesame oil stirred into the sauce at the end.

Cornstarch and potato starch both work well here. Boneless thighs cook faster, while bone-in thighs usually need more time.

How to Make Air Fryer Korean Soy Garlic Chicken Thighs

Close-up of Korean soy garlic chicken thighs showing browned edges and sticky soy garlic glaze
  1. Season the chicken: Pat the chicken dry with paper towels. In a bowl, toss with the garlic powder, onion powder, part of the black pepper, and salt if needed. Sprinkle on the cornstarch or potato starch and toss again until evenly coated. Add the oil or lightly spray the pieces so the coating looks lightly moistened, not dry or caked on.
  2. Preheat the air fryer: Preheat to 400°F for 3 to 5 minutes if your air fryer has a preheat setting.
  3. Air fry the chicken: Arrange the thighs in a single layer with space between them. Air fry at 390°F to 400°F for 18 to 24 minutes, flipping halfway through. If your air fryer browns unevenly, rotate the basket or move the pieces around near the end. Start checking early if the thighs are small or boneless. The chicken is done when the edges are browned and the thickest part reaches 165°F.
  4. Make the soy garlic sauce: While the chicken cooks, combine the soy sauce, brown sugar, rice wine vinegar, 2 tablespoons water, and the remaining black pepper in a small skillet or saucepan over medium heat. If using fresh garlic or red pepper flakes, add them now. Simmer for 3 to 6 minutes, stirring occasionally, until the sugar dissolves and the sauce looks glossy and lightly thickened. Add a little more water only if needed to loosen it.
  5. Toss and finish: Transfer the hot chicken to a bowl or clean skillet. Pour the warm sauce over the chicken and toss gently until coated. The sauce should cling to the chicken instead of pooling in the bottom. Sprinkle with the sesame seeds and green onions.
  6. Serve: Serve right away while the chicken is still hot and the edges are at their crispest.

How to Keep the Chicken From Getting Soggy

Patting the chicken dry helps the starch coating stick in a thin, even layer. Too much surface moisture can make the coating clump and soften in the air fryer.

Spacing matters just as much. Cook the thighs in a single layer and work in batches if needed. Once the sauce is added, the coating will soften a little, so toss the chicken with the sauce just before serving.

What to Serve With Soy Garlic Chicken Thighs

Steamed white rice or jasmine rice is an easy match for the sauce. For vegetables, keep the sides simple with steamed broccoli, a quick cucumber salad, or another crisp green vegetable.

If you want another easy thigh dinner, try these Crispy Cilantro Lime Chicken Thighs. For an oven version, these Mediterranean Chicken Thighs with Potatoes and Tomatoes are another good option.

How to Store and Reheat Air Fryer Korean Soy Garlic Chicken Thighs

Let leftovers cool, then refrigerate in an airtight container for up to 3 to 4 days. The coating will soften as it sits in the sauce, so the texture will not stay as crisp as when freshly made.

For the best reheating, warm the chicken in the air fryer at a moderate temperature until heated through. You can also reheat it in the oven. Microwave reheating works for convenience, but the coating will soften more.

If you want to prep ahead, make the sauce in advance and refrigerate it separately. Then air fry the chicken fresh and toss with the warmed sauce before serving. If you prefer the oven, these Baked Chicken Thighs are another easy option.

Nutrition

Nutrition is approximate and will vary based on the exact ingredients used, whether you choose boneless or bone-in thighs, and serving size.

  • Serving size: 1/4 of recipe
  • Calories: about 390
  • Protein: 29g
  • Fat: 20g
  • Carbohydrates: 20g
  • Per 100g: about 190 calories, 14g protein, 10g fat, 10g carbohydrates

Air Fryer Korean Soy Garlic Chicken Thighs

Juicy air-fried chicken thighs tossed in a glossy soy-garlic sauce with sesame and green onions.
Course: Main Course
Cuisine: Korean
Prep: 10 min
Cook: 24 min
Total: 34 min
Servings: 4 Calories: about 390 kcal

Equipment

  • air fryer
  • mixing bowl
  • small skillet or saucepan
  • tongs
  • paper towels

Ingredients

For the Chicken

  • 1 1/2 to 2 pounds chicken thighs (about 675g to 900g), boneless skinless or bone-in
  • 2 to 3 tablespoons cornstarch or potato starch
  • 1 teaspoon garlic powder
  • 1 teaspoon onion powder
  • 1/4 to 1/2 teaspoon black pepper, divided
  • Salt to taste (about 1/2 teaspoon if needed)
  • 1 to 2 teaspoons neutral oil or oil spray

For the Sauce

  • 1/4 cup soy sauce
  • 2 to 3 tablespoons brown sugar
  • 1 tablespoon rice wine vinegar
  • 2 to 4 tablespoons water
  • optional: 1 to 2 cloves minced garlic
  • optional: 1/4 to 1/2 teaspoon red pepper flakes or gochugaru
  • optional: 1 teaspoon sesame oil (stirred in at the end)

Garnish

  • 1 tablespoon toasted sesame seeds
  • 2 green onions, sliced

Instructions

  1. Pat the chicken dry with paper towels and place in a mixing bowl.
  2. Toss the chicken with garlic powder, onion powder, part of the black pepper, and salt if using.
  3. Sprinkle the cornstarch or potato starch over the chicken and toss until evenly coated, then add oil or lightly spray so the coating is lightly moistened.
  4. Preheat the air fryer to 400°F (204°C) for 3 to 5 minutes if it has a preheat setting.
  5. Arrange the thighs in a single layer in the air fryer basket with space between them.
  6. Air fry at 390°F to 400°F (199°C to 204°C) for 18 to 24 minutes, flipping halfway through; rotate or move pieces if browning unevenly and check that the thickest part reaches 165°F (74°C).
  7. While the chicken cooks, combine soy sauce, brown sugar, rice wine vinegar, 2 tablespoons water, and the remaining black pepper in a small skillet or saucepan over medium heat.
  8. Add minced garlic or red pepper flakes now if using and simmer the sauce for 3 to 6 minutes, stirring occasionally, until the sugar dissolves and the sauce is glossy and slightly thickened; add a little more water only if needed to loosen it.
  9. Transfer the hot chicken to a bowl or clean skillet, pour the warm sauce over the chicken, and toss gently until coated so the sauce clings instead of pooling.
  10. Sprinkle with toasted sesame seeds and sliced green onions and serve immediately.

Tips

  • Pat chicken thoroughly dry so the starch coating adheres in a thin layer.
  • Cook in a single layer and work in batches to avoid steaming and keep edges crisp.
  • Toss the chicken with the sauce just before serving to preserve crispness.
  • Boneless thighs cook faster; allow extra time for bone-in thighs.
  • Make the sauce ahead and store separately to reheat and toss with freshly cooked chicken.

Variations

  • Add Fresh Garlic: Stir 1 to 2 cloves minced garlic into the sauce while simmering for a brighter garlic flavor.
  • Spicy Soy Garlic: Add 1/4 to 1/2 teaspoon red pepper flakes or gochugaru to the sauce for mild heat.
  • Sesame Finish: Stir 1 teaspoon sesame oil into the sauce at the end for extra sesame aroma.

Notes

Refrigerate cooled leftovers in an airtight container for 3 to 4 days; reheat in the air fryer or oven for best texture. The coating softens in the sauce over time. Store sauce separately if prepping ahead.

Nutrition

Calories: about 390 kcal | Protein: 29 g | Fat: 20 g | Carbohydrates: 20 g | Per100g: about 190 kcal, 14 g protein, 10 g fat, 10 g carbohydrates

Crispy Cilantro Lime Chicken Thighs

These cilantro lime chicken thighs have browned edges, tender centers, and a fresh mix of lime, garlic, cilantro, and cumin. They are quick enough for a weeknight but still give you that good skillet-seared color.

The method stays simple: give the chicken a short marinade, pat it dry, then sear it in a hot skillet before finishing in the oven. Drying the surface before it hits the pan makes the biggest difference here, since wet chicken steams instead of browning.

Ingredients for Crispy Cilantro Lime Chicken Thighs

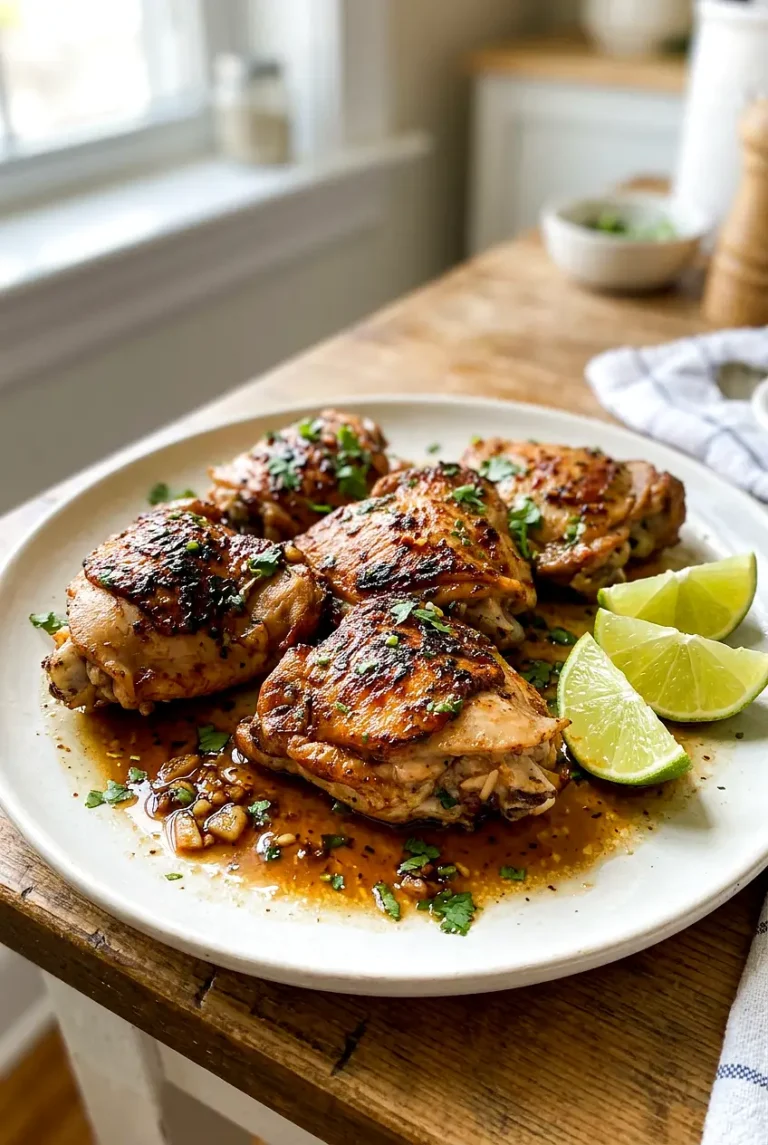
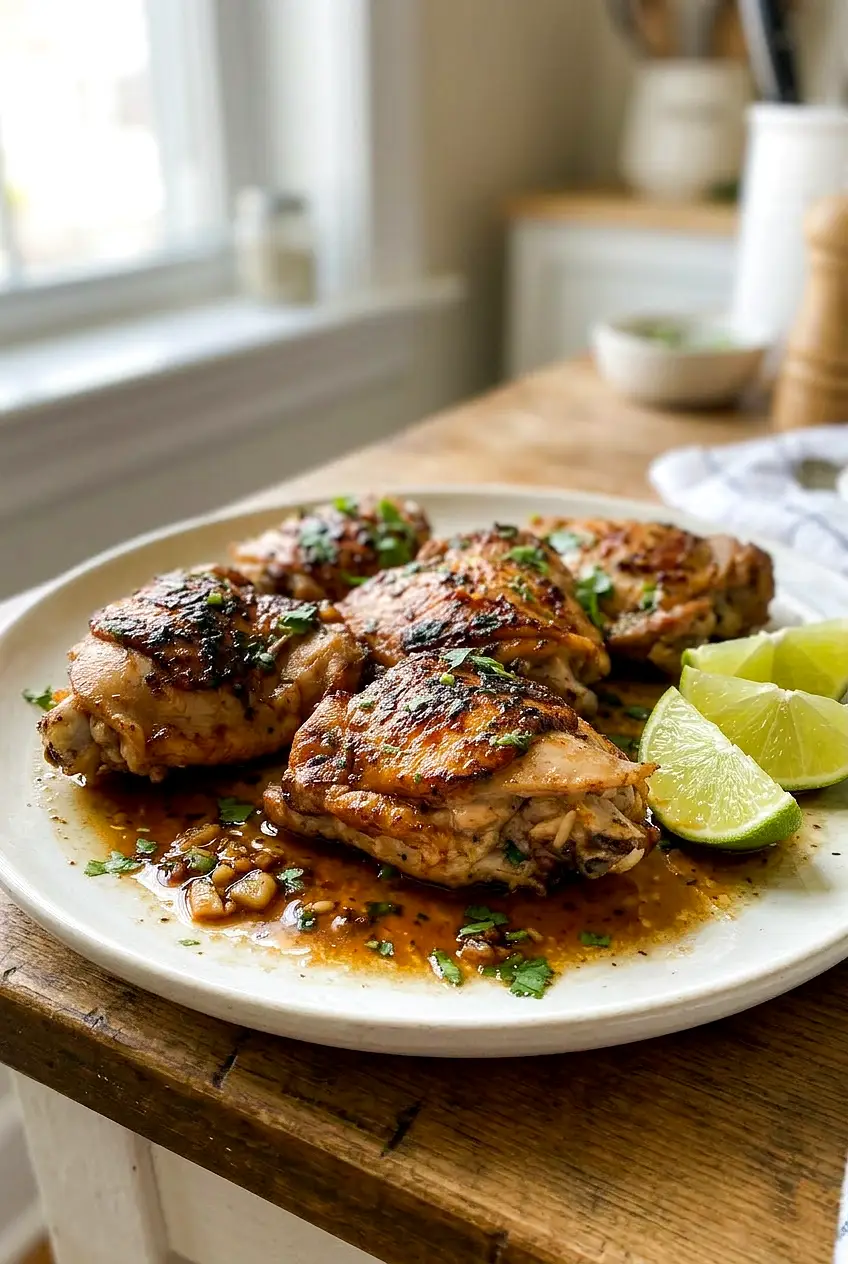
Cilantro lime chicken thighs with pan drippings, viewed from the side with fresh cilantro on top
  • 2 pounds boneless skinless chicken thighs (about 900g)
  • 1/4 cup fresh lime juice
  • 1 tablespoon lime zest
  • 1/2 cup chopped fresh cilantro (about 15g), plus more for serving
  • 3 cloves garlic, minced
  • 3 tablespoons olive oil
  • 1 teaspoon ground cumin
  • 1 teaspoon salt
  • 1/2 teaspoon black pepper
  • 1/4 teaspoon chili flakes, optional
  • Lime wedges, for serving

If you want a slightly sweeter finish, you can stir 1 to 2 teaspoons honey or brown sugar into the marinade. The lime zest is especially helpful here because it adds more citrus flavor without adding extra liquid.

How to Make Crispy Cilantro Lime Chicken Thighs

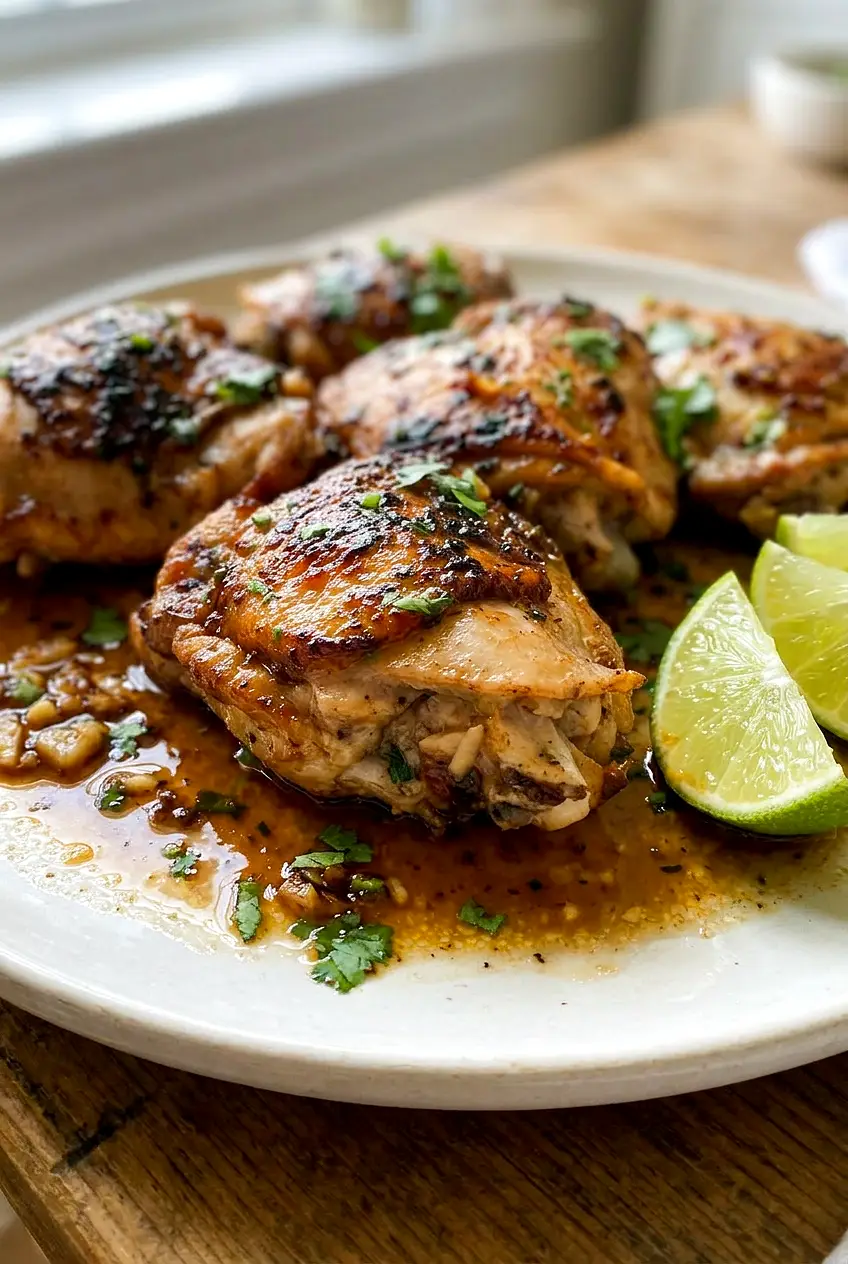
Close view of cilantro lime chicken thighs showing crisp browned edges and juicy sliced centers
  1. Mix the marinade: In a bowl, whisk together the lime juice, lime zest, cilantro, garlic, olive oil, cumin, salt, black pepper, and chili flakes if using. Add the chicken and turn to coat. Let it sit for 15 to 30 minutes, or just while the oven heats if you are short on time.
  2. Heat the oven and skillet: Preheat the oven to 425°F. Set a large 10- to 12-inch oven-safe skillet over medium-high heat and let it get hot. If your skillet cannot go in the oven, line a baking sheet for the oven step.
  3. Dry the chicken: Lift the chicken from the marinade and let the excess drip off. Pat the pieces dry with paper towels so the surface can sear instead of steam.
  4. Sear the first side: Add a light film of oil to the skillet only if needed. Arrange the chicken in a single layer with a little space between pieces. Cook in batches if needed. Sear for 3 to 4 minutes without moving the chicken too soon, until the underside is browned and releases more easily.
  5. Flip and sear again: Turn the thighs with tongs and cook for 3 to 4 minutes on the second side. At this point, you want good golden-brown color, not fully cooked chicken.
  6. Finish in the oven: Transfer the skillet to the oven and bake for 8 to 12 minutes, depending on thickness. Start checking early. The chicken is done when the thickest piece reaches 165°F and the center is no longer pink.
  7. Rest and serve: Move the chicken to a plate and rest for 5 minutes. Spoon over any pan juices if you like, then top with more cilantro and a squeeze of lime. Serve whole or sliced with rice, wraps, salad, or vegetables.

Why the Chicken May Not Brown Well

If the thighs come out pale, the surface was likely too wet or the pan was too crowded. Shake off excess marinade, pat the chicken dry well, and use a wide hot skillet so moisture can cook off quickly. Leaving the first side undisturbed for a few minutes also helps the edges brown.

Easy Variations

Spicy Cilantro Lime Chicken

Add the optional chili flakes or a small minced jalapeño or serrano to the marinade for extra heat.

Chicken Breast Variation

You can use boneless skinless chicken breasts, but check them early. They cook faster and can dry out more easily, so rely on the internal temperature rather than the thigh timing.

What to Serve With Cilantro Lime Chicken Thighs

Serve the chicken over white rice, cilantro rice, or Spanish-style rice. It also works well sliced into wraps, tacos, or burrito bowls. A simple green salad or roasted vegetables are easy sides, especially with the pan juices spooned over the top.

If you want another easy chicken-thigh dinner, try these Mediterranean Chicken Thighs with Potatoes and Tomatoes.

For a simpler baked version, see these Baked Chicken Thighs.

How to Store and Reheat Cilantro Lime Chicken Thighs

Let the chicken cool, then store it in an airtight container in the refrigerator for up to 4 days. Keep extra lime wedges separate.

Reheat gently in the microwave at reduced power or in a covered skillet over low heat until warmed through. Add fresh cilantro and a squeeze of lime after reheating to freshen the flavor. The chicken stays good for leftovers, but the crisp edges will soften in storage.

If you like boneless thighs, you may also want these Juicy Baked Boneless Skinless Chicken Thighs.

Nutrition

Nutrition is approximate and will vary based on ingredient brands, exact amounts, and serving size.

  • Serving size: 1/4 of recipe
  • Calories: about 420
  • Protein: 39g
  • Fat: 27g
  • Carbohydrates: 3g
  • Per 100g: about 190 calories, 18g protein, 12g fat, 1g carbohydrates

Crispy Cilantro Lime Chicken Thighs

Cilantro lime chicken thighs with browned edges, tender centers, and bright lime, garlic, and cilantro flavors.
Course: Main Course
Cuisine: Mexican
Prep: 10 min
Cook: 18 min
Total: 48 min
Servings: 4 Calories: about 420 kcal

Equipment

  • 10- to 12-inch oven-safe skillet
  • baking sheet
  • mixing bowl
  • measuring cups and spoons
  • tongs
  • paper towels
  • meat thermometer

Ingredients

Chicken

  • 2 pounds boneless skinless chicken thighs (about 900g)
  • Lime wedges, for serving

Marinade

  • 1/4 cup fresh lime juice
  • 1 tablespoon lime zest
  • 1/2 cup chopped fresh cilantro (about 15g), plus more for serving
  • 3 cloves garlic, minced
  • 3 tablespoons olive oil
  • 1 teaspoon ground cumin
  • 1 teaspoon salt
  • 1/2 teaspoon black pepper
  • 1/4 teaspoon chili flakes (optional)
  • 1 to 2 teaspoons honey or brown sugar (optional, for a slightly sweeter finish)

Instructions

  1. Whisk together the lime juice, lime zest, cilantro, garlic, olive oil, cumin, salt, black pepper, and chili flakes (if using) in a mixing bowl.
  2. Add the chicken to the marinade and turn to coat; let sit 15 to 30 minutes or while the oven heats.
  3. Preheat the oven to 425°F (218°C). Heat a 10- to 12-inch oven-safe skillet over medium-high heat until hot. If the skillet is not oven-safe, line a baking sheet for the oven step.
  4. Lift the chicken from the marinade, let excess drip off, and pat the pieces dry with paper towels.
  5. Add a light film of oil to the skillet if needed. Arrange the chicken in a single layer with space between pieces, working in batches if necessary.
  6. Sear the first side for 3 to 4 minutes without moving the chicken, until the underside is browned and releases easily.
  7. Flip the thighs and cook 3 to 4 minutes more to develop good golden-brown color (they will not be fully cooked).
  8. Transfer the skillet to the oven and bake 8 to 12 minutes, depending on thickness. Start checking early; chicken is done when the thickest piece reaches 165°F (74°C).
  9. Transfer the chicken to a plate and rest 5 minutes. Spoon over pan juices if desired, top with more cilantro and a squeeze of lime, and serve whole or sliced.

Tips

  • Pat chicken very dry before searing to encourage browning rather than steaming.
  • Do not overcrowd the pan; use a wide skillet and cook in batches if needed.
  • Leave the first side undisturbed for several minutes to develop color.
  • Use a meat thermometer to confirm the thickest piece reaches 165°F (74°C).
  • For more citrus flavor without extra liquid, use the lime zest in the marinade.

Variations

  • Spicy Cilantro Lime Chicken: Add the optional chili flakes or a small minced jalapeño or serrano to the marinade for extra heat.
  • Chicken Breast Variation: Use boneless skinless chicken breasts, but check them earlier since they cook faster and can dry out; rely on internal temperature rather than the thigh timing.

Notes

Store cooled chicken in an airtight container in the refrigerator up to 4 days; keep lime wedges separate. Reheat gently in a covered skillet over low heat or in the microwave at reduced power; add fresh cilantro and a squeeze of lime after reheating. Ensure chicken reaches 165°F (74°C) for safety.

Nutrition

Calories: about 420 kcal | Protein: 39 g | Fat: 27 g | Carbohydrates: 3 g

Mediterranean Chicken Thighs

Mediterranean chicken thighs make an easy one-pan dinner with crisp-skinned chicken, tender potatoes, softened tomatoes, and plenty of savory pan juices. Roasted red peppers, capers, garlic, and oregano give the whole pan a briny, herby flavor without a long ingredient list.

The method stays simple: sear the chicken briefly on the stovetop, then finish everything together in the oven. The main thing that helps here is using a large enough pan so the chicken and vegetables can roast in a single layer instead of steaming.

Ingredients for Mediterranean Chicken Thighs

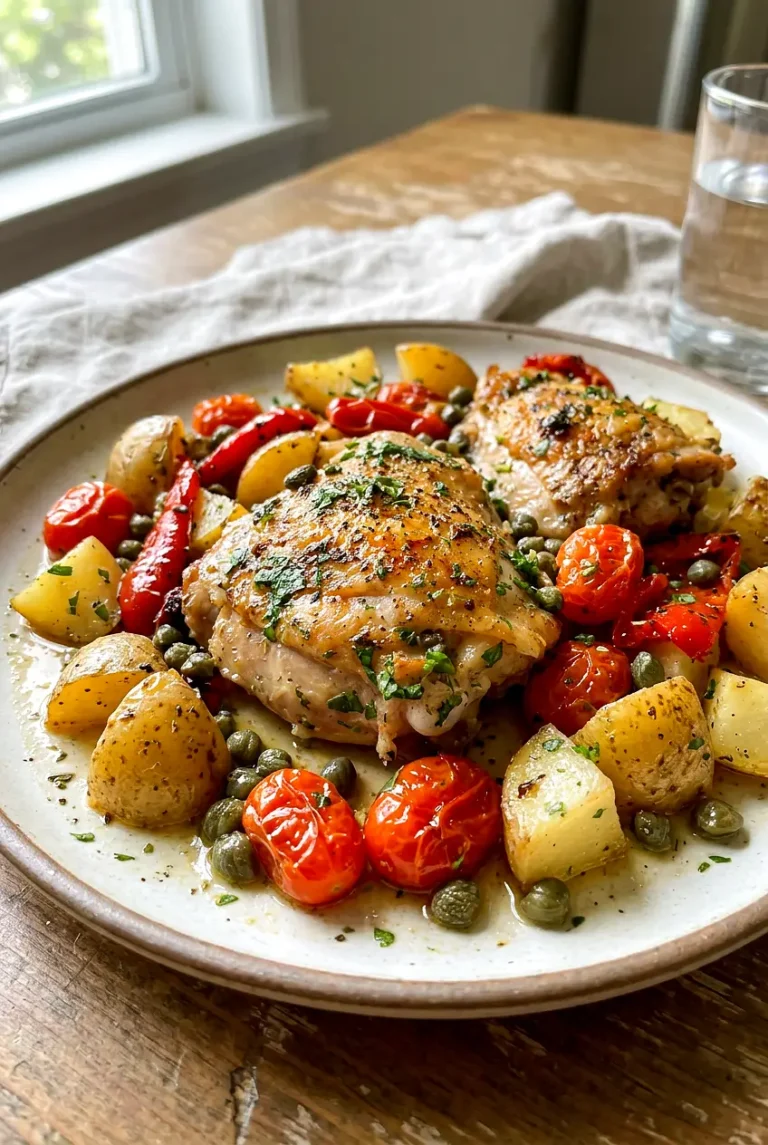
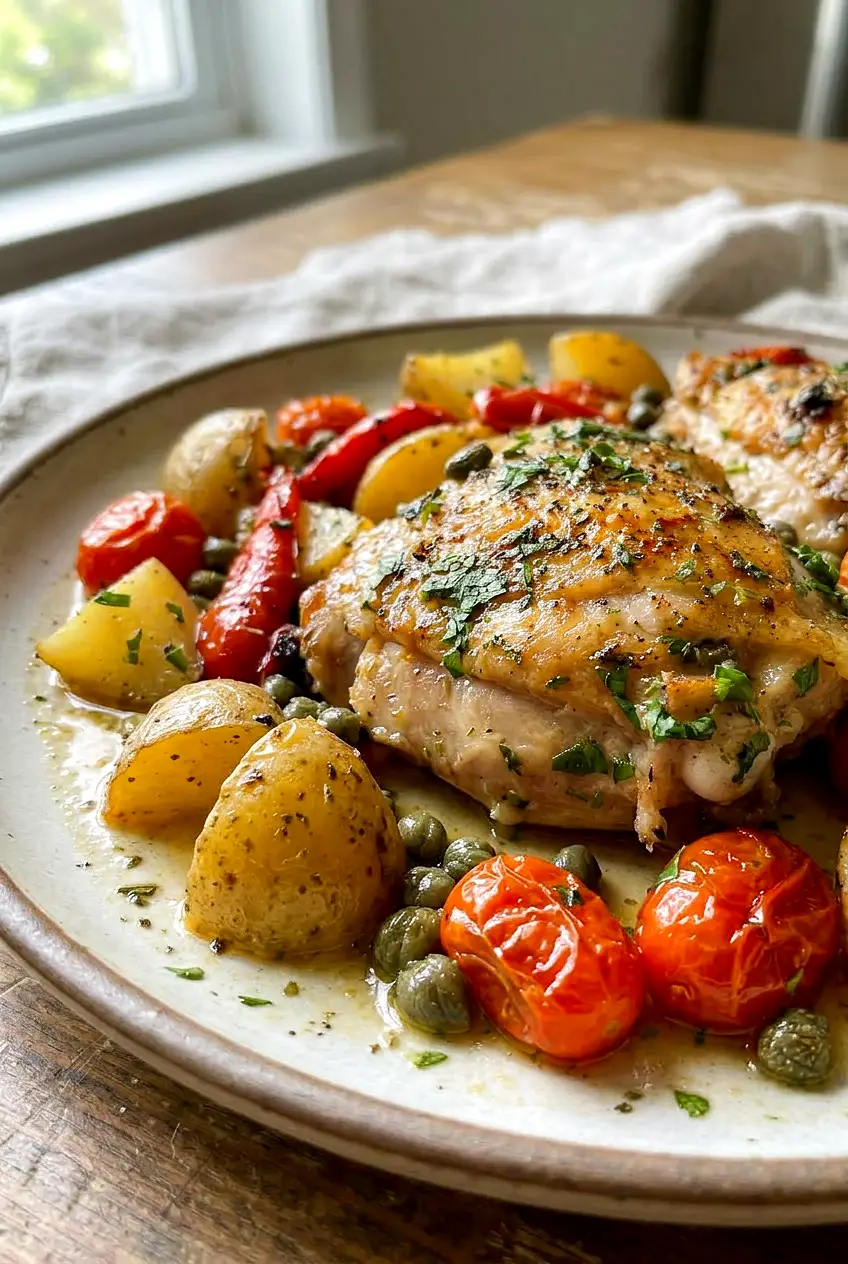
Side angle of Mediterranean chicken thighs with potatoes, red peppers, and glossy pan juices
  • 6 bone-in, skin-on chicken thighs (about 2 pounds/900g)
  • 1 1/2 pounds baby potatoes or Yukon Gold potatoes, cut into bite-size pieces (about 675g)
  • 1 pint cherry or grape tomatoes (about 340g)
  • 1 cup jarred roasted red peppers, drained and sliced (about 150g)
  • 2 tablespoons capers, drained
  • 4 garlic cloves, minced
  • 3 tablespoons olive oil
  • 2 teaspoons dried oregano or 1 tablespoon chopped fresh oregano
  • 1 1/2 teaspoons kosher salt, plus more to taste
  • 1/2 teaspoon black pepper, plus more to taste

Optional for serving: chopped fresh parsley, lemon wedges, and a pinch of red pepper flakes.

Cut the potatoes into similar-size pieces so they cook evenly. Since capers add salt too, taste the pan juices before adding extra salt at the end.

How to Make Mediterranean Chicken Thighs

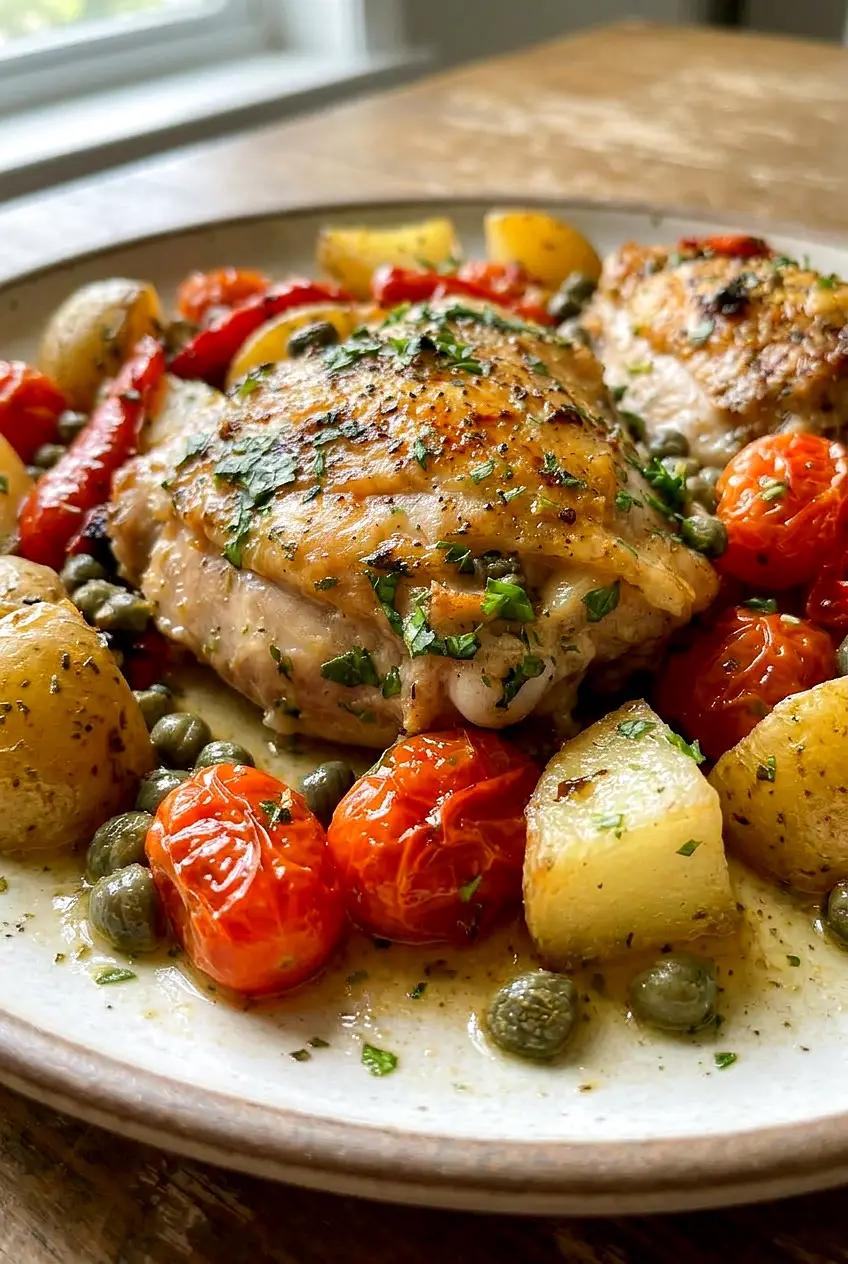
Close view of Mediterranean chicken thighs with crisp skin, soft tomatoes, and roasted potatoes
  1. Preheat the oven: Heat the oven to 400°F. Pat the chicken thighs dry with paper towels. Cut the potatoes into even bite-size pieces, and drain and slice the roasted red peppers.
  2. Season the chicken and vegetables: Rub the chicken with a little of the olive oil, then season with the oregano, salt, and black pepper. In the pan or in a large bowl, toss the potatoes, tomatoes, roasted red peppers, capers, and garlic with the remaining olive oil and any remaining seasoning until lightly coated.
  3. Sear the chicken: Set a large oven-safe roasting pan or wide skillet over medium-high heat. Place the chicken thighs skin-side down and cook for 6 to 10 minutes, mostly undisturbed, until the skin is lightly golden and some fat has rendered. The chicken should release more easily from the pan when it is ready. Turn off the heat.
  4. Arrange the pan: Scatter the vegetables around the chicken in as even a layer as possible. Keep everything in a single layer with some space between pieces so the pan roasts well.
  5. Roast until done: Transfer the pan to the oven and roast for 35 to 45 minutes. Start checking on the early side if the thighs are small or if you are using a dark pan. The chicken is done when the thickest part reaches 165°F near the bone, the potatoes are fork-tender, and the tomatoes are soft and slightly collapsed. If needed, gently toss the vegetables once during roasting so they brown more evenly.
  6. Rest and serve: Let the pan rest for 5 minutes. Spoon some of the pan juices over the chicken and vegetables, then top with parsley if using. Serve hot with lemon wedges on the side.

Why Good Browning Matters Here

For the best texture, keep an eye on moisture and pan space. Dry chicken skin browns better, and a quick sear gives it a head start before the oven. If the pan is too crowded, the chicken skin softens and the vegetables release more liquid than they roast.

If needed, divide everything between two pans rather than piling ingredients on top of each other.

How to Tell When It’s Done

Use the time range as a guide, but check the pan itself. The chicken should be browned and cooked to 165°F in the thickest part without touching the bone. The potatoes should pierce easily with a fork, and the tomatoes should look soft and slumped.

If the chicken is done before the potatoes, transfer the chicken to a plate and return the vegetables to the oven for a few more minutes.

What to Serve with Mediterranean Chicken Thighs

This works well as a full one-pan dinner, so a simple green salad or cucumber salad is usually enough on the side. Lemon wedges are especially good here and help brighten the richer roasted flavors.

If you want another easy chicken thigh dinner, you might also like these Garlic Butter Chicken Thighs.

How to Store and Reheat Mediterranean Chicken Thighs

Let leftovers cool before storing, then refrigerate them in an airtight container for up to 3 to 4 days. The skin will soften in the refrigerator, which is normal.

Reheat larger portions in a 325°F oven, loosely covered, until heated through. For individual portions, use the microwave in short bursts. If the chicken seems a little dry, add a small splash of water before reheating.

For make-ahead prep, you can cut the vegetables and season the chicken in advance, then cook just before serving.

If you want a simpler chicken dinner, try these Baked Chicken Thighs. For a boneless option, you may also like these Juicy Baked Boneless Skinless Chicken Thighs.

Nutrition

Nutrition is approximate and will vary based on ingredient brands, exact amounts, and serving size.

  • Serving size: about 1 1/2 chicken thighs with vegetables and pan juices
  • Calories: about 560
  • Protein: 31g
  • Fat: 32g
  • Carbohydrates: 35g
  • Per 100g: about 155 calories, 9g protein, 9g fat, 10g carbohydrates

Mediterranean Chicken Thighs

One-pan roasted bone-in, skin-on chicken thighs with potatoes, tomatoes, roasted red peppers, capers, and oregano.
Course: Main Course
Cuisine: Mediterranean
Prep: 15 min
Cook: 55 min
Total: 75 min
Servings: 4 Calories: 560 kcal

Equipment

  • oven-safe skillet or roasting pan
  • tongs
  • knife
  • cutting board

Ingredients

Chicken

  • 6 bone-in, skin-on chicken thighs (about 2 pounds/900g)
  • 1 tablespoon olive oil (for rubbing) — part of the 3 tablespoons below
  • 1 1/2 teaspoons kosher salt, plus more to taste
  • 1/2 teaspoon black pepper, plus more to taste
  • 2 teaspoons dried oregano or 1 tablespoon chopped fresh oregano

Vegetables & flavorings

  • 1 1/2 pounds baby potatoes or Yukon Gold, cut into bite-size pieces (about 675g)
  • 1 pint cherry or grape tomatoes (about 340g)
  • 1 cup jarred roasted red peppers, drained and sliced (about 150g)
  • 2 tablespoons capers, drained
  • 4 garlic cloves, minced
  • 3 tablespoons olive oil

To serve (optional)

  • Chopped fresh parsley
  • Lemon wedges
  • Pinch of red pepper flakes

Instructions

  1. Preheat the oven to 400°F (204°C). Pat the chicken thighs dry with paper towels. Cut the potatoes into even bite-size pieces and drain and slice the roasted red peppers.
  2. Rub the chicken with a little of the olive oil, then season with the oregano, kosher salt, and black pepper.
  3. In the pan or a large bowl, toss the potatoes, tomatoes, roasted red peppers, capers, and minced garlic with the remaining olive oil and any remaining seasoning until lightly coated.
  4. Set a large oven-safe roasting pan or wide skillet over medium-high heat. Place the chicken thighs skin-side down and cook for 6 to 10 minutes, mostly undisturbed, until the skin is lightly golden and some fat has rendered. Turn off the heat.
  5. Scatter the vegetables around the chicken in a single layer with some space between pieces so they roast rather than steam.
  6. Transfer the pan to the oven and roast for 35 to 45 minutes, checking early if thighs are small or using a dark pan. The chicken is done when the thickest part reaches 165°F (74°C) near the bone, the potatoes are fork-tender, and the tomatoes are soft and slightly collapsed.
  7. Let the pan rest for 5 minutes. Spoon pan juices over the chicken and vegetables, top with parsley if using, and serve hot with lemon wedges on the side.

Tips

  • Cut potatoes into similar-size pieces so they cook evenly.
  • Pat chicken skin dry before searing to promote good browning.
  • Use a large enough pan so ingredients roast in a single layer; avoid overcrowding.
  • Taste the pan juices before adding extra salt because capers add saltiness.
  • If the chicken finishes before the potatoes, remove the chicken and continue roasting the vegetables.

Variations

  • Boneless chicken thighs: Use boneless skinless chicken thighs instead of bone-in; adjust roasting time and check for 165°F (74°C) doneness.

Notes

Store leftovers in an airtight container in the refrigerator for 3–4 days; reheat larger portions in a 325°F (163°C) oven, loosely covered, or microwave individual portions in short bursts. The skin will soften after refrigeration.

Nutrition

Calories: 560 kcal | Protein: 31 g | Fat: 32 g | Carbohydrates: 35 g | Per100g: 155 kcal, 9 g protein, 9 g fat, 10 g carbohydrates

Baked Chicken Thighs

Baked chicken thighs are an easy way to get juicy meat and well-browned skin with very little prep. This version uses a short pantry seasoning blend and a hot oven, so the chicken roasts quickly and comes out flavorful enough to serve with almost any side.

The key is simple: dry the chicken well, keep the oil light, and leave space between the pieces so they roast instead of steam. If you want deeper color, a quick broil at the end works well.

Ingredients for Baked Chicken Thighs

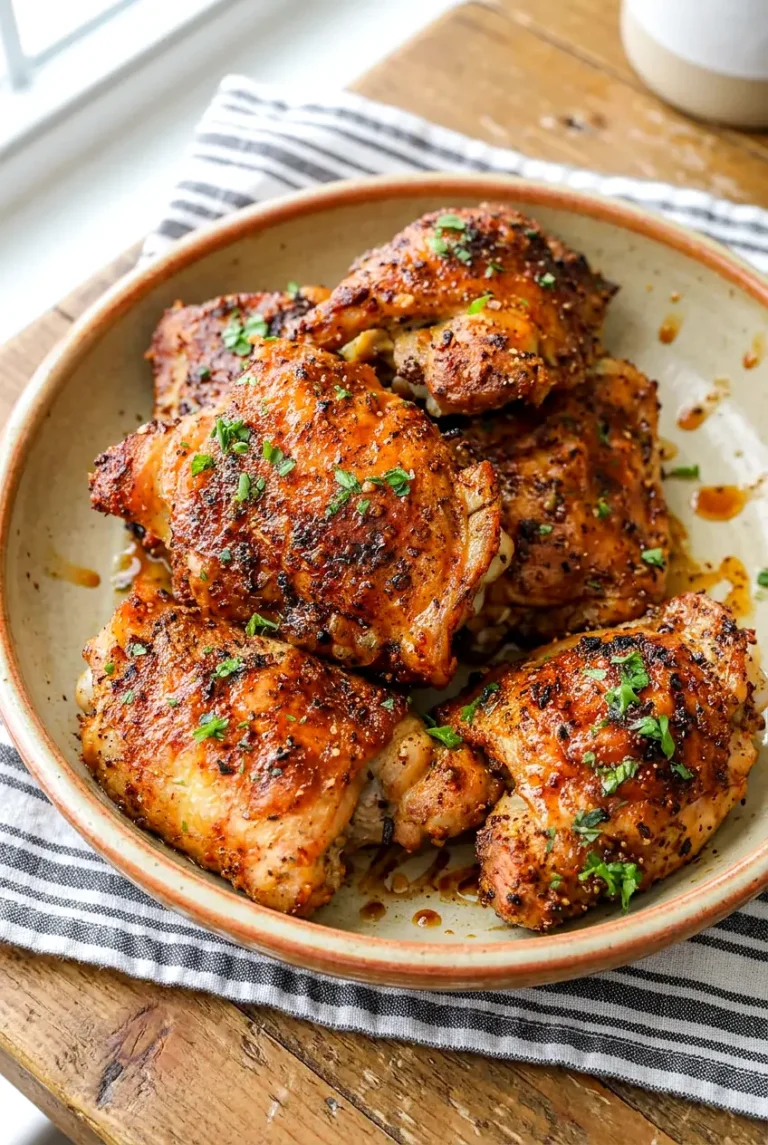
Side view of baked chicken thighs on a plate with browned skin and moist texture.
  • 6 bone-in, skin-on chicken thighs (about 2 1/2 to 3 pounds, or 1,125 to 1,150g)
  • 1 to 2 tablespoons olive oil or neutral oil
  • 1 to 1 1/2 teaspoons kosher salt, to taste
  • 1/2 teaspoon black pepper
  • 1 to 2 teaspoons poultry seasoning or Italian seasoning
  • 1 teaspoon garlic powder
  • 1 teaspoon paprika

If your seasoning blend already contains salt, reduce the added salt. If using frozen chicken thighs, thaw them fully before baking so they cook more evenly and brown better.

How to Make Baked Chicken Thighs

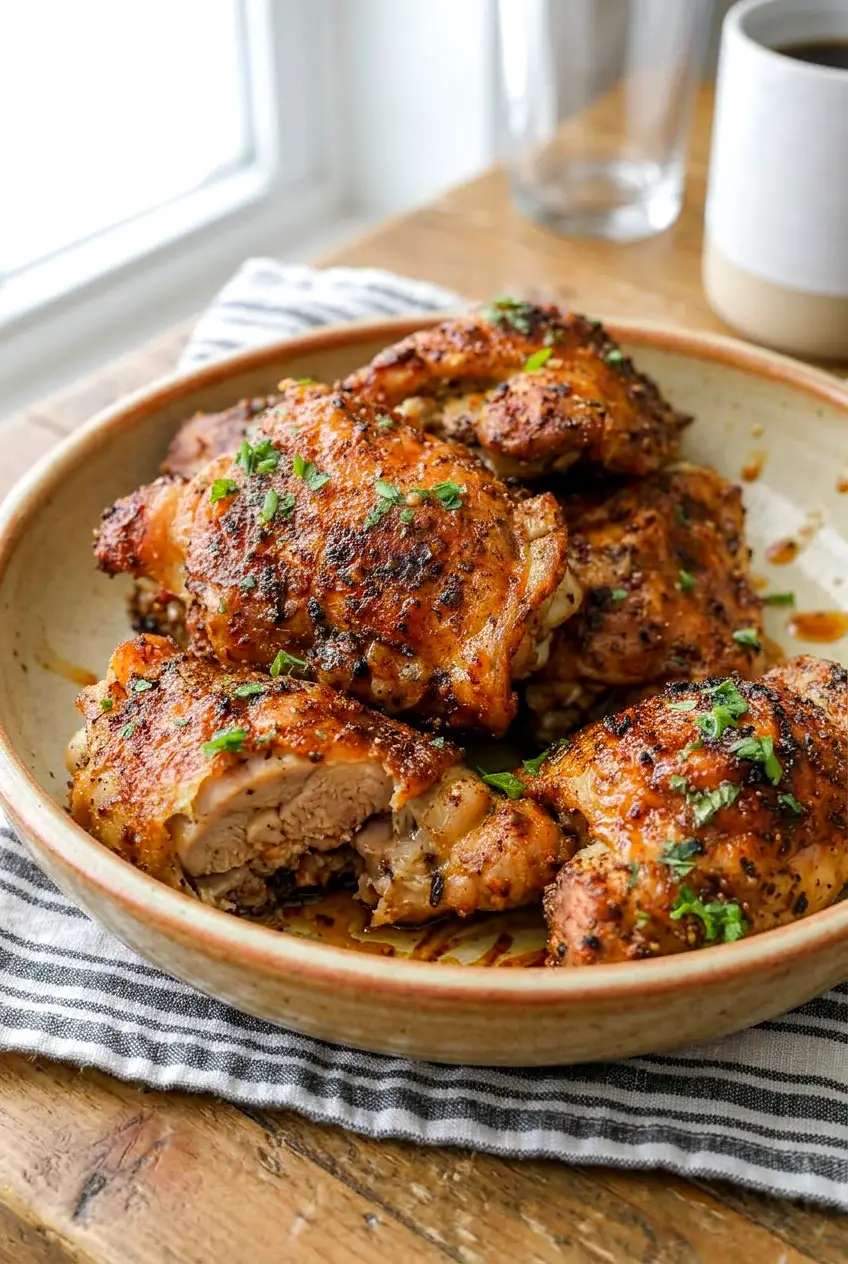
Close-up of baked chicken thighs showing juicy meat and crisp, seasoned skin.
  1. Preheat the oven and prepare the pan: Heat the oven to 425°F. Set a wire rack inside a rimmed baking sheet if you have one. You can also bake the thighs directly on the pan. For easier cleanup, line the pan with foil or parchment under the rack.
  2. Dry the chicken: Pat the chicken thighs dry on all sides with paper towels, especially the skin. The skin should look dry, not glossy.
  3. Season the thighs: Rub or brush the chicken lightly with the oil. Sprinkle evenly with the salt, pepper, poultry seasoning or Italian seasoning, garlic powder, and paprika. Coat both sides, but keep the oil light so it does not pool on top of the skin.
  4. Arrange on the pan: Place the thighs skin-side up in a single layer, leaving a little space between each piece.
  5. Bake: Roast for 35 to 45 minutes, depending on size. Start checking around 35 minutes if the thighs are on the smaller side.
  6. Check for doneness: The skin should be golden brown, the juices should run mostly clear, and the thickest part near the bone should no longer look pink. An instant-read thermometer inserted into the thickest part, without touching the bone, should read 165°F.
  7. Broil if needed: For darker, crispier skin, broil for 2 to 4 minutes at the end. Watch closely, since the skin can burn quickly.
  8. Rest and serve: Let the chicken rest for about 5 minutes before serving.

How to Get Crispy Skin

  • Dry the skin well: Moisture slows browning.
  • Use high heat: 425°F helps the skin brown better than a lower oven temperature.
  • Leave space between the thighs: Crowding traps steam and softens the skin.
  • Use a rack if you have one: It improves airflow and keeps the chicken from sitting in rendered fat.
  • Broil only at the end: This adds color quickly, but it needs close attention.

How to Tell When Chicken Thighs Are Done

Cooking time can vary based on the size of the thighs, your oven, and how cold the chicken is going into the oven. Use the thermometer and visual cues together rather than relying on time alone.

  • Internal temperature: 165°F in the thickest part, not touching the bone
  • Skin: golden brown to deep golden brown
  • Juices: mostly clear
  • Near the bone: no obvious pink in the thickest part

If the skin browns before the inside is fully cooked, keep baking and skip the broiler.

Seasoning Variations

BBQ Chicken Thighs

Brush 2 to 4 tablespoons BBQ sauce over the chicken during the last 5 to 10 minutes of baking, or serve it on the side. Adding it late helps prevent burning.

Lemon-Herb Chicken Thighs

Add 1 teaspoon lemon zest to the seasoning blend and finish with 1 to 2 teaspoons chopped fresh dill or 1/2 teaspoon dried dill.

Lemon Pepper Chicken Thighs

Use 1 to 2 teaspoons lemon pepper seasoning in place of part of the basic seasoning blend. Check the label first, since many lemon pepper blends already contain salt.

What to Serve With Baked Chicken Thighs

  • Roasted potatoes
  • Green beans
  • Steamed or roasted vegetables
  • Rice
  • Green salad

A squeeze of lemon at the table is also a good finish if you want a little brightness.

How to Store and Reheat Baked Chicken Thighs

Let the chicken cool before storing, then refrigerate it in an airtight container for up to 4 days. If you used BBQ sauce, storing the sauce separately can help the skin stay from getting as soft.

Reheat in the oven until warmed through. You can also reheat in the air fryer for a little better surface texture if you already use one. Reheat gently so the meat does not dry out.

Leftover chicken can be chopped and used in chicken salad or buffalo dip.

More Chicken Thigh Ideas

If you want a boneless version, try Juicy Baked Boneless Skinless Chicken Thighs.

For a lemony herb version, check out Crispy Chicken Thighs with Lemon-Herb Seasoning.

For a richer flavor idea, see Garlic Butter Chicken Thighs.

Nutrition

Nutrition is approximate and will vary based on the size of the chicken thighs, how much skin is eaten, and the amount of oil used.

  • Serving size: about 1 1/2 chicken thighs
  • Calories: about 470
  • Protein: 35g
  • Fat: 35g
  • Carbohydrates: 2g
  • Per 100g: about 220 calories, 16g protein, 17g fat, 1g carbohydrates

Baked Chicken Thighs

Juicy bone-in, skin-on chicken thighs roasted at high heat with a simple pantry seasoning for well-browned skin.
Course: Main Course
Cuisine: American
Prep: 15 min
Cook: 40 min
Total: 60 min
Servings: 4 Calories: about 470 kcal

Equipment

  • oven
  • rimmed baking sheet
  • wire rack (optional)
  • foil or parchment (optional)
  • instant-read thermometer
  • tongs or brush

Ingredients

For the chicken

  • 6 bone-in, skin-on chicken thighs (about 2 1/2 to 3 pounds; 1,125–1,150 g)

Seasoning

  • 1 to 2 tablespoons olive oil or neutral oil
  • 1 to 1 1/2 teaspoons kosher salt (reduce if seasoning mix contains salt)
  • 1/2 teaspoon black pepper
  • 1 to 2 teaspoons poultry seasoning or Italian seasoning
  • 1 teaspoon garlic powder
  • 1 teaspoon paprika

Instructions

  1. Preheat the oven to 425°F (218°C). Place a wire rack inside a rimmed baking sheet if using, or line the sheet with foil or parchment for easier cleanup.
  2. Pat the chicken thighs dry on all sides with paper towels, especially the skin.
  3. Rub or brush the thighs lightly with the oil, keeping the oil thin so it does not pool on the skin.
  4. Season both sides evenly with salt, pepper, poultry or Italian seasoning, garlic powder, and paprika.
  5. Arrange the thighs skin-side up in a single layer on the rack or baking sheet, leaving space between each piece.
  6. Roast for 35 to 45 minutes, beginning to check at 35 minutes; cooking time will vary by thigh size.
  7. Check doneness by ensuring the skin is golden brown, juices run mostly clear, the thickest part near the bone shows no obvious pink, and an instant-read thermometer reads 165°F (74°C) when inserted into the thickest part without touching the bone.
  8. If you want darker, crispier skin, broil for 2 to 4 minutes at the end—watch closely to prevent burning.
  9. Let the chicken rest for about 5 minutes before serving.

Tips

  • Dry the skin thoroughly before seasoning to promote browning.
  • Use high heat (425°F / 218°C) to help the skin crisp.
  • Leave space between thighs to avoid steaming and keep skin crisp.
  • Use a wire rack to improve airflow and keep chicken out of rendered fat.
  • Broil only at the end and watch closely to prevent burning.

Variations

  • BBQ Chicken Thighs: Brush 2 to 4 tablespoons BBQ sauce over the chicken during the last 5 to 10 minutes of baking or serve the sauce on the side.
  • Lemon-Herb Chicken Thighs: Add 1 teaspoon lemon zest to the seasoning blend and finish with 1 to 2 teaspoons chopped fresh dill or 1/2 teaspoon dried dill.
  • Lemon Pepper Chicken Thighs: Use 1 to 2 teaspoons lemon pepper seasoning in place of part of the basic seasoning blend (check the label for salt).

Notes

Cool before storing; refrigerate in an airtight container up to 4 days. Reheat in the oven or air fryer to preserve surface texture. If skin browns before the inside is cooked, continue baking rather than broiling.

Nutrition

Calories: about 470 kcal | Protein: 35 g | Fat: 35 g | Carbohydrates: 2 g

Juicy Baked Boneless Skinless Chicken Thighs

These baked boneless skinless chicken thighs come out well seasoned, lightly browned, and juicy inside. They cook quickly at a high oven temperature, which makes them easy enough for a weeknight dinner and practical for lunches or meal prep.

The method is simple: dry the chicken well, season it evenly, and give each piece a little space on the pan so it roasts instead of steaming. Serve the thighs whole, or slice them for salads, wraps, bowls, or roasted vegetable plates.

Ingredients for Baked Boneless Skinless Chicken Thighs

  • 1 1/2 pounds boneless, skinless chicken thighs (about 675g)
  • 1 1/2 tablespoons avocado oil
  • 1 teaspoon garlic powder
  • 1 teaspoon onion powder
  • 1 teaspoon Italian seasoning
  • 1/2 teaspoon cumin or smoked paprika
  • 1 teaspoon kosher salt
  • 1/2 teaspoon black pepper

Optional for serving: lemon wedges and 1 to 2 tablespoons chopped fresh parsley.

If you do not have avocado oil, use another neutral high-heat oil. If using fine table salt instead of kosher salt, use a little less.

Baked boneless skinless chicken thigh slices spread on a cutting board with browned edges

How to Bake Boneless Skinless Chicken Thighs

  1. Preheat the oven: Heat the oven to 425°F. Line a rimmed baking sheet with foil or parchment for easier cleanup.
  2. Trim and dry the chicken: Trim off any large pieces of excess fat, keeping the thighs intact. Pat them very dry with paper towels.
  3. Season the chicken: Place the thighs in a bowl or on the prepared pan. Toss or brush with the avocado oil, then season both sides with the garlic powder, onion powder, Italian seasoning, cumin or smoked paprika, kosher salt, and black pepper. The chicken should look evenly coated.
  4. Arrange on the pan: Spread the thighs in a single layer with a little space between each piece. Do not crowd the pan, or the chicken will steam instead of brown.
  5. Bake: Roast for 16 to 22 minutes. If you want more even browning, flip the thighs once about halfway through. Start checking early, since thickness can vary.
  6. Check for doneness: The chicken is done when the outside is browned, the center is no longer pink, and the thickest piece reaches 165°F on an instant-read thermometer. The juices should run clear.
  7. Rest and serve: Let the chicken rest for about 5 minutes before serving so the juices can settle back into the meat. Serve warm with lemon wedges or parsley, if using.

How to Keep Chicken Thighs Juicy

Three things make the biggest difference here: dry surfaces, enough space on the pan, and pulling the chicken as soon as it reaches 165°F. Wet chicken tends to stay pale, and crowded pieces release moisture that keeps them from roasting well.

Because boneless thighs vary in thickness, use the time range as a guide and rely on doneness cues near the end. Start checking at the lower end of the range, especially if your pieces are small.

Seasoning Notes

Smoked paprika

Close-up of sliced baked chicken thighs showing juicy, browned centers on a cutting board

Use smoked paprika instead of cumin for a smokier roasted flavor.

Cumin

Keep the cumin if you want a warmer, more savory flavor that works well in grain bowls, wraps, or meal prep lunches.

Finish with lemon or parsley

A squeeze of lemon juice or a little chopped parsley at the end adds freshness without changing the main recipe.

What to Serve with Baked Chicken Thighs

  • Green salad with vinaigrette
  • Roasted potatoes or baby potatoes
  • Roasted broccolini, carrots, or other vegetables
  • Sliced into wraps or grain bowls

For another chicken thigh dinner, try these Garlic Butter Chicken Thighs.

For a brighter, crispier option, see these Crispy Chicken Thighs with Lemon-Herb Seasoning.

If you want a sweet-savory sauce, try these Baked Honey Mustard Chicken Thighs.

How to Store and Reheat Baked Chicken Thighs

Let the chicken cool, then refrigerate it in an airtight container for up to 3 to 4 days. If possible, store it separately from watery side dishes so the texture stays better.

Reheat gently in a low oven or in the microwave in short bursts until warmed through. If the chicken has already been sliced, a small splash of water or broth can help keep it from drying out.

You can also mix the seasoning ahead of time and trim the chicken shortly before baking to make dinner prep faster.

Stovetop Option

If you would rather cook the thighs on the stove, use a skillet with enough room for the pieces to brown without overlapping. Cook over medium-high heat and watch closely, since stovetop timing can vary more than oven roasting.

Nutrition

Nutrition is approximate and will vary based on ingredient brands, exact amounts, and serving size.

  • Serving size: 1/4 of recipe
  • Calories: about 300
  • Protein: 28g
  • Fat: 20g
  • Carbohydrates: 1g
  • Per 100g: about 180 calories, 17g protein, 12g fat, 1g carbohydrates

Juicy Baked Boneless Skinless Chicken Thighs

Boneless skinless chicken thighs baked at high heat until lightly browned and juicy, seasoned with a simple blend of spices.
Course: Main Course
Cuisine: American
Prep: 10 min
Cook: 22 min
Total: 37 min
Servings: 4 Calories: about 300 kcal

Equipment

  • rimmed baking sheet
  • aluminum foil or parchment
  • mixing bowl
  • instant-read thermometer
  • skillet (optional)

Ingredients

For the chicken

  • 1 1/2 pounds boneless, skinless chicken thighs (about 675g)
  • 1 1/2 tablespoons avocado oil
  • 1 teaspoon garlic powder
  • 1 teaspoon onion powder
  • 1 teaspoon Italian seasoning
  • 1/2 teaspoon cumin or smoked paprika
  • 1 teaspoon kosher salt
  • 1/2 teaspoon black pepper

To serve (optional)

  • Lemon wedges
  • 1 to 2 tablespoons chopped fresh parsley

Instructions

  1. Preheat the oven to 425°F (218°C) and line a rimmed baking sheet with foil or parchment.
  2. Trim off any large pieces of excess fat from the thighs and pat them very dry with paper towels.
  3. Place the thighs in a bowl or on the prepared pan and toss or brush with the avocado oil.
  4. Season both sides of the thighs evenly with garlic powder, onion powder, Italian seasoning, cumin or smoked paprika, kosher salt, and black pepper.
  5. Arrange the thighs in a single layer on the baking sheet with a little space between each piece so they roast rather than steam.
  6. Roast for 16 to 22 minutes, flipping once about halfway through if you want more even browning; start checking early since thickness varies.
  7. Check doneness with an instant-read thermometer—the thickest piece should reach 165°F (74°C) and the juices should run clear.
  8. Let the chicken rest for about 5 minutes before serving to allow the juices to settle.
  9. Serve warm with lemon wedges or chopped parsley if desired.

Tips

  • Pat chicken very dry before seasoning to encourage browning.
  • Leave space between pieces on the pan to prevent steaming and promote roast color.
  • Use an instant-read thermometer and remove chicken at 165°F (74°C) for safe, juicy meat.
  • Start checking at the lower end of the cooking range because thigh thickness varies.
  • Flip once about halfway through for more even browning if desired.

Variations

  • Smoky Paprika: Use smoked paprika instead of cumin for a smokier roasted flavor.
  • Cumin-Spiced: Keep the cumin for a warmer, more savory flavor that works well in grain bowls or wraps.
  • Lemon-Parsley Finish: Finish with a squeeze of lemon juice and chopped parsley for brightness without changing the main method.

Notes

Refrigerate cooled chicken in an airtight container for 3–4 days. Reheat gently in a low oven or in short microwave bursts; if sliced, add a splash of water or broth to prevent drying. Cook to 165°F (74°C) for safety.

Nutrition

Calories: about 300 kcal | Protein: 28 g | Fat: 20 g | Carbohydrates: 1 g

Garlic Butter Chicken Thighs

These garlic butter chicken thighs are browned in a skillet, then finished in a simple pan sauce with garlic, broth or white wine, lemon, and butter. The chicken stays juicy, and the sauce is good spooned over rice, mashed potatoes, or noodles.

The whole dish comes together in about 25 to 35 minutes. The main thing that helps here is giving the chicken space in the pan so it sears instead of steaming.

Ingredients for Garlic Butter Chicken Thighs

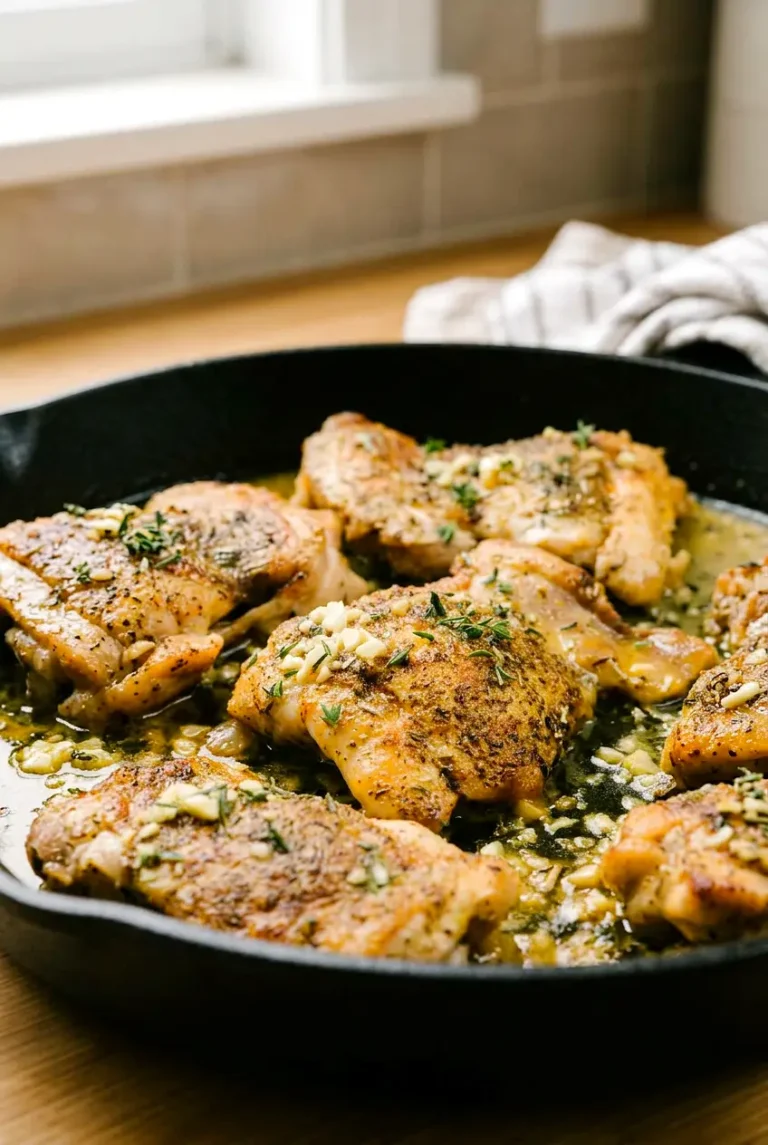
Side view of garlic butter chicken thighs in pan sauce, garnished with thyme.
  • 1 1/2 to 2 pounds boneless, skinless chicken thighs (about 675g), patted very dry
  • 1 to 1 1/2 teaspoons kosher salt
  • 1/2 teaspoon black pepper
  • 1 teaspoon garlic powder
  • 1 teaspoon paprika
  • 1 teaspoon Italian seasoning
  • 1 to 2 tablespoons olive oil
  • 4 tablespoons unsalted butter (55g), cold
  • 4 to 6 garlic cloves, minced (about 20g)
  • 1/2 cup dry white wine or chicken broth (120g)
  • 1 to 2 tablespoons lemon juice
  • 1 to 2 tablespoons chopped fresh thyme or parsley

Chicken broth works well if you do not want to use wine. If you use salted butter, reduce the added salt slightly and taste the sauce before adding more.

How to Make Garlic Butter Chicken Thighs

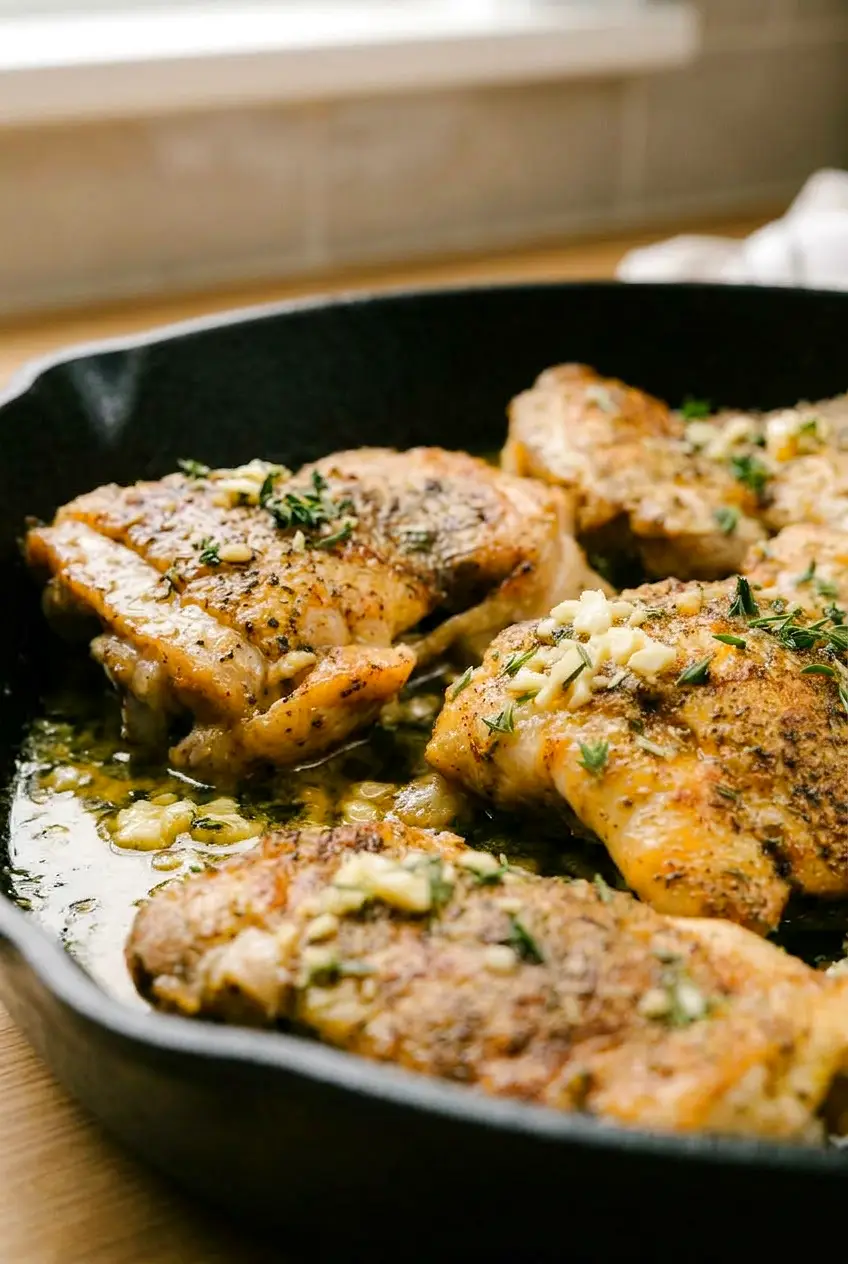
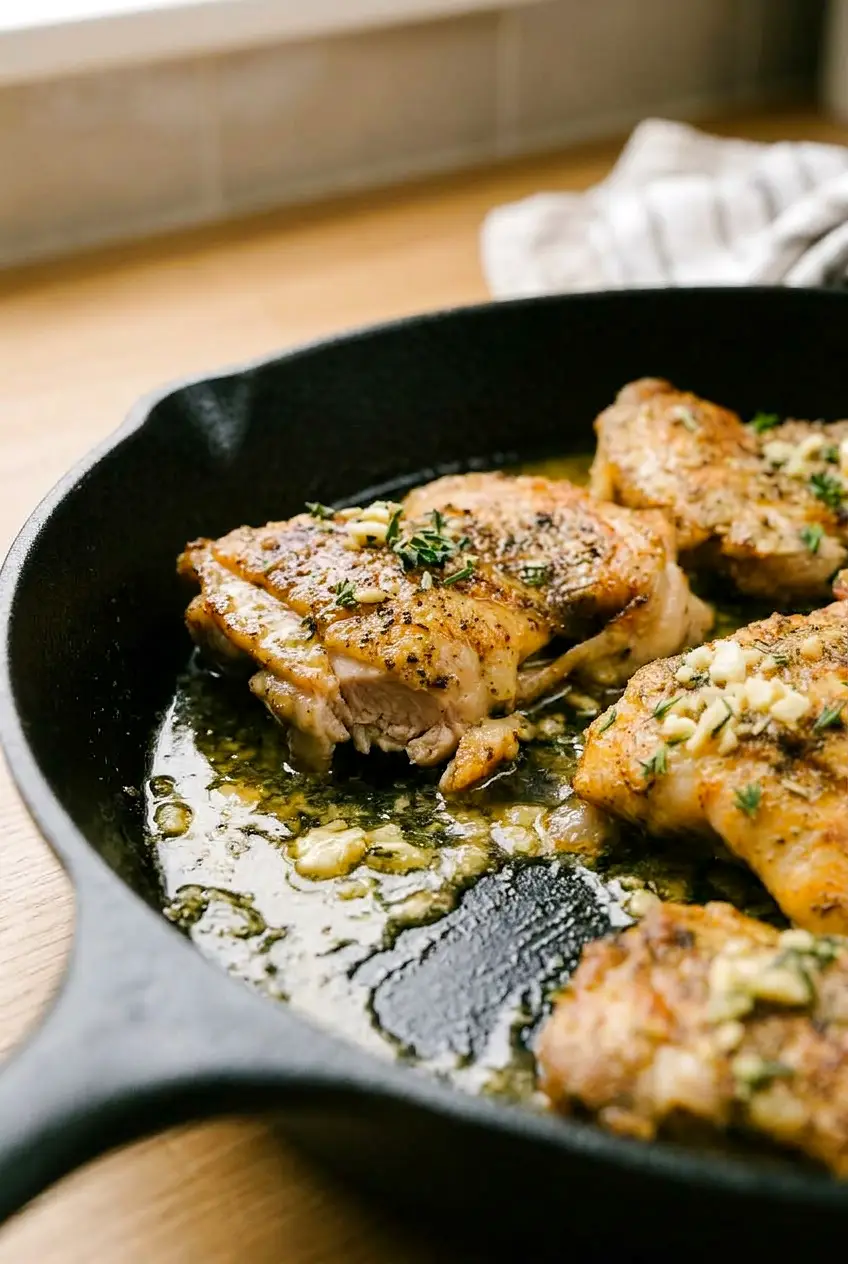
Close view of garlic butter chicken thighs with browned edges and sauce spooned over the top.
  1. Season the chicken: Pat the chicken thighs very dry with paper towels and trim any large pieces of visible fat. Season both sides with the salt, black pepper, garlic powder, paprika, and Italian seasoning. Let the chicken sit for 5 to 10 minutes while you heat a large 12-inch skillet.
  2. Heat the skillet: Set the skillet over medium-high heat and add 1 to 2 tablespoons olive oil. When the oil is shimmering, add the chicken in a single layer. If the pan is crowded, cook in batches.
  3. Sear the first side: Cook without moving the chicken for 4 to 6 minutes, until the underside is deeply golden and the pieces release easily from the pan.
  4. Flip and brown the second side: Turn the chicken with tongs and cook for 3 to 5 minutes more, until browned on the second side. If the thighs are not fully cooked through yet, that is fine. Transfer them to a plate if needed.
  5. Cook the garlic: Lower the heat to medium or medium-low. Add the minced garlic to the skillet and cook for about 30 seconds, just until fragrant. Do not let it brown too much.
  6. Deglaze the pan: Pour in the white wine or chicken broth and scrape up the browned bits from the bottom of the skillet. Let the liquid bubble gently for 1 to 2 minutes.
  7. Finish the sauce: Stir in 1 tablespoon lemon juice. Add the cold butter a little at a time, stirring until the sauce looks glossy and lightly thickened. Keep the heat moderate so the butter melts smoothly into the sauce. Taste and add more lemon juice or a little more salt if needed.
  8. Finish the chicken: Return the chicken and any juices to the skillet. Spoon the sauce over the top and cook over low to medium-low heat for 3 to 6 minutes, until the thickest part of the chicken reaches 165°F. The sauce should lightly coat the chicken and the back of a spoon.
  9. Serve: Turn off the heat, scatter the thyme or parsley over the top, and serve right away with the pan sauce.

Tips for Better Browning and Sauce

Use a wide skillet if you can. A 12-inch pan gives the chicken room to brown and helps the sauce reduce instead of turning watery.

If the chicken sticks when you try to flip it, give it another minute. It usually releases more easily once the crust is properly browned.

If the sauce looks thin, let the broth or wine reduce a little longer before adding the butter. If it looks greasy, the heat is probably too high, so lower it before stirring in the rest of the butter.

Chicken Thighs or Chicken Breasts?

Boneless, skinless chicken thighs are the easier choice here because they stay juicy and handle skillet cooking well. Chicken breasts can work too, but they usually cook faster and can dry out sooner, so start checking early and pull them as soon as they reach 165°F.

What to Serve With Garlic Butter Chicken Thighs

Serve this with something that can catch the sauce. Rice, mashed potatoes, buttered noodles, or cauliflower mash all work well. For a simple side, add steamed broccoli, green beans, or a crisp green salad.

If you want another simple chicken-thigh dinner, try Crispy Chicken Thighs with Lemon-Herb Seasoning.

For a baked chicken-thigh option with a different sauce, see Baked Honey Mustard Chicken Thighs.

How to Store and Reheat Garlic Butter Chicken Thighs

Let leftovers cool, then store the chicken and sauce together in an airtight container in the refrigerator for up to 3 to 4 days. Keeping the sauce with the chicken helps keep the meat moist.

Reheat gently on the stovetop over low heat or in the microwave at reduced power until just hot. If the sauce has thickened in the refrigerator, add a small splash of broth to loosen it.

For make-ahead prep, you can season the chicken and mince the garlic ahead of time, but cook the dish just before serving for the best browning and sauce texture.

Nutrition

Nutrition is approximate and will vary based on ingredient brands, exact amounts, and serving size.

  • Serving size: 1/4 of recipe
  • Calories: about 440
  • Protein: 35g
  • Fat: 31g
  • Carbohydrates: 3g
  • Per 100g: about 185 calories, 15g protein, 13g fat, 1g carbohydrates

Garlic Butter Chicken Thighs

Boneless skinless chicken thighs seared in a skillet and finished in a garlic-butter pan sauce with wine or broth and lemon.
Course: Main Course
Cuisine: American
Prep: 10 min
Cook: 20 min
Total: 30 min
Servings: 4 Calories: about 440 kcal

Equipment

  • 12-inch skillet
  • tongs
  • instant-read thermometer

Ingredients

Chicken

  • 1 1/2 to 2 pounds (675g) boneless skinless chicken thighs, patted very dry
  • 1 to 1 1/2 teaspoons kosher salt
  • 1/2 teaspoon black pepper
  • 1 teaspoon garlic powder
  • 1 teaspoon paprika
  • 1 teaspoon Italian seasoning
  • 1 to 2 tablespoons olive oil

Pan sauce

  • 4 tablespoons unsalted butter (55g), cold
  • 4 to 6 garlic cloves, minced (about 20g)
  • 1/2 cup dry white wine or chicken broth (120g)
  • 1 to 2 tablespoons lemon juice
  • 1 to 2 tablespoons chopped fresh thyme or parsley

Instructions

  1. Pat chicken very dry and trim any large pieces of visible fat; season both sides with kosher salt, black pepper, garlic powder, paprika, and Italian seasoning.
  2. Let the chicken sit 5 to 10 minutes while you heat a large 12-inch skillet over medium-high heat.
  3. Add 1 to 2 tablespoons olive oil to the hot skillet and add the chicken in a single layer, working in batches if the pan is crowded.
  4. Cook without moving for 4 to 6 minutes, until the underside is deeply golden and the pieces release easily from the pan.
  5. Turn the chicken with tongs and cook 3 to 5 minutes more until browned on the second side; transfer to a plate if not fully cooked through.
  6. Lower the heat to medium or medium-low and add the minced garlic to the skillet; cook about 30 seconds until fragrant, taking care not to brown it.
  7. Pour in the white wine or chicken broth and scrape up browned bits from the bottom of the skillet; let the liquid bubble gently for 1 to 2 minutes.
  8. Stir in 1 tablespoon lemon juice, then add the cold butter a little at a time, stirring until the sauce is glossy and lightly thickened; taste and adjust lemon or salt as needed.
  9. Return the chicken and any juices to the skillet and spoon sauce over the pieces; cook over low to medium-low heat 3 to 6 minutes until the thickest part reaches 165°F (74°C).
  10. Turn off the heat, scatter chopped thyme or parsley over the top, and serve immediately with the pan sauce.

Tips

  • Use a wide (12-inch) skillet so chicken has room to brown instead of steam.
  • Pat the chicken very dry before searing to improve browning.
  • If chicken sticks when flipping, give it another minute — it will usually release once browned.
  • If the sauce is thin, reduce the wine or broth a bit longer before adding the butter.
  • If the sauce looks greasy, lower the heat before stirring in the remaining butter.

Variations

  • Use chicken breasts: Substitute boneless skinless chicken breasts, but start checking earlier as breasts cook faster and can dry out.
  • No-wine option: Use chicken broth instead of dry white wine for a non-alcoholic pan sauce.

Notes

Store leftovers with sauce in an airtight container in the fridge for 3 to 4 days. Reheat gently over low heat or in the microwave at reduced power; add a splash of broth if the sauce has thickened.

Nutrition

Calories: about 440 kcal | Protein: 35 g | Fat: 31 g | Carbohydrates: 3 g | Per100g: about 185 calories, 15g protein, 13g fat, 1g carbohydrates

Air Fryer Chicken Thighs

These air fryer chicken thighs come out with crisp skin, juicy meat, and a simple lemon-herb seasoning. They cook quickly at high heat and need only a quick flip halfway through.

The key is keeping the skin dry and giving each thigh enough space in the basket so it browns instead of steams. Since thigh size and air fryer models vary, use the cook time as a range and check for doneness with an instant-read thermometer.

Ingredients for Air Fryer Chicken Thighs

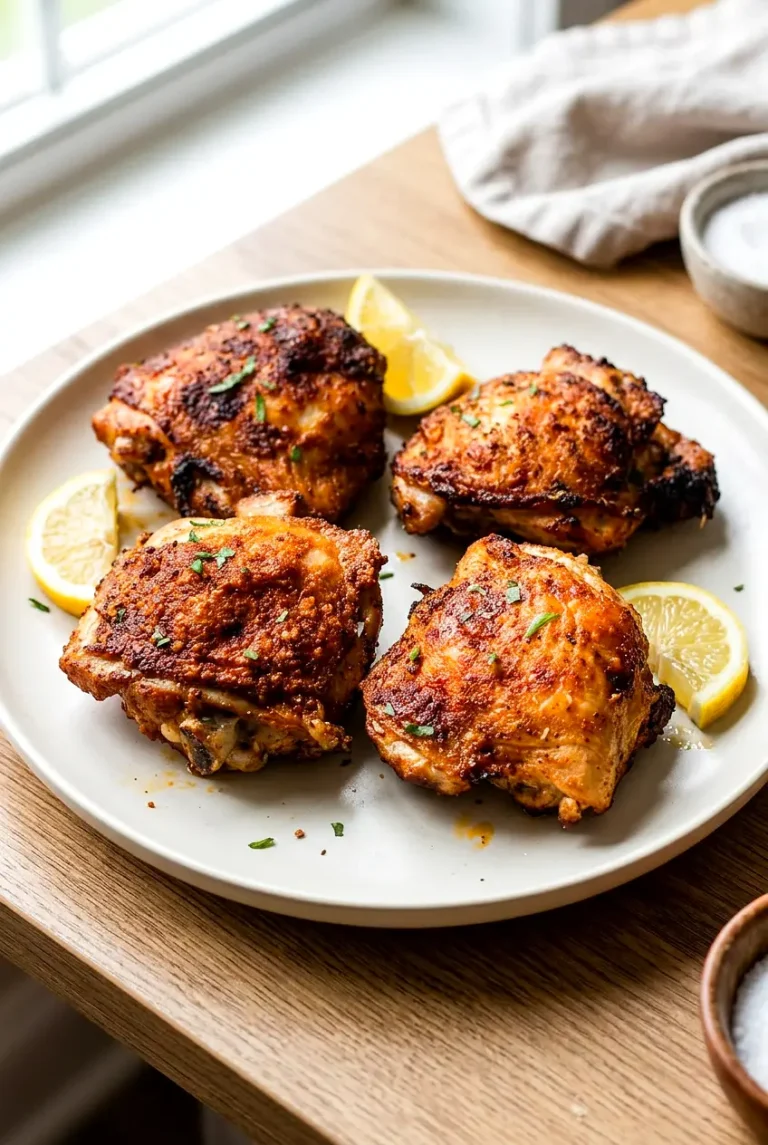
Crispy chicken thigh with lemon wedge beside it on a casual dinner plate
  • 2 pounds bone-in, skin-on chicken thighs (about 900g)
  • 1 tablespoon olive oil
  • 1 teaspoon kosher salt
  • 1/2 teaspoon black pepper
  • 1 teaspoon garlic powder
  • 1 teaspoon onion powder
  • 1 teaspoon sweet paprika
  • 1 teaspoon dried herbes de Provence
  • 1 lemon, cut into wedges

Optional for serving: 1 tablespoon chopped fresh parsley.

If you do not have herbes de Provence, use a small amount of dried thyme, rosemary, or Italian seasoning instead. Smoked paprika also works if you want a slightly deeper flavor.

How to Make Air Fryer Chicken Thighs

Close view of crispy chicken thighs showing browned skin and juicy meat
  1. Dry the chicken: Pat the chicken thighs very dry with paper towels. Dry skin helps them crisp more easily.
  2. Season the thighs: Place the chicken in a bowl or on a plate. Drizzle with the olive oil, then season with the salt, pepper, garlic powder, onion powder, paprika, and herbes de Provence. Rub or toss until evenly coated. Do not add lemon juice yet, since extra moisture can slow browning.
  3. Preheat if needed: Preheat the air fryer to 400°F if your model calls for it.
  4. Arrange in the basket: Place the thighs skin-side up in a single layer, leaving space between them. Cook in batches if needed.
  5. Air fry: Cook at 400°F for 18 to 24 minutes, flipping once about halfway through. If your air fryer heats unevenly, rotate the basket or trays as needed. Start checking early if the thighs are small or your air fryer runs hot.
  6. Check for doneness: Insert an instant-read thermometer into the thickest part of a thigh without touching the bone. The chicken is done at 165°F. The skin should be browned and crisp at the edges, the juices should run clear, and the meat should no longer be pink near the bone.
  7. Crisp a little longer if needed: If the chicken is fully cooked but the skin needs more color, cook for another 2 to 5 minutes at 400°F, checking closely.
  8. Rest and finish: Let the chicken rest for about 5 minutes. Squeeze fresh lemon over the top, sprinkle with parsley if using, and serve warm.

How to Keep the Skin Crispy

The two biggest issues are moisture and crowding. Pat the chicken dry, use only a light coating of oil, and leave space around each piece so the hot air can circulate.

Bone-in, skin-on thighs work especially well here because the skin renders as the meat cooks. One flip is enough for even browning without disturbing them too much.

How to Tell When Chicken Thighs Are Done

Cook time can vary, so rely on both temperature and visual cues.

  • Internal temperature: 165°F in the thickest part
  • Skin: browned and crisp at the edges
  • Juices: clear when pierced
  • Meat: opaque and no longer pink near the bone

Easy Variations

Boneless Chicken Thighs

You can use boneless, skinless chicken thighs, but start checking much earlier since they cook faster and can dry out more easily. Keep the same seasoning and temperature.

Skinless Version

You can remove the skin before cooking for a lighter option. The chicken will still be flavorful, but it will not brown or crisp the same way.

Spicier Paprika Version

Add 1/8 teaspoon cayenne or use smoked paprika in place of sweet paprika for a little more depth or heat.

What to Serve With Air Fryer Chicken Thighs

Serve these with simple sides like a green salad, roasted green beans, shredded Brussels sprouts, quinoa salad, roasted butternut squash, tomato soup, or plain pasta.

For a brighter herb-heavy option, try these Chimichurri Chicken Thighs.

How to Store and Reheat Air Fryer Chicken Thighs

Let the chicken cool, then refrigerate it in an airtight container for up to 4 days. If possible, store extra lemon wedges separately so the skin stays as crisp as possible.

Reheat in the air fryer at a lower temperature until warmed through. That helps the outside heat up without overbrowning before the center is hot. The skin will not be quite as crisp as it was fresh, but the air fryer brings back more texture than the microwave.

If you want a different flavor direction, try these Baked Honey Mustard Chicken Thighs or these Creamy Oven Baked Chicken Thighs.

Nutrition

Nutrition is approximate and will vary based on the size of the chicken thighs, how much rendered fat remains, and ingredient brands.

  • Serving size: 1/4 of recipe
  • Calories: about 380
  • Protein: 28g
  • Fat: 29g
  • Carbohydrates: 2g
  • Per 100g: about 210 calories, 16g protein, 16g fat, 1g carbohydrates

Air Fryer Chicken Thighs

Bone-in, skin-on chicken thighs seasoned with lemon-herb and cooked in an air fryer until the skin is crisp and the meat is juicy.
Course: Main Course
Cuisine: American
Prep: 10 min
Cook: 24 min
Total: 39 min
Servings: 4 Calories: about 380 kcal

Equipment

  • air fryer
  • instant-read thermometer
  • mixing bowl
  • tongs

Ingredients

For the chicken

  • 2 pounds bone-in, skin-on chicken thighs (about 900g)
  • 1 tablespoon olive oil
  • 1 teaspoon kosher salt
  • 1/2 teaspoon black pepper
  • 1 teaspoon garlic powder
  • 1 teaspoon onion powder
  • 1 teaspoon sweet paprika
  • 1 teaspoon dried herbes de Provence
  • 1 lemon, cut into wedges
  • 1 tablespoon chopped fresh parsley (optional)

Instructions

  1. Pat the chicken thighs very dry with paper towels.
  2. Place the chicken in a bowl or on a plate; drizzle with olive oil and rub to coat.
  3. Season evenly with kosher salt, black pepper, garlic powder, onion powder, sweet paprika, and herbes de Provence.
  4. Preheat the air fryer to 400°F (204°C) if your model requires preheating.
  5. Arrange the thighs skin-side up in a single layer in the air fryer basket, leaving space between pieces; cook in batches if needed.
  6. Air fry at 400°F (204°C) for 18 to 24 minutes, flipping once about halfway through the cook time.
  7. If your air fryer heats unevenly, rotate the basket or trays as needed and start checking earlier for small thighs.
  8. Insert an instant-read thermometer into the thickest part of a thigh without touching bone; the chicken is done at 165°F (74°C).
  9. If the chicken has reached 165°F but the skin needs more color, cook an additional 2 to 5 minutes at 400°F (204°C), checking closely.
  10. Let the chicken rest for about 5 minutes, squeeze lemon over the top, sprinkle with parsley if using, and serve warm.

Tips

  • Pat the skin very dry before seasoning to help it crisp.
  • Leave space between pieces — avoid overcrowding the basket.
  • Flip once about halfway for even browning; avoid frequent turning.
  • Use an instant-read thermometer and cook to 165°F (74°C) in the thickest part.
  • If skin needs more color after reaching temperature, air fry 2–5 minutes more at 400°F (204°C).

Variations

  • Boneless Chicken Thighs: Use boneless, skinless thighs but start checking much earlier since they cook faster and can dry out.
  • Skinless Version: Remove the skin before cooking for a lighter option; the chicken will be flavorful but won’t crisp the same way.
  • Spicier Paprika Version: Add 1/8 teaspoon cayenne or use smoked paprika in place of sweet paprika for more depth or heat.

Notes

Refrigerate leftovers in an airtight container for up to 4 days. Reheat in the air fryer at a lower temperature to warm through while preserving texture; store extra lemon wedges separately to keep skin crisp. Ensure internal temperature reaches 165°F (74°C) for safety.

Nutrition

Calories: about 380 kcal | Protein: 28 g | Fat: 29 g | Carbohydrates: 2 g

Baked Honey Mustard Chicken Thighs

These baked honey mustard chicken thighs come out juicy with lightly browned skin and a glossy pan sauce that is sweet, tangy, and garlicky. They are simple enough for a weeknight but still feel like a full dinner with very little prep.

The method keeps the sauce from burning by covering the chicken for the first part of the bake, then uncovering it so the skin can brown. You can make it in one baking dish or a 10- to 12-inch cast-iron skillet as long as the thighs fit in a single layer.

Ingredients for Baked Honey Mustard Chicken Thighs

Side-angle view of honey mustard chicken thighs with pan sauce pooling around the pieces
  • 2 1/2 to 3 pounds skin-on, bone-in chicken thighs (about 1.15kg), patted dry
  • 1/4 cup honey (about 85g)
  • 3 tablespoons Dijon mustard (about 45g)
  • 2 tablespoons whole grain mustard (about 30g)
  • 2 tablespoons olive oil
  • 2 tablespoons lemon juice
  • 3 cloves garlic, minced
  • 1 teaspoon dried oregano
  • 1 1/4 teaspoons salt
  • 1/2 teaspoon black pepper
  • 2 tablespoons chopped fresh parsley, plus more for serving if desired

A baking dish gives you a slightly saucier finish, while a cast-iron skillet can help the tops brown a little more. Whichever pan you use, leave a little space between the pieces so the chicken roasts instead of steaming.

How to Make Baked Honey Mustard Chicken Thighs

Close view of baked honey mustard chicken thighs showing browned skin and glossy sauce
  1. Preheat the oven: Heat the oven to 375°F. Lightly grease a baking dish if needed, or use a 10- to 12-inch cast-iron skillet.
  2. Mix the sauce: In a small bowl, whisk together the honey, Dijon mustard, whole grain mustard, olive oil, lemon juice, garlic, oregano, salt, pepper, and parsley until smooth. The sauce should be thick enough to coat the chicken lightly.
  3. Arrange the chicken: Pat the chicken thighs dry with paper towels. Arrange them skin-side up in the pan, then spoon or brush the sauce over the tops. Coat the chicken well, but do not bury the skin under too much liquid.
  4. Marinate if you want: Bake right away, or cover and refrigerate for 30 minutes to overnight. If the chicken goes into the oven cold from the refrigerator, it may need a little more time.
  5. Bake covered: Cover the pan tightly with foil or a lid and bake for 20 to 25 minutes. The sauce should be gently bubbling around the edges, and the chicken should be starting to firm up.
  6. Uncover and finish baking: Remove the cover and bake for 12 to 18 minutes more, until the skin is browned and the thickest part of the chicken reaches 165°F without touching the bone. If needed, rotate the pan once for even browning. If you are using a baking dish, you can spoon a little pan sauce over the chicken once during this final bake for a glossier finish.
  7. Rest and serve: Let the chicken rest for 5 to 10 minutes before serving. The sauce should look glossy with light caramelization at the edges. Spoon some of the pan sauce over the chicken and sprinkle with more parsley if you like.

Why This Method Works

Honey can brown fast, so covering the pan at the start protects the sauce while the chicken begins cooking through. Uncovering near the end gives the skin time to brown without scorching the glaze.

It also helps to use a light coating of sauce instead of pouring all of it heavily over the chicken at once. Too much liquid in the pan can keep the skin soft.

Easy Ingredient Swaps

  • Honey: Use maple syrup in the same amount.
  • Olive oil: Avocado oil or vegetable oil works well.
  • Lemon juice: Use 1 to 2 teaspoons apple cider vinegar or white wine vinegar.
  • Garlic: Use 1/2 teaspoon garlic powder if needed.

What to Serve with Honey Mustard Chicken Thighs

Serve these chicken thighs with rice, mashed potatoes, roasted potatoes, green beans, broccoli, or a simple salad. The pan sauce is especially good spooned over the chicken and whatever side you choose.

If you want another simple chicken thigh dinner, try garlic lemon chicken thighs with spinach. For another saucy option, you may also like chimichurri chicken thighs.

How to Store and Reheat Baked Honey Mustard Chicken Thighs

Let the chicken cool, then refrigerate it in an airtight container for up to 3 to 4 days. Store any pan sauce with the chicken.

To reheat, cover and warm the chicken in a 325°F oven until heated through, or microwave it in short bursts so it does not dry out. The skin will soften after storage, but the meat reheats well.

For make-ahead prep, mix the sauce and marinate the chicken earlier in the day or overnight in the refrigerator, then bake when ready. You can also freeze the chicken in the marinade for later.

For a different oven-baked option, try creamy oven baked chicken thighs.

Nutrition

Nutrition is approximate and will vary based on ingredient brands, exact chicken size, rendered fat, and serving size.

  • Serving size: about 1/4 of the recipe
  • Calories: about 510
  • Protein: 39g
  • Fat: 33g
  • Carbohydrates: 15g
  • Per 100g: about 210 calories, 16g protein, 14g fat, 6g carbohydrates

Baked Honey Mustard Chicken Thighs

Juicy skin-on, bone-in chicken thighs baked in a sweet, tangy, garlicky honey mustard glaze with a glossy pan sauce.
Course: Main Course
Cuisine: American
Prep: 15 min
Cook: 40 min
Total: 85 min
Servings: 4 Calories: 510 kcal

Equipment

  • baking dish or 10- to 12-inch cast-iron skillet
  • foil or lid
  • small bowl
  • whisk
  • pastry brush or spoon

Ingredients

For the Chicken

  • 2 1/2 to 3 pounds skin-on, bone-in chicken thighs (about 1.15 kg), patted dry

For the Honey Mustard Sauce

  • 1/4 cup honey (about 85 g)
  • 3 tablespoons Dijon mustard (about 45 g)
  • 2 tablespoons whole grain mustard (about 30 g)
  • 2 tablespoons olive oil
  • 2 tablespoons lemon juice
  • 3 cloves garlic, minced
  • 1 teaspoon dried oregano
  • 1 1/4 teaspoons salt
  • 1/2 teaspoon black pepper
  • 2 tablespoons chopped fresh parsley, plus more for serving (optional)

Instructions

  1. Preheat the oven to 375°F (190°C). Lightly grease a baking dish or use a 10- to 12-inch cast-iron skillet.
  2. In a small bowl, whisk together the honey, Dijon mustard, whole grain mustard, olive oil, lemon juice, garlic, oregano, salt, pepper, and parsley until smooth.
  3. Pat the chicken thighs dry with paper towels and arrange them skin-side up in a single layer in the pan.
  4. Spoon or brush the sauce over the tops of the thighs, coating them lightly but without burying the skin.
  5. If marinating, cover and refrigerate for 30 minutes to overnight; if chilled, add a few extra minutes to the bake time.
  6. Cover the pan tightly with foil or a lid and bake for 20 to 25 minutes, until the sauce is gently bubbling and the chicken begins to firm.
  7. Remove the cover and bake 12 to 18 minutes more, until the skin is browned and the thickest part of the chicken reaches 165°F (74°C) without touching the bone; rotate the pan if needed. If using a baking dish, spoon a little pan sauce over the chicken once during this final bake for a glossier finish.
  8. Let the chicken rest 5 to 10 minutes before serving. Spoon pan sauce over the thighs and sprinkle with additional parsley if desired.

Tips

  • Cover the pan for the first part of baking to prevent the honey from burning.
  • Use a light coating of sauce so the skin can brown instead of staying soggy.
  • Leave space between thighs so they roast rather than steam.
  • Use a cast-iron skillet for slightly better browning of the skin.
  • Rotate the pan during the final uncovered bake for even color.

Variations

  • Maple Honey Mustard: Swap equal parts maple syrup for the honey for a deeper, caramel-like sweetness.
  • Oil Substitutes: Use avocado oil or vegetable oil instead of olive oil.
  • Vinegar Replacement: Replace the lemon juice with 1 to 2 teaspoons apple cider vinegar or white wine vinegar for a different tang.
  • Garlic Powder Option: Use 1/2 teaspoon garlic powder in place of fresh garlic if preferred.

Notes

Refrigerate leftovers in an airtight container for 3 to 4 days; reheat covered in a 325°F (163°C) oven or in short microwave bursts. Internal doneness should reach 165°F (74°C). The skin will soften after storage. You can freeze the chicken in the marinade for later.

Nutrition

Calories: 510 kcal | Protein: 39 g | Fat: 33 g | Carbohydrates: 15 g