Author

Julia

Browsing

Easy Thai Red Curry Chicken

Easy Thai red curry chicken is rich, saucy, and simple enough for a weeknight dinner. Store-bought red curry paste, coconut milk, tender chicken thighs, squash or pumpkin, and green beans come together in one pan and spoon easily over jasmine rice.

The key step is cooking the curry paste briefly in oil with the garlic, ginger, and lemongrass before adding the coconut milk. Then keep the curry at a gentle simmer so the sauce has time to come together without turning thin or breaking.

Ingredients for Easy Thai Red Curry Chicken
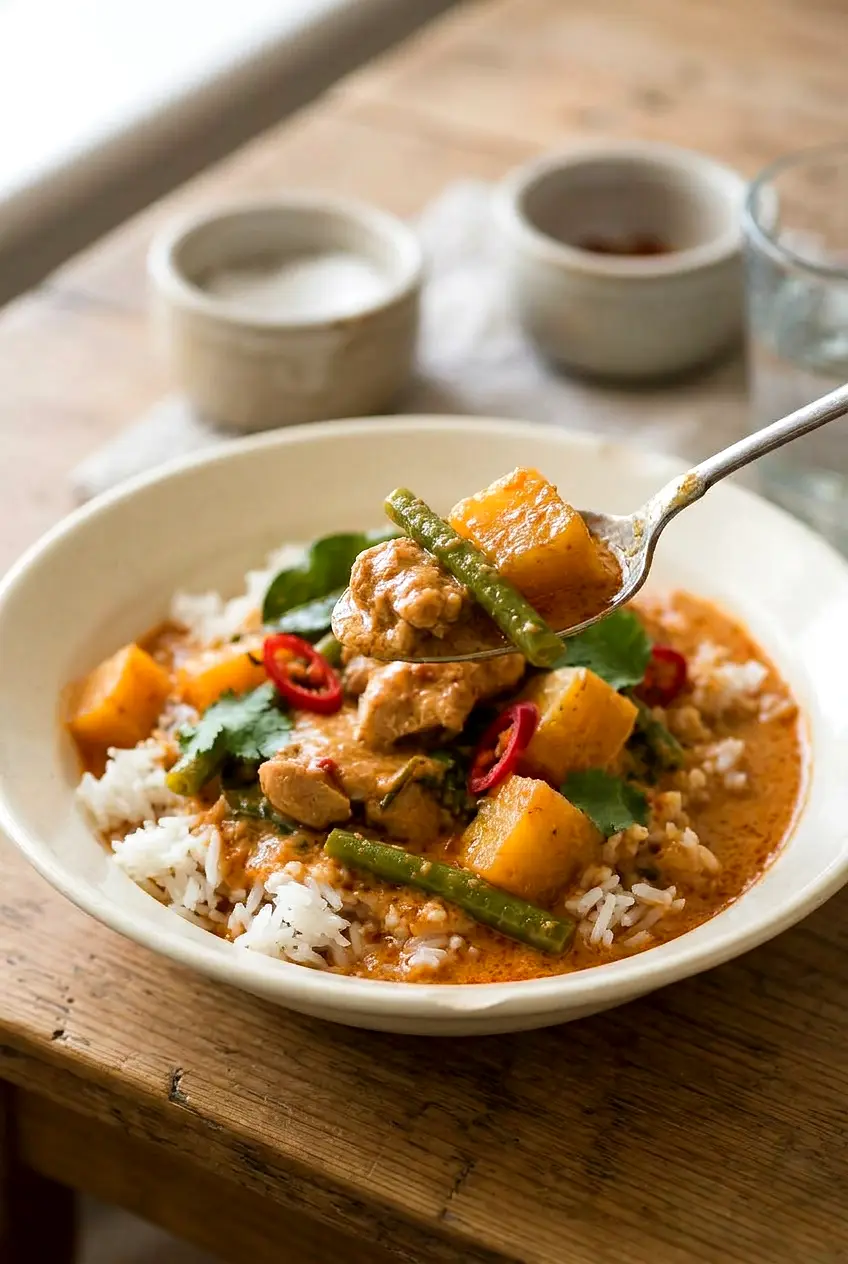
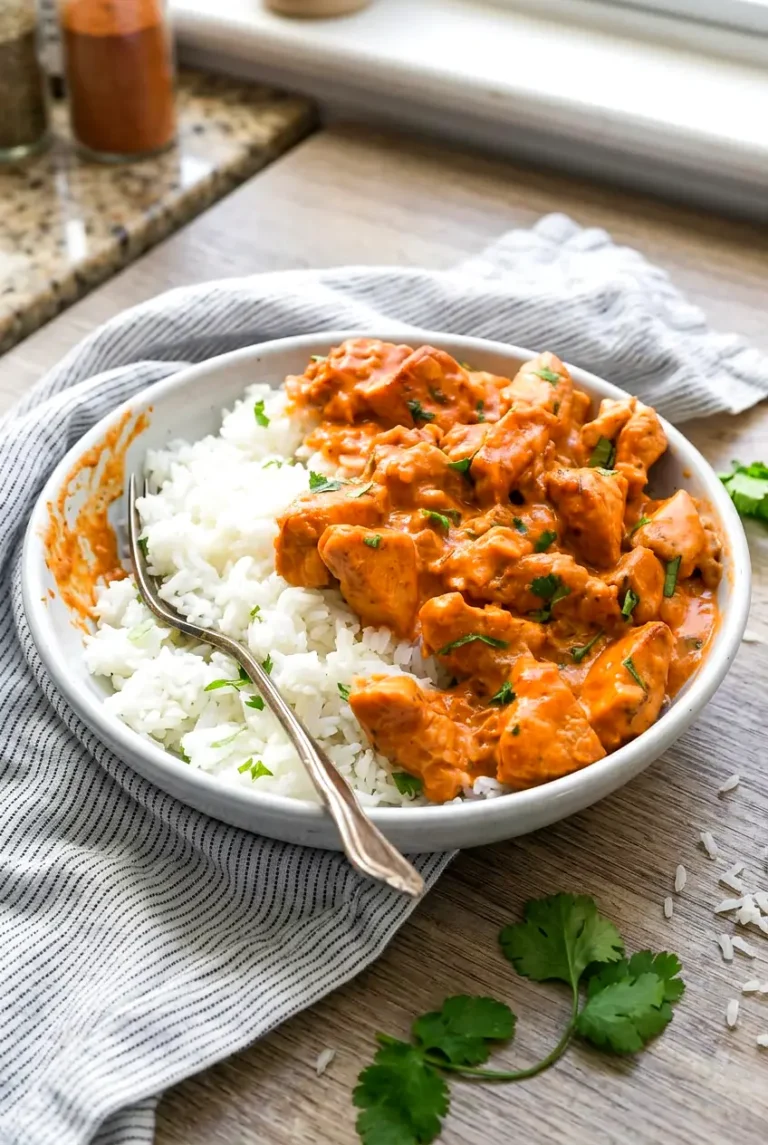
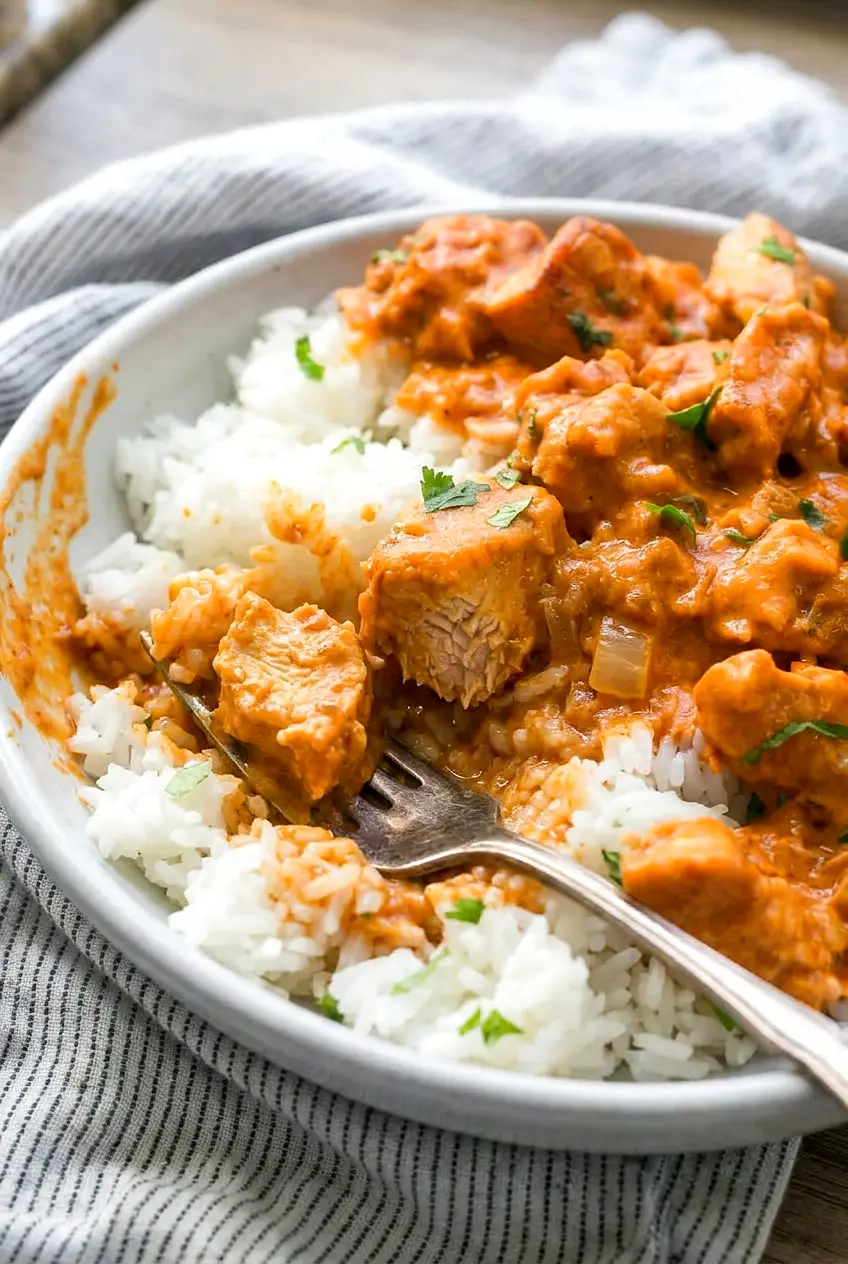
Thai red curry chicken served over rice, with a spoonful showing the saucy chicken and vegetables
  • 1 1/2 pounds boneless, skinless chicken thighs (680g), cut into bite-size pieces
  • 1 tablespoon neutral oil
  • 3 to 4 tablespoons Thai red curry paste
  • 3 cloves garlic, minced
  • 1 tablespoon fresh ginger, minced
  • 1 tablespoon minced lemongrass or lemongrass paste (15g)
  • 2 cans coconut milk, 13.5 ounces each (about 800g total)
  • 1/2 to 1 cup chicken broth (120g to 240g), plus more as needed
  • 2 cups butternut squash or pumpkin, peeled and cubed (300g)
  • 8 ounces green beans, trimmed and cut (225g)
  • 1 to 2 tablespoons fish sauce
  • 1 to 2 teaspoons sugar
  • 4 to 6 kaffir lime leaves, torn, optional
  • 1/2 cup loosely packed Thai basil leaves (10g)

Serve with hot jasmine rice.

Chicken thighs are the most forgiving choice here because they stay tender during simmering. If you use chicken breast, cut it into slightly larger pieces and keep the simmer gentle so it does not dry out. Kaffir lime leaves add a fresh citrus note, but the curry still works without them. Curry paste brands vary in heat and salt, so taste before adding more fish sauce or sugar at the end.

How to Make Easy Thai Red Curry Chicken
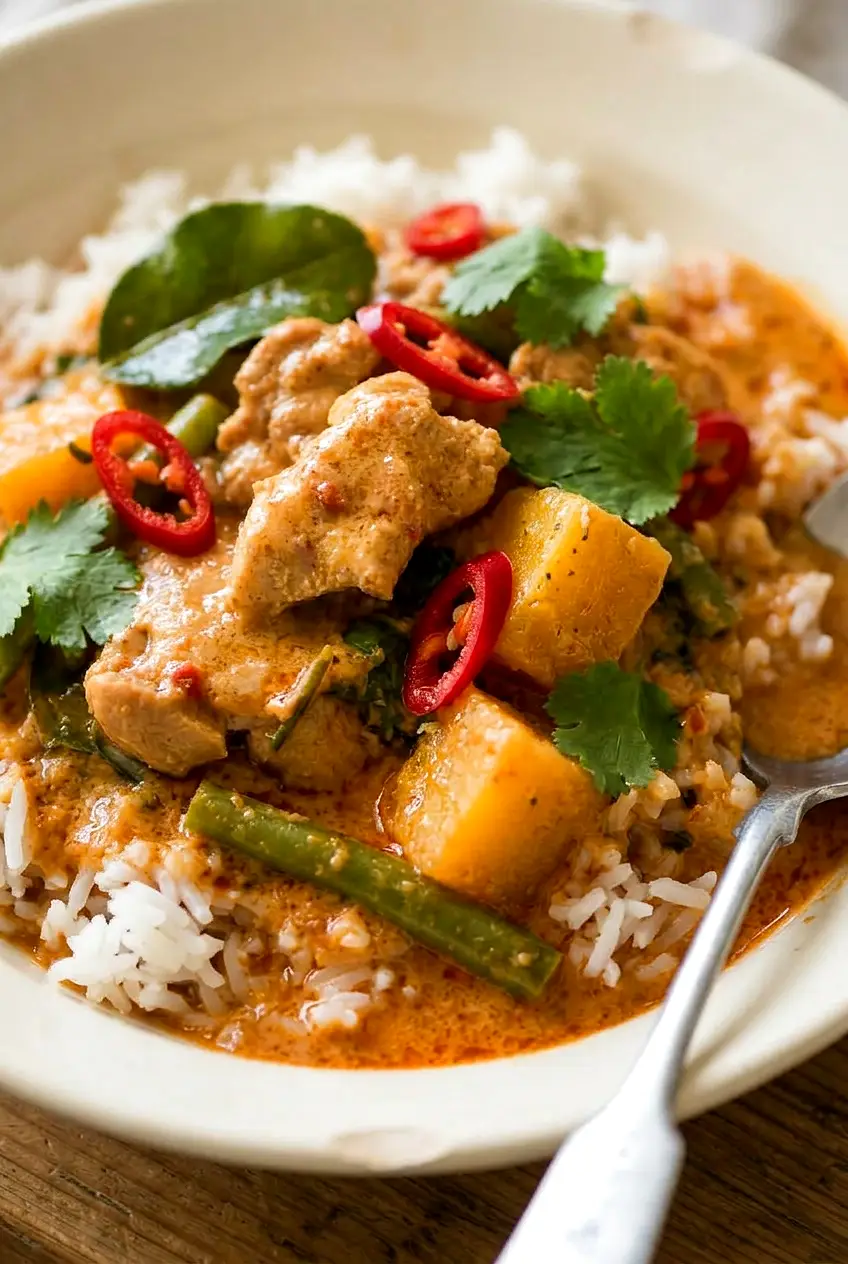
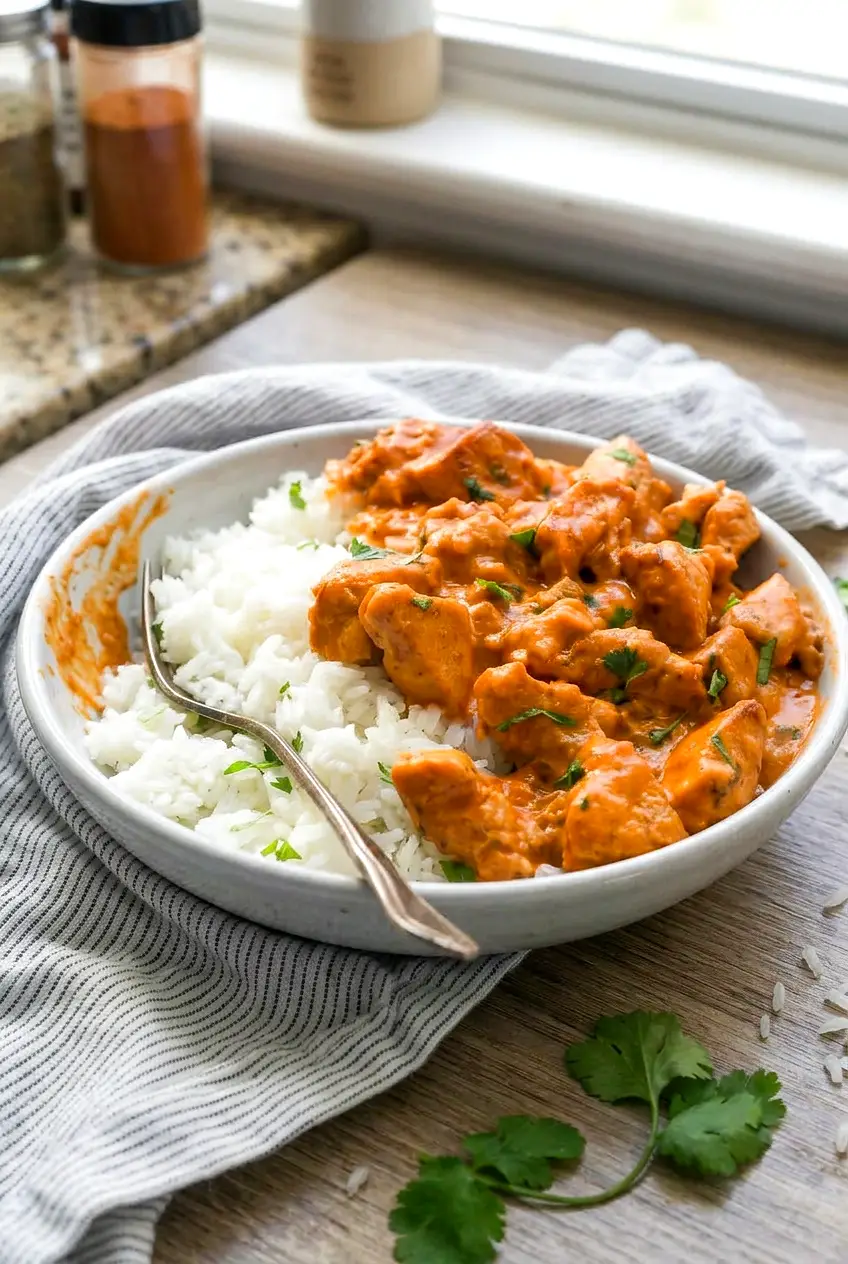
Close view of Thai red curry chicken with tender chicken, squash, and green beans in creamy coconut sauce
  1. Prep the ingredients: Cut the chicken into even bite-size pieces. Peel and cube the squash or pumpkin into similar-size pieces so it cooks evenly. Trim and cut the green beans, mince the garlic and ginger, and prepare the lemongrass. If using kaffir lime leaves, tear them to help release their flavor.
  2. Bloom the curry paste: Heat the oil in a large Dutch oven or deep 12-inch skillet over medium to medium-high heat. Add the red curry paste, garlic, ginger, and lemongrass. Stir constantly for 30 seconds to 2 minutes, until fragrant, slightly darker, and glossy. Do not let it scorch.
  3. Build the sauce: Stir in a little of the coconut milk first to loosen the paste, then add the remaining coconut milk and 1/2 cup broth. Scrape up anything stuck to the pan. Add the chicken, squash or pumpkin, kaffir lime leaves if using, 1 tablespoon fish sauce, and 1 teaspoon sugar. Bring to a gentle simmer over medium heat. The chicken should be mostly submerged.
  4. Simmer gently: Reduce the heat to medium-low and simmer uncovered for 10 to 15 minutes, stirring occasionally, until the chicken is cooked through and the squash is fork-tender. The thickest pieces of chicken should reach 165°F. If the sauce reduces too quickly, add a splash more broth. If it still looks thin, simmer a few minutes longer uncovered.
  5. Finish the curry: Stir in the green beans and cook for 3 to 5 minutes, until bright green and tender-crisp. Taste and adjust with more fish sauce or sugar as needed. If it tastes flat, add 1 to 2 teaspoons lime juice. Turn off the heat and stir in the Thai basil so it wilts from the residual heat.
  6. Serve: Remove the kaffir lime leaves if you like. Spoon the curry over hot jasmine rice and serve while the sauce is hot and spoonable.

Why Is My Red Curry Sauce Watery or Split?

A thin sauce usually means it needs a few more minutes of uncovered simmering, or too much broth was added at the start. A wide pan helps the sauce reduce better than a crowded pot.

If the coconut milk looks lightly separated with a sheen of oil on top, that is normal. What you want to avoid is a hard boil, which can split the sauce more aggressively and overcook the chicken.

What to Serve with Thai Red Curry Chicken

Jasmine rice is the easiest choice because it soaks up the sauce well without competing with the curry. Coconut rice also works if you want a richer side. For something lighter, serve it with simple steamed vegetables or a crisp slaw.

If you like saucy chicken dinners, try Spicy Korean Chicken with Gochujang Glaze next.

For another quick skillet dinner, check out Easy Chicken Stir-Fry with Honey Soy Sauce.

If you want another easy way to season chicken, try Easy Mexican Chicken Marinade.

How to Store and Reheat Easy Thai Red Curry Chicken

Let the curry cool slightly, then refrigerate it in an airtight container for up to 4 days. The sauce will thicken in the fridge, and the vegetables will soften a bit as it sits.

Reheat gently on the stovetop over low heat or in the microwave at reduced power in short bursts. Add a splash of broth or water if the sauce has thickened too much. If you want to get ahead, you can cut the chicken and vegetables in advance, but the finished curry is best cooked close to serving for the best texture.

Nutrition

Nutrition is approximate and will vary based on ingredient brands, exact amounts, and serving size.

  • Serving size: about 1/4 of the recipe, not including rice
  • Calories: about 535
  • Protein: 35g
  • Fat: 37g
  • Carbohydrates: 19g
  • Per 100g: about 135 calories, 9g protein, 9g fat, 5g carbohydrates

Easy Thai Red Curry Chicken

A simple one-pan Thai red curry with coconut milk, chicken thighs, squash or pumpkin, and green beans served over jasmine rice.
Course: Main Course
Cuisine: Thai
Prep: 15 min
Cook: 25 min
Total: 40 min
Servings: 4 Calories: 535 kcal

Equipment

  • large Dutch oven or deep skillet
  • knife
  • cutting board
  • measuring spoons
  • measuring cup
  • wooden spoon or spatula

Ingredients

Main

  • 1 1/2 pounds (680g) boneless skinless chicken thighs, cut into bite-size pieces
  • 1 tablespoon neutral oil
  • 3 to 4 tablespoons Thai red curry paste
  • 3 cloves garlic, minced
  • 1 tablespoon fresh ginger, minced
  • 1 tablespoon minced lemongrass or lemongrass paste (15g)
  • 2 cans (13.5 ounces each) coconut milk (about 800g total)
  • 1/2 to 1 cup chicken broth (120g to 240g), plus more as needed
  • 2 cups butternut squash or pumpkin, peeled and cubed (300g)
  • 8 ounces green beans, trimmed and cut (225g)
  • 1 to 2 tablespoons fish sauce
  • 1 to 2 teaspoons sugar
  • 4 to 6 kaffir lime leaves, torn (optional)
  • 1/2 cup loosely packed Thai basil leaves (10g)

To Serve

  • Hot jasmine rice

Instructions

  1. Cut the chicken into even bite-size pieces and set aside.
  2. Peel and cube the squash or pumpkin into similar-size pieces; trim and cut the green beans.
  3. Mince the garlic and ginger and prepare the lemongrass; tear kaffir lime leaves if using.
  4. Heat 1 tablespoon oil in a large Dutch oven or deep skillet over medium to medium-high heat.
  5. Add 3 to 4 tablespoons red curry paste, minced garlic, ginger, and lemongrass and stir constantly for 30 seconds to 2 minutes until fragrant and glossy, taking care not to let it scorch.
  6. Stir in a little coconut milk to loosen the paste, then add the remaining coconut milk and 1/2 cup broth; scrape up any browned bits from the pan.
  7. Add the chicken, squash or pumpkin, torn kaffir lime leaves if using, 1 tablespoon fish sauce, and 1 teaspoon sugar; bring to a gentle simmer over medium heat with the chicken mostly submerged.
  8. Reduce heat to medium-low and simmer uncovered for 10 to 15 minutes, stirring occasionally, until the chicken is cooked through and the squash is fork-tender (the thickest chicken pieces should reach 165°F (74°C)).
  9. If the sauce reduces too quickly, add a splash more broth; if the sauce is thin, simmer a few minutes longer uncovered to thicken.
  10. Stir in the green beans and cook 3 to 5 minutes until bright green and tender-crisp.
  11. Taste and adjust seasoning with more fish sauce or sugar as needed; add 1 to 2 teaspoons lime juice if the curry tastes flat.
  12. Turn off the heat and stir in the Thai basil to wilt from residual heat; remove kaffir lime leaves if you prefer.
  13. Spoon the curry over hot jasmine rice and serve immediately.

Tips

  • Bloom the curry paste in oil with garlic, ginger, and lemongrass to deepen the flavor before adding coconut milk.
  • Keep the simmer gentle to prevent the coconut milk from splitting and the chicken from drying out.
  • Use a wide pan to help the sauce reduce more efficiently than a crowded pot.
  • Add small splashes of broth if the sauce reduces too quickly instead of a large amount at once.
  • Taste before adding extra fish sauce or sugar because curry paste salt and heat levels vary by brand.

Variations

  • Chicken Breast: Use chicken breast cut into slightly larger pieces and simmer more gently to avoid drying; monitor doneness closely.
  • Pumpkin Swap: Substitute pumpkin for butternut squash if preferred; adjust cooking time until the pieces are fork-tender.
Notes

Store cooled curry in an airtight container in the refrigerator for up to 4 days. Reheat gently on low heat or in short microwave bursts, adding a splash of broth if the sauce has thickened. Ensure chicken reaches 165°F (74°C).

Nutrition

Calories: 535 kcal | Protein: 35 g | Fat: 37 g | Carbohydrates: 19 g

Spicy Korean Chicken

Spicy Korean chicken has a thick gochujang glaze, browned edges, and juicy chicken thighs that stay tender in the oven. The flavor lands in that good sweet-spicy range, and it works well with rice, vegetables, or leftovers for lunch.

The marinade comes together in one bowl, then the chicken bakes on a sheet pan at high heat. Since the glaze can darken quickly, use the clock as a guide but check for browned edges and 165°F in the thickest piece before pulling it from the oven.

Ingredients for Spicy Korean Chicken

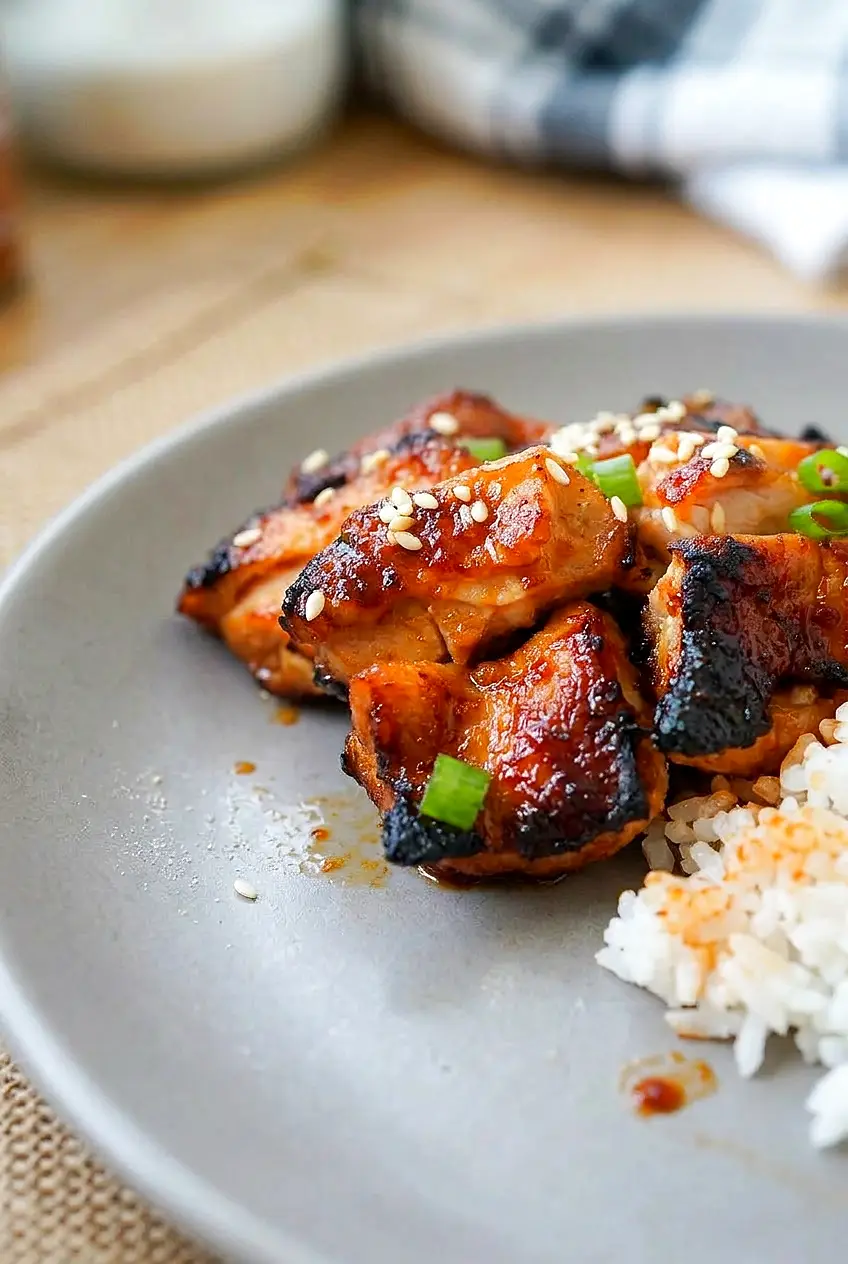
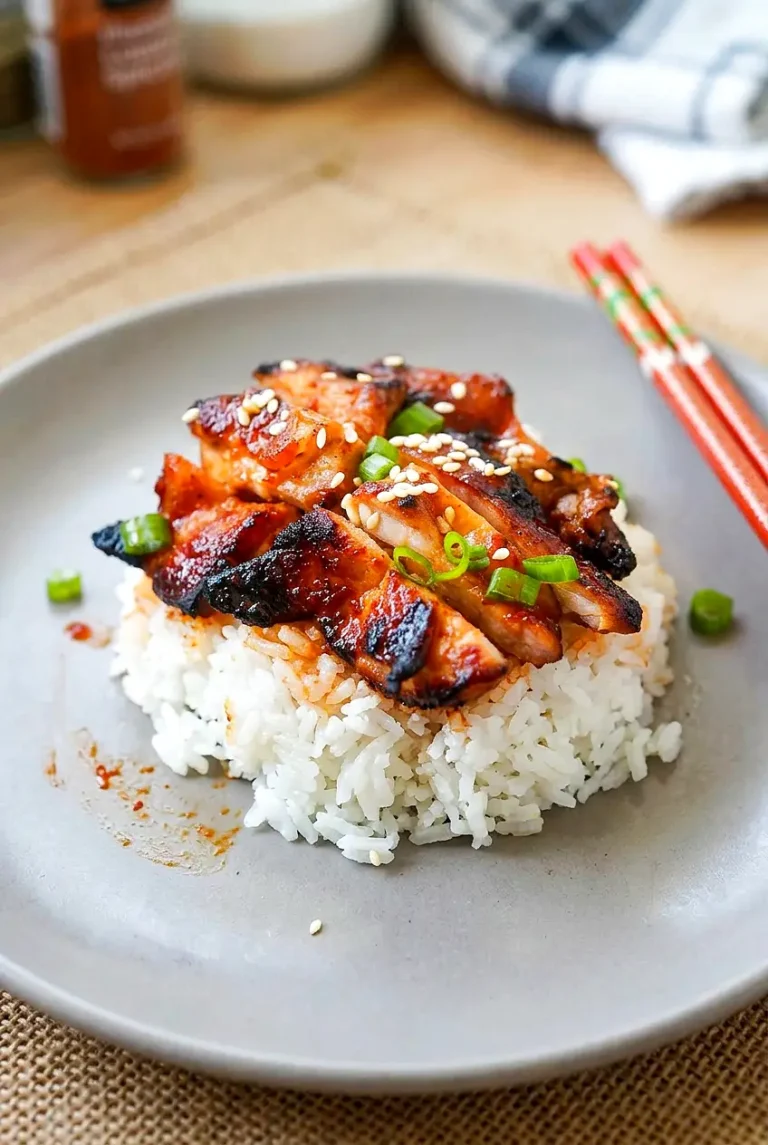
Spicy Korean chicken served on a plate with rice, showing juicy pieces and sesame topping
  • 2 pounds boneless skinless chicken thighs (about 900g)
  • 3 tablespoons gochujang
  • 2 tablespoons soy sauce
  • 1 tablespoon sesame oil
  • 1 to 2 tablespoons brown sugar or honey
  • 3 cloves garlic, minced
  • 1 teaspoon fresh ginger, grated
  • 1 to 2 teaspoons gochugaru or red chili powder
  • 1 tablespoon rice vinegar
  • 1 tablespoon neutral oil, plus a little for greasing the pan
  • 2 green onions, sliced
  • 1 tablespoon sesame seeds

Use the smaller amount of sugar and chili for a more balanced heat, or the larger amount for a sweeter, spicier glaze. Gochujang gives the chicken its main flavor, so it is worth using here.

How to Make Spicy Korean Chicken

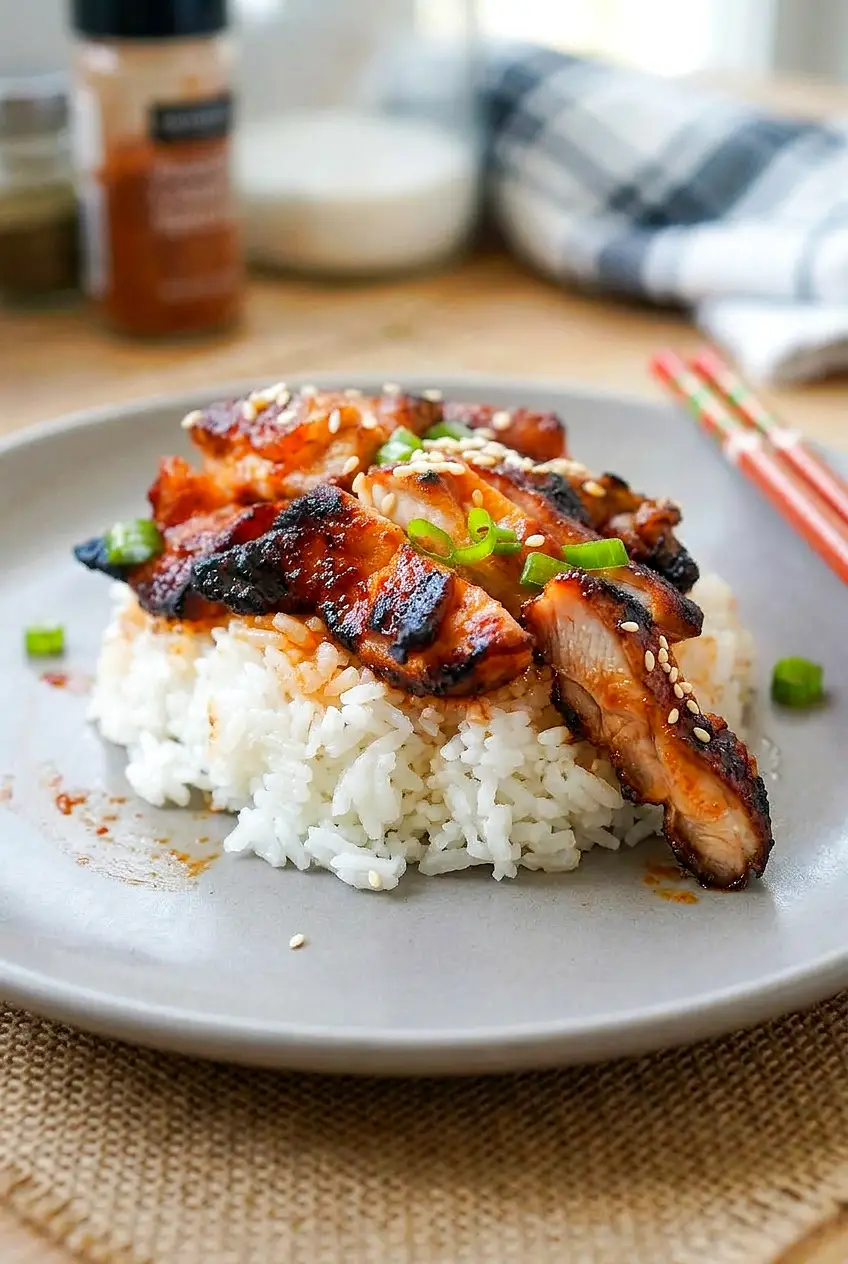
Close-up of spicy Korean chicken showing browned edges and glossy gochujang glaze
  1. Mix the marinade: In a large bowl, whisk together the gochujang, soy sauce, sesame oil, brown sugar or honey, garlic, ginger, gochugaru or red chili powder, rice vinegar, and neutral oil until smooth. The marinade should be thick and spoonable. If it feels too stiff to coat the chicken evenly, loosen it with a small splash of soy sauce or water.
  2. Coat the chicken: Add the chicken thighs and toss until well coated. Cover and refrigerate for at least 30 minutes, or up to overnight.
  3. Preheat the oven: Heat the oven to 425°F. Lightly grease a rimmed sheet pan or baking dish.
  4. Arrange the chicken: Set the chicken in a mostly single layer with a little space between pieces so it browns instead of steaming. If your thighs are very uneven, unfold or trim thicker pieces so they cook more evenly.
  5. Bake: Bake for 18 to 25 minutes, flipping once halfway through if needed for more even color. Start checking near the early end if the pieces are small. The chicken is done when the edges are browned and lightly caramelized, the center is no longer pink, and the thickest part reaches 165°F.
  6. Broil if needed: For a little more color, broil on high for 1 to 3 minutes at the end. Watch closely, especially if you used honey, since the glaze can darken fast.
  7. Rest and finish: Let the chicken rest for about 5 minutes. Spoon any pan juices over the top, then scatter with the green onions and sesame seeds.
  8. Serve: Serve hot with rice and simple vegetables.

How to Keep the Glaze From Burning

The marinade should cling to the chicken, not run off into the pan. That helps it caramelize instead of scorch. Brown sugar usually browns a little more steadily, while honey can darken faster near the end.

If the chicken is getting dark before it is fully cooked, skip the broiler or move the pan to a lower oven rack. When in doubt, go by the internal temperature instead of the color alone.

What to Serve With Spicy Korean Chicken

Steamed white rice or brown rice is the easiest base. For vegetables, keep it simple with cucumber slices, shredded carrots, sautéed greens, broccoli, or bell peppers. Kimchi also pairs well with the sweet-spicy chicken.

If you want another easy chicken dinner with a sweet-savory sauce, try Easy Chicken Stir-Fry with Honey Soy Sauce.

Easy Variations

Chicken Breast

You can use boneless skinless chicken breasts for a leaner option. Bake as directed, but start checking earlier and pull them as soon as the thickest part reaches 165°F. Skip the broiler unless they need more color.

Tofu

Extra-firm tofu can work with the same marinade. Press it well, coat it, and cook until the edges are browned. The texture and timing will be different from chicken, but the flavor profile still works.

How to Store and Reheat Spicy Korean Chicken

Let the chicken cool, then store it in an airtight container in the refrigerator for up to 3 to 4 days. If you are serving it with rice, store the rice separately if possible so both reheat better.

Reheat gently in the microwave or in a covered skillet with a small splash of water. Gentle heat helps keep the chicken from drying out and loosens the glaze.

You can also marinate the chicken the night before, which makes this a useful make-ahead dinner.

For another simple marinade-based chicken dinner, see Easy Mexican Chicken Marinade. If you like easy saucy chicken recipes, you may also enjoy Cashew Chicken.

Nutrition

Nutrition is approximate and will vary based on ingredient brands, exact amounts, and serving size.

  • Serving size: 1/4 of recipe
  • Calories: about 430
  • Protein: 40g
  • Fat: 23g
  • Carbohydrates: 14g
  • Per 100g: about 175 calories, 16g protein, 9g fat, 6g carbohydrates

Spicy Korean Chicken

Boneless chicken thighs baked in a thick gochujang glaze for a sweet-spicy sheet-pan dinner.
Course: Main Course
Cuisine: Korean
Prep: 15 min
Cook: 25 min
Total: 70 min
Servings: 4 Calories: about 430 kcal

Equipment

  • large bowl
  • whisk
  • rimmed sheet pan or baking dish
  • oven
  • tongs
  • meat thermometer

Ingredients

For the chicken

  • 2 pounds boneless skinless chicken thighs (about 900g)
  • neutral oil for greasing the pan (small amount)

For the marinade

  • 3 tablespoons gochujang
  • 2 tablespoons soy sauce
  • 1 tablespoon sesame oil
  • 1 to 2 tablespoons brown sugar or honey
  • 3 cloves garlic, minced
  • 1 teaspoon fresh ginger, grated
  • 1 to 2 teaspoons gochugaru or red chili powder
  • 1 tablespoon rice vinegar
  • 1 tablespoon neutral oil
  • small splash soy sauce or water (optional, to thin marinade)

Garnish

  • 2 green onions, sliced
  • 1 tablespoon sesame seeds

Instructions

  1. Whisk together gochujang, soy sauce, sesame oil, brown sugar or honey, garlic, ginger, gochugaru or red chili powder, rice vinegar, and 1 tablespoon neutral oil until smooth; add a small splash of soy sauce or water if needed to loosen.
  2. Add the chicken thighs to the bowl and toss to coat evenly; cover and refrigerate at least 30 minutes or up to overnight.
  3. Preheat the oven to 425°F (218°C). Lightly grease a rimmed sheet pan or baking dish.
  4. Arrange the chicken in a mostly single layer on the pan with a little space between pieces so they brown instead of steam; trim or unfold very thick pieces if needed.
  5. Bake for 18 to 25 minutes, flipping once halfway through if needed for even color, and start checking near the early end for small pieces.
  6. Confirm the chicken is done when the edges are browned and the thickest part reaches 165°F (74°C).
  7. If you want more color, broil on high for 1 to 3 minutes at the end, watching closely to avoid burning (especially if using honey).
  8. Let the chicken rest about 5 minutes, spoon any pan juices over the top, then scatter with sliced green onions and sesame seeds.
  9. Serve hot with rice and vegetables.

Tips

  • Use the smaller amounts of sugar and chili for milder heat and the larger amounts for a sweeter, spicier glaze.
  • Make sure the marinade clings to the chicken rather than running off to help caramelize instead of scorch.
  • If the chicken is darkening before it’s cooked through, skip the broiler or move the pan to a lower oven rack.
  • Watch the broiler closely, especially when using honey, because the glaze can darken very quickly.
  • Go by internal temperature (165°F / 74°C) rather than color alone to ensure doneness.

Variations

  • Chicken Breast: Use boneless skinless chicken breasts; start checking earlier and remove when the thickest part reaches 165°F (74°C).
  • Tofu: Use pressed extra-firm tofu coated in the same marinade and cook until edges are browned; timing and texture will differ from chicken.

Notes

Store cooled chicken in an airtight container in the refrigerator for 3 to 4 days; store rice separately. Reheat gently in the microwave or in a covered skillet with a splash of water. Ensure chicken reaches 165°F (74°C).

Nutrition

Calories: about 430 kcal | Protein: 40 g | Fat: 23 g | Carbohydrates: 14 g

Best Chicken Stir-Fry Recipe

This chicken stir-fry is saucy, crisp-tender, and easy to get on the table without a long prep list. Juicy chicken thighs, broccoli, carrots, peppers, mushrooms, and zucchini cook quickly in one hot skillet or wok, then get coated in a simple honey-soy sauce.

The method stays straightforward: cook the chicken first, stir-fry the vegetables in stages, then finish everything together with the sauce and cashews. Keep the pan hot and avoid crowding it so the chicken browns instead of steaming.

Ingredients for Chicken Stir-Fry

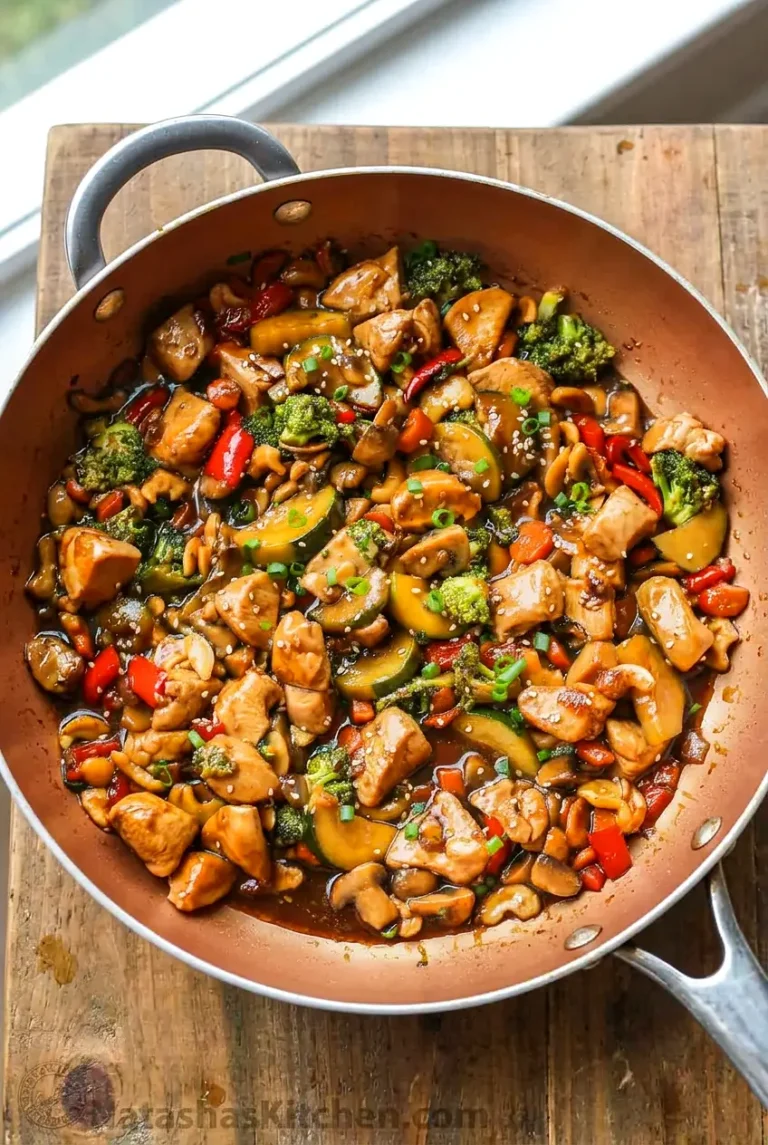
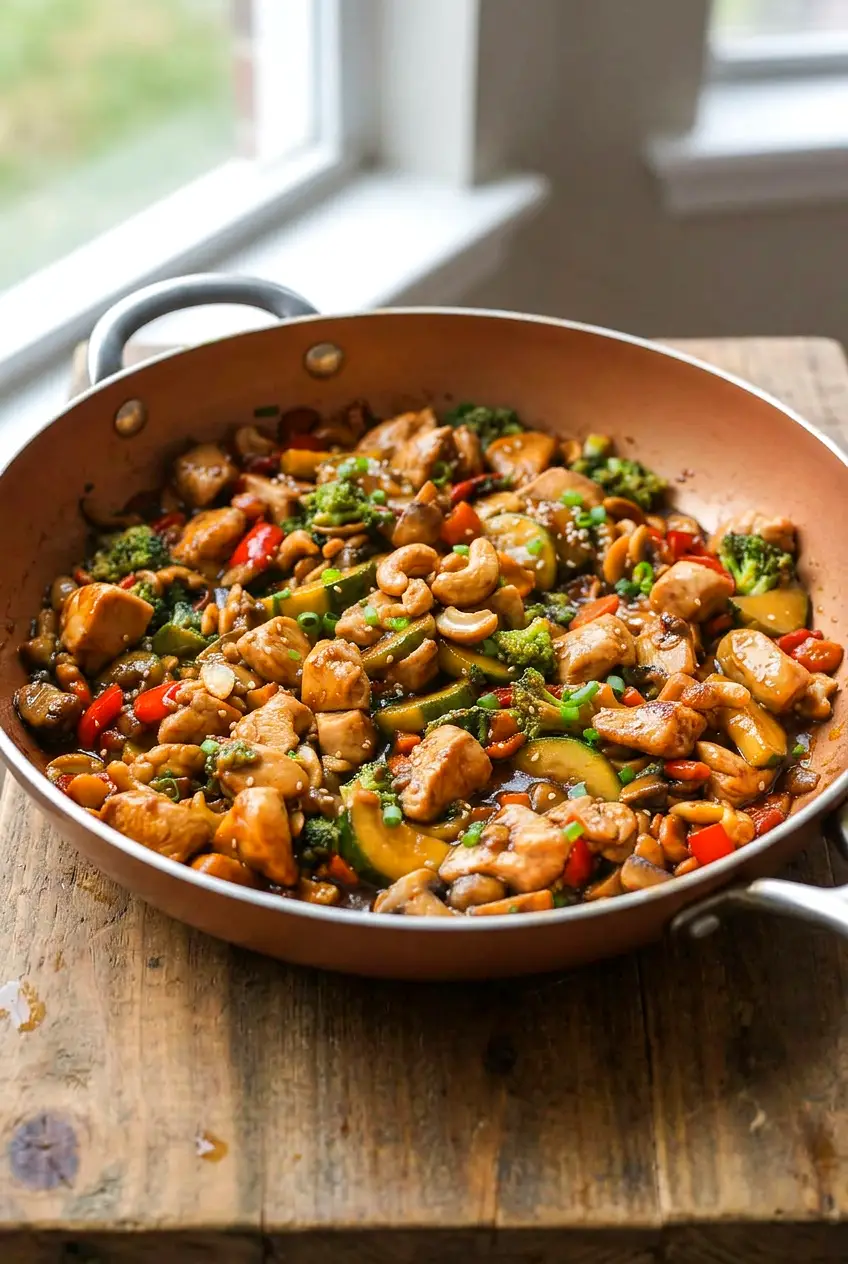
Chicken stir-fry in a skillet with crisp-tender vegetables and browned chicken pieces
  • 1 1/2 pounds boneless, skinless chicken thighs (about 675g), cut into bite-sized pieces
  • 2 tablespoons vegetable oil, plus a little more if needed
  • 1 tablespoon butter
  • 3 garlic cloves, minced
  • 1 tablespoon fresh ginger, grated
  • 2 cups broccoli florets (about 180g)
  • 1 cup carrots (about 120g), thinly sliced
  • 1 red bell pepper, sliced
  • 8 ounces mushrooms (about 225g), sliced
  • 1 medium zucchini (about 200g), sliced
  • 1/3 cup cashews (about 45g)
  • 1/4 cup soy sauce
  • 1/2 cup chicken broth (about 120g)
  • 2 tablespoons water
  • 1 tablespoon cornstarch
  • 1 to 2 tablespoons honey

Optional for serving: sliced green onions, a pinch of red pepper flakes, or a light drizzle of sesame oil.

Chicken thighs stay especially juicy here, but chicken breast or tenders also work if you pull them from the pan as soon as they are nearly cooked through. If using frozen stir-fry vegetables, add them straight from the freezer and expect a little extra moisture in the pan.

How to Make Chicken Stir-Fry

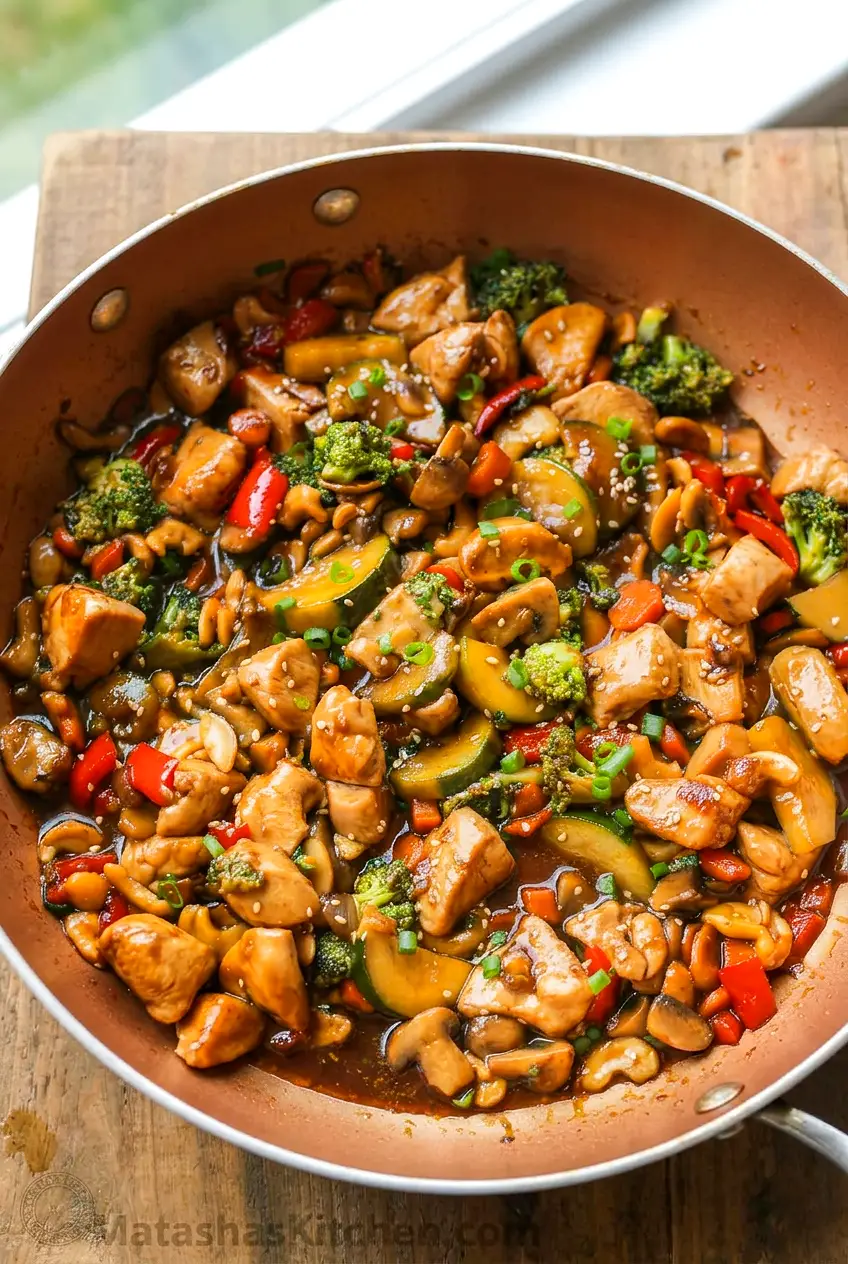
Close-up of chicken stir-fry with glossy honey-soy sauce coating the vegetables and chicken
  1. Prep the ingredients: Cut the chicken into even bite-sized pieces. Slice the vegetables, keeping the carrots a little thinner than the quicker-cooking vegetables. In a small bowl, whisk together the soy sauce, chicken broth, water, cornstarch, and 1 tablespoon honey until smooth.
  2. Heat the pan: Set a large 12-inch skillet or wok over medium-high to high heat and let it get fully hot. Add the vegetable oil and swirl to coat. The chicken should sizzle right away when it hits the pan.
  3. Sear the chicken: Add the chicken in a single layer. If needed, cook it in 2 batches so it browns instead of steaming. Let it sit mostly undisturbed at first, then stir or toss as needed. Cook for 4 to 6 minutes, until browned on the outside and nearly cooked through. Transfer to a plate.
  4. Cook the vegetables: Add a little more oil if the pan looks dry. Add the broccoli and carrots first and stir-fry for about 2 minutes. Add the bell pepper, mushrooms, and zucchini and cook for 2 to 4 minutes more, stirring often, until the vegetables are bright and crisp-tender.
  5. Add the garlic and ginger: Stir in the garlic and ginger and cook for about 30 seconds, just until fragrant. Keep them moving so they do not burn.
  6. Finish with the sauce: Return the chicken and any juices to the skillet. Add the cashews. Whisk the sauce again, then pour it into the pan. Stir for 2 to 4 minutes over medium-high heat, until the sauce turns glossy and lightly coats the chicken and vegetables.
  7. Check and serve: Stir in the butter. Taste and add the second tablespoon of honey if you want a slightly sweeter sauce. Cook until the thickest pieces of chicken reach 165°F, then serve hot.

Why Is My Stir-Fry Sauce Watery?

A thin sauce usually means one of three things: the cornstarch was not whisked in smoothly, the pan was crowded so the vegetables released too much liquid, or frozen vegetables added extra moisture. The easiest fix is to keep cooking for another minute or two over medium-high heat, stirring often, until the extra liquid reduces and the sauce looks glossy. It should coat the ingredients lightly, not pool at the bottom of the pan.

Serving Ideas

Serve the stir-fry over steamed white rice, brown rice, quinoa, noodles, or fried rice. Spoon any extra sauce from the pan over the rice, and top with sliced green onions if you want a fresh finish.

For similar dinners, try Cashew Chicken with Glossy Savory Sauce, Coconut Chicken Rice Bowl, or Easy Mexican Chicken Marinade.

How to Store and Reheat Chicken Stir-Fry

Let leftovers cool, then refrigerate in an airtight container for up to 4 days. The vegetables will soften a bit once chilled.

Reheat gently in a skillet over medium-low heat with a splash of water or chicken broth, or microwave in short bursts until hot. If the sauce has thickened in the fridge, that little splash of liquid will help loosen it without overcooking the chicken.

For make-ahead prep, cut the chicken, chop the vegetables, and mix the sauce in advance. Cook the stir-fry just before serving for the best texture.

Nutrition

Nutrition is approximate and will vary based on ingredient brands, exact amounts, vegetable mix, and serving size.

  • Serving size: 1/4 of recipe
  • Calories: about 505
  • Protein: 38g
  • Fat: 28g
  • Carbohydrates: 24g
  • Per 100g: about 125 calories, 9g protein, 7g fat, 6g carbohydrates

Best Chicken Stir-Fry

A quick skillet stir-fry of juicy chicken thighs and mixed vegetables glazed in a simple honey-soy sauce.
Course: Main Course
Cuisine: Global
Prep: 15 min
Cook: 20 min
Total: 35 min
Servings: 4 Calories: about 505 kcal

Equipment

  • 12-inch skillet or wok
  • mixing bowl
  • whisk
  • tongs or spatula
  • measuring cups and spoons
  • knife and cutting board

Ingredients

Main

  • 1 1/2 pounds boneless, skinless chicken thighs (about 675g), cut into bite-sized pieces
  • 2 tablespoons vegetable oil, plus more if needed
  • 1 tablespoon butter
  • 3 garlic cloves, minced
  • 1 tablespoon fresh ginger, grated
  • 2 cups broccoli florets (about 180g)
  • 1 cup carrots (about 120g), thinly sliced
  • 1 red bell pepper, sliced
  • 8 ounces mushrooms (about 225g), sliced
  • 1 medium zucchini (about 200g), sliced
  • 1/3 cup cashews (about 45g)

Sauce

  • 1/4 cup soy sauce
  • 1/2 cup chicken broth (about 120g)
  • 2 tablespoons water
  • 1 tablespoon cornstarch
  • 1 to 2 tablespoons honey (start with 1 tbsp)

Optional for serving

  • sliced green onions
  • pinch of red pepper flakes
  • light drizzle of sesame oil

Instructions

  1. Cut the chicken into even bite-sized pieces and slice all vegetables; keep carrots a bit thinner than the other vegetables.
  2. In a small bowl, whisk together the soy sauce, chicken broth, water, cornstarch, and 1 tablespoon honey until smooth.
  3. Heat a large 12-inch skillet or wok over medium-high to high heat until fully hot, then add the vegetable oil and swirl to coat.
  4. Add the chicken in a single layer and sear, letting it sit mostly undisturbed at first; cook 4 to 6 minutes until browned and nearly cooked through, working in batches if needed to avoid crowding. Transfer chicken to a plate.
  5. Add a little more oil if the pan is dry, then add the broccoli and carrots and stir-fry for about 2 minutes.
  6. Add the bell pepper, mushrooms, and zucchini and cook 2 to 4 minutes more, stirring often, until the vegetables are bright and crisp-tender.
  7. Stir in the garlic and ginger and cook about 30 seconds until fragrant, keeping them moving so they do not burn.
  8. Return the chicken and any juices to the skillet and add the cashews. Whisk the sauce again and pour it into the pan.
  9. Stir for 2 to 4 minutes over medium-high heat until the sauce turns glossy and lightly coats the chicken and vegetables.
  10. Stir in the butter, taste and add the second tablespoon of honey if a sweeter sauce is desired, and cook until the thickest pieces of chicken reach 165°F (74°C). Serve hot.

Tips

  • Keep the pan very hot and avoid crowding to encourage browning instead of steaming.
  • Cook the chicken in batches if needed so pieces brown evenly.
  • Whisk the cornstarch into the sauce until completely smooth to prevent lumps.
  • If the sauce is watery, continue cooking over medium-high heat and stir until the extra liquid reduces and the sauce becomes glossy.
  • If using frozen vegetables, add them straight from the freezer and expect extra moisture — cook a little longer to reduce liquid.

Variations

  • Use chicken breast or tenders: Swap thighs for boneless skinless chicken breasts or tenders and remove from the pan as soon as they are nearly cooked to avoid overcooking.
  • Frozen-vegetable shortcut: Use a bag of frozen stir-fry vegetables added straight from the freezer for a faster shortcut; cook a bit longer to reduce extra moisture.

Notes

Store leftovers in an airtight container in the refrigerator for up to 4 days. Reheat gently in a skillet over medium-low with a splash of water or broth or microwave in short bursts. Ensure chicken reaches 165°F (74°C) before serving.

Nutrition

Calories: about 505 kcal | Protein: 38 g | Fat: 28 g | Carbohydrates: 24 g | Per100g: about 125 kcal, 9 g protein, 7 g fat, 6 g carbohydrates

Easy Mexican Chicken Marinade

This Mexican chicken marinade gives chicken a bright, savory flavor from lime, cilantro, chili powder, cumin, smoked paprika, and oregano. It works especially well on the grill, but you can also bake it, cook it in a skillet, or use the air fryer.

The ingredient list stays short, and the method is straightforward. The main thing to watch is marinating time: lime juice flavors the chicken quickly, so thin pieces need less time than thick ones.

Ingredients for Easy Mexican Chicken Marinade

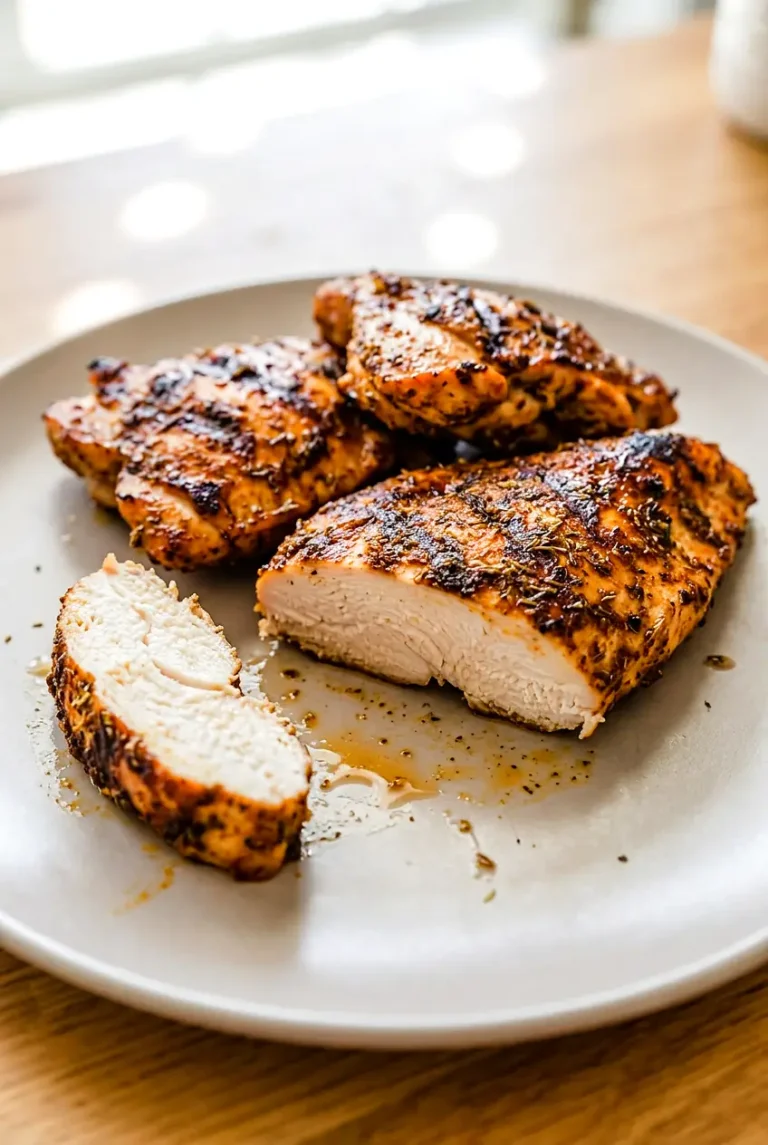
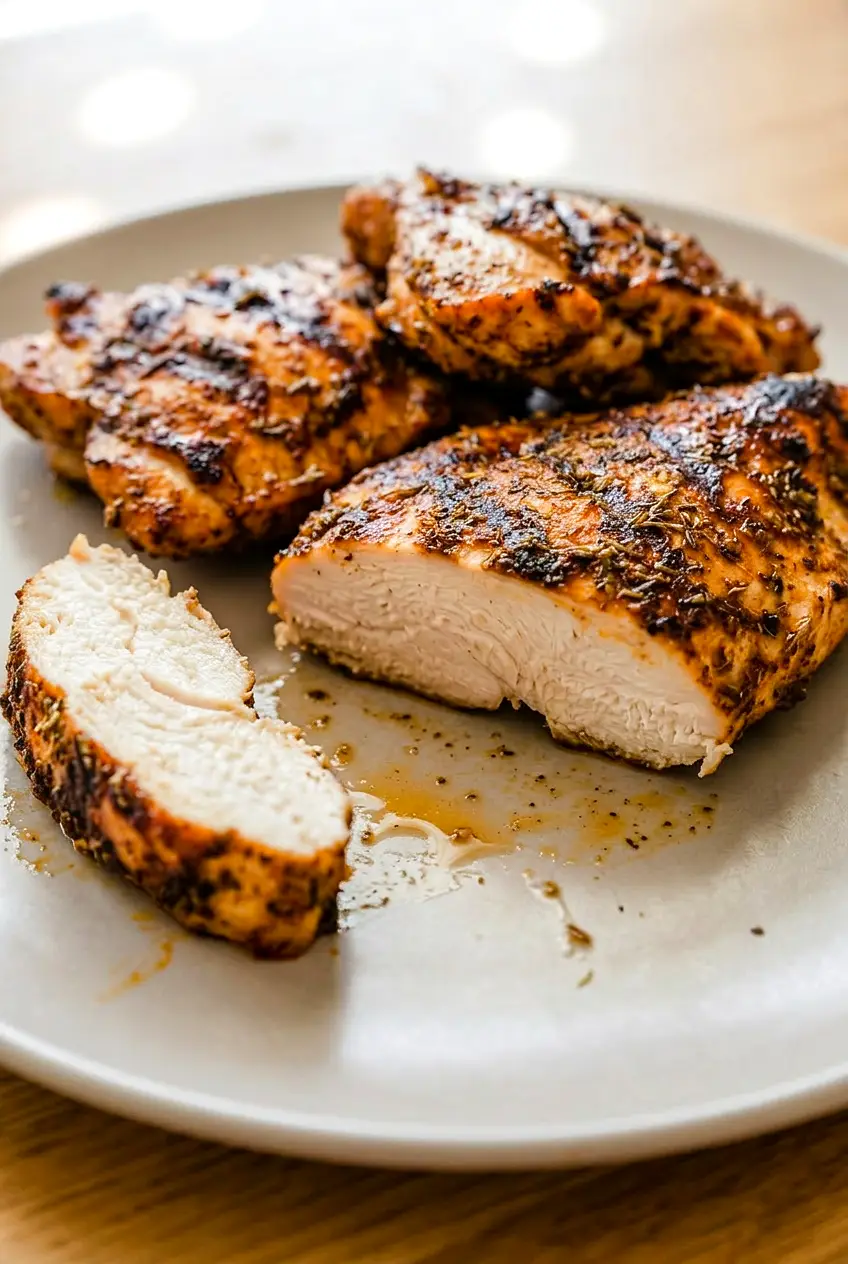
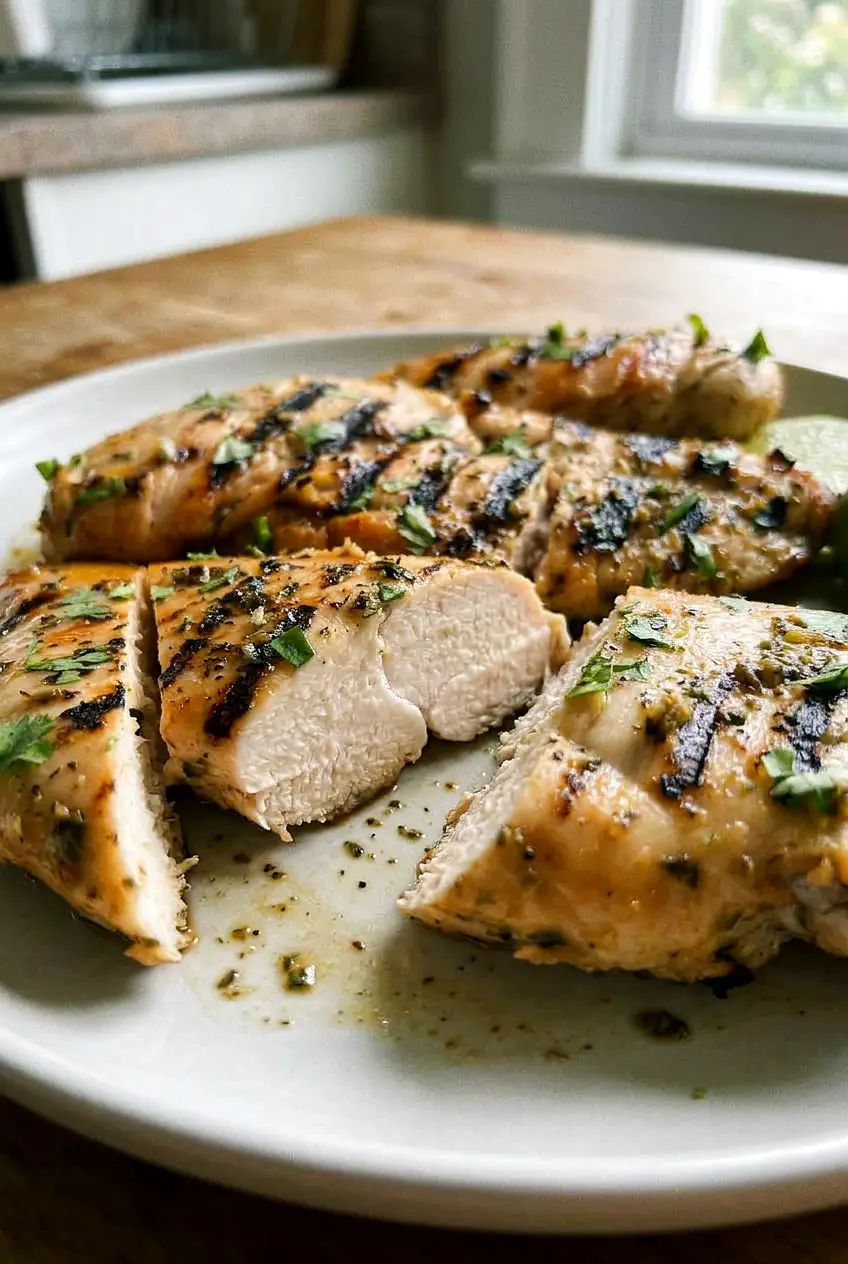
Mexican chicken sliced on a plate, with charred edges and tender interior visible
  • 2 pounds boneless skinless chicken breasts or thighs (about 900g): Use similar-sized pieces so they cook evenly. If the breasts are thick, pound or slice them to an even thickness.
  • 1/4 cup olive oil
  • 1/4 cup lime juice
  • 1 tablespoon chili powder
  • 2 teaspoons ground cumin
  • 1 teaspoon smoked paprika
  • 1 teaspoon dried oregano
  • 1/4 cup fresh cilantro, chopped
  • 1 teaspoon salt
  • 1/2 teaspoon black pepper

Optional: add 1 to 2 teaspoons brown sugar for a slightly rounder flavor and a little more browning, especially for grilling or baking.

Optional add-ins: 1 teaspoon garlic powder, 1 teaspoon onion powder, or 1/2 to 1 teaspoon chipotle powder for extra heat.

How to Make Mexican Chicken Marinade

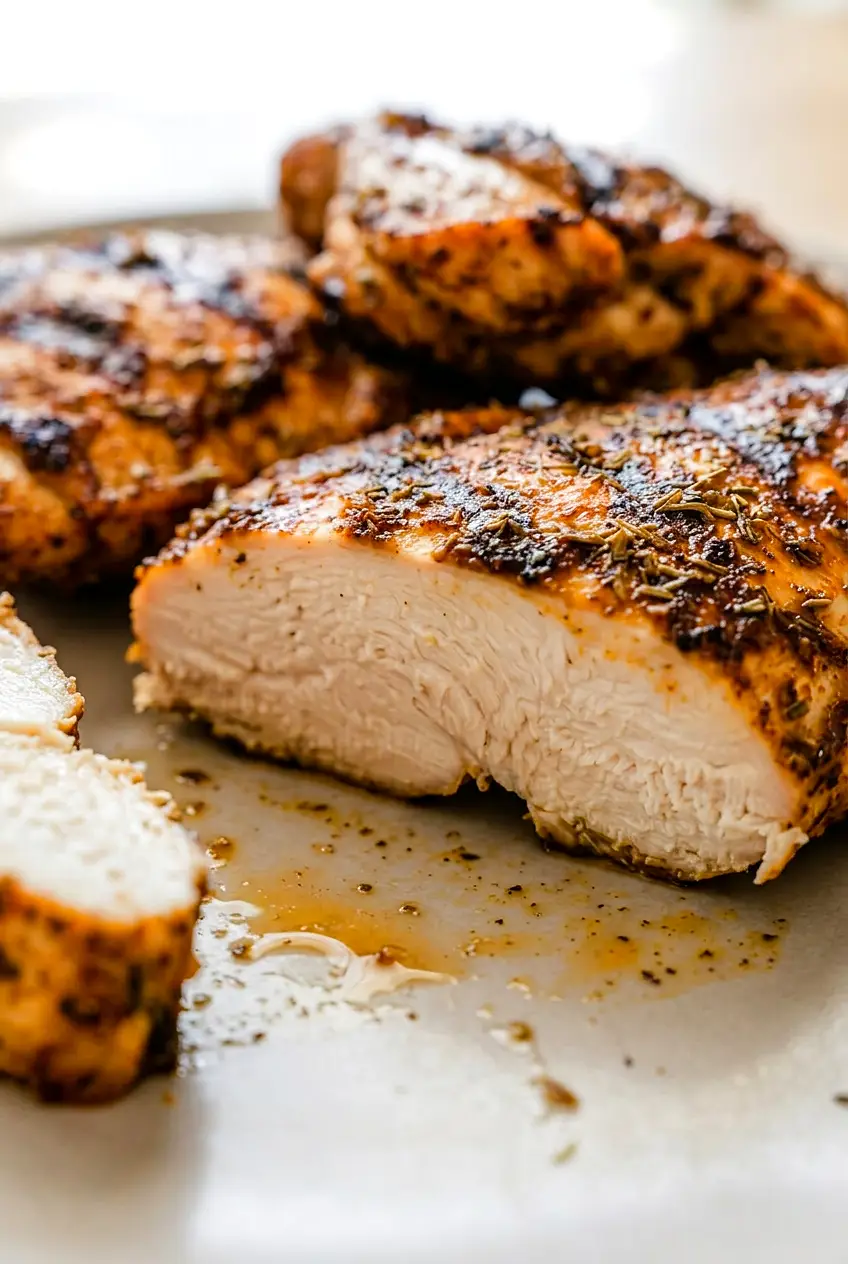
Close-up of Mexican chicken showing browned spice crust and juicy sliced edge
  1. Mix the marinade: In a large bowl or zip-top bag, whisk together the olive oil, lime juice, chili powder, cumin, smoked paprika, oregano, cilantro, salt, and black pepper. If using brown sugar, stir it in now.
  2. Prep the chicken: Pat the chicken dry and trim if needed. If you are using thick chicken breasts, pound or slice them to a more even thickness. Add the chicken to the marinade and turn to coat well.
  3. Marinate: Cover and refrigerate for at least 30 minutes and up to 24 hours. Thin cutlets or tenders do well with a shorter marinating time. Thicker pieces can stay in longer, but do not go past 24 hours.
  4. Preheat the grill: Heat the grill to medium-high. If you can, leave a cooler indirect zone for thicker pieces or in case the outside browns too fast. Lightly oil the grates.
  5. Grill the chicken: Remove the chicken from the marinade and shake off the excess. Grill over medium-high heat for about 10 to 15 minutes for boneless pieces, flipping once halfway through. If the chicken starts getting too dark before the center is done, move it to indirect heat.
  6. Check for doneness: The chicken should be browned with some char marks, and the thickest part should no longer be pink. Cook until the center reaches 165°F.
  7. Rest and serve: Let the chicken rest for 5 minutes before slicing or chopping. Serve whole or use it for tacos, bowls, salads, burritos, or rice plates.

How to Keep the Chicken Juicy

Even thickness makes the biggest difference. Thin pieces cook quickly, while thick pieces can dry out on the outside before the middle is done. Pound or slice the chicken so it cooks at the same rate.

Also keep an eye on the marinating time. Acidic marinades can affect the texture if the chicken sits too long. For thin pieces, stay closer to 30 minutes to a few hours. For thicker boneless pieces, you can marinate longer, up to 24 hours total.

Oven, Skillet, and Air Fryer Options

If you are not grilling, the same marinade works well with other cooking methods. Keep the chicken in a single layer and use the temperature more than the clock, since thickness and equipment can vary.

  • Oven: Bake on a sheet pan in a single layer. Start checking in the 10 to 20 minute range, depending on thickness, and cook until the chicken reaches 165°F.
  • Skillet: Cook in a lightly oiled skillet over medium-high heat, flipping once, until browned and cooked through to 165°F. Do not crowd the pan.
  • Air fryer: Arrange the chicken in a single layer in the basket and cook until browned and the center reaches 165°F. Start checking early, since air fryer models vary.

Flavor Variations

Chipotle Version

Add 1/2 to 1 teaspoon chipotle powder or 1 tablespoon adobo sauce for a deeper smoky heat.

Brown Sugar Version

Use the optional 1 to 2 teaspoons brown sugar to soften the sharpness of the lime and help with browning. Keep it light, especially on a hot grill, since sugar can burn.

Serving Ideas

Use this chicken for easy meals through the week. Slice it for tacos, add it to burrito bowls with beans and corn, or serve it over rice or cauliflower rice.

  • Tacos, burritos, or flautas
  • Salads with avocado and a simple dressing
  • Cilantro-lime rice or cauliflower rice
  • Roasted or grilled vegetables
  • Beans, salsa, and lime wedges

For a rice bowl dinner, you could also make Coconut Chicken Rice Bowl.

If you want a lighter chicken meal, serve it with ideas like Keto Chicken Caesar Salad.

If you want another easy chicken dinner idea, try Cashew Chicken with Glossy Savory Sauce.

How to Store and Reheat Mexican Chicken

Let cooked chicken cool slightly, then store it in an airtight container in the refrigerator for up to 3 to 4 days.

If you are storing raw marinated chicken, keep it refrigerated and cook it within the 30-minute to 24-hour marinating window. You can also mix the marinade ahead and refrigerate it separately until needed.

For freezer prep, combine the raw chicken and marinade in a freezer bag and freeze. Thaw in the refrigerator before cooking, and do not leave the thawed chicken in the marinade longer than the recommended total marinating time.

To reheat cooked chicken, warm it gently so it does not dry out. Use a covered oven-safe dish or a skillet with a small splash of water or broth.

Nutrition

Nutrition is approximate and will vary based on ingredient brands, exact amounts, and serving size.

  • Serving size: about 1/4 of the recipe
  • Calories: about 310
  • Protein: 36g
  • Fat: 16g
  • Carbohydrates: 3g
  • Per 100g: about 150 calories, 18g protein, 8g fat, 1g carbohydrates

Easy Mexican Chicken Marinade

A bright, savory marinade of lime, cilantro, and spices for boneless skinless chicken that works for grilling, baking, skillet cooking, or the air fryer.
Course: Main Course
Cuisine: Mexican
Prep: 15 min
Cook: 15 min
Total: 65 min
Servings: 4 Calories: 310 kcal

Equipment

  • large bowl or zip-top bag
  • grill (or oven, skillet, or air fryer)
  • meat mallet (optional)
  • tongs

Ingredients

For the Chicken

  • 2 pounds boneless skinless chicken breasts or thighs (about 900 g)

For the Marinade

  • 1/4 cup olive oil
  • 1/4 cup lime juice
  • 1 tablespoon chili powder
  • 2 teaspoons ground cumin
  • 1 teaspoon smoked paprika
  • 1 teaspoon dried oregano
  • 1/4 cup fresh cilantro, chopped
  • 1 teaspoon salt
  • 1/2 teaspoon black pepper
  • Optional: 1 to 2 teaspoons brown sugar (for browning and roundness)
  • Optional add-ins: 1 teaspoon garlic powder, 1 teaspoon onion powder, or 1/2 to 1 teaspoon chipotle powder

Instructions

  1. Whisk together olive oil, lime juice, chili powder, cumin, smoked paprika, oregano, chopped cilantro, salt, and black pepper in a large bowl or a zip-top bag; stir in brown sugar if using.
  2. Pat the chicken dry and trim as needed; pound or slice thick breasts to an even thickness.
  3. Add the chicken to the bowl or bag and turn to coat thoroughly in the marinade.
  4. Cover and refrigerate for at least 30 minutes and up to 24 hours (shorter for thin pieces, longer for thicker pieces).
  5. Preheat the grill to medium-high and oil the grates; leave a cooler indirect zone if possible.
  6. Remove chicken from the marinade and shake off excess; grill over medium-high heat about 10 to 15 minutes for boneless pieces, flipping once halfway through—move to indirect heat if the exterior is browning too fast.
  7. Alternatively, bake on a sheet pan in a single layer and start checking at 10 to 20 minutes depending on thickness, or cook in a lightly oiled skillet over medium-high heat flipping once, or arrange in a single layer in the air fryer and cook until done.
  8. Cook until the thickest part reaches 165°F (74°C) and no longer looks pink.
  9. Let the chicken rest 5 minutes before slicing or chopping and serve.

Tips

  • Pound or slice chicken to an even thickness so it cooks evenly.
  • Marinate thin pieces closer to 30 minutes; do not exceed 24 hours to avoid texture changes from the acid.
  • If the outside is browning too fast, move chicken to a cooler indirect zone on the grill.
  • Use a light sprinkle of brown sugar only if grilling or baking to avoid burning on high heat.
  • Check doneness with an instant-read thermometer at the thickest part (165°F / 74°C).

Variations

  • Chipotle Version: Add 1/2 to 1 teaspoon chipotle powder or 1 tablespoon adobo sauce for deeper smoky heat.
  • Brown Sugar Version: Stir in 1 to 2 teaspoons brown sugar to soften lime sharpness and encourage browning.
  • Garlic & Onion Boost: Add 1 teaspoon garlic powder and 1 teaspoon onion powder for extra savory flavor.

Notes

Store cooked chicken in an airtight container in the refrigerator for 3–4 days. Keep raw marinated chicken refrigerated and cook within 24 hours. For freezer prep, freeze raw chicken with the marinade in a freezer bag and thaw in the refrigerator before cooking. Reheat gently to avoid drying.

Nutrition

Calories: 310 kcal | Protein: 36 g | Fat: 16 g | Carbohydrates: 3 g

Cashew Chicken

Cashew chicken is a quick skillet dinner with tender chicken, crisp-tender onion and bell pepper, and a savory sauce that lightly coats everything. The roasted cashews go in at the end so they keep their crunch.

This version is set up for a smooth weeknight cook. Once the pan is hot, the stir-fry moves fast, so it helps to have the sauce mixed and the vegetables chopped before you start.

Ingredients for Cashew Chicken

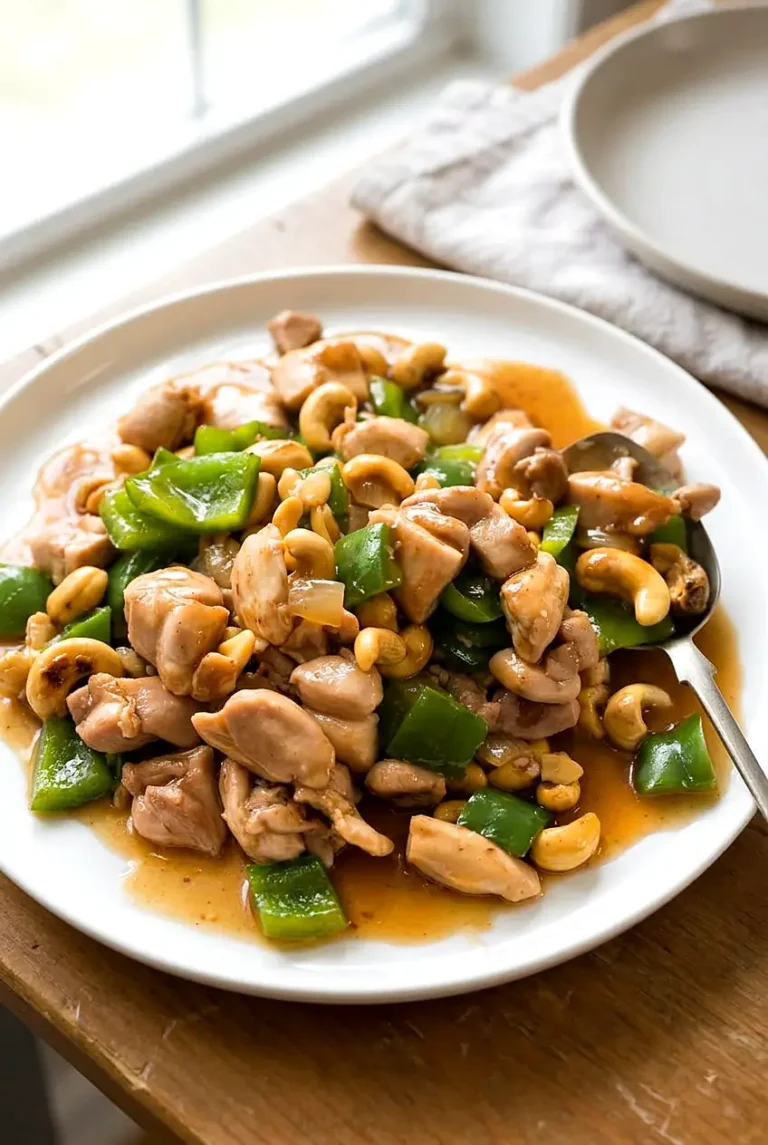
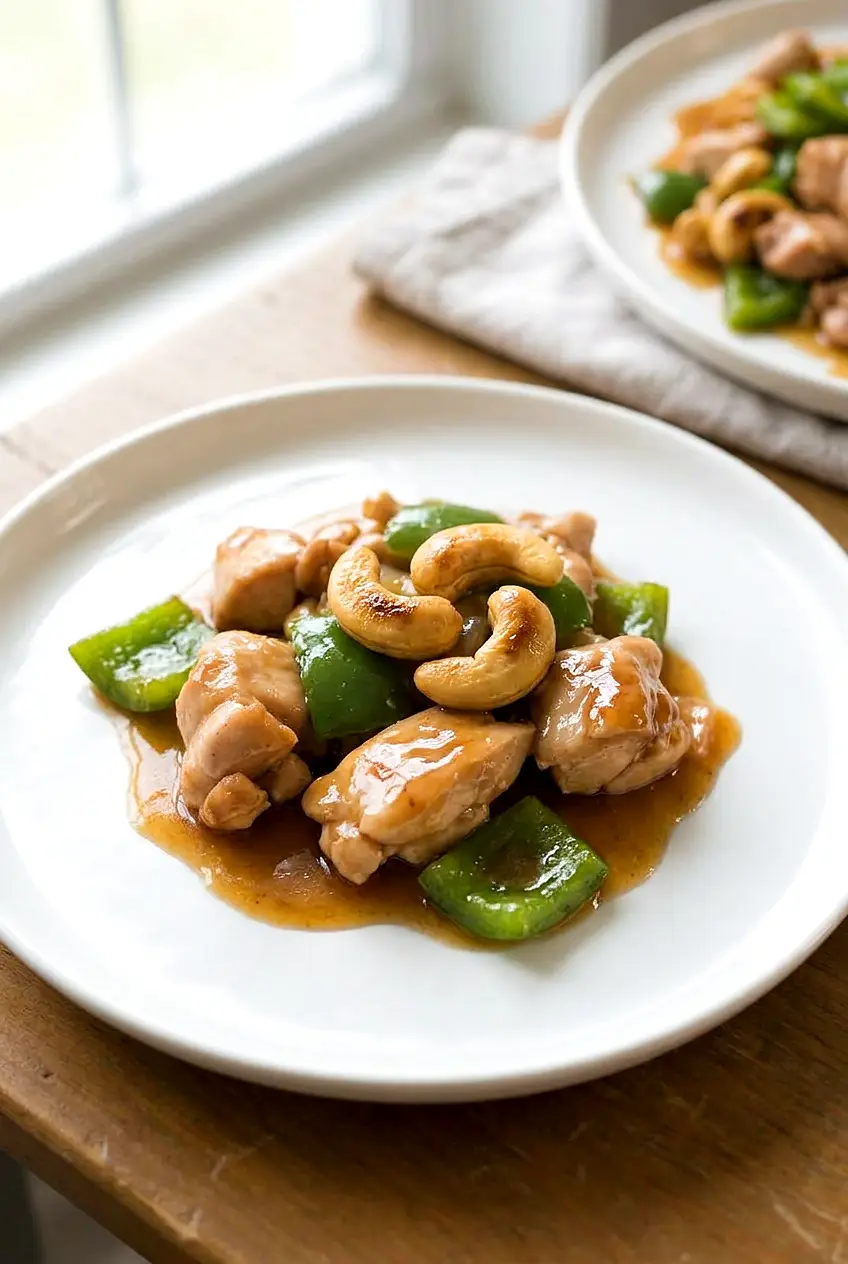
Cashew chicken on a white plate with a closer view of the saucy chicken and crunchy cashews
  • 1 1/2 pounds boneless, skinless chicken thighs (about 675g), cut into bite-sized pieces
  • 2 to 3 teaspoons cornstarch, divided
  • 1/4 cup soy sauce (about 60g)
  • 2 tablespoons oyster sauce (about 35g)
  • 1 tablespoon Shaoxing wine (about 15g)
  • 1 teaspoon sesame oil
  • 1/3 cup water or low-sodium chicken broth (about 80g)
  • 1/4 teaspoon black pepper
  • 2 tablespoons neutral oil, such as peanut or vegetable oil
  • 3 garlic cloves, minced
  • 1 tablespoon fresh ginger, minced
  • 1 medium yellow onion (about 150g), cut into wedges or chunks
  • 1 medium green bell pepper (about 150g), cut into bite-sized pieces
  • 3/4 cup roasted cashews (about 105g)

Chicken thighs are the easiest choice here because they stay juicy over high heat. If you use chicken breast instead, cut it evenly and cook it just until it reaches 165°F.

If needed, mirin or dry sherry can stand in for the Shaoxing wine. For a non-alcoholic option, use broth in its place. Stick with regular soy sauce rather than dark soy sauce so the sauce stays lighter and balanced.

How to Make Cashew Chicken

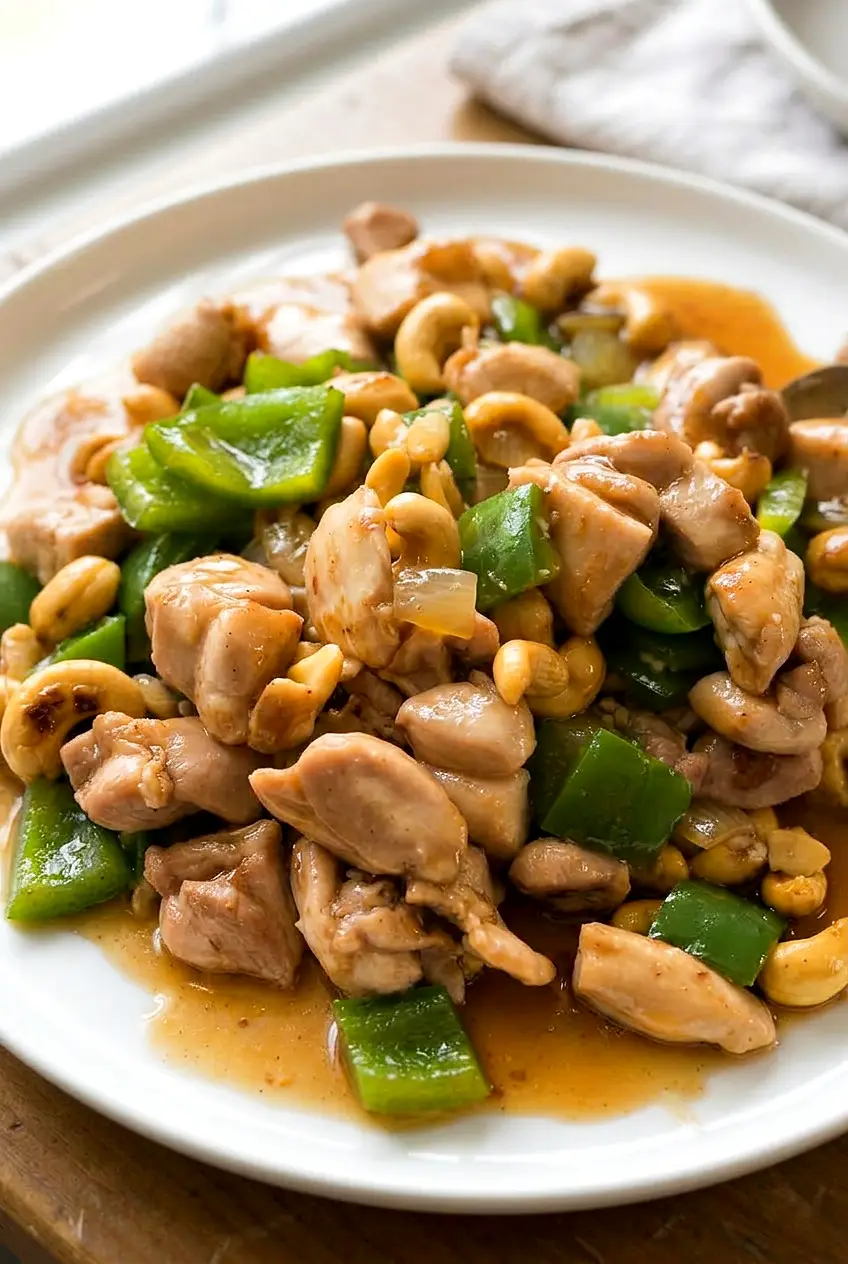
Close-up of cashew chicken showing tender chicken, bell pepper, onion, and glossy sauce
  1. Mix the sauce and coat the chicken: In a small bowl, whisk together the soy sauce, oyster sauce, Shaoxing wine, sesame oil, water or broth, black pepper, and 2 teaspoons cornstarch until smooth. In a separate bowl, toss the chicken with 1 to 2 spoonfuls of the sauce mixture so the pieces are lightly coated. Chop the onion and bell pepper, and have the garlic, ginger, and cashews ready before cooking.
  2. Heat the pan: Set a large 12-inch skillet or wok over high heat. When the pan is hot, add the neutral oil and swirl to coat. The oil should look shiny and move easily across the surface.
  3. Brown the chicken: Add the chicken in a single layer. If the pan is crowded, cook in batches so the chicken browns instead of steams. Stir-fry for 4 to 6 minutes, turning as needed, until the outside is lightly browned and the pieces are mostly cooked through.
  4. Cook the vegetables: Add the onion and bell pepper and stir-fry over medium-high heat for 1 to 2 minutes. Add the garlic and ginger and cook for 30 seconds to 1 minute more, stirring constantly, until fragrant. The vegetables should still be bright and slightly crisp.
  5. Add the sauce: Whisk the sauce again, then pour it into the pan. Toss as it comes to a simmer. Cook for 1 to 3 minutes, stirring often, until the sauce turns glossy and lightly thickens enough to coat the chicken and vegetables.
  6. Finish and serve: Stir in the roasted cashews just before serving. The chicken should be opaque and reach 165°F in the thickest pieces. Serve hot over steamed rice.

Use the visual cues along with the clock here. Skillet size, stovetop heat, and how crowded the pan is can all shift the timing a little.

How to Keep the Sauce Glossy

The sauce should lightly coat the chicken and vegetables, not get thick like gravy. A small amount of cornstarch is enough. If the sauce tightens too much, add a splash of water or broth and toss again. If it looks thin, let it simmer briefly until it catches up.

What to Serve With Cashew Chicken

Serve cashew chicken over steamed white rice or brown rice to catch the sauce. If you want a fuller takeout-style dinner, pair it with fried rice or a simple soup.

If you like easy chicken-and-rice meals, try this Coconut Chicken Rice Bowl next.

For a lighter chicken dinner, you might also like this Keto Chicken Caesar Salad.

If you want another simple chicken dinner, try this Key West Grilled Chicken.

How to Store and Reheat Cashew Chicken

Let the cashew chicken cool, then refrigerate it in an airtight container for up to 3 to 4 days. For the best texture, store the cashews separately if you can and add them after reheating.

Reheat gently in a skillet over medium-low heat. Add a small splash of water or broth if the sauce has thickened in the refrigerator.

You can freeze it, but the cornstarch-thickened sauce may thin out or separate a bit after thawing, so the texture is usually better from the fridge than the freezer.

For make-ahead prep, chop the vegetables and mix the sauce earlier in the day, then cook the stir-fry right before serving.

Nutrition

Nutrition is approximate and will vary based on ingredient brands, exact amounts, and serving size.

  • Serving size: about 1/4 of the recipe
  • Calories: about 505
  • Protein: 40g
  • Fat: 30g
  • Carbohydrates: 18g
  • Per 100g: about 165 calories, 13g protein, 10g fat, 6g carbohydrates

Cashew Chicken

A quick skillet stir-fry of tender chicken, crisp-tender onion and bell pepper, and a glossy savory sauce finished with roasted cashews.
Course: Main Course
Cuisine: Chinese
Prep: 15 min
Cook: 12 min
Total: 27 min
Servings: 4 Calories: 505 kcal

Equipment

  • 12-inch skillet or wok
  • mixing bowls
  • whisk
  • measuring spoons
  • cutting board
  • knife

Ingredients

For the chicken and sauce

  • 1 1/2 pounds boneless skinless chicken thighs (about 675g), cut into bite-sized pieces
  • 2 to 3 teaspoons cornstarch, divided
  • 1/4 cup soy sauce (about 60g)
  • 2 tablespoons oyster sauce (about 35g)
  • 1 tablespoon Shaoxing wine (about 15g) (or mirin, dry sherry, or broth for non-alcoholic)
  • 1 teaspoon sesame oil
  • 1/3 cup water or low-sodium chicken broth (about 80g)
  • 1/4 teaspoon black pepper

For cooking and vegetables

  • 2 tablespoons neutral oil (peanut or vegetable)
  • 3 garlic cloves, minced
  • 1 tablespoon fresh ginger, minced
  • 1 medium yellow onion (about 150g), cut into wedges or chunks
  • 1 medium green bell pepper (about 150g), cut into bite-sized pieces
  • 3/4 cup roasted cashews (about 105g)

Instructions

  1. Whisk together soy sauce, oyster sauce, Shaoxing wine, sesame oil, water or broth, black pepper, and 2 teaspoons cornstarch in a small bowl until smooth.
  2. Toss the chicken with 1 to 2 spoonfuls of the sauce mixture so pieces are lightly coated; set aside. Chop the onion and bell pepper and have garlic, ginger, and cashews ready.
  3. Heat a large 12-inch skillet or wok over high heat. Add the neutral oil when the pan is hot and swirl to coat.
  4. Add the chicken in a single layer and stir-fry 4 to 6 minutes, turning as needed, until the outside is lightly browned and pieces are mostly cooked through. Cook in batches if crowded.
  5. Add the onion and bell pepper and stir-fry over medium-high heat 1 to 2 minutes, then add the garlic and ginger and cook 30 seconds to 1 minute more, stirring constantly.
  6. Whisk the sauce again, pour it into the pan, and toss as it comes to a simmer. Cook 1 to 3 minutes, stirring often, until the sauce turns glossy and lightly thickens to coat the chicken and vegetables.
  7. Stir in the roasted cashews just before serving. Confirm the chicken is opaque and reaches 165°F (74°C) in the thickest pieces. Serve hot over steamed rice.

Tips

  • Mix the sauce ahead so the stir-fry moves quickly once the pan is hot.
  • Have all vegetables chopped and aromatics minced before you start cooking.
  • Add cashews at the end to keep them crunchy.
  • Use chicken thighs for juicier results; if using breast, cook until 165°F (74°C).
  • If the sauce gets too thick, add a splash of water or broth and toss to loosen it.

Variations

  • Shaoxing wine substitutes: Use mirin or dry sherry in place of Shaoxing wine, or use additional broth for a non-alcoholic option.
  • Chicken breast: Use boneless skinless chicken breast instead of thighs; cut evenly and cook just until it reaches 165°F (74°C).

Notes

Store cooled leftovers in an airtight container in the refrigerator for 3 to 4 days; store cashews separately if possible and reheat gently in a skillet with a splash of water or broth. Ensure chicken reaches 165°F (74°C).

Nutrition

Calories: 505 kcal | Protein: 40 g | Fat: 30 g | Carbohydrates: 18 g

Coconut Chicken Rice Bowl

This coconut chicken rice bowl is a simple skillet dinner with tender chicken, fluffy rice, and a creamy coconut-tomato sauce. The flavor is warm and savory, with onion, garlic, ginger, and smoked paprika in every bite.

The rice cooks separately while the chicken and sauce come together in one pan. Sear the chicken just until lightly browned, then let it finish gently in the sauce so it stays juicy.

Ingredients for Coconut Chicken Rice Bowl

Side view of coconut chicken rice bowl with coconut-tomato sauce spooned over rice
  • 1 1/2 pounds boneless, skinless chicken breast or thighs (about 675g), cut into even bite-size pieces
  • 2 cups uncooked jasmine or basmati rice (about 400g)
  • 1 can (13.5 ounces) light coconut milk (about 400g)
  • 1 cup chicken broth (about 240g)
  • 1 small onion (about 120g), diced
  • 3 garlic cloves, minced
  • 1 tablespoon grated fresh ginger
  • 2 tablespoons tomato paste (about 35g)
  • 1 teaspoon smoked paprika
  • 1 teaspoon dried oregano or dried herb blend
  • 1 to 1 1/2 teaspoons salt, divided, or to taste
  • 1/2 teaspoon black pepper
  • 1 to 2 tablespoons neutral oil
  • 1/4 cup chopped cilantro or scallions, for serving

Optional additions: 1/2 teaspoon turmeric for a warmer color, 1 to 2 teaspoons Thai red curry paste for a spicier curry-style version, cucumber slices for serving, or 1 to 2 cups bok choy or other quick-cooking greens.

Ingredient note: Chicken thighs are a little more forgiving than chicken breast. If you use Thai red curry paste, reduce or skip some of the smoked paprika so the sauce does not taste crowded.

How to Make Coconut Chicken Rice Bowl

Close-up of coconut chicken rice bowl showing tender chicken and saucy rice
  1. Cook the rice: Prepare the jasmine or basmati rice according to the package directions in a medium saucepan or rice cooker. This usually takes about 15 to 20 minutes. Keep it covered and warm while you make the chicken.
  2. Season the chicken: Pat the chicken dry. Season with 1 teaspoon salt, the black pepper, and about half of the smoked paprika.
  3. Sear the chicken: Heat a large 12-inch skillet or sauté pan over medium-high heat and add 1 tablespoon oil. When the oil is hot, add the chicken in a single layer. Cook in batches if needed so the pieces brown instead of steam. Let the chicken sit for 1 to 2 minutes before stirring, then cook for about 4 to 6 minutes total, until lightly browned outside but not fully cooked through. Transfer to a plate.
  4. Cook the aromatics: Reduce the heat to medium. Add a little more oil if the pan looks dry, then add the onion. Cook for 2 to 3 minutes, stirring occasionally, until it starts to soften. Add the garlic and ginger and cook for 30 to 60 seconds, just until fragrant.
  5. Build the sauce: Stir in the tomato paste, remaining smoked paprika, and oregano. If using turmeric, add it here. If using Thai red curry paste, stir it in with the aromatics before adding the broth. Cook for about 1 minute, until the tomato paste darkens slightly. Pour in the chicken broth, scraping up any browned bits, then add the coconut milk and stir until smooth.
  6. Simmer gently: Return the chicken and any juices to the skillet. Bring the sauce to a gentle simmer over medium to medium-low heat. Cook for 5 to 8 minutes, stirring now and then, until the chicken is cooked through and the sauce lightly coats the chicken and a spoon. Do not let it boil hard. The thickest pieces of chicken should reach 165°F.
  7. Adjust and serve: Taste and add the remaining salt if needed. If the sauce reduced too much, add a small splash of broth. If it still looks thin, simmer for 1 to 2 minutes more uncovered. Spoon the rice into bowls, top with the coconut chicken and sauce, and finish with cilantro or scallions.

Why Is My Coconut Sauce Too Thin?

If the sauce looks watery, it usually just needs a little more time at a gentle simmer. A wide skillet helps it reduce faster. The finished sauce should lightly coat a spoon but still be easy to spoon over rice.

If the sauce gets thicker than you want, stir in a small splash of broth until it loosens up again.

Serving Ideas

Serve the chicken over jasmine or basmati rice with chopped cilantro or scallions on top. Cucumber slices add a cool crunch, and bok choy or other quick-cooking greens make the bowls feel more complete.

If you want another easy chicken meal, try this Keto Chicken Caesar Salad.

For another simple chicken dinner, you may also like Key West Grilled Chicken.

If you like bold chicken dinners, try Vietnamese Lemongrass Chicken next.

How to Store and Reheat Coconut Chicken Rice Bowl

Let leftovers cool, then refrigerate in airtight containers for up to 4 days. If possible, store the rice and chicken separately for the best texture.

Reheat gently on the stovetop or in the microwave until hot. Add a small splash of broth if the sauce has thickened in the refrigerator. Avoid overheating, especially if you used chicken breast, since it can dry out more quickly.

For meal prep, portion the cooled rice and coconut chicken into containers, or pack them separately and combine when reheating.

Nutrition

Nutrition is approximate and will vary based on ingredient brands, exact amounts, and serving size.

  • Serving size: about 1/4 of the recipe
  • Calories: about 620
  • Protein: 42g
  • Fat: 14g
  • Carbohydrates: 76g
  • Per 100g: about 145 calories, 10g protein, 3g fat, 18g carbohydrates

Coconut Chicken Rice Bowl

A simple skillet dinner of bite-size chicken simmered in a creamy coconut-tomato sauce and served over jasmine or basmati rice.
Course: Main Course
Cuisine: Global
Prep: 10 min
Cook: 25 min
Total: 35 min
Servings: 4 Calories: 620 kcal

Equipment

  • 12-inch skillet
  • saucepan or rice cooker
  • measuring cups
  • measuring spoons
  • spatula
  • instant-read thermometer

Ingredients

For the Chicken

  • 1 1/2 pounds boneless, skinless chicken breast or thighs (about 675g), cut into bite-size pieces
  • 1 to 2 tablespoons neutral oil
  • 1 to 1 1/2 teaspoons salt, divided
  • 1/2 teaspoon black pepper
  • 1 teaspoon smoked paprika, divided

For the Rice

  • 2 cups uncooked jasmine or basmati rice (about 400g)
  • Water as needed per package directions

For the Sauce

  • 1 can (13.5 ounces) light coconut milk (about 400g)
  • 1 cup chicken broth (about 240g)
  • 1 small onion (about 120g), diced
  • 3 garlic cloves, minced
  • 1 tablespoon grated fresh ginger
  • 2 tablespoons tomato paste (about 35g)
  • 1 teaspoon dried oregano or dried herb blend

For Serving

  • 1/4 cup chopped cilantro or scallions

Optional

  • 1/2 teaspoon turmeric (optional)
  • 1 to 2 teaspoons Thai red curry paste (optional)
  • Cucumber slices for serving (optional)
  • 1 to 2 cups bok choy or other quick-cooking greens (optional)

Instructions

  1. Cook the rice according to the package directions in a saucepan or rice cooker; keep covered and warm.
  2. Pat the chicken dry and season with 1 teaspoon salt, black pepper, and about half of the smoked paprika.
  3. Heat a 12-inch skillet over medium-high heat and add 1 tablespoon oil.
  4. Add the chicken in a single layer and cook in batches if needed so pieces brown instead of steam; let sit 1 to 2 minutes before stirring and cook about 4 to 6 minutes total until lightly browned but not fully cooked through.
  5. Transfer the seared chicken to a plate.
  6. Reduce heat to medium and add a little more oil if the pan is dry.
  7. Add the diced onion and cook 2 to 3 minutes until it starts to soften.
  8. Add the garlic and ginger and cook 30 to 60 seconds until fragrant.
  9. If using Thai red curry paste, stir it in now with the aromatics.
  10. Stir in the tomato paste, the remaining smoked paprika, oregano, and turmeric if using; cook about 1 minute until the tomato paste darkens slightly.
  11. Pour in the chicken broth, scraping up browned bits, then add the coconut milk and stir until smooth.
  12. Return the chicken and any juices to the skillet and bring to a gentle simmer over medium to medium-low heat.
  13. Simmer gently 5 to 8 minutes, stirring occasionally, until the chicken is cooked through and the sauce lightly coats a spoon; do not boil hard.
  14. Check the thickest pieces of chicken with an instant-read thermometer; they should reach 165°F (74°C).
  15. Taste and add the remaining salt if needed; if the sauce reduced too much, add a small splash of broth, or simmer uncovered 1 to 2 minutes if it is too thin.
  16. Spoon rice into bowls, top with the coconut chicken and sauce, and finish with chopped cilantro or scallions.

Tips

  • Sear the chicken in batches so pieces brown instead of steaming.
  • Use thighs if you want a more forgiving, juicier result than breast.
  • Simmer the sauce gently to thicken; a wide skillet speeds reduction.
  • If the sauce becomes too thick after chilling, stir in a small splash of broth when reheating.
  • Store rice and chicken separately for the best texture when reheating.

Variations

  • Spicier Thai-style: Stir in 1 to 2 teaspoons Thai red curry paste with the aromatics for a spicier, curry-style version.
  • Golden Turmeric: Add 1/2 teaspoon turmeric when building the sauce for a warmer color and subtle earthiness.
  • Greens and Crunch: Add 1 to 2 cups bok choy or other quick-cooking greens to the skillet near the end, and serve with cucumber slices for crunch.

Notes

Refrigerate leftovers in airtight containers for up to 4 days; store rice and chicken separately if possible. Reheat gently and add a splash of broth if the sauce has thickened. Ensure chicken reaches 165°F (74°C) before serving.

Nutrition

Calories: 620 kcal | Protein: 42 g | Fat: 14 g | Carbohydrates: 76 g

Keto Chicken Caesar Salad

Keto chicken Caesar salad is at its best when the textures stay crisp and separate: juicy sliced chicken, dry crunchy romaine, a creamy dressing, and plenty of Parmesan in each bite.

This version keeps it simple with skillet-cooked chicken breast and a quick Caesar-style dressing made in the blender. For the best texture, keep the dressing and salad components separate until just before serving.

Ingredients for Keto Chicken Caesar Salad

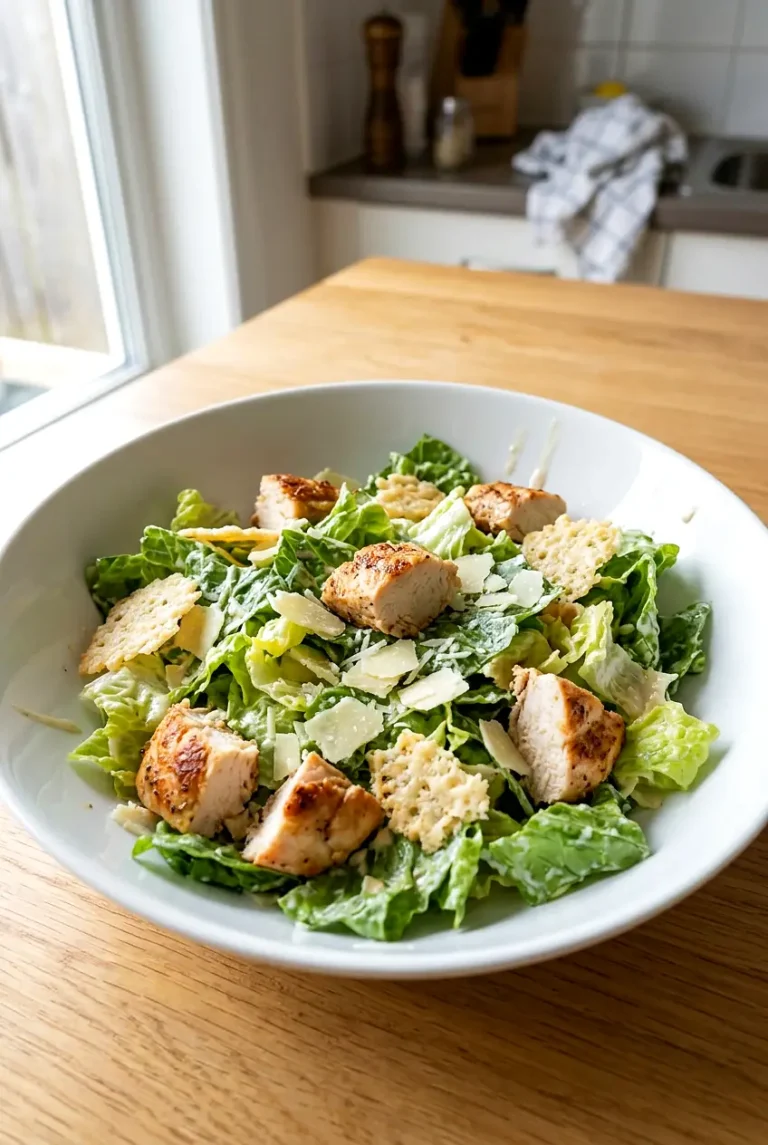
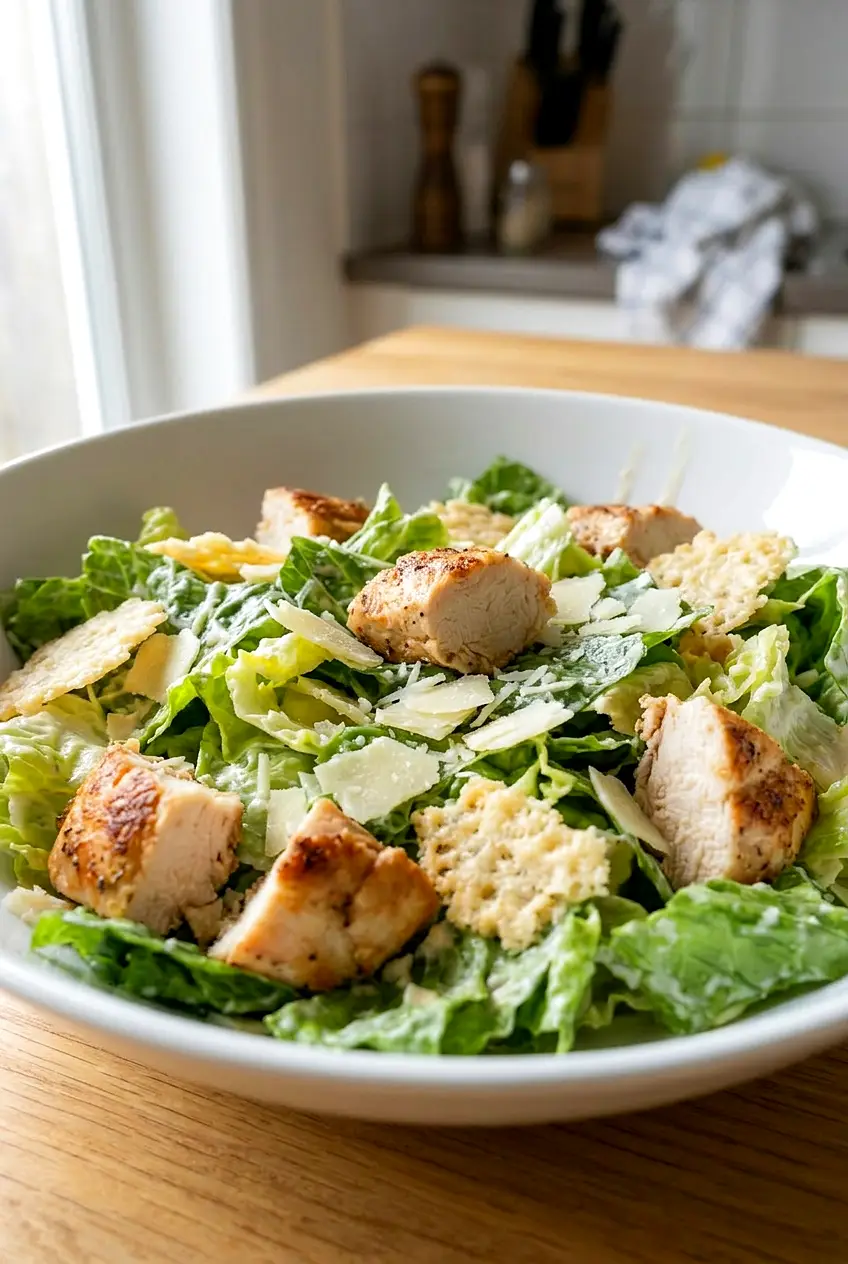
Side view of keto chicken Caesar salad with Parmesan crisps and thin sliced chicken
  • 1 1/2 pounds boneless skinless chicken breasts (about 675g)
  • 2 large heads romaine lettuce, chopped (about 450g)
  • 1/2 cup mayonnaise (120g)
  • 1/3 cup grated Parmesan cheese (30g)
  • 2 to 4 canned anchovy fillets
  • 1 to 2 garlic cloves
  • 2 tablespoons lemon juice
  • 1 teaspoon Dijon mustard
  • 1/4 teaspoon salt, plus more to taste
  • 1/4 teaspoon black pepper, plus more to taste
  • 1/2 cup shredded or shaved Parmesan cheese (45g)
  • 1/2 to 1 cup Parmesan crisps (about 15g), store-bought or homemade

Optional add-ins: 1 cup halved cherry tomatoes, 1 cup sliced cucumbers, or 4 slices cooked bacon, crumbled.

For a faster version, use rotisserie chicken or leftover cooked chicken. Let it cool before adding it to the salad so the romaine stays crisp.

How to Make Keto Chicken Caesar Salad

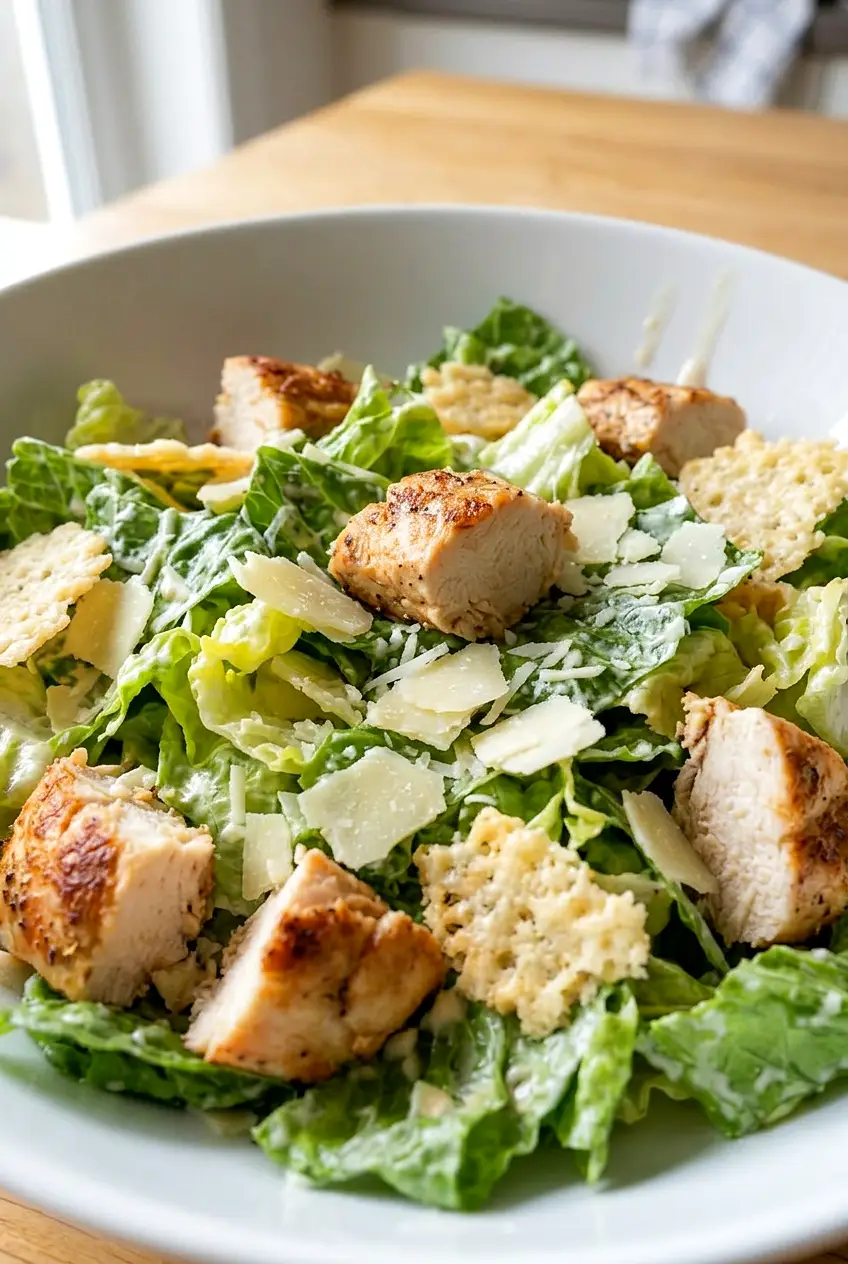
Close-up of keto chicken Caesar salad with creamy dressing on romaine and sliced chicken
  1. Make the dressing: Add the mayonnaise, grated Parmesan, anchovy fillets, garlic, lemon juice, Dijon mustard, salt, and black pepper to a blender or food processor. Blend for 2 to 3 minutes, until smooth and creamy and the anchovies are fully broken down. Taste and adjust with a little more lemon juice, salt, or pepper if needed. If the dressing is too thick to drizzle, blend in a small splash of water. Chill while you cook the chicken if you have time.
  2. Cook the chicken: If the chicken breasts are very thick, slice them in half horizontally or pound them slightly thinner so they cook more evenly. Heat a large skillet over medium to medium-high heat and lightly oil or spray the pan if needed. Season the chicken lightly with salt and pepper, then cook in a single layer for 8 to 12 minutes total, flipping once halfway through. Start checking early, since thickness and skillet heat can vary. The outside should be browned and the thickest part should reach 165°F.
  3. Rest and slice: Transfer the chicken to a cutting board and let it rest for about 5 minutes. Slice thinly across the grain.
  4. Prep the salad base: Chop the romaine and dry it very well. Add it to a large bowl with the shredded or shaved Parmesan. If using tomatoes, cucumbers, or bacon, add them now or save them for the top.
  5. Assemble the salad: Add the sliced chicken to the bowl. Drizzle with enough dressing to lightly coat the lettuce, then toss gently. Add the Parmesan crisps at the end or scatter them over each serving so they stay crunchy.
  6. Serve: Serve right away with extra dressing, Parmesan, or black pepper on the side if you like.

Tips for Crisp Salad and Juicy Chicken

Dry romaine matters here. If the lettuce is wet, the dressing will slide off and the salad can turn watery. After washing, dry the leaves well before chopping or use a salad spinner.

For the chicken, even thickness helps it cook through before the outside dries out. A thermometer is the easiest way to avoid overcooking, especially with chicken breast.

Easy Variations

Shrimp Caesar Salad

Use 1 pound of grilled or pan-cooked shrimp instead of chicken. Keep the dressing and salad base the same.

Extra Add-Ins

Cherry tomatoes, cucumbers, and bacon all work well here. Add them to the bowl or use them as toppings so the base recipe stays simple.

How to Store Keto Chicken Caesar Salad

For the best texture, store the romaine, chicken, Parmesan, Parmesan crisps, and dressing in separate airtight containers in the refrigerator. Dress only the portion you plan to eat right away.

If the salad is already dressed, it will soften quickly and is best eaten soon after assembling. The dressing can be made a few days ahead and kept chilled. The chicken can also be cooked, sliced, and cooled ahead for meal prep.

If you want to serve the chicken warm, reheat it gently in a skillet or briefly in the microwave just until warmed through so it does not dry out.

Nutrition

Nutrition is approximate and will vary based on ingredient brands, exact amounts, and serving size.

  • Serving size: 1 of 4 main-dish servings
  • Calories: about 510
  • Protein: 48g
  • Fat: 31g
  • Carbohydrates: 8g
  • Per 100g: about 145 calories, 14g protein, 9g fat, 2g carbohydrates

Keto Chicken Caesar Salad

A crisp romaine salad topped with skillet-cooked chicken, a creamy blender Caesar-style dressing, and plenty of Parmesan.
Course: Salad
Cuisine: American
Prep: 15 min
Cook: 12 min
Total: 32 min
Servings: 4 Calories: about 510 kcal

Equipment

  • skillet
  • blender or food processor
  • cutting board
  • knife
  • salad spinner (optional)

Ingredients

For the Chicken

  • 1 1/2 pounds boneless skinless chicken breasts (about 675 g)
  • Salt and black pepper to season
  • Oil or cooking spray for the skillet

For the Salad

  • 2 large heads romaine lettuce, chopped (about 450 g)
  • 1/2 cup shredded or shaved Parmesan cheese (45 g)

For the Dressing

  • 1/2 cup mayonnaise (120 g)
  • 1/3 cup grated Parmesan cheese (30 g)
  • 2 to 4 canned anchovy fillets
  • 1 to 2 garlic cloves
  • 2 tablespoons lemon juice
  • 1 teaspoon Dijon mustard
  • 1/4 teaspoon salt, plus more to taste
  • 1/4 teaspoon black pepper, plus more to taste

Toppings / Optional

  • 1/2 to 1 cup Parmesan crisps (about 15 g), store-bought or homemade
  • Optional: 1 cup halved cherry tomatoes
  • Optional: 1 cup sliced cucumbers
  • Optional: 4 slices cooked bacon, crumbled
  • Optional (fast): rotisserie or leftover cooked chicken, cooled

Instructions

  1. Make the dressing: combine mayonnaise, grated Parmesan, anchovy fillets, garlic, lemon juice, Dijon, salt, and black pepper in a blender or food processor and blend 2 to 3 minutes until smooth; thin with a splash of water if needed and chill while you cook the chicken.
  2. Prepare the chicken: if breasts are thick, slice them horizontally or pound to even thickness so they cook evenly.
  3. Heat a large skillet over medium to medium-high heat and lightly oil or spray the pan.
  4. Season the chicken lightly with salt and pepper and cook in a single layer for 8 to 12 minutes total, flipping once halfway through, until the outside is browned and the thickest part reaches 165°F (74°C).
  5. Transfer the chicken to a cutting board and let rest about 5 minutes, then slice thinly across the grain.
  6. Prep the salad base: chop the romaine and dry it thoroughly (use a salad spinner if available); add the shredded or shaved Parmesan and any optional vegetables.
  7. Assemble the salad: add the sliced chicken to the bowl, drizzle just enough dressing to lightly coat the lettuce, and toss gently.
  8. Add Parmesan crisps at the end or scatter them over individual servings so they stay crunchy, and serve immediately with extra dressing or black pepper if desired.

Tips

  • Dry romaine thoroughly after washing to prevent the salad from becoming watery.
  • Pound or slice chicken to even thickness so it cooks through without drying.
  • Use an instant-read thermometer to confirm the chicken reaches 165°F (74°C).
  • Keep the dressing separate from the salad until serving to preserve crisp textures.
  • Reheat cooked chicken gently to avoid drying it out.

Variations

  • Shrimp Caesar Salad: Use 1 pound of grilled or pan-cooked shrimp instead of chicken; keep the dressing and salad base the same.
  • Extra Add-Ins: Add cherry tomatoes, cucumbers, or crumbled bacon to the bowl or use them as toppings for more flavor and texture.

Notes

Store romaine, chicken, Parmesan, crisps, and dressing separately in airtight containers and dress only the portion you plan to eat; dressing keeps chilled for a few days and chicken can be cooked ahead and cooled. Ensure chicken reaches 165°F (74°C) for safety.

Nutrition

Calories: about 510 kcal | Protein: 48 g | Fat: 31 g | Carbohydrates: 8 g

Key West Grilled Chicken

Key West grilled chicken is bright, savory, and just a little sweet, with lime and orange in the marinade and plenty of garlic and herbs. The chicken comes off the grill with good color and a fresh citrus-herb flavor that works for an easy dinner or for meal prep.

The method is straightforward: blend the marinade, chill the chicken, then grill over medium-high heat until the thickest piece reaches 165°F. If you are using chicken breasts, pounding them to an even thickness helps them cook more evenly and stay juicier.

Ingredients for Key West Grilled Chicken

Sliced Key West grilled chicken on a plate, showing tender, juicy pieces with grill marks
  • 1 1/2 to 2 pounds boneless skinless chicken breasts (about 675g to 900g), or boneless chicken thighs or tenderloins
  • 1/4 cup soy sauce
  • 1/4 cup olive oil or neutral oil
  • 2 tablespoons honey
  • 1/4 cup fresh lime juice
  • 2 tablespoons fresh orange juice
  • 1 tablespoon red wine vinegar
  • 4 to 6 garlic cloves
  • 1/2 cup chopped fresh cilantro leaves and tender stems (about 15g)
  • 1 tablespoon fresh thyme leaves
  • 1 small jalapeño, seeded for less heat
  • 1 teaspoon ground cumin
  • 1 teaspoon dried oregano
  • 1 teaspoon kosher salt
  • 1/2 teaspoon black pepper

Fresh lime and orange juice give the best flavor here. Bottled juice will work, but the chicken will taste less fresh and a little flatter.

Coconut aminos can replace the soy sauce if needed, but the marinade will be a little less salty and less savory.

How to Make Key West Grilled Chicken

Close-up of Key West grilled chicken showing the browned exterior and moist sliced center
  1. Blend the marinade: Add the soy sauce, oil, honey, lime juice, orange juice, vinegar, garlic, cilantro, thyme, jalapeño, cumin, oregano, salt, and pepper to a blender. Blend for 30 seconds to 1 minute, until mostly smooth and speckled with herbs.
  2. Prep the chicken: If using chicken breasts, pound them to an even thickness so they cook at the same rate. Place the chicken in a large resealable bag or shallow dish and pour the marinade over it. Turn the pieces to coat all sides.
  3. Marinate: Cover and refrigerate for at least 30 minutes and up to several hours. Keep the chicken cold until grilling. Discard any marinade that has touched the raw chicken.
  4. Preheat the grill: Heat an outdoor grill or grill pan over medium-high heat. Clean the grates well and lightly oil them to help prevent sticking.
  5. Grill the first side: Lift the chicken from the marinade and let the excess drip off. Arrange the pieces in a single layer with a little space between them. Grill for 4 to 7 minutes, until the chicken releases fairly easily and has grill marks.
  6. Flip and finish: Turn the chicken once and cook for 4 to 8 minutes more, depending on thickness and the cut you use. Move pieces only as needed for hot spots. Start checking early, since the honey in the marinade can brown quickly.
  7. Check for doneness: The chicken should be opaque throughout, and the thickest piece should reach 165°F in the center on an instant-read thermometer.
  8. Rest and serve: Transfer the chicken to a plate and let it rest for 5 minutes before slicing. Serve warm.

How to Keep the Chicken Juicy

Even thickness makes the biggest difference, especially with chicken breasts. Thin tapered ends can dry out before the center is cooked, so it helps to pound the thicker parts down before marinating.

Use the thermometer more than the clock here. Grill heat can vary, and this marinade browns fast because of the honey. Pull the chicken as soon as the thickest part reaches 165°F, then let it rest before slicing so the juices stay in the meat.

Serving Ideas

Serve this chicken with cilantro-lime rice, grilled vegetables, or a simple mango or pineapple salsa. It also works well with roasted broccoli or asparagus for an easy dinner.

Leftovers are easy to use. Slice the chicken for salads, rice bowls, or wraps the next day.

If you like grilled chicken with bold marinade flavor, try Vietnamese Lemongrass Chicken next.

For another fresh chicken dinner, check out Strawberry Basil Chicken.

If you want another sweet-savory option, try Char Siu Chicken with Sticky Glaze.

Easy Variations

Use chicken thighs

Boneless chicken thighs are a good choice if you want slightly juicier chicken and a little more forgiveness on the grill. They may need a bit more time, so check them with a thermometer rather than relying on the clock.

Adjust the heat

Seed the jalapeño for a milder marinade, or leave some seeds and ribs in if you want more heat. Keep it moderate so the citrus and herbs still come through.

How to Store and Reheat Key West Grilled Chicken

Let the chicken cool before storing, then refrigerate it in an airtight container for up to 3 to 4 days. If you are serving it with rice, salsa, or vegetables, store those separately when possible so the textures hold up better.

Reheat gently in the microwave or in a low oven until warmed through. Avoid high heat, which can dry the chicken out. Leftovers are also good sliced cold for salads, bowls, or wraps.

For make-ahead prep, marinate the chicken earlier in the day and keep it refrigerated until grilling. Do not reuse the raw marinade as a sauce unless you boil it separately first.

Nutrition

Nutrition is approximate and will vary based on ingredient brands, exact chicken weight, and serving size.

  • Serving size: about 1/4 of the recipe
  • Calories: about 390
  • Protein: 40g
  • Fat: 18g
  • Carbohydrates: 15g
  • Per 100g: about 170 calories, 17g protein, 8g fat, 7g carbohydrates

Key West Grilled Chicken

Citrus-and-herb marinated chicken grilled until juicy with bright lime and orange flavor.
Course: Main Course
Cuisine: American
Prep: 15 min
Cook: 16 min
Total: 66 min
Servings: 4 Calories: 390 kcal

Equipment

  • blender
  • grill or grill pan
  • meat mallet
  • instant-read thermometer
  • resealable bag or shallow dish

Ingredients

Chicken

  • 1 1/2 to 2 pounds boneless skinless chicken breasts (about 675–900g), or boneless chicken thighs or tenderloins

Marinade

  • 1/4 cup soy sauce
  • 1/4 cup olive oil or neutral oil
  • 2 tablespoons honey
  • 1/4 cup fresh lime juice
  • 2 tablespoons fresh orange juice
  • 1 tablespoon red wine vinegar
  • 4 to 6 garlic cloves
  • 1/2 cup chopped fresh cilantro leaves and tender stems (about 15g)
  • 1 tablespoon fresh thyme leaves
  • 1 small jalapeño, seeded for less heat
  • 1 teaspoon ground cumin
  • 1 teaspoon dried oregano
  • 1 teaspoon kosher salt
  • 1/2 teaspoon black pepper

Instructions

  1. Add soy sauce, oil, honey, lime juice, orange juice, vinegar, garlic, cilantro, thyme, jalapeño, cumin, oregano, salt, and pepper to a blender and blend for 30 seconds to 1 minute until mostly smooth and speckled with herbs.
  2. If using chicken breasts, pound to an even thickness.
  3. Place chicken in a large resealable bag or shallow dish and pour the marinade over it, turning to coat all sides.
  4. Cover and refrigerate for at least 30 minutes and up to several hours; discard any marinade that has touched raw chicken.
  5. Heat an outdoor grill or grill pan over medium-high heat; clean and lightly oil the grates.
  6. Lift chicken from the marinade and let excess drip off; arrange in a single layer on the grill with space between pieces.
  7. Grill the first side for 4 to 7 minutes until the chicken releases fairly easily and has grill marks.
  8. Flip and grill 4 to 8 minutes more, checking early because the honey can brown quickly.
  9. Check the thickest piece with an instant-read thermometer and cook until it reaches 165°F (74°C) in the center.
  10. Transfer chicken to a plate and let rest for 5 minutes before slicing and serving.

Tips

  • Pound chicken breasts to an even thickness to ensure even cooking and juicier meat.
  • Use an instant-read thermometer and pull the chicken at 165°F (74°C) rather than relying solely on time.
  • Seed the jalapeño for milder heat or leave some seeds for more spice.
  • Use fresh lime and orange juice for the brightest flavor.
  • Discard any marinade that contacted raw chicken or boil it before using as a sauce.

Variations

  • Use chicken thighs: Swap in boneless chicken thighs for slightly juicier, more forgiving meat; check doneness with a thermometer as they may need more time.
  • Adjust the heat: Seed the jalapeño for a milder marinade or leave seeds and ribs for more heat while keeping citrus and herbs balanced.

Notes

Store cooled chicken in an airtight container in the fridge for 3 to 4 days. Reheat gently in a low oven or microwave to avoid drying. Do not reuse raw marinade unless boiled first.

Nutrition

Calories: 390 kcal | Protein: 40 g | Fat: 18 g | Carbohydrates: 15 g | Per100g: about 170 kcal, 17 g protein, 8 g fat, 7 g carbohydrates

Air Fryer Vietnamese Lemongrass Chicken

Air fryer Vietnamese lemongrass chicken comes out savory, lightly sweet, and deeply fragrant, with browned edges and juicy meat. Chicken thighs work especially well here because they stay tender while the skin crisps and renders in the hot air fryer.

The marinade is simple: lemongrass, garlic, fish sauce, oyster sauce, sugar, black pepper, and a little oil. For the best texture, mince the lemongrass very finely and keep the chicken in a single layer so it browns instead of steaming.

Ingredients for Air Fryer Vietnamese Lemongrass Chicken

Side view of Vietnamese lemongrass chicken with browned edges and tender texture
  • 2 to 2 1/2 pounds skin-on chicken thighs (about 1.1 kg), boneless or bone-in
  • 2 to 3 lemongrass stalks, tender pale yellow part only, finely minced or grated (about 60g)
  • 4 garlic cloves, minced (about 10g)
  • 2 tablespoons fish sauce
  • 1 tablespoon oyster sauce
  • 1 to 1 1/2 tablespoons granulated sugar
  • 1 teaspoon black pepper
  • 1 tablespoon neutral oil
  • Salt, only if needed

Optional for serving: lime wedges, chopped cilantro, sliced scallions, Vietnamese fish dipping sauce, or Thai sweet chili sauce.

Use only the tender inner part of the lemongrass. Peel away the tough outer layers first, then mince, grate, or briefly process it so it blends into the marinade without leaving stringy bits on the chicken.

How to Make Air Fryer Vietnamese Lemongrass Chicken

Close-up of Vietnamese lemongrass chicken showing juicy meat and caramelized skin
  1. Make the marinade: In a bowl, mix the minced lemongrass, garlic, fish sauce, oyster sauce, sugar, black pepper, and oil. Stir until the sugar is mostly dissolved.
  2. Coat the chicken: Pat the chicken thighs dry, then toss them in the marinade until evenly coated. Try to leave the skin side mostly exposed rather than buried under thick clumps of marinade. Marinate for at least 30 minutes, or refrigerate longer for deeper flavor.
  3. Preheat the air fryer: Heat the air fryer to 390°F for 3 to 5 minutes. Lightly oil or spray the basket if needed.
  4. Arrange the chicken: Place the thighs in the basket in a single layer, skin-side up, with a little space between pieces. Let excess marinade drip off before adding the chicken so it does not pool and burn in the basket. Cook in batches if needed.
  5. Air fry: Cook for 18 to 24 minutes total, flipping once about halfway through. Start checking at 16 to 18 minutes, especially for boneless thighs. If your air fryer browns unevenly, rotate the pieces near the end.
  6. Check for doneness: The chicken is done when the skin is lightly crisp, the edges are browned, and the thickest part reaches 165°F. If you want more color, cook 2 to 4 minutes longer, watching closely since the sugar can darken fast.
  7. Rest and serve: Let the chicken rest for 5 minutes before serving. Serve whole or slice for rice bowls, vermicelli bowls, or spring rolls.

Prepping the Lemongrass

Lemongrass gives this chicken its main flavor, but it needs a little prep. Remove the dry outer layers and use the pale yellow lower section of the stalk. Mince it very finely, grate it, or pulse it briefly in a food processor so it blends into the marinade.

If fresh lemongrass is hard to find, frozen pre-chopped lemongrass is a useful shortcut. Extra chopped lemongrass also freezes well for another batch.

Why Chicken Thighs Work Well Here

Skin-on chicken thighs are the best fit for this recipe because the skin helps the chicken brown and the meat stays juicy in the air fryer. Boneless thighs are the quickest option and usually finish sooner, while bone-in thighs take longer and should be checked a little earlier and then cooked until they reach 165°F in the thickest part.

Serving Ideas

  • Steamed jasmine rice with cucumber and simple vegetables
  • Vermicelli bowls with lettuce and fresh herbs
  • Sliced and tucked into spring rolls
  • Vietnamese fish dipping sauce or Thai sweet chili sauce on the side
  • Lime wedges, cilantro, and scallions for a fresh finish

For another Asian-inspired chicken option, you might also like Char Siu Chicken.

If you want a lighter chicken meal next, check out Asian Chicken Crunch Salad.

If you want another flavorful chicken dinner, try Strawberry Basil Chicken.

Oven Method

If you do not have an air fryer, roast the marinated chicken on a rimmed sheet pan at high heat in the oven. Keep the pieces spaced apart and cook until the edges are browned, the juices run clear, and the thickest part reaches 165°F. Bone-in thighs will take longer than boneless thighs.

How to Store and Reheat Air Fryer Vietnamese Lemongrass Chicken

Let the chicken cool, then refrigerate it in an airtight container for up to 3 to 4 days. If you are serving it with dipping sauce, store the sauce separately so the chicken keeps its texture better.

Reheat in the air fryer or oven until heated through. That will bring back some of the browned exterior better than the microwave, though the skin will not be quite as crisp as when freshly cooked.

For make-ahead prep, marinate the chicken earlier in the day or the night before, then cook when ready.

Nutrition

Nutrition is approximate and will vary based on ingredient brands, exact thigh size, and how much rendered fat remains after cooking.

  • Serving size: 1/4 of recipe
  • Calories: about 470
  • Protein: 34g
  • Fat: 33g
  • Carbohydrates: 8g
  • Per 100g: about 215 calories, 16g protein, 15g fat, 4g carbohydrates

Air Fryer Vietnamese Lemongrass Chicken

Skin-on chicken thighs marinated with lemongrass, garlic, fish sauce, and a touch of sugar, then cooked in an air fryer until browned and juicy.
Course: Main Course
Cuisine: Vietnamese
Prep: 15 min
Cook: 20 min
Total: 75 min
Servings: 4 Calories: about 470 kcal

Equipment

  • air fryer
  • mixing bowl
  • knife
  • cutting board
  • measuring spoons
  • grater or food processor
  • tongs

Ingredients

Chicken

  • 2 to 2 1/2 pounds skin-on chicken thighs (about 1.1 kg), boneless or bone-in

Marinade

  • 2 to 3 lemongrass stalks, tender pale yellow part only, finely minced or grated (about 60 g)
  • 4 garlic cloves, minced (about 10 g)
  • 2 tablespoons fish sauce
  • 1 tablespoon oyster sauce
  • 1 to 1 1/2 tablespoons granulated sugar
  • 1 teaspoon black pepper
  • 1 tablespoon neutral oil
  • Salt, only if needed

To serve (optional)

  • Lime wedges
  • Chopped cilantro
  • Sliced scallions
  • Vietnamese fish dipping sauce or Thai sweet chili sauce

Instructions

  1. Mix the minced lemongrass, garlic, fish sauce, oyster sauce, sugar, black pepper, and oil in a mixing bowl until the sugar is mostly dissolved.
  2. Pat the chicken thighs dry and toss them in the marinade until evenly coated, keeping the skin side as exposed as possible.
  3. Marinate the chicken for at least 30 minutes in the refrigerator for deeper flavor.
  4. Preheat the air fryer to 390°F (199°C) for 3 to 5 minutes and lightly oil or spray the basket if needed.
  5. Arrange the thighs in a single layer in the basket, skin-side up, with a little space between pieces; let excess marinade drip off before placing them in the basket.
  6. Air fry for 18 to 24 minutes total, flipping once about halfway through; start checking doneness at 16 to 18 minutes for boneless thighs and rotate pieces near the end if browning is uneven.
  7. Confirm the thickest part of the chicken reaches 165°F (74°C). If more color is desired, cook 2 to 4 minutes longer while watching closely.
  8. Let the chicken rest for 5 minutes before serving; serve whole or sliced.

Tips

  • Mince or grate only the pale inner part of the lemongrass to avoid stringy bits.
  • Keep chicken pieces in a single layer so they brown instead of steam; cook in batches if needed.
  • Boneless thighs usually finish sooner than bone-in—check internal temperature early.
  • Use frozen pre-chopped lemongrass as a convenient shortcut if fresh is unavailable.
  • If the air fryer browns unevenly, rotate pieces near the end of cooking for even color.

Variations

  • Oven method: Roast the marinated chicken on a rimmed sheet pan at high heat until the edges are browned and the thickest part reaches 165°F (74°C); bone-in thighs will take longer than boneless.

Notes

Refrigerate cooled chicken in an airtight container for 3 to 4 days; store dipping sauce separately. Reheat in an air fryer or oven to restore some crispness. Cook until internal temperature reaches 165°F (74°C).

Nutrition

Calories: about 470 kcal | Protein: 34 g | Fat: 33 g | Carbohydrates: 8 g | Per100g: about 215 kcal, 16 g protein, 15 g fat, 4 g carbohydrates

Strawberry Basil Chicken

Strawberry basil chicken is a quick skillet or grill dinner with browned chicken, a short balsamic-garlic marinade, and a fresh topping of chopped strawberries and basil. The sweet fruit, sharp balsamic, and warm chicken work especially well together when the topping stays uncooked.

The method is simple: marinate the chicken briefly, cook it over fairly high heat, then finish with the strawberries and basil right before serving. Keep the pan roomy and leave excess marinade behind so the chicken browns instead of steaming and the balsamic does not scorch.

Ingredients for Strawberry Basil Chicken

Strawberry basil chicken sliced on a plate with strawberries and basil spooned over the top
  • 1 1/2 pounds boneless, skinless chicken breasts or thighs (675g to 700g) — use pieces of similar thickness for even cooking
  • 1/4 cup balsamic vinegar
  • 2 cloves garlic, minced
  • 1 tablespoon olive oil
  • 1 teaspoon sea salt, plus more to taste
  • 1/2 teaspoon black pepper
  • 1 to 1 1/2 cups fresh strawberries, chopped (150g)
  • 1/4 cup fresh basil leaves, chopped or torn

Optional for serving: 1 to 2 teaspoons extra balsamic vinegar for drizzling, a pinch of red pepper flakes, and mixed greens or arugula.

Ingredient note: Boneless, skinless chicken thighs are a good choice if you want a juicier result, but they may take a little longer to cook. If the strawberries are tart, add a small pinch of salt or a light drizzle of balsamic at the end rather than sugar.

How to Make Strawberry Basil Chicken

Close view of strawberry basil chicken with browned edges and fresh strawberry topping
  1. Mix the marinade: In a bowl or shallow dish, whisk together the balsamic vinegar, garlic, olive oil, salt, and black pepper. Add the chicken and turn to coat. Let it sit for 5 to 10 minutes while you heat the skillet or grill.
  2. Preheat the pan: Heat a large 12-inch skillet over medium-high heat, or preheat an outdoor grill to high direct heat. If using a skillet, let it get fully hot before adding the chicken.
  3. Cook the chicken: Lightly oil the pan or grill grates if needed. Add the chicken in a single layer without crowding, working in batches if necessary. Leave it undisturbed until the first side is browned and releases easily, then flip once. Cook for 12 to 18 minutes total, depending on thickness, until browned outside and no longer pink in the center. Do not pour in excess marinade, which can make the chicken steam and can cause the balsamic to burn.
  4. Check for doneness: The thickest part should reach 165°F. If you do not have a thermometer, cut into the thickest piece and check that the juices run clear and no pink remains.
  5. Rest and top: Transfer the chicken to a plate or cutting board and rest for 2 to 3 minutes. Spoon the chopped strawberries and basil over the top, then add a little extra balsamic if you want a sharper finish.
  6. Serve: Slice the chicken if you like and spoon over any juices from the plate or pan. Serve right away while the chicken is hot and the topping is still fresh.

How to Keep the Chicken Juicy

Use chicken pieces that are close in thickness so they finish at the same time. A wide skillet also helps because crowded chicken releases moisture and steams instead of browning.

Start checking a little early, especially if you are using chicken breasts. Balsamic darkens quickly in a hot pan, so pull the chicken as soon as it reaches 165°F and let it rest before slicing.

Why Add the Strawberries at the End

Strawberries soften quickly in a hot pan, so they are best added after the chicken is cooked. That keeps the topping bright and lightly juicy instead of soft and watery.

The same goes for the basil. Chopped or torn basil has the best aroma when it hits the hot chicken right before serving.

Serving Ideas

Serve strawberry basil chicken over mixed greens or arugula for a lighter meal, or pair it with rice or plain pasta for something more filling. It also works well with spiralized vegetables for a simple bowl-style dinner.

For a lighter chicken-and-greens option, see Asian Chicken Crunch Salad.

Variations

Use Chicken Thighs

Swap in boneless, skinless chicken thighs for a richer, juicier result. Cook them to 165°F.

Add a Little Heat

Sprinkle red pepper flakes into the marinade or over the finished dish for a mild spicy contrast with the strawberries and balsamic.

How to Store and Reheat Strawberry Basil Chicken

Let leftovers cool, then refrigerate in an airtight container for up to 3 days. If possible, store the chicken and strawberry topping separately for the best texture.

Reheat the chicken gently in a skillet over low heat or in short microwave bursts so it does not dry out. Add fresh basil after reheating, and spoon the strawberries over just before serving.

If you want to prep ahead, marinate the chicken a little in advance, but chop the strawberries and basil close to serving time so they do not release too much juice.

If you like saucy chicken dinners, try Char Siu Chicken with Sticky Glaze next.

If you want another quick chicken dinner, try Honey Garlic Chicken Skewers.

Nutrition

Nutrition is approximate and will vary based on ingredient brands, exact amounts, and serving size.

  • Serving size: 1/4 of recipe
  • Calories: about 270
  • Protein: 38g
  • Fat: 9g
  • Carbohydrates: 8g
  • Per 100g: about 145 calories, 20g protein, 5g fat, 4g carbohydrates

Strawberry Basil Chicken

Quick skillet or grilled chicken marinated in balsamic and garlic, finished with a fresh chopped strawberry and basil topping.
Course: Main Course
Cuisine: American
Prep: 10 min
Cook: 18 min
Total: 31 min
Servings: 4 Calories: about 270 kcal

Equipment

  • 12-inch skillet or grill
  • mixing bowl
  • tongs
  • meat thermometer
  • cutting board
  • knife

Ingredients

For the Chicken and Marinade

  • 1 1/2 pounds boneless, skinless chicken breasts or thighs (675g to 700g)
  • 1/4 cup balsamic vinegar
  • 2 cloves garlic, minced
  • 1 tablespoon olive oil
  • 1 teaspoon sea salt, plus more to taste
  • 1/2 teaspoon black pepper

For the Topping

  • 1 to 1 1/2 cups fresh strawberries, chopped (150g)
  • 1/4 cup fresh basil leaves, chopped or torn

Optional for Serving

  • 1 to 2 teaspoons extra balsamic vinegar for drizzling (optional)
  • pinch of red pepper flakes (optional)
  • mixed greens or arugula (optional)

Instructions

  1. Whisk together balsamic vinegar, minced garlic, olive oil, salt, and black pepper in a bowl or shallow dish.
  2. Add the chicken to the marinade and turn to coat; let sit for 5 to 10 minutes while you heat the pan or grill.
  3. Heat a large 12-inch skillet over medium-high heat or preheat an outdoor grill to high direct heat; let it get fully hot.
  4. Lightly oil the pan or grill grates if needed and add the chicken in a single layer without crowding, working in batches if necessary.
  5. Leave the chicken undisturbed until the first side is browned and releases easily, then flip once and continue cooking until done, about 12 to 18 minutes total depending on thickness.
  6. Check the thickest part with a meat thermometer; the internal temperature should reach 165°F (74°C).
  7. Transfer the chicken to a plate or cutting board and rest for 2 to 3 minutes.
  8. Spoon the chopped strawberries and basil over the rested chicken and add a little extra balsamic or red pepper flakes if desired.
  9. Slice the chicken if you like and serve immediately, spooning any accumulated juices over the top.

Tips

  • Use chicken pieces of similar thickness so they finish at the same time.
  • Avoid crowding the pan so the chicken browns instead of steaming.
  • Pull the chicken as soon as it reaches 165°F (74°C) and let it rest before slicing.
  • Add strawberries and basil only at the end to keep the topping bright and not watery.
  • Store topping separately from chicken for best texture if making ahead.

Variations

  • Use Chicken Thighs: Swap boneless, skinless chicken thighs for a richer, juicier result; cook to 165°F (74°C).
  • Add a Little Heat: Sprinkle red pepper flakes into the marinade or over the finished dish for a mild spicy contrast.

Notes

Refrigerate leftovers in an airtight container for up to 3 days; store strawberries and basil separately if possible. Reheat chicken gently and add fresh basil and strawberries just before serving. Cook chicken to 165°F (74°C) for safety.

Nutrition

Calories: about 270 kcal | Protein: 38 g | Fat: 9 g | Carbohydrates: 8 g