Author

Julia

Browsing

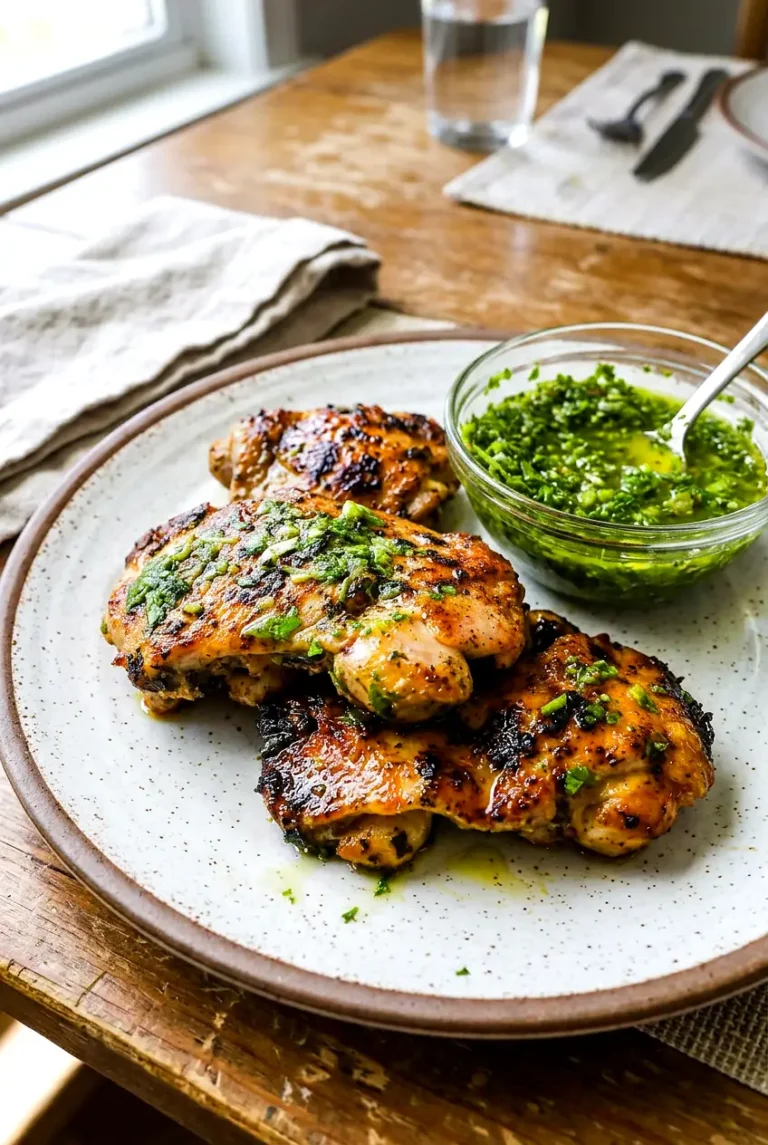
Chimichurri Chicken Thighs

These chimichurri chicken thighs are bright, herby, and easy enough for a weeknight. Boneless skinless thighs cook quickly and stay flavorful, and the fresh cilantro-parsley sauce keeps the whole dish lively without adding much extra work.

The same chimichurri works as both the marinade and the finishing sauce. Just reserve part of it before it touches the raw chicken. You can cook the thighs on an outdoor grill, a grill pan, or a cast-iron skillet, and the chicken is done when the thickest piece reaches 165°F.

Ingredients for Chimichurri Chicken Thighs
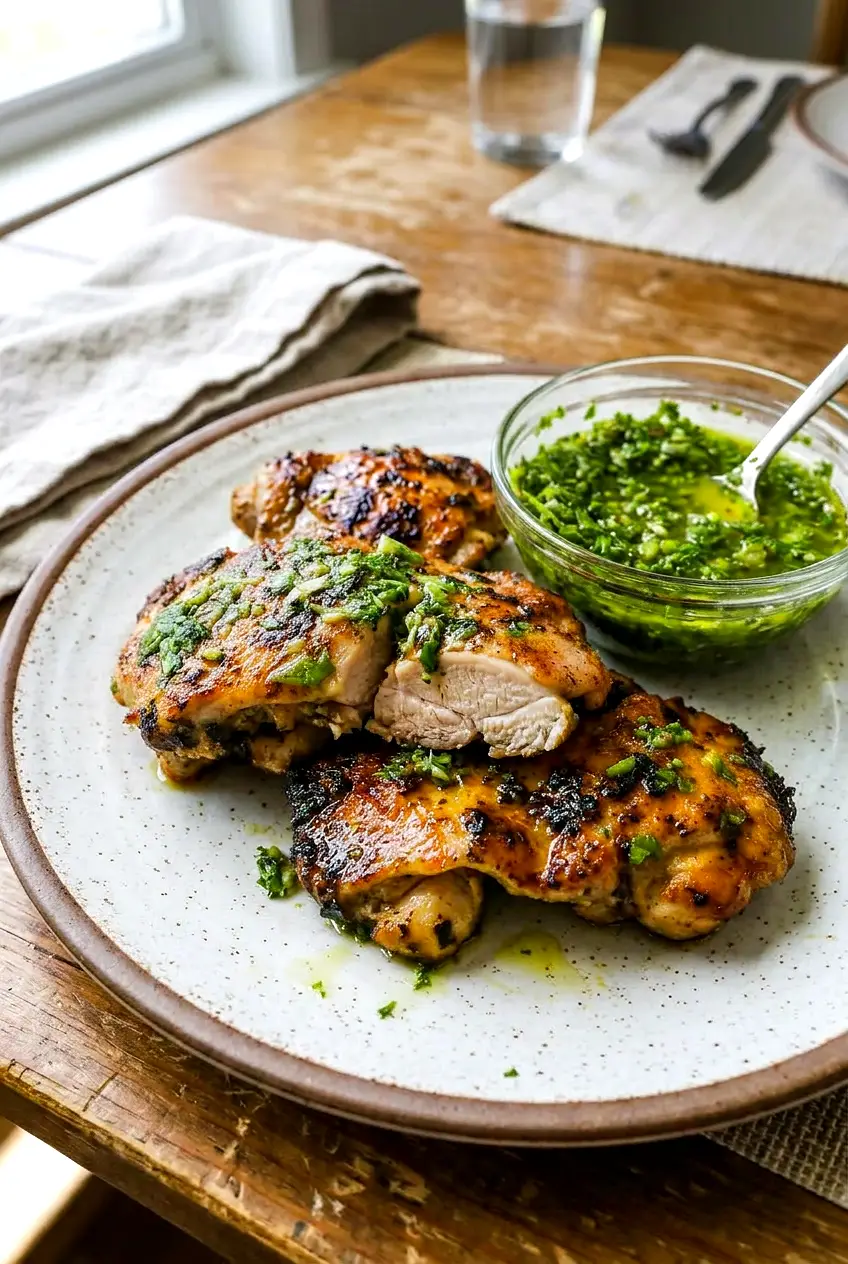
Sliced chimichurri chicken thighs with a spoonful of chimichurri beside the plate
  • 2 pounds boneless skinless chicken thighs (about 900g)
  • 1 cup packed fresh cilantro, chopped (about 15g)
  • 1 cup packed fresh parsley, chopped (about 30g)
  • 2 tablespoons fresh oregano, chopped
  • 1 small shallot, chopped (about 30g)
  • 3 garlic cloves
  • 1 small jalapeño, seeded for less heat
  • 2 tablespoons lemon juice
  • 2 tablespoons red wine vinegar
  • 1/2 cup olive oil (about 110g)
  • 1 1/2 teaspoons salt, plus more to taste
  • 1/2 teaspoon black pepper

Optional: add 1/4 teaspoon red pepper flakes if your jalapeño is mild, and serve with lemon wedges.

Fresh herbs work best here. If you want the sauce a little more parsley-forward, use more parsley and less cilantro.

How to Make Chimichurri Chicken Thighs
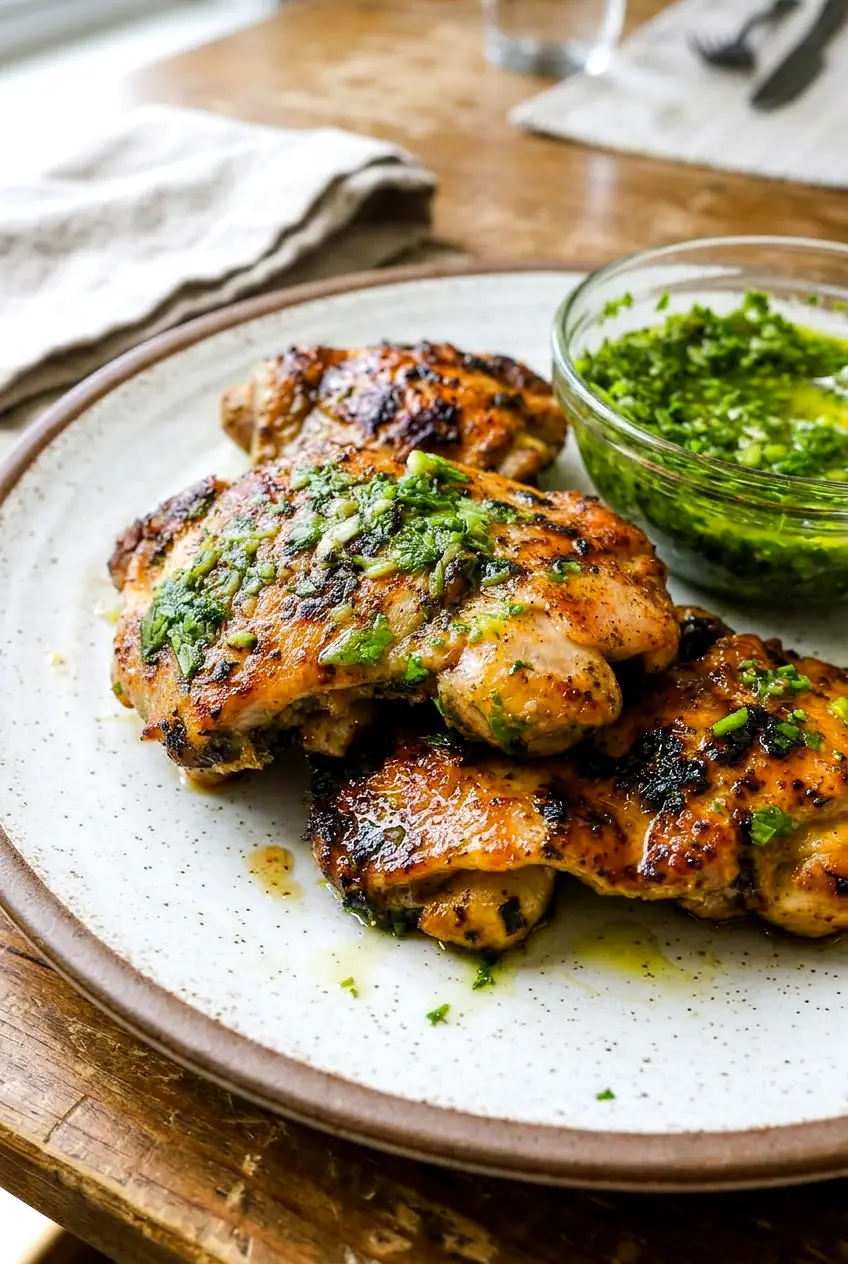
Close view of chimichurri chicken thighs with fresh herb sauce over the browned chicken
  1. Make the chimichurri: In a small bowl or food processor, combine the cilantro, parsley, oregano, shallot, garlic, jalapeño, lemon juice, red wine vinegar, olive oil, salt, and black pepper. Pulse briefly for a chunky sauce, or chop everything by hand and stir to combine. The chimichurri should be loose and spoonable, not thick like a paste. Taste and adjust the salt or acidity if needed.
  2. Reserve some for serving: Set aside about half of the chimichurri in a separate bowl. Keep it separate so it stays safe to spoon over the cooked chicken later.
  3. Marinate the chicken: Pat the chicken thighs dry, then toss them with the remaining chimichurri until evenly coated. Let them sit for 15 minutes while you heat the grill or pan, or refrigerate for up to 24 hours if making ahead. If marinating longer than 30 minutes, keep the chicken chilled.
  4. Preheat the grill or pan: Heat an outdoor grill, grill pan, or cast-iron skillet over medium-high heat until hot. Lightly oil the grates or pan if needed. The chicken should sizzle as soon as it hits the surface.
  5. Cook the chicken: Arrange the thighs in a single layer without crowding. Cook undisturbed for 5 to 6 minutes on the first side, then flip once and cook for 5 to 6 minutes more, until the outside is well browned and the thickest piece reaches 165°F. Start checking early if your pieces are small or thin.
  6. Rest and serve: Transfer the chicken to a plate and rest for 5 minutes. Spoon some of the reserved chimichurri over the top and serve the rest on the side.

Texture and Doneness Tips

If you use a food processor, pulse just until the herbs are finely chopped. Overprocessing can turn the chimichurri heavy instead of loose and spoonable. If the sauce separates as it sits, stir it again before serving.

For the chicken, leave the thighs undisturbed long enough to brown before flipping. Moving them too soon makes it harder to get good color. Avoid spooning the fresh reserved sauce onto the chicken while it cooks, since the garlic and herbs can scorch over high heat.

Why Did My Chimichurri Chicken Turn Out Dry?

Boneless thighs cook fast, so they can go from juicy to overdone in a minute or two. Check the thickest piece early and pull the chicken as soon as it reaches 165°F. A short rest also helps the juices settle before serving.

What to Serve With Chimichurri Chicken Thighs

Simple sides work best here. Try grilled corn, watermelon salad, or baked coconut lime rice. Extra chimichurri is also good spooned over rice or vegetables.

If you want a richer chicken-thigh dinner, try Creamy Oven Baked Chicken Thighs next.

For another easy chicken-thigh dinner with a bright flavor profile, see Garlic Lemon Chicken Thighs with Spinach.

How to Store and Reheat Chimichurri Chicken Thighs

Let the chicken cool before storing. Refrigerate the cooked chicken in an airtight container for up to 4 days, and keep any extra chimichurri in a separate container so the chicken does not get soggy.

Reheat gently in a low oven or in short microwave bursts, just until warmed through, so the chicken does not dry out. If the chimichurri thickens in the refrigerator, let it sit at room temperature for a bit and stir before serving.

The chimichurri can be frozen in ice-cube trays for longer storage. For make-ahead prep, you can marinate the chicken up to 24 hours in advance.

Nutrition

Nutrition is approximate and will vary based on ingredient brands, exact amounts, and serving size.

  • Serving size: 1/4 of recipe
  • Calories: about 650
  • Protein: 41g
  • Fat: 51g
  • Carbohydrates: 5g
  • Per 100g: about 225 calories, 14g protein, 18g fat, 2g carbohydrates

Chimichurri Chicken Thighs

Boneless skinless chicken thighs marinated and finished with a fresh cilantro-parsley chimichurri.
Course: Main Course
Cuisine: Global
Prep: 15 min
Cook: 12 min
Total: 32 min
Servings: 4 Calories: about 650 kcal

Equipment

  • grill or grill pan or cast-iron skillet
  • food processor or knife
  • mixing bowl
  • tongs
  • instant-read thermometer

Ingredients

For the Chicken

  • 2 pounds boneless skinless chicken thighs (about 900g)

For the Chimichurri

  • 1 cup packed fresh cilantro, chopped (about 15g)
  • 1 cup packed fresh parsley, chopped (about 30g)
  • 2 tablespoons fresh oregano, chopped
  • 1 small shallot, chopped (about 30g)
  • 3 garlic cloves
  • 1 small jalapeño, seeded for less heat
  • 2 tablespoons lemon juice
  • 2 tablespoons red wine vinegar
  • 1/2 cup olive oil (about 110g)
  • 1 1/2 teaspoons salt, plus more to taste
  • 1/2 teaspoon black pepper
  • Optional: 1/4 teaspoon red pepper flakes (if jalapeño is mild)
  • Optional: lemon wedges for serving

Instructions

  1. Combine cilantro, parsley, oregano, shallot, garlic, jalapeño, lemon juice, red wine vinegar, olive oil, salt, and black pepper in a food processor and pulse briefly for a chunky sauce, or chop by hand and stir to combine; the chimichurri should be loose and spoonable.
  2. Set aside about half of the chimichurri in a separate bowl for serving.
  3. Pat the chicken thighs dry and toss with the remaining chimichurri until evenly coated; let sit 15 minutes at room temperature or refrigerate up to 24 hours (keep chilled if marinating longer than 30 minutes).
  4. Heat an outdoor grill, grill pan, or cast-iron skillet over medium-high heat until hot and lightly oil the grates or pan if needed.
  5. Arrange the thighs in a single layer without crowding and cook undisturbed for 5 to 6 minutes on the first side.
  6. Flip once and cook 5 to 6 minutes more, until the outside is well browned and the thickest piece reaches 165°F (74°C).
  7. Transfer the chicken to a plate and rest for 5 minutes.
  8. Spoon reserved chimichurri over the chicken and serve the rest on the side.

Tips

  • Pulse the herbs just until chopped to keep the chimichurri loose and spoonable.
  • If the sauce separates as it sits, stir it again before serving.
  • Leave the thighs undisturbed long enough to brown before flipping to develop good color.
  • Do not spoon the reserved fresh sauce onto the chicken while it cooks to avoid scorching the herbs and garlic.
  • Check the thickest piece early and remove once it reaches 165°F (74°C) to avoid overcooking.

Variations

  • Parsley-forward chimichurri: Use more parsley and less cilantro for a milder, more parsley-forward sauce.
  • Spicier chimichurri: Add 1/4 teaspoon red pepper flakes or leave the jalapeño seeds in for extra heat.
Notes

Refrigerate cooked chicken in an airtight container for up to 4 days and keep extra chimichurri separate to prevent sogginess; reheat gently to avoid drying. Chicken is safe at 165°F (74°C). Chimichurri can be frozen in ice-cube trays for longer storage.

Nutrition

Calories: about 650 kcal | Protein: 41 g | Fat: 51 g | Carbohydrates: 5 g

Creamy Oven Baked Chicken Thighs

These creamy oven baked chicken thighs have plenty of browned flavor, a simple garlic-Parmesan sauce, and enough richness to make an easy dinner feel complete. Boneless chicken thighs stay tender in the oven, and the sauce is good with just about any side that can catch it.

The whole dish comes together in one oven-safe skillet. Brown the chicken first so it gets real color, make the sauce in the same pan, then finish everything in the oven until the thickest piece reaches 165°F.

Ingredients for Creamy Oven Baked Chicken Thighs

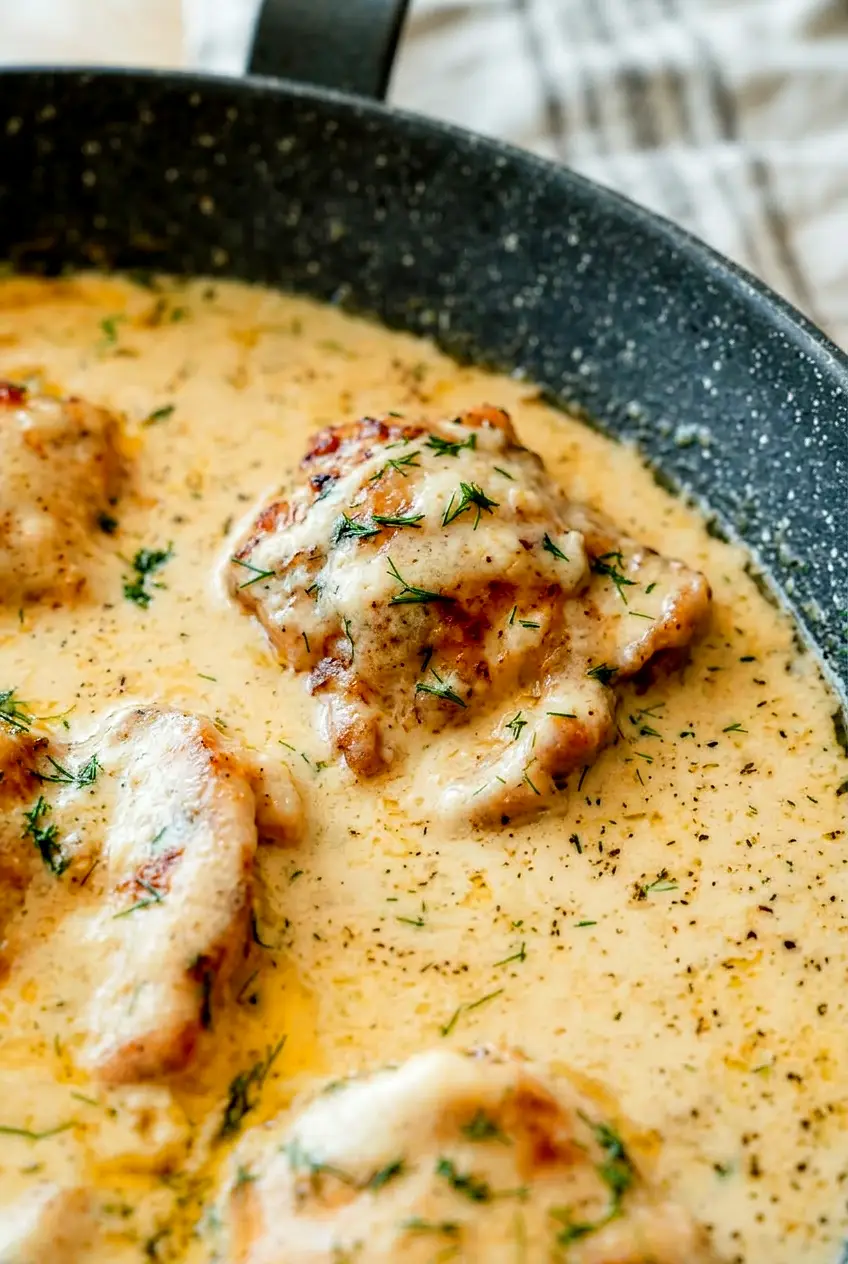
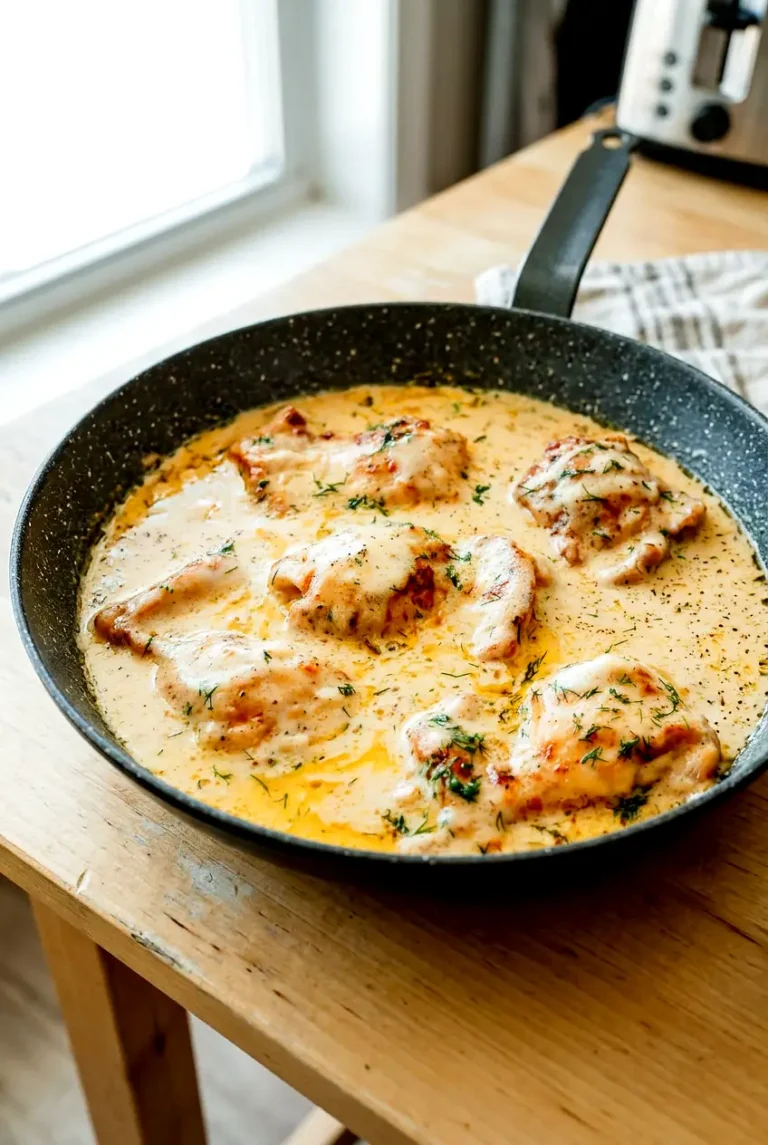
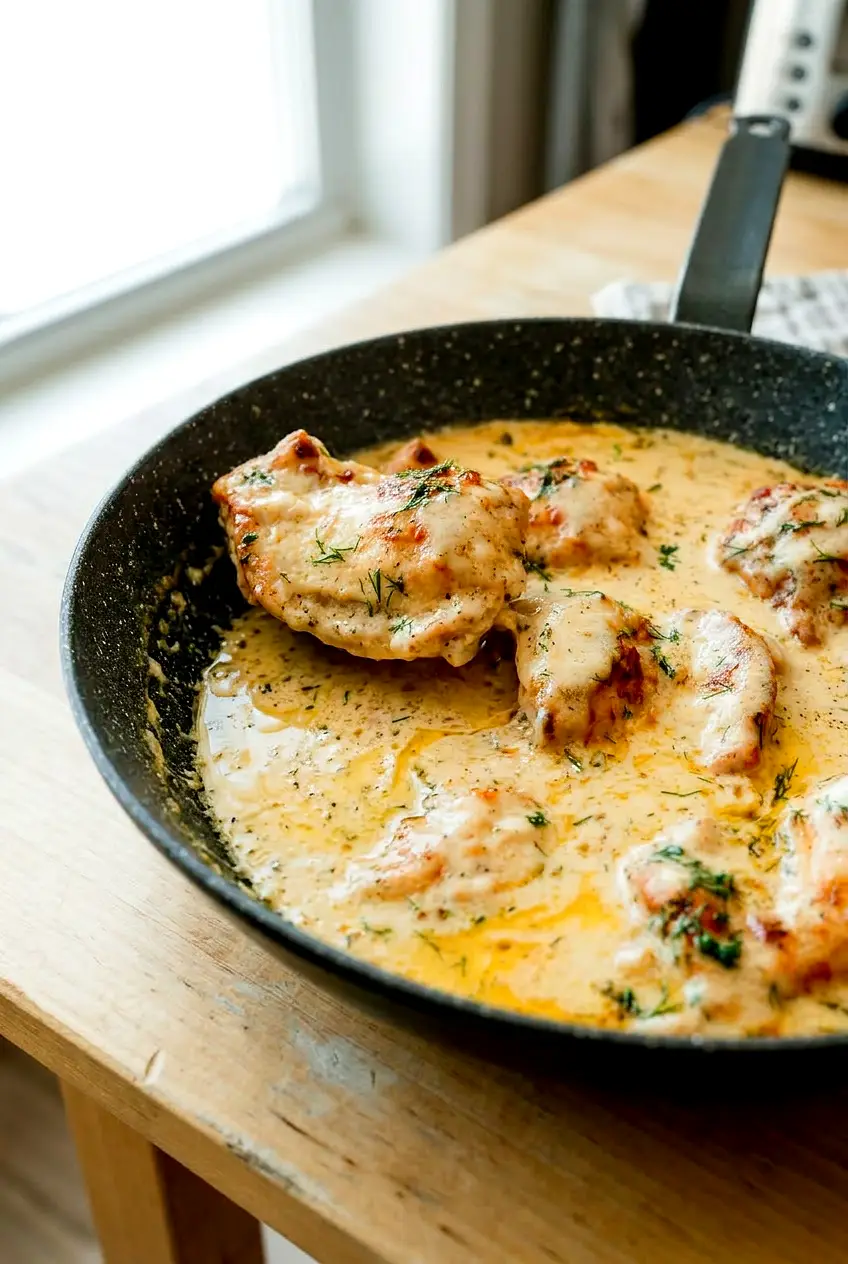
Side view of creamy chicken thighs with sauce spooned over the top and chopped dill
  • 1 1/2 pounds boneless, skinless chicken thighs (675g)
  • 1 teaspoon salt, plus more to taste
  • 1/2 teaspoon black pepper
  • 1 to 2 teaspoons 21 Salute seasoning or a similar Italian-style seasoning blend
  • 2 tablespoons unsalted butter
  • 4 cloves garlic, minced
  • 2 tablespoons all-purpose flour
  • 1 cup chicken broth (240g), preferably lower-sodium if your seasoning blend is salty
  • 1 cup heavy cream (240g)
  • 1/2 cup freshly grated Parmesan cheese (45g)
  • 1 to 2 tablespoons fresh dill, chopped

If the skillet seems dry while searing, add 1 tablespoon olive oil. At the end, 1 to 2 teaspoons lemon juice can help if the sauce needs a little brightness.

How to Make Creamy Oven Baked Chicken Thighs

Close-up of creamy oven baked chicken thighs with browned edges and smooth Parmesan sauce
  1. Heat the oven and season the chicken: Preheat the oven to 375°F. Pat the chicken thighs dry with paper towels. Season both sides with the salt, pepper, and seasoning blend.
  2. Sear the chicken: Heat a large 10- to 12-inch oven-safe skillet over medium-high heat. Add the butter, or use part butter and a little olive oil if needed. Add the chicken in batches so the pan is not crowded. Sear until deep golden brown, flipping once, about 6 to 8 minutes per batch total. The chicken should release fairly easily when it is ready to turn. Transfer to a plate.
  3. Cook the garlic and flour: Reduce the heat to medium. Add the garlic and cook for about 30 seconds, just until fragrant. Sprinkle in the flour and whisk for 1 to 2 minutes until it forms a paste and no longer looks raw.
  4. Whisk in the broth and cream: Slowly whisk in the chicken broth, scraping up the browned bits from the skillet. Once smooth, whisk in the heavy cream. Bring the sauce to a gentle simmer and cook for 3 to 5 minutes, whisking as needed, until it thickens enough to coat a spoon. Do not let it boil hard.
  5. Add the Parmesan: Lower the heat or take the skillet off the heat. Stir in the Parmesan a little at a time until melted and smooth. If the sauce seems too thick, add a small splash of broth.
  6. Return the chicken and bake: Nestle the chicken thighs back into the sauce and spoon a little sauce over the top. Transfer the skillet to the oven and bake for 15 to 20 minutes, or until the thickest thigh reaches 165°F. Start checking early if the pieces are small.
  7. Rest and finish: Let the skillet rest for 5 minutes. Taste the sauce and add more salt or pepper if needed. Sprinkle with the chopped dill before serving.

How to Keep the Chicken Browned and the Sauce Smooth

Use a wide skillet and sear the chicken in batches if needed. If the pan is crowded, the thighs will steam instead of brown, and the sauce will be thinner later.

For the smoothest sauce, cook the flour briefly before adding the broth, whisk the liquid in slowly, and keep the heat moderate once the cream is added. Freshly grated Parmesan melts more cleanly than pre-shredded cheese and is less likely to turn grainy.

What to Serve with Creamy Oven Baked Chicken Thighs

Mashed potatoes are an easy choice here, but rice, egg noodles, or buttery pasta work just as well. For something green, serve it with steamed broccoli, green beans, asparagus, or a simple salad.

How to Store and Reheat Creamy Oven Baked Chicken Thighs

Let the chicken cool before storing, then refrigerate it in an airtight container for up to 3 to 4 days. The sauce will thicken in the fridge, which is normal.

Reheat gently on the stovetop over low heat or in a covered baking dish in a low oven. Add a splash of chicken broth or cream if the sauce is too thick. Avoid high heat, which can dry out the chicken and cause the sauce to separate.

This dish is best cooked fresh rather than assembled far ahead.

More Chicken Thigh Dinner Ideas

For a brighter chicken dinner, try Garlic Lemon Chicken Thighs with Spinach.

Nutrition

Nutrition is approximate and will vary based on ingredient brands, exact amounts, and serving size.

  • Serving size: 1/4 of recipe
  • Calories: about 500
  • Protein: 33g
  • Fat: 37g
  • Carbohydrates: 8g
  • Per 100g: about 210 calories, 14g protein, 16g fat, 3g carbohydrates

Creamy Oven Baked Chicken Thighs

Boneless chicken thighs baked in a garlic-Parmesan cream sauce until tender and browned.
Course: Main Course
Cuisine: American
Prep: 10 min
Cook: 35 min
Total: 50 min
Servings: 4 Calories: about 500 kcal

Equipment

  • oven
  • 10- to 12-inch oven-safe skillet
  • whisk
  • tongs
  • measuring cups
  • measuring spoons

Ingredients

For the chicken

  • 1 1/2 pounds boneless, skinless chicken thighs (675g)
  • 1 teaspoon salt, plus more to taste
  • 1/2 teaspoon black pepper
  • 1 to 2 teaspoons 21 Salute seasoning or Italian-style seasoning blend

For the sauce

  • 2 tablespoons unsalted butter
  • 4 cloves garlic, minced
  • 2 tablespoons all-purpose flour
  • 1 cup chicken broth (240g)
  • 1 cup heavy cream (240g)
  • 1/2 cup freshly grated Parmesan cheese (45g)

Finishing and optional

  • 1 to 2 tablespoons fresh dill, chopped
  • 1 tablespoon olive oil (optional, if skillet seems dry while searing)
  • 1 to 2 teaspoons lemon juice (optional, to brighten the sauce)

Instructions

  1. Preheat the oven to 375°F (190°C).
  2. Pat the chicken thighs dry with paper towels and season both sides with salt, pepper, and the seasoning blend.
  3. Heat a large 10- to 12-inch oven-safe skillet over medium-high heat and add the butter (use part butter and a little olive oil if needed).
  4. Add the chicken in batches so the pan is not crowded and sear until deep golden brown, flipping once, about 6 to 8 minutes per batch total. Transfer seared chicken to a plate.
  5. Reduce the heat to medium and add the minced garlic; cook about 30 seconds until fragrant.
  6. Sprinkle in the flour and whisk for 1 to 2 minutes until it forms a paste and no longer looks raw.
  7. Slowly whisk in the chicken broth, scraping up browned bits from the skillet, then whisk in the heavy cream until smooth.
  8. Bring the sauce to a gentle simmer and cook 3 to 5 minutes, whisking as needed, until it thickens enough to coat a spoon; do not let it boil hard.
  9. Remove the skillet from heat or lower the heat and stir in the Parmesan a little at a time until melted and smooth; add a small splash of broth if the sauce is too thick.
  10. Nestle the chicken thighs back into the sauce and spoon some sauce over the top.
  11. Transfer the skillet to the oven and bake 15 to 20 minutes, or until the thickest thigh reaches 165°F (74°C). Start checking early if pieces are small.
  12. Let the skillet rest for 5 minutes, taste the sauce and adjust seasoning if needed, then sprinkle with chopped dill before serving.

Tips

  • Use a wide skillet and sear the chicken in batches to avoid crowding and steaming.
  • Add 1 tablespoon olive oil while searing if the skillet seems dry.
  • Cook the flour briefly before adding broth and whisk liquids in slowly for a smooth sauce.
  • Use freshly grated Parmesan for a creamier, less grainy sauce.
  • Start checking internal temperature early if the thighs are small to avoid overcooking.

Variations

  • Garlic Lemon Chicken Thighs with Spinach: Add lemon and spinach for a brighter, lighter version similar to the linked garlic-lemon recipe.

Notes

Refrigerate cooled leftovers in an airtight container for 3 to 4 days. Reheat gently on low stovetop or in a low oven, adding a splash of broth or cream if the sauce is too thick. Cook chicken to an internal temperature of 165°F (74°C).

Nutrition

Calories: about 500 kcal | Protein: 33 g | Fat: 37 g | Carbohydrates: 8 g

Garlic Lemon Boneless Skinless Chicken Thighs

These garlic lemon chicken thighs cook up tender in a light pan sauce with onion, garlic, and a handful of spinach stirred in at the end. The flavor is bright but not sharp, and the sauce is thin enough to spoon over rice, pasta, or bread.

The method is simple: sear the chicken in an oven-safe skillet, build the sauce in the same pan, then finish the chicken in the oven. Use a wide skillet and avoid crowding the pan so the thighs brown instead of steaming.

Ingredients for Garlic Lemon Boneless Skinless Chicken Thighs

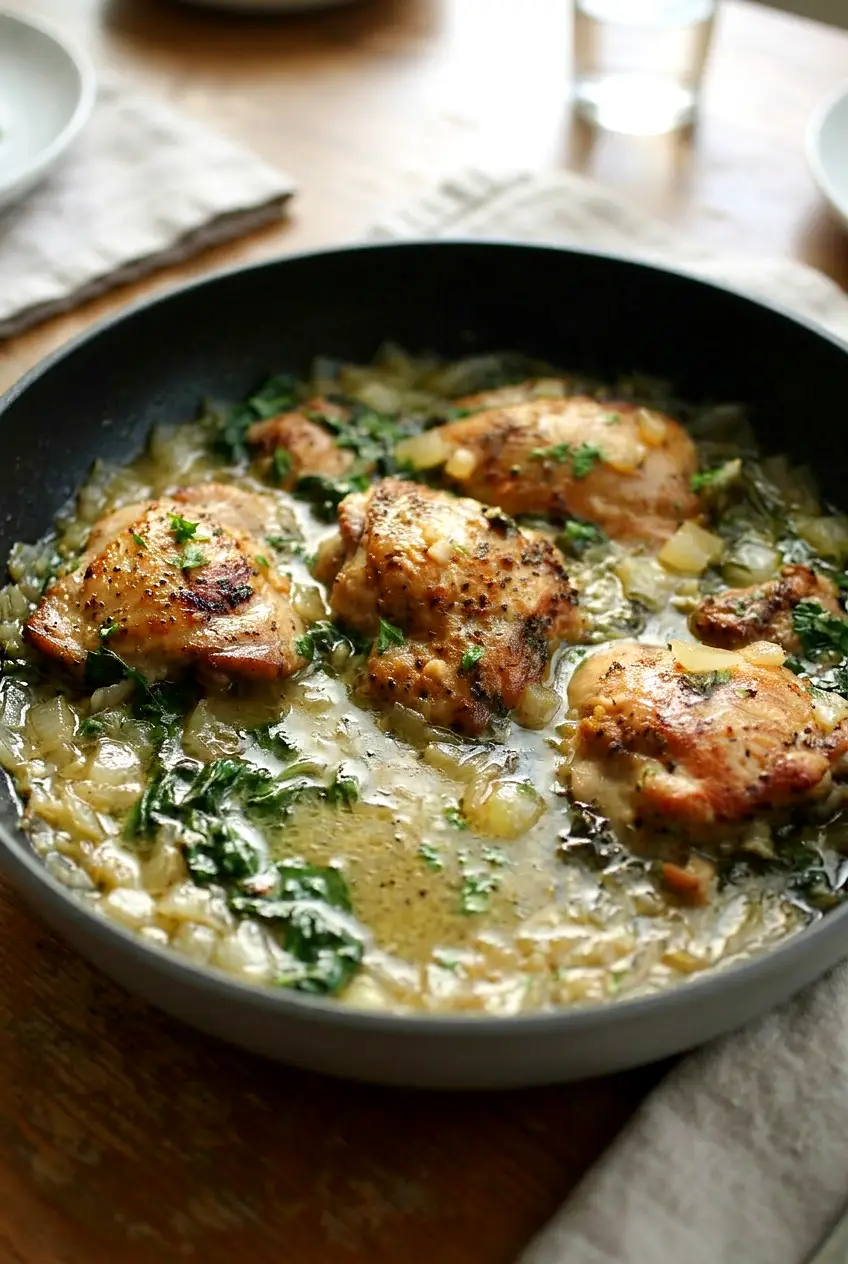
Side view of garlic lemon chicken thighs spooned with light broth sauce and spinach
  • 1 1/2 to 2 pounds boneless, skinless chicken thighs (about 675g to 900g), patted dry
  • 2 tablespoons olive oil
  • 1 medium yellow onion, sliced or chopped (about 150g)
  • 5 to 6 cloves garlic, minced
  • 3/4 to 1 cup chicken stock
  • 2 to 3 tablespoons fresh lemon juice
  • 1 teaspoon chopped fresh thyme or 1/2 teaspoon dried thyme
  • 2 to 3 cups fresh spinach (about 60g)
  • 1 to 1 1/2 teaspoons salt, to taste
  • 1/2 teaspoon black pepper, to taste

Optional: 1/4 to 1/2 cup white wine as part of the cooking liquid, 1 teaspoon lemon zest for extra lemon flavor, a few thin lemon slices for the skillet, 1 tablespoon cornstarch mixed with 1 tablespoon water for a thicker sauce, or 1/4 cup heavy cream stirred in at the end for a richer finish.

How to Make Garlic Lemon Chicken Thighs

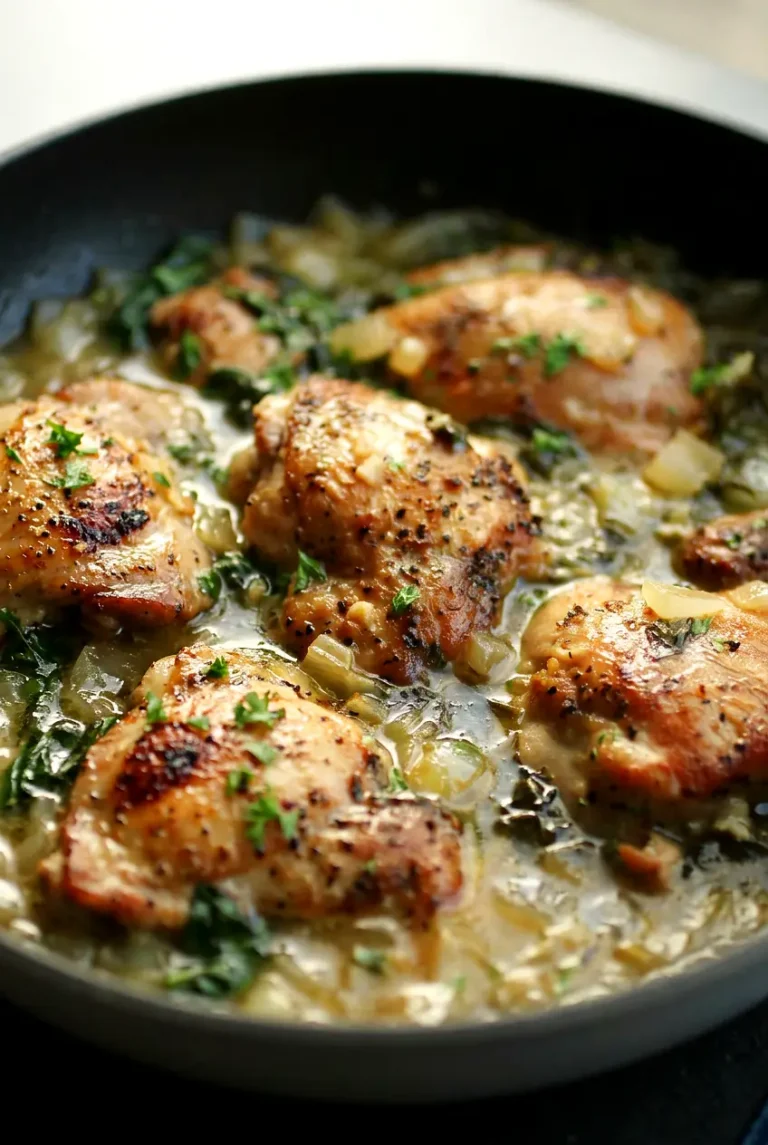
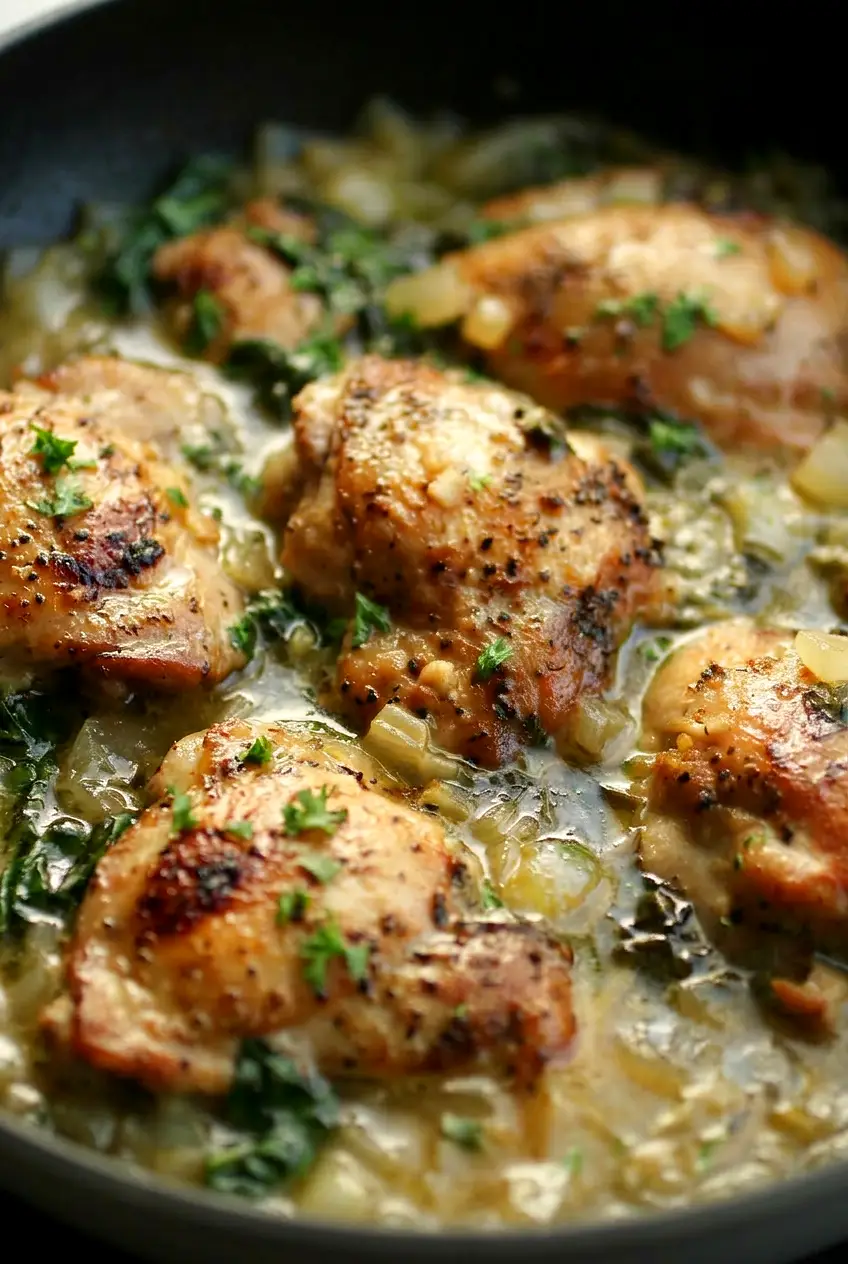
Close-up of garlic lemon chicken thighs with browned edges and wilted spinach in sauce
  1. Preheat the oven and season the chicken: Heat the oven to 400°F. Pat the chicken dry, then season both sides with the salt and pepper.
  2. Sear the chicken: Heat the olive oil in a large 12-inch oven-safe skillet over medium-high heat. Add the chicken in a single layer, working in batches if needed. Cook for 3 to 4 minutes per side, mostly undisturbed, until deep golden brown and the pieces release easily from the pan. The chicken does not need to be cooked through yet. Transfer to a plate if needed.
  3. Cook the onion: Reduce the heat to medium. Add the onion to the skillet and cook for 3 to 4 minutes, stirring occasionally, until softened. If the pan looks dry, add a small drizzle of oil.
  4. Add the garlic and thyme: Stir in the garlic and thyme and cook for 30 to 60 seconds, just until fragrant. Do not let the garlic brown.
  5. Build the sauce: Pour in the chicken stock and lemon juice, scraping up the browned bits from the bottom of the skillet. If using white wine, include it here as part of the total liquid. Let the sauce simmer gently for 2 to 4 minutes so it reduces slightly.
  6. Return the chicken and bake: Nestle the chicken back into the skillet and spoon a little sauce over the top. Add lemon slices if using. Transfer the skillet to the oven and bake for 12 to 18 minutes, depending on the size of the thighs. Start checking early. The chicken is done when it reaches 165°F in the thickest part.
  7. Finish the sauce: Remove the skillet from the oven and stir in the spinach until wilted, 1 to 3 minutes. Taste the sauce and adjust with more lemon juice, salt, or pepper if needed. For a thicker sauce, bring the skillet to a gentle simmer on the stove and stir in the cornstarch slurry. For a richer sauce, stir in the cream at the end.
  8. Rest and serve: Let the chicken rest for a few minutes, then spoon the lemon-garlic sauce over the top. Finish with lemon zest or a little extra thyme if you like.

How to Keep the Chicken Juicy

Use a skillet large enough to give the thighs some space. If the pan is crowded, the chicken will steam instead of brown. Patting the chicken dry also helps it sear better.

Oven time can vary with the size of the thighs, the skillet, and your oven, so rely on the internal temperature more than the clock. Start checking a few minutes early if the pieces are small.

How to Adjust the Sauce

The sauce here is meant to be light and spoonable. If you want it thicker, simmer it a little longer on the stove or add the cornstarch slurry while it is gently bubbling.

If you want a richer finish, stir in the heavy cream after the chicken is fully cooked. That keeps the lemon flavor clear and the sauce smooth.

What to Serve with Garlic Lemon Chicken Thighs

Serve the chicken with something that can catch the sauce, like rice, pasta, quinoa, farro, mashed potatoes, or crusty bread. Roasted broccoli, carrots, or a simple green salad also fit well here.

How to Store and Reheat Garlic Lemon Chicken Thighs

Let the chicken cool slightly, then refrigerate it with the sauce in an airtight container for up to 3 to 4 days. The spinach will soften more as it sits.

Reheat gently on the stovetop over low heat or in the microwave in short intervals until warmed through. If the sauce has thickened in the refrigerator, add a small splash of stock or water to loosen it. You can chop the onion and season the chicken earlier in the day, but the dish is best cooked fresh.

Nutrition

Nutrition is approximate and will vary based on the exact chicken size, ingredient brands, and serving size.

  • Serving size: 1/4 of recipe
  • Calories: about 380
  • Protein: 36g
  • Fat: 23g
  • Carbohydrates: 7g
  • Per 100g: about 155 calories, 15g protein, 9g fat, 3g carbohydrates

Garlic Lemon Boneless Skinless Chicken Thighs

Boneless, skinless chicken thighs seared and finished in a light lemon-garlic pan sauce with spinach.
Course: Main Course
Cuisine: American
Prep: 10 min
Cook: 31 min
Total: 45 min
Servings: 4 Calories: 380 kcal

Equipment

  • 12-inch oven-safe skillet
  • tongs
  • measuring cups
  • measuring spoons
  • instant-read thermometer
  • oven

Ingredients

Main

  • 1 1/2 to 2 lb boneless skinless chicken thighs (675g to 900g), patted dry
  • 2 tablespoons olive oil
  • 1 medium yellow onion (about 150g), sliced or chopped
  • 5 to 6 cloves garlic, minced
  • 3/4 to 1 cup chicken stock
  • 2 to 3 tablespoons fresh lemon juice
  • 1 teaspoon chopped fresh thyme or 1/2 teaspoon dried thyme
  • 2 to 3 cups fresh spinach (about 60g)
  • 1 to 1 1/2 teaspoons salt, to taste
  • 1/2 teaspoon black pepper, to taste

Optional

  • 1/4 to 1/2 cup white wine (use as part of the cooking liquid)
  • 1 teaspoon lemon zest
  • a few thin lemon slices
  • 1 tablespoon cornstarch mixed with 1 tablespoon water (for thicker sauce)
  • 1/4 cup heavy cream (stir in at the end for a richer sauce)

Instructions

  1. Preheat the oven to 400°F (204°C).
  2. Pat the chicken dry and season both sides with the salt and pepper.
  3. Heat the olive oil in a large 12-inch oven-safe skillet over medium-high heat.
  4. Add the chicken in a single layer (work in batches if needed) and sear mostly undisturbed for 3 to 4 minutes per side until deep golden; transfer to a plate.
  5. Reduce heat to medium and add the onion; cook 3 to 4 minutes, stirring occasionally, until softened. Add a small drizzle of oil if the pan looks dry.
  6. Stir in the garlic and thyme and cook 30 to 60 seconds, until fragrant — do not let the garlic brown.
  7. Pour in the chicken stock and lemon juice, scraping up any browned bits; include white wine here if using. Let the sauce simmer gently for 2 to 4 minutes to reduce slightly.
  8. Nestle the chicken back into the skillet and spoon some sauce over the top; add lemon slices if using. Transfer the skillet to the oven and bake 12 to 18 minutes, until the chicken reaches 165°F (74°C) in the thickest part.
  9. Remove the skillet from the oven and stir in the spinach until wilted, about 1 to 3 minutes. Taste and adjust with more lemon juice, salt, or pepper.
  10. If you prefer a thicker sauce, simmer gently on the stove and stir in the cornstarch slurry; for a richer sauce, stir in the cream at the end.
  11. Let the chicken rest for a few minutes, then spoon the lemon-garlic sauce over the top and finish with lemon zest or extra thyme if desired.

Tips

  • Don’t overcrowd the skillet; leave space so the thighs brown instead of steam.
  • Pat the chicken dry before searing to get a better crust.
  • Use an instant-read thermometer and start checking early; chicken is done at 165°F (74°C).
  • If the sauce thickens after chilling, loosen it with a splash of stock or water when reheating.
  • Add cream only after the chicken is cooked to keep the lemon flavor bright.

Variations

  • Richer Creamy Lemon Chicken: Stir in 1/4 cup heavy cream at the end for a smoother, richer sauce while preserving the lemon flavor.
  • Wine-Infused Chicken: Replace part of the stock with 1/4 to 1/2 cup white wine when building the sauce for extra depth.
  • Extra Lemon: Add 1 teaspoon lemon zest and a few thin lemon slices in the skillet for brighter citrus flavor.

Notes

Store cooked chicken with the sauce in an airtight container in the refrigerator for 3 to 4 days. Reheat gently on the stovetop or in short microwave intervals; add a splash of stock or water if the sauce has thickened. Ensure internal temperature reaches 165°F (74°C) for doneness.

Nutrition

Calories: 380 kcal | Protein: 36 g | Fat: 23 g | Carbohydrates: 7 g

Nigerian Chicken Stew

Nigerian chicken stew is a rich red pepper-tomato stew with tender chicken and a sauce that is meant to coat, not run. When the pepper base cooks down properly, the flavor turns deeper and more savory, and the color shifts from bright and raw-looking to a darker red.

This version keeps the process straightforward for home cooks. You simmer the chicken to make a quick stock, blend a softened pepper base, then finish the stew in one pot. The main thing to watch is the sauce texture: keep it fairly thick at the start, then let it simmer until the raw smell is gone and the sauce clings to the chicken.

Ingredients for Nigerian Chicken Stew

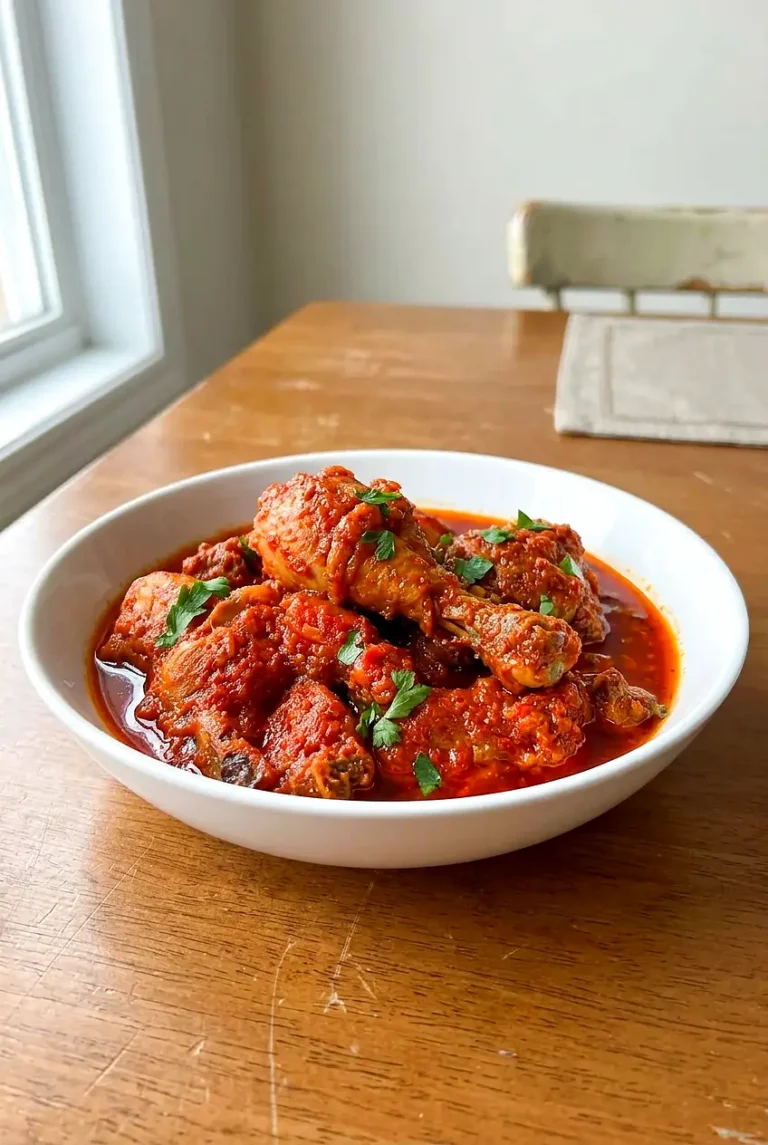
Side view of Nigerian chicken stew with the sauce clinging to the chicken in a simple bowl
  • 2 1/2 to 3 pounds chicken pieces, bone-in or boneless (about 1.35kg), cut into even portions if needed
  • 4 medium tomatoes (about 500g)
  • 2 large red bell peppers (about 300g)
  • 2 medium onions (about 300g total), divided
  • 1 to 2 Scotch bonnet peppers or other hot chiles
  • 4 garlic cloves
  • 1 tablespoon grated fresh ginger
  • 1/2 cup neutral cooking oil
  • 2 to 3 cups reserved chicken stock
  • 1 to 2 bouillon cubes or 1 teaspoon bouillon powder
  • 1 to 2 teaspoons curry powder
  • 1 teaspoon dried thyme
  • 1/2 teaspoon black pepper
  • Salt, to taste

Optional for serving or finishing: bay leaf, chopped parsley, sliced green onion, rice, fried plantains, yams, beans, bread, or spaghetti.

Bone-in chicken gives you a richer stock, while boneless chicken is easier to serve. Start with 1 Scotch bonnet for a milder stew. If you blend the vegetables while they are still hot, vent the blender carefully and work in batches.

How to Make Nigerian Chicken Stew

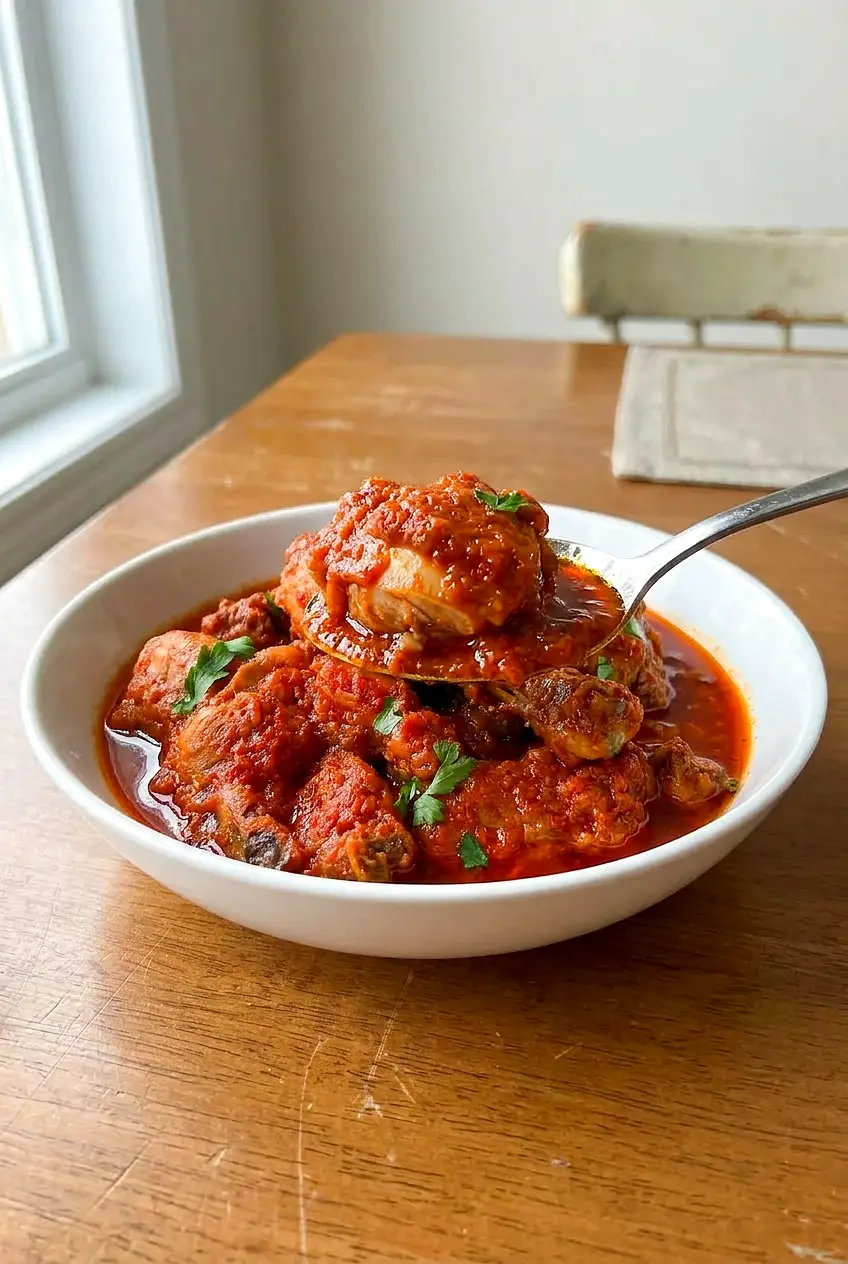
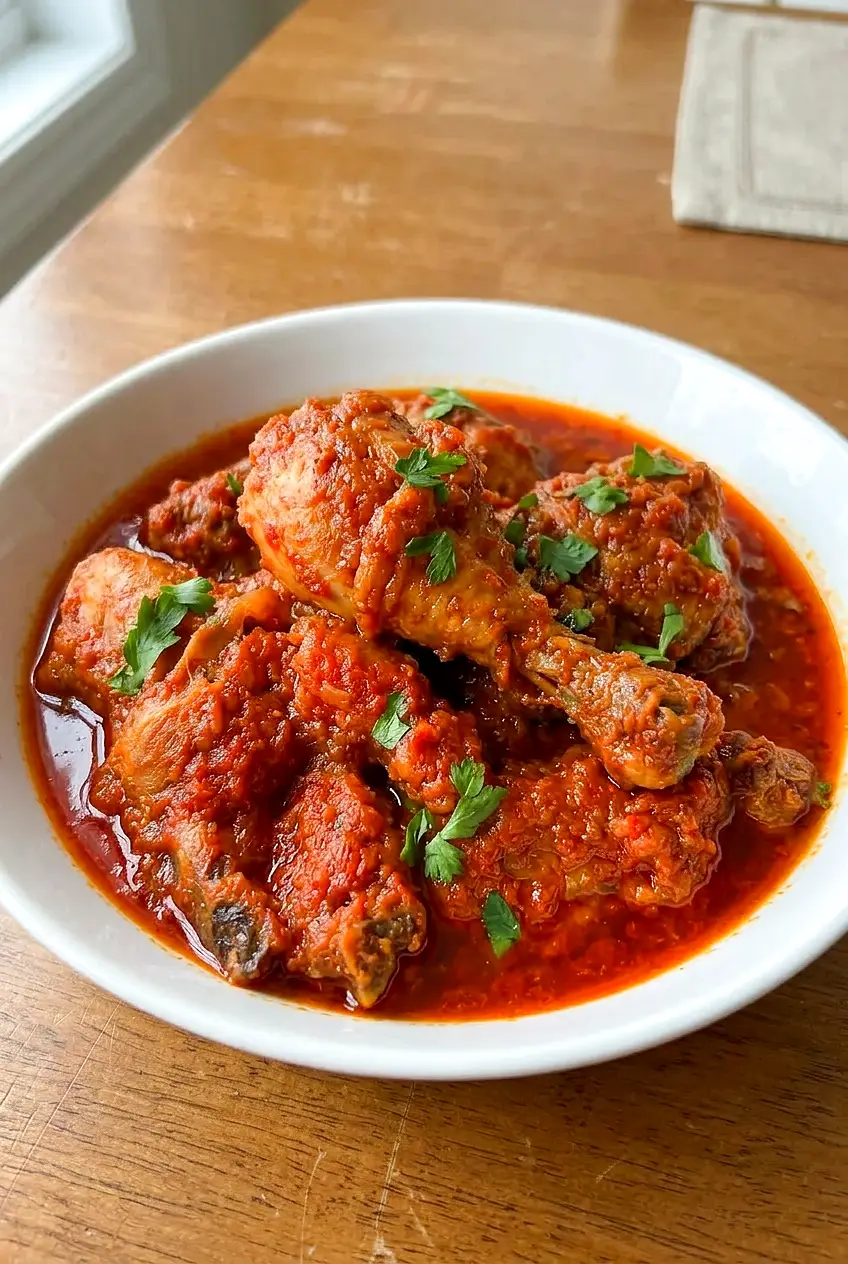
Close-up of Nigerian chicken stew showing tender chicken pieces in a rich red pepper sauce
  1. Simmer the chicken: Add the chicken to a large Dutch oven or heavy pot with half of 1 onion, sliced or chopped, a little salt, and enough water to cover well. Bring to a gentle boil over medium to medium-high heat, then reduce to medium and simmer for 20 to 30 minutes, or until the chicken is cooked through and the thickest piece reaches 165°F. Transfer the chicken to a plate and reserve 2 to 3 cups of the stock.
  2. Soften the vegetables: While the chicken cooks, combine the tomatoes, bell peppers, remaining onion, Scotch bonnet, garlic, and ginger. Roast on a sheet pan at 400°F, air fry at 400°F, or soften them on the stovetop over medium heat for 15 to 25 minutes, until softened and lightly blistered in spots. The vegetables should be cooked and tender, not dried out.
  3. Blend the pepper base: Blend the softened vegetables into a smooth, thick red sauce. Add only a small splash of reserved stock if needed to help it blend. The puree should be pourable, but not thin.
  4. Brown the chicken if you want: For extra flavor and texture, heat a thin film of oil in the pot or in a skillet over medium-high heat and brown the cooked chicken in batches for 8 to 15 minutes total. Turn the pieces so they pick up some golden spots instead of steaming. This step is optional.
  5. Start the stew base: In the same pot, heat the remaining oil over medium heat. If you have a little onion left, add it and cook for a few minutes until softened. Carefully pour in the blended pepper sauce, then add the curry powder, thyme, bouillon, black pepper, and 1 to 1 1/2 cups of reserved stock. Stir well and bring to a steady simmer over medium to medium-low heat.
  6. Cook down the sauce: Simmer uncovered or partially covered for 20 to 30 minutes, stirring often enough to prevent scorching. Add more stock only as needed if the sauce gets too thick. The stew is ready for the chicken when the sauce looks deeper red, smells cooked and savory instead of raw, and has thickened enough to lightly coat a spoon. You may also see a little oil collect around the edges.
  7. Finish the stew: Return the chicken and any juices to the pot. Simmer gently over low to medium-low heat for 10 to 15 minutes, until the chicken is hot, the sauce coats the pieces well, and the thickest piece still reads 165°F. Taste and adjust with salt, more bouillon, or a small splash of stock if needed.
  8. Rest and serve: Let the stew sit off the heat for 5 minutes, then serve over rice or alongside plantains, yams, beans, bread, or spaghetti.

How to Keep the Sauce Thick and Rich

A watery stew usually comes from blending the vegetables too thin or adding too much stock too early. Start with a thick pepper puree and loosen it gradually as it cooks.

Use the sauce itself as the cue more than the clock. Keep simmering until the raw pepper smell is gone and the stew clings to the chicken instead of pooling like broth. If it still looks loose near the end, simmer it uncovered a little longer.

How to Keep the Chicken Juicy

Do not overcook the chicken during the first simmer. Once it reaches 165°F, take it out and let the stew finish separately. After that, keep the final simmer gentle so the chicken warms through without drying out.

Bone-in pieces give you a little more room for error and make a better stock. Boneless thighs or breasts work too, but start checking early.

Easy Variations

Boneless Chicken Stew

Use boneless chicken thighs or breasts for easier serving. Follow the same method, but watch the chicken closely since boneless pieces can dry out faster.

Crispier Chicken Finish

After simmering the chicken, brown it in a skillet, shallow-fry it, or air-fry it before adding it back to the stew. Keep the final simmer short so the outside keeps some texture.

What to Serve With Nigerian Chicken Stew

Rice is the easiest pairing because it soaks up the sauce well. Steamed white rice, basmati rice, or brown rice all work. Fried plantains, boiled yams, beans, bread, or spaghetti are also good with this stew.

For another spicy chicken dinner, try Spicy Dragon Chicken with Cashews or Moroccan Harissa Chicken.

How to Store and Reheat Nigerian Chicken Stew

Let the stew cool before transferring it to an airtight container. Refrigerate for up to 4 days. If you are storing it with rice, keep the rice separate so it does not soak up too much sauce.

For longer storage, freeze the stew in portions. Reheat gently on the stovetop over low to medium-low heat or in the microwave until hot. If the sauce has thickened too much, stir in a small splash of stock or water to loosen it. The flavor settles in well overnight, so this is a good make-ahead dish.

If you want another chicken dinner idea, try Easy Turkish Yogurt Chicken Kabobs.

Nutrition

Nutrition is approximate and will vary based on the chicken cut, how much oil stays in the finished stew, ingredient brands, and serving size.

  • Serving size: about 1/6 of the stew
  • Calories: about 510
  • Protein: 31g
  • Fat: 38g
  • Carbohydrates: 12g
  • Per 100g: about 145 calories, 9g protein, 11g fat, 3g carbohydrates

Nigerian Chicken Stew

A rich red pepper-tomato stew with tender chicken and a thick, savory sauce that clings to the meat.
Course: Main Course
Cuisine: Nigerian
Prep: 20 min
Cook: 60 min
Total: 80 min
Servings: 6 Calories: 510 kcal

Equipment

  • Dutch oven or heavy pot
  • blender
  • sheet pan or air fryer
  • skillet (optional for browning)

Ingredients

For the Chicken

  • 2 1/2 to 3 pounds chicken pieces (about 1.35 kg), bone-in or boneless, cut into even portions
  • salt, to taste
  • water, enough to cover the chicken

For the Pepper-Tomato Base

  • 4 medium tomatoes (about 500 g)
  • 2 large red bell peppers (about 300 g)
  • 2 medium onions, divided (use half for simmering chicken and the rest for the sauce)
  • 1 to 2 Scotch bonnet peppers or other hot chiles
  • 4 garlic cloves
  • 1 tablespoon grated fresh ginger

For the Stew & Seasoning

  • 1/2 cup neutral cooking oil
  • 2 to 3 cups reserved chicken stock
  • 1 to 2 bouillon cubes or 1 teaspoon bouillon powder
  • 1 to 2 teaspoons curry powder
  • 1 teaspoon dried thyme
  • 1/2 teaspoon black pepper
  • salt, to taste

Optional for Serving

  • bay leaf
  • chopped parsley or sliced green onion
  • rice, fried plantains, yams, beans, bread, or spaghetti

Instructions

  1. Place the chicken in a large Dutch oven or heavy pot with half of 1 onion (sliced or chopped), a little salt, and enough water to cover; bring to a gentle boil over medium to medium-high heat.
  2. Reduce heat to medium and simmer the chicken 20 to 30 minutes, or until cooked through and the thickest piece registers 165°F (74°C); transfer the chicken to a plate and reserve 2 to 3 cups of the stock.
  3. While the chicken cooks, combine the tomatoes, red bell peppers, the remaining onion, Scotch bonnet, garlic, and ginger.
  4. Roast the vegetables on a sheet pan at 400°F (204°C), air fry at 400°F (204°C), or soften them on the stovetop over medium heat for 15 to 25 minutes until softened and lightly blistered.
  5. Blend the softened vegetables into a smooth, thick red sauce, adding only a small splash of reserved stock if needed so the puree is pourable but not thin.
  6. Optional: heat a thin film of oil in a skillet or the pot over medium-high and brown the cooked chicken in batches for 8 to 15 minutes total, turning so pieces pick up golden spots; set aside.
  7. In the same pot, heat the remaining oil over medium; if you have some onion left, cook it a few minutes until softened.
  8. Carefully pour in the blended pepper sauce, then add the curry powder, thyme, bouillon, black pepper, and 1 to 1 1/2 cups of the reserved stock; stir and bring to a steady simmer over medium to medium-low heat.
  9. Simmer the sauce uncovered or partially covered for 20 to 30 minutes, stirring often to prevent scorching, and add more stock only if the sauce becomes too thick; look for a deeper red color, a cooked pepper aroma, and a sauce that coats a spoon.
  10. Return the chicken and any juices to the pot and simmer gently over low to medium-low heat for 10 to 15 minutes, until the chicken is hot, the sauce coats the pieces, and the thickest piece reads 165°F (74°C); taste and adjust seasoning with salt or bouillon or a splash of stock.
  11. Remove from heat and let the stew rest 5 minutes, then serve over rice or with plantains, yams, beans, bread, or spaghetti.

Tips

  • Start with a thick pepper puree and loosen gradually to avoid a watery stew.
  • Vent the blender carefully and blend in batches when the vegetables are still hot.
  • Remove the chicken from the initial simmer as soon as it reaches 165°F (74°C) to prevent overcooking.
  • Use bone-in chicken for richer stock or boneless for easier serving.
  • If the sauce thickens too much after chilling, loosen with a small splash of stock or water when reheating.

Variations

  • Boneless Chicken Stew: Use boneless chicken thighs or breasts for easier serving; watch closely to avoid drying them out.
  • Crispier Chicken Finish: After simmering, brown the chicken in a skillet, shallow-fry, or air-fry before adding back to the stew and keep the final simmer short to preserve texture.

Notes

Refrigerate cooled stew in an airtight container up to 4 days or freeze in portions for longer storage. Reheat gently on low to medium-low and add a splash of stock if the sauce is too thick; store rice separately.

Nutrition

Calories: 510 kcal | Protein: 31 g | Fat: 38 g | Carbohydrates: 12 g

Easy Turkish Yogurt Chicken

Easy Turkish yogurt chicken is tender, lightly charred, and full of lemon, garlic, and warm spices. The yogurt marinade keeps the chicken juicy and gives the seasonings a thick coating that clings well on the grill.

The ingredient list stays simple, and the chicken cooks quickly over medium-high heat. Serve it with rice, tuck it into pita, or pack it for lunches. Since the marinade stays pale, use char, firmness, and an internal temperature of 165°F as your main doneness cues.

Ingredients for Easy Turkish Yogurt Chicken

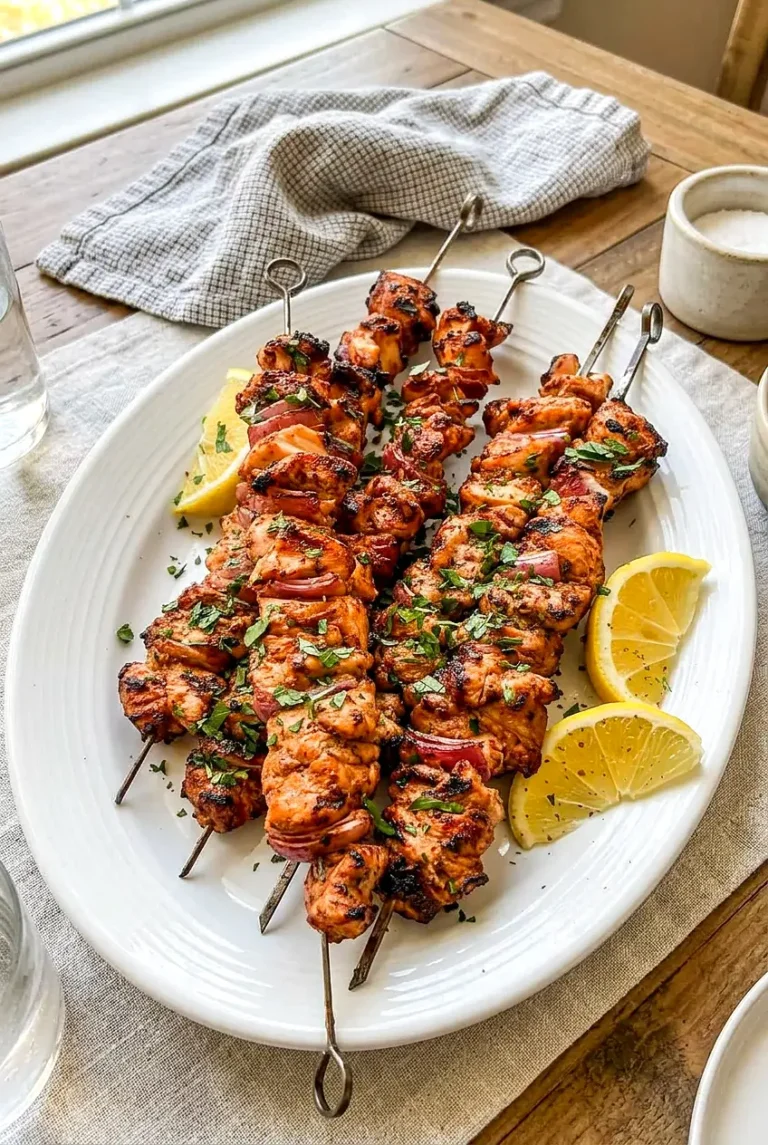
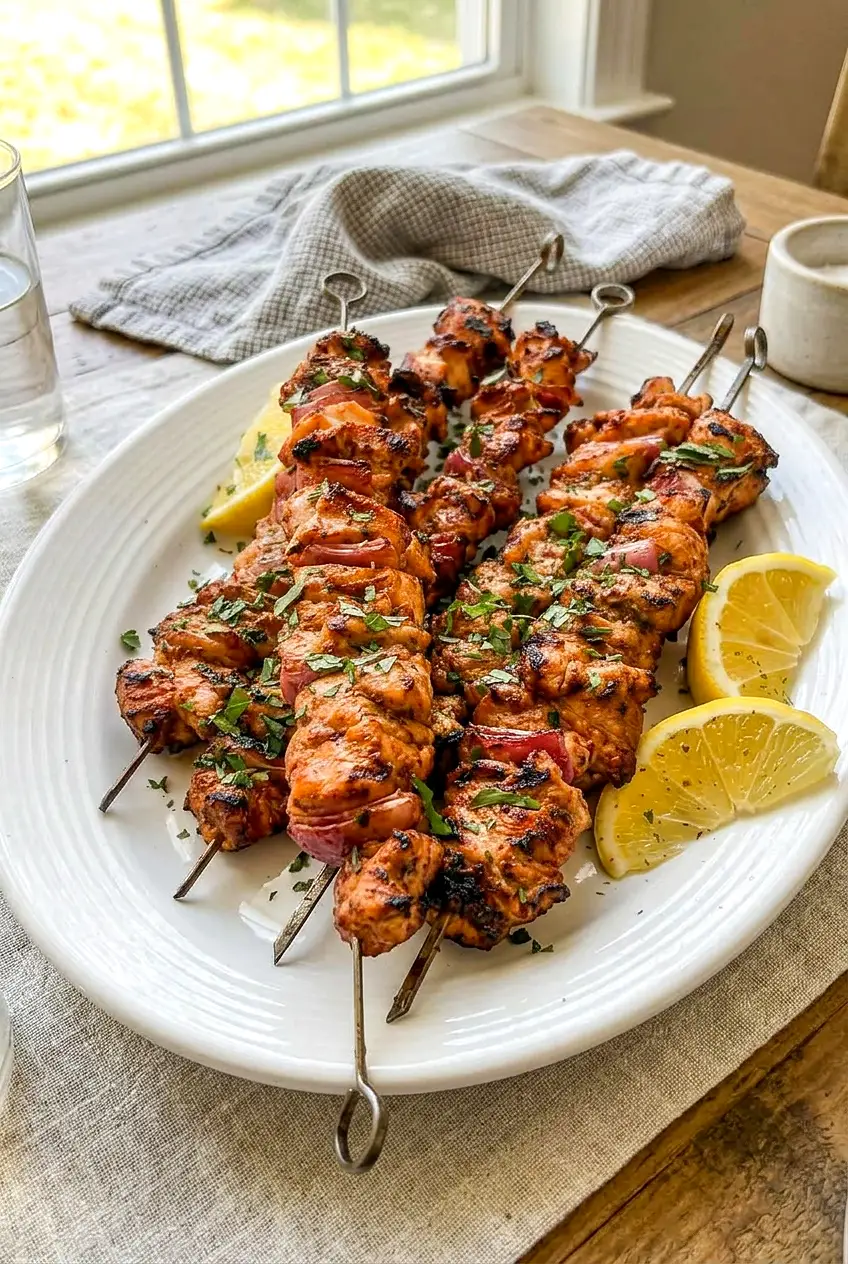
Side view of Turkish yogurt chicken kabobs on a white platter with sliced lemons beside them
  • 2 pounds boneless skinless chicken thighs or breasts (about 900g), cut into even bite-size pieces
  • 1 cup plain yogurt or Greek yogurt (about 245g)
  • 2 tablespoons olive oil
  • 2 tablespoons lemon juice
  • 1 teaspoon lemon zest
  • 3 cloves garlic, minced
  • 1/4 cup finely grated or minced red onion (about 40g)
  • 2 teaspoons paprika
  • 1 teaspoon ground cumin
  • 1 teaspoon sumac
  • 1 teaspoon dried mint or dried oregano
  • 1/2 teaspoon black pepper
  • 1 1/2 teaspoons salt
  • 8 to 10 metal skewers or soaked wooden skewers

Optional: Add a small pinch of cinnamon, about 1/8 teaspoon, for a slightly warmer spice profile.

Optional garnish: Chopped parsley, extra sumac, or 1 to 2 teaspoons sesame seeds.

How to Make Easy Turkish Yogurt Chicken

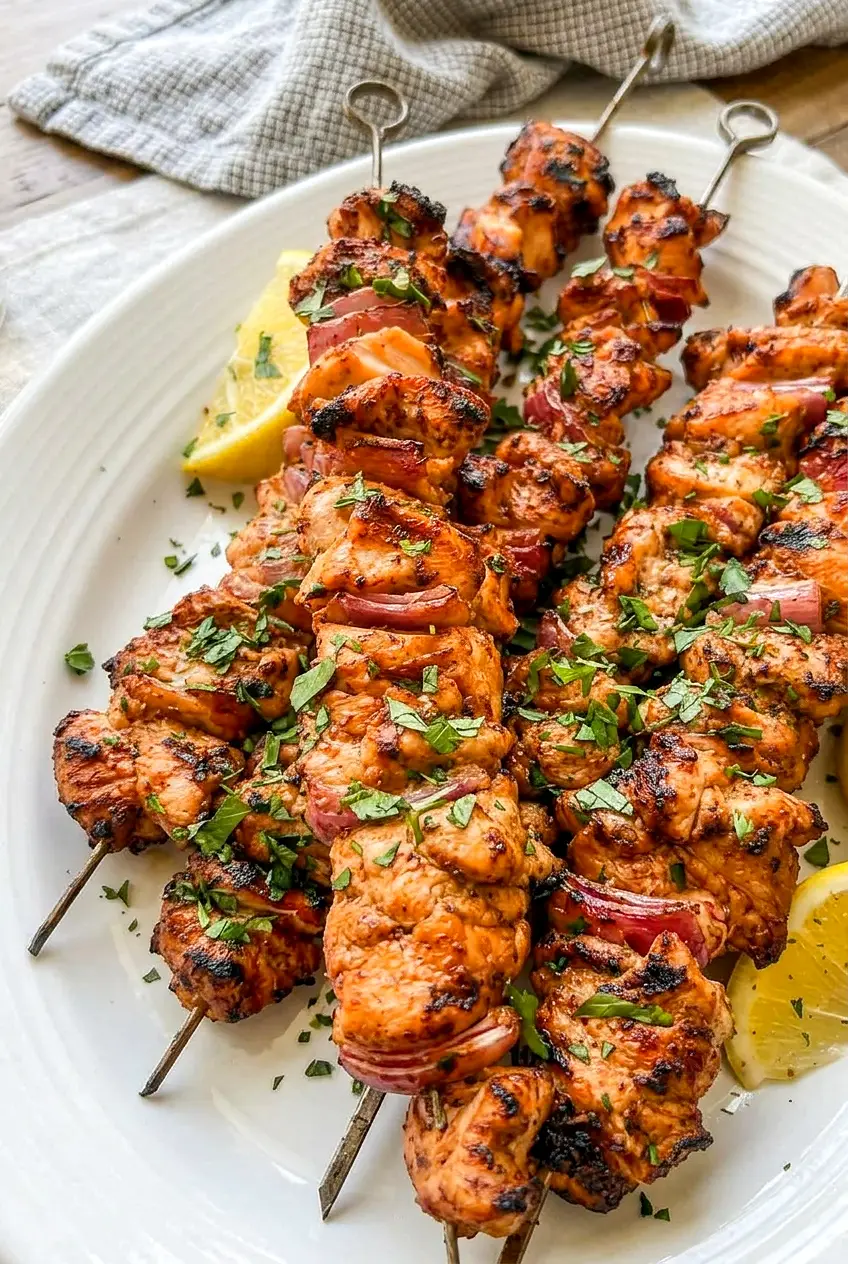
Close-up of grilled Turkish chicken kabobs showing browned edges and juicy pieces on skewers
  1. Mix the marinade: In a large bowl, whisk together the yogurt, olive oil, lemon juice, lemon zest, garlic, red onion, paprika, cumin, sumac, dried mint or oregano, black pepper, and salt until smooth. The marinade should be thick and creamy, not thin or runny.
  2. Marinate the chicken: Add the chicken and toss until evenly coated. Cover and let it marinate for at least 25 minutes, or refrigerate for up to 24 hours. Chicken thighs are more forgiving on the grill, while chicken breast should be checked a little earlier for doneness.
  3. Preheat the grill: Heat an outdoor grill or grill pan to medium-high heat. Clean the grates well, then lightly oil them to help prevent sticking.
  4. Thread the skewers: Thread the chicken onto 8 to 10 skewers, leaving a little space between pieces so the heat can reach all sides. Do not pack the pieces tightly.
  5. Grill the chicken: Cook the skewers for 10 to 14 minutes total, turning every few minutes so the chicken browns on several sides. Let each side sit long enough to pick up some color before turning. If the outside is browning too fast, move the skewers to a slightly cooler part of the grill.
  6. Check for doneness: The chicken should be opaque all the way through, lightly charred in spots, and firm but still juicy. The thickest piece should reach 165°F on an instant-read thermometer.
  7. Rest and serve: Transfer the skewers to a plate and let them rest for 3 to 5 minutes. Garnish with parsley, extra sumac, or sesame seeds if using, and serve warm.

Tips for Juicy Grilled Yogurt Chicken

Cut the chicken into even pieces so it cooks at the same rate. Small gaps between the pieces help the chicken brown instead of steam.

Yogurt marinades can stick more than oil-based marinades, so clean and oil the grill well before cooking. Since the coating stays fairly pale, do not rely on color alone. Look for browned edges and check the thickest piece with a thermometer.

What to Serve with Turkish Yogurt Chicken

Serve the skewers over saffron rice with a cucumber-tomato salad, or tuck the chicken into warm pita with lettuce and a simple yogurt sauce. Roasted vegetables also work well, and a little extra parsley or sumac at the table brightens the plate.

If you like bold chicken dinners, try Spicy Dragon Chicken with Cashews next.

For another spiced chicken dinner, see Moroccan Harissa Chicken with Saffron Rice.

If you want another easy chicken recipe, try Honey Gochujang Chicken with Sesame Seeds.

How to Store and Reheat Easy Turkish Yogurt Chicken

You can marinate the chicken up to 24 hours ahead, which makes this a good prep-ahead dinner. Once cooked, let the chicken cool, then remove it from the skewers and store it in an airtight container in the refrigerator for up to 3 to 4 days.

Reheat gently in a skillet over medium-low heat or in the microwave just until warmed through. Avoid overheating, especially if you used chicken breast, since it can dry out quickly.

Nutrition

Nutrition is approximate and will vary based on ingredient brands, exact amounts, and serving size.

  • Serving size: 1/4 of recipe
  • Calories: about 470
  • Protein: 52g
  • Fat: 23g
  • Carbohydrates: 10g
  • Per 100g: about 160 calories, 18g protein, 8g fat, 4g carbohydrates

Easy Turkish Yogurt Chicken

Yogurt-marinated chicken skewers flavored with lemon, garlic, sumac, and warm spices, grilled until lightly charred and juicy.
Course: Main Course
Cuisine: Turkish
Prep: 15 min
Cook: 14 min
Total: 59 min
Servings: 4 Calories: about 470 kcal

Equipment

  • grill or grill pan
  • 8 to 10 metal or soaked wooden skewers
  • large bowl
  • whisk
  • instant-read thermometer
  • tongs

Ingredients

Chicken

  • 2 pounds boneless skinless chicken thighs or breasts (about 900g), cut into even bite-size pieces

Marinade

  • 1 cup plain yogurt or Greek yogurt (about 245g)
  • 2 tablespoons olive oil
  • 2 tablespoons lemon juice
  • 1 teaspoon lemon zest
  • 3 cloves garlic, minced
  • 1/4 cup finely grated or minced red onion (about 40g)
  • 2 teaspoons paprika
  • 1 teaspoon ground cumin
  • 1 teaspoon sumac
  • 1 teaspoon dried mint or dried oregano
  • 1/2 teaspoon black pepper
  • 1 1/2 teaspoons salt
  • Optional: small pinch (about 1/8 teaspoon) ground cinnamon

To Thread & Serve

  • 8 to 10 metal skewers or soaked wooden skewers
  • Optional garnish: chopped parsley, extra sumac, or 1 to 2 teaspoons sesame seeds

Instructions

  1. Whisk the yogurt, olive oil, lemon juice, lemon zest, garlic, red onion, paprika, cumin, sumac, dried mint or oregano, black pepper, and salt in a large bowl until smooth and thick.
  2. Add the chicken pieces to the marinade and toss to coat evenly.
  3. Cover and refrigerate the chicken for at least 25 minutes or up to 24 hours.
  4. Preheat an outdoor grill or grill pan to medium-high heat; clean and lightly oil the grates.
  5. Thread the marinated chicken onto 8 to 10 skewers, leaving small gaps between pieces so heat reaches all sides.
  6. Grill the skewers 10 to 14 minutes total, turning every few minutes so the chicken browns on several sides; move to a cooler part of the grill if the outside is browning too fast.
  7. Check doneness with an instant-read thermometer—the thickest piece should reach 165°F (74°C); the chicken should be opaque and lightly charred in spots.
  8. Transfer skewers to a plate and let rest for 3 to 5 minutes. Garnish with parsley, extra sumac, or sesame seeds if desired and serve warm.

Tips

  • Cut chicken into even pieces so they cook at the same rate.
  • Leave small gaps between pieces on the skewers to encourage browning instead of steaming.
  • Clean and oil the grill well to prevent the yogurt coating from sticking.
  • Don’t rely on color alone; check the thickest piece with a thermometer for doneness.
  • If the exterior browns too quickly, move skewers to a cooler part of the grill.

Variations

  • Warm Spiced Turkish Chicken: Add a small pinch (about 1/8 teaspoon) of ground cinnamon to the marinade for a warmer spice profile.
  • Herby Oregano Chicken: Use dried oregano instead of dried mint for a different herb note in the marinade.

Notes

Marinate up to 24 hours. Store cooked chicken (removed from skewers) in an airtight container in the fridge for 3–4 days. Reheat gently to avoid drying; ensure the internal temperature reaches 165°F (74°C) when reheating if needed.

Nutrition

Calories: about 470 kcal | Protein: 52 g | Fat: 23 g | Carbohydrates: 10 g

Spicy Dragon Chicken

Spicy Dragon Chicken is all about texture: crisp chicken strips, tender-crisp peppers and onions, crunchy cashews, and a glossy sauce with sweet heat and a little tang. It works well as a quick dinner over rice or noodles, and it also makes a good appetizer while the coating is still at its crispiest.

This version keeps the process simple with a skillet, a basic flour-and-cornstarch coating, and a fast pantry sauce. The key is to fry the chicken in batches and wait until the end to toss it with the sauce.

Ingredients for Spicy Dragon Chicken

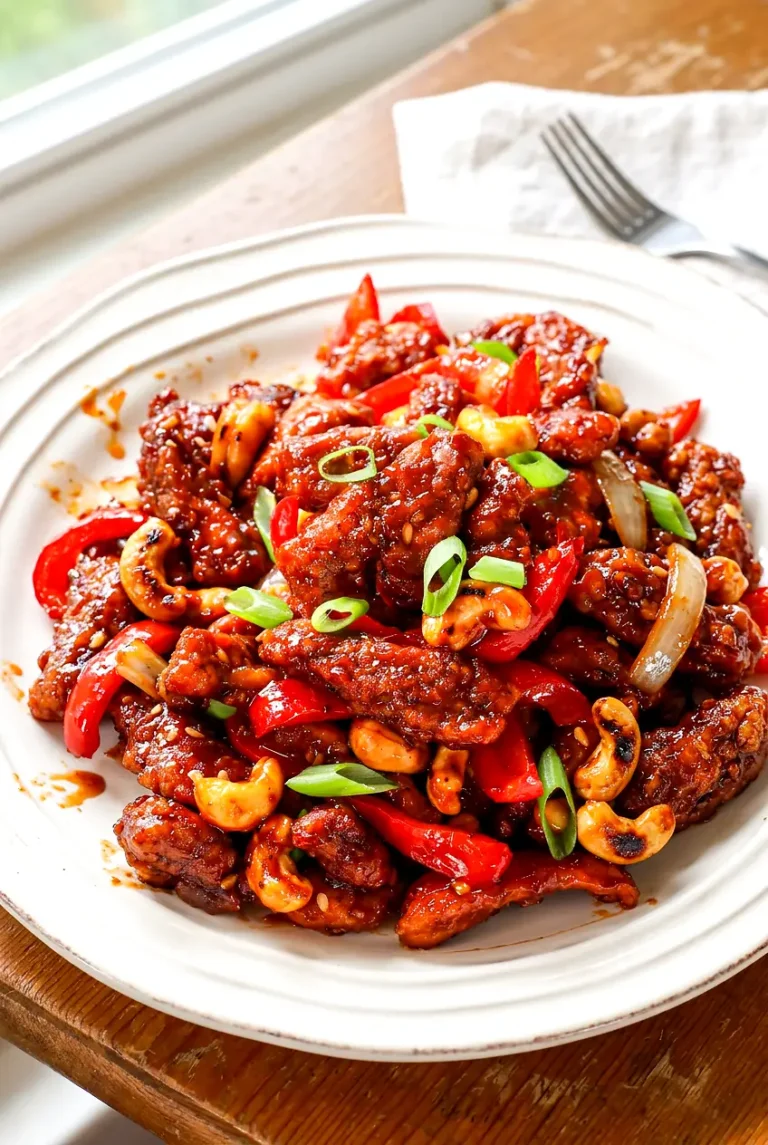
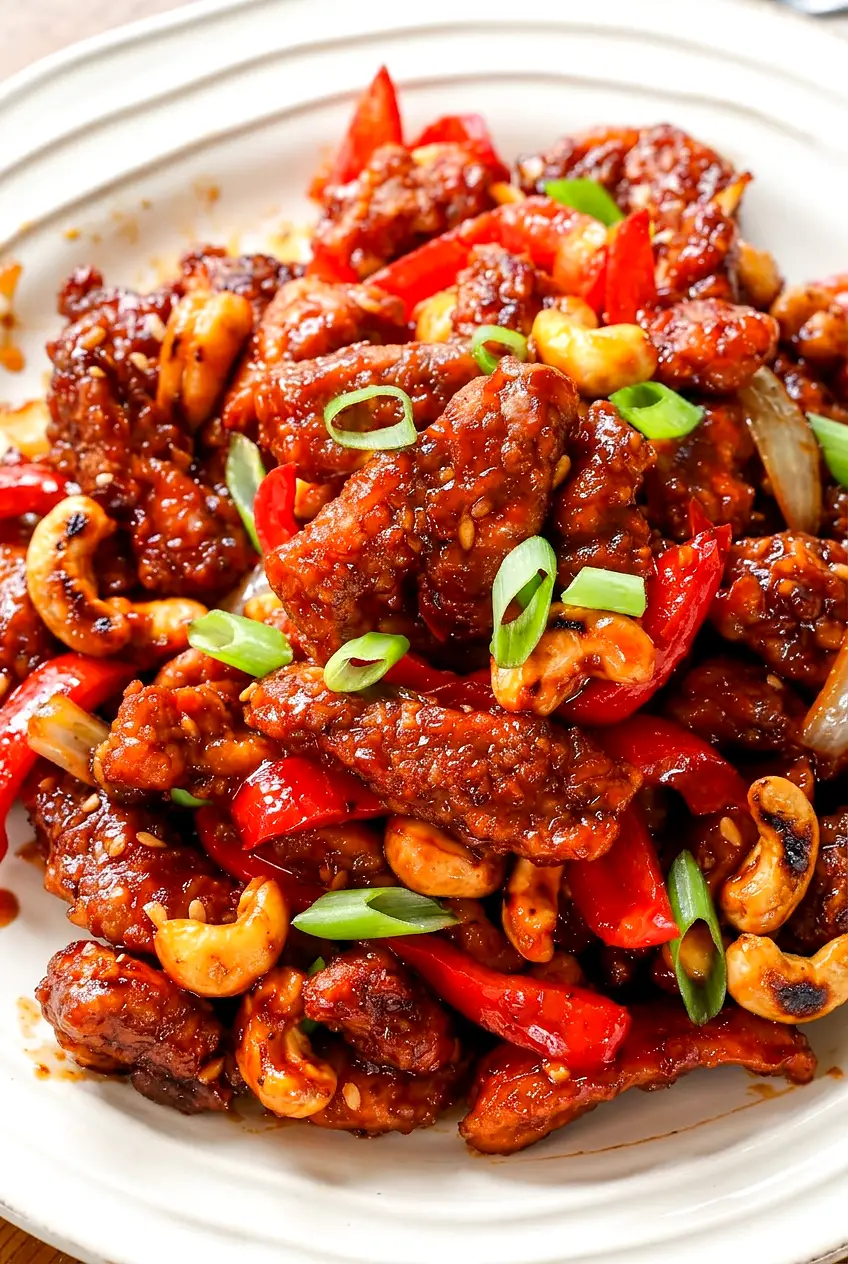
Side view of Spicy Dragon Chicken with crisp chicken pieces, tender peppers, and toasted cashews in glossy sauce
  • 1 1/2 pounds boneless skinless chicken thighs, cut into strips (about 675g)
  • 1 teaspoon salt
  • 1/2 teaspoon black pepper
  • 1/2 cup all-purpose flour (60g)
  • 1/2 cup cornstarch (60g)
  • 1 large egg, beaten
  • 1/2 to 3/4 cup neutral oil, as needed for shallow frying
  • 1/2 cup raw unsalted cashews (65g)
  • 1 large bell pepper, sliced (about 160g)
  • 1 medium yellow or red onion, sliced (about 150g)
  • 4 garlic cloves, minced
  • 1 tablespoon minced fresh ginger
  • 1 to 2 tablespoons Sambal Oelek
  • 3 tablespoons soy sauce
  • 2 tablespoons oyster sauce
  • 2 tablespoons ketchup
  • 1 to 2 tablespoons honey
  • 1 tablespoon Chinkiang black vinegar

Optional for serving: sliced green onions, sesame seeds, or a pinch of red pepper flakes.

Chicken thighs stay juicier during frying, but chicken breast can work if you cut it into even strips and watch the cooking closely.

How to Make Spicy Dragon Chicken in a Skillet

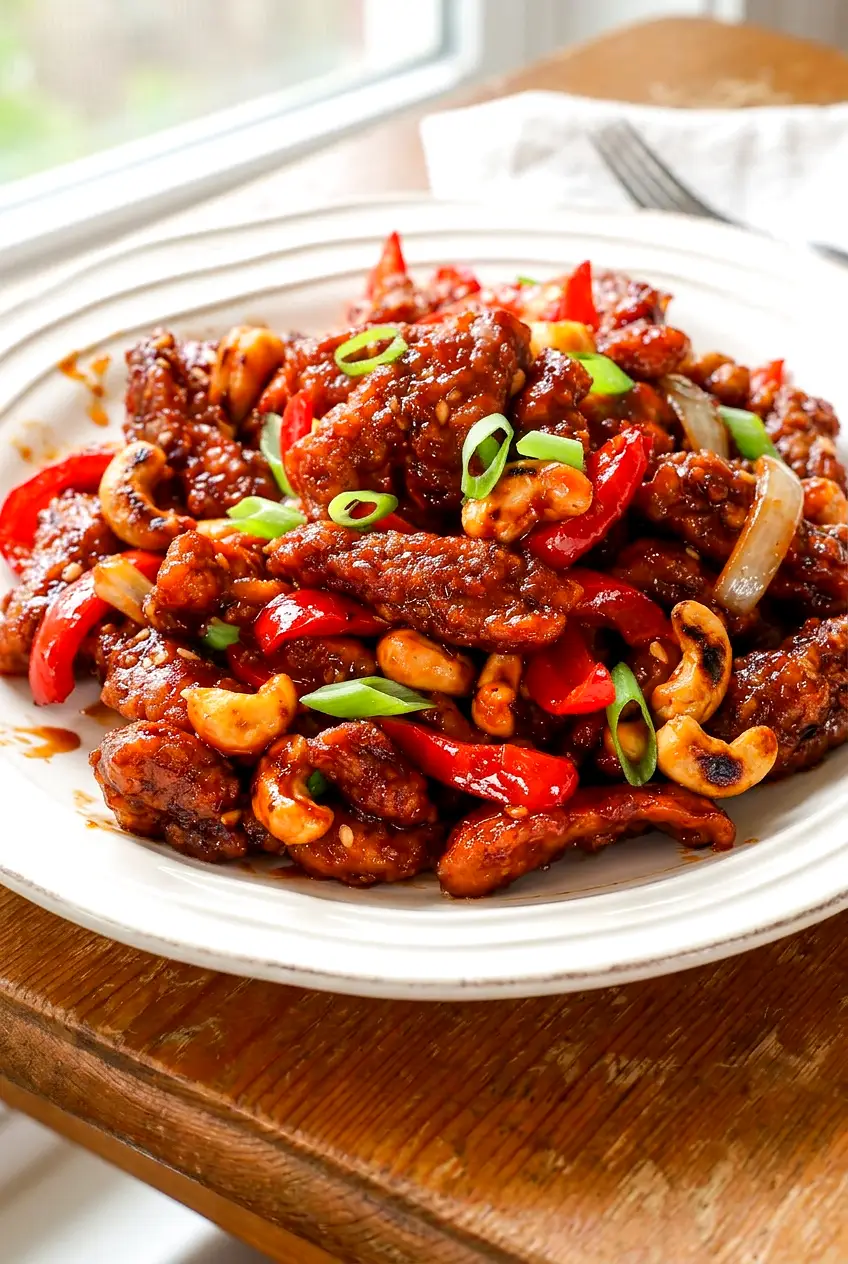
Close-up of Spicy Dragon Chicken showing crispy chicken strips, peppers, onions, and cashews coated in sauce
  1. Season the chicken: Pat the chicken dry if needed and cut it into even strips. Season with the salt and black pepper. Put the flour in one bowl, the cornstarch in a second bowl, and the beaten egg in a third bowl.
  2. Coat the chicken: Dredge each piece lightly in flour, dip it in egg, then coat it in cornstarch. Let any extra egg drip off before the final coating so the crust stays light and crisp. Set the coated chicken on a plate.
  3. Fry in batches: Heat a large 12-inch skillet or sauté pan over medium-high to high heat. Add enough oil for shallow frying and heat until shimmering. Fry the chicken in a single layer, working in batches so the pan does not get crowded. Flip when the first side is well browned. Cook until the pieces are deeply golden and the thickest piece reaches 165°F. Transfer to a wire rack or a paper towel-lined plate.
  4. Toast the cashews: Pour off excess oil if needed. In the same skillet over medium-high heat, toast the cashews briefly, either dry or with a very thin film of oil, until lightly browned and fragrant. Stir often and remove them promptly so they do not burn.
  5. Cook the vegetables: Add a small amount of oil if the skillet looks dry. Add the bell pepper and onion and stir-fry over medium-high heat for 2 to 3 minutes, until bright and crisp-tender. Add the garlic and ginger and cook for about 30 seconds, just until fragrant.
  6. Make the sauce: In a small bowl, stir together the Sambal Oelek, soy sauce, oyster sauce, ketchup, honey, and black vinegar. Pour the sauce into the skillet and cook over medium heat for 1 to 2 minutes, stirring, until bubbling and glossy. It should lightly coat a spoon. If it gets too thick, stir in a small splash of water.
  7. Toss and serve: Return the chicken and toasted cashews to the skillet and toss just until coated. Serve right away for the best texture.

How to Keep the Chicken Crispy

For the crispest coating, let excess egg drip off before the cornstarch, fry in small batches, and do not crowd the skillet. Too much chicken in the pan traps steam and softens the coating before it browns.

If you have a wire rack, use it while you finish the vegetables and sauce. Once the chicken is tossed with the sauce, serve it right away.

Heat and Sauce Balance

Sambal Oelek brings most of the heat here, while honey and ketchup round it out and give the sauce body. Soy sauce and oyster sauce add the savory base, and black vinegar keeps the sauce from tasting too sweet.

For a milder version, use 1 tablespoon Sambal Oelek and 2 tablespoons honey. For more heat, use 2 tablespoons Sambal Oelek and finish with a pinch of red pepper flakes if you like.

Why Did the Coating Fall Off?

The usual causes are too much egg, oil that was not hot enough, or crowding the skillet. Let the excess egg drip off, wait until the oil is shimmering, and fry in batches so the coating can set properly.

If the outside is browning too fast before the chicken cooks through, the strips may be too thick or the heat may be slightly too high. Smaller, even pieces cook more evenly.

Serving Ideas

Serve Spicy Dragon Chicken over jasmine rice or with noodles for dinner. It also works well on a platter as an appetizer, especially with egg rolls or a simple Asian-style salad.

If you like bold chicken dinners, try Moroccan Harissa Chicken with Saffron Rice next.

For another sweet-spicy chicken idea, make Honey Gochujang Chicken with Sesame Seeds.

Variations

Milder Dragon Chicken

Use 1 tablespoon Sambal Oelek and 2 tablespoons honey for a gentler sweet-heat balance.

Peanut Dragon Chicken

Use peanuts instead of cashews if needed. They toast quickly, so watch them closely.

How to Store and Reheat Spicy Dragon Chicken

Let leftovers cool, then refrigerate in an airtight container for up to 3 days. The coating will soften once stored, especially after the chicken has been tossed in the sauce.

If possible, store the fried chicken separately from the sauce for better texture. Reheat gently in a skillet over medium heat or in a 350°F oven until hot. The microwave works if needed, but it will soften the coating more.

You can also bread the chicken a little ahead of time and refrigerate it briefly before frying, but the finished dish is best assembled just before serving.

If you want a different chicken dinner after this one, try Greek Chicken Gyros with Tzatziki.

Nutrition

Nutrition is approximate and will vary based on ingredient brands, exact oil absorption, and serving size.

  • Serving size: 1/4 of recipe
  • Calories: about 740
  • Protein: 42g
  • Fat: 40g
  • Carbohydrates: 49g
  • Per 100g: about 205 calories, 12g protein, 11g fat, 14g carbohydrates

Spicy Dragon Chicken

Crispy coated chicken strips stir-fried with peppers, onions, toasted cashews, and a sweet-spicy glossy sauce.
Course: Main Course
Cuisine: Asian
Prep: 20 min
Cook: 25 min
Total: 45 min
Servings: 4 Calories: about 740 kcal

Equipment

  • 12-inch skillet
  • mixing bowls
  • wire rack or paper towels
  • tongs
  • measuring cups and spoons

Ingredients

For the Chicken

  • 1 1/2 lb boneless skinless chicken thighs, cut into strips (about 675g)
  • 1 teaspoon salt
  • 1/2 teaspoon black pepper

For the Coating

  • 1/2 cup all-purpose flour (60g)
  • 1/2 cup cornstarch (60g)
  • 1 large egg, beaten

For Frying & Nuts

  • 1/2 to 3/4 cup neutral oil, for shallow frying
  • 1/2 cup raw unsalted cashews (65g)

Vegetables & Aromatics

  • 1 large bell pepper, sliced (about 160g)
  • 1 medium yellow or red onion, sliced (about 150g)
  • 4 garlic cloves, minced
  • 1 tablespoon minced fresh ginger

Sauce

  • 1 to 2 tablespoons Sambal Oelek
  • 3 tablespoons soy sauce
  • 2 tablespoons oyster sauce
  • 2 tablespoons ketchup
  • 1 to 2 tablespoons honey
  • 1 tablespoon Chinkiang black vinegar

Optional for Serving

  • Sliced green onions (optional)
  • Sesame seeds (optional)
  • Pinch of red pepper flakes (optional)

Instructions

  1. Pat the chicken dry and cut into even strips; season with the salt and black pepper.
  2. Place the flour, cornstarch, and beaten egg in three separate bowls.
  3. Dredge each chicken piece lightly in flour, dip in egg, let excess drip off, then coat in cornstarch; set coated pieces on a plate.
  4. Heat a large 12-inch skillet over medium-high to high heat and add enough oil for shallow frying; heat until shimmering.
  5. Fry the chicken in a single layer, working in batches so the pan is not crowded; flip when the first side is well browned and cook until deeply golden and the thickest piece reaches 165°F (74°C). Transfer to a wire rack or paper towel-lined plate.
  6. Pour off excess oil if desired. In the same skillet over medium-high, toast the cashews briefly until lightly browned and fragrant, stirring often; remove promptly.
  7. If needed, add a small amount of oil to the skillet and stir-fry the bell pepper and onion over medium-high for 2 to 3 minutes until bright and crisp-tender.
  8. Add the garlic and ginger and cook for about 30 seconds until fragrant.
  9. Whisk together the Sambal Oelek, soy sauce, oyster sauce, ketchup, honey, and black vinegar in a small bowl; pour the sauce into the skillet and cook over medium heat for 1 to 2 minutes until bubbling and glossy (add a splash of water if it becomes too thick).
  10. Return the fried chicken and toasted cashews to the skillet and toss just until coated with the sauce.
  11. Serve immediately, garnished with sliced green onions, sesame seeds, or red pepper flakes if using.

Tips

  • Let excess egg drip off before the cornstarch to keep the coating light and crisp.
  • Fry the chicken in small batches and avoid crowding the pan to prevent steaming and sogginess.
  • Use a wire rack to drain fried chicken while you finish the vegetables and sauce to help maintain crispness.
  • Adjust heat by using 1 tablespoon Sambal Oelek for milder or 2 tablespoons plus red pepper flakes for more heat.
  • Toast nuts briefly and remove promptly to avoid burning.

Variations

  • Milder Dragon Chicken: Use 1 tablespoon Sambal Oelek and 2 tablespoons honey for a gentler sweet-heat balance.
  • Peanut Dragon Chicken: Substitute peanuts for cashews; toast them carefully as they brown quickly.

Notes

Let leftovers cool and refrigerate in an airtight container for up to 3 days; store fried chicken separately from the sauce for better texture. Reheat gently in a skillet or in a 350°F (177°C) oven until hot.

Nutrition

Calories: about 740 kcal | Protein: 42 g | Fat: 40 g | Carbohydrates: 49 g | Per100g: about 205 kcal, 12 g protein, 11 g fat, 14 g carbohydrates

Moroccan Harissa Chicken

Moroccan harissa chicken is bold, a little smoky, and deeply savory, with roasted chicken pieces served over saffron rice and sweet caramelized onions. It feels like a full dinner without needing a long ingredient list or complicated steps.

The chicken roasts in the oven while the rice cooks on the stove, so the timing is easy to manage. Harissa can vary a lot in heat and salt, so starting on the lower end and tasting the paste first helps keep the marinade balanced.

Ingredients for Moroccan Harissa Chicken

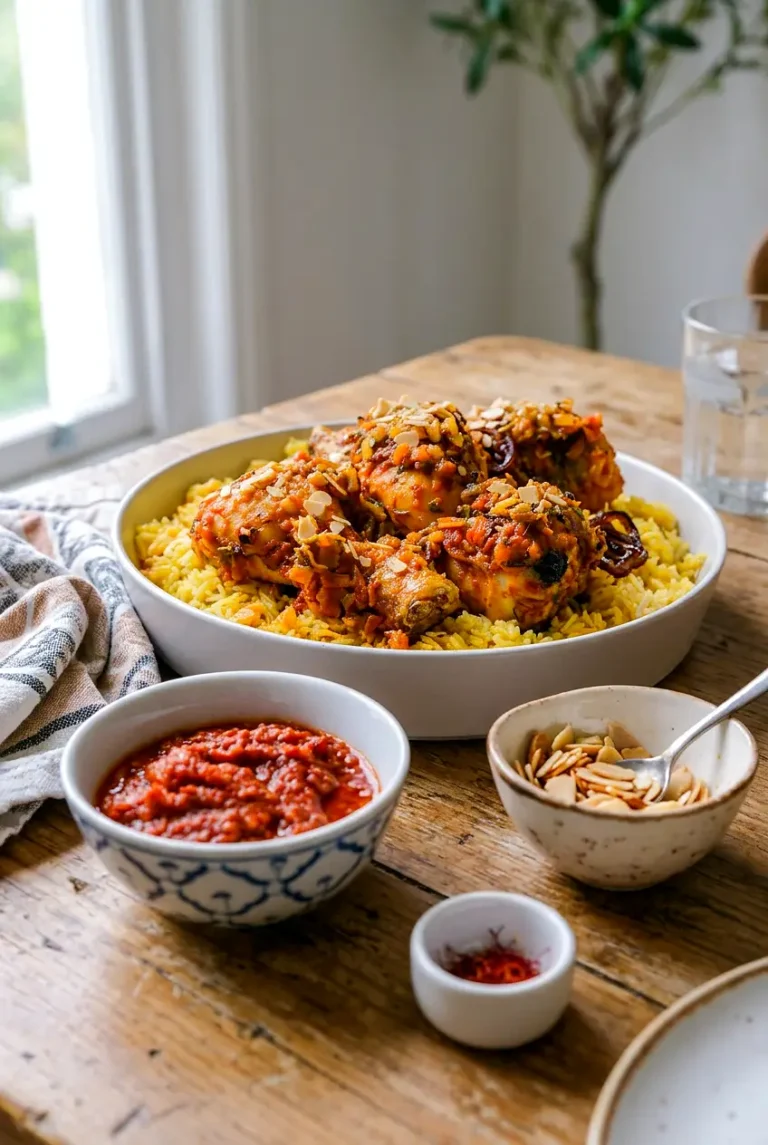
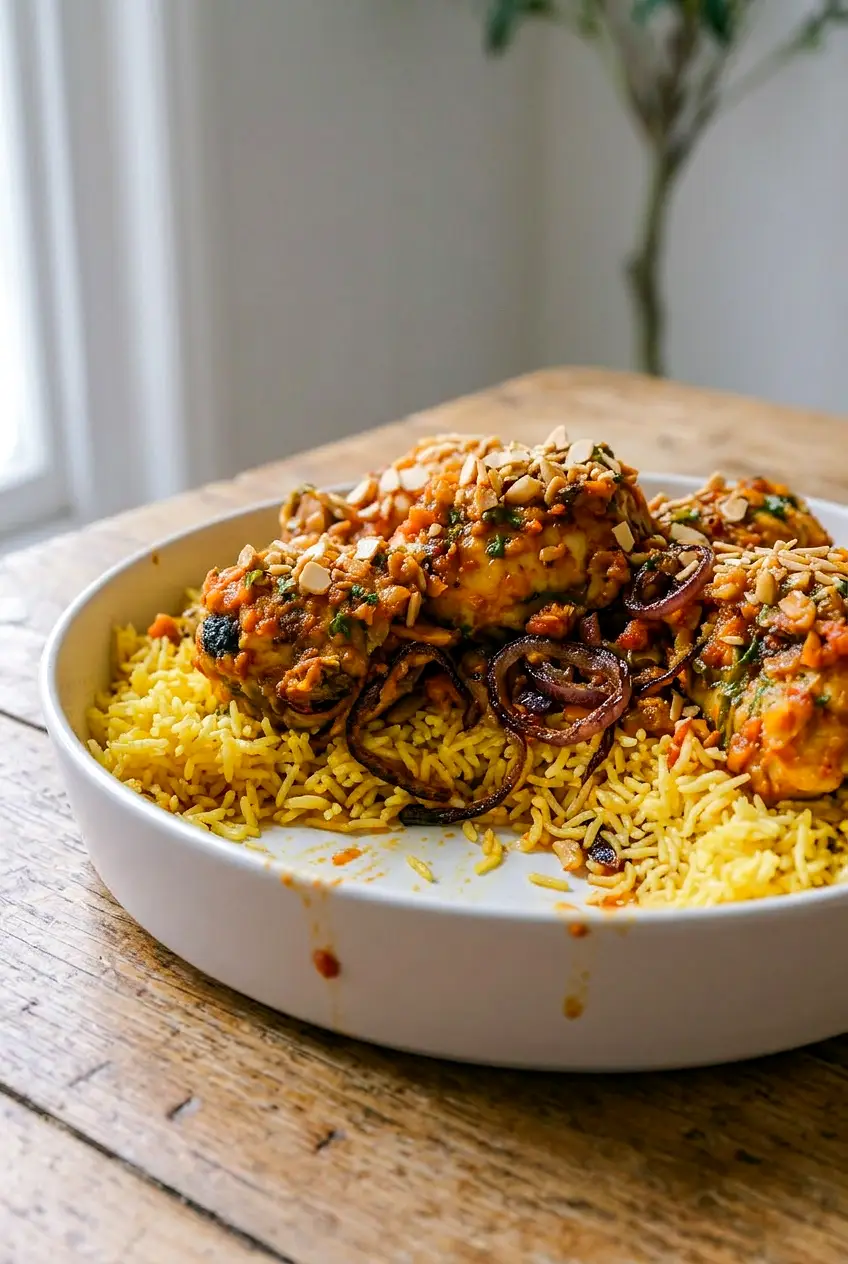
A bowl of Moroccan harissa chicken and saffron rice shown at a side angle with caramelized onions
  • 3 to 3 1/2 pounds bone-in, skin-on chicken pieces (about 1.6 kg); thighs, drumsticks, or a mix
  • 3 to 4 tablespoons harissa paste; start with 3 tablespoons if your brand is spicy
  • 4 garlic cloves, minced
  • 1 small onion, grated or blended into a paste (about 110g)
  • 1/4 cup chopped fresh parsley (about 15g)
  • 2 tablespoons lemon juice
  • 1 teaspoon ground cumin
  • 1/2 teaspoon ground turmeric
  • 3 tablespoons olive oil
  • 1 to 1 1/2 teaspoons kosher salt; use less if your harissa is already salty
  • 1 1/2 cups basmati or long-grain white rice (about 285g)
  • 2 medium shallots or 1 medium onion, thinly sliced (about 120g)
  • A pinch to 1/4 teaspoon saffron threads
  • 2 1/4 to 2 1/2 cups water or broth

Optional for serving: raisins, butter, extra parsley, chopped almonds or pistachios, lemon wedges, or a little extra harissa.

How to Make Moroccan Harissa Chicken

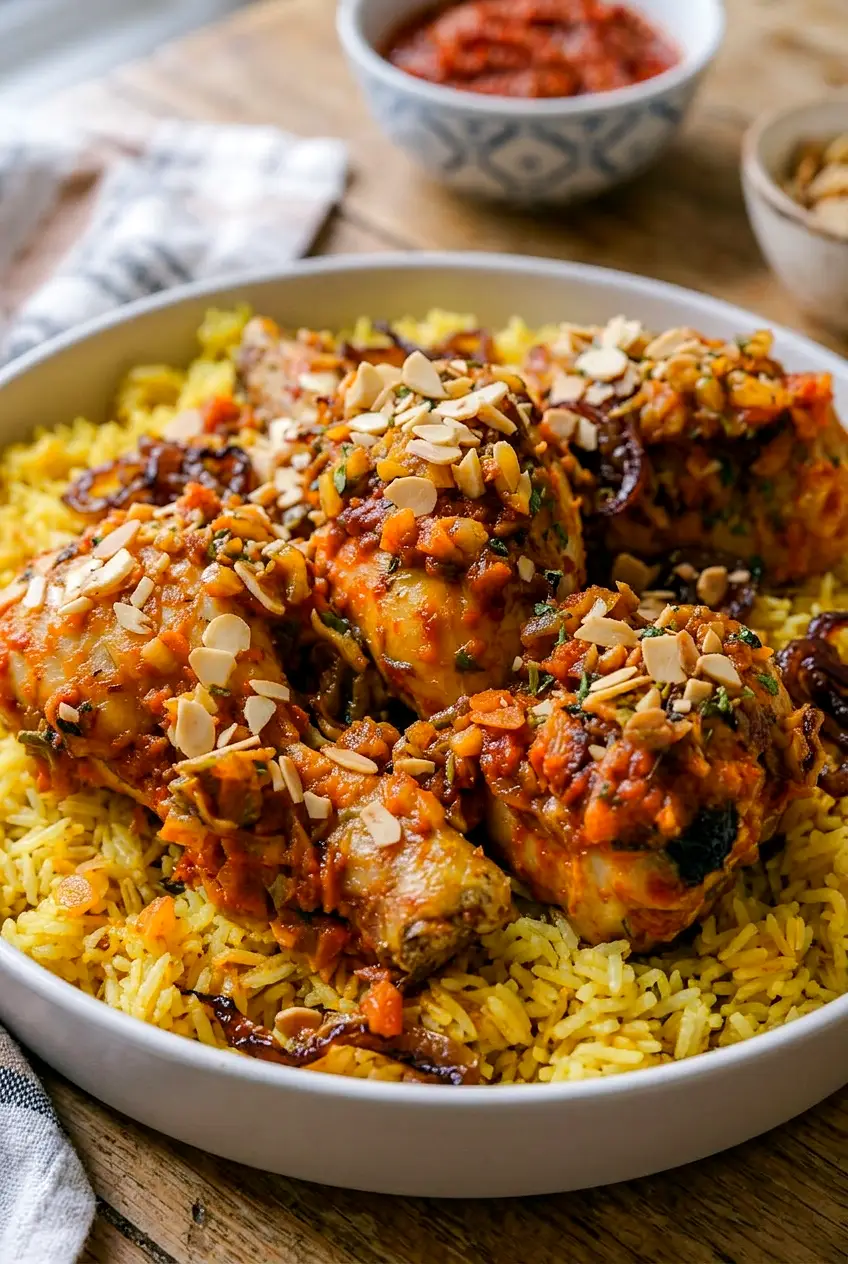
Close-up of Moroccan harissa chicken on saffron rice with glossy harissa sauce and browned skin
  1. Preheat the oven: Heat the oven to 425°F.
  2. Make the marinade: In a large bowl, mix the harissa, grated onion, garlic, parsley, lemon juice, cumin, turmeric, olive oil, and 1 teaspoon kosher salt. The marinade should be thick enough to coat the chicken well.
  3. Coat the chicken: Add the chicken pieces and turn to coat them on all sides. Let them sit at room temperature for about 20 minutes while the oven finishes heating, or cover and refrigerate for up to overnight. If marinating longer than 30 minutes, refrigerate the chicken.
  4. Bloom the saffron: Put the saffron in a small bowl with a few tablespoons of warm water taken from your measured rice liquid. Let it sit while you start the onions.
  5. Cook the onions: In a medium saucepan or small pot with a lid, cook the sliced shallots or onion in a little oil or butter over medium to medium-low heat for 15 to 20 minutes, stirring as needed, until soft and deep golden.
  6. Toast the rice: Stir the rice into the pot and cook for about 1 minute, stirring until the grains look glossy.
  7. Roast the chicken: Arrange the chicken skin-side up on a rimmed sheet pan or roasting pan, leaving space between the pieces. Roast for 25 to 40 minutes, depending on the size and cut. Start checking early if your pieces are small.
  8. Cook the rice: Add the saffron and soaking liquid to the rice pot, then add the remaining water or broth. Bring to a gentle simmer, cover, reduce the heat to low, and cook for 15 to 20 minutes, until the rice is tender and the liquid is absorbed. Remove from the heat and let it rest, covered, for 5 minutes. Stir in raisins or butter, if using.
  9. Finish the chicken: If the chicken needs more color, broil it or raise the oven heat briefly for 3 to 8 minutes. Watch closely, since harissa can darken quickly. The chicken is done when it is browned and the thickest pieces reach 165°F away from the bone.
  10. Rest and serve: Let the chicken rest for a few minutes. Fluff the rice and spoon it onto plates or a platter. Top with the chicken and finish with extra parsley, nuts, lemon, or more harissa if you like.

How to Balance the Harissa

Harissa brands can vary a lot in both heat and salt. If you are using a new brand, taste a small amount first and start with 3 tablespoons in the marinade. The onion, lemon juice, and olive oil help round it out so the chicken tastes rich and spiced instead of sharply hot.

How to Keep the Chicken Juicy

Try to use similar-size pieces so they cook at the same rate. Give the chicken space on the pan so it roasts instead of steaming, and use temperature and color as your guide rather than relying only on the clock. A short rest after roasting helps the juices settle.

Serving Ideas

The saffron-onion rice makes this a complete meal, but the chicken also works well with plain white rice or brown rice if you want to simplify. Leftovers are good in wraps or sandwiches with parsley and a squeeze of lemon.

If you like bold chicken dinners with a sweet-heat profile, try Honey Gochujang Chicken with Sesame Seeds next.

For another flavorful chicken option that works well for lunches, see Greek Chicken Gyros with Tzatziki.

How to Store and Reheat Moroccan Harissa Chicken

Let the chicken and rice cool before storing. Keep them in separate airtight containers in the refrigerator for up to 3 days.

Reheat the chicken in the oven, in a skillet, or in the microwave until hot all the way through. If needed, cover loosely or add a small splash of water so it does not dry out. The skin will soften as it sits.

Reheat the rice with a spoonful of water in a covered pan or under a microwave-safe cover, then fluff before serving.

You can also marinate the chicken the night before and roast it the next day.

Nutrition

Nutrition is approximate and will vary based on ingredient brands, exact amounts, and serving size.

  • Serving size: about 1/4 of the recipe, including chicken and rice
  • Calories: about 850
  • Protein: 46g
  • Fat: 44g
  • Carbohydrates: 61g
  • Per 100g: about 205 calories, 11g protein, 11g fat, 15g carbohydrates

Moroccan Harissa Chicken

Roasted bone-in, skin-on chicken tossed in a harissa-onion marinade and served over saffron-infused rice with caramelized onions.
Course: Main Course
Cuisine: Moroccan
Prep: 20 min
Cook: 40 min
Total: 80 min
Servings: 4 Calories: 850 kcal

Equipment

  • rimmed sheet pan or roasting pan
  • medium saucepan with lid
  • mixing bowl
  • small bowl

Ingredients

For the chicken and marinade

  • 3 to 3 1/2 pounds bone-in, skin-on chicken pieces (thighs, drumsticks, or a mix)
  • 3 to 4 tablespoons harissa paste (start with 3 tbsp if spicy)
  • 4 garlic cloves, minced
  • 1 small onion, grated or blended into a paste (about 110 g)
  • 1/4 cup chopped fresh parsley (about 15 g)
  • 2 tablespoons lemon juice
  • 1 teaspoon ground cumin
  • 1/2 teaspoon ground turmeric
  • 3 tablespoons olive oil
  • 1 to 1 1/2 teaspoons kosher salt (use less if harissa is salty)

For the saffron rice and onions

  • 1 1/2 cups basmati or long-grain white rice (about 285 g)
  • 2 medium shallots or 1 medium onion, thinly sliced (about 120 g)
  • A pinch to 1/4 teaspoon saffron threads
  • 2 1/4 to 2 1/2 cups water or broth
  • Optional: raisins, butter

For serving (optional)

  • extra chopped parsley
  • chopped almonds or pistachios
  • lemon wedges
  • extra harissa

Instructions

  1. Preheat the oven to 425°F (218°C).
  2. In a large mixing bowl, combine harissa, grated onion, garlic, parsley, lemon juice, cumin, turmeric, olive oil, and 1 teaspoon kosher salt to form a thick marinade.
  3. Add the chicken pieces and turn to coat all over; let sit at room temperature about 20 minutes or cover and refrigerate up to overnight (if marinating longer than 30 minutes, refrigerate).
  4. Place the saffron in a small bowl with a few tablespoons of the warm measured rice liquid to bloom and set aside.
  5. In a medium saucepan, cook the sliced shallots or onion in a little oil or butter over medium to medium-low heat for 15 to 20 minutes, stirring occasionally, until soft and deep golden.
  6. Stir the rice into the pot with the onions and cook about 1 minute until the grains look glossy.
  7. Add the bloomed saffron and its soaking liquid, then add the remaining water or broth. Bring to a gentle simmer, cover, reduce heat to low, and cook 15 to 20 minutes until the rice is tender and liquid is absorbed; remove from heat and let rest, covered, for 5 minutes.
  8. Arrange the marinated chicken skin-side up on a rimmed sheet pan or roasting pan with space between pieces and roast 25 to 40 minutes depending on size, checking early for smaller pieces.
  9. If the chicken needs more color at the end of roasting, broil or raise the oven heat for 3 to 8 minutes while watching closely. The chicken is done when the thickest pieces reach 165°F (74°C) away from the bone.
  10. Let the chicken rest a few minutes. Fluff the rice and spoon onto plates or a platter, top with chicken and finish with optional parsley, nuts, lemon, or extra harissa.

Tips

  • Taste your harissa before using; start with 3 tablespoons if it’s particularly hot or salty.
  • If marinating longer than 30 minutes, refrigerate the chicken.
  • Give chicken pieces space on the pan so they roast instead of steam for crispier skin.
  • Use color and internal temperature (165°F / 74°C) rather than clock time to judge doneness.
  • Bloom saffron in warm liquid first to maximize its flavor and color.

Variations

  • Serve with brown rice: Use brown rice instead of white for a heartier side; adjust liquid and cooking time for brown rice as needed.
  • Simpler rice: Skip saffron and caramelized onions and serve chicken with plain white rice for a quicker meal.

Notes

Store chicken and rice separately in airtight containers in the refrigerator for up to 3 days. Reheat chicken in oven or skillet and reheat rice with a splash of water covered to prevent drying. Ensure chicken reaches 165°F (74°C).

Nutrition

Calories: 850 kcal | Protein: 46 g | Fat: 44 g | Carbohydrates: 61 g

High-Protein Honey Gochujang Chicken

This honey gochujang chicken is sweet, spicy, and glossy, with browned pieces of chicken breast that stay tender and cook fast in a skillet. It is an easy dinner to serve over rice, noodles, or with a simple vegetable side.

The method is straightforward: coat the chicken lightly with starch, sear it in batches so it browns instead of steams, then finish it in a quick sauce of gochujang, honey, garlic, soy sauce, and mirin. Keep the pieces similar in size and start checking for doneness early, since chicken breast can go from juicy to dry pretty quickly.

Ingredients for High-Protein Honey Gochujang Chicken

Side view of honey gochujang chicken on a white plate with sesame seeds and salad leaves
  • 1 1/2 pounds boneless skinless chicken breast (about 675g), sliced into even pieces and lightly flattened where needed
  • 2 tablespoons potato starch or cornstarch
  • 2 tablespoons neutral oil
  • 3 cloves garlic, minced
  • 3 tablespoons gochujang
  • 2 tablespoons honey
  • 2 tablespoons mirin
  • 2 tablespoons soy sauce
  • 2 to 4 tablespoons water, as needed to loosen the sauce
  • 1 tablespoon toasted white sesame seeds

Optional for serving: sliced scallions, a small drizzle of toasted sesame oil, or a pinch of red pepper flakes for extra heat.
Chicken thighs can be used instead of chicken breast if you want a juicier result, but they may need a little longer to cook. For a gluten-free version, use tamari instead of soy sauce and check your gochujang and starch labels.

How to Make High-Protein Honey Gochujang Chicken

Close-up of honey gochujang chicken showing the glossy sauce and browned chicken pieces over greens
  1. Prep the chicken: Slice the chicken into even pieces and lightly flatten any thicker spots so it cooks at the same rate. Pat dry, then toss with the potato starch or cornstarch until lightly coated. The coating should look thin and dry, not heavy or pasty.
  2. Mix the sauce: In a small bowl, stir together the gochujang, honey, mirin, soy sauce, garlic, and 2 tablespoons water until smooth and pourable.
  3. Heat the pan: Set a large 12-inch skillet or wok over medium-high heat. When hot, add the oil and swirl to coat.
  4. Sear the chicken in batches: Add the chicken in a single layer without crowding the pan. Cook for 3 to 4 minutes on the first side, leaving it mostly undisturbed so it can brown. Flip and cook for 2 to 4 minutes more, until the edges are browned and the chicken is nearly cooked through. Transfer out as needed and repeat with the remaining chicken.
  5. Add the sauce: Lower the heat to medium or medium-low if the pan looks very hot. If there is a lot of dark residue in the skillet, wipe it out so the sauce does not taste scorched. Return all the chicken to the pan and pour in the sauce.
  6. Simmer until glossy: Toss to coat, then let the sauce bubble gently for 2 to 4 minutes. Stir enough to coat the chicken and keep the garlic from burning. Add another splash of water if the sauce thickens too fast or starts sticking.
  7. Finish and serve: Cook just until the sauce is glossy and clings to the chicken and the thickest piece reaches 165°F. Remove from the heat, sprinkle with sesame seeds, and add scallions or a little toasted sesame oil if using. Serve right away.

Timing can vary with chicken thickness, pan size, and stovetop heat, so use the color of the chicken and the sauce texture along with the clock.

How to Keep the Chicken Juicy

Even pieces make the biggest difference here. Thin, similar-sized pieces cook quickly and evenly, which helps you avoid dry edges and undercooked centers. Searing the chicken until it is almost done, then finishing it briefly in the sauce, also helps keep the texture tender.

Pull the chicken off the heat as soon as the thickest piece reaches 165°F. If you leave it simmering once the sauce has reduced, the glaze can get too thick and the chicken can dry out.

Why the Sauce Can Burn Quickly

Honey and gochujang both thicken fast in a hot skillet. If the pan is too hot when the sauce goes in, it can go from glossy to sticky and dark very quickly. Lower the heat before adding the sauce, and use a splash of water if it needs loosening. You want a thin glaze that coats the chicken, not a dry pan with burnt spots around the edges.

Easy Variations

Honey Gochujang Chicken Thighs

Use the same method with boneless skinless chicken thighs. Keep the pieces in a single layer so they brown well, and cook until the thickest piece reaches 165°F.

Honey Gochujang Chicken with Vegetables

For more of a one-pan dinner, add 1 to 2 cups of broccoli, bell peppers, or snap peas. Stir-fry the vegetables briefly before adding the sauce, or cook them separately and serve them alongside. Leave enough room in the pan so the chicken still sears well.

What to Serve With High-Protein Honey Gochujang Chicken

Steamed white rice, brown rice, or rice noodles all work well here. For a simple side, try a crisp cucumber salad, bean sprouts, quick pickled vegetables, steamed broccoli, or sautéed greens.

If you want another easy chicken dinner, try these Greek Chicken Gyros with Tzatziki.

How to Store and Reheat High-Protein Honey Gochujang Chicken

Let the chicken cool slightly, then refrigerate it in an airtight container for up to 3 to 4 days. If possible, store it separately from rice so the texture stays better.

Reheat gently in a skillet over low heat or in the microwave at reduced power. Add a small splash of water if the sauce has thickened too much. Avoid overheating, since chicken breast can dry out quickly when reheated.

You can also mix the sauce ahead and refrigerate it, but the chicken is best cooked just before serving.

For another quick skillet dinner, take a look at Creamy Cajun Chicken Skillet Dinner.

If you like saucy chicken dinners, you may also enjoy Easy Thai Red Curry Chicken.

Nutrition

Nutrition is approximate and will vary based on ingredient brands, exact amounts, and serving size.

  • Serving size: 1/4 of recipe
  • Calories: about 345
  • Protein: 39g
  • Fat: 10g
  • Carbohydrates: 24g
  • Per 100g: about 155 calories, 18g protein, 5g fat, 11g carbohydrates

High-Protein Honey Gochujang Chicken

Sweet, spicy, and glossy chicken pieces are seared and finished in a quick honey-gochujang sauce for a fast weeknight dinner.
Course: Main Course
Cuisine: Global
Prep: 15 min
Cook: 15 min
Total: 30 min
Servings: 4 Calories: about 345 kcal

Equipment

  • 12-inch skillet or wok
  • mixing bowl
  • knife
  • cutting board
  • measuring spoons
  • instant-read thermometer
  • tongs or spatula

Ingredients

For the chicken

  • 1 1/2 pounds boneless skinless chicken breast (about 675g), sliced into even pieces and lightly flattened where needed
  • 2 tablespoons potato starch or cornstarch
  • 2 tablespoons neutral oil

For the sauce

  • 3 tablespoons gochujang
  • 2 tablespoons honey
  • 2 tablespoons mirin
  • 2 tablespoons soy sauce
  • 3 cloves garlic, minced
  • 2 tablespoons water (plus 2 to 4 tablespoons more as needed to loosen the sauce)

To finish

  • 1 tablespoon toasted white sesame seeds

Optional for serving

  • sliced scallions (optional)
  • toasted sesame oil, a small drizzle (optional)
  • red pepper flakes, a pinch (optional)

Instructions

  1. Slice the chicken into even pieces and lightly flatten any thicker spots so pieces cook at the same rate.
  2. Pat the chicken dry and toss with the potato starch or cornstarch until lightly and evenly coated.
  3. In a small bowl, whisk together gochujang, honey, mirin, soy sauce, minced garlic, and 2 tablespoons water until smooth and pourable.
  4. Heat a large 12-inch skillet or wok over medium-high heat, add the oil, and swirl to coat the pan.
  5. Add the chicken in a single layer without crowding; cook 3 to 4 minutes on the first side without disturbing to allow browning.
  6. Flip the chicken and cook 2 to 4 minutes more, until edges are browned and pieces are nearly cooked through; transfer cooked pieces out and repeat with remaining chicken.
  7. Lower the heat to medium or medium-low and wipe out the pan if there is a lot of dark residue to avoid a scorched sauce.
  8. Return all chicken to the pan and pour in the sauce; toss to coat and let the sauce bubble gently for 2 to 4 minutes, stirring enough to prevent burning and adding a splash of water if the sauce thickens too fast.
  9. Cook just until the sauce is glossy and clings to the chicken and the thickest piece reaches 165°F (74°C).
  10. Remove from heat, sprinkle with toasted sesame seeds, add sliced scallions or a drizzle of toasted sesame oil if using, and serve immediately.

Tips

  • Cut chicken into even, thin pieces so they cook quickly and evenly.
  • Sear in batches to brown the chicken rather than steam it.
  • Lower the heat before adding the sauce to prevent the honey and gochujang from burning.
  • Use an instant-read thermometer and remove chicken once the thickest piece reaches 165°F (74°C).
  • Add a splash of water if the sauce reduces too quickly or starts to stick.

Variations

  • Honey Gochujang Chicken Thighs: Use boneless skinless chicken thighs for a juicier result; cook until the thickest piece reaches 165°F (74°C).
  • Honey Gochujang Chicken with Vegetables: Add 1 to 2 cups of broccoli, bell peppers, or snap peas; stir-fry the vegetables briefly before adding the sauce or cook separately and serve alongside.

Notes

Store cooled chicken in an airtight container in the refrigerator for 3 to 4 days. Reheat gently in a skillet over low heat or in the microwave at reduced power with a splash of water. Use a thermometer to ensure chicken reaches 165°F (74°C).

Nutrition

Calories: about 345 kcal | Protein: 39 g | Fat: 10 g | Carbohydrates: 24 g | Per100g: about 155 kcal, 18 g protein, 5 g fat, 11 g carbohydrates

Greek Chicken Gyros with Lemon-Herb Marinade and Tzatziki

These chicken gyros are fresh, filling, and easy to pull together with warm pita, juicy lemon-herb chicken, a quick tzatziki, and a simple tomato-cucumber-onion salad.

The recipe keeps things straightforward: one yogurt marinade for the chicken, one bowl of sauce, and one chopped salad. You can cook the chicken on an outdoor grill, grill pan, or large skillet. Just keep the heat at medium-high so the yogurt marinade browns well without scorching.

Ingredients for Greek Chicken Gyros

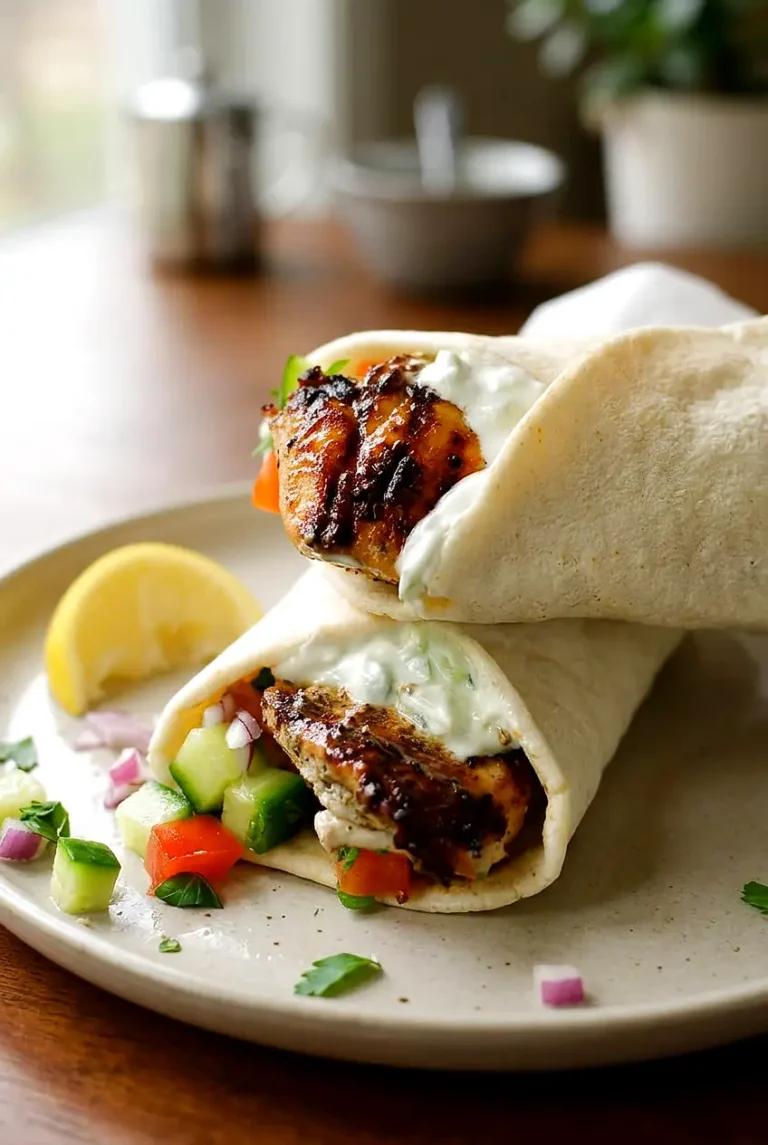
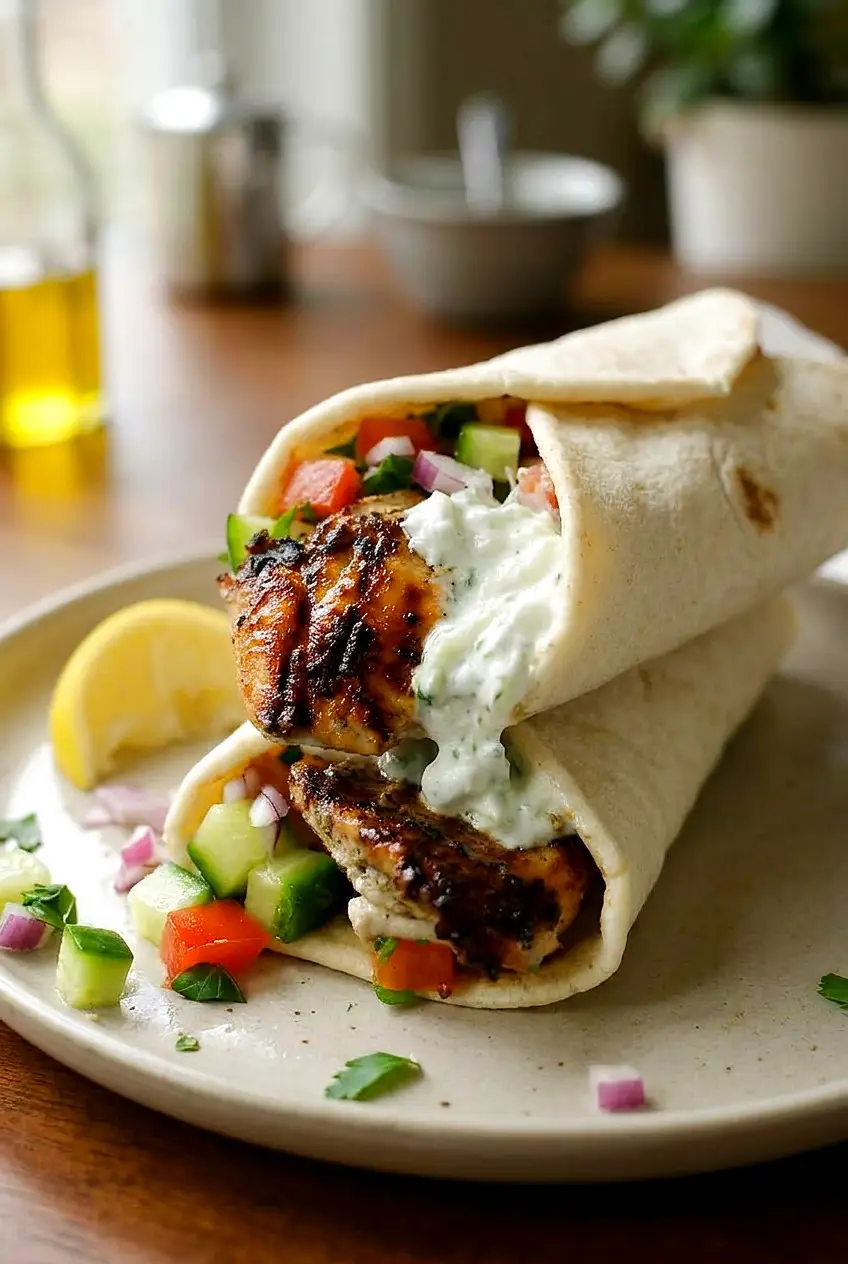
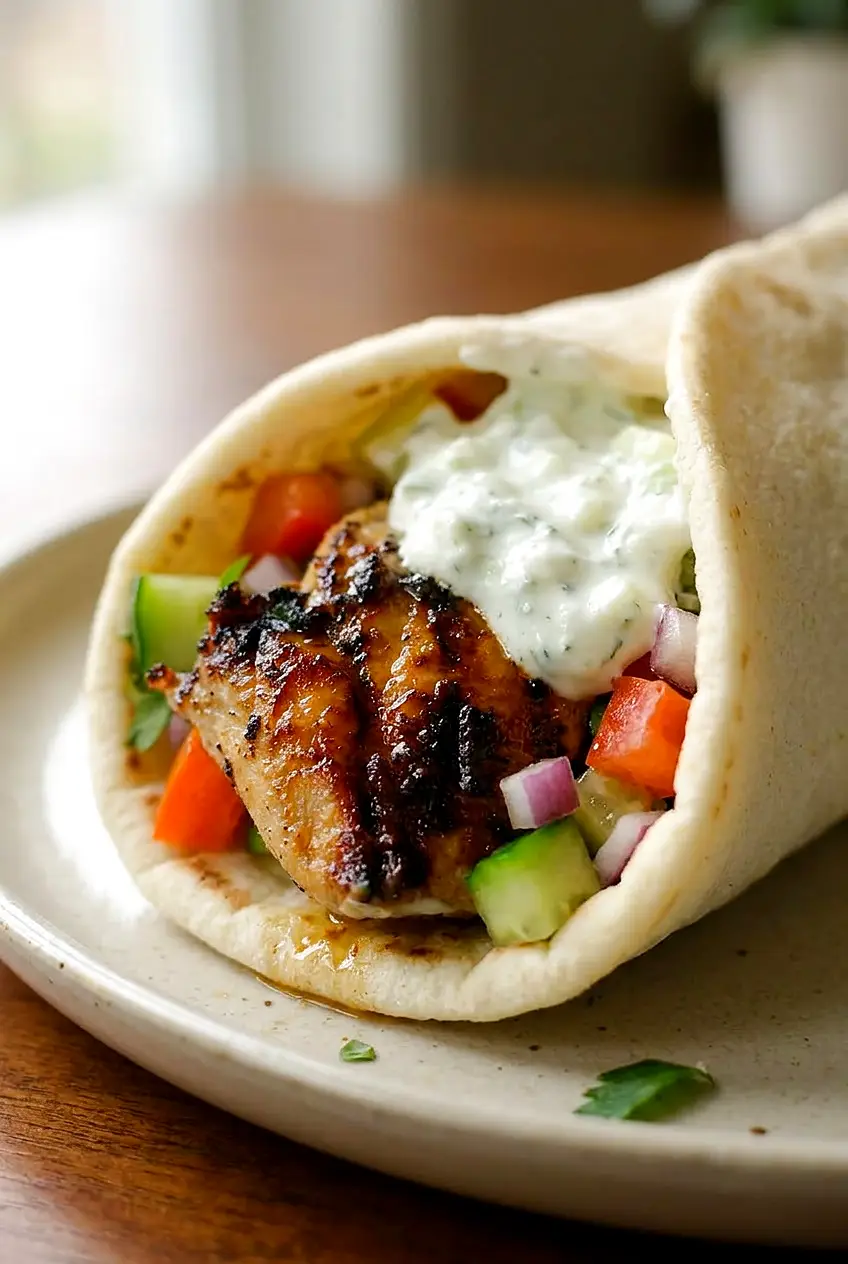
Side view of a Greek chicken gyros wrap with juicy chicken, salad, and sauce inside
  • 2 pounds boneless, skinless chicken thighs (about 900g)
  • 1 cup plain Greek yogurt (about 225g), divided
  • 5 to 6 garlic cloves, minced, divided
  • 3 tablespoons lemon juice, divided
  • 3 tablespoons olive oil
  • 2 teaspoons dried oregano
  • 1 tablespoon red wine vinegar
  • 1 1/2 teaspoons kosher salt, divided
  • 1/2 teaspoon black pepper
  • 1 medium cucumber (about 200g)
  • 2 tablespoons chopped fresh dill or mint
  • 2 medium tomatoes (about 300g), chopped
  • 1/2 small red onion, thinly sliced
  • 1/4 cup chopped fresh parsley (about 15g)
  • 4 to 6 pita breads or flatbreads

For the marinade, use 1/2 cup of the Greek yogurt, about half the garlic, 2 tablespoons of the lemon juice, the olive oil, oregano, red wine vinegar, 1 teaspoon of the salt, and the pepper.

For the tzatziki, use the remaining 1/2 cup Greek yogurt, the rest of the garlic, 1 tablespoon lemon juice, 1/4 teaspoon salt, the dill or mint, and about half of the grated cucumber.

For the salad, use the tomatoes, red onion, parsley, and the remaining cucumber if you like. If the cucumber is very seedy, scoop out part of the center before grating so the tzatziki stays thick.

How to Make Greek Chicken Gyros

Close-up of Greek chicken gyros showing browned sliced chicken and creamy tzatziki in pita
  1. Mix the marinade: In a large bowl, stir together 1/2 cup Greek yogurt, half the minced garlic, 2 tablespoons lemon juice, olive oil, oregano, red wine vinegar, 1 teaspoon kosher salt, and black pepper. Add the chicken thighs and turn to coat well.
  2. Marinate the chicken: Cover and refrigerate for at least 30 minutes or up to 4 hours. Longer marinating can soften the texture too much because of the yogurt and lemon.
  3. Make the tzatziki: Grate the cucumber, then squeeze out as much liquid as possible with clean hands or paper towels. In a small bowl, stir together the remaining 1/2 cup Greek yogurt, the rest of the garlic, 1 tablespoon lemon juice, 1/4 teaspoon salt, the dill or mint, and about half the grated cucumber. Let it sit while the chicken cooks. It should be thick, not watery.
  4. Prep the salad and warm the bread: In another bowl, combine the tomatoes, red onion, parsley, and the remaining cucumber if using. Season lightly with the remaining salt to taste. Warm the pita or flatbreads just before serving so they fold easily.
  5. Heat the grill or pan: Preheat an outdoor grill, grill pan, or large skillet over medium-high heat. Lightly oil the grates or pan. If needed, cook in batches so the chicken browns instead of steaming.
  6. Cook the chicken: Lift the chicken from the marinade and cook for 15 to 20 minutes total, depending on thickness, flipping once or turning as needed for even browning. The outside should be well browned, the center should no longer be pink, and the thickest part should reach 165°F. If the outside is darkening too fast, lower the heat slightly.
  7. Rest and slice: Transfer the chicken to a cutting board and rest for 5 minutes, then slice into strips.
  8. Assemble the gyros: Fill each warm pita or flatbread with sliced chicken, tzatziki, and the tomato-cucumber-onion salad. Serve right away.

How to Keep the Chicken Juicy

Use medium-high heat rather than very high heat. The yogurt marinade helps the chicken brown quickly, so aggressive heat can darken the outside before the center is done.

Give the chicken enough space in the pan or on the grill, and let it rest before slicing. That short rest helps keep more juice in the meat.

How to Keep Tzatziki Thick

The key is squeezing plenty of water out of the grated cucumber before stirring it into the yogurt. If the sauce still looks loose, the cucumber likely needed more draining.

Serving Ideas

Serve the chicken in pita or flatbread as written, or turn it into a bowl with rice, greens, or roasted vegetables. Keep the tzatziki separate until serving so everything stays fresh.

How to Store and Reheat Greek Chicken Gyros

Store the cooked chicken, tzatziki, and salad in separate airtight containers in the refrigerator. Let the chicken cool before storing. The chicken will keep for 3 to 4 days. The salad is best within the first day or two while it still has some crunch.

Reheat the chicken gently in a skillet, microwave, or low oven until just warmed through. Avoid overheating, which can dry it out. Keep the tzatziki cold and add it after reheating. Warm the pita separately before serving.

You can also marinate the chicken earlier in the day, or freeze the raw chicken in the marinade for later. Thaw it fully in the refrigerator before cooking.

Nutrition

Nutrition is approximate and will vary based on ingredient brands, exact amounts, and serving size. This estimate includes the chicken, marinade, tzatziki, salad, and pita for 4 servings.

  • Serving size: 1/4 of recipe
  • Calories: about 650
  • Protein: 49g
  • Fat: 31g
  • Carbohydrates: 40g
  • Per 100g: about 170 calories, 13g protein, 8g fat, 10g carbohydrates

Greek Chicken Gyros with Lemon-Herb Marinade and Tzatziki

Juicy yogurt-marinated chicken served in warm pita with tzatziki and a tomato-cucumber-onion salad.
Course: Main Course
Cuisine: Greek
Prep: 20 min
Cook: 20 min
Total: 75 min
Servings: 4 Calories: about 650 kcal

Equipment

  • outdoor grill or grill pan or large skillet
  • mixing bowl
  • small bowl
  • grater
  • cutting board
  • knife
  • tongs
  • paper towels

Ingredients

For the Chicken

  • 2 pounds boneless, skinless chicken thighs (about 900g)

For the Marinade

  • 1/2 cup plain Greek yogurt
  • 2 to 3 garlic cloves, minced
  • 2 tablespoons lemon juice
  • 3 tablespoons olive oil
  • 2 teaspoons dried oregano
  • 1 tablespoon red wine vinegar
  • 1 teaspoon kosher salt
  • 1/2 teaspoon black pepper

For the Tzatziki

  • 1/2 cup plain Greek yogurt
  • 2 to 3 garlic cloves, minced
  • 1 tablespoon lemon juice
  • 1/4 teaspoon kosher salt
  • 2 tablespoons chopped fresh dill or mint
  • About half of 1 medium cucumber, grated and squeezed dry

For the Salad

  • 1 medium cucumber (about 200g), grated or chopped and divided
  • 2 medium tomatoes (about 300g), chopped
  • 1/2 small red onion, thinly sliced
  • 1/4 cup chopped fresh parsley (about 15g)
  • Salt to taste

To Serve

  • 4 to 6 pita breads or flatbreads

Instructions

  1. Make the marinade: in a large mixing bowl combine 1/2 cup Greek yogurt, half the minced garlic, 2 tablespoons lemon juice, olive oil, dried oregano, red wine vinegar, 1 teaspoon kosher salt, and black pepper.
  2. Add the chicken thighs to the marinade and turn to coat evenly.
  3. Cover and refrigerate the chicken for at least 30 minutes and up to 4 hours.
  4. Prepare the cucumber for tzatziki: grate the cucumber, then squeeze out as much liquid as possible with paper towels or clean hands.
  5. Make the tzatziki: in a small bowl stir together the remaining 1/2 cup Greek yogurt, the remaining garlic, 1 tablespoon lemon juice, 1/4 teaspoon salt, the chopped dill or mint, and about half the grated, drained cucumber. Chill while chicken cooks.
  6. Prep the salad: combine the tomatoes, red onion, parsley, and the remaining cucumber; season lightly with the remaining salt to taste.
  7. Warm the pita or flatbreads just before serving so they fold easily.
  8. Heat an outdoor grill, grill pan, or large skillet over medium-high heat and lightly oil the grates or pan.
  9. Lift the chicken from the marinade and cook on the preheated grill or pan for 15 to 20 minutes total, turning as needed so it browns evenly. Cook until the outside is well browned and the thickest part reaches 165°F (74°C).
  10. Transfer the cooked chicken to a cutting board and let rest for 5 minutes, then slice into strips.
  11. Assemble the gyros: fill each warm pita or flatbread with sliced chicken, tzatziki, and the tomato-cucumber-onion salad and serve immediately.

Tips

  • Use medium-high heat to brown the yogurt-marinated chicken without burning the exterior.
  • Give chicken pieces enough space in the pan or on the grill to avoid steaming.
  • Squeeze as much liquid as possible from grated cucumber to keep tzatziki thick.
  • Let chicken rest 5 minutes before slicing to retain juices.
  • Warm pita right before serving so it folds without cracking.

Variations

  • Gyro Bowl: Serve sliced chicken over rice or greens with tzatziki and the salad for a bowl instead of in pita.
  • Herb Options: Use fresh mint instead of dill in the tzatziki for a brighter, different herb flavor.

Notes

Store chicken, tzatziki, and salad separately in airtight containers; chicken keeps 3–4 days. Reheat chicken gently and add tzatziki cold. Thaw frozen marinated chicken fully before cooking.

Nutrition

Calories: about 650 kcal | Protein: 49 g | Fat: 31 g | Carbohydrates: 40 g

Creamy Cajun Chicken

Creamy Cajun chicken is a simple skillet dinner with well-browned chicken, tender onion, bell pepper, and celery, and a rich Parmesan cream sauce. It has enough heat to feel bold without making the method complicated.

Everything cooks in one pan, which keeps the cleanup easy and gives the sauce more flavor from the browned bits left behind after searing the chicken. Once the cream goes in, keep the heat at a gentle simmer so the sauce thickens smoothly.

Ingredients for Creamy Cajun Chicken

Creamy Cajun chicken from a side angle with the sauce coating the chicken and vegetables in the same skillet
  • 1 1/2 pounds boneless skinless chicken breasts (about 675g)
  • 1 1/2 to 2 tablespoons Cajun seasoning
  • Salt, to taste
  • Black pepper, to taste
  • 1 to 2 tablespoons olive oil or avocado oil
  • 1 medium yellow onion, diced (about 150g)
  • 1 medium bell pepper, diced (about 150g)
  • 2 ribs celery, diced (about 80g)
  • 3 cloves garlic, minced
  • 1/2 cup chicken broth (about 120g)
  • 1 cup heavy cream (about 240g)
  • 1/2 cup grated Parmesan cheese (about 45g)
  • 2 tablespoons chopped fresh parsley

Pat the chicken dry before seasoning so it browns better. If the breasts are very thick, slice them in half horizontally or pound them to an even thickness so they cook more evenly. Cajun seasoning blends vary in both salt and heat, so start with the smaller amount if needed.

How to Make Creamy Cajun Chicken

Close view of creamy Cajun chicken showing browned chicken and thick Parmesan sauce with tender peppers and celery
  1. Season the chicken: Pat the chicken dry with paper towels. If needed, cut or pound the pieces so they are close to the same thickness. Season both sides with the Cajun seasoning and a little salt and black pepper if your seasoning blend is low in salt.
  2. Sear the chicken: Heat 1 tablespoon oil in a large 12-inch skillet over medium-high heat. When the oil is hot, add the chicken in a single layer. Sear for 3 to 5 minutes per side, flipping once, until well browned and nearly cooked through. Work in batches if needed so the pan does not get crowded. Transfer the chicken to a plate.
  3. Cook the vegetables: Reduce the heat to medium. Add a little more oil if the skillet looks dry. Add the onion, bell pepper, and celery. Cook for 5 to 7 minutes, stirring occasionally, until softened and starting to turn translucent around the edges. Add the garlic and cook for about 30 seconds, just until fragrant.
  4. Build the sauce: Pour in the chicken broth and scrape up the browned bits from the bottom of the skillet. Stir in the heavy cream and Parmesan. Bring the sauce to a gentle simmer over medium to medium-low heat and cook for 3 to 5 minutes, stirring gently, until smooth and lightly thickened. Do not let it boil hard.
  5. Finish the chicken: Return the chicken and any juices to the skillet. Simmer gently for 5 to 8 minutes, turning the chicken once or spooning the sauce over the top, until the chicken is cooked through and reaches 165°F at the thickest part. The sauce should lightly coat the chicken instead of running thin across the pan.
  6. Adjust and serve: Taste the sauce and add more Cajun seasoning, salt, or black pepper if needed. Sprinkle with parsley and serve hot.

How to Keep the Chicken Juicy

Chicken breasts cook best when the pieces are an even thickness. During the sear, aim for good color rather than fully cooking them through, since they will finish in the sauce. Start checking early near the end of the simmer so the chicken does not overcook.

If you want a more forgiving cut, boneless skinless chicken thighs work well here and stay juicy a little more easily.

Why the Sauce Turns Thin or Splits

If the sauce looks thin, it usually just needs a few more minutes at a gentle simmer. The Parmesan also helps thicken it, so make sure it has fully melted into the sauce before deciding it needs more time.

If the sauce gets too thick, stir in 2 to 4 tablespoons of extra broth a little at a time. If it looks oily or broken, the heat is too high. Keep the sauce at a gentle simmer once the cream is added.

What to Serve with Creamy Cajun Chicken

Serve it with white rice, brown rice, or mashed potatoes to catch the sauce. For a lighter plate, add roasted vegetables or a simple green salad. Lentils also work well if you want something hearty but different from rice or potatoes.

If you like creamy chicken dinners with bold flavor, you might also enjoy Easy Thai Red Curry Chicken.

For another spicy chicken dinner, try Spicy Korean Chicken with Gochujang Glaze.

If you want another fast weeknight chicken recipe, check out Easy Chicken Stir-Fry with Honey Soy Sauce.

How to Store and Reheat Creamy Cajun Chicken

Let the chicken cool before storing, then refrigerate it in an airtight container for up to 3 to 4 days. The sauce will thicken as it chills.

Reheat gently on the stovetop over low heat or in the microwave at reduced power. Add a small splash of broth or water if needed to loosen the sauce, and avoid a hard boil so the sauce stays smooth. Warm just until heated through, especially if you used chicken breasts.

Nutrition

Nutrition is approximate and will vary based on ingredient brands, exact amounts, and serving size.

  • Serving size: 1/4 of recipe
  • Calories: about 520
  • Protein: 43g
  • Fat: 32g
  • Carbohydrates: 11g
  • Per 100g: about 160 calories, 13g protein, 10g fat, 3g carbohydrates

Creamy Cajun Chicken

A one-pan skillet dinner of seared chicken and vegetables finished in a Parmesan cream sauce with Cajun seasoning.
Course: Main Course
Cuisine: American
Prep: 15 min
Cook: 30 min
Total: 45 min
Servings: 4 Calories: about 520 kcal

Equipment

  • 12-inch skillet
  • tongs
  • spatula
  • knife
  • cutting board
  • instant-read thermometer
  • measuring cups
  • measuring spoons

Ingredients

For the Chicken

  • 1 1/2 pounds boneless skinless chicken breasts (about 675g)
  • 1 1/2 to 2 tablespoons Cajun seasoning
  • Salt, to taste
  • Black pepper, to taste
  • 1 to 2 tablespoons olive oil or avocado oil

For the Vegetables and Sauce

  • 1 medium yellow onion, diced (about 150g)
  • 1 medium bell pepper, diced (about 150g)
  • 2 ribs celery, diced (about 80g)
  • 3 cloves garlic, minced
  • 1/2 cup chicken broth (about 120g)
  • 1 cup heavy cream (about 240g)
  • 1/2 cup grated Parmesan cheese (about 45g)
  • 2 tablespoons chopped fresh parsley

Instructions

  1. Pat the chicken dry and, if needed, slice horizontally or pound to even thickness.
  2. Season both sides of the chicken with Cajun seasoning and a little salt and black pepper if desired.
  3. Heat 1 tablespoon oil in a large 12-inch skillet over medium-high heat until hot.
  4. Add the chicken in a single layer and sear 3 to 5 minutes per side until well browned and nearly cooked through; work in batches if the pan is crowded. Transfer chicken to a plate.
  5. Reduce heat to medium and add a little more oil if the skillet is dry.
  6. Add the onion, bell pepper, and celery and cook 5 to 7 minutes, stirring occasionally, until softened and beginning to turn translucent at the edges.
  7. Add the garlic and cook about 30 seconds until fragrant.
  8. Pour in the chicken broth and scrape up browned bits from the bottom of the skillet.
  9. Stir in the heavy cream and Parmesan and bring to a gentle simmer over medium to medium-low heat; cook 3 to 5 minutes, stirring gently, until smooth and lightly thickened. Do not boil hard.
  10. Return the chicken and any accumulated juices to the skillet and simmer gently 5 to 8 minutes, turning once or spooning sauce over the top, until the chicken reaches 165°F (74°C) at the thickest part.
  11. Taste and adjust seasoning with more Cajun seasoning, salt, or black pepper if needed.
  12. Sprinkle with chopped parsley and serve hot.

Tips

  • Pat chicken dry before seasoning to promote better browning.
  • Slice or pound breasts to an even thickness so they cook evenly.
  • Aim for good color during the sear rather than fully cooking the chicken; finish it in the sauce.
  • Keep the sauce at a gentle simmer after adding cream to prevent splitting.
  • If the sauce is too thick, stir in 2 to 4 tablespoons extra broth a little at a time.

Variations

  • Chicken Thighs: Use boneless skinless chicken thighs instead of breasts for a more forgiving, juicier result.

Notes

Store cooled leftovers in an airtight container in the refrigerator for 3 to 4 days. Reheat gently on low heat or in the microwave at reduced power, adding a splash of broth if needed. Ensure chicken reaches 165°F (74°C).

Nutrition

Calories: about 520 kcal | Protein: 43 g | Fat: 32 g | Carbohydrates: 11 g | Per100g: about 160 kcal, 13 g protein, 10 g fat, 3 g carbohydrates