Author

Julia

Browsing

Maple Brown Sugar Cookies

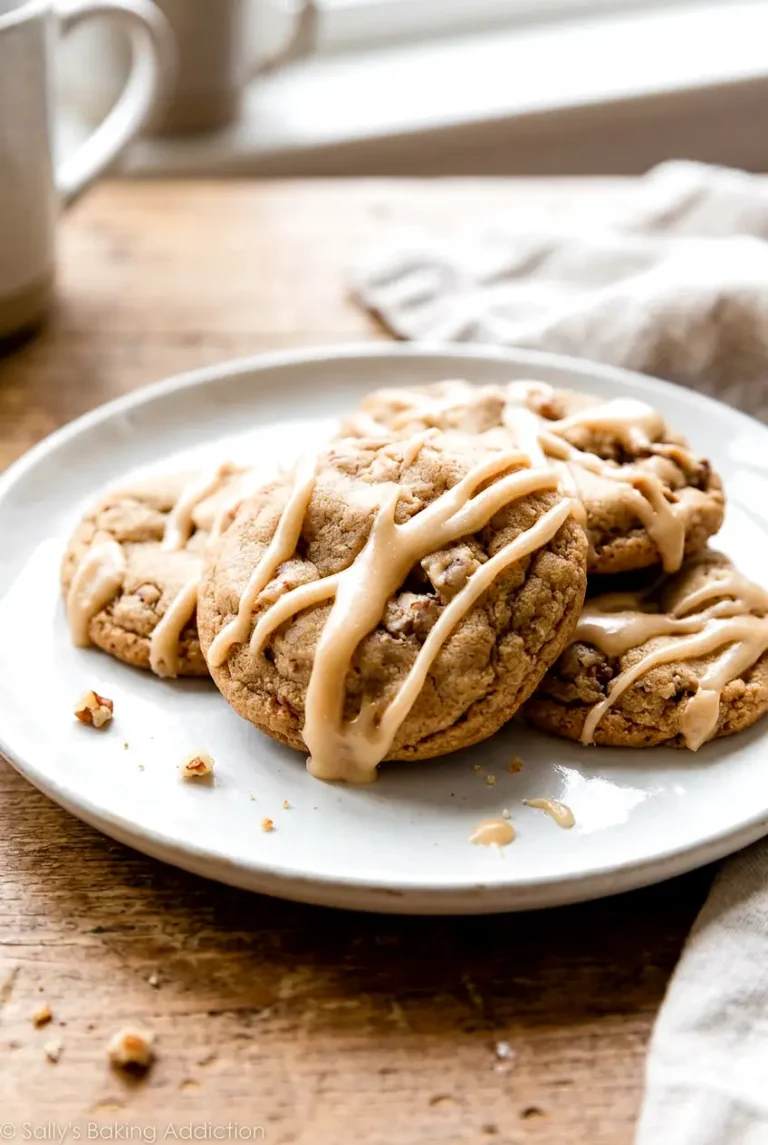
These maple brown sugar cookies bake up soft in the center with lightly crisp edges and a simple maple icing on top. Brown sugar and pure maple syrup give them a warm, deep flavor, and the icing adds a little extra sweetness without making the recipe fussy.

The dough is easy to mix, but it does need time to chill before baking. That step helps the cookies hold their shape and keeps them from spreading too thin.

Ingredients for Maple Brown Sugar Cookies
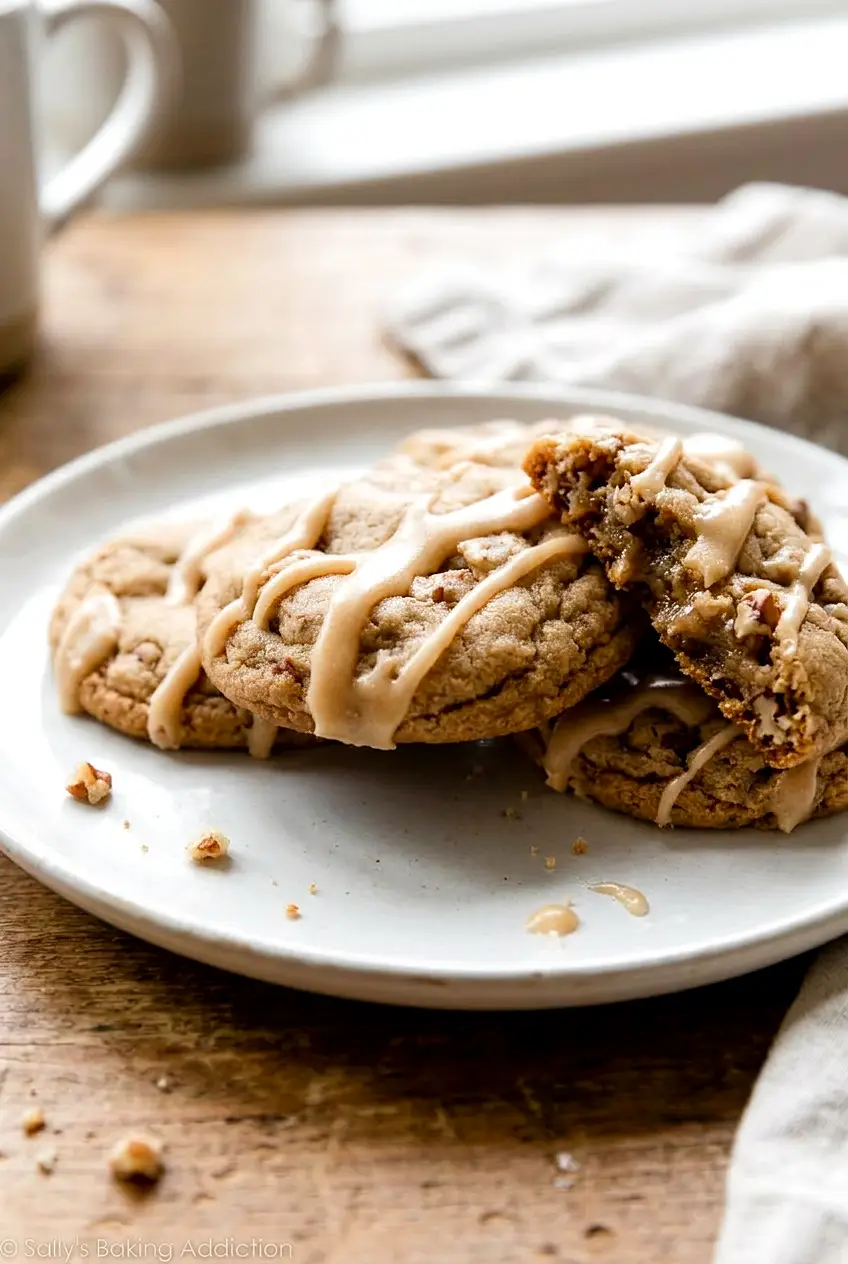
A maple iced brown sugar cookie with another cookie beside it on a plate
  • 2 1/3 cups all-purpose flour (290g)
  • 1 teaspoon baking soda
  • 1/2 teaspoon salt
  • 3/4 cup unsalted butter, softened (170g)
  • 1 cup packed brown sugar (200g)
  • 1/3 cup pure maple syrup (110g)
  • 1 large egg
  • 1 teaspoon vanilla extract
  • 1 to 2 teaspoons maple extract
  • 1 cup chopped pecans (110g), optional

For the maple icing:

  • 2 tablespoons unsalted butter, softened (30g)
  • 2 tablespoons pure maple syrup (40g)
  • 1 to 1 1/2 cups sifted confectioners’ sugar (120g to 180g)

Use pure maple syrup, not pancake syrup. Light or dark brown sugar both work here; dark brown sugar gives the cookies a deeper molasses flavor. If you leave out the maple extract, the cookies will still turn out well, but the maple flavor will be lighter.

How to Make Maple Brown Sugar Cookies
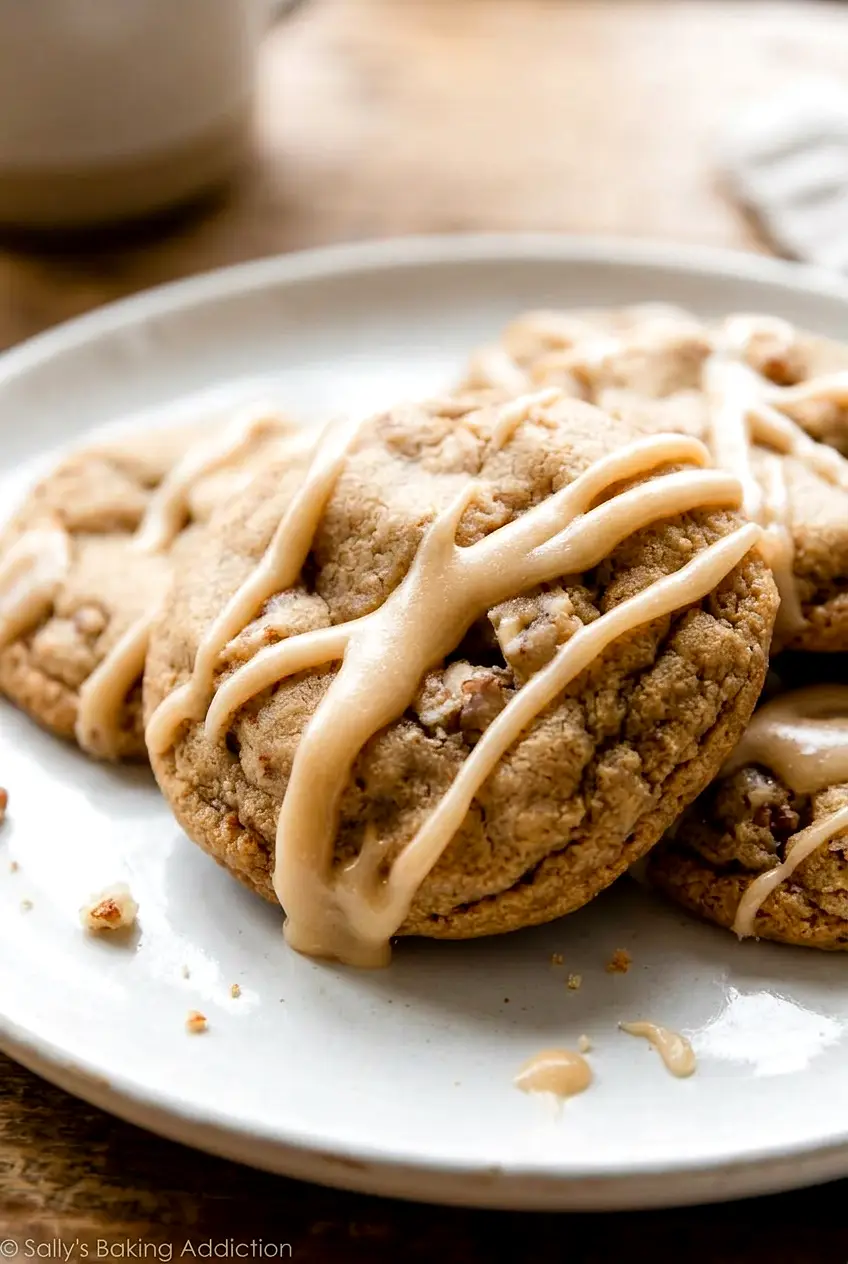
Close-up of maple brown sugar cookies showing soft centers and maple icing
  1. Mix the dry ingredients: In a medium bowl, whisk together the flour, baking soda, and salt until evenly combined.
  2. Cream the butter and sugar: In a large bowl, beat the softened butter and brown sugar with an electric mixer for 3 to 4 minutes, until well combined and slightly fluffy. Beat in the egg, maple syrup, vanilla, and maple extract until smooth.
  3. Finish the dough: Add the flour mixture and mix just until no dry streaks remain. Fold in the pecans, if using. The dough should be soft and cohesive. Do not overmix.
  4. Chill the dough: Cover and refrigerate for at least 2 hours or overnight. The dough should feel firm before scooping.
  5. Preheat the oven: Heat the oven to 350°F. Line a baking sheet with parchment paper.
  6. Scoop the cookies: Portion the chilled dough into even balls and place them a few inches apart on the baking sheet so they have room to spread.
  7. Bake: Bake for 9 to 12 minutes, until the edges are set and lightly golden and the centers still look a little soft. Rotate the pan near the end if your oven bakes unevenly.
  8. Cool: Let the cookies sit on the baking sheet for a few minutes, then transfer them to a wire rack. Cool completely before icing.
  9. Make the icing: In a small bowl, stir together the softened butter, maple syrup, and confectioners’ sugar until smooth and spreadable. If it looks too thin, stir in a little more confectioners’ sugar.
  10. Ice the cookies: Spoon or drizzle the icing over the cooled cookies. Let it set until dry to the touch before stacking or storing.

Why Chilling the Dough Matters

This dough is made with softened butter and maple syrup, so it spreads more if baked warm. Chilling firms the dough, helps the cookies keep a better shape, and gives you a softer center with cleaner edges. If your kitchen is warm and the dough still feels soft after 2 hours, let it chill longer.

How to Tell When the Cookies Are Done

Take the cookies out when the edges look set and lightly golden but the centers still look slightly underbaked. They will continue to set on the hot pan as they cool. If you wait until the centers look fully baked in the oven, the cookies can turn out drier.

How to Store and Freeze Maple Brown Sugar Cookies

Once the icing is fully set, store the cookies in an airtight container at room temperature. If you need to stack them, separate the layers with parchment paper.

You can make the dough ahead and chill it overnight before baking. You can also freeze unbaked dough balls for later baking, or freeze baked cookies after the icing has set. For frozen iced cookies, let them come back to room temperature rather than reheating them, since heat can soften the icing.

More Simple Baking Ideas

If you like simple homemade bakes, try these Simple Zucchini Muffins next.

For another easy dessert, you might also like these Sourdough Discard Brownies.

If you like thick, soft cookies, check out these Thick Soft Chocolate Chip Cookies.

Nutrition

Nutrition is approximate and will vary based on ingredient brands, exact amounts, whether you use the pecans, and how much icing you add to each cookie.

  • Serving size: 1 cookie
  • Calories: about 165
  • Protein: 2g
  • Fat: 7g
  • Carbohydrates: 25g
  • Per 100g: about 410 calories, 4g protein, 18g fat, 60g carbohydrates

Maple Brown Sugar Cookies

Soft-centered cookies with lightly crisp edges flavored with brown sugar and pure maple syrup and finished with a simple maple icing.
Course: Dessert
Cuisine: American
Prep: 25 min
Cook: 12 min
Total: 167 min
Servings: 24 Calories: about 165

Equipment

  • electric mixer
  • mixing bowls
  • measuring cups and spoons
  • baking sheet
  • parchment paper
  • wire rack
  • refrigerator
  • small bowl

Ingredients

Cookies

  • 2 1/3 cups all-purpose flour (290g)
  • 1 teaspoon baking soda
  • 1/2 teaspoon salt
  • 3/4 cup unsalted butter, softened (170g)
  • 1 cup packed brown sugar (200g)
  • 1/3 cup pure maple syrup (110g)
  • 1 large egg
  • 1 teaspoon vanilla extract
  • 1 to 2 teaspoons maple extract
  • 1 cup chopped pecans (110g), optional

Maple icing

  • 2 tablespoons unsalted butter, softened (30g)
  • 2 tablespoons pure maple syrup (40g)
  • 1 to 1 1/2 cups sifted confectioners’ sugar (120g to 180g)

Instructions

  1. Whisk together the flour, baking soda, and salt in a medium bowl until evenly combined.
  2. Beat the softened butter and brown sugar in a large bowl with an electric mixer for 3 to 4 minutes until slightly fluffy.
  3. Beat in the egg, maple syrup, vanilla, and maple extract until smooth.
  4. Add the flour mixture and mix just until no dry streaks remain; fold in the pecans if using and avoid overmixing.
  5. Cover the dough and refrigerate for at least 2 hours or overnight until firm.
  6. Preheat the oven to 350°F (177°C) and line a baking sheet with parchment paper.
  7. Portion the chilled dough into even balls and place them a few inches apart on the prepared baking sheet.
  8. Bake for 9 to 12 minutes, until the edges are set and lightly golden and centers still look slightly soft; rotate the pan near the end if your oven bakes unevenly.
  9. Let the cookies sit on the baking sheet for a few minutes, then transfer to a wire rack and cool completely before icing.
  10. Stir together the softened butter, maple syrup, and confectioners’ sugar in a small bowl until smooth and spreadable, adding more confectioners’ sugar if the icing is too thin.
  11. Spoon or drizzle the icing over the cooled cookies and let it set until dry to the touch before stacking or storing.

Tips

  • Chill the dough at least 2 hours to prevent excessive spreading and to get clean edges with a soft center.
  • Use pure maple syrup (not pancake syrup) for true maple flavor.
  • Dark brown sugar gives a deeper molasses flavor; light brown sugar yields a milder taste.
  • If the dough still feels soft after 2 hours, chill longer until firm enough to scoop.
  • If the icing is too thin, add a little more confectioners’ sugar to thicken it.

Variations

  • With pecans: Fold 1 cup chopped pecans into the dough for added crunch and a nutty flavor.
  • Deeper maple flavor: Use dark brown sugar and the higher amount of maple extract for a stronger maple and molasses note.
  • No maple extract: Omit the maple extract for a subtler maple flavor relying on the pure maple syrup.
Notes

Store fully set iced cookies in an airtight container at room temperature with parchment between layers; dough balls and baked cookies freeze well—thaw iced cookies to room temperature rather than reheating.

Nutrition

Calories: about 165 | Protein: 2 g | Fat: 7 g | Carbohydrates: 25 g | Per100g: about 410 calories, 4 g protein, 18 g fat, 60 g carbohydrates

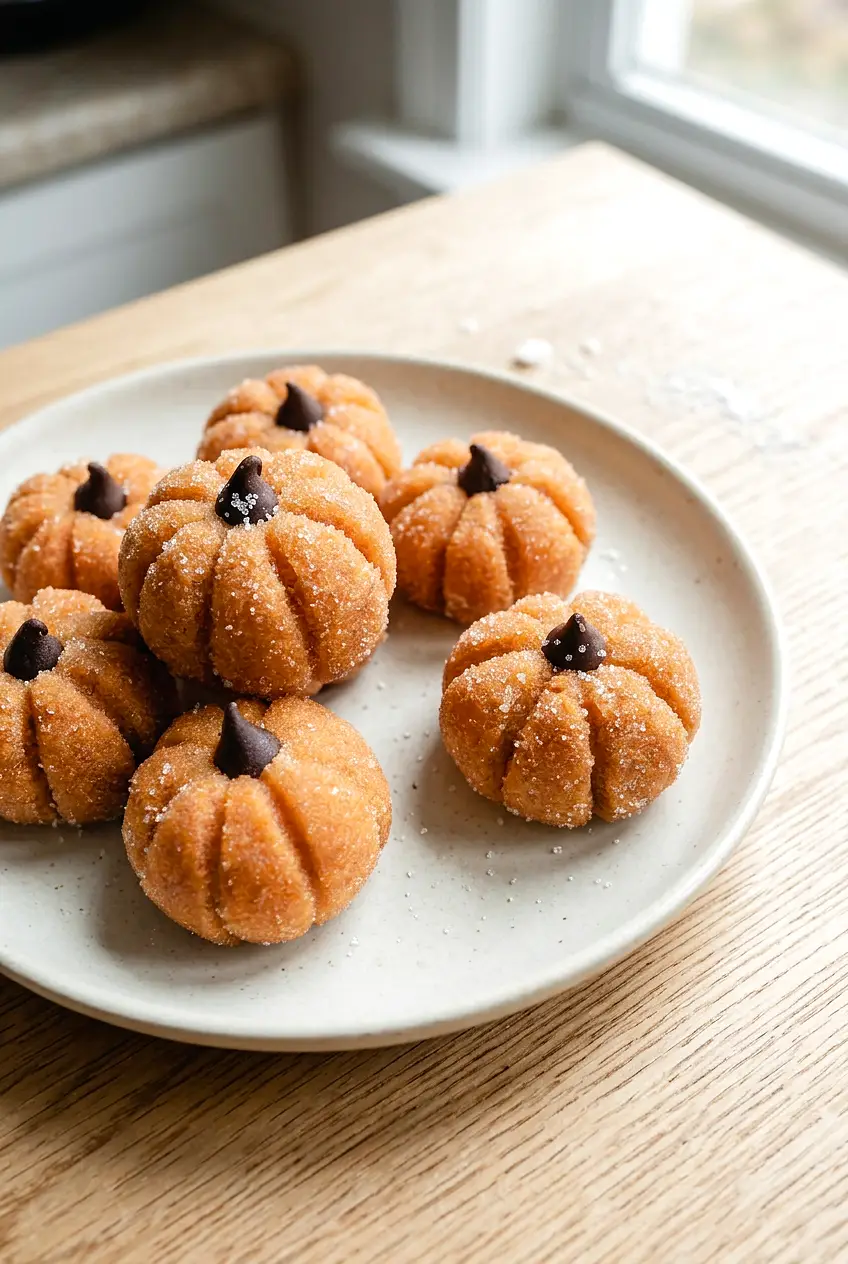
Pumpkin Cheesecake Truffles

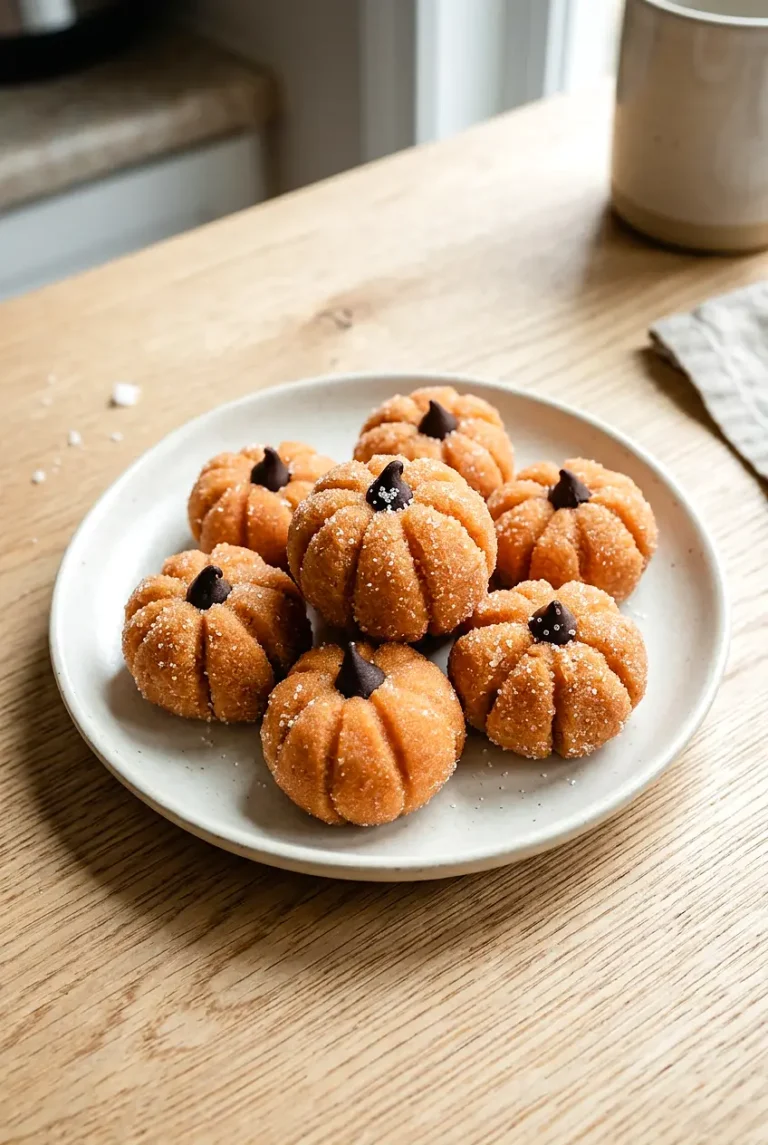
These pumpkin cheesecake truffles are soft, creamy, and easy to shape into little pumpkins for a simple fall dessert. The flavor is somewhere between pumpkin cheesecake and candy, with a light sugar coating on the outside.

The method stays straightforward: cook everything in one saucepan until the mixture is thick enough to hold its shape, chill it, then roll and decorate. If you want another pumpkin and cream cheese dessert, try these Pumpkin Bars with Cream Cheese Frosting.

Ingredients for Pumpkin Cheesecake Truffles

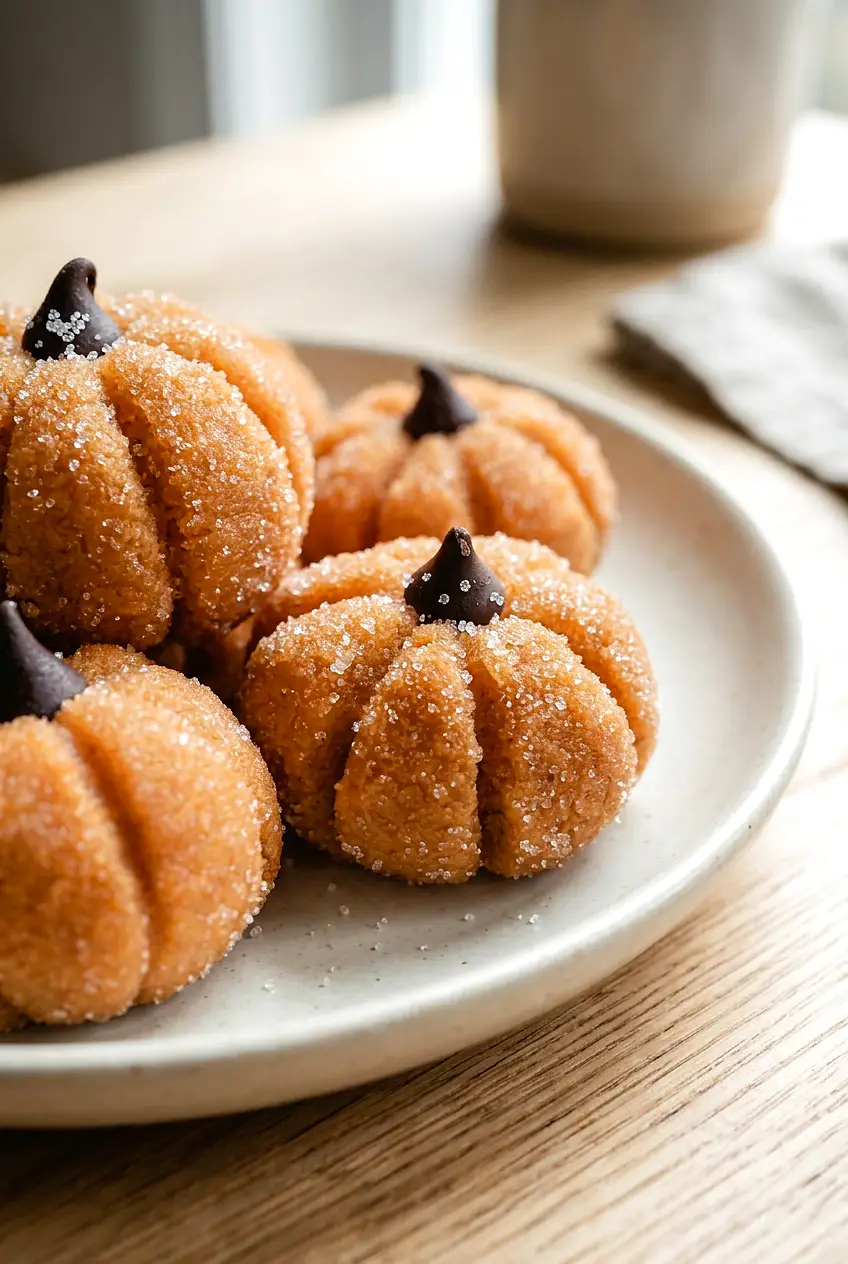
A few pumpkin cheesecake truffles grouped together with visible chocolate chip stems
  • 1 cup canned pumpkin puree (245g), not pumpkin pie filling
  • 8 ounces cream cheese, softened (225g)
  • 1 can (14 ounces) sweetened condensed milk (395g)
  • 2 tablespoons unsalted butter (30g)
  • 1 teaspoon pumpkin pie spice
  • 1 1/2 cups graham cracker crumbs (150g)
  • 1 cup white chocolate chips or chopped white chocolate (170g)
  • 1/2 cup granulated sugar (100g), for coating

Optional for decorating: a few drops of orange food coloring for a brighter color, 1 to 2 tablespoons mini chocolate chips or small chocolate pieces for stems, and a small pinch of salt if the cooked mixture tastes flat.

Equipment: A medium saucepan or deep skillet, a spatula or wooden spoon, parchment paper, and a bowl or shallow baking sheet for cooling. A small cookie scoop is helpful but not required.

How to Make Pumpkin Cheesecake Truffles

Close-up of pumpkin cheesecake truffles showing the sugar coating and ridged pumpkin shape
  1. Cook the base: In a medium saucepan or deep 10- to 12-inch skillet, combine the pumpkin puree, softened cream cheese, sweetened condensed milk, butter, and pumpkin pie spice. Cook over medium to medium-low heat for 5 to 8 minutes, stirring constantly, until the cream cheese is fully melted and the mixture is smooth.
  2. Thicken the mixture: Add the white chocolate and graham cracker crumbs. Continue cooking over medium to medium-low heat for 10 to 17 minutes, stirring constantly so the bottom does not scorch. The mixture should become thick and glossy, pull away from the sides of the pan, and leave a brief track when you drag a spatula through it. If using food coloring or a pinch of salt, stir it in during the last minute.
  3. Cool and chill: Spread the mixture onto a buttered parchment-lined baking sheet or transfer it to a bowl. Let it cool slightly, then refrigerate for 30 to 60 minutes, until it is no longer warm and is firm enough to scoop.
  4. Roll the truffles: Lightly butter your hands to reduce sticking. Scoop small portions and roll into balls. If the mixture softens too much while you work, return it to the refrigerator for a few minutes.
  5. Coat in sugar: Roll each ball in the granulated sugar until evenly coated, then place them on a parchment-lined tray.
  6. Shape the pumpkins: Use a toothpick or skewer to press shallow ridges around each truffle. Keep the lines light so the truffles do not crack. Press a mini chocolate chip or small chocolate piece into the top for a stem, if using.
  7. Chill to finish: Refrigerate for 15 to 30 minutes, until the outside feels firmer and the truffles are easy to pick up and serve.

How to Tell When the Mixture Is Ready

The stovetop step is what determines whether the truffles will roll cleanly or stay too soft. At first, the mixture will look loose and creamy. As it cooks, it will get thicker, shinier, and heavier.

It is ready when the mixture briefly holds its shape when stirred and pulls away from the pan in one mass. If it still spreads quickly and looks more like pudding, keep cooking. Pumpkin moisture can vary, so the visual cues matter more than the clock.

Why the Truffles May Turn Out Too Sticky

Undercooking is the most common reason. Different pumpkin brands hold different amounts of moisture, and a wider pan lets steam cook off faster than a narrow pot.

If your batch is hard to roll, chill it longer and work in small batches. For the next batch, cook the mixture a little longer rather than adding a lot of extra graham cracker crumbs, which can make the texture heavy.

Serving Ideas

Serve these truffles chilled or slightly cool so they stay neat and firm. They fit well on a fall dessert tray, as part of a dessert board, or alongside coffee or hot tea.

How to Store Pumpkin Cheesecake Truffles

Store the truffles in an airtight container in the refrigerator for up to 4 to 5 days. If you need to stack them, separate the layers with parchment so the sugar coating and pumpkin ridges stay in place.

These are best served cold or slightly cool, not reheated. For make-ahead prep, shape them in advance and keep them refrigerated until serving. If the decorations seem delicate, add the sugar coating and chocolate stems just before the final chill.

Nutrition

Nutrition is approximate and will vary based on ingredient brands, exact amounts, and serving size.

  • Serving size: 1 truffle, based on 24 truffles
  • Calories: about 130
  • Protein: 2g
  • Fat: 5g
  • Carbohydrates: 20g
  • Per 100g: about 340 calories, 5g protein, 13g fat, 53g carbohydrates

Pumpkin Cheesecake Truffles

Soft, creamy pumpkin-and-cream-cheese truffles rolled in sugar and shaped like little pumpkins for an easy fall dessert.
Course: Dessert
Cuisine: American
Prep: 20 min
Cook: 25 min
Total: 135 min
Servings: 24 Calories: 130 kcal

Equipment

  • medium saucepan or deep skillet
  • spatula or wooden spoon
  • parchment-lined baking sheet
  • bowl or shallow baking sheet
  • small cookie scoop (optional)
  • toothpick or skewer

Ingredients

Main

  • 1 cup canned pumpkin puree (245g), not pumpkin pie filling
  • 8 ounces cream cheese, softened (225g)
  • 1 can (14 ounces) sweetened condensed milk (395g)
  • 2 tablespoons unsalted butter (30g)
  • 1 teaspoon pumpkin pie spice
  • 1 1/2 cups graham cracker crumbs (150g)
  • 1 cup white chocolate chips or chopped white chocolate (170g)
  • 1/2 cup granulated sugar (100g) for coating

Optional for decorating

  • a few drops orange food coloring (optional, for brighter color)
  • 1 to 2 tablespoons mini chocolate chips or small chocolate pieces for stems (optional)
  • small pinch of salt (optional, if mixture tastes flat)

Instructions

  1. Combine the pumpkin puree, softened cream cheese, sweetened condensed milk, butter, and pumpkin pie spice in a medium saucepan or deep skillet.
  2. Cook over medium to medium-low heat, stirring constantly, for 5 to 8 minutes until the cream cheese is fully melted and the mixture is smooth.
  3. Add the white chocolate and graham cracker crumbs and continue cooking over medium to medium-low heat, stirring constantly, for 10 to 17 minutes so the mixture becomes thick, glossy, pulls away from the pan, and leaves a brief track when you drag a spatula through it.
  4. If using food coloring or a pinch of salt, stir it in during the last minute of cooking.
  5. Spread the mixture onto a buttered, parchment-lined baking sheet or transfer it to a bowl; let it cool slightly, then refrigerate for 30 to 60 minutes until firm enough to scoop.
  6. Lightly butter your hands, scoop small portions (a small cookie scoop helps) and roll into balls; if the mixture softens too much while working, return it to the refrigerator for a few minutes.
  7. Roll each ball in granulated sugar until evenly coated and place on a parchment-lined tray.
  8. Use a toothpick or skewer to press shallow ridges around each truffle and press a mini chocolate chip or small chocolate piece into the top for a stem, if using.
  9. Refrigerate the coated truffles for 15 to 30 minutes until the outside feels firmer and they are easy to pick up and serve.

Tips

  • Cook the mixture until it pulls away from the pan in one mass to ensure truffles will hold their shape.
  • If the mixture is too soft to roll, chill it longer and work in small batches.
  • Buttering your hands reduces sticking when rolling the truffles.
  • Avoid adding excessive graham cracker crumbs to fix softness—cook a bit longer instead to avoid a heavy texture.
  • Keep the ridge lines light when shaping to prevent cracking.

Notes

Store truffles in an airtight container in the refrigerator for 4 to 5 days; separate stacked layers with parchment. Serve cold or slightly cool; do not reheat. Add delicate decorations just before the final chill if needed.

Nutrition

Calories: 130 kcal | Protein: 2 g | Fat: 5 g | Carbohydrates: 20 g

Pumpkin Bars

These pumpkin bars bake up soft, moist, and sturdy enough to slice cleanly. They have warm spice, a smooth pumpkin base, and a cream cheese frosting that keeps them firmly in bar territory instead of turning into a layer cake.

The ingredient list stays simple, and the method is straightforward: use a 9×13-inch pan, mix the batter gently once the flour goes in, and bake just until the center is set.

Ingredients for Pumpkin Bars

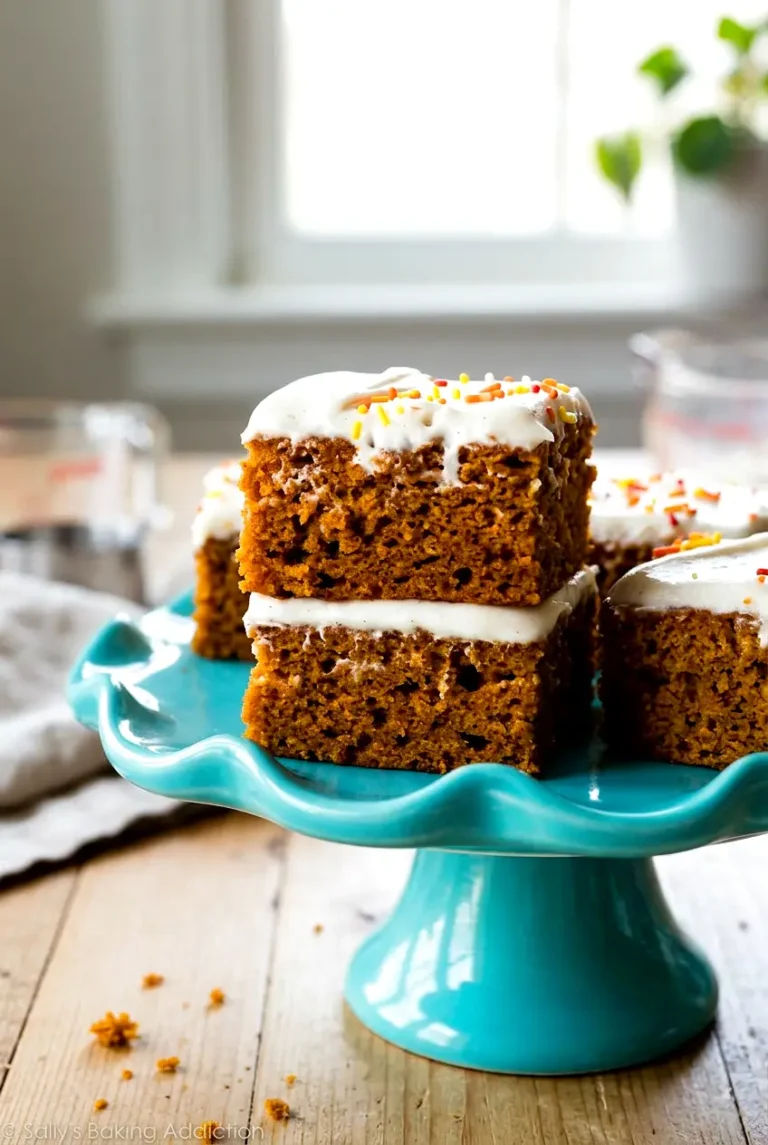
One pumpkin bar slice on a blue cake stand with thick frosting and clean edges
  • 2 cups all-purpose flour (240g)
  • 1 teaspoon baking powder
  • 1/2 teaspoon baking soda
  • 1 1/2 teaspoons ground cinnamon
  • 1 teaspoon pumpkin pie spice
  • 1/2 teaspoon salt
  • 1/2 cup granulated sugar (100g)
  • 3/4 cup light brown sugar (150g)
  • 1/4 cup maple syrup (80g)
  • 1 cup canned pumpkin puree (245g), plain puree, not pumpkin pie filling
  • 2 large eggs
  • 1/2 cup neutral oil or melted coconut oil (120g)
  • 2 teaspoons vanilla extract

For the frosting:

  • 8 ounces cream cheese (225g), softened
  • 1/2 cup unsalted butter (115g), softened
  • 2 to 3 cups confectioners’ sugar (about 240g to 360g)
  • 1/2 teaspoon pumpkin pie spice
  • 1 teaspoon vanilla extract
  • Pinch of salt

Optional: Replace up to 1/4 cup of the oil with unsweetened applesauce, and add sprinkles on top if you like.

How to Make Pumpkin Bars

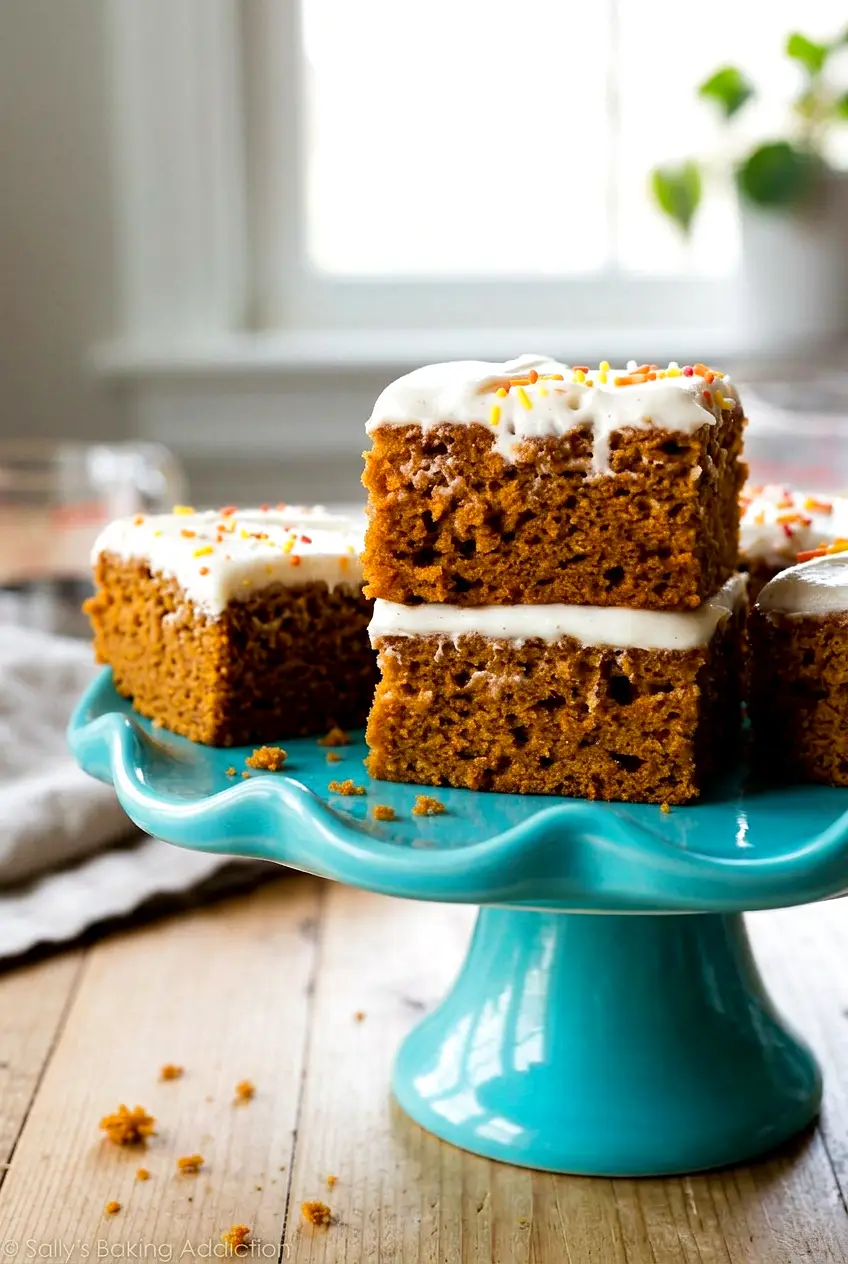
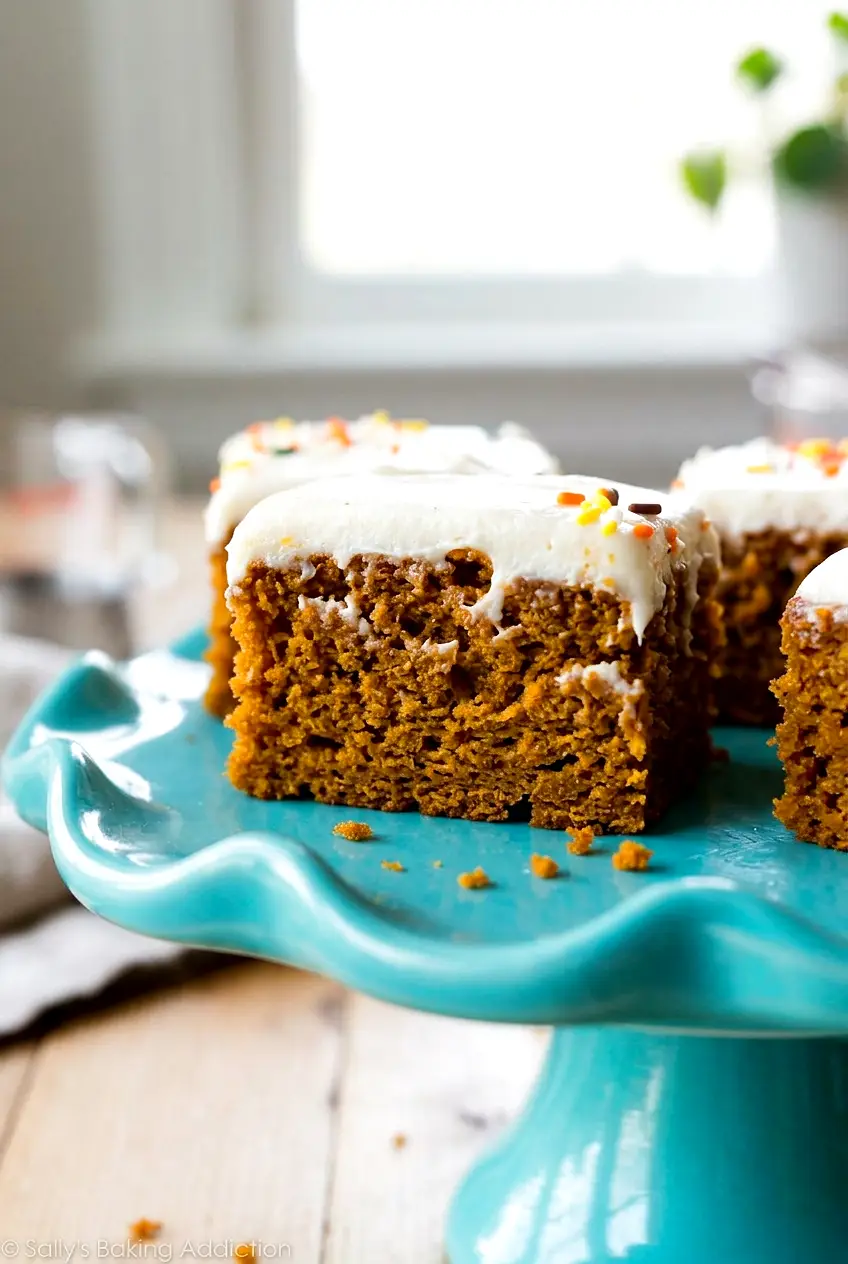
Close-up of pumpkin bars showing the soft crumb and cream cheese frosting layers
  1. Prep the oven and pan: Heat the oven to 350°F. Line a 9×13-inch pan with parchment, leaving some overhang on the long sides for easy lifting.
  2. Whisk the dry ingredients: In a medium bowl, whisk together the flour, baking powder, baking soda, cinnamon, pumpkin pie spice, and salt.
  3. Mix the wet ingredients: In a large bowl, whisk together the pumpkin puree, granulated sugar, brown sugar, maple syrup, eggs, oil, and vanilla until combined and mostly smooth.
  4. Finish the batter: Add the dry ingredients to the wet ingredients and fold with a spatula just until no dry flour remains. The batter will be thick. Do not overmix.
  5. Spread in the pan: Scrape the batter into the prepared pan and spread it evenly into the corners.
  6. Bake: Bake for 22 to 30 minutes. Start checking early. The bars are done when the edges look set, the center no longer looks wet, and a toothpick inserted in the middle comes out with a few moist crumbs instead of wet batter.
  7. Cool completely: Let the bars cool fully before frosting so the topping stays thick and spreadable.
  8. Make the frosting: Beat the cream cheese and butter until smooth. Add 2 cups of the confectioners’ sugar, the pumpkin pie spice, vanilla, and salt, then beat until fluffy. Add more confectioners’ sugar as needed until the frosting is thick enough to spread.
  9. Frost and chill: Spread the frosting over the cooled bars. Add sprinkles if using. Chill for 15 to 30 minutes if you want cleaner slices.
  10. Slice and serve: Cut into 16 bars. Wipe the knife between cuts for neater edges.

Why Pan Size Matters

A 9×13-inch pan gives these bars the intended thickness. In a larger pan, the batter will spread thinner and bake faster, which can dry the bars out. In a smaller pan, the bars will be thicker, so the center will need more time and the edges may brown first.

Use the visual doneness cues more than the clock if your pan runs dark or your oven bakes hot.

How to Keep Pumpkin Bars Soft

Two things make the biggest difference here: gentle mixing and pulling the bars once the center is just set. Stir only until the flour disappears. If you keep mixing, the bars can turn tougher and more cake-like.

Do not wait for a completely dry toothpick. A few moist crumbs are the better cue, since the bars will continue to finish as they cool.

Easy Variation

Pumpkin Bars with Applesauce

You can replace up to 1/4 cup of the oil with unsweetened applesauce. Keep it as a partial swap so the bars stay moist instead of turning dense or gummy.

How to Store Pumpkin Bars

Once fully cooled, store the bars covered in the refrigerator because of the cream cheese frosting. If you need to stack them, place parchment between layers.

They are good served chilled or after sitting at cool room temperature for a short time. These are best made ahead rather than reheated. You can also bake and cool the bars first, then frost them once completely cool.

Nutrition

Nutrition is approximate and will vary based on ingredient brands, exact frosting amount, and serving size.

  • Serving size: 1 bar
  • Calories: about 340
  • Protein: 4g
  • Fat: 17g
  • Carbohydrates: 45g
  • Per 100g: about 330 calories, 4g protein, 17g fat, 43g carbohydrates

Pumpkin Bars

Soft, spiced pumpkin bars topped with a thick cream cheese frosting that holds up for clean slices.
Course: Dessert
Cuisine: American
Prep: 15 min
Cook: 25 min
Total: 120 min
Servings: 16 Calories: about 340 kcal

Equipment

  • 9×13-inch pan
  • parchment paper
  • mixing bowls
  • whisk
  • spatula
  • electric mixer or hand mixer

Ingredients

For the bars

  • 2 cups all-purpose flour (240g)
  • 1 teaspoon baking powder
  • 1/2 teaspoon baking soda
  • 1 1/2 teaspoons ground cinnamon
  • 1 teaspoon pumpkin pie spice
  • 1/2 teaspoon salt
  • 1/2 cup granulated sugar (100g)
  • 3/4 cup light brown sugar (150g)
  • 1/4 cup maple syrup (80g)
  • 1 cup canned pumpkin puree (245g)
  • 2 large eggs
  • 1/2 cup neutral oil or melted coconut oil (120g)
  • 2 teaspoons vanilla extract

For the frosting

  • 8 ounces cream cheese (225g), softened
  • 1/2 cup unsalted butter (115g), softened
  • 2 to 3 cups confectioners’ sugar (about 240g to 360g)
  • 1/2 teaspoon pumpkin pie spice
  • 1 teaspoon vanilla extract
  • Pinch of salt

Optional

  • Replace up to 1/4 cup of the oil with unsweetened applesauce
  • Sprinkles for topping

Instructions

  1. Preheat the oven to 350°F (177°C) and line a 9×13-inch pan with parchment, leaving overhang on the long sides.
  2. In a medium bowl, whisk together the flour, baking powder, baking soda, cinnamon, pumpkin pie spice, and salt.
  3. In a large bowl, whisk the pumpkin puree, granulated sugar, brown sugar, maple syrup, eggs, oil, and vanilla until combined and mostly smooth.
  4. Add the dry ingredients to the wet ingredients and fold with a spatula just until no dry flour remains; do not overmix.
  5. Scrape the batter into the prepared pan and spread it evenly into the corners.
  6. Bake for 22 to 30 minutes, checking early; the bars are done when the edges look set, the center no longer looks wet, and a toothpick comes out with a few moist crumbs.
  7. Let the bars cool completely in the pan before frosting so the topping stays thick and spreadable.
  8. Beat the cream cheese and butter until smooth with an electric mixer, then add 2 cups confectioners’ sugar, the pumpkin pie spice, vanilla, and salt and beat until fluffy; add more confectioners’ sugar as needed to reach a spreadable thickness.
  9. Spread the frosting over the cooled bars and add sprinkles if using.
  10. Chill the frosted bars 15 to 30 minutes for cleaner slices if desired.
  11. Use the parchment overhang to lift the slab from the pan, then cut into 16 bars, wiping the knife between cuts for neater edges.

Tips

  • Mix the batter only until the flour disappears to keep bars tender and not cake-like.
  • Use a 9×13-inch pan for the intended thickness and baking time.
  • Rely on visual doneness and a toothpick with moist crumbs rather than waiting for a completely dry toothpick.
  • Chill the frosted bars briefly for cleaner slices.
  • Swap up to 1/4 cup of oil with unsweetened applesauce for a lighter option.

Variations

  • Pumpkin Bars with Applesauce: Replace up to 1/4 cup of the oil with unsweetened applesauce to lighten the bars while keeping moisture; avoid larger swaps to prevent a gummy texture.

Notes

Store fully cooled and frosted bars covered in the refrigerator; place parchment between layers if stacking. These are best made ahead; you can bake and cool the bars, then frost just before serving.

Nutrition

Calories: about 340 kcal | Protein: 4 g | Fat: 17 g | Carbohydrates: 45 g

Mexican Chicken Marinade

This Mexican chicken marinade gives chicken a bright lime flavor with warm spices like chili powder, cumin, and smoked paprika. It works well with breasts, thighs, drumsticks, or a whole chicken, and it keeps the ingredient list simple.

Mix it in a bowl or a zip-top bag, let the chicken marinate for a few hours or overnight, then grill, bake, or roast until the chicken reaches 165°F. It is an easy prep-ahead option for tacos, bowls, nachos, or a straightforward dinner with vegetables on the side.

Ingredients for Mexican Chicken Marinade

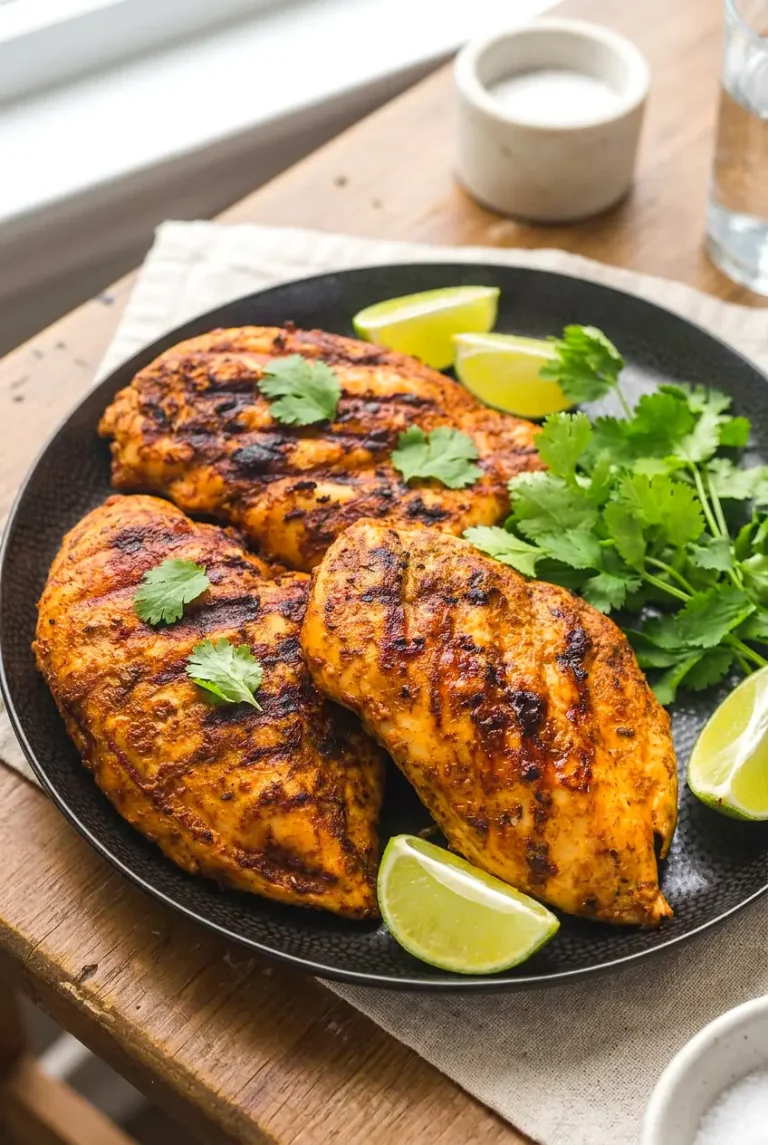
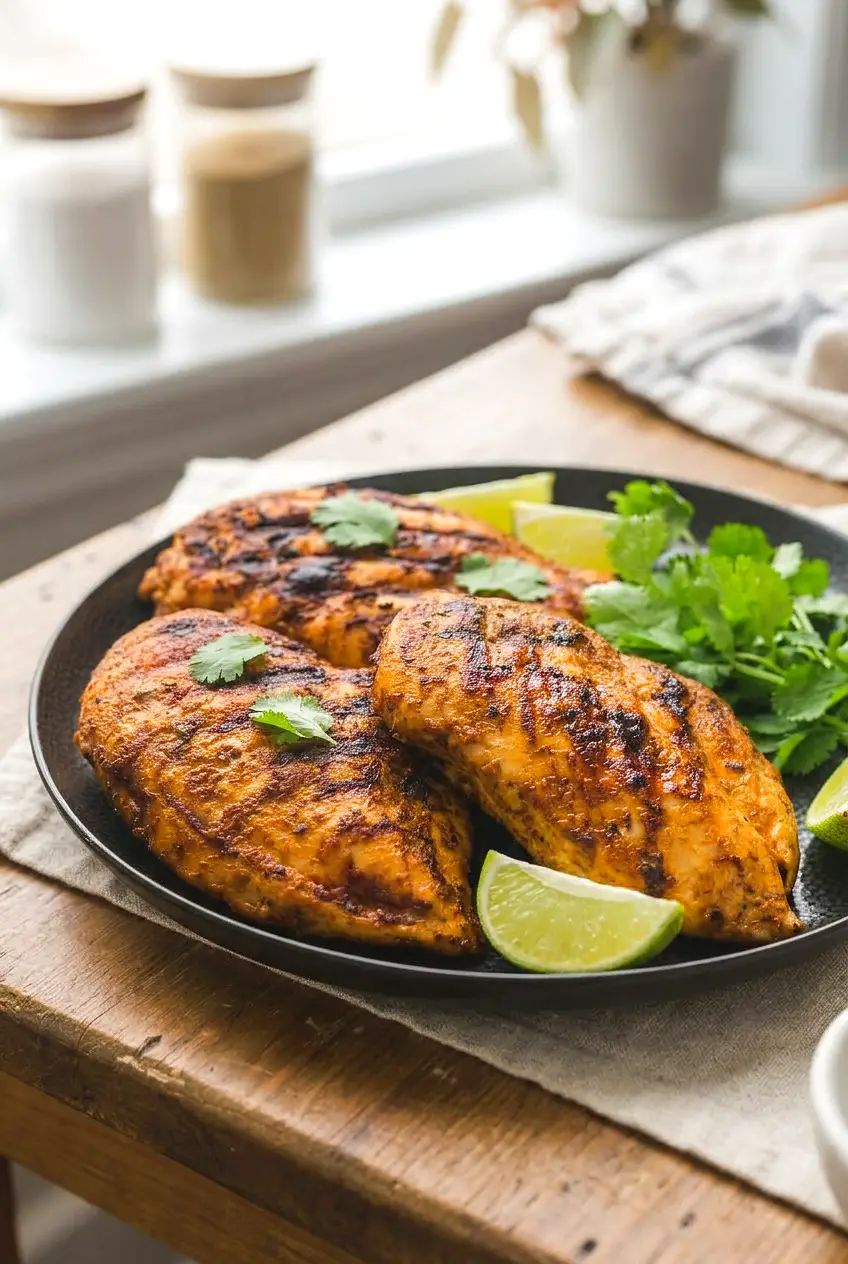
Side angle of grilled Mexican marinated chicken on a black plate with fresh cilantro and lime wedges
  • 2 1/2 to 3 pounds chicken (about 1.15 to 1.35 kg), such as boneless skinless breasts, thighs, drumsticks, or a whole or spatchcock chicken
  • 1/4 cup olive oil
  • 1/4 cup fresh lime juice
  • 3 cloves garlic, minced
  • 1 tablespoon chili powder
  • 1 teaspoon smoked paprika
  • 1 teaspoon ground cumin
  • 1 teaspoon kosher salt
  • 1/2 teaspoon black pepper
  • 1/8 teaspoon ground cinnamon (optional)

For a few simple flavor changes, you can add 1 to 2 teaspoons honey for a slightly rounder flavor and better browning, 1/4 teaspoon crushed red pepper flakes for more heat, or 2 tablespoons chopped cilantro for a fresher finish.

Lime juice gives the most fitting flavor here, but lemon juice can work if needed. If you use fine salt instead of kosher salt, use a little less.

How to Make Mexican Chicken Marinade

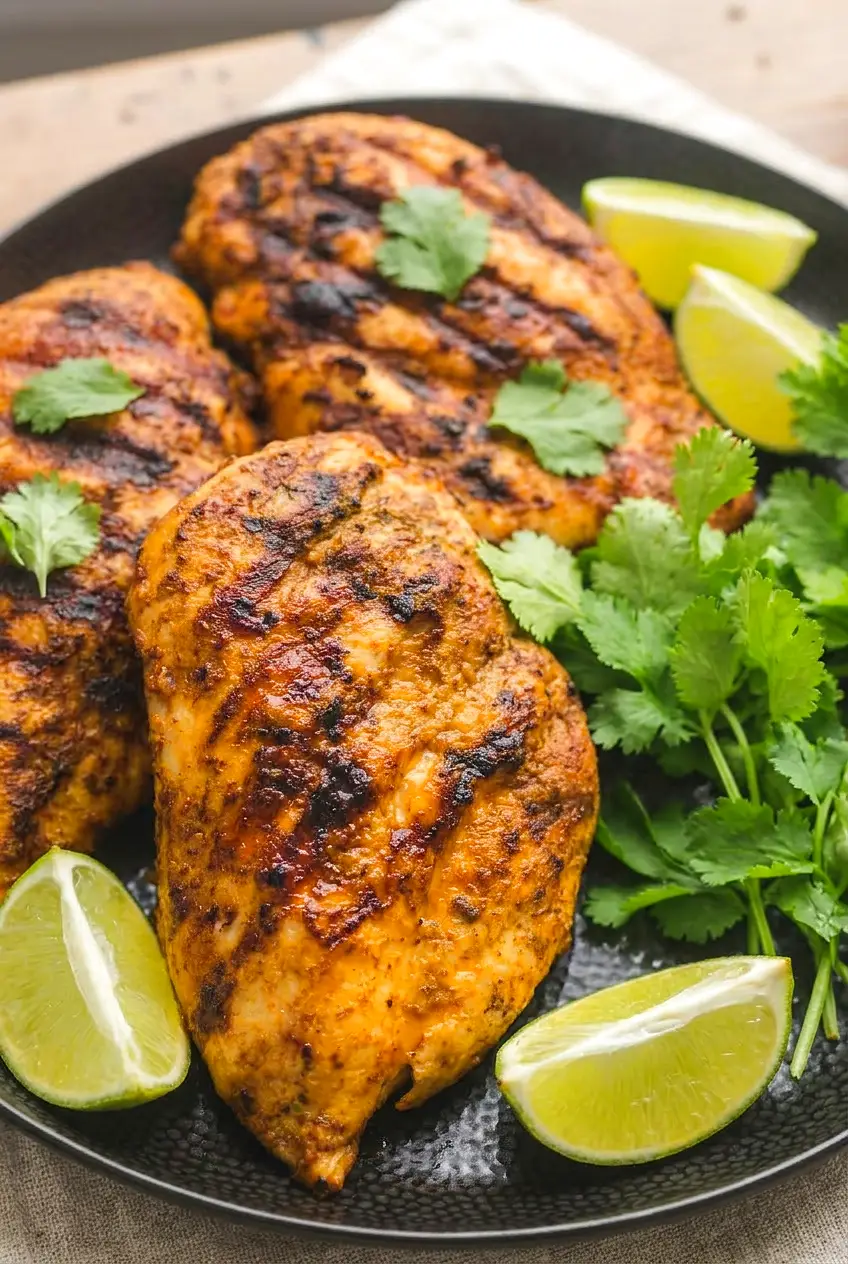
Close view of grilled Mexican chicken showing browned edges and lime and cilantro garnish
  1. Mix the marinade: In a bowl or large zip-top bag, combine the olive oil, lime juice, garlic, chili powder, smoked paprika, cumin, salt, pepper, and optional cinnamon. Whisk or squish until the spices are evenly mixed and no dry clumps remain.
  2. Coat the chicken: Add the chicken and turn to coat well. If using a bag, press out the extra air and seal tightly. Refrigerate right away.
  3. Marinate: Refrigerate for at least a few hours and up to 24 hours. Thicker cuts and bone-in pieces do better with the longer end of that range. Do not go much past 24 hours, or the lime juice can start to affect the texture.
  4. Preheat: Heat a grill to medium-high or preheat the oven to 400°F. If grilling, clean the grates and oil them lightly if needed. If baking or roasting, use a rimmed sheet pan or baking dish and leave space between the pieces so they brown instead of steam.
  5. Cook the chicken: Remove the chicken from the marinade and cook until browned outside and cooked through, turning once about halfway through. Grill pieces for about 12 to 20 minutes, depending on the cut and thickness, or bake at 400°F for about 20 to 35 minutes. Bone-in pieces and whole chicken will take longer than boneless pieces.
  6. Check for doneness: Use an instant-read thermometer in the thickest part. The chicken should reach 165°F. The juices should run clear, and grilled chicken should have light charring in spots.
  7. Rest and serve: Let the chicken rest for 5 to 10 minutes before slicing or serving. Spoon any resting juices over the top if you like.

Best Chicken Cuts to Use

This marinade works with most common chicken cuts. Boneless breasts cook faster and can dry out more easily, so start checking them early. Thighs and drumsticks are more forgiving and usually stay juicier. A whole or spatchcock chicken also works well but needs more time to marinate and cook.

Try to keep the pieces close in thickness so they cook more evenly.

How Long to Marinate Chicken

A few hours gives the chicken good flavor, and overnight is convenient for meal prep. Keep the chicken refrigerated the whole time, whether it is in a zip-top bag or a covered bowl.

For the best texture, keep the marinating time under 24 hours.

Serving Ideas

Slice the chicken for tacos with corn tortillas, guacamole, and pico de gallo, or use it in burrito bowls with cilantro lime rice, black beans, and lime crema. It also works well chopped over nachos with cheese, sour cream, guacamole, and pineapple salsa.

For a simple dinner, serve it with roasted potatoes or steamed broccoli. If you want another easy chicken flavor, try this Greek Chicken Marinade for Juicy Grilled Chicken.

Optional Flavor Tweaks

For more heat

Stir in 1/4 teaspoon crushed red pepper flakes.

For a slightly sweeter finish

Add 1 to 2 teaspoons honey for a rounder flavor and a little more browning.

For a fresher flavor

Add 2 tablespoons chopped cilantro before marinating.

How to Store and Reheat the Chicken

Let the cooked chicken cool, then store it in an airtight container in the refrigerator for up to 5 days. For better moisture, keep the pieces whole or in larger pieces and slice only what you need.

Reheat gently in the microwave or covered in the oven until heated through. Gentle reheating helps keep the chicken from drying out.

You can also marinate the chicken the night before and cook it the next day. For another marinated chicken dinner, see these Easy Turkish Yogurt Chicken Kabobs. If you are planning more chicken dinners, you may also like this Nigerian Chicken Stew.

Nutrition

Nutrition is approximate and will vary based on the chicken cut, exact ingredients, and how much marinade remains on the chicken after cooking.

  • Serving size: about 1/4 of the recipe
  • Calories: about 390
  • Protein: 43g
  • Fat: 22g
  • Carbohydrates: 3g
  • Per 100g: about 175 calories, 19g protein, 10g fat, 1g carbohydrates

Mexican Chicken Marinade

A bright lime-and-spice marinade for chicken that works with breasts, thighs, drumsticks, or a whole chicken for grilling, baking, or roasting.
Course: Main Course
Cuisine: Mexican
Prep: 10 min
Cook: 35 min
Total: 1485 min
Servings: 4 Calories: 390 kcal

Equipment

  • bowl or zip-top bag
  • whisk or fork
  • grill or oven
  • rimmed baking sheet or baking dish
  • instant-read thermometer
  • tongs

Ingredients

Chicken

  • 2 1/2 to 3 pounds chicken (about 1.15 to 1.35 kg) — breasts, thighs, drumsticks, or a whole/spatchcock chicken

Marinade

  • 1/4 cup olive oil
  • 1/4 cup fresh lime juice
  • 3 cloves garlic, minced
  • 1 tablespoon chili powder
  • 1 teaspoon smoked paprika
  • 1 teaspoon ground cumin
  • 1 teaspoon kosher salt
  • 1/2 teaspoon black pepper
  • 1/8 teaspoon ground cinnamon (optional)

Optional additions

  • 1 to 2 teaspoons honey (optional, for sweeter finish and better browning)
  • 1/4 teaspoon crushed red pepper flakes (optional, for more heat)
  • 2 tablespoons chopped cilantro (optional, for fresher flavor)

Instructions

  1. Combine the olive oil, lime juice, minced garlic, chili powder, smoked paprika, ground cumin, kosher salt, black pepper, and optional cinnamon in a bowl or large zip-top bag; whisk or squeeze until spices are evenly mixed and no dry clumps remain.
  2. Add the chicken to the bowl or bag and turn to coat thoroughly; press out extra air if using a bag and seal.
  3. Refrigerate the coated chicken and marinate for at least a few hours and up to 24 hours, keeping it refrigerated the whole time.
  4. If grilling, heat the grill to medium-high and clean and lightly oil the grates; if baking or roasting, preheat the oven to 400°F (204°C) and arrange a rimmed sheet pan or baking dish with space between pieces.
  5. Remove the chicken from the marinade and place on the preheated grill or prepared pan; cook until browned and cooked through, turning once about halfway through.
  6. Grill pieces about 12 to 20 minutes depending on cut and thickness, or bake at 400°F (204°C) for about 20 to 35 minutes; bone-in pieces and whole chickens will take longer than boneless pieces.
  7. Check doneness with an instant-read thermometer in the thickest part; the internal temperature should reach 165°F (74°C).
  8. Let the chicken rest 5 to 10 minutes before slicing or serving and spoon any resting juices over the top if desired.

Tips

  • Keep pieces similar in thickness so they cook evenly.
  • Start checking boneless breasts earlier to avoid overcooking.
  • Do not marinate much past 24 hours to prevent texture changes from the lime juice.
  • Leave space between pieces on the baking sheet so they brown instead of steam.
  • Rest the chicken 5 to 10 minutes before slicing to retain juices.

Variations

  • More heat: Stir in 1/4 teaspoon crushed red pepper flakes for extra spice.
  • Slightly sweeter finish: Add 1 to 2 teaspoons honey for a rounder flavor and better browning.
  • Fresher flavor: Add 2 tablespoons chopped cilantro before marinating for a bright finish.

Notes

Store cooled cooked chicken in an airtight container in the refrigerator for up to 5 days; reheat gently in the microwave or covered in the oven to preserve moisture. Keep marinating time under 24 hours for best texture.

Nutrition

Calories: 390 kcal | Protein: 43 g | Fat: 22 g | Carbohydrates: 3 g

Greek Chicken Marinade

This Greek chicken marinade gives chicken a bright lemon-and-herb flavor with enough olive oil to keep it balanced. Garlic, oregano, parsley, thyme, and paprika round it out, so it tastes fresh without being too sharp.

It is easy to use with thighs, breasts, legs, or cutlets, and you can cook the chicken on the grill, in the oven, or in a skillet. Just keep the marinating time shorter for breasts and cutlets so the lemon does not overpower the texture.

Ingredients for Greek Chicken Marinade

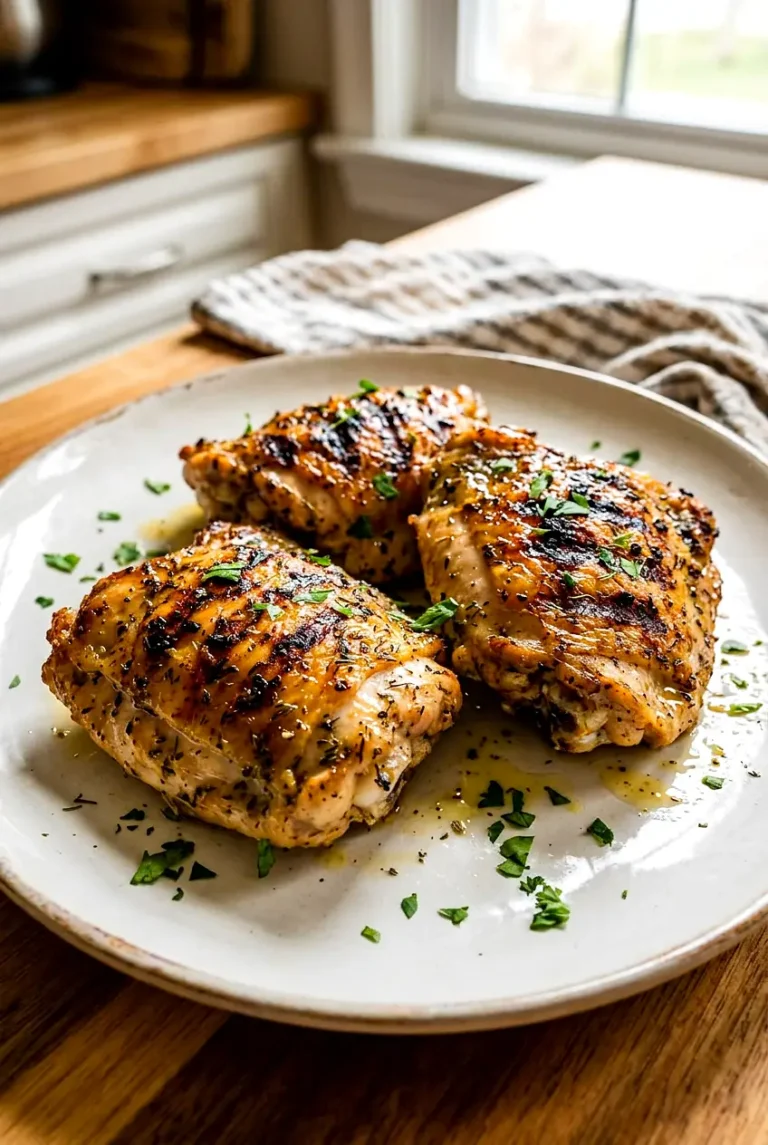
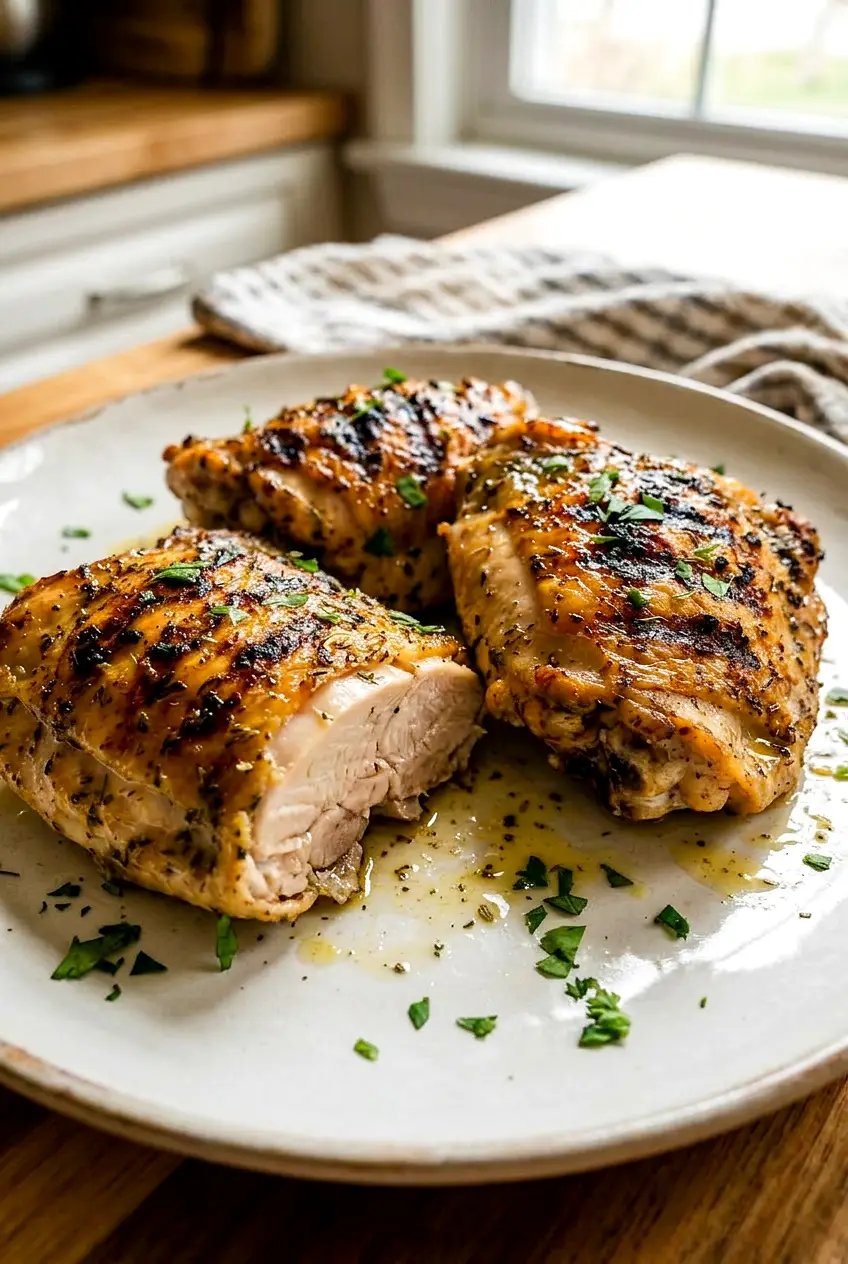
Sliced grilled Greek chicken showing moist meat and golden browned skin
  • Chicken: 2 to 3 pounds chicken thighs, breasts, legs, or cutlets (about 1.1 to 1.35 kg). Thighs are the most forgiving. If using breasts, keep them even in thickness or cut large ones into cutlets.
  • Extra-virgin olive oil: 1/3 cup (75g)
  • Fresh lemon juice: 1/4 cup
  • Lemon zest: 1 tablespoon
  • Garlic: 4 cloves, minced
  • Dried Greek oregano: 2 teaspoons
  • Fresh thyme: 1 teaspoon, chopped
  • Fresh parsley: 2 tablespoons, chopped
  • Sweet paprika: 1 teaspoon
  • Kosher salt: 1 1/2 teaspoons
  • Black pepper: 1/2 teaspoon

Optional: use smoked paprika instead of sweet paprika for a deeper flavor, add a small pinch of chili flakes or Aleppo pepper for mild heat, or stir in 1 to 2 teaspoons honey if the marinade tastes too sharp.

How to Make Greek Chicken Marinade

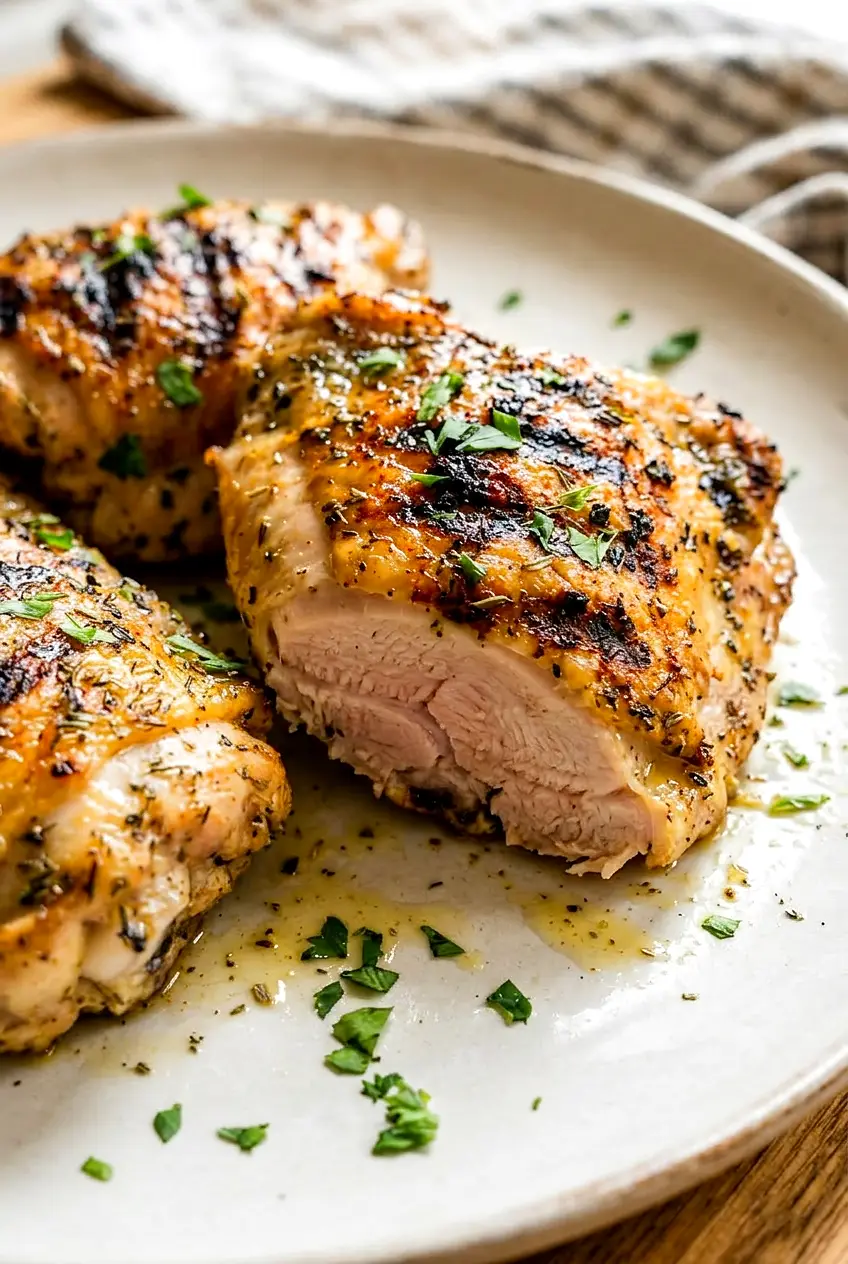
Close-up of Greek chicken with browned edges and juicy herb-coated surface
  1. Mix the marinade: In a bowl, whisk together the olive oil, lemon juice, lemon zest, garlic, oregano, thyme, parsley, paprika, salt, and black pepper until combined. If you want some for serving, reserve it now before it touches the raw chicken.
  2. Coat the chicken: Put the chicken in a zip-top bag or shallow dish and pour the marinade over it. Turn the pieces so they are evenly coated. If you are using chicken breasts, cut very large ones into cutlets or pound them to an even thickness so they cook more evenly.
  3. Marinate: Cover and refrigerate for at least 30 minutes or up to several hours. Breasts and thin cutlets do best with a shorter marinating time, while thighs and legs can handle longer.
  4. Preheat the grill: Heat the grill to medium-high and lightly oil the grates.
  5. Grill the chicken: Remove the chicken from the marinade and let the excess drip off. Grill for about 10 to 18 minutes, depending on the cut and thickness, turning once halfway through. Let the first side cook undisturbed until it releases easily and has good color.
  6. Check for doneness: Cook until the outside is browned, the meat is opaque throughout, and the thickest part reaches 165°F on an instant-read thermometer. Thin cutlets will finish faster than bone-in legs or thick thighs, so start checking early.
  7. Rest and serve: Transfer the chicken to a plate and rest for 5 to 10 minutes before slicing or serving. Serve with any reserved marinade only if it was kept separate from the raw chicken.

Oven and Skillet Cooking Options

Baked Greek Chicken

Heat the oven to 425°F. Lightly oil a rimmed sheet pan and arrange the marinated chicken in a single layer with a little space between pieces. Bake for 18 to 25 minutes, turning once halfway through if needed, until the thickest part reaches 165°F. Rotate the pan if your oven browns unevenly.

Skillet Greek Chicken

Heat a lightly oiled large skillet over medium-high heat. Add the chicken in a single layer and cook until browned on the first side, then flip and finish cooking until the thickest part reaches 165°F. Work in batches if needed so the chicken browns instead of steaming.

Best Cuts for This Marinade

  • Chicken thighs: Tender, flavorful, and the easiest cut to work with.
  • Chicken breasts: Good for a leaner option, but keep the marinating time shorter and watch the temperature closely.
  • Chicken cutlets: The fastest-cooking option and a good choice for quick grilling or skillet cooking.
  • Chicken legs: Great for grilling or roasting, but they take longer than boneless pieces.

How to Keep the Chicken Juicy

  • Use a shorter marinating time for breasts and cutlets.
  • Do not move the chicken too early or it may stick and tear before it browns.
  • Cook only until the thickest part reaches 165°F.
  • Let the chicken rest for 5 to 10 minutes before slicing.

What to Serve With Greek Chicken

This chicken works well with simple sides that let the lemon and herbs stand out.

  • Greek salad
  • Warm pita or crusty bread
  • Rice or couscous
  • Roasted potatoes
  • Cucumbers and tomatoes
  • A simple yogurt-based sauce

It is also good sliced for wraps or grain bowls.

Variations

Smoky Greek Chicken

Use smoked paprika instead of sweet paprika, or add a small pinch of chili flakes or Aleppo pepper. Keep the heat modest so the lemon and oregano still come through.

Roasted Garlic Version

Swap the raw garlic for 2 to 3 tablespoons mashed roasted garlic for a softer, sweeter garlic flavor. If needed, add a little extra lemon zest or oregano to keep the marinade bright.

How to Store and Reheat Greek Chicken

Store cooked chicken in an airtight container in the refrigerator for up to 4 days. Let it cool before refrigerating.

Reheat gently in the microwave, oven, or a skillet until warmed through. If the chicken is sliced, cover it loosely or add a small splash of water to help keep it from drying out.

For make-ahead prep, marinate the chicken several hours ahead and keep it refrigerated until you are ready to cook. Discard any marinade that touched raw chicken. Reserved marinade is only safe to serve if it was set aside before adding the raw poultry.

Nutrition

Nutrition is approximate and will vary based on the cut of chicken, marinade absorption, ingredient brands, and serving size.

  • Serving size: about 1/4 of the recipe
  • Calories: about 430
  • Protein: 38g
  • Fat: 29g
  • Carbohydrates: 3g
  • Per 100g: about 180 calories, 16g protein, 12g fat, 1g carbohydrates

Greek Chicken Marinade

A lemon-and-herb marinade for chicken that brightens the meat and keeps it tender for grilling, baking, or skillet cooking.
Course: Main Course
Cuisine: Mediterranean
Prep: 10 min
Cook: 20 min
Total: 65 min
Servings: 4 Calories: 430 kcal

Equipment

  • bowl
  • whisk
  • zip-top bag or shallow dish
  • grill
  • rimmed baking sheet
  • large skillet
  • instant-read thermometer
  • tongs

Ingredients

Chicken

  • 2 to 3 lb (1.1–1.35 kg) chicken thighs, breasts, legs, or cutlets

Marinade

  • 1/3 cup extra-virgin olive oil (75 g)
  • 1/4 cup fresh lemon juice
  • 1 tablespoon lemon zest
  • 4 cloves garlic, minced
  • 2 teaspoons dried Greek oregano
  • 1 teaspoon fresh thyme, chopped
  • 2 tablespoons fresh parsley, chopped
  • 1 teaspoon sweet paprika
  • 1 1/2 teaspoons kosher salt
  • 1/2 teaspoon black pepper

Optional

  • Smoked paprika instead of sweet paprika
  • Small pinch chili flakes or Aleppo pepper for heat
  • 1 to 2 teaspoons honey if the marinade tastes too sharp

Instructions

  1. In a bowl, whisk together the olive oil, lemon juice, lemon zest, garlic, oregano, thyme, parsley, paprika, salt, and black pepper until combined; reserve a portion if you want to use some for serving before it touches the raw chicken.
  2. Place the chicken in a zip-top bag or shallow dish and pour the marinade over it, turning pieces to coat evenly; trim or cut large breasts into cutlets or pound to even thickness if needed.
  3. Cover and refrigerate to marinate for at least 30 minutes or up to several hours (use shorter times for breasts and cutlets, longer for thighs and legs).
  4. If grilling, heat the grill to medium-high and lightly oil the grates.
  5. Remove the chicken from the marinade, letting excess drip off, and grill in a single layer for about 10 to 18 minutes total, turning once halfway through and letting the first side develop good color before flipping.
  6. Check doneness with an instant-read thermometer; cook until the thickest part reaches 165°F (74°C).
  7. Transfer the chicken to a plate and rest for 5 to 10 minutes before slicing or serving; use only reserved marinade that was kept separate from the raw chicken.
  8. For oven baking: preheat the oven to 425°F (218°C), lightly oil a rimmed sheet pan, arrange chicken in a single layer, and bake 18 to 25 minutes (turn once if needed) until the thickest part reaches 165°F (74°C).
  9. For skillet cooking: heat a lightly oiled large skillet over medium-high, add chicken in a single layer, brown the first side, then flip and cook until the thickest part reaches 165°F (74°C); work in batches if necessary so pieces brown rather than steam.

Tips

  • Reserve any serving marinade before it touches raw chicken; discard marinade that contacted raw poultry.
  • Use shorter marinating times for breasts and cutlets to avoid the lemon overpowering texture.
  • Do not move chicken too early on the grill or skillet; let it develop color so it releases easily.
  • Work in batches in the skillet to prevent steaming and ensure browning.
  • Let chicken rest 5 to 10 minutes after cooking to keep juices locked in.

Variations

  • Smoky Greek Chicken: Use smoked paprika instead of sweet paprika and add a small pinch of chili flakes or Aleppo pepper for mild heat.
  • Roasted Garlic Version: Swap the raw garlic for 2 to 3 tablespoons mashed roasted garlic for a sweeter, softer garlic flavor; add extra lemon zest or oregano if desired.

Notes

Store cooked chicken in an airtight container in the refrigerator for up to 4 days. Reheat gently and add a splash of water if sliced to prevent drying. Discard any marinade that touched raw chicken unless it was reserved separately before contact.

Nutrition

Calories: 430 kcal | Protein: 38 g | Fat: 29 g | Carbohydrates: 3 g

Chicken Thigh Marinade

This chicken thigh marinade makes juicy, well-seasoned chicken with a balance of lime, soy sauce, honey, garlic, and cumin. The flavor works especially well with boneless skinless thighs, which stay tender and brown nicely whether you grill them or bake them.

The marinade comes together in a few minutes and uses common ingredients. Marinate the chicken for at least 30 minutes and up to 12 hours; much longer than that can make the texture too soft because of the lime juice.

Ingredients for Chicken Thigh Marinade

Sliced chicken thighs with glossy browned surface on a plain plate
  • 1 1/2 to 2 pounds boneless skinless chicken thighs (about 675g to 900g), preferably similar in size
  • 1/4 cup lime juice
  • 1 tablespoon lime zest
  • 1/4 cup soy sauce
  • 2 tablespoons honey
  • 1 tablespoon Dijon mustard
  • 1 tablespoon Worcestershire sauce
  • 2 tablespoons olive oil
  • 3 cloves garlic, minced
  • 1 teaspoon ground cumin
  • 1/2 teaspoon salt
  • 1/4 teaspoon black pepper
  • 1/8 teaspoon cayenne pepper, optional

Optional for serving: chopped cilantro, red pepper flakes, or lime wedges.

How to Make Chicken Thigh Marinade

Close view of chicken thigh marinade chicken showing browned edges and moist texture
  1. Mix the marinade: In a medium bowl, whisk together the lime juice, lime zest, soy sauce, honey, Dijon mustard, Worcestershire sauce, olive oil, garlic, cumin, salt, black pepper, and optional cayenne until evenly combined. The honey does not need to dissolve completely right away.
  2. Marinate the chicken: Place the chicken thighs in a shallow dish or zip-top bag and pour the marinade over them. Turn the pieces to coat well, then cover and refrigerate for at least 30 minutes or up to 12 hours.
  3. Preheat: Heat a grill to medium-high or preheat the oven to 400°F. If baking, lightly grease a baking dish or line a sheet pan.
  4. Prep for cooking: Remove the chicken from the marinade and let the excess drip off. If grilling, lightly oil the grates to help prevent sticking. Discard the used marinade.
  5. Cook: Grill for 6 to 8 minutes per side, flipping once, or bake in a single layer for 20 to 25 minutes. If baking, you can flip the chicken halfway through for more even color. Start checking early if the pieces are small or thin.
  6. Check for doneness: The thickest part should reach 165°F. The centers should no longer look translucent, and the juices should run mostly clear.
  7. Rest and serve: Let the chicken rest for 5 to 10 minutes before slicing or serving. This helps the juices stay in the meat instead of running out onto the plate.

Tips for Juicy Chicken Thighs

Try to use thighs that are close in size so they finish cooking at about the same time. If some are much thicker than others, pull the smaller pieces first and give the larger ones a few more minutes.

Letting the excess marinade drip off before cooking helps the chicken brown instead of burn, especially because the marinade contains honey. Whether you grill or bake, keep the thighs in a single layer with a little space between them so they do not steam.

Serving Ideas

Serve the chicken whole or sliced with rice, roasted vegetables, pasta, or a simple green salad. It also works well in wraps, sandwiches, and meal prep bowls.

For another oven-baked thigh dinner, see these Sheet Pan Parmesan Garlic Chicken Thighs. For a different flavor profile, try these Thai Boneless Chicken Thighs. If you want a saucier finish, you may also like these Low Carb BBQ Chicken Thighs.

Flavor Variations

Lemon Version

Use the same amount of lemon juice and zest in place of the lime for a slightly softer citrus flavor.

Spicier Version

Add a little more cayenne or a small pinch of red pepper flakes if you want extra heat without changing the rest of the marinade.

How to Store and Reheat

Let the cooked chicken cool before storing, then refrigerate it in an airtight container for up to 4 days. If you want to prep ahead, keep the raw chicken in the marinade in the refrigerator and cook it within 12 hours for the best texture.

Reheat gently so the chicken stays moist. Use the microwave at reduced power, or warm it in a covered skillet over low heat with a small splash of water if needed. Leftovers are also good cold, sliced over salads or tucked into sandwiches and grain bowls.

Nutrition

Nutrition is approximate and will vary based on ingredient brands, exact amounts, and serving size.

  • Serving size: about 1/4 of the recipe
  • Calories: about 400
  • Protein: 31g
  • Fat: 23g
  • Carbohydrates: 16g
  • Per 100g: about 190 calories, 15g protein, 11g fat, 7g carbohydrates

Chicken Thigh Marinade

A lime-soy-honey marinade for boneless skinless chicken thighs that yields juicy, well-seasoned meat suitable for grilling or baking.
Course: Main Course
Cuisine: American
Prep: 10 min
Cook: 25 min
Total: 65 min
Servings: 4 Calories: 400 kcal

Equipment

  • medium bowl
  • whisk
  • zip-top bag or shallow dish
  • grill or oven
  • baking dish or sheet pan
  • tongs
  • meat thermometer

Ingredients

For the Chicken

  • 1 1/2 to 2 pounds (675 to 900 g) boneless skinless chicken thighs

For the Marinade

  • 1/4 cup lime juice
  • 1 tablespoon lime zest
  • 1/4 cup soy sauce
  • 2 tablespoons honey
  • 1 tablespoon Dijon mustard
  • 1 tablespoon Worcestershire sauce
  • 2 tablespoons olive oil
  • 3 cloves garlic, minced
  • 1 teaspoon ground cumin
  • 1/2 teaspoon salt
  • 1/4 teaspoon black pepper
  • 1/8 teaspoon cayenne pepper (optional)

Optional for serving

  • Chopped cilantro
  • Red pepper flakes
  • Lime wedges

Instructions

  1. Whisk the lime juice, lime zest, soy sauce, honey, Dijon mustard, Worcestershire sauce, olive oil, garlic, cumin, salt, black pepper, and cayenne (if using) in a medium bowl until combined.
  2. Place the chicken thighs in a zip-top bag or shallow dish, pour the marinade over them, turn to coat, then cover and refrigerate for at least 30 minutes or up to 12 hours.
  3. Preheat a grill to medium-high or preheat the oven to 400°F (204°C). If baking, lightly grease a baking dish or line a sheet pan.
  4. Remove the chicken from the marinade and let excess drip off; discard the used marinade. If grilling, lightly oil the grates to prevent sticking.
  5. Grill the thighs 6 to 8 minutes per side, flipping once, or bake the thighs in a single layer for 20 to 25 minutes (flip halfway for more even color). Start checking early if pieces are small or thin.
  6. Check for doneness: the thickest part should reach 165°F (74°C), the centers should not look translucent, and juices should run mostly clear.
  7. Let the chicken rest 5 to 10 minutes before slicing or serving.

Tips

  • Use thighs that are similar in size so they finish cooking at the same time.
  • Let excess marinade drip off before cooking to help the chicken brown rather than burn.
  • Keep the thighs in a single layer with space between them to avoid steaming.
  • Start checking internal temperature early for smaller or thinner pieces.

Variations

  • Lemon Version: Substitute equal amounts of lemon juice and lemon zest for a softer citrus flavor.
  • Spicier Version: Increase the cayenne slightly or add a pinch of red pepper flakes for more heat without changing the rest of the marinade.

Notes

Store cooked chicken in an airtight container in the refrigerator for up to 4 days. If marinating raw chicken, cook within 12 hours for best texture. Reheat gently (microwave at reduced power or warm in a covered skillet) and ensure internal temperature reaches 165°F (74°C) before serving.

Nutrition

Calories: 400 kcal | Protein: 31 g | Fat: 23 g | Carbohydrates: 16 g

Thai Boneless Chicken Thighs

These Thai boneless chicken thighs are juicy, lightly charred, and full of flavor from coconut milk, curry paste, soy sauce, garlic, and a little maple syrup. The marinade is simple to mix, and the finished chicken works just as well with rice for dinner as it does sliced cold for lunch the next day.
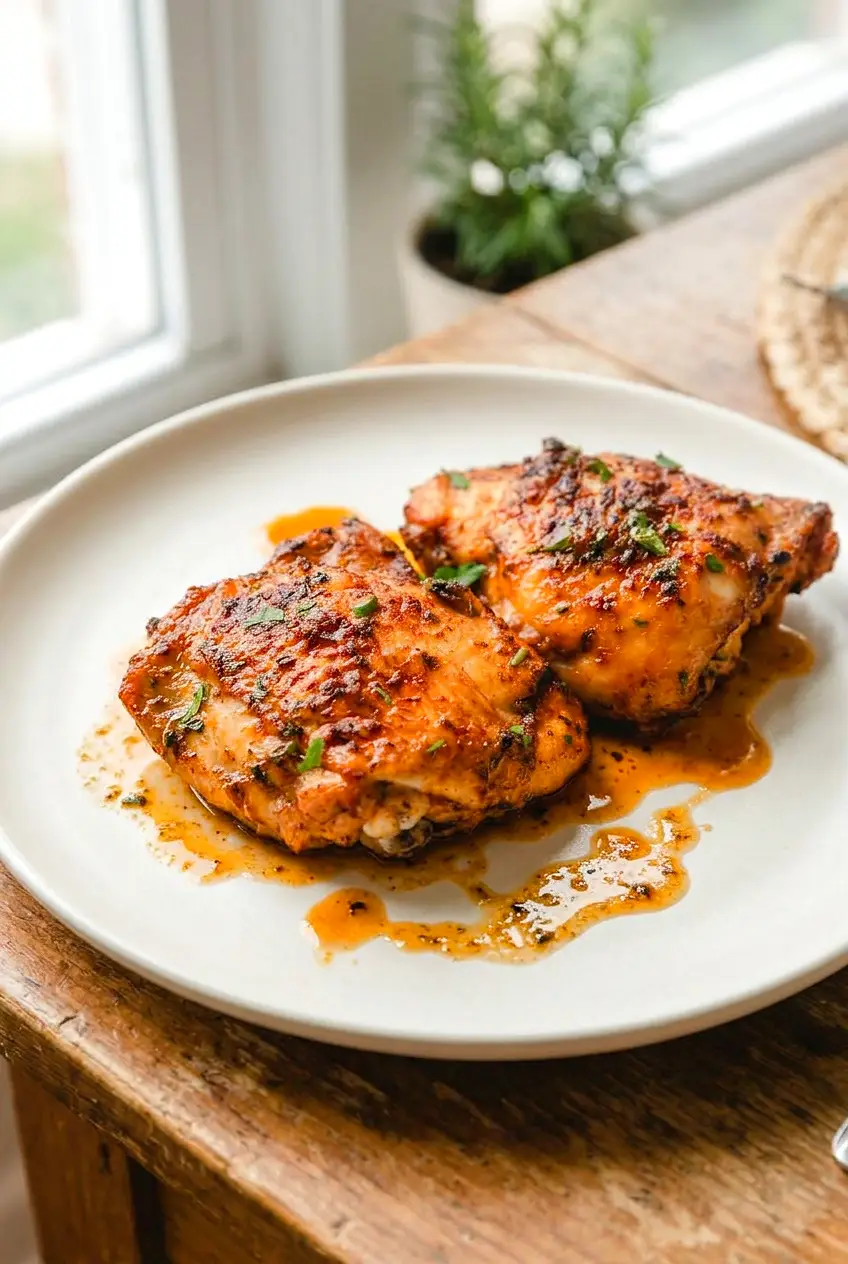
This recipe also gives you an easy sauce without much extra work. Just reserve some of the marinade before adding the raw chicken, then boil it until slightly thickened for serving.

Ingredients for Thai Boneless Chicken Thighs

Sliced Thai boneless chicken thighs with charred edges and sauce on a simple plate
  • 1 1/2 to 2 pounds boneless skinless chicken thighs (about 675g), trimmed if needed
  • 1/2 cup coconut milk (120g)
  • 2 tablespoons Thai red curry paste or green curry paste (30g)
  • 2 tablespoons soy sauce (30g)
  • 1 tablespoon maple syrup (20g)
  • 3 cloves garlic, minced
  • 1 tablespoon lime juice
  • 1 tablespoon neutral oil, plus a little more for the grill grates or grill pan
  • Small pinch of salt, only if needed
  • Fresh cilantro or parsley, for serving
  • Lime wedges, for serving

If your curry paste is already salty, skip the extra salt and taste the marinade first.

How to Make Thai Boneless Chicken Thighs

Close-up of Thai boneless chicken thighs with browned edges and glossy coconut curry sauce
  1. Mix the marinade: In a medium bowl, whisk together the coconut milk, curry paste, soy sauce, maple syrup, garlic, lime juice, and 1 tablespoon oil until smooth. If you want a sauce for serving, scoop some of the marinade into a separate small bowl before adding the chicken.
  2. Prep the chicken: Pat the chicken thighs dry. Trim any large pieces of excess fat and gently flatten any very thick pieces so they cook more evenly.
  3. Marinate the chicken: Add the chicken to the marinade and turn to coat well. Cover and refrigerate for at least 30 minutes or up to overnight.
  4. Preheat the grill: Heat an outdoor grill or grill pan over medium-high heat. Lightly oil the grates or pan so the chicken is less likely to stick.
  5. Boil the reserved marinade: If using the reserved marinade as a sauce, pour it into a small saucepan and bring it to a full boil. Simmer briefly until slightly thickened and spoonable.
  6. Grill the chicken: Lift the chicken from the marinade and let the excess drip off. Arrange the pieces in a single layer with a little space between them. Grill for 10 to 15 minutes total, depending on thickness, flipping once halfway through. If some pieces brown faster than others, move them to a cooler spot on the grill or a different part of the grill pan.
  7. Check for doneness: The chicken should be browned at the edges and should release more easily when ready to flip. Use an instant-read thermometer in the thickest part of the largest piece and pull the chicken at 160°F. Let it rest 3 to 5 minutes so carryover heat brings it to 165°F. The center should no longer be pink.
  8. Serve: Slice if you like, then drizzle with the boiled sauce or serve it on the side. Finish with cilantro or parsley and lime wedges.

How to Keep the Chicken Juicy

Boneless thighs are forgiving, but a few small details help. Patting the chicken dry before marinating helps it brown better, and a properly heated grill keeps the meat from sticking and tearing.

Use the clock as a guide, but rely on color and temperature to finish the chicken. Start checking once the edges are browned and the pieces lift more easily from the grill.

Serving Ideas

Serve these chicken thighs with steamed jasmine rice, rice noodles, or a simple cucumber salad. They also pair well with grilled or steamed vegetables.

For meal prep, slice the chicken and use it in rice bowls, wraps, or salads.

Variations

Make It Spicier

For more heat, increase the curry paste slightly or add 1/4 to 1/2 teaspoon red pepper flakes to the marinade. Curry paste brands vary quite a bit, so adjust a little at a time.

Use Chicken Breasts or Bone-In Thighs

You can use chicken breasts or bone-in thighs instead. Pound chicken breasts to an even thickness and pull them as soon as they reach temperature so they do not dry out. Bone-in thighs will take longer, so follow the thermometer rather than the timing here.

How to Store and Reheat Thai Boneless Chicken Thighs

Let the chicken cool, then refrigerate it in an airtight container for up to a few days. If you made the sauce, store it separately if possible so the chicken does not get too soft.

Reheat gently in a skillet, in the oven, or in the microwave just until warmed through. Avoid overheating, which can dry out the meat. Leftovers are also good cold in salads, rice bowls, or lunch boxes.

If you want another easy chicken dinner idea, try Sheet Pan Parmesan Garlic Chicken Thighs.

For another saucy chicken thigh recipe, see Low Carb BBQ Chicken Thighs.

If you like simple chicken thigh recipes, you may also enjoy Old Bay Chicken Thighs.

Nutrition

Nutrition is approximate and will vary based on ingredient brands, exact amounts, and serving size.

  • Serving size: about 1/4 of the recipe
  • Calories: about 420
  • Protein: 39g
  • Fat: 24g
  • Carbohydrates: 9g
  • Per 100g: about 185 calories, 17g protein, 11g fat, 4g carbohydrates

Thai Boneless Chicken Thighs

Juicy boneless chicken thighs marinated in coconut milk and Thai curry paste, grilled and served with a quick boiled marinade sauce.
Course: Main Course
Cuisine: Thai
Prep: 15 min
Cook: 15 min
Total: 60 min
Servings: 4 Calories: 420 kcal

Equipment

  • mixing bowl
  • small saucepan
  • grill or grill pan
  • tongs
  • instant-read thermometer
  • whisk

Ingredients

For the Chicken

  • 1 1/2 to 2 pounds boneless skinless chicken thighs (about 675 g), trimmed if needed
  • additional neutral oil for oiling the grill grates or grill pan (optional)

For the Marinade

  • 1/2 cup coconut milk (120 g)
  • 2 tablespoons Thai red or green curry paste (30 g)
  • 2 tablespoons soy sauce (30 g)
  • 1 tablespoon maple syrup (20 g)
  • 3 cloves garlic, minced
  • 1 tablespoon lime juice
  • 1 tablespoon neutral oil

For Serving

  • Small pinch of salt, optional (taste the marinade first)
  • Fresh cilantro or parsley, for serving
  • Lime wedges, for serving

Instructions

  1. Whisk together the coconut milk, curry paste, soy sauce, maple syrup, minced garlic, lime juice, and 1 tablespoon oil in a medium bowl until smooth.
  2. If you want a sauce, scoop some of the marinade into a separate small bowl before adding the raw chicken and set aside.
  3. Pat the chicken thighs dry and trim excess fat; flatten any very thick pieces for even cooking.
  4. Add the chicken to the marinade and turn to coat. Cover and refrigerate for at least 30 minutes or up to overnight.
  5. Heat an outdoor grill or grill pan over medium-high heat and lightly oil the grates or pan.
  6. Pour the reserved marinade into a small saucepan and bring to a full boil, then simmer briefly until slightly thickened and spoonable.
  7. Lift the chicken from the marinade and let excess drip off. Arrange pieces in a single layer on the grill with space between them.
  8. Grill the chicken 10 to 15 minutes total, flipping once halfway through; move pieces to cooler spots if some brown faster.
  9. Use an instant-read thermometer in the thickest part of the largest piece and pull the chicken at 160°F (71°C).
  10. Let the chicken rest 3 to 5 minutes so carryover heat brings it to 165°F (74°C).
  11. Slice if desired, drizzle with the boiled sauce or serve it on the side, and finish with cilantro or parsley and lime wedges.

Tips

  • Pat chicken dry before marinating to help it brown.
  • Reserve some marinade before adding raw chicken if you want a sauce.
  • Preheat the grill well and oil the grates to prevent sticking and tearing.
  • Move pieces that brown too quickly to a cooler part of the grill.
  • Rely on color and an instant-read thermometer rather than strictly on time.

Variations

  • Make It Spicier: Increase the amount of curry paste slightly or add 1/4 to 1/2 teaspoon red pepper flakes to the marinade for more heat.
  • Use Chicken Breasts or Bone-In Thighs: Use pounded chicken breasts for even thickness or bone-in thighs (which will take longer); follow the thermometer rather than the listed grill time.

Notes

Store cooled chicken in an airtight container in the refrigerator for a few days; store the sauce separately if possible. Reheat gently to avoid drying out. Pull chicken at 160°F (71°C) and let rest to reach 165°F (74°C).

Nutrition

Calories: 420 kcal | Protein: 39 g | Fat: 24 g | Carbohydrates: 9 g

Sheet Pan Parmesan Garlic Chicken Thighs

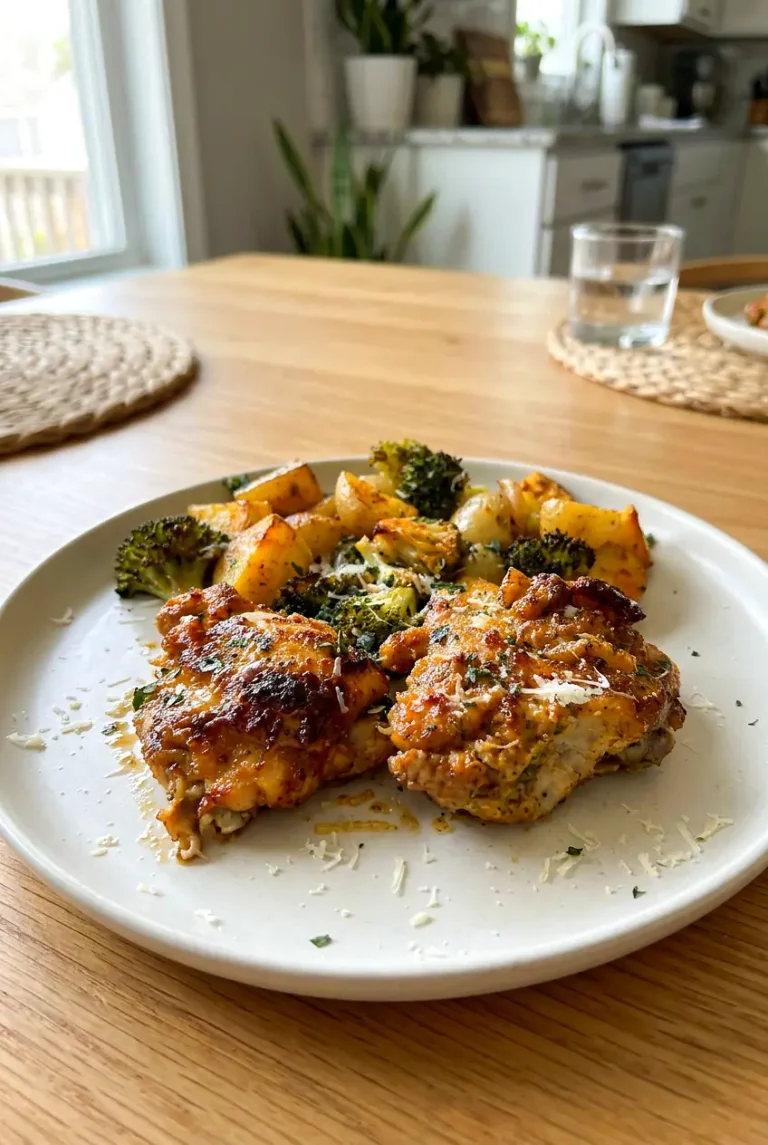
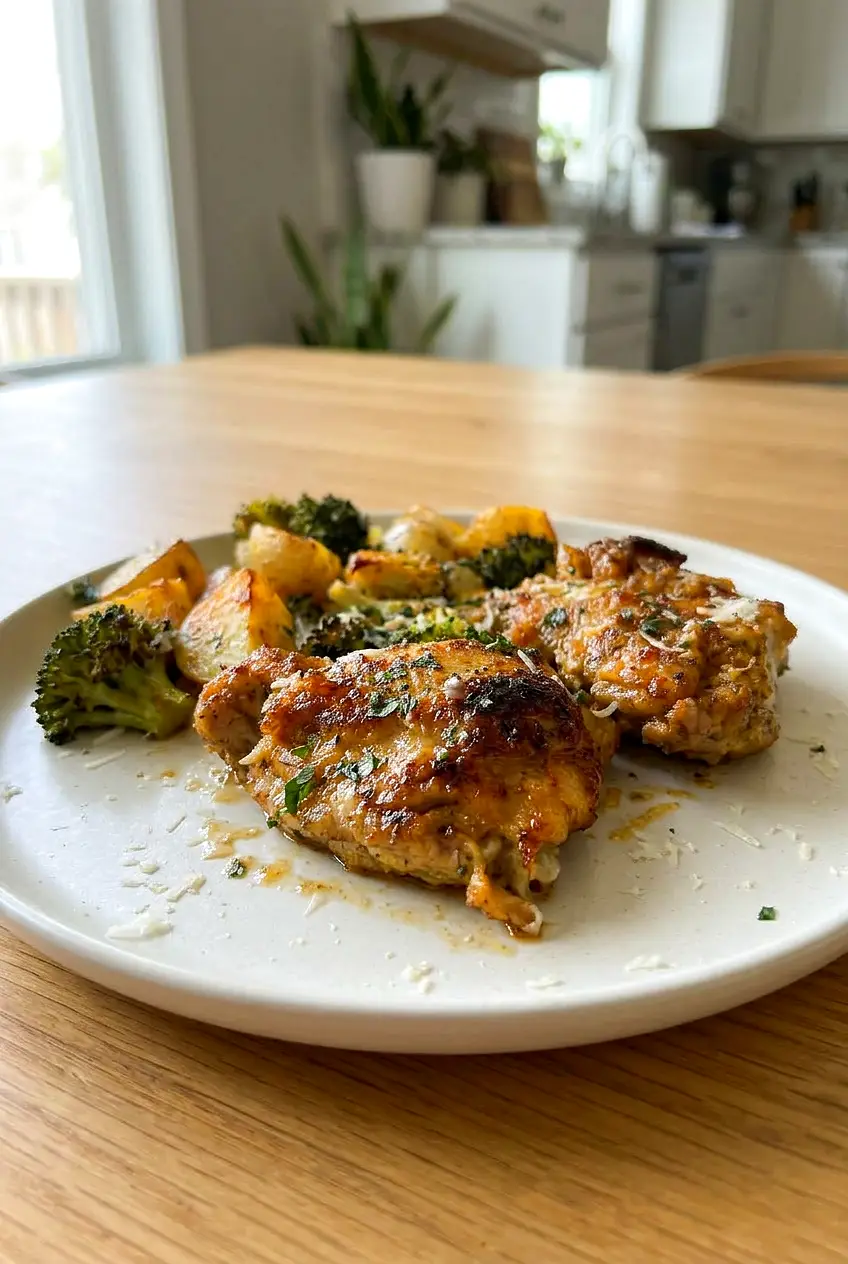
Parmesan garlic chicken thighs, roasted potatoes, broccoli, and onion all cook on one pan for an easy dinner with very little cleanup. The chicken stays juicy, the potatoes get tender, and the broccoli picks up some browned edges.

The method is simple: give the potatoes and onion a short head start, then add the chicken and broccoli so everything finishes at about the same time. Using a moderate amount of bottled Parmesan garlic sauce adds flavor without making the pan too wet.

Ingredients for Sheet Pan Parmesan Garlic Chicken Thighs

Parmesan garlic chicken thighs with roasted vegetables shown from a side angle with light Parmesan on top
  • 2 pounds boneless skinless chicken thighs (about 900g)
  • 1/2 to 3/4 cup Buffalo Wild Wings Parmesan Garlic sauce (about 150g)
  • 1 1/2 pounds baby potatoes, halved or quartered if large (about 675g)
  • 4 to 5 cups broccoli florets (about 350g), cut in larger pieces
  • 1 medium yellow onion, sliced (about 150g)
  • 2 tablespoons olive oil
  • 1 teaspoon salt
  • 1/2 teaspoon black pepper
  • 1 teaspoon Italian seasoning
  • 1 teaspoon onion powder
  • 1 teaspoon garlic powder
  • 1/2 teaspoon smoked paprika
  • 1/3 to 1/2 cup shredded Parmesan cheese (about 35g)

Optional: foil, parchment paper, or cooking spray for easier cleanup.

For serving: extra Parmesan or a pinch of red pepper flakes.

How to Make Sheet Pan Parmesan Garlic Chicken Thighs

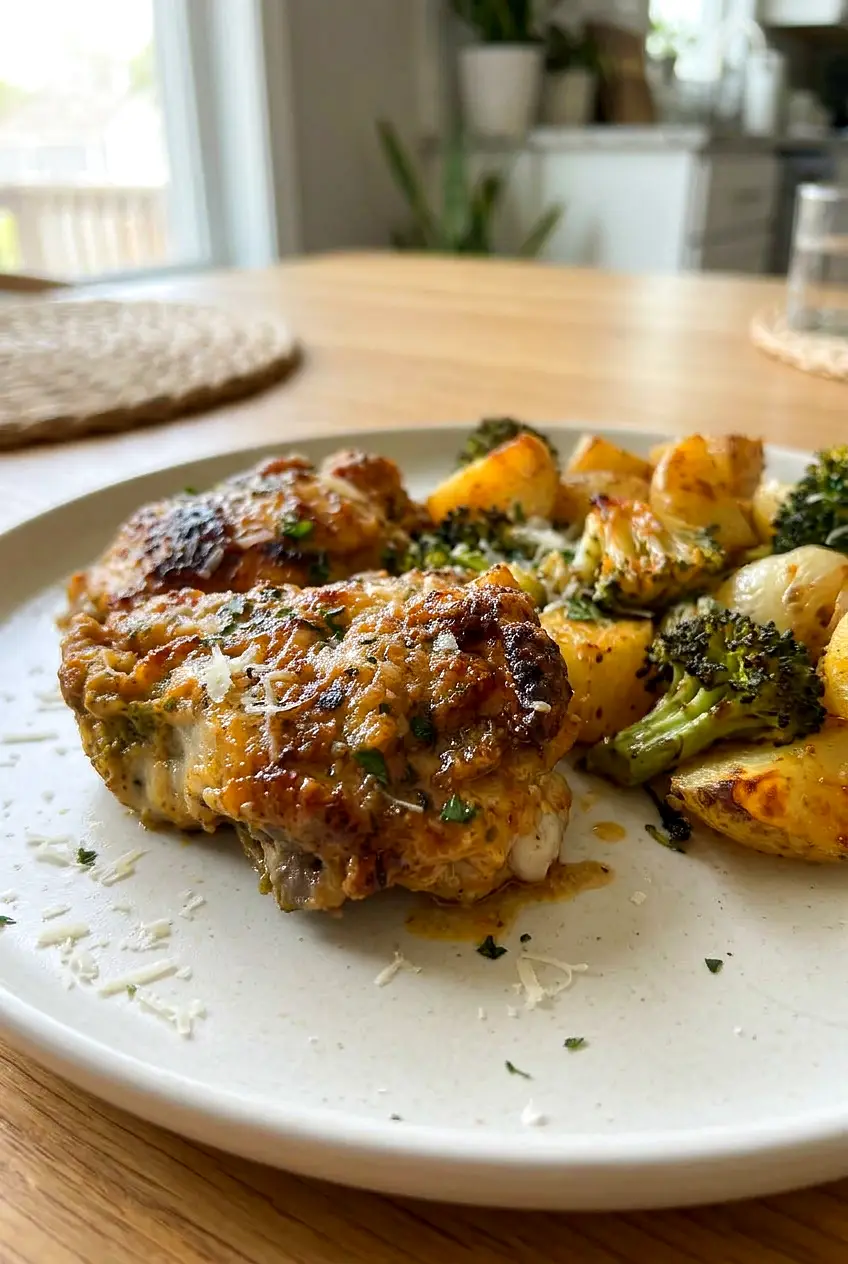
Close view of Parmesan garlic chicken thighs with browned potatoes, broccoli, and soft roasted onion
  1. Preheat the oven and prep the pan: Heat the oven to 425°F. Line a large rimmed sheet pan with foil or parchment if you like, or coat it lightly with cooking spray.
  2. Prep the vegetables: Cut the potatoes into even bite-size pieces if needed, slice the onion, and keep the broccoli florets fairly large so they roast instead of getting too soft.
  3. Mix the seasonings: In a small bowl, stir together the salt, black pepper, Italian seasoning, onion powder, garlic powder, and smoked paprika.
  4. Coat the chicken: In a mixing bowl, toss the chicken thighs with the Parmesan garlic sauce and about half of the seasoning blend. The chicken should be well coated, but not swimming in sauce.
  5. Season the potatoes and onion: On the sheet pan, toss the potatoes and onion with the olive oil and most of the remaining seasoning blend. Spread them into a single layer so they roast instead of steam.
  6. Give them a head start: Roast the potatoes and onion for 10 to 15 minutes, until the onions start to soften and the potatoes begin to lose their raw look.
  7. Add the chicken and broccoli: Remove the pan from the oven. Nestle the chicken thighs onto the pan and scatter the broccoli around them. If you have any seasoning left, toss it with the broccoli.
  8. Roast until done: Return the pan to the oven and roast for 18 to 25 minutes more. Toss the vegetables partway through, and flip the chicken if needed for more even browning. Rotate the pan if your oven has hot spots.
  9. Check for doneness: Start checking around the 30-minute total mark. The chicken is done when the thickest piece reaches 165°F, the potatoes are fork-tender, the broccoli is tender with browned tips, and the onions are soft and lightly caramelized.
  10. Finish with Parmesan: Sprinkle the shredded Parmesan over the hot chicken and vegetables. For a little more color, broil for 2 to 4 minutes, watching closely so the sauce and cheese do not burn.
  11. Rest and serve: Let the chicken rest for about 5 minutes before serving. If the pan looks watery, carefully spoon off some of the liquid first.

Why the Pan Can Turn Watery

Chicken thighs release moisture as they cook, and bottled sauce adds more. Keeping the sauce amount moderate and roasting the potatoes first helps. If there is still extra liquid near the end, spoon off some of it before broiling or serving.

Serving Ideas

This works well as a full dinner on its own, but a green salad or some crusty bread fits nicely alongside it. A little extra Parmesan at the table is also good.

If you want another sauce-forward chicken dinner, try these Low Carb BBQ Chicken Thighs. For another easy chicken thigh dinner, you might also like these Old Bay Chicken Thighs. If you like savory garlic flavor, you may also want to bookmark Garlic Miso Chicken.

How to Store and Reheat Sheet Pan Parmesan Garlic Chicken Thighs

Let leftovers cool, then store them in an airtight container in the refrigerator for up to 3 to 4 days. The broccoli will soften some after chilling, which is normal for a sheet pan meal.

Reheat in the microwave in short bursts or in a 350°F oven until warmed through. If the chicken seems a little dry, add a spoonful of sauce or a small splash of water before reheating.

For make-ahead prep, cut the vegetables and mix the seasonings ahead of time, then roast everything just before dinner for the best texture.

Nutrition

Nutrition is approximate and will vary based on ingredient brands, exact amounts, and serving size.

  • Serving size: about 1/4 of the recipe
  • Calories: about 625
  • Protein: 44g
  • Fat: 31g
  • Carbohydrates: 41g
  • Per 100g: about 145 calories, 10g protein, 7g fat, 9g carbohydrates

Sheet Pan Parmesan Garlic Chicken Thighs

Parmesan garlic–coated chicken thighs roast with potatoes, broccoli, and onion on a single sheet pan for an easy, low-cleanup dinner.
Course: Main Course
Cuisine: American
Prep: 15 min
Cook: 40 min
Total: 60 min
Servings: 4 Calories: 625 kcal

Equipment

  • rimmed sheet pan
  • mixing bowl
  • small bowl
  • knife
  • cutting board

Ingredients

Chicken

  • 2 pounds boneless skinless chicken thighs (about 900g)
  • 1/2 to 3/4 cup Buffalo Wild Wings Parmesan Garlic sauce (about 150g)

Vegetables

  • 1 1/2 pounds baby potatoes, halved or quartered if large (about 675g)
  • 4 to 5 cups broccoli florets (about 350g), cut in larger pieces
  • 1 medium yellow onion, sliced (about 150g)

Seasonings & Oil

  • 2 tablespoons olive oil
  • 1 teaspoon salt
  • 1/2 teaspoon black pepper
  • 1 teaspoon Italian seasoning
  • 1 teaspoon onion powder
  • 1 teaspoon garlic powder
  • 1/2 teaspoon smoked paprika

Finish (optional)

  • 1/3 to 1/2 cup shredded Parmesan cheese (about 35g)
  • extra Parmesan or red pepper flakes for serving (optional)
  • foil, parchment paper, or cooking spray for easier cleanup (optional)

Instructions

  1. Preheat the oven to 425°F (218°C). Line a large rimmed sheet pan with foil or parchment or lightly coat it with cooking spray if desired.
  2. Cut the potatoes into even bite-size pieces if needed, slice the onion, and cut the broccoli into fairly large florets so they roast instead of getting too soft.
  3. In a small bowl, stir together the salt, black pepper, Italian seasoning, onion powder, garlic powder, and smoked paprika.
  4. In a mixing bowl, toss the chicken thighs with the Parmesan garlic sauce and about half of the seasoning blend until well coated.
  5. On the sheet pan, toss the potatoes and onion with the olive oil and most of the remaining seasoning blend, then spread them into a single layer.
  6. Roast the potatoes and onion for 10 to 15 minutes, until the onions start to soften and the potatoes begin to lose their raw look.
  7. Remove the pan from the oven, nestle the chicken thighs onto the pan, and scatter the broccoli around them; toss the broccoli with any remaining seasoning if desired.
  8. Return the pan to the oven and roast for 18 to 25 minutes more, tossing the vegetables partway through and flipping the chicken if needed for even browning. Rotate the pan if your oven has hot spots.
  9. Start checking around the 30-minute total mark; the chicken is done when the thickest piece reaches 165°F (74°C), the potatoes are fork-tender, the broccoli has browned tips, and the onions are soft and lightly caramelized.
  10. Sprinkle the shredded Parmesan over the hot chicken and vegetables. Broil 2 to 4 minutes if you want more color, watching closely so the sauce and cheese do not burn.
  11. Let the chicken rest for about 5 minutes before serving. If the pan looks watery, carefully spoon off some of the liquid first.

Tips

  • Roast the potatoes and onions first so the potatoes get tender without the broccoli overcooking.
  • Keep the amount of bottled sauce moderate to avoid a watery pan.
  • Cut broccoli into larger pieces so it roasts instead of becoming mushy.
  • Spoon off excess liquid before broiling or serving to improve browning.
  • Let the chicken rest 5 minutes to retain juices before serving.

Notes

Store leftovers in an airtight container in the refrigerator for 3–4 days; broccoli will soften after chilling. Reheat in short microwave bursts or in a 350°F oven and add a splash of sauce or water if the chicken seems dry.

Nutrition

Calories: 625 kcal | Protein: 44 g | Fat: 31 g | Carbohydrates: 41 g | Per100g: about 145 kcal, 10 g protein, 7 g fat, 9 g carbohydrates

Low Carb BBQ Chicken Thighs

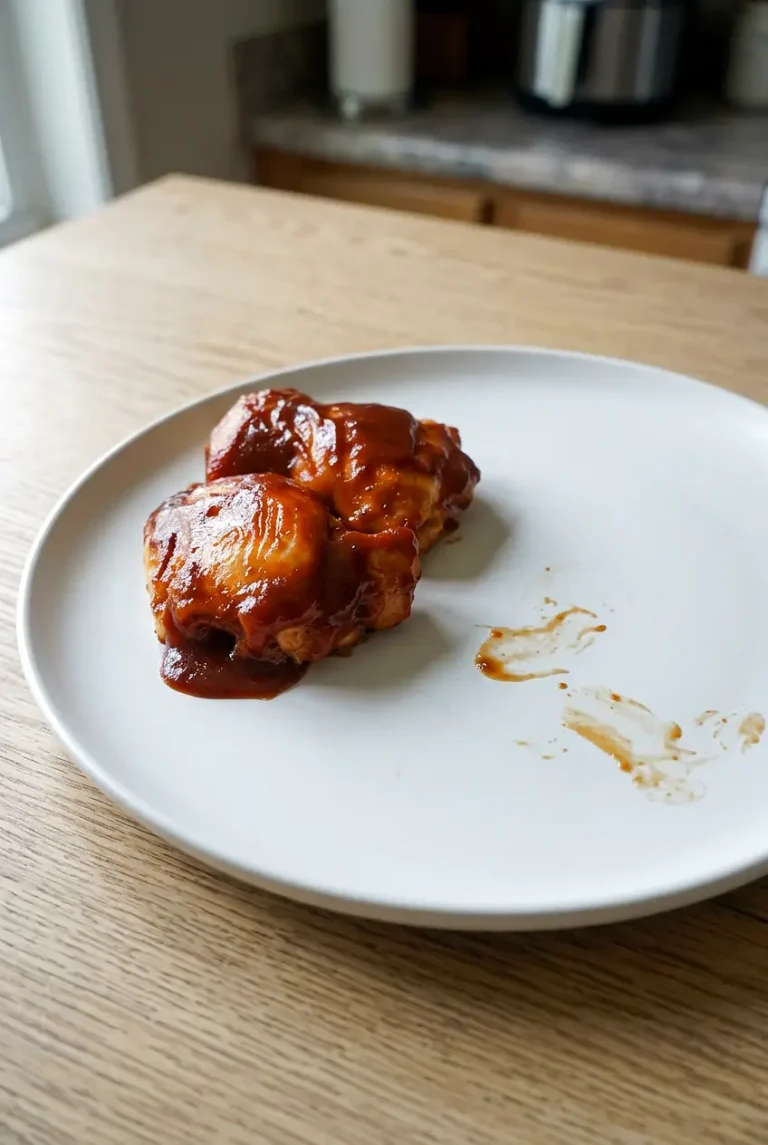
These baked BBQ chicken thighs come out juicy, smoky, and nicely glazed, with a sticky layer of sauce on top instead of a burnt coating. Boneless skinless thighs cook quickly and stay tender, which makes this an easy dinner to get on the table.

The method is simple: bake the seasoned chicken first, then add the sugar-free barbecue sauce near the end and broil briefly for color. That gives the chicken time to cook through before the sauce starts to darken.

Ingredients for Low Carb BBQ Chicken Thighs

Side-angle view of saucy low carb BBQ chicken thighs showing juicy, glazed texture
  • 2 pounds boneless skinless chicken thighs (about 900g)
  • 1 tablespoon olive oil
  • 1 teaspoon garlic powder
  • 1 teaspoon onion powder
  • 1 teaspoon smoked paprika
  • 1 teaspoon kosher salt
  • 1/2 teaspoon black pepper
  • 1 cup sugar-free barbecue sauce (about 240g)

Pat the chicken dry before seasoning so the oil and spices cling evenly.

Any sugar-free or low-carb barbecue sauce works here, but brands vary in sweetness, tang, and thickness. If your sauce is very thick, stir in 1 to 2 tablespoons apple cider vinegar so it brushes on more easily. If it is thin, simmer it briefly until it thickens.

How to Make Low Carb BBQ Chicken Thighs

Close view of low carb BBQ chicken thighs with sticky sauce and browned edges
  1. Preheat the oven: Heat the oven to 425°F. Line a rimmed baking sheet with foil or parchment for easier cleanup, or use a baking dish that can go under the broiler. Pat the chicken dry.
  2. Season the chicken: In a large bowl, toss the chicken with the olive oil, garlic powder, onion powder, smoked paprika, kosher salt, and black pepper until evenly coated.
  3. Arrange on the pan: Place the thighs in a single layer with a little space between them so they brown instead of steam.
  4. Bake until nearly done: Bake for 20 to 25 minutes, until the chicken is opaque and starting to brown around the edges. The thickest piece should be close to 165°F before you add the sauce.
  5. Add the sauce: Brush or spoon a generous layer of barbecue sauce over the tops of the thighs. Coat them evenly, but do not flood the pan with sauce.
  6. Broil briefly: Broil for 1 to 3 minutes, just until the sauce is bubbling and the edges start to caramelize. Watch closely. Sugar-free sauces can darken fast. The chicken is done when the thickest part reaches 165°F.
  7. Rest and serve: Let the chicken rest for 5 minutes before serving so the juices settle and the sauce sets slightly.

Why Add the BBQ Sauce at the End?

Barbecue sauce browns faster than plain seasoned chicken. If it goes on too early, the sauce can burn before the thighs are fully cooked. Baking first gives the meat time to cook through and pick up some browning on its own.

The short broil at the end is just enough to make the sauce look glossy and sticky. You want light caramelization at the edges, not a wet layer sitting on top.

Common Problems

Why did the seasoning slide off?

The chicken was likely too wet. Pat it dry well before tossing it with the oil and spices.

Why is the sauce burning?

The pan may be too close to the broiler, or the sauce is browning faster than expected. Start checking in the first minute and pull the pan as soon as the sauce bubbles and darkens at the edges.

Why are some pieces done before others?

Chicken thighs often vary in size and thickness. Start checking the thicker pieces early, and remove smaller pieces first if needed.

Why does the chicken taste flat?

The seasoning may not be evenly distributed, or your barbecue sauce may be mild. Make sure the dry rub coats all of the chicken before baking.

What to Serve with Low Carb BBQ Chicken Thighs

Serve these with a green salad, roasted broccoli, green beans, or cauliflower rice. If you like a saucier plate, warm a little extra sugar-free BBQ sauce on the side.

For another easy chicken dinner, try these Old Bay Chicken Thighs. For a different savory option, see Garlic Miso Chicken with Roasted Shallots.

How to Store and Reheat Low Carb BBQ Chicken Thighs

Let the chicken cool, then refrigerate it in an airtight container for up to 4 days. You can store the chicken with the sauce or keep extra sauce separate.

Reheat gently in the microwave or in a covered skillet over low heat until warmed through. Avoid high heat, which can dry out the chicken and make the sauce too thick. If needed, spoon on a little extra sauce after reheating.

You can also season the chicken several hours ahead and refrigerate it before baking. Add the barbecue sauce only before the final broil.

If you want another saucy chicken thigh dinner, try these Honey Soy Chicken Thighs.

Nutrition

Nutrition is approximate and will vary based on the barbecue sauce brand, exact amounts used, and serving size.

  • Serving size: 1/4 of recipe
  • Calories: about 390
  • Protein: 37g
  • Fat: 22g
  • Carbohydrates: 9g
  • Per 100g: about 170 calories, 17g protein, 10g fat, 4g carbohydrates

Low Carb BBQ Chicken Thighs

Juicy boneless skinless chicken thighs baked, then brushed with sugar-free barbecue sauce and briefly broiled for a sticky glaze.
Course: Main Course
Cuisine: American
Prep: 10 min
Cook: 28 min
Total: 43 min
Servings: 4 Calories: about 390 kcal

Equipment

  • rimmed baking sheet
  • foil or parchment
  • baking dish
  • large bowl
  • basting brush or spoon
  • meat thermometer

Ingredients

For the Chicken

  • 2 pounds boneless skinless chicken thighs (about 900g)
  • 1 tablespoon olive oil
  • 1 teaspoon garlic powder
  • 1 teaspoon onion powder
  • 1 teaspoon smoked paprika
  • 1 teaspoon kosher salt
  • 1/2 teaspoon black pepper

Sauce

  • 1 cup sugar-free barbecue sauce (about 240g)
  • 1 to 2 tablespoons apple cider vinegar (optional, to thin very thick sauce)

Instructions

  1. Preheat the oven to 425°F (218°C). Line a rimmed baking sheet with foil or parchment or use an oven-safe baking dish. Pat the chicken dry.
  2. In a large bowl, toss the chicken with the olive oil, garlic powder, onion powder, smoked paprika, kosher salt, and black pepper until evenly coated.
  3. Arrange the thighs in a single layer on the prepared pan with a little space between pieces.
  4. Bake for 20 to 25 minutes, until the chicken is opaque and starting to brown at the edges and the thickest piece is close to 165°F (74°C).
  5. Brush or spoon a generous, even layer of barbecue sauce over the tops of the thighs without flooding the pan.
  6. Broil for 1 to 3 minutes, watching closely, until the sauce bubbles and edges start to caramelize; the chicken is done when the thickest part reaches 165°F (74°C).
  7. Let the chicken rest for 5 minutes before serving.

Tips

  • Pat the chicken very dry before seasoning so the oil and spices cling.
  • Add barbecue sauce only near the end to prevent burning under the broiler.
  • Watch the broiler closely—sugar-free sauces can darken quickly.
  • Thin very thick sauce with 1–2 tablespoons apple cider vinegar for easier brushing.
  • Remove smaller pieces early if they reach 165°F before larger ones.

Notes

Refrigerate cooled chicken in an airtight container for up to 4 days. Reheat gently in the microwave or a covered skillet over low heat to avoid drying; add extra sauce if needed. You can season the chicken several hours ahead and add sauce only before the final broil.

Nutrition

Calories: about 390 kcal | Protein: 37 g | Fat: 22 g | Carbohydrates: 9 g

Old Bay Chicken Thighs

These Old Bay chicken thighs come out juicy inside with browned, lightly crisp skin and a simple savory rub. Old Bay does most of the seasoning work here, with tomato paste, garlic, onion powder, and parsley rounding it out without overpowering the chicken.

The method is straightforward: dry the thighs well, roast them skin-side down first to help the fat render, then flip and finish skin-side up. Give the pieces a little space in the pan so they roast instead of steam.

Ingredients for Old Bay Chicken Thighs

  • 2 to 2 1/2 pounds bone-in, skin-on chicken thighs (about 1.15kg), patted very dry
  • 1 1/2 to 2 tablespoons Old Bay seasoning
  • 1 tablespoon avocado oil
  • 1 tablespoon tomato paste
  • 1 teaspoon garlic paste
  • 1 teaspoon onion powder
  • 1 teaspoon dried parsley
  • 1/2 teaspoon fine salt, or to taste
  • 1/2 teaspoon black pepper

Optional: 1/8 to 1/2 teaspoon cayenne pepper or chili flakes for heat, 1 to 2 teaspoons honey for a slightly sweet finish, and lemon wedges for serving.

Ingredient note: Old Bay usually contains salt, so it is best to start at the lower end of the seasoning range and add the extra salt carefully.

Side view of Old Bay chicken thighs with a spooned-on drizzle of pan juices

How to Bake Old Bay Chicken Thighs

  1. Preheat the oven: Heat the oven to 400°F. Line a rimmed sheet pan or use a baking dish large enough to hold the thighs in a single layer with a little space between them.
  2. Prep the chicken: Pat the thighs very dry. Trim any loose excess skin or large pieces of fat so the chicken browns more cleanly instead of sitting in too much rendered fat.
  3. Make the rub: In a small bowl, stir together the Old Bay, avocado oil, tomato paste, garlic paste, onion powder, dried parsley, salt, and black pepper. If you want heat, stir in the cayenne or chili flakes. If using honey, keep it to 1 to 2 teaspoons so the surface does not brown too fast.
  4. Coat the thighs: Rub the seasoning mixture all over the chicken, including under the loose edge of the skin where you can. The coating should be thin and even, without dry patches. You can cook the chicken right away or cover and refrigerate it for a short marinating time or up to 48 hours.
  5. Roast skin-side down: Arrange the thighs skin-side down in the pan. Roast for 15 to 20 minutes, undisturbed, until the skin starts rendering and the chicken releases more easily from the pan.
  6. Flip and finish: Turn the thighs skin-side up with tongs and roast for 15 to 20 minutes more. Rotate the pan once if your oven browns unevenly. The chicken is done when the skin is browned, the edges look crisp, the juices near the bone run mostly clear, and the thickest part reaches 165°F.
  7. Rest before serving: Transfer the chicken to a plate and let it rest for 5 to 10 minutes before serving. Spoon a little of the pan drippings over the top if you like.

Start checking on the early side if your thighs are small or your oven runs hot. Larger thighs, colder chicken, or a crowded pan may need a little more time.

How to Get Crispier Skin

  • Pat the chicken very dry before adding the rub.
  • Keep the thighs in a single layer with space between them.
  • Start skin-side down so the fat renders before the final browning.
  • Flip only after the chicken releases more easily from the pan.
  • Rest briefly, but do not leave the chicken sitting too long if you want the skin to stay as crisp as possible.

A wire rack set inside the pan can help the skin brown more evenly, but it is optional.

Serving Ideas

Serve these chicken thighs with sides that can catch the pan juices, like seasoned rice, garlic butter rice, quinoa, roasted vegetables, cauliflower rice, baked sweet potato slices, or ricotta mashed potatoes.

Leftovers are also easy to slice or shred for sandwiches or wraps. If you want another savory chicken dinner, try Garlic Miso Chicken with Roasted Shallots.

Easy Variations

Spicy Old Bay Chicken Thighs

Close view of Old Bay chicken thighs showing crisp browned skin and juicy meat

Stir 1/8 to 1/2 teaspoon cayenne pepper or chili flakes into the rub. Keep the amount modest so the Old Bay still comes through clearly.

Grilled Old Bay Chicken Thighs

Use moderate grill heat and turn the thighs as needed to prevent flare-ups. Watch closely if your rub includes tomato paste or honey, since both can darken quickly over direct heat.

How to Store and Reheat Old Bay Chicken Thighs

Let the chicken cool before storing, then refrigerate it in an airtight container for up to 3 to 4 days. You can also freeze the cooled thighs for longer storage.

Reheat gently in the oven or air fryer until warmed through. That keeps the skin in better shape than microwaving, though it will not be quite as crisp as when freshly cooked.

If you want another chicken thigh dinner, try Korean Soy Garlic Chicken Thighs. For a sweet-savory option, see Honey Soy Chicken Thighs.

Nutrition

Nutrition is approximate and will vary based on ingredient brands, exact amounts, and how much rendered fat remains with the chicken after cooking.

  • Serving size: 1/4 of recipe
  • Calories: about 420
  • Protein: 31g
  • Fat: 32g
  • Carbohydrates: 2g
  • Per 100g: about 205 calories, 15g protein, 16g fat, 1g carbohydrates

Old Bay Chicken Thighs

Roasted bone-in, skin-on chicken thighs seasoned with Old Bay and a simple savory rub for juicy meat and browned, lightly crisp skin.
Course: Main Course
Cuisine: American
Prep: 15 min
Cook: 35 min
Total: 60 min
Servings: 4 Calories: about 420 kcal

Equipment

  • rimmed baking sheet
  • baking dish
  • small bowl
  • tongs
  • meat thermometer
  • wire rack (optional)

Ingredients

Chicken

  • 2 to 2 1/2 pounds bone-in, skin-on chicken thighs (about 1.15 kg), patted very dry

Rub

  • 1 1/2 to 2 tablespoons Old Bay seasoning
  • 1 tablespoon avocado oil
  • 1 tablespoon tomato paste
  • 1 teaspoon garlic paste
  • 1 teaspoon onion powder
  • 1 teaspoon dried parsley
  • 1/2 teaspoon fine salt, or to taste
  • 1/2 teaspoon black pepper

Optional

  • 1/8 to 1/2 teaspoon cayenne pepper or chili flakes (for heat)
  • 1 to 2 teaspoons honey (for a slightly sweet finish)
  • Lemon wedges for serving

Instructions

  1. Preheat the oven to 400°F (204°C). Line a rimmed baking sheet or use a baking dish that holds the thighs in a single layer.
  2. Pat the thighs very dry and trim any loose excess skin or large pieces of fat.
  3. In a small bowl, combine Old Bay, avocado oil, tomato paste, garlic paste, onion powder, dried parsley, salt, and black pepper; add cayenne or honey if using.
  4. Rub the seasoning mixture evenly over each thigh, including under loose skin where possible.
  5. Arrange the thighs skin-side down on the prepared pan with space between pieces so they roast rather than steam.
  6. Roast skin-side down for 15 to 20 minutes undisturbed, until fat begins to render and the thighs release more easily from the pan.
  7. Flip the thighs skin-side up with tongs and roast 15 to 20 minutes more, rotating the pan once if needed for even browning.
  8. Check doneness: the thickest part should reach 165°F (74°C) and the skin should be browned and crisp at the edges.
  9. Transfer the thighs to a plate and let rest 5 to 10 minutes before serving; spoon pan drippings over the chicken if desired.

Tips

  • Pat the chicken very dry before applying the rub to encourage browning.
  • Keep thighs in a single layer with space between pieces so they roast instead of steam.
  • Start skin-side down to render fat before final browning.
  • Only flip once the chicken releases easily from the pan to preserve the skin.
  • A wire rack in the pan helps the skin brown more evenly but is optional.

Variations

  • Spicy Old Bay Chicken Thighs: Stir 1/8 to 1/2 teaspoon cayenne pepper or chili flakes into the rub for a modest spicy kick.
  • Grilled Old Bay Chicken Thighs: Cook the thighs over moderate grill heat, turning as needed; watch closely if the rub includes tomato paste or honey to avoid rapid darkening.

Notes

Store cooled chicken in an airtight container in the refrigerator for 3 to 4 days or freeze for longer. Reheat gently in the oven or air fryer to preserve skin texture. Ensure internal temperature reaches 165°F (74°C) before serving. Start with the lower end of the Old Bay range since it contains salt.

Nutrition

Calories: about 420 kcal | Protein: 31 g | Fat: 32 g | Carbohydrates: 2 g