Author

Julia

Browsing

Pumpkin Snickerdoodle Cookies

These pumpkin snickerdoodle cookies bake up soft and chewy with a cinnamon-sugar coating and just enough pumpkin and spice to make them feel like fall without turning cakey. They have the classic snickerdoodle tang from cream of tartar, plus a tender center and lightly crisp edges.

The dough comes together with melted butter and a bowl and spoon, so there is no mixer step to fuss with. A short chill helps the cookies hold their shape and keeps the texture closer to a cookie than a muffin.

Ingredients for Pumpkin Snickerdoodle Cookies
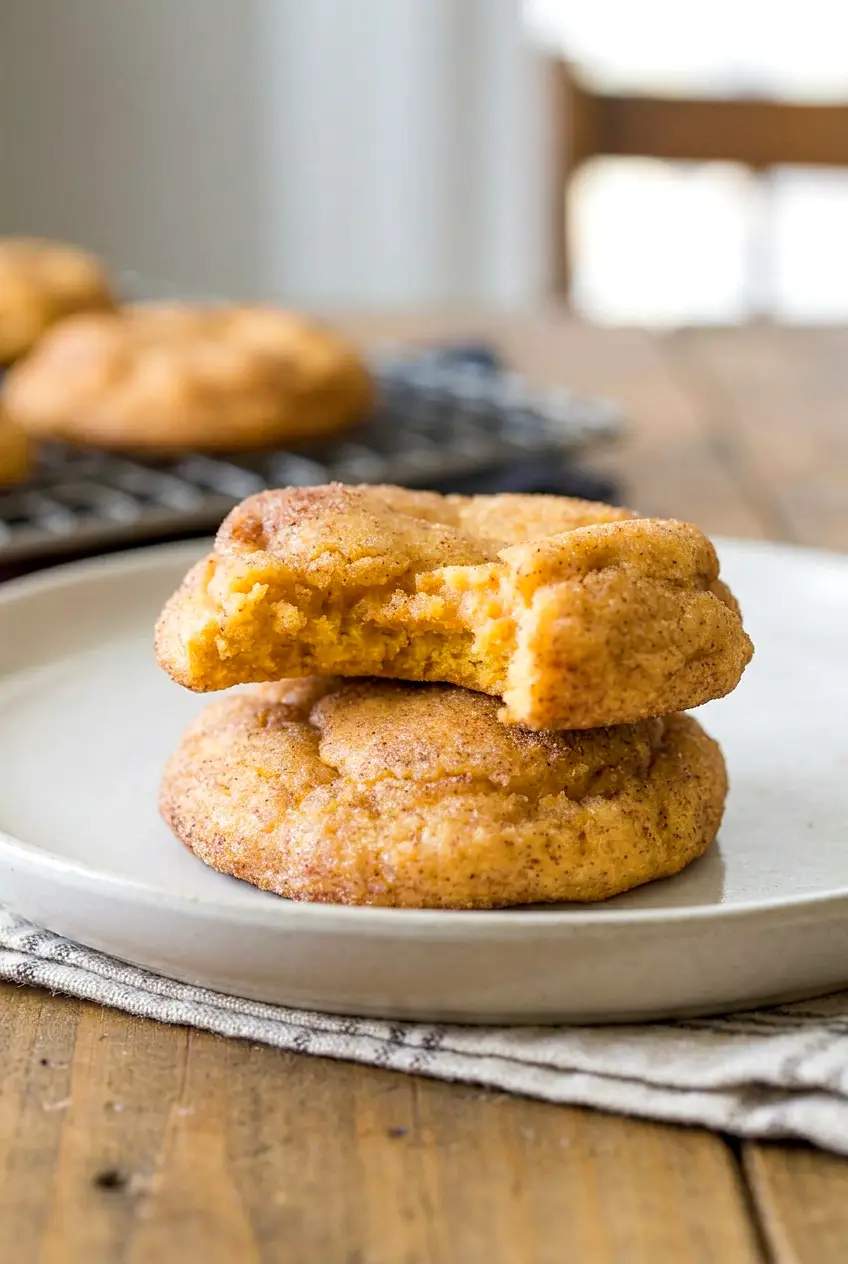
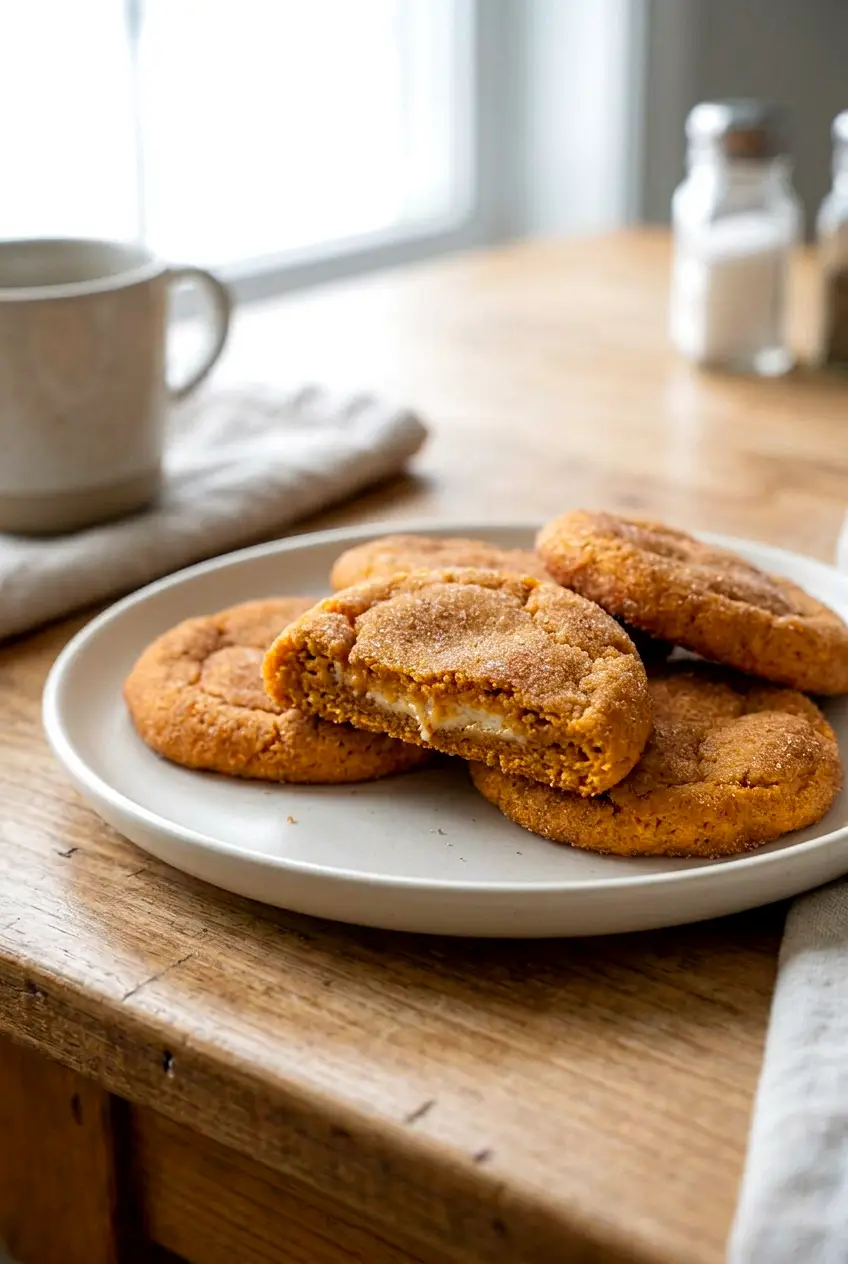
A bitten pumpkin snickerdoodle cookie stacked on another cookie, showing a soft interior
  • 2 1/4 cups all-purpose flour (280g)
  • 2 teaspoons cream of tartar
  • 1 teaspoon baking soda
  • 1 1/2 teaspoons ground cinnamon
  • 1 teaspoon pumpkin pie spice
  • 1/2 teaspoon fine salt
  • 3/4 cup unsalted butter, melted and cooled slightly (170g)
  • 1 cup granulated sugar (200g)
  • 1/2 cup packed brown sugar (100g)
  • 1/2 cup pure pumpkin puree (120g)
  • 1 large egg yolk
  • 2 teaspoons vanilla extract

For rolling:

  • 1/4 cup granulated sugar (50g)
  • 2 teaspoons ground cinnamon

Use pure pumpkin puree, not pumpkin pie filling. If the dough still feels very sticky after mixing, chill it a little longer instead of adding much more flour.

How to Make Pumpkin Snickerdoodle Cookies
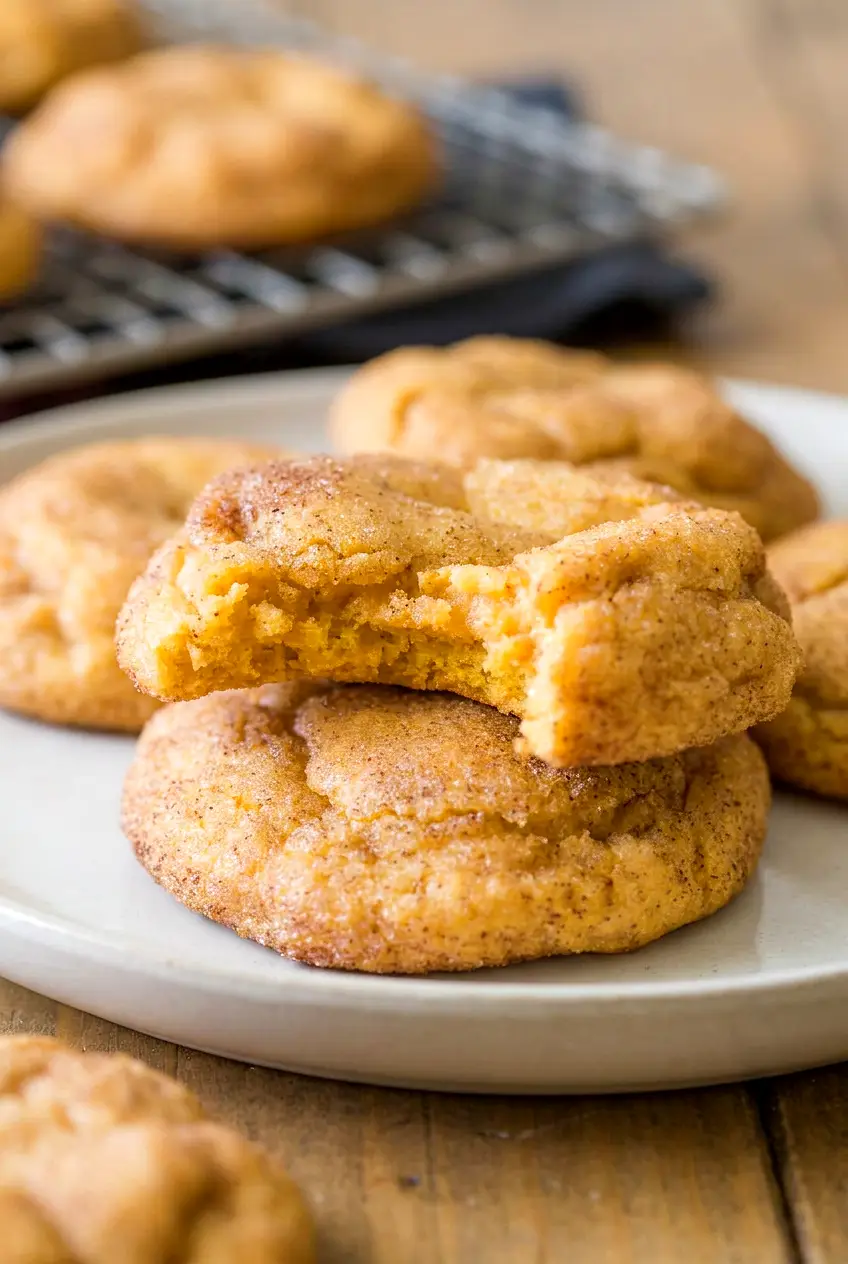
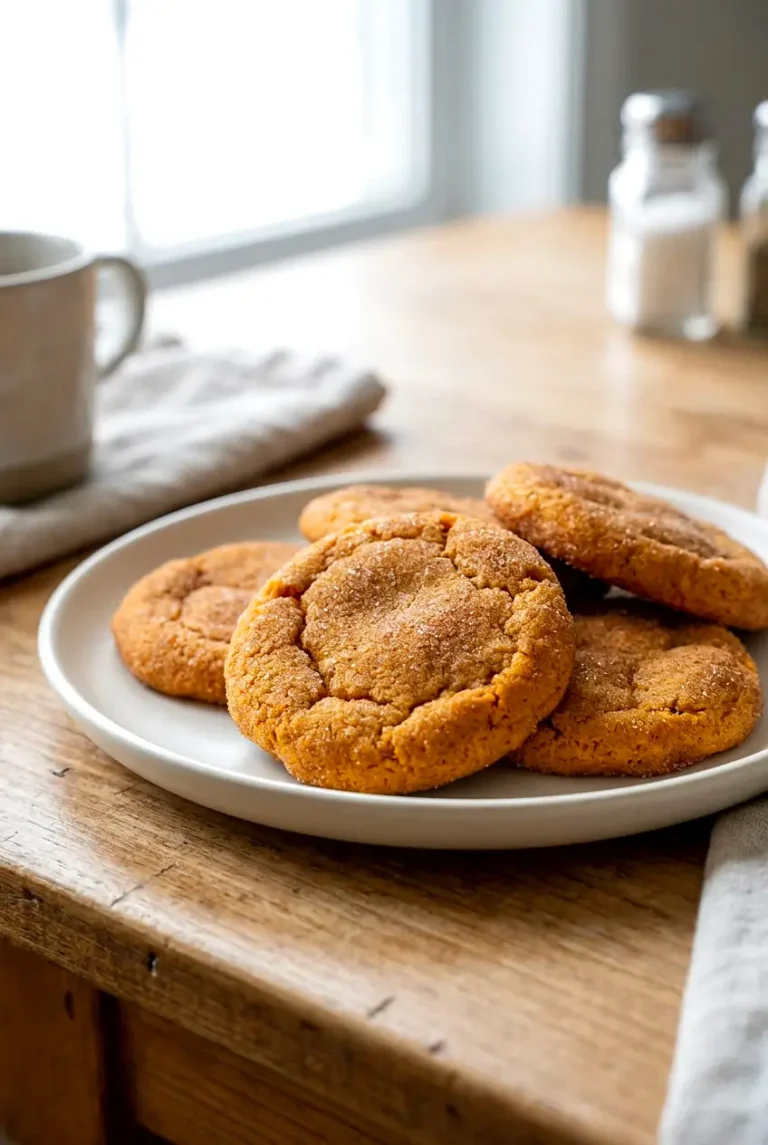
Close-up of pumpkin snickerdoodle cookies showing chewy centers and cinnamon-sugar coating
  1. Preheat the oven: Heat the oven to 350°F. Line a light-colored rimmed baking sheet with parchment paper.
  2. Mix the dry ingredients: In a medium bowl, whisk together the flour, cream of tartar, baking soda, cinnamon, pumpkin pie spice, and salt until evenly combined.
  3. Mix the wet ingredients: In a large bowl, stir together the melted butter, granulated sugar, brown sugar, pumpkin puree, egg yolk, and vanilla until smooth and glossy, about 3 to 4 minutes.
  4. Make the dough: Add the dry ingredients to the wet mixture and stir just until no dry flour pockets remain. The dough should look soft and cohesive. Do not keep mixing once the flour is absorbed.
  5. Chill the dough: Cover and refrigerate for 30 to 45 minutes, until the dough feels firmer and is easier to scoop.
  6. Roll in cinnamon sugar: In a small bowl, mix the 1/4 cup sugar and 2 teaspoons cinnamon. Scoop the chilled dough into even portions with a cookie scoop or tablespoon, roll into balls, and coat generously in the cinnamon-sugar. Set them on the prepared baking sheet about 2 inches apart.
  7. Bake: Bake for 10 to 12 minutes, until the edges are set and just barely golden and the centers still look soft. Rotate the pan halfway through if your oven bakes unevenly. Start checking at the lower end of the time range.
  8. Cool: Let the cookies rest on the baking sheet for 5 minutes, then transfer to a wire rack to cool completely. They will puff slightly in the oven and settle as they cool.

Why These Cookies Stay Soft Instead of Cakey

Pumpkin adds enough moisture to make cookies turn puffy if the dough is too loose. Using an egg yolk instead of a whole egg keeps extra water out of the dough, and the chill time helps control spread. Melted butter also keeps the texture tender without making the cookies dense.

Cream of tartar is worth keeping here. It gives snickerdoodles their classic flavor and helps with the texture.

How to Tell When They Are Done

Look for set edges and a center that still looks slightly underdone. Do not wait for deep browning. The cookies finish setting on the hot pan, so pulling them a little early helps keep them soft.

Optional Flavor Variations

More Pumpkin Pie Spice

Add an extra 1/2 teaspoon pumpkin pie spice to the dry ingredients for a stronger spice note.

Add a Pinch of Nutmeg or Clove

A small pinch of nutmeg or clove can deepen the flavor, but keep it light so the cinnamon and pumpkin still come through.

Serving Ideas

Serve these cookies slightly warm with coffee, tea, or cold milk. They also fit well on a fall dessert tray or holiday cookie plate.

For a party spread, pair them with Caramel Apple Cheesecake Dip. For another fall cookie option, try these Pecan Pie Cookies or Maple Brown Sugar Cookies with Maple Icing.

How to Store and Reheat Pumpkin Snickerdoodle Cookies

Let the cookies cool completely before storing. Keep them in an airtight container at room temperature for 3 to 4 days.

For longer storage, freeze the baked cookies in a freezer-safe container with parchment between layers. The dough can also be made ahead and chilled, covered, until later the same day or the next day.

To soften leftover cookies, warm one briefly in the microwave. Do not overheat, or they can dry out.

Nutrition

Nutrition is approximate and will vary based on ingredient brands, exact amounts, and cookie size.

  • Serving size: 2 cookies
  • Calories: about 220
  • Protein: 2g
  • Fat: 10g
  • Carbohydrates: 30g
  • Per 100g: about 430 calories, 4g protein, 19g fat, 61g carbohydrates

Pumpkin Snickerdoodle Cookies

Soft, chewy snickerdoodle-style cookies with pumpkin, warm spices, and a cinnamon-sugar coating.
Course: Dessert
Cuisine: American
Prep: 20 min
Cook: 12 min
Total: 75 min
Servings: 2 Calories: about 220 kcal

Equipment

  • rimmed baking sheet
  • parchment paper
  • mixing bowls
  • whisk
  • spoon or spatula
  • cookie scoop (optional)
  • wire rack

Ingredients

For the cookies

  • 2 1/4 cups all-purpose flour (280g)
  • 2 teaspoons cream of tartar
  • 1 teaspoon baking soda
  • 1 1/2 teaspoons ground cinnamon
  • 1 teaspoon pumpkin pie spice
  • 1/2 teaspoon fine salt
  • 3/4 cup unsalted butter, melted and cooled slightly (170g)
  • 1 cup granulated sugar (200g)
  • 1/2 cup packed brown sugar (100g)
  • 1/2 cup pure pumpkin puree (120g)
  • 1 large egg yolk
  • 2 teaspoons vanilla extract

For rolling

  • 1/4 cup granulated sugar (50g)
  • 2 teaspoons ground cinnamon

Instructions

  1. Preheat the oven to 350°F (177°C) and line a light-colored rimmed baking sheet with parchment paper.
  2. In a medium bowl, whisk together the flour, cream of tartar, baking soda, cinnamon, pumpkin pie spice, and salt until evenly combined.
  3. In a large bowl, stir the melted butter, granulated sugar, brown sugar, pumpkin puree, egg yolk, and vanilla until smooth and glossy, about 3 to 4 minutes.
  4. Add the dry ingredients to the wet mixture and stir just until no dry flour pockets remain, stopping once the flour is absorbed.
  5. Cover and refrigerate the dough for 30 to 45 minutes, until firmer and easier to scoop.
  6. In a small bowl, mix the 1/4 cup sugar and 2 teaspoons cinnamon for rolling.
  7. Scoop chilled dough into even portions with a cookie scoop or tablespoon, roll into balls, and coat generously in the cinnamon-sugar; place them on the prepared baking sheet about 2 inches apart.
  8. Bake for 10 to 12 minutes, until the edges are set and just barely golden and the centers still look soft; rotate the pan halfway through baking if needed and start checking at the lower end of the time range.
  9. Let the cookies rest on the baking sheet for 5 minutes, then transfer to a wire rack to cool completely.

Tips

  • Use pure pumpkin puree, not pumpkin pie filling.
  • Chill the dough until firmer to control spread and keep texture cookie-like rather than cakey.
  • Use only the egg yolk to reduce extra moisture and prevent a cakey texture.
  • Pull cookies from the oven when edges are set but centers still look slightly underdone to keep them soft.
  • Melted butter creates a tender center while still allowing light crisp edges.

Variations

  • More Pumpkin Pie Spice: Add an extra 1/2 teaspoon pumpkin pie spice to the dry ingredients for a stronger spice note.
  • Pinch of Nutmeg or Clove: Add a small pinch of nutmeg or clove to deepen the flavor, keeping it light so the cinnamon and pumpkin remain prominent.
Notes

Let cookies cool completely before storing. Store in an airtight container at room temperature for 3–4 days or freeze baked cookies with parchment between layers; dough can be chilled overnight. Warm briefly in the microwave to soften leftovers but avoid overheating.

Nutrition

Calories: about 220 kcal | Protein: 2 g | Fat: 10 g | Carbohydrates: 30 g

Brown Butter Pumpkin Chocolate Chip Cookies

These pumpkin chocolate chip cookies bake up soft and chewy with warm spice, plenty of semisweet chocolate, and a deeper flavor from browned butter. They stay thick enough to feel like a cookie instead of a cakey pumpkin muffin top.

The method is straightforward: brown the butter, mix a thick dough, and chill it briefly before baking. Pull the cookies when the edges are set and the centers still look soft, since they finish setting on the pan.

For another easy fall dessert, try this No Bake Caramel Apple Cake.

Ingredients for Brown Butter Pumpkin Chocolate Chip Cookies

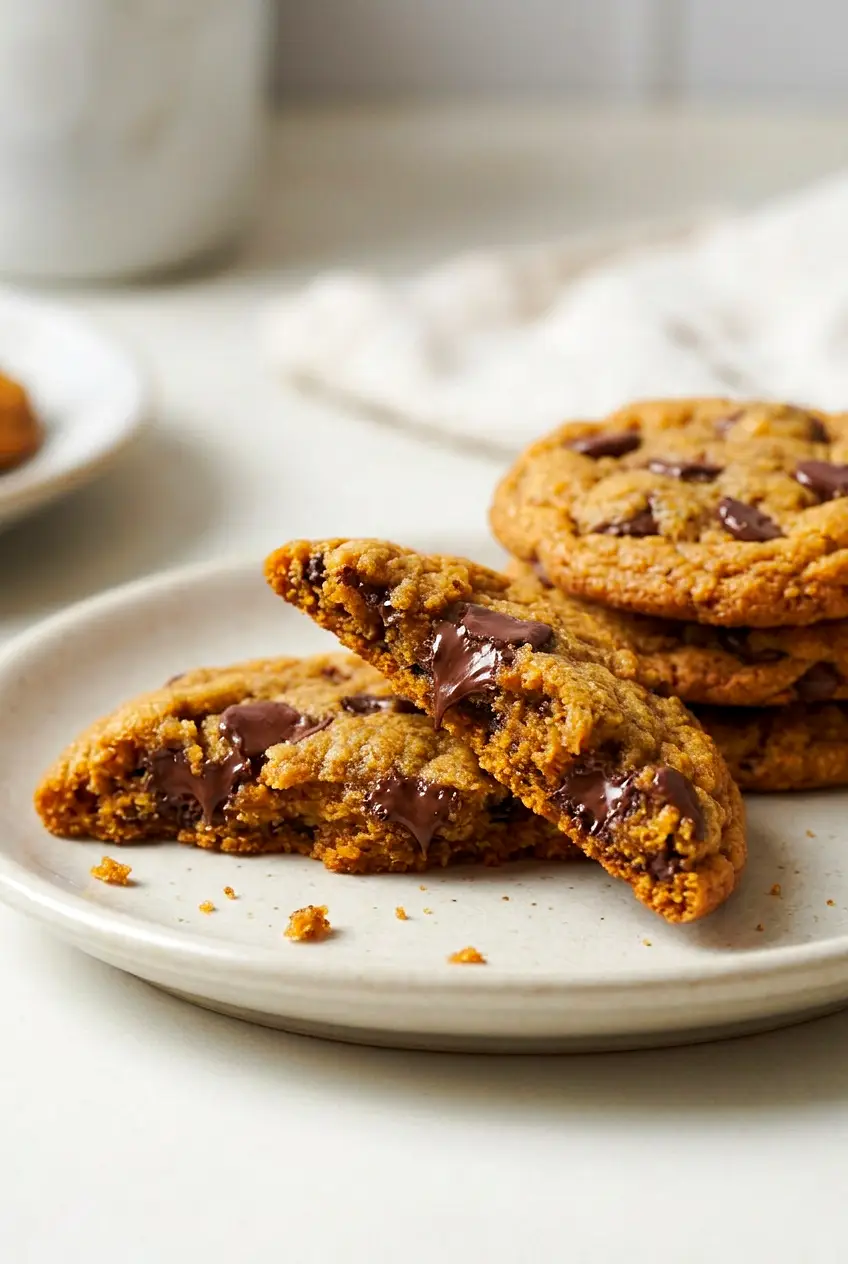
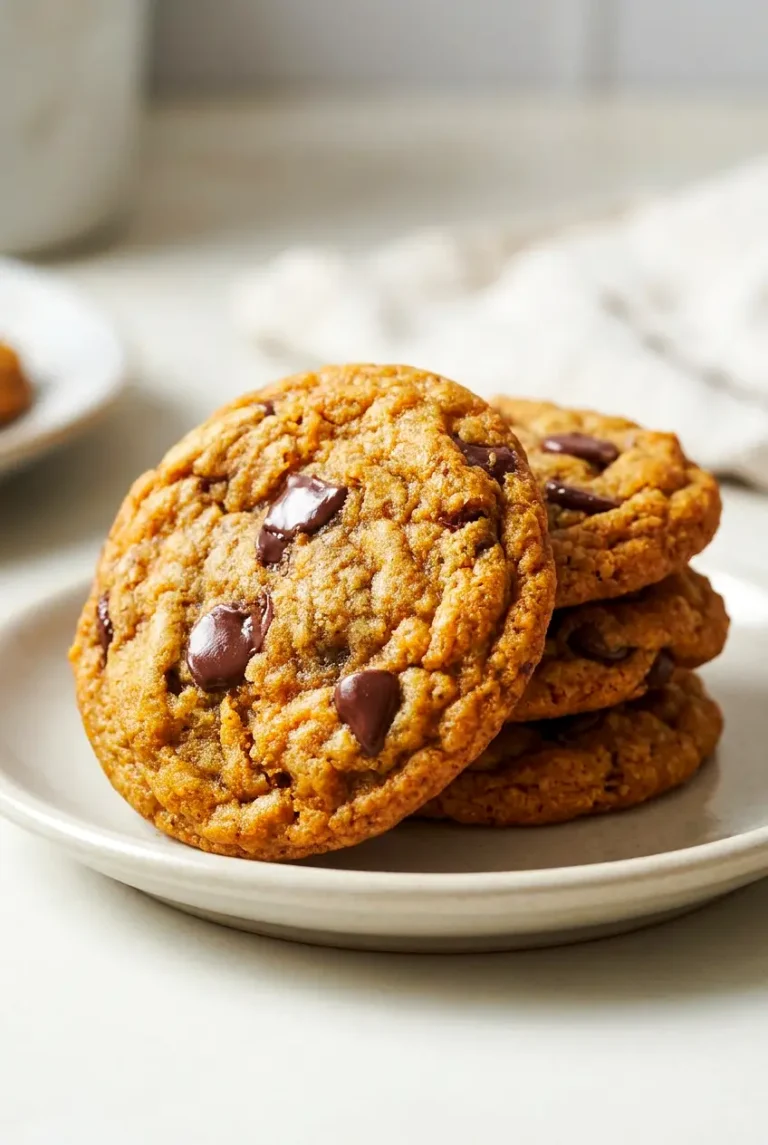
A pumpkin chocolate chip cookie with a cracked edge and melted chocolate chips
  • 1/2 cup unsalted butter (115g)
  • 1/2 cup pumpkin puree (120g), preferably canned pure pumpkin, not pumpkin pie filling
  • 1/2 cup granulated sugar (100g)
  • 3/4 cup light brown sugar (150g)
  • 1 large egg yolk
  • 2 teaspoons vanilla extract
  • 1 3/4 cups all-purpose flour (210g), spooned and leveled
  • 1 teaspoon baking soda
  • 1/2 teaspoon salt
  • 1 1/2 teaspoons ground cinnamon
  • 1/2 teaspoon ground ginger
  • 1/4 teaspoon ground nutmeg
  • 1/8 teaspoon ground cloves
  • 1 cup semisweet chocolate chips (170g)

Optional for finishing: a light sprinkle of flaky salt, or 1/2 cup chopped chocolate or chocolate chunks for extra melted pockets.

How to Make Brown Butter Pumpkin Chocolate Chip Cookies

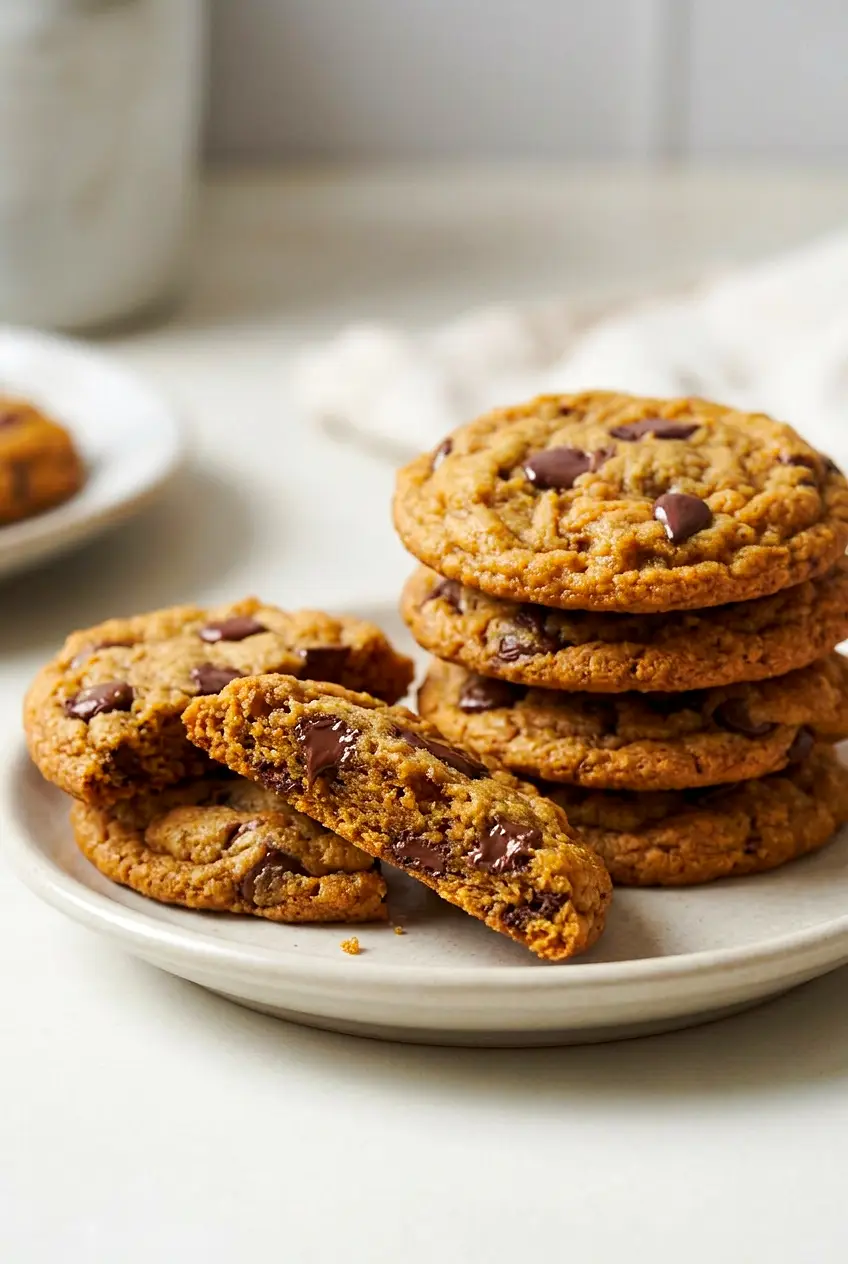
Close-up of a broken pumpkin chocolate chip cookie showing gooey chocolate chips
  1. Brown the butter: Melt the butter in a medium saucepan or light-colored skillet over medium heat. Cook for 5 to 8 minutes, swirling or stirring occasionally, until it foams, smells nutty, and the milk solids turn golden brown. Pour it into a mixing bowl right away so it does not keep cooking. Let it cool until warm but still fluid.
  2. Mix the wet ingredients: Add the pumpkin puree, granulated sugar, brown sugar, egg yolk, and vanilla to the browned butter. Whisk until smooth and combined. The mixture may look glossy and a little loose.
  3. Whisk the dry ingredients: In a separate bowl, whisk together the flour, baking soda, salt, cinnamon, ginger, nutmeg, and cloves.
  4. Make the dough: Add the dry ingredients to the wet ingredients and stir with a spatula just until no dry flour pockets remain. Fold in the chocolate chips. The dough should be thick, soft, and scoopable. Do not keep mixing once it comes together.
  5. Chill the dough: Cover and refrigerate for about 30 minutes. This helps control spread and keeps the cookies thicker. If the dough chills much longer, let it sit at room temperature for a few minutes before scooping.
  6. Preheat the oven: Heat the oven to 350°F. Line a rimmed baking sheet with parchment paper.
  7. Scoop the cookies: Portion the dough into even scoops on the prepared baking sheet, leaving space between them so they can spread. Bake one sheet at a time if possible for the most even results.
  8. Bake: Bake for 10 to 12 minutes, rotating the pan halfway through if your oven bakes unevenly. Start checking early, since pan color, scoop size, and dough temperature can affect the time. The edges should look set and lightly golden, and the centers should still look soft and slightly underbaked but not wet.
  9. Cool: Let the cookies rest on the baking sheet for 5 minutes, then transfer them to a wire rack to cool completely.

Why Brown Butter Helps

Brown butter gives these cookies a deeper, nuttier flavor that works well with pumpkin and warm spices. Let it cool slightly before mixing so the dough does not loosen too much and the egg yolk does not start to cook. If the butter smells burnt instead of toasted, it is better to start over.

How to Keep Pumpkin Cookies Soft and Chewy

Pumpkin adds moisture fast, which is why these cookies can turn cakey if the dough is too loose. Use pure pumpkin puree, measure the flour carefully, and stick with the egg yolk instead of a whole egg. The short chill also helps the cookies stay thicker and chewier in the oven.

Ingredient Notes and Easy Swaps

  • Brown sugar: Dark brown sugar works in place of light brown sugar if you want a slightly deeper molasses flavor.
  • Pumpkin puree: Canned puree is the most consistent. If homemade puree is looser, the dough may need a longer chill.
  • Chocolate: Semisweet chips keep the sweetness balanced, but chopped chocolate or chunks work well too.
  • Spices: Fresh spices make a noticeable difference. Older spices can make the cookies taste flat.

How to Store and Reheat Brown Butter Pumpkin Chocolate Chip Cookies

Let the cookies cool completely before storing. Keep them in an airtight container at room temperature for 3 to 4 days. If you stack them, place parchment between layers.

The dough can be made ahead and refrigerated for up to 48 hours before baking. If it firms up too much, let it sit at room temperature just until it is scoopable again.

To reheat baked cookies, microwave one at a time in short bursts until just soft. Avoid overheating, which can make them tough.

More Pumpkin Dessert Ideas

If you want another pumpkin dessert, this Pumpkin Lush Dessert with Graham Cracker Crust is a good option.

For a party-friendly pumpkin dessert, these Mini Pumpkin Pies with Whipped Cream are a fun choice.

Nutrition

Nutrition is approximate and will vary based on ingredient brands, exact amounts, and serving size.

  • Serving size: 1 cookie
  • Calories: about 160
  • Protein: 2g
  • Fat: 7g
  • Carbohydrates: 24g
  • Per 100g: about 430 calories, 5g protein, 18g fat, 63g carbohydrates

Brown Butter Pumpkin Chocolate Chip Cookies

Soft, chewy pumpkin cookies with warm spices, semisweet chocolate, and a nutty depth from browned butter.
Course: Dessert
Cuisine: American
Prep: 20 min
Cook: 12 min
Total: 67 min
Servings: 24 Calories: about 160 kcal

Equipment

  • saucepan or light-colored skillet
  • mixing bowls
  • whisk
  • spatula
  • measuring cups and spoons
  • rimmed baking sheet
  • parchment paper
  • wire rack
  • refrigerator
  • oven

Ingredients

For the cookies

  • 1/2 cup unsalted butter (115g)
  • 1/2 cup pumpkin puree (120g)
  • 1/2 cup granulated sugar (100g)
  • 3/4 cup light brown sugar (150g)
  • 1 large egg yolk
  • 2 teaspoons vanilla extract
  • 1 3/4 cups all-purpose flour (210g), spooned and leveled
  • 1 teaspoon baking soda
  • 1/2 teaspoon salt
  • 1 1/2 teaspoons ground cinnamon
  • 1/2 teaspoon ground ginger
  • 1/4 teaspoon ground nutmeg
  • 1/8 teaspoon ground cloves
  • 1 cup semisweet chocolate chips (170g)
  • Flaky salt, for finishing (optional)
  • 1/2 cup chopped chocolate or chocolate chunks (optional)

Instructions

  1. Melt the butter in a medium saucepan or light-colored skillet over medium heat and cook, stirring or swirling occasionally, for 5 to 8 minutes until it foams, smells nutty, and the milk solids turn golden brown.
  2. Pour the browned butter into a mixing bowl to stop the cooking and let it cool until warm but still fluid.
  3. Add the pumpkin puree, granulated sugar, brown sugar, egg yolk, and vanilla to the warm browned butter and whisk until smooth.
  4. In a separate bowl, whisk together the flour, baking soda, salt, cinnamon, ginger, nutmeg, and cloves.
  5. Add the dry ingredients to the wet ingredients and stir with a spatula just until no dry flour pockets remain, then fold in the chocolate chips.
  6. Cover the dough and refrigerate for about 30 minutes; if chilled much longer, let it sit at room temperature a few minutes before scooping.
  7. Preheat the oven to 350°F (177°C) and line a rimmed baking sheet with parchment paper.
  8. Portion the dough into even scoops on the prepared baking sheet, leaving space between them; bake one sheet at a time if possible.
  9. Bake for 10 to 12 minutes, rotating the pan halfway if needed; remove when edges are set and centers still look soft and slightly underbaked.
  10. Let the cookies rest on the baking sheet for 5 minutes, then transfer them to a wire rack to cool completely.

Tips

  • Cool browned butter until warm but still fluid to avoid loosening the dough or cooking the egg yolk.
  • Chill the dough about 30 minutes to control spread and keep cookies thick.
  • Pull cookies when the edges are set but centers are still slightly underbaked; they finish setting on the pan.
  • Use pure pumpkin puree and measure flour carefully to avoid a cakey texture.
  • Rotate the pan halfway through baking if your oven heats unevenly.

Variations

  • Dark Brown Sugar: Swap light brown sugar for dark brown sugar for a deeper molasses flavor.
  • Chopped Chocolate: Use 1/2 cup chopped chocolate or chocolate chunks (optional) in place of or in addition to chips for bigger melted pockets.
  • Adjustable Pumpkin Puree: If using homemade pumpkin puree that’s looser, chill the dough longer before scooping to firm it up.
  • Spice Freshness: Use freshly ground spices for brighter flavor; older spices can make the cookies taste flat.

Notes

Store cooled cookies in an airtight container at room temperature for 3 to 4 days; refrigerate dough up to 48 hours before baking and microwave individual cookies in short bursts to reheat.

Nutrition

Calories: about 160 kcal | Protein: 2 g | Fat: 7 g | Carbohydrates: 24 g

No Bake Caramel Apple Cake

No Bake Caramel Apple Cake is a simple layered dessert with cinnamon graham crackers, a thick vanilla pudding filling, spiced apple pie filling, and a caramel drizzle on top. After chilling, the crackers soften into cake-like layers that slice neatly and make this easy to serve.

The method stays straightforward: layer everything in a 9×13-inch dish, chill until set, and add the caramel just before serving. Cutting the apples into smaller pieces and using a thick pudding layer helps the dessert hold together better.

Ingredients for No Bake Caramel Apple Cake

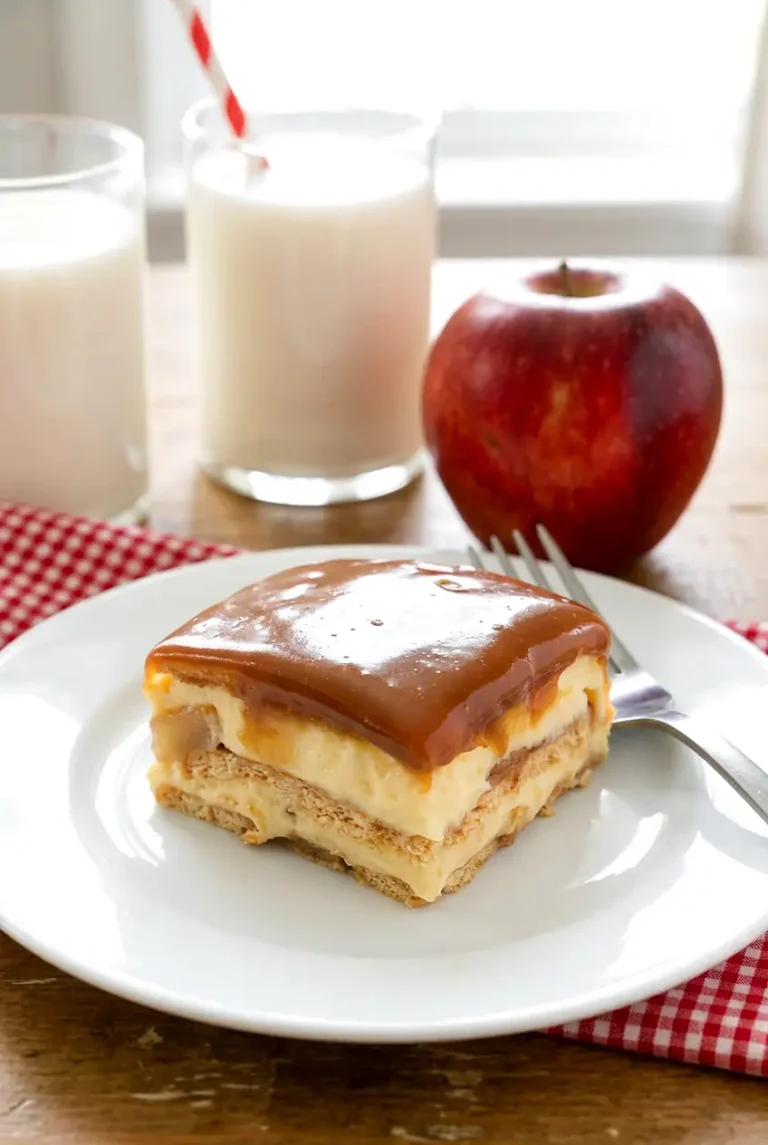
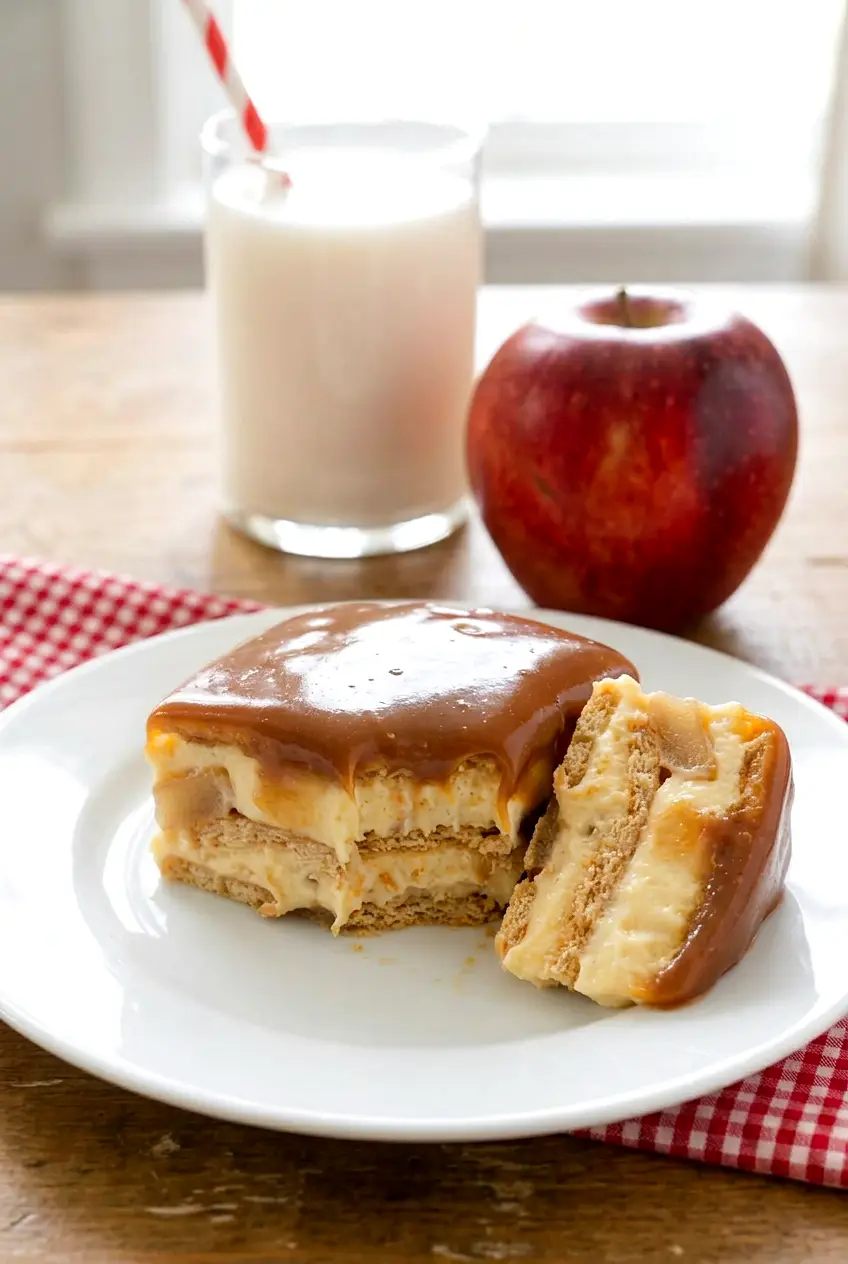
Side view of a caramel apple cake slice on a white plate with a glass of milk
  • About 1 1/2 sleeves cinnamon graham crackers (about 340g)
  • 2 boxes (3.4 ounces each) instant vanilla pudding mix (about 190g total)
  • 3 cups cold milk (about 725g)
  • 1 cup heavy cream (240g)
  • 1/2 cup powdered sugar (60g)
  • 1 can (20 ounces) apple pie filling (about 575g)
  • 1/2 teaspoon ground cinnamon
  • 1/8 teaspoon ground nutmeg
  • 1/2 to 3/4 cup caramel sauce or caramel topping (about 160g)
  • Whipped cream, for serving, optional

If the apple slices are large, cut them into smaller bite-size pieces before layering. If the filling seems very loose, spoon off a little excess syrup so the dessert sets more cleanly.

How to Make No Bake Caramel Apple Cake

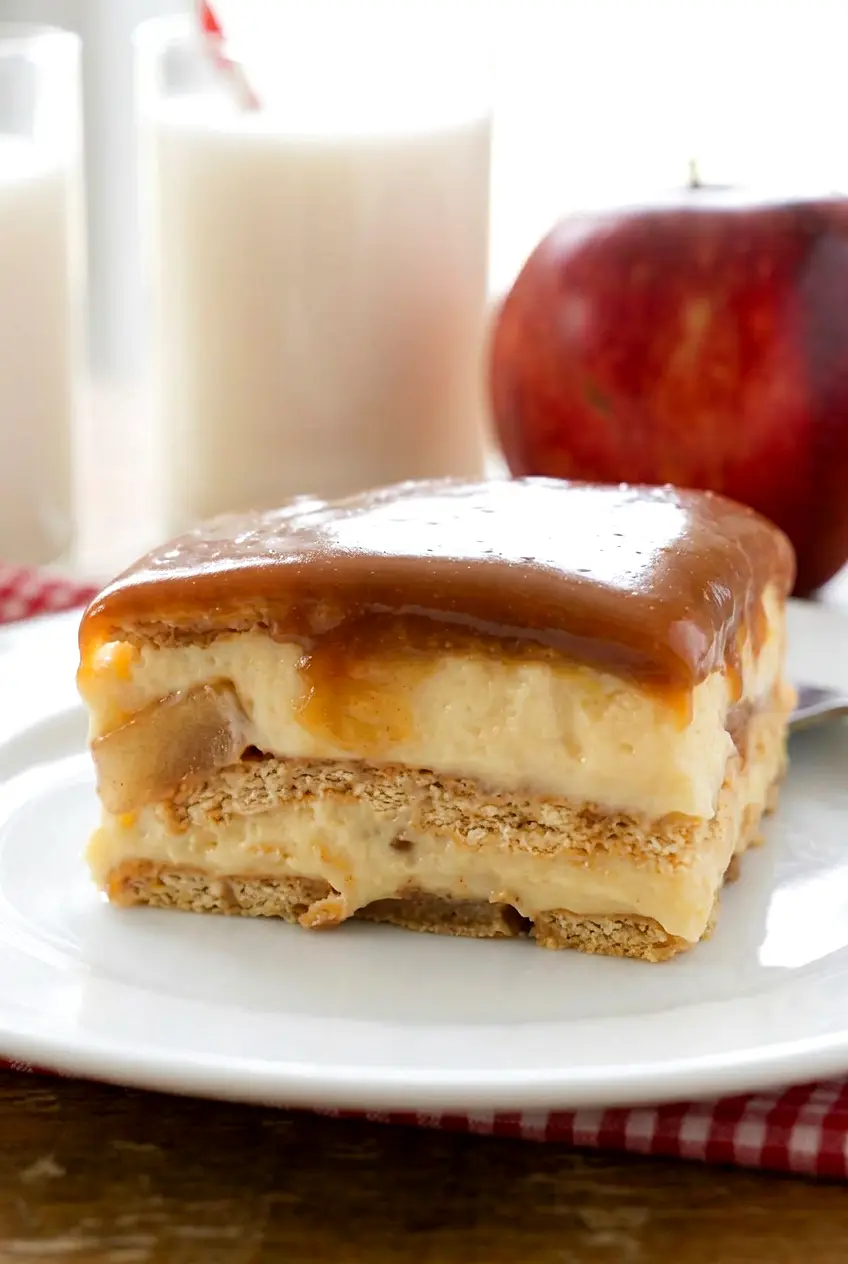
Close-up of no bake caramel apple cake showing creamy layers and soft apple filling
  1. Season the apples: In a small bowl, stir the apple pie filling with the cinnamon and nutmeg until evenly mixed.
  2. Make the creamy filling: In a large bowl, whisk the instant pudding mix with the cold milk for 1 to 2 minutes, until it starts to thicken. Add the heavy cream and powdered sugar, then beat with a hand mixer or stand mixer for 2 to 4 minutes, until smooth and thick enough to mound on a spoon.
  3. Start the layers: Arrange a single layer of cinnamon graham crackers in the bottom of a 9×13-inch baking dish, breaking pieces as needed to fit the corners and edges. Spread about one-third of the pudding mixture over the crackers, then spoon about half of the apple filling over the top.
  4. Repeat and finish: Add another layer of graham crackers, another third of the pudding mixture, and the remaining apple filling. Finish with a final layer of graham crackers and spread the remaining pudding mixture over the top. Smooth the surface gently with a spatula.
  5. Chill until set: Cover and refrigerate for at least 4 hours, or preferably overnight. It is ready when the graham crackers have softened and the layers hold together when sliced.
  6. Top and serve: Drizzle the caramel sauce over the top just before serving. Slice into squares and use a sturdy spatula to lift out the pieces. Add whipped cream or extra caramel if you like.

How to Keep the Layers Neat

The two things that matter most here are pudding thickness and apple filling moisture. If the pudding still looks loose, keep mixing until it thickens well. If the apple filling is very syrupy, remove a little of the extra liquid before layering.

Chill time matters too. A 4-hour chill will work, but overnight usually gives the cleanest slices and the most even texture.

Easy Variations

Cherry Caramel Icebox Cake

Use cherry pie filling instead of apple pie filling. Spread it gently since it can be a little looser.

Blueberry Caramel Icebox Cake

Use blueberry pie filling for a fruitier version. Spoon it carefully so it does not streak too much into the cream layer.

Chocolate Graham Caramel Dessert

Replace the cinnamon graham crackers with chocolate graham crackers or chocolate wafer cookies for a richer version.

Make-Ahead and Serving Notes

This dessert is a good make-ahead choice for potlucks and holiday meals. Assemble it earlier in the day or the night before, then keep it covered in the refrigerator until serving.

For the cleanest top, wait to add the caramel until just before serving. If you like chilled layered desserts, you may also enjoy Pumpkin Lush Dessert.

How to Store No Bake Caramel Apple Cake

Cover leftovers tightly and refrigerate. The texture is best within 2 to 3 days while the layers are still firm and cold.

Serve leftovers straight from the refrigerator. No reheating is needed.

Do not leave this dessert at room temperature for more than about 4 hours total. Return leftovers to the refrigerator promptly so the filling stays set.

For another fall dessert, try Mini Pumpkin Pies. If you want a baked fruit dessert instead, these Cranberry Crumble Bars are another good option.

Nutrition

Nutrition is approximate and will vary based on ingredient brands, exact amounts, caramel quantity, and serving size.

  • Serving size: 1 of 12 servings
  • Calories: about 340
  • Protein: 4g
  • Fat: 13g
  • Carbohydrates: 54g
  • Per 100g: about 220 calories, 3g protein, 8g fat, 35g carbohydrates

No Bake Caramel Apple Cake

A layered no-bake dessert with cinnamon graham crackers, a thick vanilla pudding filling, apple pie filling, and a caramel drizzle that softens into cake-like slices after chilling.
Course: Dessert
Cuisine: American
Prep: 20 min
Total: 260 min
Servings: 12 Calories: about 340 kcal

Equipment

  • 9×13-inch baking dish
  • mixing bowls
  • hand mixer or stand mixer
  • spatula
  • measuring cups

Ingredients

Main

  • About 1 1/2 sleeves cinnamon graham crackers (about 340g)
  • 2 boxes (3.4 oz each) instant vanilla pudding mix (about 190g total)
  • 3 cups cold milk (about 725g)
  • 1 cup heavy cream (240g)
  • 1/2 cup powdered sugar (60g)
  • 1 can (20 ounces) apple pie filling (about 575g)
  • 1/2 teaspoon ground cinnamon
  • 1/8 teaspoon ground nutmeg
  • 1/2 to 3/4 cup caramel sauce or caramel topping (about 160g)
  • Whipped cream, for serving (optional)

Instructions

  1. Stir the apple pie filling with the ground cinnamon and nutmeg in a small bowl until evenly mixed.
  2. Whisk the instant vanilla pudding mix with the cold milk for 1 to 2 minutes, until it starts to thicken.
  3. Add the heavy cream and powdered sugar to the pudding mixture and beat with a hand mixer or stand mixer for 2 to 4 minutes, until smooth and thick enough to mound on a spoon.
  4. Arrange a single layer of cinnamon graham crackers in the bottom of a 9×13-inch baking dish, breaking pieces as needed to fit.
  5. Spread about one-third of the pudding mixture over the crackers.
  6. Spoon about half of the seasoned apple filling over the pudding layer.
  7. Add another layer of graham crackers, spread another third of the pudding mixture, then spoon the remaining apple filling over that layer.
  8. Finish with a final layer of graham crackers and spread the remaining pudding mixture over the top, smoothing gently with a spatula.
  9. Cover and refrigerate for at least 4 hours, or preferably overnight, until the graham crackers have softened and the layers hold together.
  10. Just before serving, drizzle the caramel sauce over the top, slice into squares, and lift pieces with a sturdy spatula. Add whipped cream or extra caramel if desired.

Tips

  • Cut large apple slices into bite-size pieces before layering to improve texture and serving.
  • If the apple filling is very syrupy, spoon off some excess syrup before layering to prevent soggy layers.
  • Keep mixing the pudding until it is thick enough to mound for cleaner layers.
  • Chill at least 4 hours, but refrigerate overnight for the cleanest slices.
  • Wait to add the caramel sauce until just before serving to keep the top neat.

Variations

  • Cherry Caramel Icebox Cake: Use cherry pie filling instead of apple pie filling; spread gently if the filling is looser.
  • Blueberry Caramel Icebox Cake: Use blueberry pie filling for a fruitier version and spoon it carefully to avoid streaking the cream.
  • Chocolate Graham Caramel Dessert: Replace the cinnamon graham crackers with chocolate graham crackers or chocolate wafer cookies for a richer dessert.

Notes

Cover leftovers tightly and refrigerate; best within 2 to 3 days while cold and firm. Serve chilled; do not leave at room temperature for more than about 4 hours.

Nutrition

Calories: about 340 kcal | Protein: 4 g | Fat: 13 g | Carbohydrates: 54 g

Pumpkin Lush

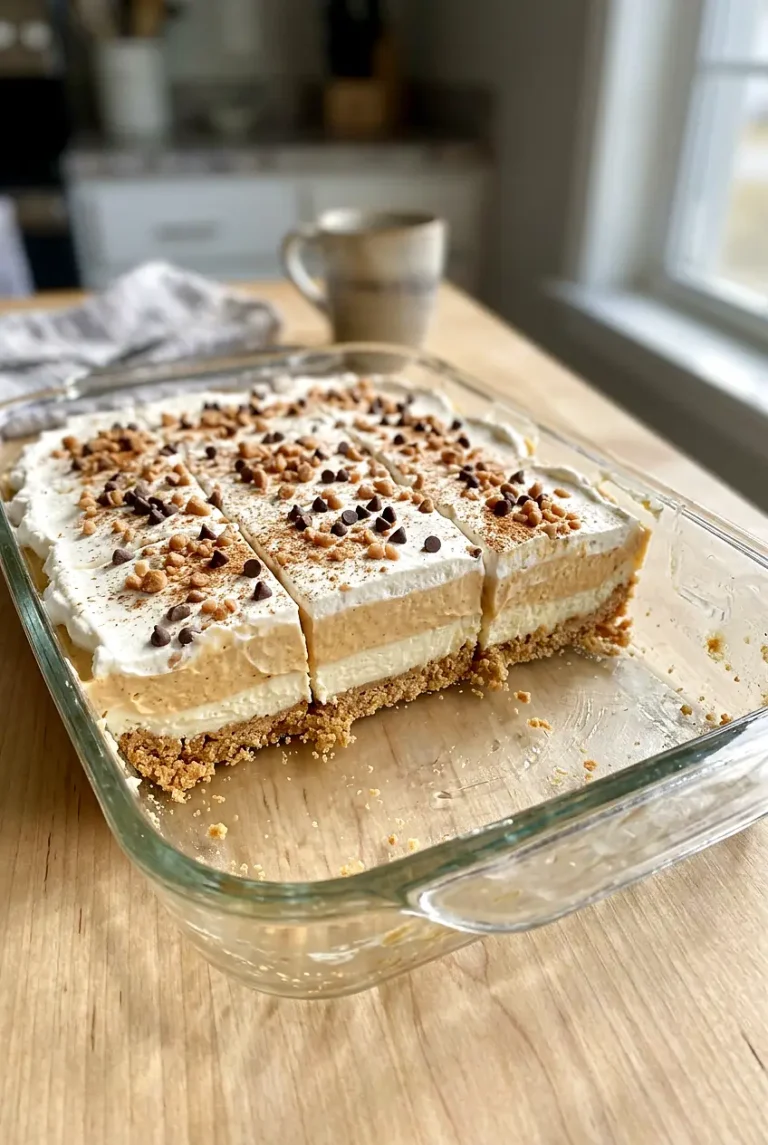
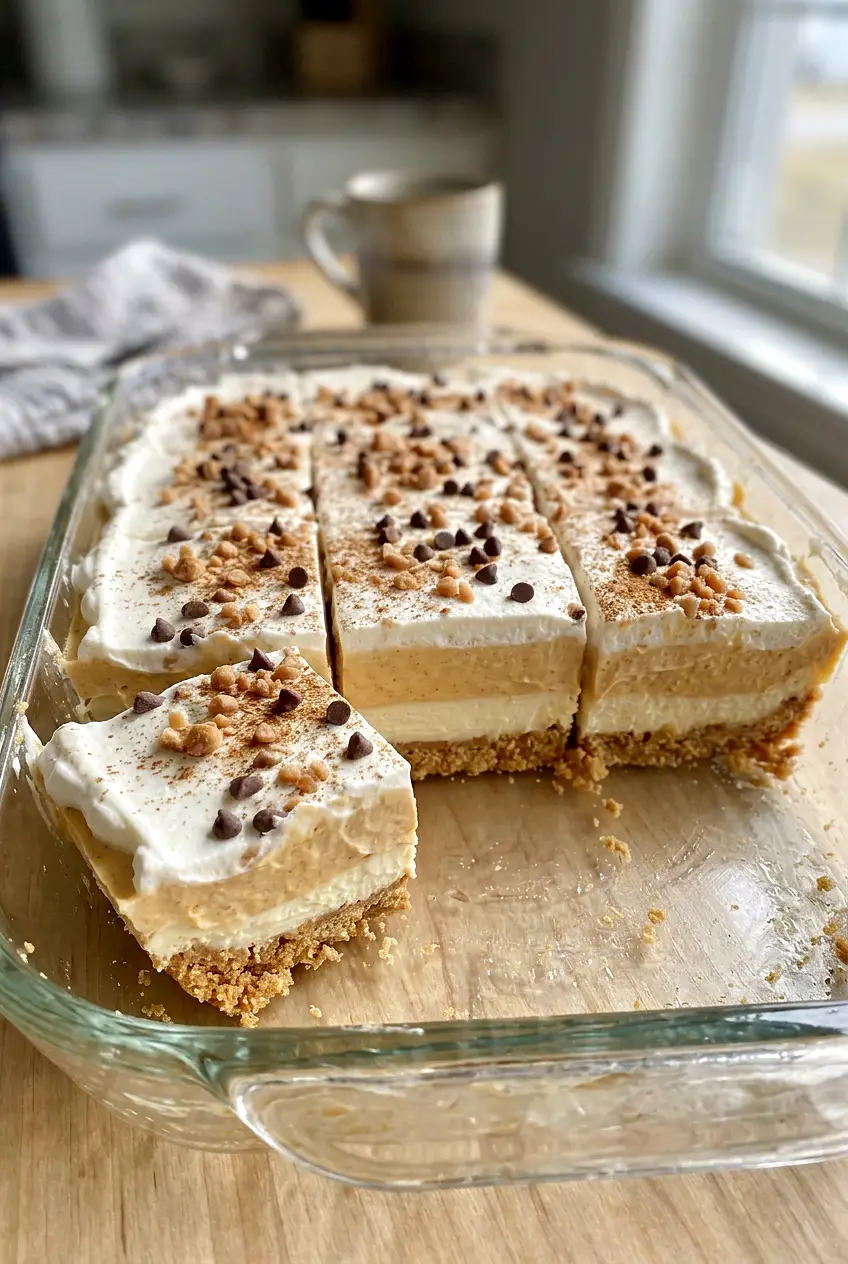
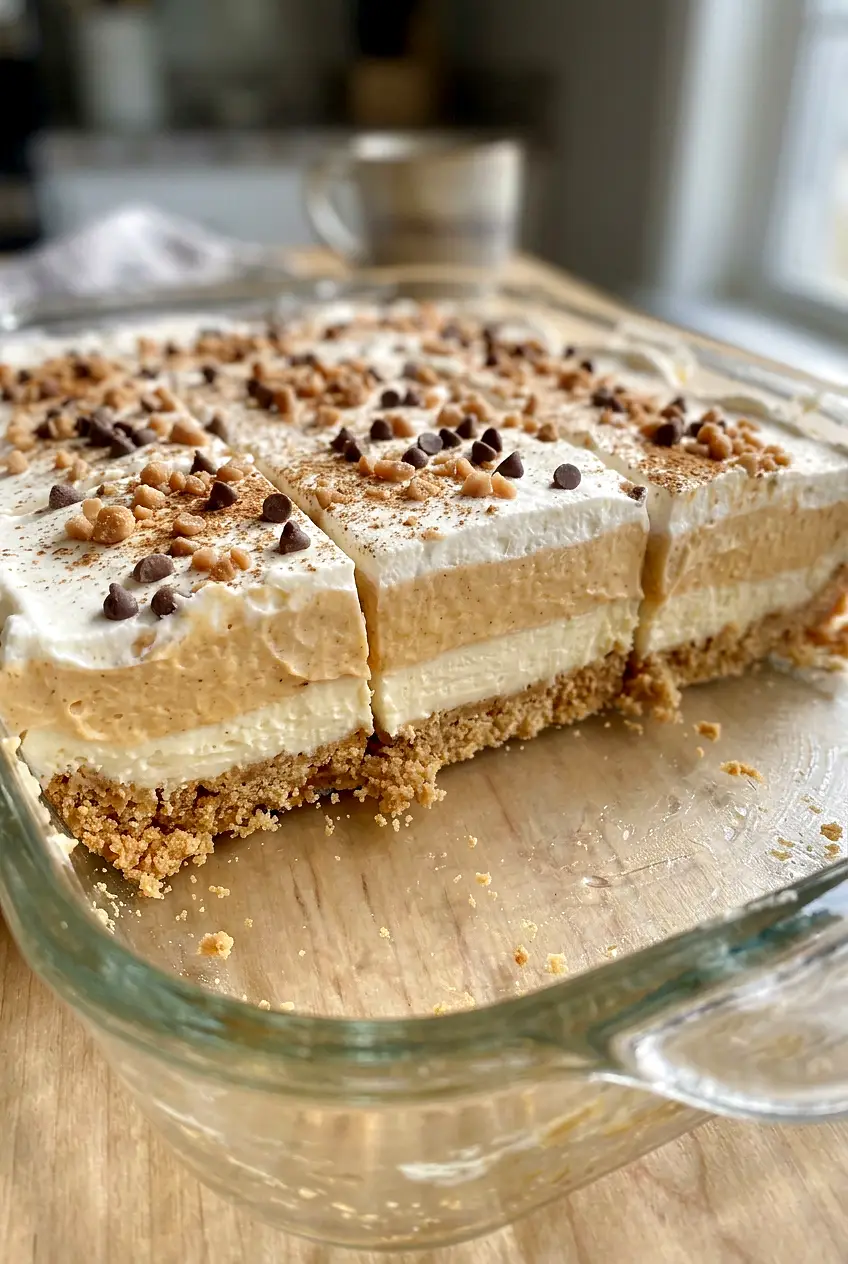
Pumpkin lush is a chilled layered dessert with a buttery graham cracker crust, a sweet cream cheese layer, creamy pumpkin pudding, and a whipped topping finish. It is cool, soft, and easy to slice once fully chilled.

The method stays simple: bake the crust briefly, then add the no-cook layers and refrigerate until firm. Use brick-style cream cheese, instant pudding, and cold milk so each layer sets the way it should.

Ingredients for Pumpkin Lush

A separated pumpkin lush square with whipped topping and crunchy toffee bits on top
  • 2 1/2 cups graham cracker crumbs (250g)
  • 1/4 cup granulated sugar (50g)
  • 1/2 cup melted butter (115g)
  • 8 ounces brick-style cream cheese, softened (225g)
  • 1 cup powdered sugar (120g)
  • 2 packages (3.4 ounces each) vanilla instant pudding mix (about 190g total)
  • 3 cups cold milk (725g)
  • 1 cup pumpkin puree (245g)
  • 1 to 2 teaspoons pumpkin pie spice
  • 8 ounces whipped topping, thawed (225g), divided
  • 1/2 cup toffee bits (70g)
  • 1/4 cup mini chocolate chips (45g)

Optional: 1 teaspoon vanilla extract for the cream cheese layer, or a light sprinkle of pumpkin pie spice on top before serving.

How to Make Pumpkin Lush

Close view of pumpkin lush showing the creamy pumpkin layer and smooth cream cheese layer in a cut square
  1. Preheat the oven and make the crust: Heat the oven to 350°F. In a bowl, stir together the graham cracker crumbs, granulated sugar, and melted butter until evenly moistened. Press firmly into a 9×13-inch baking dish.
  2. Bake the crust: Bake for 8 to 10 minutes, until the crust looks lightly golden and feels set. Let it cool completely before adding the next layer.
  3. Make the cream cheese layer: In a second bowl, beat the softened cream cheese and powdered sugar with a hand mixer until smooth, about 5 to 7 minutes. If using vanilla extract, mix it in here. Spread the mixture gently over the cooled crust in an even layer.
  4. Mix the pumpkin pudding layer: In another bowl, whisk the instant pudding mix with the cold milk until it starts to thicken, about 2 to 3 minutes. Stir in the pumpkin puree and pumpkin pie spice until smooth. For a lighter texture, fold in about half of the whipped topping.
  5. Add the pumpkin layer: Spoon the pumpkin mixture over the cream cheese layer and smooth it carefully with a spatula so the layers stay separate.
  6. Finish the top: Spread the remaining whipped topping evenly over the pumpkin layer. Sprinkle the toffee bits and mini chocolate chips over the top.
  7. Chill until firm: Refrigerate for at least 4 hours, or overnight for the cleanest slices. The center should feel fully chilled and firm enough to cut neatly.
  8. Slice and serve: Cut into 12 squares and serve cold. For cleaner slices, use a sharp knife and wipe it between cuts.

Why the Layers Hold Their Shape

The two details that matter most here are using instant pudding and keeping the milk cold. Cook-and-serve pudding will not set the same way, and warmer milk can slow the thickening.

The cream cheese layer also helps the dessert slice better. A smooth, firm layer underneath keeps the pumpkin pudding from sinking into the crust.

Tips for Clean Layers

  • Cool the crust completely before adding the cream cheese layer.
  • Let the cream cheese soften fully so it mixes smooth and spreads easily.
  • Spread each layer gently instead of pressing down hard.
  • A straight-sided 9×13-inch dish makes neater squares.
  • If the center still looks loose after chilling, refrigerate longer before slicing.

Variations

Pumpkin Spice Pudding

Use pumpkin spice instant pudding instead of vanilla for a stronger spiced flavor. If you do, use a little less pumpkin pie spice so the filling does not taste overly seasoned.

Butterscotch Topping

Swap some or all of the mini chocolate chips for butterscotch chips for a sweeter caramel-like finish. Keep the topping light so it does not overpower the layers.

Serving Ideas

Serve Pumpkin Lush cold, straight from the refrigerator. A few extra toffee bits or mini chocolate chips on top add a little crunch just before serving.

If you want another small-format pumpkin dessert, try these Mini Pumpkin Pies. For another make-ahead dessert that slices well, try these Cranberry Crumble Bars with Orange Filling. If you want a baked pumpkin dessert, these Pumpkin Cupcakes with Caramel Cream Cheese Frosting are another good option.

How to Store Pumpkin Lush

This dessert is best made ahead. An overnight chill gives the cleanest slices and the firmest texture.

Cover the baking dish or transfer leftovers to an airtight container and refrigerate for up to 3 days. For longer storage, freeze it well wrapped and thaw in the refrigerator before serving. If it is still very firm from the freezer, let it soften slightly before cutting.

Serve chilled. This dessert does not need reheating.

Nutrition

Nutrition is approximate and will vary based on ingredient brands, exact amounts, and serving size.

  • Serving size: 1 of 12 squares
  • Calories: about 360
  • Protein: 4g
  • Fat: 20g
  • Carbohydrates: 43g
  • Per 100g: about 260 calories, 3g protein, 14g fat, 31g carbohydrates

Pumpkin Lush

A chilled layered pumpkin dessert with a graham cracker crust, cream cheese layer, pumpkin pudding, and whipped topping.
Course: Dessert
Cuisine: American
Prep: 20 min
Cook: 10 min
Total: 270 min
Servings: 12 Calories: about 360

Equipment

  • 9×13-inch baking dish
  • oven
  • mixing bowls
  • hand mixer
  • whisk
  • spatula
  • measuring cups
  • measuring spoons

Ingredients

Crust

  • 2 1/2 cups graham cracker crumbs (250g)
  • 1/4 cup granulated sugar (50g)
  • 1/2 cup melted butter (115g)

Cream cheese layer

  • 8 ounces brick-style cream cheese, softened (225g)
  • 1 cup powdered sugar (120g)
  • 1 teaspoon vanilla extract (optional)

Pumpkin pudding layer

  • 2 packages (3.4 ounces each) vanilla instant pudding mix (about 190g total)
  • 3 cups cold milk (725g)
  • 1 cup pumpkin puree (245g)
  • 1 to 2 teaspoons pumpkin pie spice
  • About half of the whipped topping (see below) — optional to fold in for lighter texture

Topping and mix-ins

  • 8 ounces whipped topping, thawed (225g), divided
  • 1/2 cup toffee bits (70g)
  • 1/4 cup mini chocolate chips (45g)

Instructions

  1. Preheat the oven to 350°F (177°C).
  2. Stir together graham cracker crumbs, granulated sugar, and melted butter until evenly moistened; press firmly into a 9×13-inch baking dish.
  3. Bake the crust for 8 to 10 minutes until lightly golden and set, then let it cool completely.
  4. Beat the softened cream cheese and powdered sugar with a hand mixer until smooth, about 5 to 7 minutes; stir in vanilla if using and spread evenly over the cooled crust.
  5. Whisk the instant pudding mixes with the cold milk until it starts to thicken, about 2 to 3 minutes.
  6. Stir in the pumpkin puree and pumpkin pie spice until smooth; optionally fold in about half of the whipped topping for a lighter texture.
  7. Spoon the pumpkin mixture over the cream cheese layer and smooth carefully with a spatula to keep layers separate.
  8. Spread the remaining whipped topping evenly over the pumpkin layer and sprinkle toffee bits and mini chocolate chips on top.
  9. Refrigerate for at least 4 hours, or overnight for the cleanest slices.
  10. Cut into 12 squares and serve chilled; for cleaner slices, use a sharp knife and wipe it between cuts.

Tips

  • Cool the crust completely before adding the cream cheese layer to prevent sinking.
  • Soften cream cheese fully so it mixes smooth and spreads easily.
  • Use cold milk and instant pudding mix so the pumpkin layer sets properly.
  • Spread each layer gently rather than pressing down hard to keep layers distinct.
  • Refrigerate overnight for the firmest texture and cleanest slices.

Variations

  • Pumpkin Spice Pudding: Use pumpkin-spice instant pudding instead of vanilla and reduce added pumpkin pie spice for a stronger spiced flavor.
  • Butterscotch Topping: Swap some or all of the mini chocolate chips for butterscotch chips for a sweeter caramel-like finish.

Notes

Make ahead and chill overnight for best slicing; cover and refrigerate up to 3 days or freeze well wrapped and thaw in the refrigerator before serving. Serve chilled.

Nutrition

Calories: about 360 | Protein: 4g | Fat: 20g | Carbohydrates: 43g

Mini Pumpkin Pies

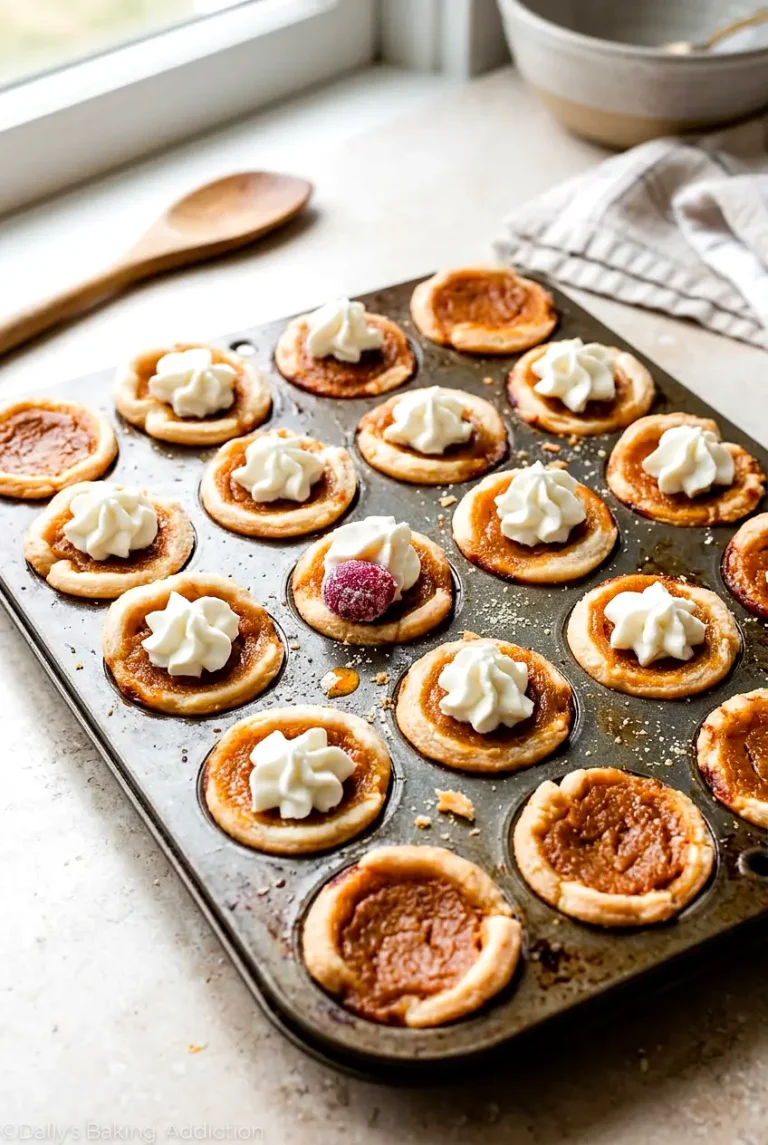
Mini pumpkin pies have the same smooth, spiced filling as a full-size pie, but they are easier to serve and fit well on a dessert tray. A little whipped cream on top is all they need.

This version keeps the process simple: a homemade butter-shortening crust, a thick pumpkin filling that is easy to spoon into the shells, and clear baking cues so the centers set without drying out.

Ingredients for Mini Pumpkin Pies

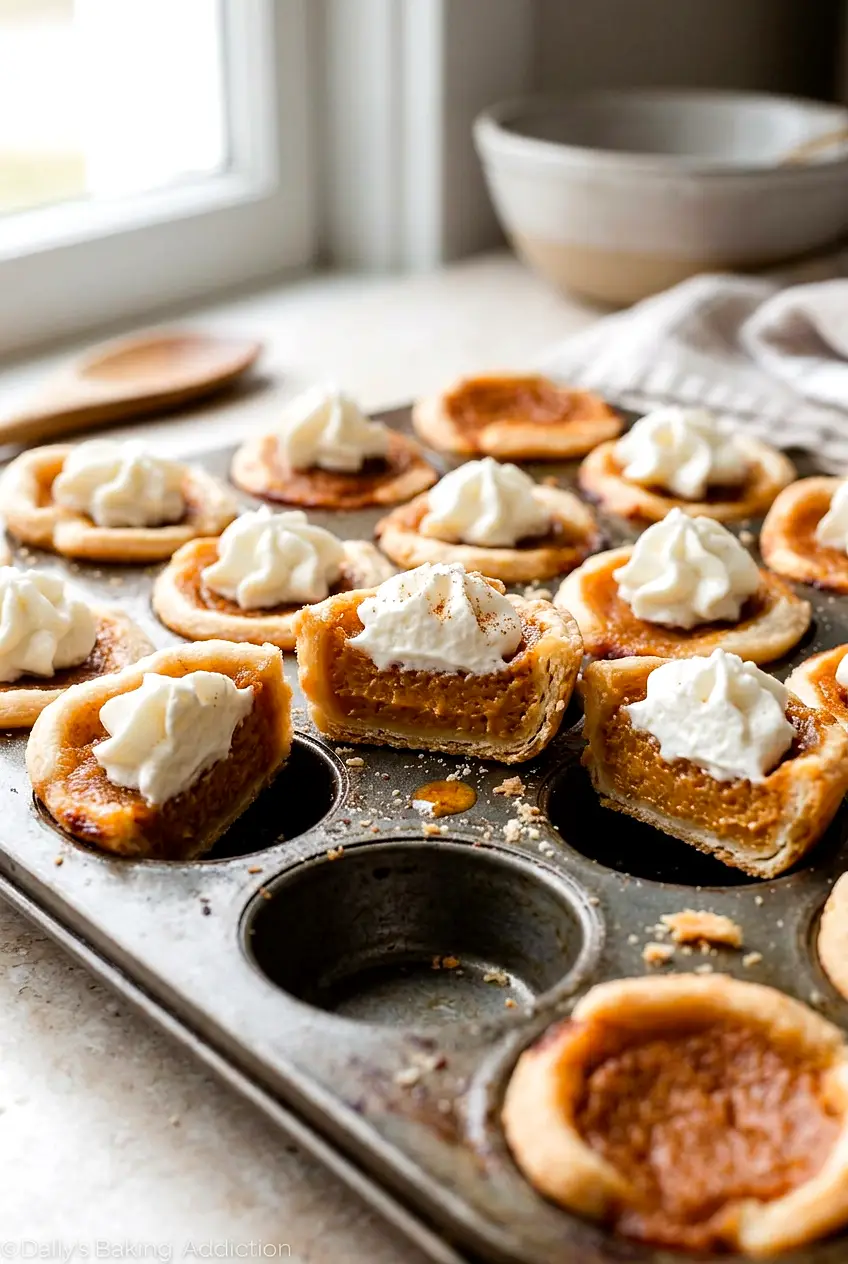
Mini pumpkin pies in a mini muffin pan with one pie showing the creamy filling inside
  • 1 1/4 cups all-purpose flour (155g)
  • 1 tablespoon granulated sugar
  • 1/2 teaspoon salt
  • 1/2 cup unsalted butter, cold and cubed (115g)
  • 1/4 cup vegetable shortening, cold (50g)
  • 4 to 6 tablespoons ice water, or just enough to bring the dough together
  • 1 cup pumpkin puree (245g), preferably canned pumpkin puree, not pumpkin pie filling
  • 1/2 cup brown sugar (100g)
  • 1/4 cup heavy cream (60g)
  • 1/4 cup milk (60g)
  • 1 large egg
  • 1 teaspoon ground cinnamon
  • 1 teaspoon pumpkin pie spice
  • Small pinch of black pepper, optional
  • Whipped cream, optional for serving

You will also need a lightly greased standard mini muffin pan and a 2 1/2-inch round cutter. If you do not have one, use something close in size as a guide.

How to Make Mini Pumpkin Pies

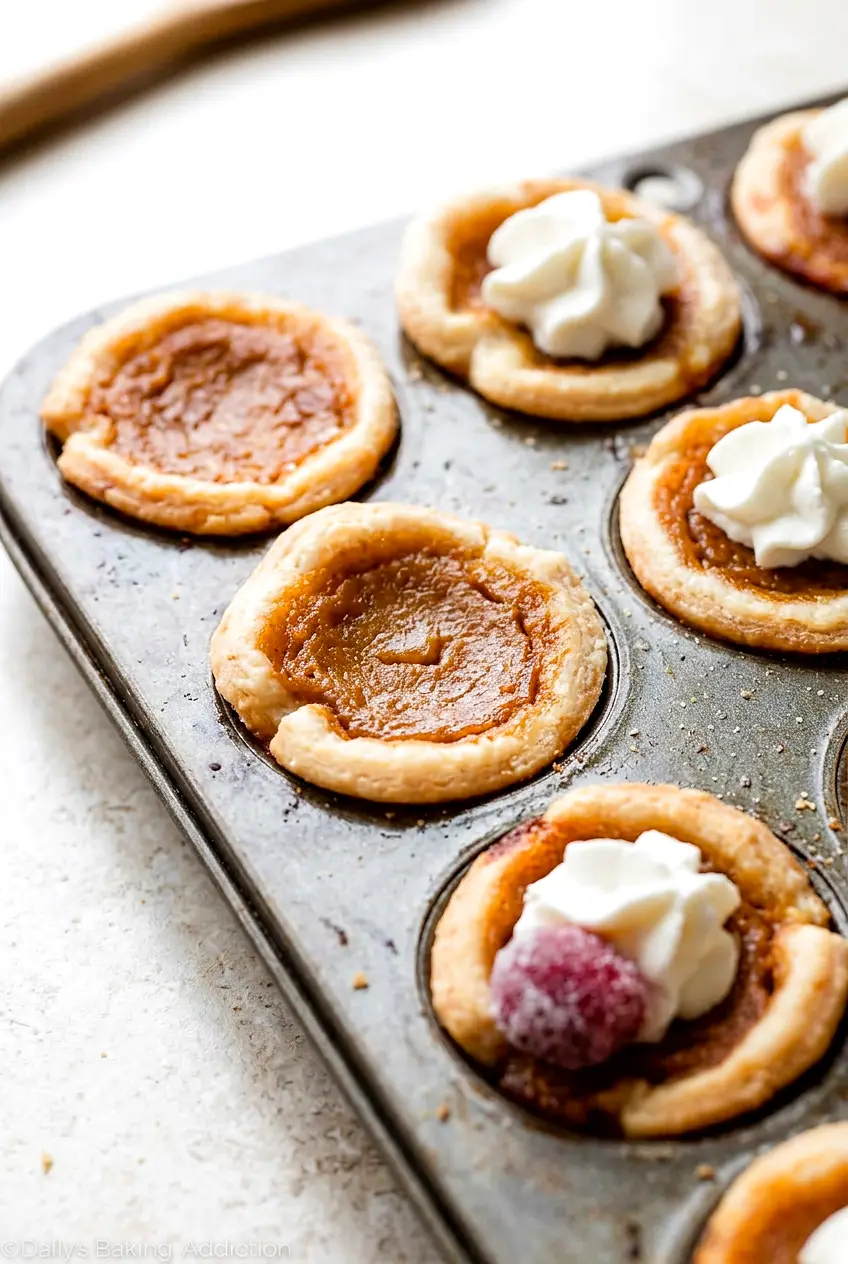
Close view of mini pumpkin pies showing the smooth pumpkin filling and browned crust edges
  1. Make the dough: In a mixing bowl, combine the flour, granulated sugar, and salt. Cut in the cold butter and shortening with a pastry blender or fork until the mixture looks like coarse crumbs. Add 4 tablespoons ice water and mix gently. Add more water a little at a time only as needed until the dough just comes together. It should hold when pressed but should not feel sticky.
  2. Chill the dough: Shape the dough into a disk, wrap or cover it, and refrigerate for at least 30 minutes. This makes it easier to roll and helps prevent shrinking.
  3. Preheat the oven: Heat the oven to 375°F. Lightly grease a standard mini muffin pan.
  4. Make the filling: In another bowl, whisk together the pumpkin puree, brown sugar, heavy cream, milk, egg, cinnamon, pumpkin pie spice, and black pepper if using. Whisk until smooth, with no streaks of egg. The filling should be thick and spoonable, not thin.
  5. Roll and cut the crust: On a lightly floured surface, roll the chilled dough and cut out rounds with a 2 1/2-inch cutter. Work fairly quickly so the dough stays cool. If it softens too much, chill it again for a few minutes before continuing.
  6. Fit the crusts into the pan: Press each dough round gently into a mini muffin cup. Do not stretch the dough, or it can shrink as it bakes. Patch any small tears with scraps of dough.
  7. Fill the shells: Spoon the pumpkin filling into each crust, filling just below the rim. Do not overfill, since the custard can bubble up as it bakes. If needed, tap the pan gently on the counter to settle the filling.
  8. Bake: Bake for 14 to 20 minutes, until the crust edges are lightly browned and the filling is just set. The centers can still have the slightest wobble, but the tops should look more matte than wet. Start checking early, since mini pies can brown quickly.
  9. Cool and remove: Let the pies cool in the pan for 15 to 20 minutes so they can firm up. Remove them carefully and transfer to a wire rack to cool completely. Add whipped cream only after they are fully cool.

How to Tell When They Are Done

Use the visual cues more than the clock. The crust edges should be lightly browned, and the filling should be set around the outside with only a slight wobble in the center. If the tops still look glossy and wet, bake a little longer. If the centers are completely firm in the oven, the filling can dry out and may crack as it cools.

Crust Options

All-Butter Crust

You can replace the shortening with more butter. The flavor will be a little richer, but the dough may be slightly less forgiving, so keep it cold and work quickly.

Store-Bought Crust

Packaged pie crust works well if you want a shortcut. Use the same cutter size and mini muffin pan method, but start checking a little early since some store-bought crusts are thinner and can brown faster.

Serving Ideas

Top the pies with whipped cream just before serving. You can spoon it on or pipe it for a cleaner finish. Serve the pies chilled or at cool room temperature with coffee or tea.

For another make-ahead dessert bar, try these Cranberry Crumble Bars with Orange Filling. If you want another pumpkin dessert, these Pumpkin Cupcakes with Caramel Cream Cheese Frosting are a good follow-up. For a softer pumpkin treat, you could also make these Pumpkin Cheesecake Cookies.

How to Store Mini Pumpkin Pies

Once fully cooled, store the pies in an airtight container in the refrigerator for up to 4 days. If you need to stack them, place parchment between layers. Keep whipped cream separate if possible so the tops stay neat.

The crust will soften a bit over time, which is normal for a custard pie. These are best served chilled or at cool room temperature rather than reheated. For make-ahead prep, you can chill the dough before rolling, or bake the pies 1 to 2 days in advance.

Nutrition

Nutrition is approximate and will vary based on ingredient brands, exact amounts, and serving size.

  • Serving size: 2 mini pies
  • Calories: about 220
  • Protein: 3g
  • Fat: 12g
  • Carbohydrates: 25g
  • Per 100g: about 350 calories, 5g protein, 19g fat, 41g carbohydrates

Mini Pumpkin Pies

Individual pumpkin pies with a butter-shortening crust and a thick spiced pumpkin filling.
Course: Dessert
Cuisine: American
Prep: 25 min
Cook: 20 min
Total: 95 min
Servings: 2 Calories: about 220 kcal

Equipment

  • mini muffin pan
  • 2 1/2-inch round cutter
  • mixing bowls
  • pastry blender or fork
  • rolling pin
  • wire rack

Ingredients

For the crust

  • 1 1/4 cups all-purpose flour (155g)
  • 1 tablespoon granulated sugar
  • 1/2 teaspoon salt
  • 1/2 cup unsalted butter, cold and cubed (115g)
  • 1/4 cup vegetable shortening, cold (50g)
  • 4 to 6 tablespoons ice water, or just enough to bring the dough together

For the filling

  • 1 cup pumpkin puree (245g), not pumpkin pie filling
  • 1/2 cup brown sugar (100g)
  • 1/4 cup heavy cream (60g)
  • 1/4 cup milk (60g)
  • 1 large egg
  • 1 teaspoon ground cinnamon
  • 1 teaspoon pumpkin pie spice
  • Small pinch black pepper (optional)

For serving

  • Whipped cream (optional)

Instructions

  1. Combine flour, granulated sugar, and salt in a mixing bowl.
  2. Cut in cold butter and shortening with a pastry blender or fork until mixture resembles coarse crumbs.
  3. Add 4 tablespoons ice water and mix gently; add more water a tablespoon at a time only as needed until dough just comes together.
  4. Shape dough into a disk, wrap or cover, and refrigerate for at least 30 minutes.
  5. Preheat the oven to 375°F (190°C) and lightly grease a standard mini muffin pan.
  6. Whisk together pumpkin puree, brown sugar, heavy cream, milk, egg, cinnamon, pumpkin pie spice, and black pepper (if using) until smooth and thick.
  7. On a lightly floured surface, roll chilled dough and cut rounds with a 2 1/2-inch cutter; chill briefly if it softens.
  8. Press each dough round gently into a mini muffin cup without stretching; patch any small tears with scraps.
  9. Spoon filling into each crust, filling just below the rim; tap the pan gently to settle the filling.
  10. Bake 14 to 20 minutes, until crust edges are lightly browned and filling is just set (centers may have a slight wobble).
  11. Cool pies in the pan for 15 to 20 minutes, then remove to a wire rack to cool completely.
  12. Add whipped cream only after pies are fully cool and serve chilled or at cool room temperature.

Tips

  • Keep the dough cold and work quickly to prevent shrinking.
  • Do not stretch the dough when fitting into cups to avoid shrinkage during baking.
  • Use visual cues: crust edges should be lightly browned and filling just set with a slight center wobble.
  • Start checking early since mini pies can brown faster than full-size pies.
  • Tap the pan to settle filling and patch any small tears before baking.

Variations

  • All-Butter Crust: Replace the shortening with additional butter for a richer flavor; keep the dough cold and work quickly.
  • Store-Bought Crust: Use packaged pie crust for a shortcut; use the same cutter and check baking time early because store-bought crusts can brown faster.

Notes

Store fully cooled pies in an airtight container in the refrigerator for up to 4 days; place parchment between layers if stacking and keep whipped cream separate. Best served chilled or at cool room temperature; crust will soften over time.

Nutrition

Calories: about 220 kcal | Protein: 3 g | Fat: 12 g | Carbohydrates: 25 g

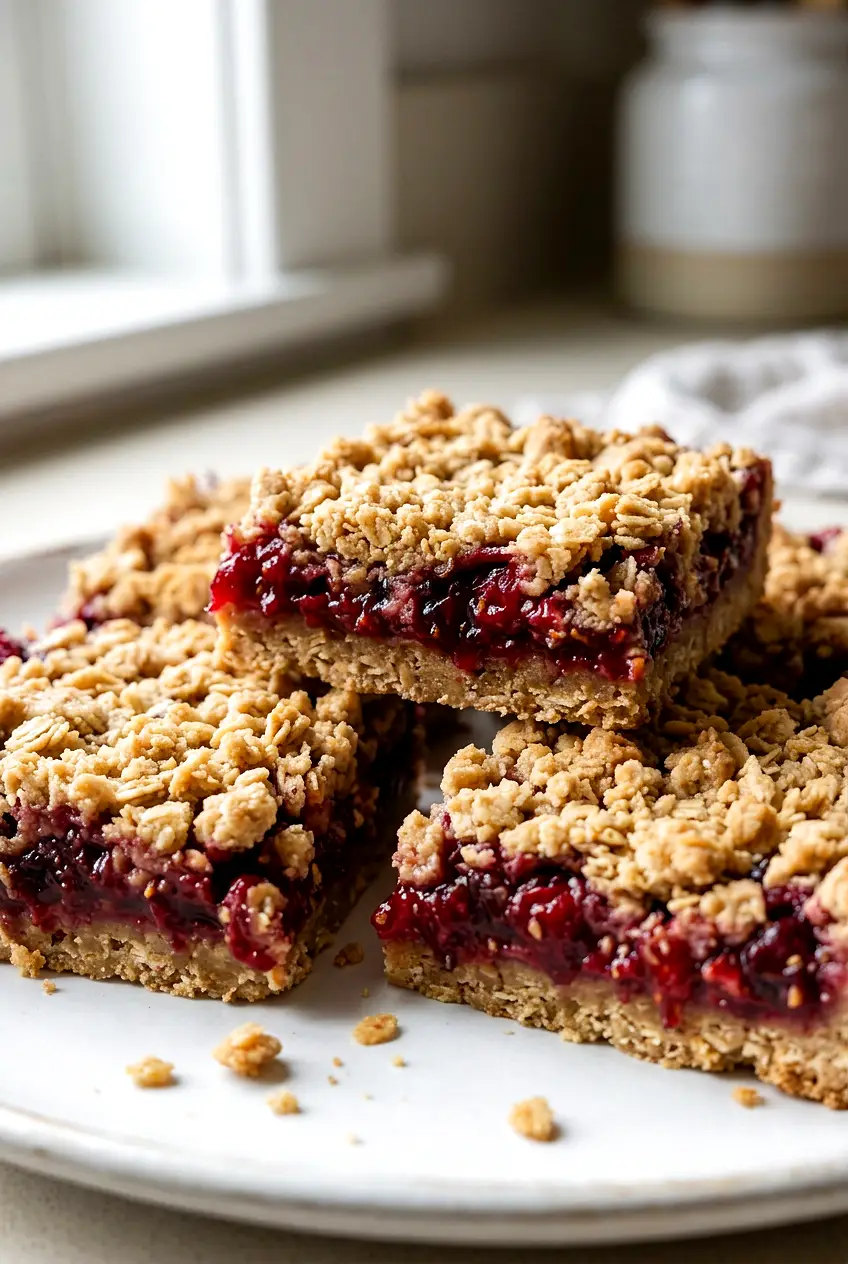
Cranberry Crumble Bars

These cranberry crumble bars have a firm oat crust, a bright cranberry-orange filling, and a crumbly top that slices cleanly once chilled. They are tart, buttery, and just sweet enough, with an optional orange glaze if you want a little extra sweetness.

The method stays simple: mix the crumble in one bowl, cook the filling in one saucepan, and bake everything in a parchment-lined 9×13-inch pan. The key is to cook the filling until it is thick and glossy before it goes over the crust.

Ingredients for Cranberry Crumble Bars

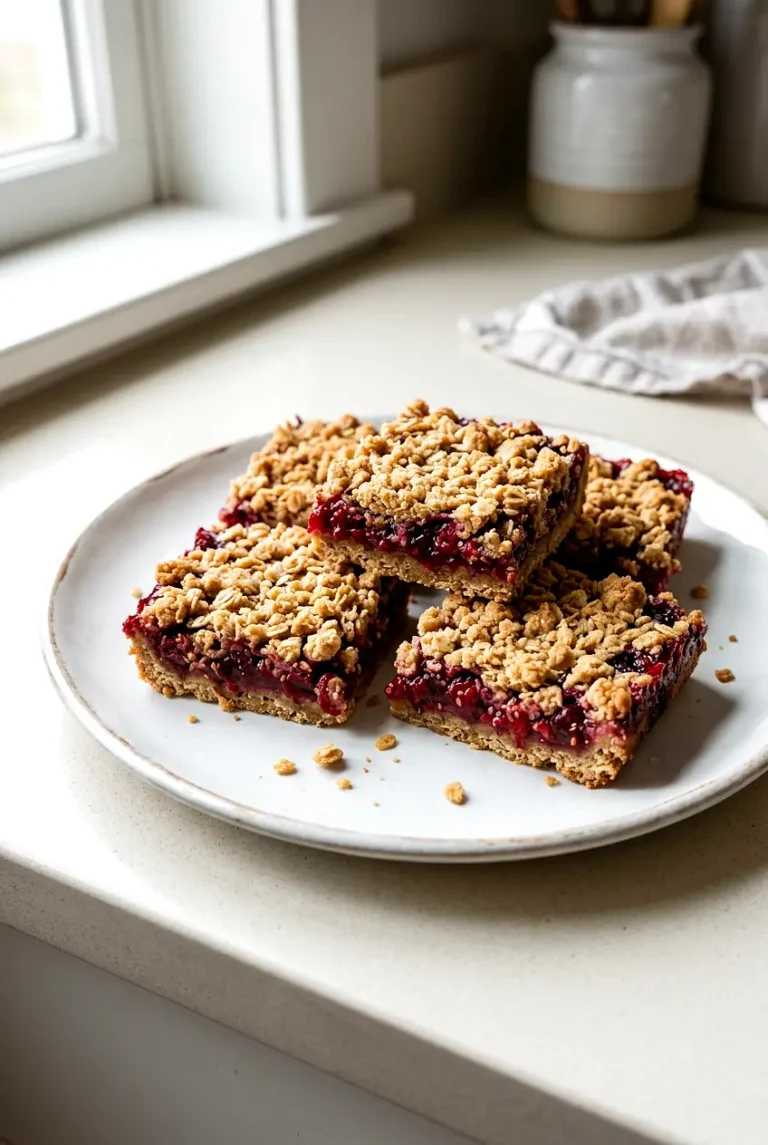
A square of cranberry crumble bars with a visible jammy center and crumb topping on a plate.
  • 2 1/2 cups old-fashioned rolled oats (225g)
  • 1 1/2 cups gluten-free 1-to-1 baking flour (180g)
  • 1 1/4 cups brown sugar (250g)
  • 1/2 teaspoon salt
  • 1 teaspoon ground cinnamon
  • 1 cup cold unsalted butter, cubed (225g)
  • 3 cups fresh or frozen cranberries (300g)
  • 1/3 cup maple syrup (105g)
  • 1 tablespoon orange zest
  • 1/4 cup orange juice (60g)
  • 2 tablespoons tapioca flour or arrowroot (16g)
  • 1/2 teaspoon almond extract or vanilla extract

Optional topping: 1/3 cup sliced almonds.

Optional for serving: powdered sugar orange glaze, drizzled over fully cooled bars.

Use rolled oats rather than quick oats for the best crumble texture. Keep the butter cold so the mixture stays crumbly instead of turning greasy. Vanilla gives the filling a softer flavor, while almond extract makes it a little more pronounced.

How to Make Cranberry Crumble Bars

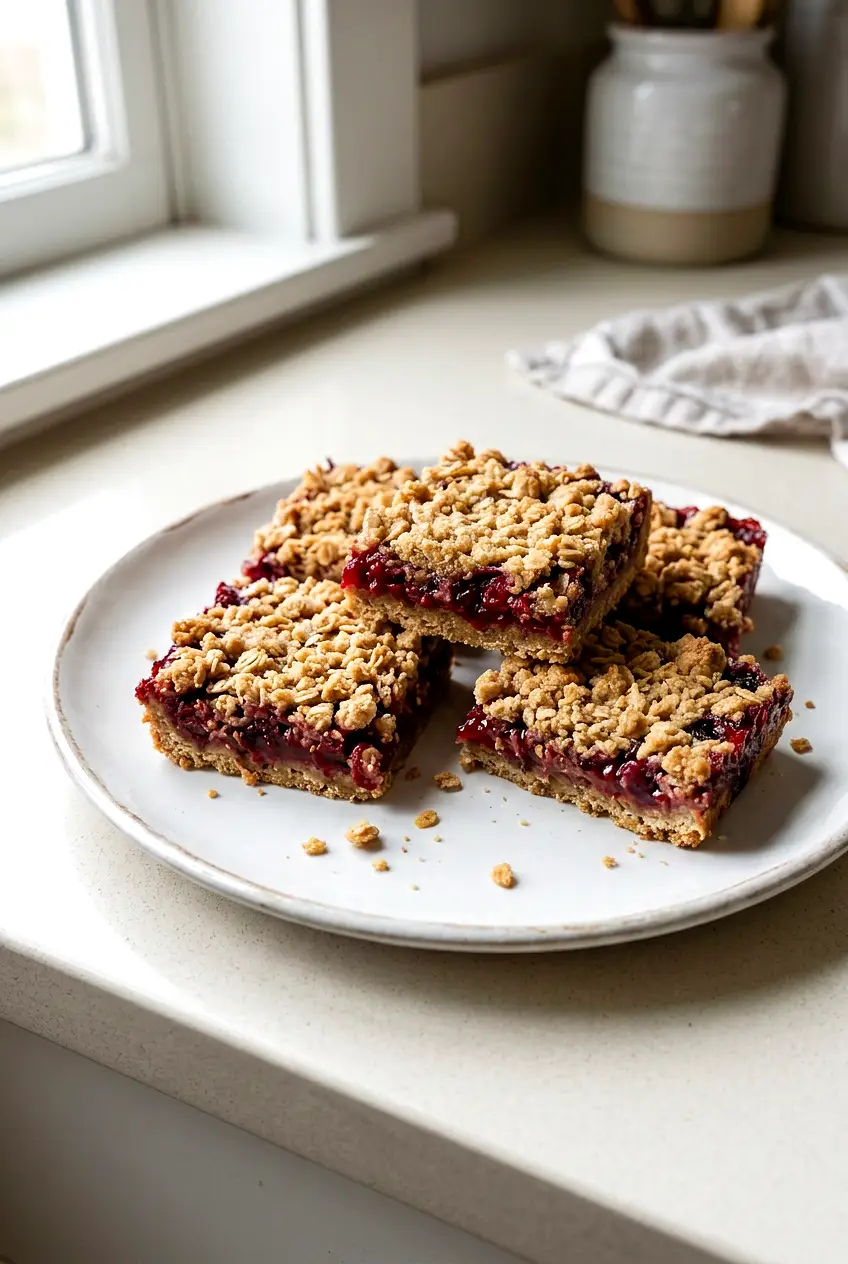
Close view of cranberry crumble bars showing the glossy cranberry-orange filling and oat crust.
  1. Preheat the oven and line the pan: Heat the oven to 375°F. Line a 9×13-inch baking pan with parchment paper, leaving overhang on two sides so you can lift the bars out later.
  2. Make the crumble mixture: In a large bowl, stir together the oats, flour, brown sugar, salt, and cinnamon. Cut in the cold butter with a pastry cutter, fork, or your fingertips until the mixture looks sandy with small clumps and holds together when squeezed. It should still look crumbly, not pasty.
  3. Form the crust: Reserve about 2 cups of the crumble mixture for the topping. Press the remaining mixture evenly and firmly into the bottom of the prepared pan.
  4. Par-bake the crust: Bake for 10 to 12 minutes, until the crust looks set and lightly golden at the edges. The center should no longer look raw. Set aside.
  5. Cook the filling: In a medium saucepan, combine the cranberries, maple syrup, orange zest, orange juice, tapioca flour or arrowroot, and almond or vanilla extract. Cook over medium heat for 8 to 12 minutes, stirring often, until the cranberries burst and the mixture thickens into a glossy, jammy filling. A spoon should leave a trail for a second before it closes.
  6. Assemble the bars: Spread the warm filling evenly over the par-baked crust. Sprinkle the reserved crumble over the top without pressing it down. If using sliced almonds, scatter them over the crumble.
  7. Bake until set: Return the pan to the oven and bake for 22 to 30 minutes, until the top is golden brown and the filling is bubbling around the edges. Rotate the pan once if your oven browns unevenly. If the top darkens too quickly, tent loosely with foil near the end.
  8. Cool and chill: Let the bars cool completely in the pan, then chill until firm. Plan on at least 2 hours total cooling and chilling time before slicing. Lift the slab out with the parchment and cut into 12 to 16 bars. Add glaze only after the bars are fully cool.

Start checking a little early if you are using a metal pan, which can brown faster than glass. Use the visual cues more than the clock, since ovens, pans, berry moisture, and stovetop heat can all shift the timing.

How to Keep the Bars from Getting Soggy

Three things help most here: par-bake the crust, cook the filling until it is thick rather than loose, and chill the bars before slicing. If you cut them while they are still warm, the center will be softer and the edges are more likely to break.

Fresh or Frozen Cranberries

Fresh and frozen cranberries both work well. Frozen berries may take an extra minute or two to break down and thicken on the stove, but you can use them straight from the freezer.

If you want to use leftover cranberry sauce in place of some or all of the filling, make sure it is thick enough to hold its shape. If it seems loose, simmer it down first so the bars set properly.

How to Slice, Store, and Serve

For the cleanest slices, chill the bars fully before cutting. Lift the slab out with the parchment, set it on a cutting board, and use a sharp knife. Wipe the knife between cuts if the filling starts to stick.

Store the bars in an airtight container in the refrigerator for up to 5 days. If you stack them, place parchment between layers.

These bars are a good make-ahead dessert because they firm up as they chill. Serve them cold or let them sit at room temperature for 10 to 15 minutes for a slightly softer texture. If you are adding glaze, wait until the bars are completely cool.

More Seasonal Dessert Ideas

For another holiday-friendly dessert, try these Pumpkin Cupcakes with Caramel Cream Cheese Frosting.

If you want a different easy baked treat, these Pumpkin Cheesecake Cookies are another good option.

For a warm dessert to serve alongside these bars, take a look at Pumpkin Pecan Cobbler.

Nutrition

Nutrition is approximate and will vary based on ingredient brands, exact amounts, optional toppings or glaze, and serving size.

  • Serving size: 1 bar, based on 16 bars
  • Calories: about 255
  • Protein: 3g
  • Fat: 11g
  • Carbohydrates: 37g
  • Per 100g: about 300 calories, 4g protein, 13g fat, 43g carbohydrates

Cranberry Crumble Bars

Tart cranberry-orange filling between a firm oat crust and a crumbly topping that slices cleanly once chilled.
Course: Dessert
Cuisine: American
Prep: 20 min
Cook: 54 min
Total: 194 min
Servings: 16 Calories: about 255 kcal

Equipment

  • 9×13-inch pan
  • parchment paper
  • mixing bowl
  • pastry cutter
  • saucepan
  • spatula
  • measuring cups
  • measuring spoons
  • sharp knife
  • cutting board
  • oven

Ingredients

Crumble

  • 2 1/2 cups old-fashioned rolled oats (225g)
  • 1 1/2 cups gluten-free 1-to-1 baking flour (180g)
  • 1 1/4 cups brown sugar (250g)
  • 1/2 teaspoon salt
  • 1 teaspoon ground cinnamon
  • 1 cup cold unsalted butter, cubed (225g)

Filling

  • 3 cups fresh or frozen cranberries (300g)
  • 1/3 cup maple syrup (105g)
  • 1 tablespoon orange zest
  • 1/4 cup orange juice (60g)
  • 2 tablespoons tapioca flour or arrowroot (16g)
  • 1/2 teaspoon almond extract or vanilla extract

Optional

  • 1/3 cup sliced almonds (optional)
  • powdered sugar orange glaze, for drizzling (optional)

Instructions

  1. Preheat the oven to 375°F (191°C). Line a 9×13-inch pan with parchment paper, leaving an overhang on two sides.
  2. In a large bowl, stir together the oats, gluten-free flour, brown sugar, salt, and cinnamon.
  3. Cut the cold cubed butter into the dry mixture with a pastry cutter, fork, or your fingertips until it looks sandy with small clumps and holds together when squeezed.
  4. Reserve about 2 cups of the crumble mixture for the topping and press the remaining mixture evenly and firmly into the bottom of the prepared pan.
  5. Par-bake the crust for 10 to 12 minutes, until set and lightly golden at the edges; the center should no longer look raw. Set aside.
  6. In a medium saucepan, combine the cranberries, maple syrup, orange zest, orange juice, tapioca flour or arrowroot, and almond or vanilla extract.
  7. Cook the filling over medium heat for 8 to 12 minutes, stirring often, until the cranberries burst and the mixture thickens to a glossy, jammy consistency (a spoon should leave a trail for a second).
  8. Spread the warm filling evenly over the par-baked crust and sprinkle the reserved crumble over the top without pressing. Scatter sliced almonds over the crumble if using.
  9. Bake for 22 to 30 minutes, until the top is golden brown and the filling is bubbling around the edges; rotate the pan once if needed and tent with foil if the top darkens too quickly.
  10. Cool the bars completely in the pan, then chill until firm (plan on at least 2 hours total cooling and chilling time). Lift the slab out with the parchment and cut into 12 to 16 bars.
  11. If using glaze, drizzle powdered sugar orange glaze over fully cooled bars.

Tips

  • Use old-fashioned rolled oats, not quick oats, for the best crumble texture.
  • Keep the butter cold so the crumble stays crumbly and not greasy.
  • Par-bake the crust to prevent a soggy bottom.
  • Cook the filling until thick and glossy so the bars set properly.
  • Chill the bars fully before slicing for the cleanest cuts; wipe the knife between cuts if needed.

Variations

  • Leftover cranberry sauce: Use leftover cranberry sauce for the filling but simmer it down first if it’s loose so the bars set properly.
  • Vanilla filling: Use vanilla extract instead of almond extract for a softer, milder filling flavor; omit or add sliced almonds for texture.

Notes

Store bars in an airtight container in the refrigerator for up to 5 days; place parchment between layers if stacking. Wait to add any glaze until bars are completely cool.

Nutrition

Calories: about 255 kcal | Protein: 3 g | Fat: 11 g | Carbohydrates: 37 g

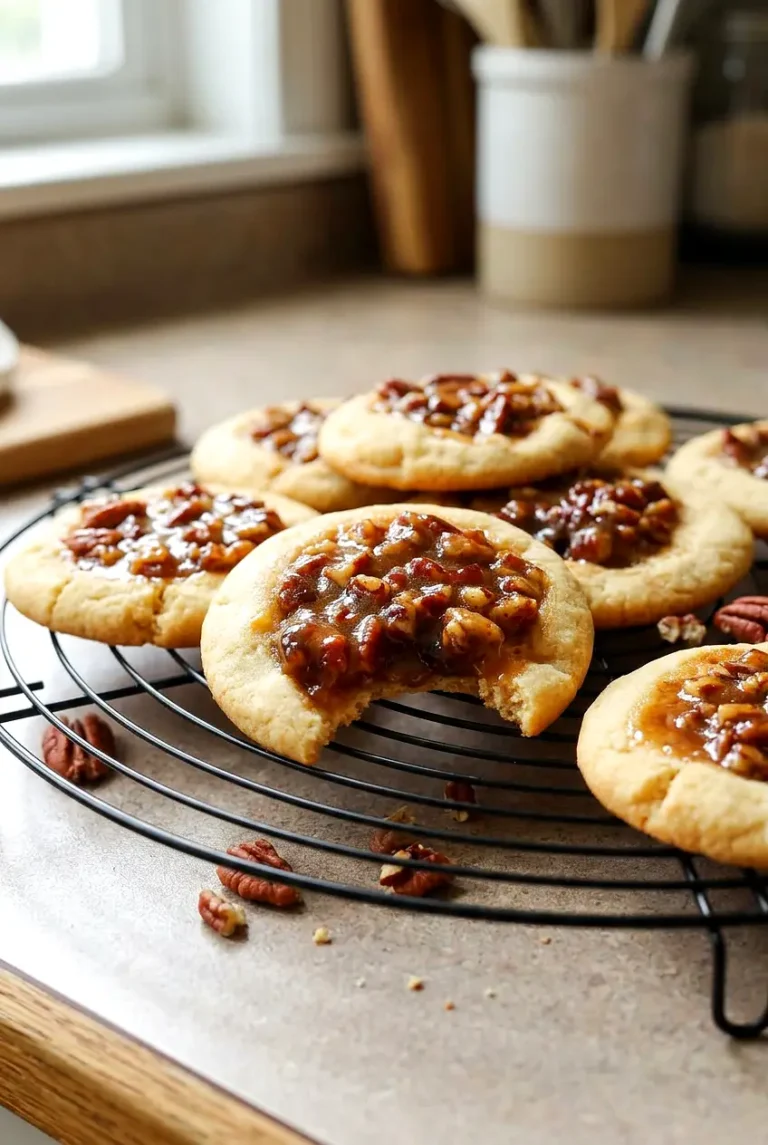
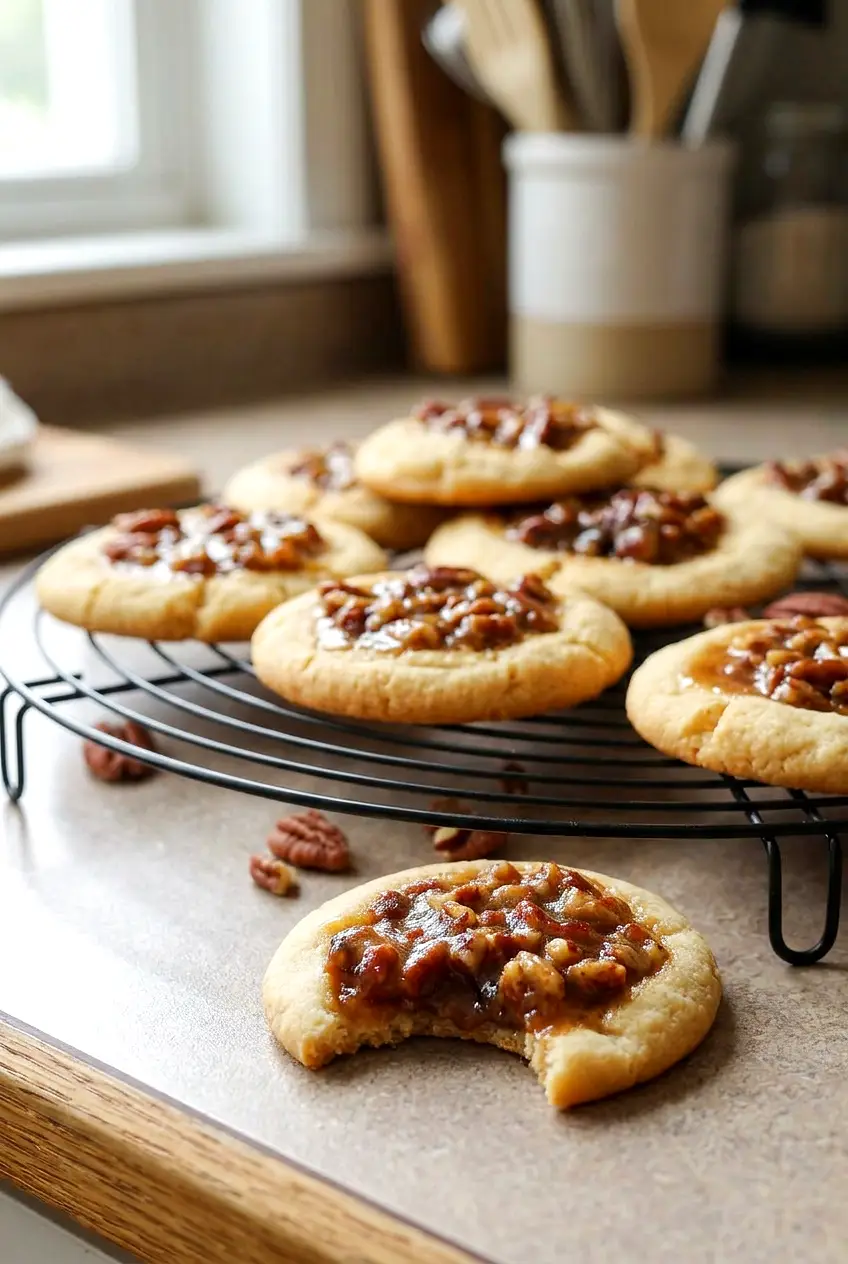
Pecan Pie Cookies

Pecan pie cookies have the flavor of classic pecan pie in a smaller, easier-to-serve cookie. They bake up with lightly crisp edges, a soft brown-butter base, and a gooey pecan center.

The method stays simple: make the dough, cook the filling on the stovetop, then chill both long enough to shape and fill the cookies cleanly. Those short chilling steps help the dough hold its shape and keep the filling from running.

Ingredients for Pecan Pie Cookies

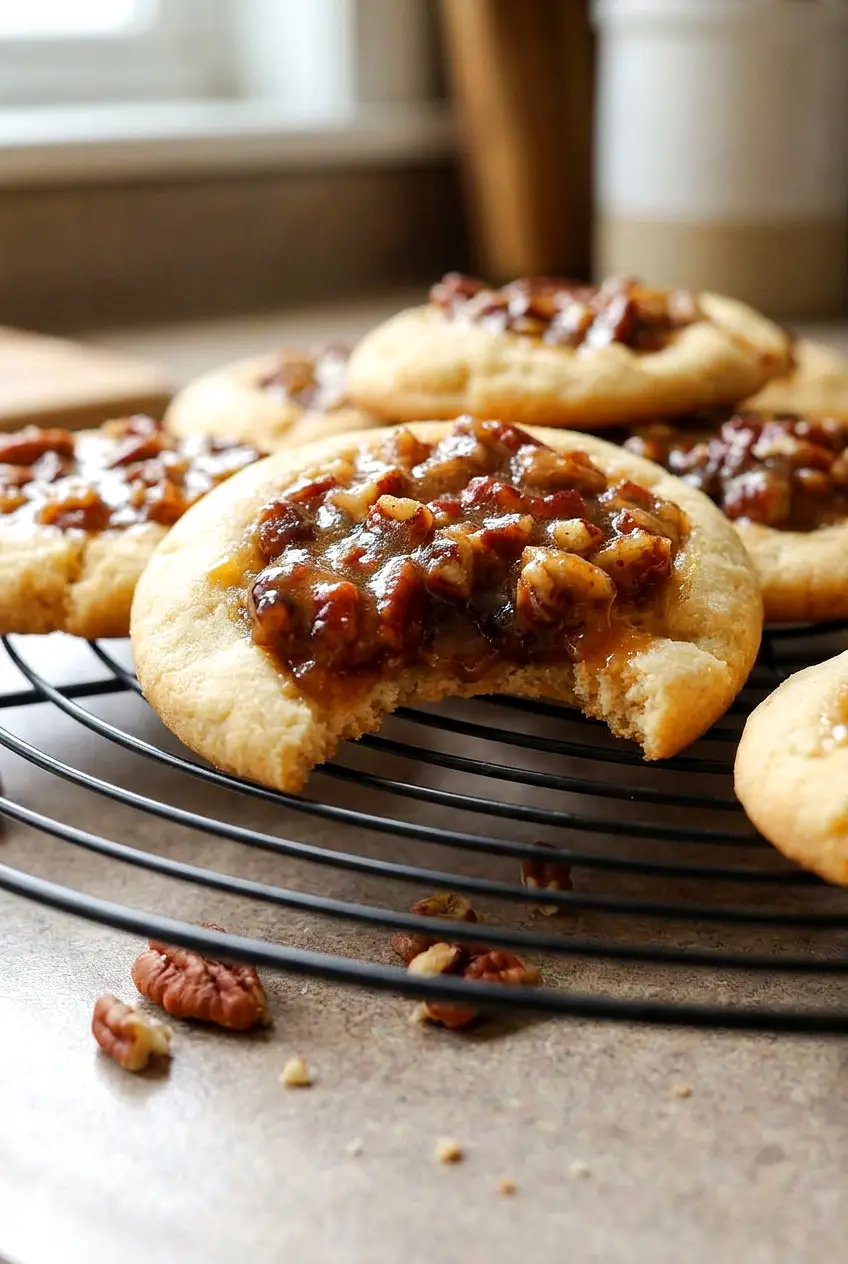
A pecan pie cookie with a bite taken out, revealing the soft brown-butter base and pecan center
  • 1 cup unsalted butter, divided (225g)
  • 2 cups all-purpose flour (240g)
  • 1 cup packed light or dark brown sugar (200g)
  • 1/4 cup granulated sugar (50g)
  • 2 large eggs, divided
  • 2 teaspoons pure vanilla extract
  • 1/2 cup corn syrup (160g)
  • 1 1/2 cups chopped pecans, preferably toasted first (150g)
  • 1 teaspoon salt, divided
  • 1 to 2 tablespoons milk, only if needed
  • 2 to 3 ounces dark chocolate, melted, for optional drizzling (55g to 85g)

Light brown sugar gives a milder caramel flavor. Dark brown sugar makes the cookies a little deeper and richer. Toasted pecans add more flavor to the filling, but the cookies still work if you skip that extra step.

How to Make Pecan Pie Cookies

Close-up of pecan pie cookies showing the gooey pecan filling and crisp cookie edges
  1. Brown the butter for the dough: Melt 1/2 cup of the butter in a medium heavy-bottomed saucepan over medium heat for 5 to 8 minutes, stirring occasionally, until golden with brown flecks and a nutty smell. Do not let it get very dark. Pour it into a mixing bowl and cool until warm, not hot.
  2. Mix the dough: Add the brown sugar, granulated sugar, 1 egg, 1 teaspoon vanilla, and 1/2 teaspoon salt to the warm browned butter and whisk until combined. Stir in the flour until no dry pockets remain. If the dough seems crumbly and will not hold together when pressed, mix in 1 tablespoon milk. Add the second tablespoon only if needed. The dough should be soft but not sticky.
  3. Chill the dough: Cover and refrigerate for 30 to 45 minutes, or until firm enough to scoop and shape.
  4. Cook the pecan filling: In the same saucepan, combine the remaining 1/2 cup butter, the remaining egg, the corn syrup, the remaining 1 teaspoon vanilla, and the remaining 1/2 teaspoon salt. Cook over medium heat for 8 to 12 minutes, stirring often, until thickened and glossy enough to coat a spoon. Keep the heat moderate so the mixture thickens without scorching or boiling hard.
  5. Add the pecans and chill: Stir the chopped pecans into the filling. Transfer to a bowl and chill for at least 1 hour, or until the filling is spoonable and holds its shape.
  6. Preheat the oven: Heat the oven to 350°F. Line a baking sheet with parchment paper.
  7. Portion the dough: Divide the dough into 13 even portions and place them on the baking sheet with space between them for slight spreading.
  8. Make the wells: Press a shallow well into the center of each dough portion with the back of a small spoon or measuring teaspoon. Leave a border around the edge so the cookies stay sturdy.
  9. Fill the centers: Spoon a small mound of chilled pecan filling into each well. Do not overfill, or the filling can bubble over the sides.
  10. Bake: Bake for 12 to 16 minutes, rotating the pan once if your oven browns unevenly. The cookies are done when the edges are lightly golden and set, the centers look baked through, and the filling is hot and glossy but not spilling over.
  11. Cool and finish: Let the cookies cool on the baking sheet for several minutes so the centers can set, then transfer to a rack. If using chocolate, drizzle it lightly over the mostly cooled cookies.

How to Keep the Filling from Running

The filling should be clearly thickened before it comes off the stove. If it still looks thin and syrupy, it will be more likely to leak during baking.

Chilling matters too. Once cold, the filling should be easy to spoon and should hold a small mound in the center of each cookie. If it softens too much while you work, return it to the refrigerator for a few minutes.

How to Tell When the Cookies Are Done

Start checking on the early side, especially if your oven runs hot. Look for lightly golden edges and centers that look set rather than wet. The filling should still look glossy, but it should not be boiling over the top.

Letting the cookies rest on the hot pan for a few minutes is part of the baking process. That short rest helps the centers firm up enough to move without breaking.

Variations

Chocolate Drizzle

A light drizzle of melted dark chocolate adds a little contrast without covering the pecan flavor. Wait until the cookies are mostly cool so the chocolate sets more cleanly.

Maple Version

You can replace the corn syrup with 1/2 cup maple syrup for a different flavor. The filling may be a little looser, so chill it well before filling the cookies.

Serving Ideas

Serve these slightly warm or at room temperature. They are good with coffee or tea, and they also work well as a plated dessert with a small scoop of vanilla ice cream.

They fit nicely on a holiday cookie tray too. For another easy dessert for a crowd, try this Caramel Apple Cheesecake Dip. If you like brown-sugar cookies, you may also want these Maple Brown Sugar Cookies with Maple Icing.

How to Store and Reheat Pecan Pie Cookies

Let the cookies cool completely before storing. Keep them in an airtight container at room temperature for a few days, or refrigerate them if your kitchen is warm.

If you need to stack them, separate the layers with parchment paper so the filling stays neater.

To serve later, warm the cookies briefly just until the centers soften slightly. Do not overheat them, or the filling can loosen too much.

The pecan filling can also be made several days ahead and kept chilled until you are ready to assemble and bake the cookies.

Nutrition

Nutrition is approximate and will vary based on ingredient brands, exact amounts, and whether you use the optional chocolate drizzle.

  • Serving size: 1 cookie
  • Calories: about 310
  • Protein: 3g
  • Fat: 18g
  • Carbohydrates: 35g
  • Per 100g: about 450 calories, 4g protein, 26g fat, 51g carbohydrates

Pecan Pie Cookies

Small cookies with a brown-butter base and a gooey pecan pie–style filling.
Course: Dessert
Cuisine: American
Prep: 45 min
Cook: 28 min
Total: 183 min
Servings: 13 Calories: 310 kcal

Equipment

  • saucepan
  • mixing bowl
  • whisk
  • measuring spoons
  • measuring cups
  • baking sheet
  • parchment paper
  • spoon or measuring teaspoon
  • wire rack

Ingredients

For the dough

  • 1/2 cup unsalted butter, browned (from 1 cup total)
  • 2 cups all-purpose flour (240g)
  • 1 cup packed light or dark brown sugar (200g)
  • 1/4 cup granulated sugar (50g)
  • 1 large egg
  • 1 teaspoon pure vanilla extract
  • 1/2 teaspoon salt
  • 1 to 2 tablespoons milk (optional, only if needed)

For the pecan filling

  • 1/2 cup unsalted butter (remaining from 1 cup total)
  • 1 large egg
  • 1/2 cup corn syrup (160g)
  • 1 teaspoon pure vanilla extract
  • 1/2 teaspoon salt
  • 1 1/2 cups chopped pecans, preferably toasted (150g)

Optional

  • 2 to 3 ounces dark chocolate, melted, for drizzling (55g to 85g)

Instructions

  1. Melt 1/2 cup of the butter in a medium heavy‑bottomed saucepan over medium heat, stirring occasionally, for 5 to 8 minutes until golden with brown flecks and a nutty aroma; do not let it get very dark.
  2. Pour the browned butter into a mixing bowl and cool until warm but not hot.
  3. Whisk in the brown sugar, granulated sugar, 1 egg, 1 teaspoon vanilla, and 1/2 teaspoon salt until combined.
  4. Stir in the flour until no dry pockets remain; if the dough is crumbly, mix in 1 tablespoon milk and add a second tablespoon only if needed so the dough is soft but not sticky.
  5. Cover and refrigerate the dough for 30 to 45 minutes, or until firm enough to scoop and shape.
  6. In the same saucepan, combine the remaining 1/2 cup butter, the remaining egg, the corn syrup, the remaining 1 teaspoon vanilla, and the remaining 1/2 teaspoon salt.
  7. Cook the filling over medium heat for 8 to 12 minutes, stirring often, until thickened and glossy enough to coat a spoon; keep the heat moderate to avoid scorching or hard boiling.
  8. Stir the chopped pecans into the filling, transfer to a bowl, and chill for at least 1 hour, or until the filling is spoonable and holds its shape.
  9. Preheat the oven to 350°F (177°C) and line a baking sheet with parchment paper.
  10. Divide the chilled dough into 13 even portions and place them on the prepared baking sheet with space for slight spreading.
  11. Press a shallow well into the center of each dough portion with the back of a small spoon or measuring teaspoon, leaving a border around the edge.
  12. Spoon a small mound of chilled pecan filling into each well, being careful not to overfill.
  13. Bake for 12 to 16 minutes, rotating the pan once if your oven browns unevenly, until edges are lightly golden and set and centers look baked through but glossy.
  14. Let the cookies cool on the baking sheet for several minutes to allow centers to set, then transfer to a wire rack.
  15. If using chocolate, drizzle melted dark chocolate lightly over mostly cooled cookies.

Tips

  • Toast the pecans before chopping to deepen their flavor.
  • Ensure the filling coats a spoon and is thick before chilling to prevent running during baking.
  • Chill both the dough and the filling well; return filling to the refrigerator if it softens while you work.
  • If the dough is crumbly, add milk 1 tablespoon at a time until it holds when pressed.
  • Let cookies rest on the hot pan a few minutes after baking so the centers firm up before moving.

Variations

  • Chocolate Drizzle: Drizzle melted dark chocolate over mostly cooled cookies for a flavor contrast without covering the pecans.
  • Maple Version: Replace the corn syrup with 1/2 cup maple syrup for a maple-flavored filling; chill well as the filling may be looser.

Notes

Store cooled cookies in an airtight container at room temperature for a few days or refrigerate if warm; separate stacked layers with parchment. Warm briefly before serving to soften centers, but avoid overheating so the filling doesn’t loosen.

Nutrition

Calories: 310 kcal | Protein: 3 g | Fat: 18 g | Carbohydrates: 35 g

Pumpkin Cupcakes with Caramel Cream Cheese Frosting

These pumpkin cupcakes bake up soft, moist, and warmly spiced, with a rich caramel cream cheese frosting on top. They fit well on a fall dessert table, but they are also easy enough to make for a weekend bake or bake sale.

The batter comes together with a simple whisk-and-fold method, and the frosting is straightforward as long as the caramel is fully cooled before you mix it in. You can also bake the cupcakes and make the caramel ahead, then frost them closer to serving.

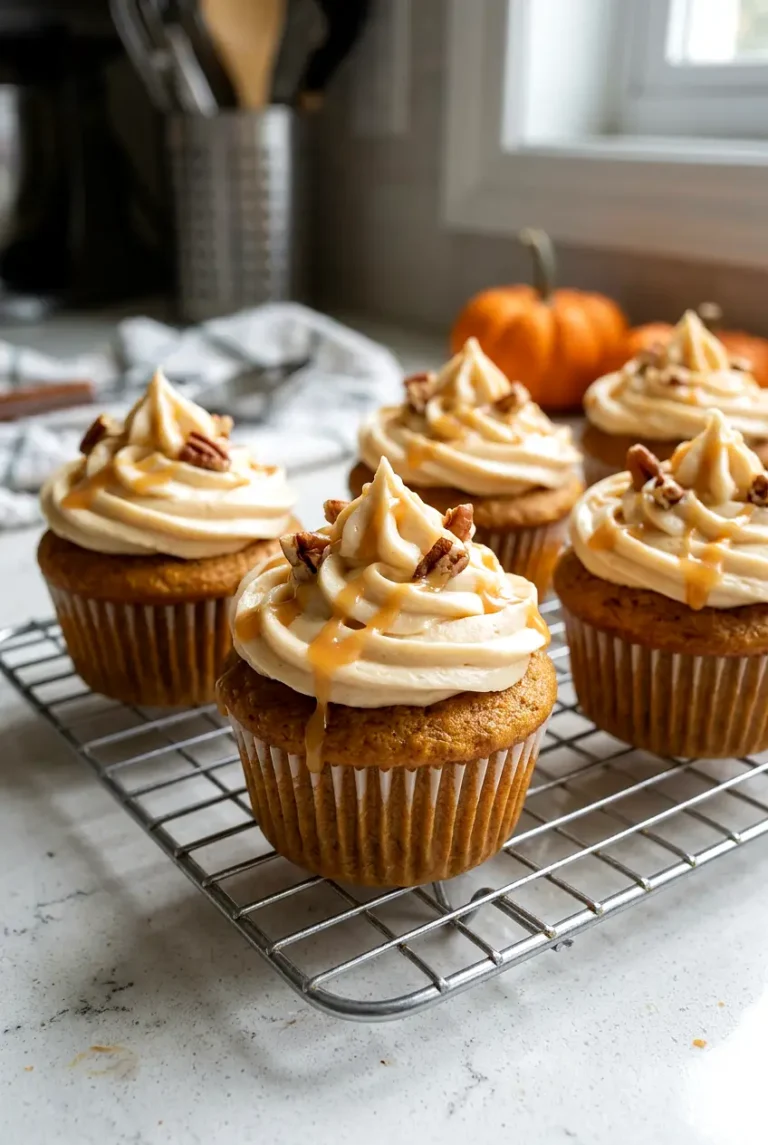
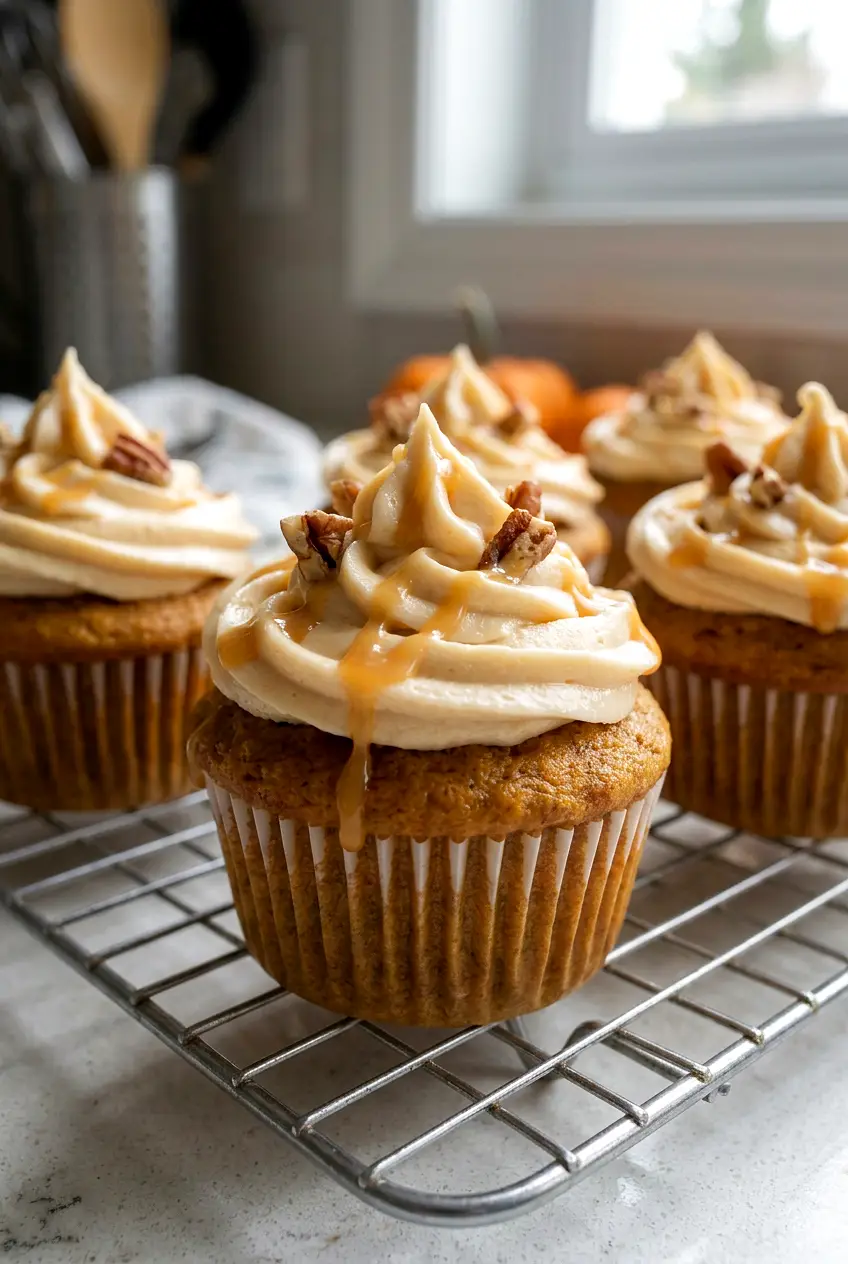
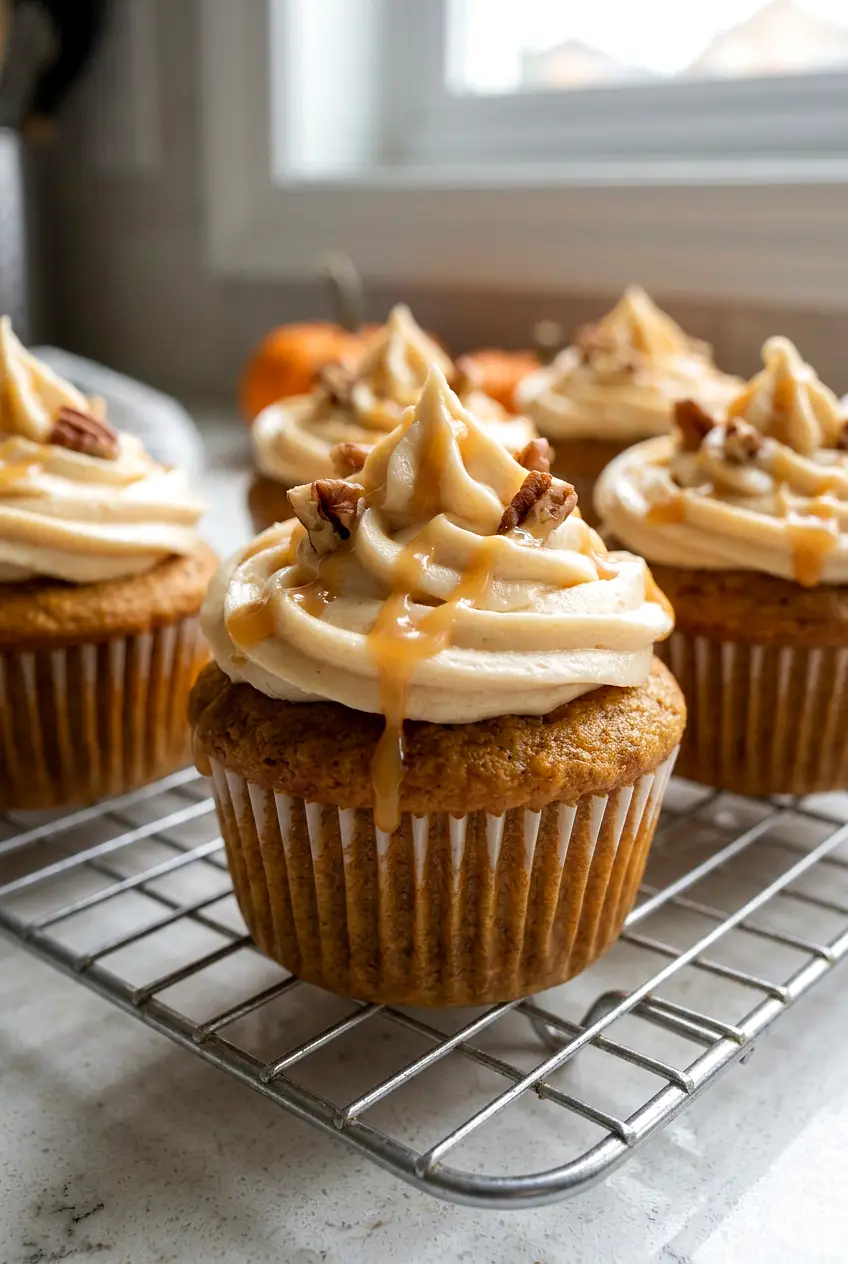
Ingredients for Pumpkin Cupcakes with Caramel Cream Cheese Frosting

A pumpkin cupcake with caramel cream cheese frosting on a wire rack, side view
  • 1 3/4 cups all-purpose flour (220g)
  • 1 teaspoon baking powder
  • 1/2 teaspoon baking soda
  • 1/2 teaspoon salt
  • 2 teaspoons ground cinnamon
  • 1 teaspoon pumpkin pie spice
  • 1 cup pure pumpkin puree (245g), not pumpkin pie filling
  • 1/2 cup granulated sugar (100g)
  • 1/2 cup light brown sugar (110g)
  • 1/2 cup vegetable oil or other neutral oil (110g)
  • 2 large eggs
  • 1/4 cup milk (60g)

For the caramel cream cheese frosting:

  • 1/2 cup unsalted butter, softened (115g)
  • 8 ounces full-fat brick cream cheese, softened (225g)
  • 2 1/2 to 3 cups powdered sugar (300g to 360g)
  • 1/3 to 1/2 cup cooled salted caramel sauce, very thick store-bought caramel sauce, or dulce de leche (110g)
  • 1 teaspoon vanilla extract, optional

Optional for finishing:

  • Extra caramel drizzle
  • 2 to 3 tablespoons chopped pecans

Use full-fat brick cream cheese for the frosting. Tub cream cheese is softer and can make the frosting too loose. If you use store-bought caramel, choose one that is thick enough to spoon, not one that pours like syrup.

How to Make Pumpkin Cupcakes

Close-up of pumpkin cupcakes showing caramel cream cheese frosting and pecans
  1. Preheat and line the pan: Heat the oven to 350°F. Line a standard 12-cup muffin pan with paper liners.
  2. Whisk the dry ingredients: In a medium bowl, whisk together the flour, baking powder, baking soda, salt, cinnamon, and pumpkin pie spice until evenly combined.
  3. Mix the wet ingredients: In a large bowl, whisk the pumpkin puree, granulated sugar, brown sugar, oil, eggs, and milk until smooth, with no visible streaks of egg.
  4. Make the batter: Add the dry ingredients to the wet ingredients. Fold with a rubber spatula just until no dry flour remains. The batter should look smooth and thick. Do not overmix.
  5. Fill the liners: Divide the batter among the liners, filling each about two-thirds full.
  6. Bake: Bake for 18 to 22 minutes. The cupcakes are done when the tops look set, spring back lightly when touched, and a toothpick inserted in the center comes out clean or with a few moist crumbs. If your oven bakes unevenly, rotate the pan once near the end.
  7. Cool: Let the cupcakes rest in the pan for a few minutes, then transfer them to a wire rack and cool completely before frosting.
  8. Make the frosting: In a mixing bowl, beat the softened butter and cream cheese until smooth. Add 2 1/2 cups powdered sugar and mix until combined. Beat in the cooled caramel sauce and the vanilla, if using. If needed, add more powdered sugar until the frosting is thick enough to spread or pipe.
  9. Chill if needed: If the frosting feels too soft, chill it briefly until it firms up slightly.
  10. Frost and finish: Pipe or spread the frosting onto the cooled cupcakes. Finish with extra caramel drizzle and chopped pecans, if using.

Tips for Soft, Light Pumpkin Cupcakes

For the best texture, fold the batter just until the flour disappears. Overmixing after the flour is added can make the cupcakes dense.

It also helps to keep the liners at about two-thirds full so the cupcakes rise evenly without spilling over the edges.

How to Keep the Frosting Thick Enough to Pipe

The two biggest things that affect this frosting are the cream cheese and the caramel. Use brick cream cheese, and make sure the caramel is fully cooled before adding it to the bowl.

If the frosting softens too much, chill it for a short time instead of adding a lot of extra powdered sugar. That helps it firm up without making it overly sweet.

Troubleshooting

  • Dense cupcakes: The batter was likely overmixed after the flour was added.
  • Cupcakes overflowed: The liners were probably filled too high. Aim for about two-thirds full.
  • Uneven baking: Bake one pan on one rack, and rotate the pan near the end if needed.
  • Runny frosting: The caramel may have been warm, too thin, or the cream cheese may have been too soft.
  • Frosting will not hold a swirl: Chill it briefly, then pipe again.

Serving Ideas

Serve these cupcakes slightly cool or chilled if you want the frosting to hold its shape neatly. A light caramel drizzle right before serving adds a little extra flavor, and chopped pecans add a nice crunch.

If you want another pumpkin-and-cream-cheese dessert, try these Pumpkin Cheesecake Cookies. For another cozy pumpkin dessert, take a look at this Pumpkin Pecan Cobbler. If you’re building a fall dessert menu, these Baked Pears with Walnut Oatmeal Crumble are a nice addition.

How to Store Pumpkin Cupcakes with Caramel Cream Cheese Frosting

Store frosted cupcakes covered in the refrigerator because of the cream cheese frosting. For the best texture, let them sit at cool room temperature for a short time before serving if you want a softer frosting.

Unfrosted cupcakes can be cooled completely and stored in an airtight container at room temperature for a short time, or refrigerated for longer storage. You can also make the cupcakes and caramel ahead, then frost them closer to serving.

Nutrition

Nutrition is approximate and will vary based on ingredient brands, exact amounts, and how much frosting is used on each cupcake.

  • Serving size: 1 cupcake
  • Calories: about 360
  • Protein: 4g
  • Fat: 19g
  • Carbohydrates: 45g
  • Per 100g: about 330 calories, 4g protein, 17g fat, 41g carbohydrates

Pumpkin Cupcakes with Caramel Cream Cheese Frosting

Soft, moist pumpkin cupcakes topped with a rich caramel cream cheese frosting.
Course: Dessert
Cuisine: American
Prep: 20 min
Cook: 20 min
Total: 60 min
Servings: 12 Calories: about 360 kcal

Equipment

  • 12-cup muffin pan
  • paper liners
  • mixing bowls
  • whisk
  • rubber spatula
  • hand mixer or stand mixer
  • wire rack
  • measuring cups and spoons

Ingredients

Cupcakes

  • 1 3/4 cups all-purpose flour (220g)
  • 1 teaspoon baking powder
  • 1/2 teaspoon baking soda
  • 1/2 teaspoon salt
  • 2 teaspoons ground cinnamon
  • 1 teaspoon pumpkin pie spice
  • 1 cup pure pumpkin puree (245g), not pumpkin pie filling
  • 1/2 cup granulated sugar (100g)
  • 1/2 cup light brown sugar (110g)
  • 1/2 cup vegetable oil or other neutral oil (110g)
  • 2 large eggs
  • 1/4 cup milk (60g)

Caramel cream cheese frosting

  • 1/2 cup unsalted butter, softened (115g)
  • 8 ounces full-fat brick cream cheese, softened (225g)
  • 2 1/2 to 3 cups powdered sugar (300g to 360g)
  • 1/3 to 1/2 cup cooled salted caramel sauce, very thick store-bought caramel sauce, or dulce de leche (110g)
  • 1 teaspoon vanilla extract (optional)

Optional finishing

  • Extra caramel drizzle
  • 2 to 3 tablespoons chopped pecans

Instructions

  1. Preheat the oven to 350°F (177°C). Line a standard 12-cup muffin pan with paper liners.
  2. In a medium bowl, whisk together the flour, baking powder, baking soda, salt, cinnamon, and pumpkin pie spice until evenly combined.
  3. In a large bowl, whisk the pumpkin puree, granulated sugar, brown sugar, oil, eggs, and milk until smooth and no streaks of egg remain.
  4. Add the dry ingredients to the wet ingredients and fold with a rubber spatula just until no dry flour remains; do not overmix.
  5. Divide the batter among the liners, filling each about two-thirds full.
  6. Bake for 18 to 22 minutes, until the tops look set, spring back lightly when touched, and a toothpick inserted in the center comes out clean or with a few moist crumbs; rotate the pan once near the end if your oven bakes unevenly.
  7. Let the cupcakes rest in the pan for a few minutes, then transfer to a wire rack and cool completely before frosting.
  8. In a mixing bowl, beat the softened butter and cream cheese until smooth.
  9. Add 2 1/2 cups powdered sugar and mix until combined.
  10. Beat in the cooled caramel sauce and vanilla, if using; add more powdered sugar as needed until the frosting is thick enough to spread or pipe.
  11. If the frosting feels too soft, chill it briefly until it firms up slightly.
  12. Pipe or spread the frosting onto the cooled cupcakes and finish with extra caramel drizzle and chopped pecans, if using.

Tips

  • Fold the batter just until the flour disappears to avoid dense cupcakes.
  • Fill liners about two-thirds full so cupcakes rise evenly without overflowing.
  • Use full-fat brick cream cheese for firmer frosting.
  • Make sure the caramel is fully cooled before adding to the frosting to prevent it from thinning.
  • If frosting softens, chill briefly instead of adding a lot more powdered sugar to avoid excess sweetness.

Variations

  • Make-ahead cupcakes: Bake the cupcakes and make the caramel ahead of time, then frost them closer to serving for fresher frosting.
  • Dulce de leche frosting: Use thick dulce de leche in place of caramel for a slightly different caramel flavor and texture.

Notes

Store frosted cupcakes covered in the refrigerator; let sit at cool room temperature briefly before serving for a softer frosting. Unfrosted cupcakes can be stored at room temperature short-term or refrigerated for longer.

Nutrition

Calories: about 360 kcal | Protein: 4 g | Fat: 19 g | Carbohydrates: 45 g

Caramel Apple Cheesecake Dip

Caramel apple cheesecake dip has all the familiar flavors of caramel apples in an easy, scoopable dessert. It starts with a buttery graham cracker crust, then gets layered with a light cheesecake filling, caramel, whipped topping, and chopped salted peanuts.

This is a simple no-bake dessert to make ahead for a party or holiday table. The main thing to watch is the caramel temperature: warm it just enough to spoon, then let it cool slightly so it spreads easily without softening the cheesecake layer too much.

Ingredients for Caramel Apple Cheesecake Dip

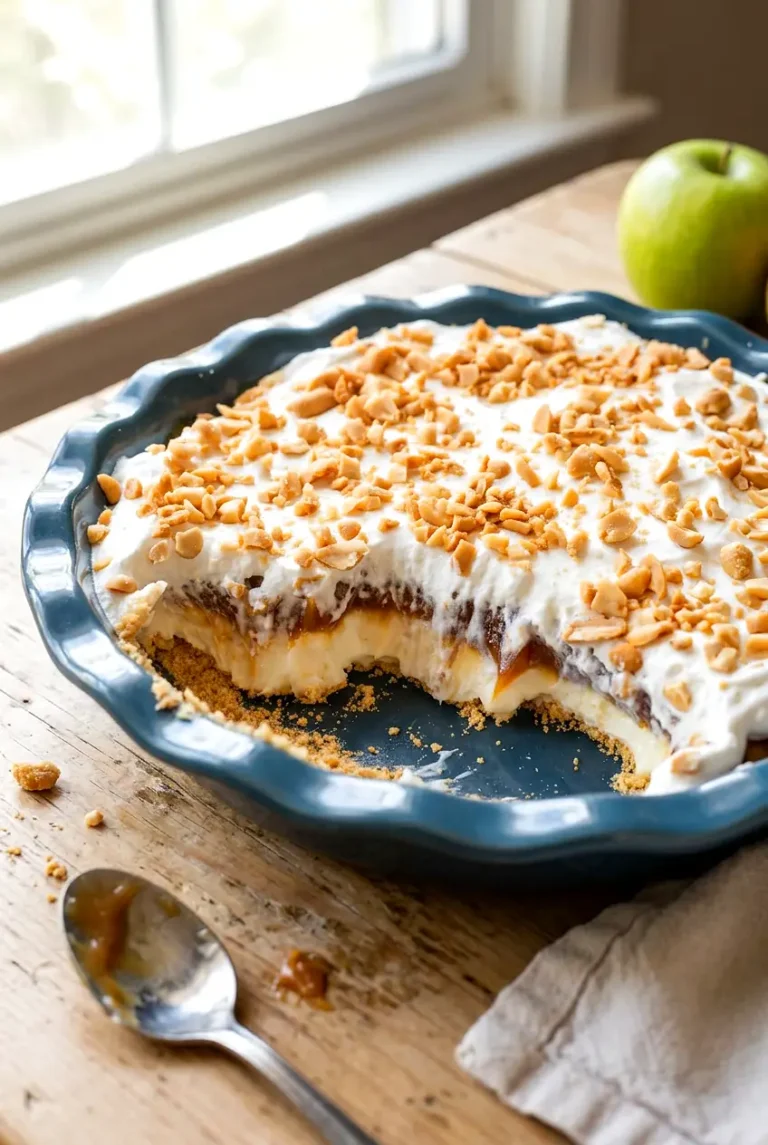
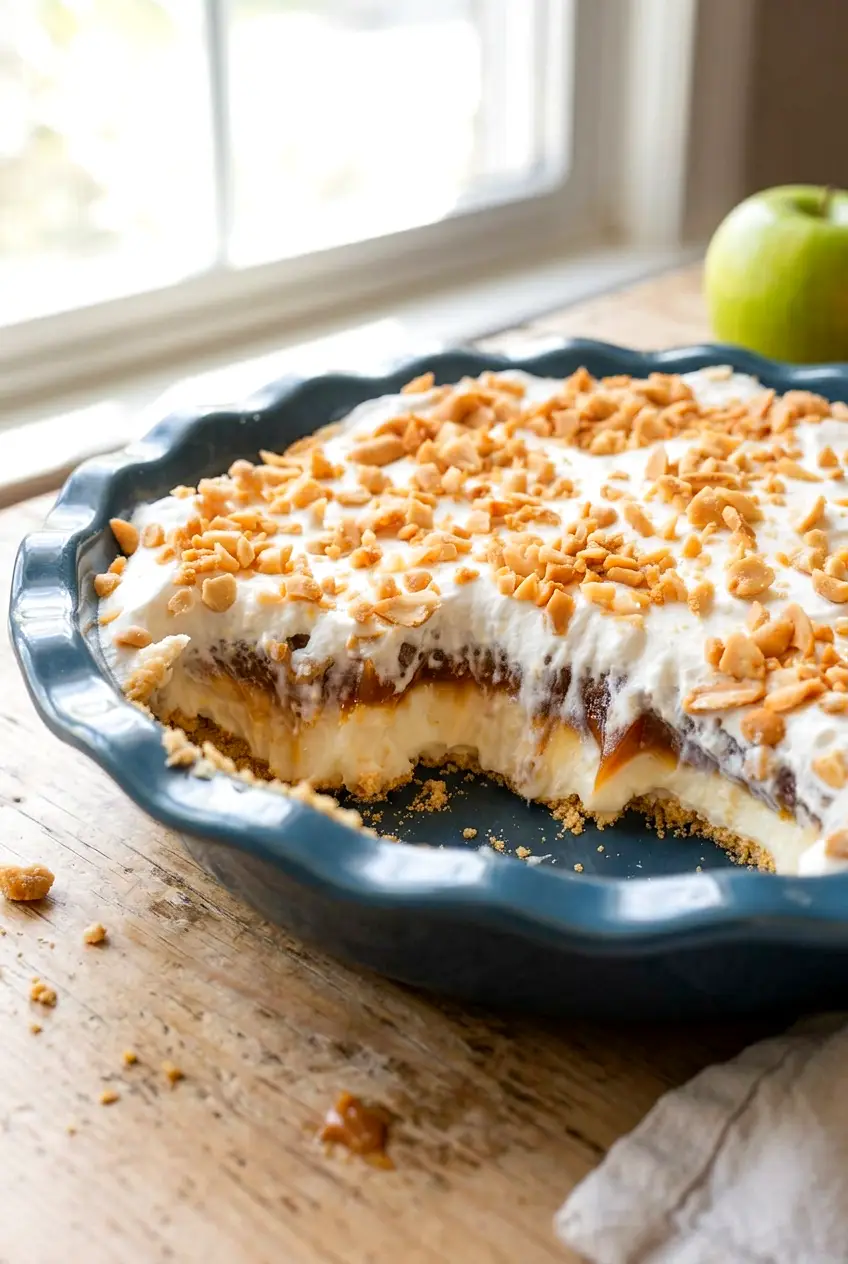
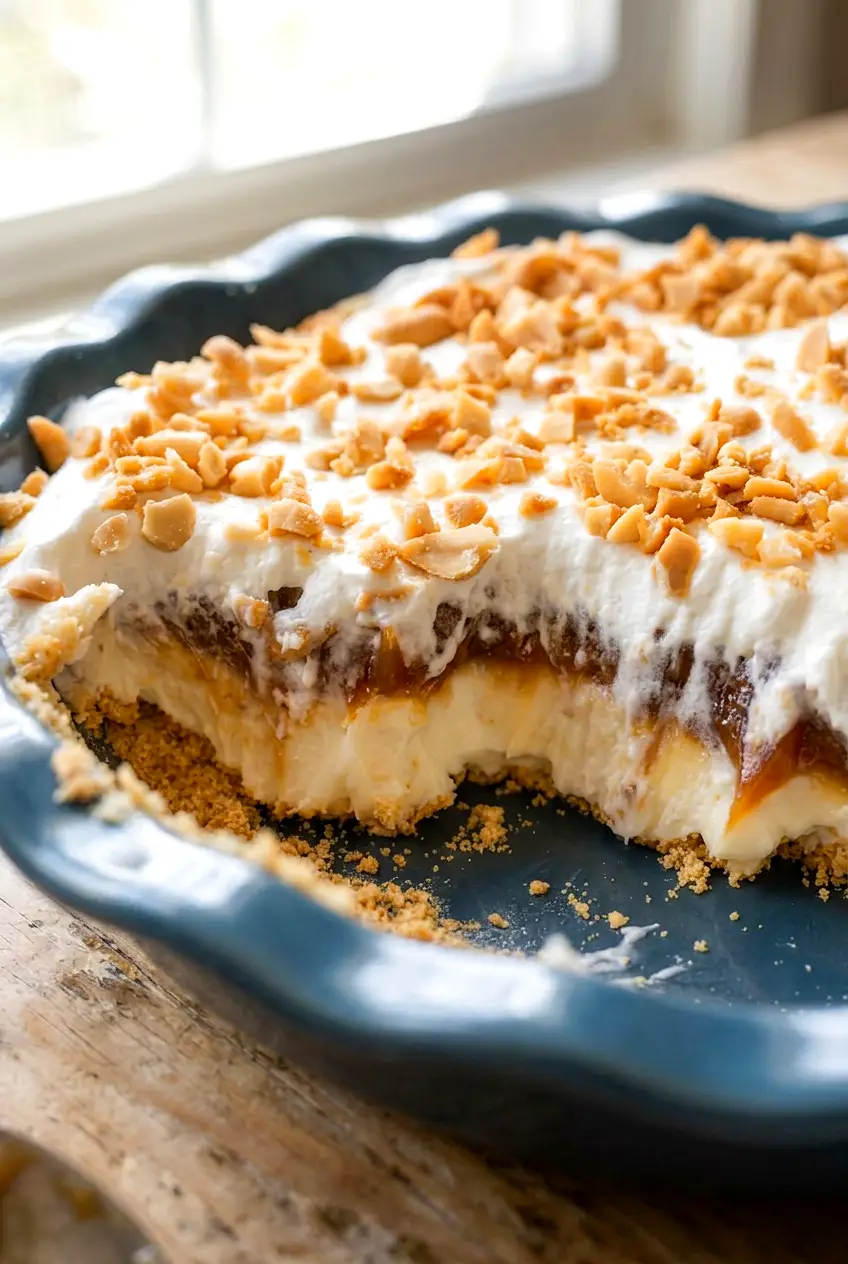
Side angle of the caramel apple cheesecake dip with the crust and scooped-out center visible
  • 1 1/2 cups graham cracker crumbs (150g)
  • 5 tablespoons unsalted butter, melted (70g)
  • 8 ounces cream cheese, softened (225g)
  • 1/2 cup powdered sugar (60g)
  • 1 teaspoon vanilla extract
  • 1 1/2 cups whipped topping, thawed (90g), divided
  • 1 cup caramel dip or caramel sauce (320g)
  • 1/3 cup salted peanuts, chopped (40g)
  • 2 to 3 medium apples, sliced for serving (about 360g)
  • 1 to 2 medium pears, sliced for serving (about 250g)

Use full-fat cream cheese for the best texture. If the whipped topping is still icy in the center, let it thaw fully in the refrigerator before folding it in.

How to Make Caramel Apple Cheesecake Dip

Closer view of caramel apple cheesecake dip showing the creamy layers and peanut topping
  1. Make the crust: Stir the graham cracker crumbs and melted butter together in a mixing bowl until evenly moistened. Press the mixture gently into the bottom of a 9-inch pie plate or similar shallow serving dish. The crumbs should hold together when pressed, but do not pack them down too firmly or the crust can turn dense.
  2. Mix the cheesecake layer: In a second bowl, beat the softened cream cheese, powdered sugar, and vanilla with a hand mixer until smooth and fluffy, about 3 to 5 minutes. Fold in 1 cup of the whipped topping just until combined. The mixture should look thick, smooth, and easy to spread.
  3. Spread over the crust: Dollop the cheesecake mixture over the crust, then spread it into an even layer all the way to the edges. Adding it in spoonfuls helps keep the crust from shifting.
  4. Warm the caramel: Warm the caramel dip or sauce according to the package directions, either briefly in the microwave or over low heat, until spoonable. Let it cool slightly so it is warm, not hot, then spread or drizzle it over the cheesecake layer.
  5. Finish the top: Spread the remaining 1/2 cup whipped topping loosely over the caramel, or add it in dollops if you want some of the caramel to show through. Sprinkle the chopped peanuts evenly over the top.
  6. Chill before serving: Cover and refrigerate for 1 to 2 hours, or until the dip is chilled and firm enough to scoop cleanly. Slice the apples and pears close to serving time so they stay crisp.

How to Keep the Layers Clean

Softened cream cheese is the key to a smooth cheesecake layer. Beat it well before adding the whipped topping, and fold that in gently so the filling stays light.

For distinct layers, use a shallow dish and spread the cheesecake mixture in small dollops rather than one large mound. Warm caramel flows more easily, but it should be only slightly warm when it goes on top.

Easy Variations

Cinnamon Caramel Apple Cheesecake Dip

Add 1/2 teaspoon ground cinnamon to the cheesecake layer for a warmer flavor that works well with apples and caramel.

Toffee Crunch Version

Use 2 to 3 tablespoons of toffee bits in place of the peanuts, or use a small mix of both for extra crunch.

Cookie Crust Version

Use crushed shortbread or vanilla wafer crumbs instead of graham cracker crumbs for a sweeter base. Add just enough butter for the crumbs to hold together when pressed.

How to Store Caramel Apple Cheesecake Dip

Store the dip covered in the refrigerator for up to 3 days. The crust and toppings will soften as it sits, so the texture is best the first day.

For make-ahead serving, assemble and chill the dip without the fruit. Slice the apples and pears just before serving, or toss them lightly with lemon juice if you need to cut them a little earlier.

Serve with extra graham crackers or vanilla wafers if you want more dipping options. If you want another sweet treat for a dessert spread, try these Maple Brown Sugar Cookies with Maple Icing.

If you are planning a dessert menu, these Sourdough Discard Brownies are another rich option to add.

For a different easy bake, you might also like these Simple Zucchini Muffins.

Nutrition

Nutrition is approximate and will vary based on ingredient brands, exact amounts, and serving size. This estimate is for the dip only and does not include the apples or pears served alongside.

  • Serving size: about 1/10 of the dip
  • Calories: about 300
  • Protein: 4g
  • Fat: 18g
  • Carbohydrates: 34g
  • Per 100g: about 280 calories, 3g protein, 17g fat, 32g carbohydrates

Caramel Apple Cheesecake Dip

A no-bake scoopable dessert with a graham cracker crust, light cheesecake layer, warm caramel, whipped topping, and chopped salted peanuts served with apples and pears.
Course: Dessert
Cuisine: American
Prep: 20 min
Total: 140 min
Servings: 10 Calories: 300 kcal

Equipment

  • mixing bowl
  • hand mixer
  • 9-inch pie plate
  • spatula
  • microwave or saucepan

Ingredients

Crust

  • 1 1/2 cups graham cracker crumbs (150g)
  • 5 tablespoons unsalted butter, melted (70g)

Cheesecake Layer

  • 8 ounces cream cheese, softened (225g)
  • 1/2 cup powdered sugar (60g)
  • 1 teaspoon vanilla extract
  • 1 1/2 cups whipped topping, thawed (90g), divided

Toppings & Serving

  • 1 cup caramel dip or caramel sauce (320g)
  • 1/3 cup salted peanuts, chopped (40g)
  • 2 to 3 medium apples, sliced for serving (about 360g)
  • 1 to 2 medium pears, sliced for serving (about 250g)

Instructions

  1. Stir the graham cracker crumbs and melted butter in a mixing bowl until evenly moistened.
  2. Press the crumb mixture gently into the bottom of a 9-inch pie plate or shallow serving dish without packing it down firmly.
  3. Beat the softened cream cheese, powdered sugar, and vanilla with a hand mixer until smooth and fluffy, about 3 to 5 minutes.
  4. Fold in 1 cup of the thawed whipped topping just until combined.
  5. Dollop the cheesecake mixture over the crust and spread into an even layer to the edges.
  6. Warm the caramel dip or sauce per package directions (briefly in the microwave or over low heat) until spoonable, then let it cool slightly until warm but not hot.
  7. Spread or drizzle the warm caramel over the cheesecake layer.
  8. Spread the remaining 1/2 cup whipped topping loosely over the caramel or add in dollops, then sprinkle the chopped peanuts evenly over the top.
  9. Cover and refrigerate 1 to 2 hours, or until chilled and firm enough to scoop cleanly.
  10. Slice apples and pears close to serving time and serve alongside the dip (offer extra graham crackers or vanilla wafers if desired).

Tips

  • Use full-fat cream cheese for the best texture.
  • Thaw whipped topping fully in the refrigerator before folding it in to avoid icy lumps.
  • Warm caramel only until spoonable and let it cool slightly so it doesn’t soften the cheesecake layer.
  • Spread the cheesecake in small dollops to keep the crust from shifting and to maintain distinct layers.
  • Slice apples and pears just before serving or toss with a little lemon juice to prevent browning if prepping early.

Variations

  • Cinnamon Caramel Apple Cheesecake Dip: Add 1/2 teaspoon ground cinnamon to the cheesecake layer for a warmer, spiced flavor.
  • Toffee Crunch Version: Use 2 to 3 tablespoons of toffee bits in place of the peanuts or mix toffee bits and peanuts for extra crunch.
  • Cookie Crust Version: Use crushed shortbread or vanilla wafer crumbs instead of graham cracker crumbs for a sweeter base; add just enough butter to hold the crumbs together.

Notes

Store covered in the refrigerator for up to 3 days; assemble and chill without the fruit for make-ahead serving. Fruit slices are best when cut just before serving or tossed with lemon juice to slow browning.

Nutrition

Calories: 300 kcal | Protein: 4 g | Fat: 18 g | Carbohydrates: 34 g | Per100g: about 280 kcal, 3 g protein, 17 g fat, 32 g carbohydrates

Pumpkin Cheesecake Cookies

These pumpkin cheesecake cookies have a soft, spiced pumpkin dough with a creamy cheesecake center tucked inside. A cinnamon-sugar coating gives the outside a little extra sweetness and helps them feel a bit like a fall snickerdoodle.

The method is simple once you break it into parts: freeze the cream cheese filling first, then chill the dough before shaping. Bake at 350°F until the edges are set and the centers still look slightly soft so the cookies stay chewy instead of drying out.

Ingredients for Pumpkin Cheesecake Cookies

A pumpkin cheesecake cookie broken open to show the creamy cheesecake filling inside
  • 2 1/2 cups all-purpose flour (315g)
  • 1 teaspoon baking soda
  • 1/2 teaspoon salt
  • 2 teaspoons ground cinnamon
  • 1/2 teaspoon ground ginger
  • 1/4 teaspoon ground nutmeg
  • 3/4 cup unsalted butter, softened (170g)
  • 3/4 cup brown sugar (150g)
  • 1/2 cup granulated sugar (100g)
  • 1/2 cup pumpkin puree (120g), preferably a thick canned puree
  • 1 large egg yolk
  • 1 teaspoon vanilla extract
  • 8 ounces block-style cream cheese, softened (225g)
  • 1/4 cup powdered sugar (30g)
  • For the coating: 2 tablespoons granulated sugar mixed with 1 teaspoon ground cinnamon

Optional: A few drops of orange gel food coloring for a brighter dough, and a simple glaze made with about 1/2 cup powdered sugar plus 1 to 2 tablespoons milk or cream for drizzling over the cooled cookies.

Ingredient note: Use pumpkin puree, not pumpkin pie filling. Pumpkin pie filling is already sweetened and spiced and will change both the flavor and texture.

How to Make Pumpkin Cheesecake Cookies

Close-up of a pumpkin cheesecake cookie showing the soft center and spiced crumb
  1. Make the filling: In a mixing bowl, beat the softened cream cheese and powdered sugar until smooth. Scoop small dollops onto a parchment-lined plate or tray. Freeze for at least 45 minutes, or until firm enough to pick up cleanly.
  2. Mix the dry ingredients: In a medium bowl, whisk together the flour, baking soda, salt, cinnamon, ginger, and nutmeg.
  3. Cream the butter and sugars: In a large bowl, beat the softened butter, brown sugar, and granulated sugar until creamy, about 3 to 4 minutes. Beat in the pumpkin puree, egg yolk, and vanilla. If using orange gel food coloring, add it here.
  4. Finish the dough: Add the dry ingredients to the wet ingredients and mix until a soft dough forms and no dry streaks remain. Cover and chill for about 1 hour, or until the dough is easier to scoop and shape.
  5. Preheat the oven: Heat the oven to 350°F. Line rimmed baking sheets with parchment paper. Put the cinnamon-sugar coating in a small bowl.
  6. Fill and shape the cookies: Scoop a portion of chilled dough and flatten it in your hand. Place one frozen cheesecake dollop in the center, wrap the dough around it, and seal the seams completely. Roll gently into a ball, then coat it in the cinnamon-sugar. If the dough starts to soften or get sticky, chill it again for a few minutes before shaping the rest.
  7. Arrange on the pans: Place the cookies on the prepared baking sheets, spacing them well apart so they can spread without touching.
  8. Bake: Bake for 10 to 14 minutes, rotating the baking sheet halfway through if your oven browns unevenly. The cookies are done when the edges look set and lightly golden and the centers still look soft but not wet. Start checking early, especially if your cookies are small or your oven runs hot.
  9. Cool: Let the cookies rest on the baking sheet for a few minutes, then transfer them to a wire rack to cool completely.
  10. Glaze if desired: Stir together the powdered sugar and 1 to 2 tablespoons milk or cream until smooth and thin enough to drizzle. Spoon over fully cooled cookies.

How to Keep the Cheesecake Filling Inside

Freeze the filling until it is firm, and keep the dollops small and even. When shaping the cookies, make sure the dough fully covers the cream cheese with no cracks or thin spots. If the dough gets too warm, it is harder to seal, so a short chill midway through shaping can help.

How to Tell When the Cookies Are Done

Do not wait for the centers to look fully baked in the oven. Pumpkin cookie dough can dry out quickly. Look for set edges, a little light browning on the bottoms, and centers that still look soft. The cookies will finish setting as they rest on the baking sheet.

Easy Variations

Mini Pumpkin Cheesecake Cookies

Use smaller dough portions and much smaller cheesecake centers. They will bake faster, so start checking early.

No-Glaze Version

You can skip the glaze if you want a less sweet finish. The cinnamon-sugar coating adds enough sweetness on its own.

Serving Ideas

Serve these slightly warm for a softer center or fully cooled for a neater cheesecake filling. They pair well with coffee, tea, or a glass of cold milk.

If you want another cozy pumpkin dessert, try this pumpkin pecan cobbler. For a different fall dessert, you might also like these baked pears with walnut oatmeal crumble. If you want another pumpkin bake, check out this pumpkin bundt cake with maple icing.

How to Store and Reheat Pumpkin Cheesecake Cookies

Once the cookies are fully cooled, store them in an airtight container in the refrigerator because of the cream cheese filling. If they are glazed, place parchment between layers so the tops do not stick. The cookies will soften a bit in storage, which is normal.

You can make parts ahead by freezing the cheesecake filling in advance and chilling the dough until you are ready to assemble. Baked cookies can also be frozen, though the filling may be a little softer after thawing.

To warm a cookie before serving, heat it briefly and gently so the center softens without melting out and the cookie does not dry out.

Nutrition

Nutrition is approximate and will vary based on ingredient brands, exact amounts, and serving size. Optional glaze and food coloring are not included.

  • Serving size: 1 cookie
  • Calories: about 185
  • Protein: 2g
  • Fat: 9g
  • Carbohydrates: 24g
  • Per 100g: about 375 calories, 4g protein, 18g fat, 49g carbohydrates

Pumpkin Cheesecake Cookies

Soft spiced pumpkin cookies filled with a frozen cream cheese center and rolled in cinnamon-sugar for a snickerdoodle-like finish.
Course: Dessert
Cuisine: American
Prep: 25 min
Cook: 14 min
Total: 154 min
Servings: 24 Calories: 185 kcal

Equipment

  • mixing bowls
  • electric mixer
  • measuring cups and spoons
  • baking sheets
  • parchment paper
  • wire rack
  • small bowl
  • spoon or cookie scoop
  • freezer
  • refrigerator

Ingredients

For the filling

  • 8 ounces block-style cream cheese, softened (225g)
  • 1/4 cup powdered sugar (30g)

For the dough

  • 2 1/2 cups all-purpose flour (315g)
  • 1 teaspoon baking soda
  • 1/2 teaspoon salt
  • 2 teaspoons ground cinnamon
  • 1/2 teaspoon ground ginger
  • 1/4 teaspoon ground nutmeg
  • 3/4 cup unsalted butter, softened (170g)
  • 3/4 cup brown sugar (150g)
  • 1/2 cup granulated sugar (100g)
  • 1/2 cup pumpkin puree (120g)
  • 1 large egg yolk
  • 1 teaspoon vanilla extract

For the coating

  • 2 tablespoons granulated sugar
  • 1 teaspoon ground cinnamon

Optional

  • A few drops orange gel food coloring
  • Glaze: about 1/2 cup powdered sugar plus 1 to 2 tablespoons milk or cream

Instructions

  1. Beat the softened cream cheese and powdered sugar until smooth.
  2. Scoop small dollops of the cream cheese mixture onto a parchment-lined plate and freeze at least 45 minutes until firm.
  3. Whisk together the flour, baking soda, salt, cinnamon, ginger, and nutmeg in a medium bowl.
  4. Beat the softened butter, brown sugar, and granulated sugar until creamy, about 3 to 4 minutes.
  5. Beat in the pumpkin puree, egg yolk, and vanilla extract (add orange gel food coloring if using).
  6. Add the dry ingredients to the wet ingredients and mix until a soft dough forms with no dry streaks.
  7. Cover the dough and chill about 1 hour until easier to scoop and shape.
  8. Preheat the oven to 350°F (177°C). Line rimmed baking sheets with parchment paper and stir the coating sugar and cinnamon together in a small bowl.
  9. Scoop a portion of chilled dough, flatten it in your hand, place one frozen cheesecake dollop in the center, and wrap the dough around it, sealing seams completely.
  10. Roll each filled ball gently, coat in the cinnamon-sugar mixture, and place on prepared baking sheets spaced well apart.
  11. Bake 10 to 14 minutes, rotating the sheet halfway if needed, until edges look set and lightly golden and centers still look soft.
  12. Let cookies rest on the baking sheet for a few minutes, then transfer to a wire rack to cool completely.
  13. If desired, stir powdered sugar with 1 to 2 tablespoons milk or cream until drizzleable and spoon over fully cooled cookies.

Tips

  • Freeze the cream cheese dollops until firm so they stay contained during baking.
  • Chill the dough before shaping to make sealing easier and prevent stickiness.
  • Seal seams completely to keep the filling from leaking out while baking.
  • Start checking bake time early for smaller cookies or hot ovens; centers should remain slightly soft.
  • Store assembled cookies in the refrigerator because of the cream cheese filling.

Variations

  • Mini Pumpkin Cheesecake Cookies: Use smaller dough portions and much smaller cheesecake centers; bake for less time and check early.
  • No-Glaze Version: Skip the glaze for a less-sweet finish; the cinnamon-sugar coating is sufficient.

Notes

Store fully cooled cookies in an airtight container in the refrigerator because of the cream cheese filling; freeze filling or baked cookies for make-ahead; warm gently before serving so centers soften without leaking.

Nutrition

Calories: 185 kcal | Protein: 2 g | Fat: 9 g | Carbohydrates: 24 g