Author

Julia

Browsing

Easy Thai Red Curry Chicken

This Thai red curry chicken is creamy, savory, and easy to pull together in one pan. Tender chicken simmers in coconut milk with red curry paste, onion, carrots, and bell pepper for a simple dinner that works well over rice or served on its own.

The method is straightforward and quick once everything is chopped. Keep the sauce at a gentle simmer, not a hard boil, so the chicken stays juicy and the coconut milk sauce stays smooth.

Ingredients for Easy Thai Red Curry Chicken
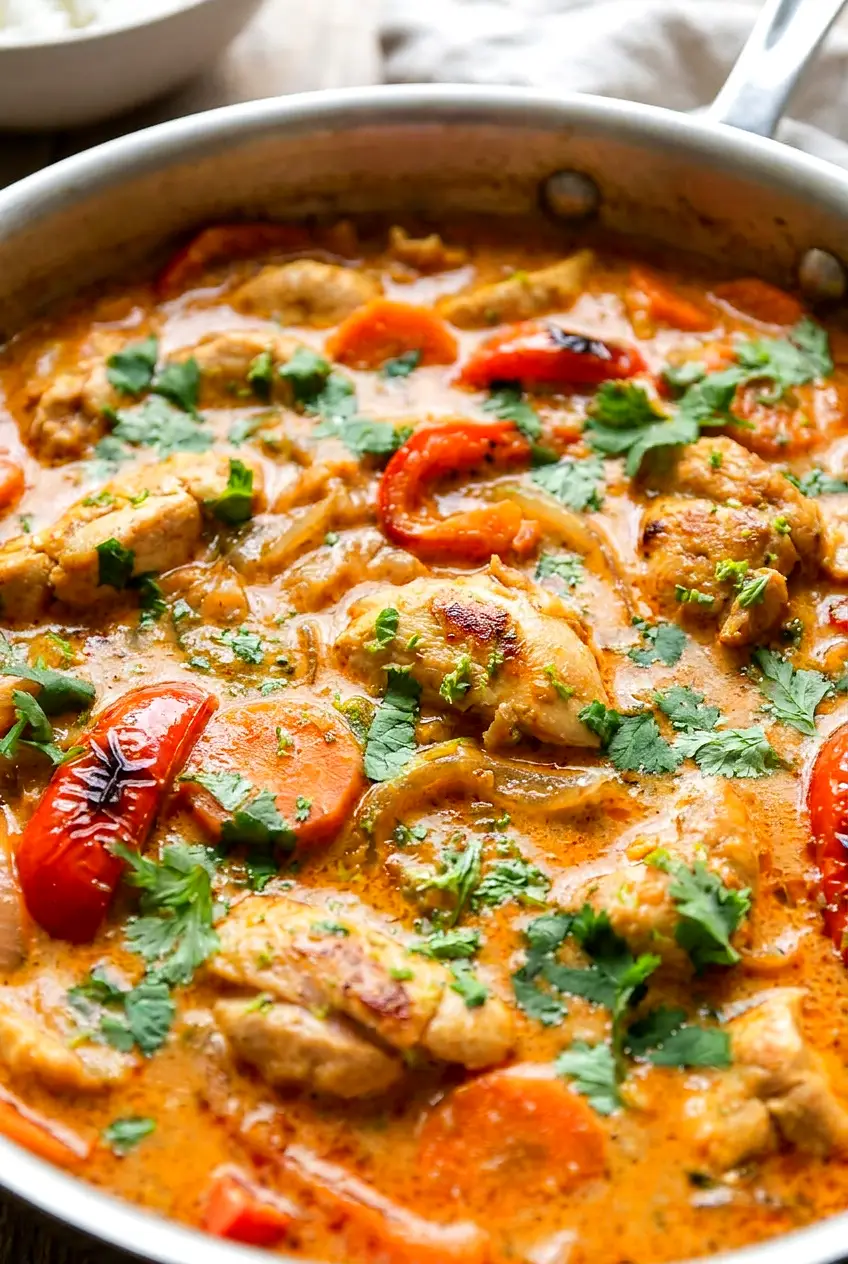
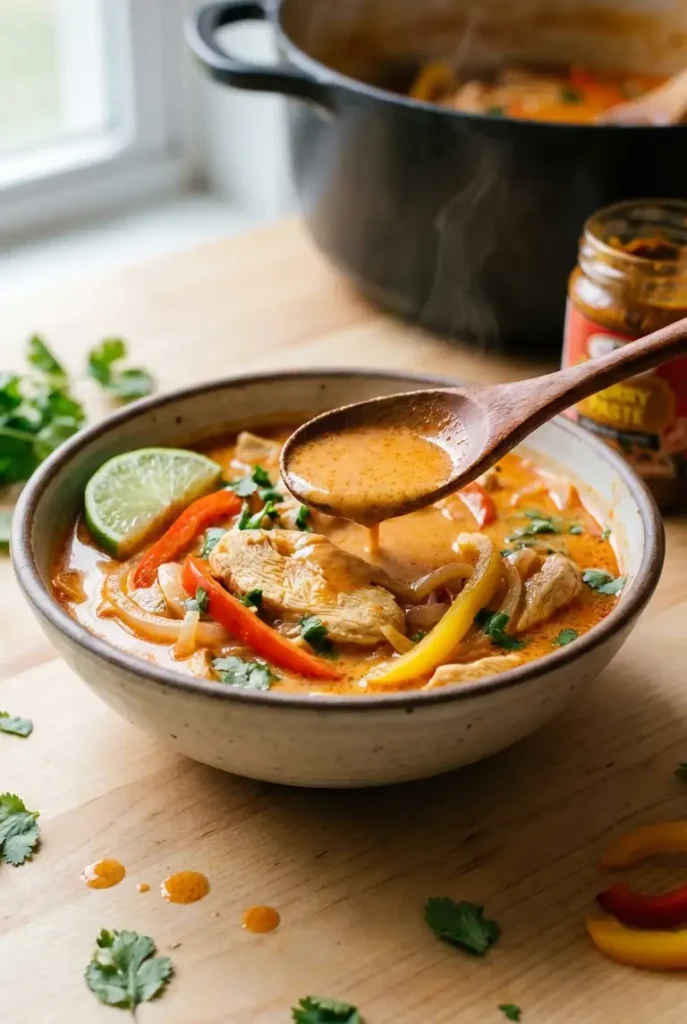
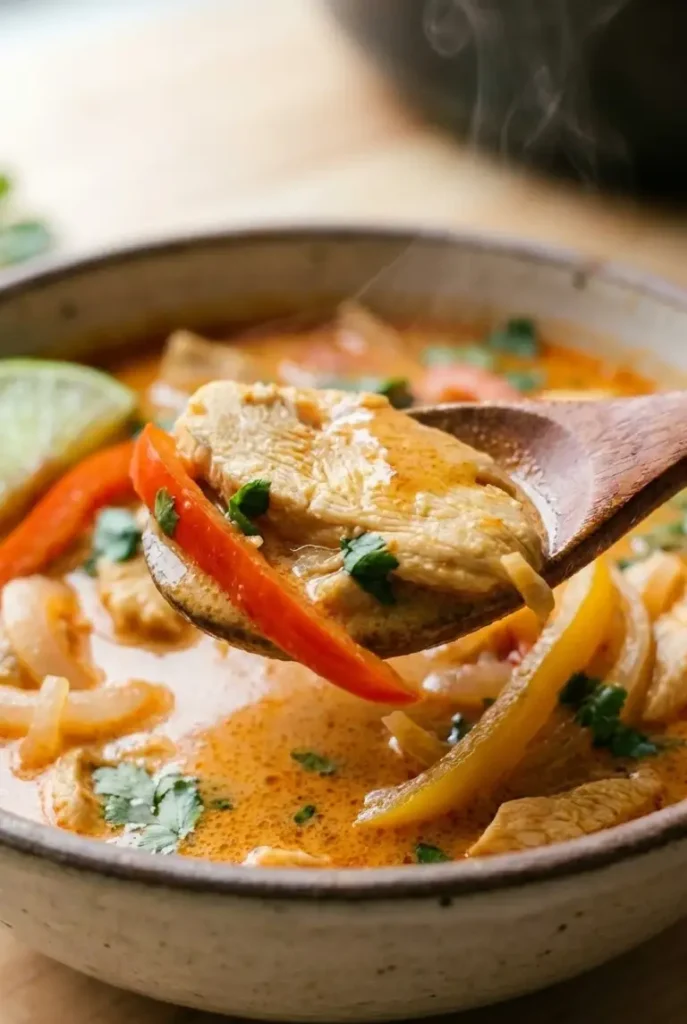
Close-up of Thai red curry chicken with tender chicken pieces, vegetables, and creamy red curry sauce
  • 1 1/2 pounds boneless skinless chicken breasts or thighs (about 675g), cut into bite-size pieces if desired
  • 1 tablespoon neutral oil
  • 1 medium onion (about 150g), sliced or diced
  • 3 cloves garlic, minced
  • 1 tablespoon grated fresh ginger
  • 2 to 4 tablespoons red curry paste
  • 1 teaspoon ground coriander
  • 1 can (13.5 ounces) coconut milk (about 400g)
  • 1 to 2 teaspoons brown sugar
  • 1 to 2 tablespoons fish sauce or soy sauce
  • 1 to 2 medium carrots (about 120g), thinly sliced
  • 1 red bell pepper (about 150g), sliced
  • Zest and juice of 1 lime
  • 1/4 cup chopped cilantro

Optional if needed: 1/4 to 1/2 cup chicken broth or water to thin the sauce, or 1 tablespoon cornstarch mixed with 1 tablespoon water to thicken it near the end.

How to Make Easy Thai Red Curry Chicken
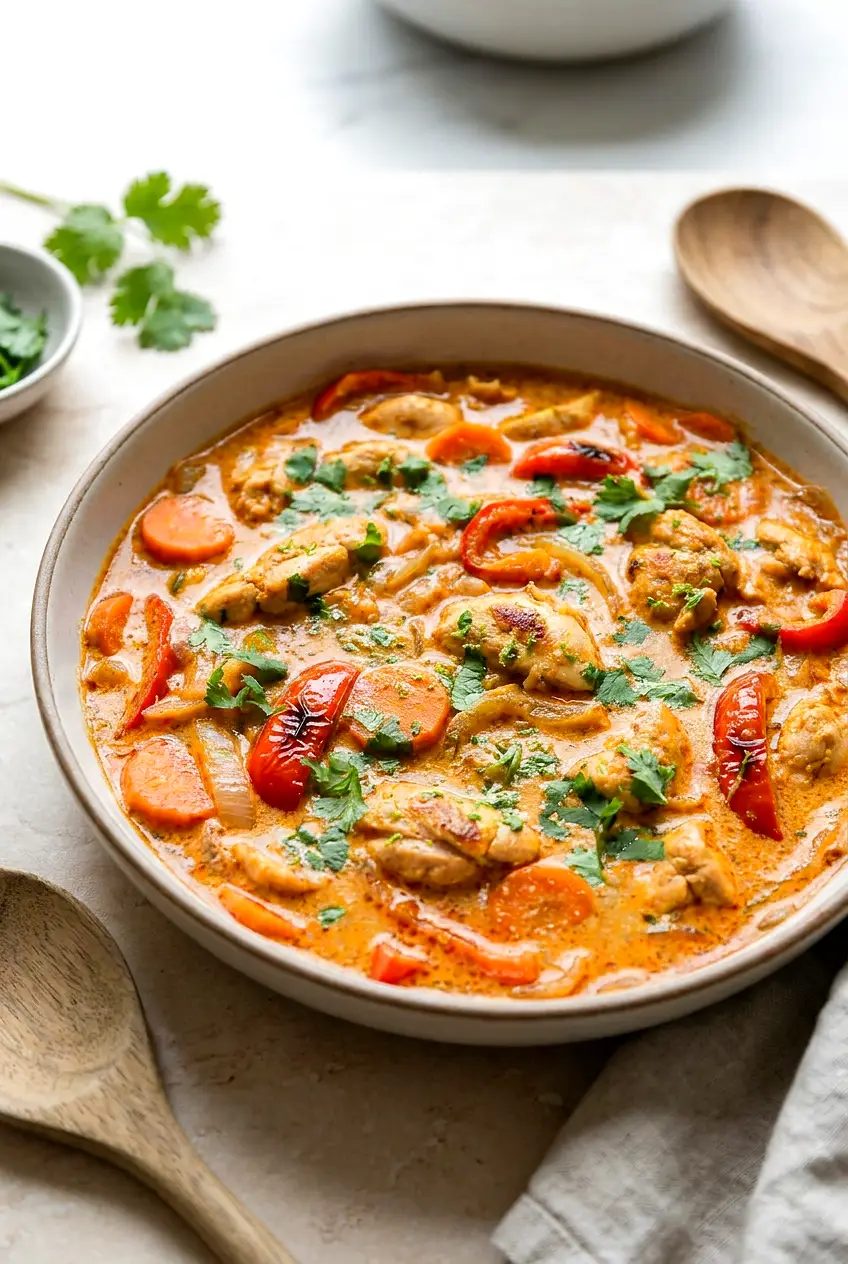
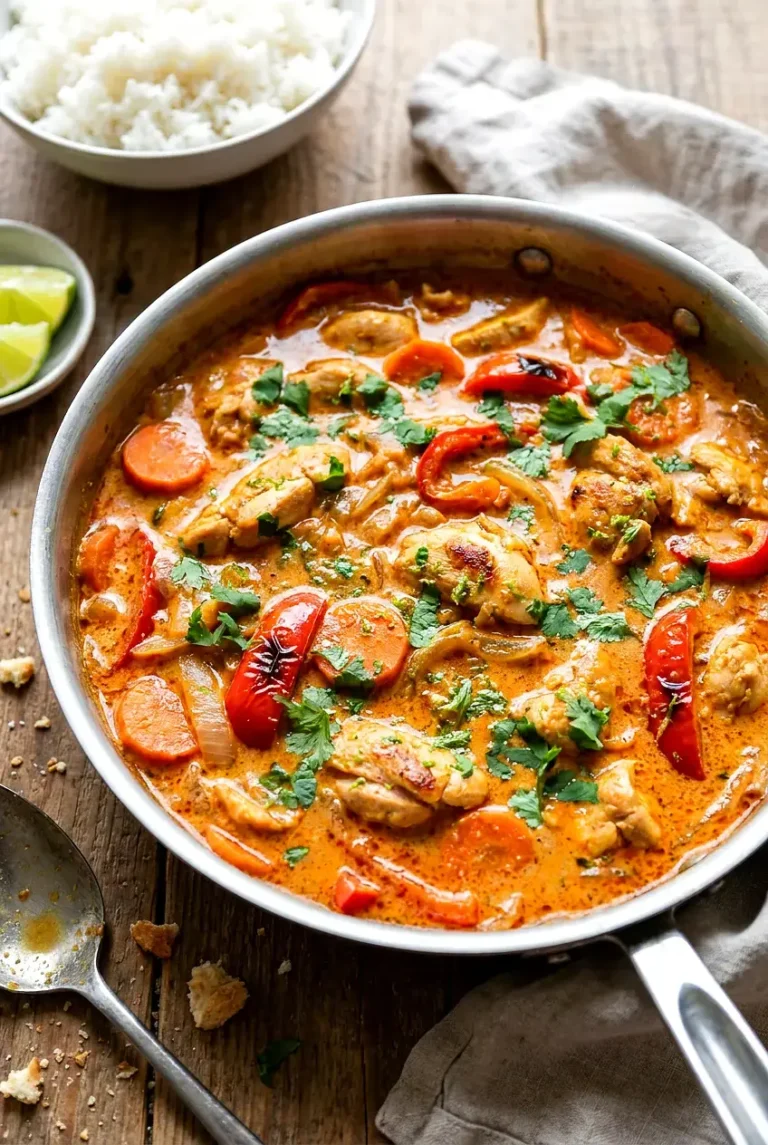
Thai red curry chicken in a shallow bowl with rice on the side and a glossy coconut curry sauce
  1. Prep the ingredients: Cut the chicken into even pieces for even cooking. Slice the onion, carrots, and bell pepper, mince the garlic, grate the ginger, and zest and juice the lime before you start. The curry comes together quickly once the pan is hot.
  2. Cook the onion: Heat the oil in a large deep skillet or 5- to 6-quart Dutch oven over medium heat. Add the onion and cook for 3 to 5 minutes, stirring occasionally, until softened but not deeply browned.
  3. Bloom the curry paste: Stir in the garlic, ginger, red curry paste, and coriander. Cook for about 1 minute, stirring constantly, until fragrant and slightly darker. Do not let the garlic scorch.
  4. Add the sauce: Pour in the coconut milk, then stir in 1 teaspoon brown sugar and 1 tablespoon fish sauce or soy sauce. Bring the mixture to a gentle simmer, scraping along the bottom of the pan so the sauce stays smooth.
  5. Simmer the chicken: Add the chicken and reduce the heat to medium-low. Simmer gently for 8 to 12 minutes, stirring occasionally, until the chicken is cooked through and the thickest pieces reach 165°F.
  6. Add the vegetables: Stir in the carrots first and cook for a few minutes so they begin to soften. Add the bell pepper and continue simmering for 5 to 8 minutes, until the carrots are tender and the pepper is just softened with a little bite left. If the sauce reduces too much, add a splash of broth or water.
  7. Finish and adjust: Remove the pan from the heat and stir in the lime zest, lime juice, and cilantro. Taste and adjust with more fish sauce or soy sauce for saltiness, more sugar for balance, or more curry paste if you want more heat.
  8. Serve: Spoon the curry over jasmine rice, serve with naan, or ladle into bowls on its own. Add extra cilantro or lime wedges if you like.

How to Adjust the Heat

Red curry paste brands vary quite a bit in heat and saltiness. Start with 2 tablespoons if you are unsure, then taste the sauce before adding more. If the finished curry is hotter than you want, stir in a little extra coconut milk or a small pinch of sugar to soften the heat.

Why the Sauce May Seem Too Thin or Too Thick

The sauce often looks a little loose right off the stove, then thickens slightly as it sits. If it gets too thick, stir in a splash of broth or water. If it stays thinner than you want, add the cornstarch slurry near the end and simmer briefly until the sauce tightens.

Serving Ideas

  • Jasmine rice
  • Naan or another flatbread
  • Extra cilantro and lime wedges

If you want another easy chicken dinner, try Easy Healthy Sesame Chicken.

For a different chicken dinner with a bold sauce, try Peruvian Grilled Chicken with Green Sauce.

If you want something lighter next, try Asian Chicken Crunch Salad.

Slow Cooker Variation

Slow Cooker Thai Red Curry Chicken

Add the chicken, coconut milk, curry paste, onion, garlic, ginger, coriander, brown sugar, and fish sauce or soy sauce to the slow cooker. Cook on low for 4 to 6 hours. Add the carrots and bell pepper later if possible so they do not get too soft. Stir in the lime zest, lime juice, and cilantro at the end, then taste and adjust before serving.

How to Store and Reheat Easy Thai Red Curry Chicken

Let the curry cool before transferring it to an airtight container. Refrigerate for up to 3 to 4 days. The sauce will thicken in the fridge, which is normal.

Reheat gently on the stovetop over low heat or in the microwave. Add a splash of water or broth if needed to loosen the sauce. For make-ahead prep, you can chop the chicken and vegetables in advance, but add the lime and cilantro after reheating for the freshest flavor.

Nutrition

Nutrition is approximate and will vary based on ingredient brands, exact amounts, and serving size. These estimates are based on 4 servings and do not include rice or optional additions.

  • Serving size: about 1/4 of the recipe
  • Calories: about 465
  • Protein: 41g
  • Fat: 27g
  • Carbohydrates: 15g
  • Per 100g: about 135 calories, 12g protein, 8g fat, 4g carbohydrates

Easy Thai Red Curry Chicken

Creamy Thai red curry with chicken simmered in coconut milk, red curry paste, onions, carrots, and bell pepper, finished with lime and cilantro.
Course: Main Course
Cuisine: Thai
Prep: 15 min
Cook: 25 min
Total: 40 min
Servings: 4 Calories: 465 kcal

Equipment

  • large deep skillet or Dutch oven
  • knife
  • cutting board
  • measuring spoons
  • measuring cups
  • wooden spoon or spatula

Ingredients

Main

  • 1 1/2 pounds boneless skinless chicken breasts or thighs (about 675g), cut into bite-size pieces
  • 1 tablespoon neutral oil
  • 1 medium onion (about 150g), sliced or diced
  • 3 cloves garlic, minced
  • 1 tablespoon grated fresh ginger
  • 2 to 4 tablespoons red curry paste
  • 1 teaspoon ground coriander
  • 1 can (13.5 ounces) coconut milk (about 400g)
  • 1 to 2 teaspoons brown sugar
  • 1 to 2 tablespoons fish sauce or soy sauce
  • 1 to 2 medium carrots (about 120g), thinly sliced
  • 1 red bell pepper (about 150g), sliced
  • Zest and juice of 1 lime
  • 1/4 cup chopped cilantro

Optional

  • 1/4 to 1/2 cup chicken broth or water (optional, to thin the sauce)
  • 1 tablespoon cornstarch mixed with 1 tablespoon water (optional, to thicken near the end)

To Serve

  • Jasmine rice
  • Naan or another flatbread
  • Extra cilantro and lime wedges

Instructions

  1. Cut the chicken into even bite-size pieces. Slice the onion, carrots, and bell pepper; mince the garlic; grate the ginger; zest and juice the lime.
  2. Heat the oil in a large deep skillet or Dutch oven over medium heat.
  3. Add the onion and cook 3 to 5 minutes, stirring occasionally, until softened but not deeply browned.
  4. Stir in the garlic, ginger, red curry paste, and ground coriander and cook about 1 minute, stirring constantly, until fragrant.
  5. Pour in the coconut milk, then stir in 1 teaspoon brown sugar and 1 tablespoon fish sauce or soy sauce; bring to a gentle simmer, scraping the bottom of the pan.
  6. Add the chicken and reduce heat to medium-low; simmer gently 8 to 12 minutes, stirring occasionally, until the thickest pieces reach 165°F (74°C).
  7. Stir in the carrots and cook a few minutes so they begin to soften.
  8. Add the bell pepper and continue simmering 5 to 8 minutes, until carrots are tender and pepper is just softened; add a splash of broth or water if the sauce reduces too much.
  9. Remove from the heat and stir in the lime zest, lime juice, and cilantro; taste and adjust with more fish sauce or soy sauce, sugar, or curry paste as desired.
  10. Serve the curry over jasmine rice, with naan, or on its own and garnish with extra cilantro and lime wedges.

Tips

  • Keep the sauce at a gentle simmer to keep the coconut milk smooth and the chicken juicy.
  • Start with 2 tablespoons of red curry paste and add more after tasting to control heat.
  • If the finished curry is too thin, stir in a cornstarch slurry and simmer briefly to thicken.
  • If the curry is too spicy, mellow it with extra coconut milk or a small pinch of sugar.
  • Add lime zest, lime juice, and cilantro at the end for the freshest flavor.

Variations

  • Slow Cooker Thai Red Curry Chicken: Combine chicken, coconut milk, curry paste, onion, garlic, ginger, coriander, brown sugar, and fish sauce or soy sauce in a slow cooker and cook on low 4 to 6 hours; add carrots and bell pepper later if possible and stir in lime zest, juice, and cilantro at the end.
Notes

Refrigerate cooled curry in an airtight container for 3 to 4 days. Reheat gently on the stovetop or microwave, adding a splash of water or broth if needed. Ensure chicken reaches 165°F (74°C) for safety; add lime and cilantro after reheating for best freshness.

Nutrition

Calories: 465 kcal | Protein: 41 g | Fat: 27 g | Carbohydrates: 15 g

Easy Healthy Sesame Chicken

This sesame chicken is quick, saucy, and easy to make in a skillet with simple pantry ingredients. The chicken gets a light starch coating for browned edges, then finishes in a short sweet-savory sauce with garlic, ginger, and sesame.

The method stays practical for a weeknight dinner: brown the chicken in batches, build the sauce in the same pan, and toss everything together just until glossy. Use a wide skillet so the chicken can brown instead of steam.

Ingredients for Easy Healthy Sesame Chicken

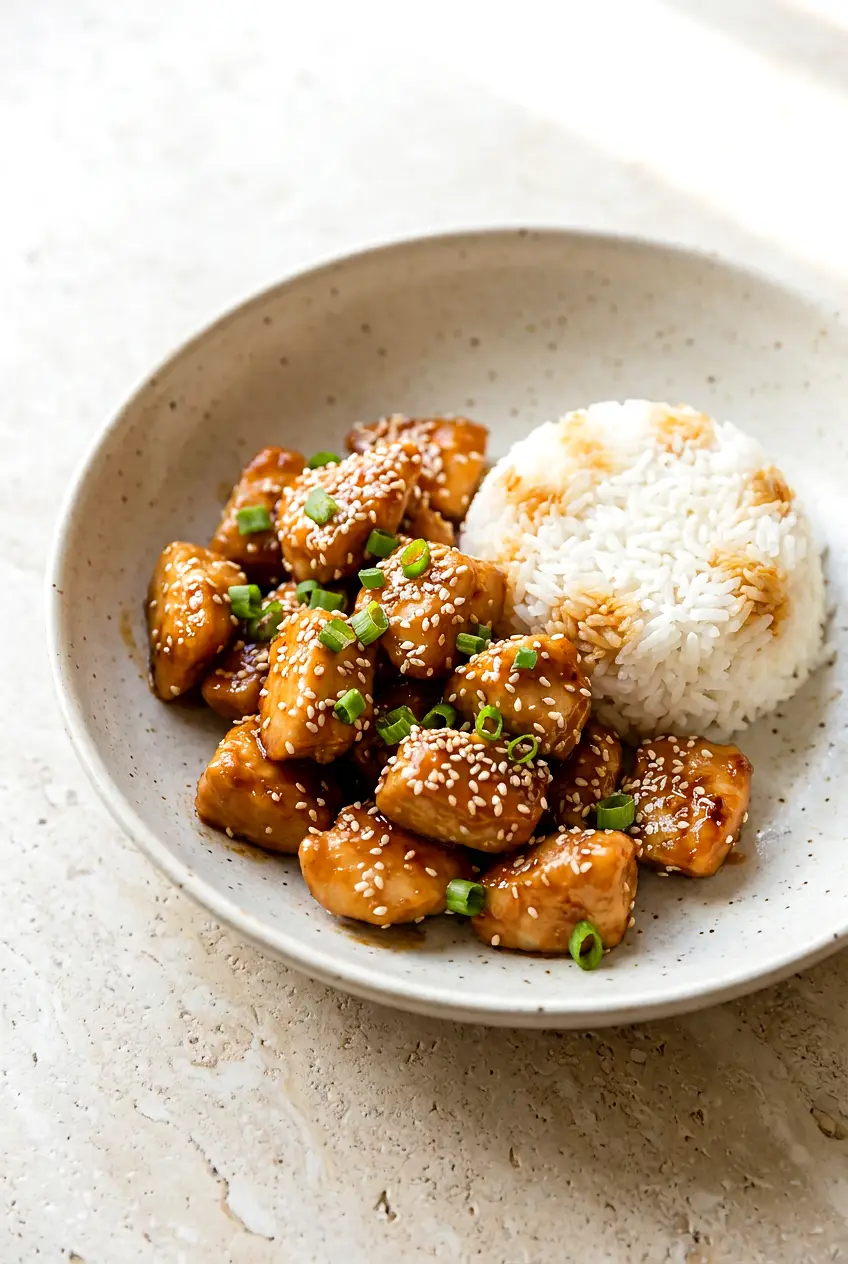
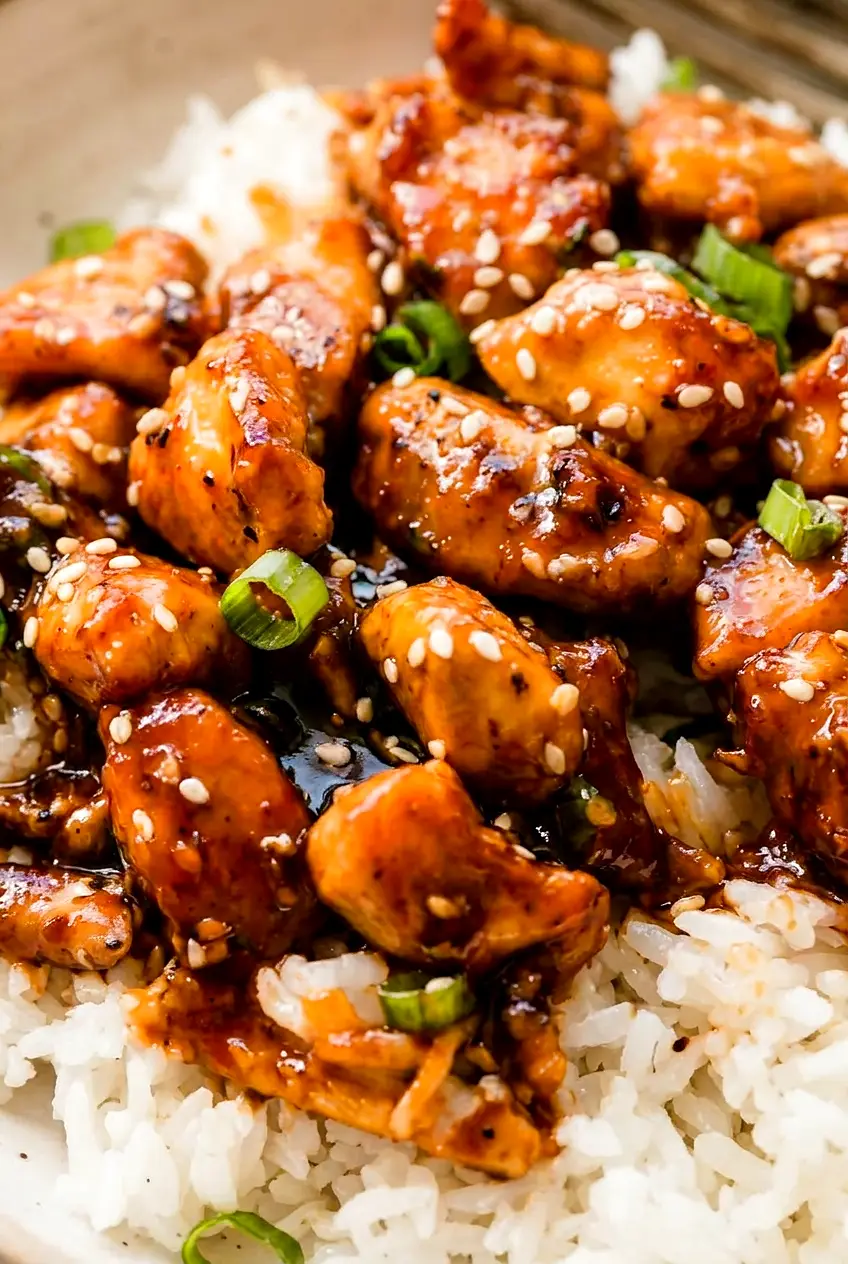
Close-up of sesame chicken pieces coated in glossy sauce with sesame seeds and scallions
  • 1 1/2 pounds boneless skinless chicken breasts or thighs (675g), cut into bite-size pieces
  • 1/4 cup cornstarch or arrowroot starch (30g)
  • 1/3 cup reduced-sodium soy sauce or tamari (80g)
  • 1/4 cup water (60g)
  • 2 to 3 tablespoons honey, monk fruit sweetener, or coconut sugar, to taste
  • 1 tablespoon tomato paste (15g)
  • 2 tablespoons seasoned rice vinegar
  • 1 teaspoon toasted sesame oil
  • 2 to 3 tablespoons avocado oil, for cooking
  • 3 garlic cloves, minced
  • 1 tablespoon fresh ginger, grated
  • 1/4 teaspoon red pepper flakes
  • 1 to 2 tablespoons sesame seeds
  • 2 scallions, sliced
  • Cooked rice or noodles, for serving

Chicken thighs are a little more forgiving and stay juicier. If you use chicken breasts, start checking them early so they do not dry out.

Seasoned rice vinegar already contains some sweetness and salt, so it helps to taste the sauce before using the full 3 tablespoons of sweetener.

How to Make Easy Healthy Sesame Chicken

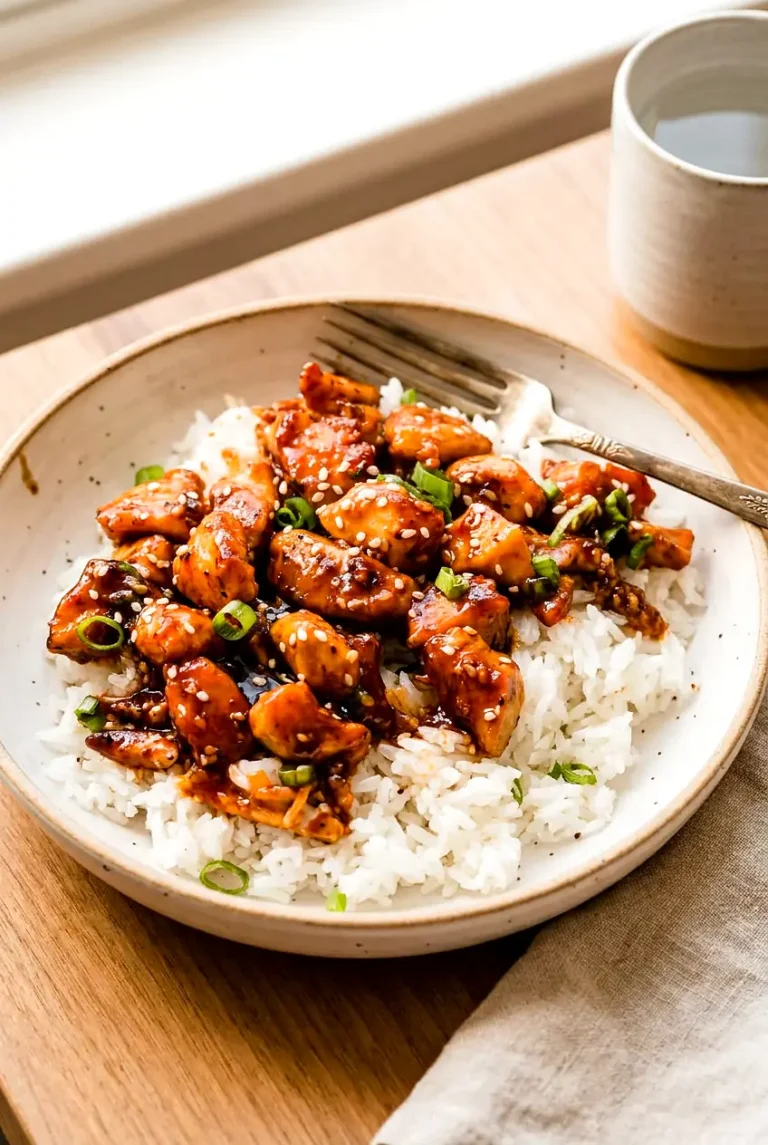
Sesame chicken plated in a shallow bowl with glossy sauce and rice on the side
  1. Prep the chicken and sauce: Pat the chicken dry and cut it into even bite-size pieces. In a bowl, whisk together the soy sauce or tamari, water, sweetener, tomato paste, rice vinegar, and toasted sesame oil until smooth. If you want to thicken the sauce with a slurry, stir 1 teaspoon of the cornstarch or arrowroot with 1 tablespoon water in a small bowl until smooth.
  2. Coat the chicken: Toss the chicken with the remaining cornstarch or arrowroot until lightly and evenly coated. Shake off any excess. The coating should be thin so the chicken browns instead of turning gummy.
  3. Brown the chicken in batches: Heat a large skillet or sauté pan over medium-high heat, then add 2 tablespoons avocado oil. When the oil is hot and the chicken sizzles on contact, add half the chicken in a single layer. Leave it undisturbed for 1 to 2 minutes, then turn and cook until browned in spots and nearly cooked through, about 3 to 5 minutes total per batch, depending on size. Transfer to a plate and repeat with the remaining chicken, adding the last tablespoon of oil if needed.
  4. Cook the aromatics: Reduce the heat to medium. If the pan looks dry, add a small drizzle of oil. Add the garlic, ginger, and red pepper flakes and cook for about 30 seconds, stirring, just until fragrant.
  5. Simmer the sauce: Pour in the sauce mixture and bring it to a gentle simmer. Stir the slurry again, then add it gradually while whisking or stirring. Simmer for 1 to 2 minutes, until the sauce is glossy and lightly thickened enough to coat the back of a spoon. If you are using arrowroot, add it slowly since it thickens quickly.
  6. Finish the chicken: Return the chicken and any juices to the skillet and toss to coat. Cook for 1 to 3 minutes more, just until the chicken is cooked through and the sauce clings to the pieces. The thickest piece should reach 165°F, and the center should be opaque with no pink left.
  7. Garnish and serve: Turn off the heat and sprinkle with sesame seeds and scallions. Serve right away over rice, noodles, or vegetables.

How to Keep the Chicken from Getting Soggy

This recipe is meant to have lightly crisp edges, not a thick fried crust. Pat the chicken dry, preheat the skillet well, and cook in batches so the pieces brown instead of steam. After you add the sauce, serve the chicken soon so the coating stays at its best texture.

Serving Ideas

  • Steamed white rice or brown rice
  • Noodles
  • Cauliflower rice
  • Broccoli, snap peas, or a simple stir-fried vegetable mix

For a lighter chicken option, you may also like Asian Chicken Crunch Salad.

If you want another flavorful chicken dinner, try Peruvian Grilled Chicken with Green Sauce.

How to Store and Reheat Easy Healthy Sesame Chicken

Let leftovers cool, then refrigerate in an airtight container for up to 3 to 4 days. The coating will soften as it sits, so the texture will be less crisp than when freshly cooked.

Reheat gently in a skillet over medium-low heat or in the microwave in short bursts until hot. If the sauce has thickened too much in the refrigerator, add a small splash of water to loosen it.

For better make-ahead texture, keep the cooked chicken and sauce separate when possible and combine them just before serving.

If you want a richer chicken dinner, try Creamy Chicken Thigh Pasta.

Nutrition

Nutrition is approximate and will vary based on ingredient brands, exact sweetener used, oil absorption, and serving size. These numbers are for the chicken and sauce only, not rice, noodles, or vegetables.

  • Serving size: 1/4 of recipe
  • Calories: about 340
  • Protein: 37g
  • Fat: 12g
  • Carbohydrates: 18g
  • Per 100g: about 155 calories, 17g protein, 5g fat, 8g carbohydrates

Easy Healthy Sesame Chicken

A quick skillet sesame chicken with a light starch coating and a glossy sweet-savory sauce flavored with garlic, ginger, and sesame.
Course: Main Course
Cuisine: Asian
Prep: 15 min
Cook: 15 min
Total: 30 min
Servings: 4 Calories: about 340 kcal

Equipment

  • large skillet or sauté pan
  • mixing bowls
  • measuring cups
  • measuring spoons
  • whisk
  • tongs
  • small bowl

Ingredients

For the chicken

  • 1 1/2 lb boneless skinless chicken breasts or thighs (675g), cut into bite-size pieces
  • 1/4 cup cornstarch or arrowroot starch (30g)
  • 2 to 3 tablespoons avocado oil, for cooking

For the sauce

  • 1/3 cup reduced-sodium soy sauce or tamari (80g)
  • 1/4 cup water (60g)
  • 2 to 3 tablespoons honey, monk fruit sweetener, or coconut sugar, to taste
  • 1 tablespoon tomato paste (15g)
  • 2 tablespoons seasoned rice vinegar
  • 1 teaspoon toasted sesame oil
  • 1 teaspoon cornstarch or arrowroot + 1 tablespoon water (optional slurry)

Aromatics & garnish

  • 3 garlic cloves, minced
  • 1 tablespoon fresh ginger, grated
  • 1/4 teaspoon red pepper flakes
  • 1 to 2 tablespoons sesame seeds
  • 2 scallions, sliced

To serve

  • Cooked rice or noodles, for serving

Instructions

  1. Pat the chicken dry and cut into even bite-size pieces.
  2. Whisk together the soy sauce or tamari, water, sweetener, tomato paste, rice vinegar, and toasted sesame oil in a bowl until smooth.
  3. If using a slurry to thicken, stir 1 teaspoon of the cornstarch or arrowroot with 1 tablespoon water in a small bowl until smooth and set aside.
  4. Toss the chicken with the remaining cornstarch or arrowroot until lightly and evenly coated; shake off excess.
  5. Heat a large skillet over medium-high heat and add 2 tablespoons avocado oil.
  6. When the oil is hot and sizzling, add half the chicken in a single layer and leave undisturbed 1 to 2 minutes, then turn and cook until browned in spots and nearly cooked through, about 3 to 5 minutes per batch; transfer to a plate and repeat with remaining chicken, adding more oil if needed.
  7. Reduce heat to medium and add a small drizzle of oil if the pan is dry; add garlic, ginger, and red pepper flakes and cook about 30 seconds until fragrant.
  8. Pour in the sauce mixture and bring to a gentle simmer; whisk in the slurry gradually while stirring and simmer 1 to 2 minutes until glossy and lightly thickened (add slurry slowly if using arrowroot).
  9. Return the chicken and any juices to the skillet and toss to coat; cook 1 to 3 minutes more until chicken is cooked through and sauce clings to pieces (thickest piece should reach 165°F (74°C)).
  10. Turn off the heat, sprinkle with sesame seeds and sliced scallions, and serve immediately over rice or noodles.

Tips

  • Pat chicken very dry before coating to promote browning and prevent sogginess.
  • Cook the chicken in batches so pieces brown instead of steaming.
  • Taste the sauce before adding the maximum sweetener because seasoned rice vinegar may add sweetness.
  • Use thighs for a juicier result; check breasts early to avoid drying out.
  • Add arrowroot slurry slowly because it thickens quickly.

Variations

  • Chicken Thighs: Use boneless skinless chicken thighs for a more forgiving, juicier result.
  • Arrowroot or Alternative Sweeteners: Swap cornstarch with arrowroot and use monk fruit or coconut sugar instead of honey for a different texture or lower-sugar option.

Notes

Store cooled leftovers in an airtight container in the refrigerator for 3 to 4 days. Reheat gently in a skillet over medium-low heat or microwave in short bursts; add a splash of water if the sauce is too thick. Ensure chicken reaches 165°F (74°C). For best texture, keep chicken and sauce separate until serving when making ahead.

Nutrition

Calories: about 340 kcal | Protein: 37 g | Fat: 12 g | Carbohydrates: 18 g

Peruvian Grilled Chicken with Creamy Green Sauce

Peruvian grilled chicken is smoky, garlicky, and bright with lime, and the creamy green sauce brings everything together. Using boneless chicken thighs keeps the recipe simple and helps the chicken stay juicy on the grill.

The method is straightforward: marinate the chicken ahead of time, blend the sauce, and grill until the thickest pieces reach 165°F. Start checking early, since thigh thickness and grill heat can vary quite a bit.

Ingredients for Peruvian Grilled Chicken

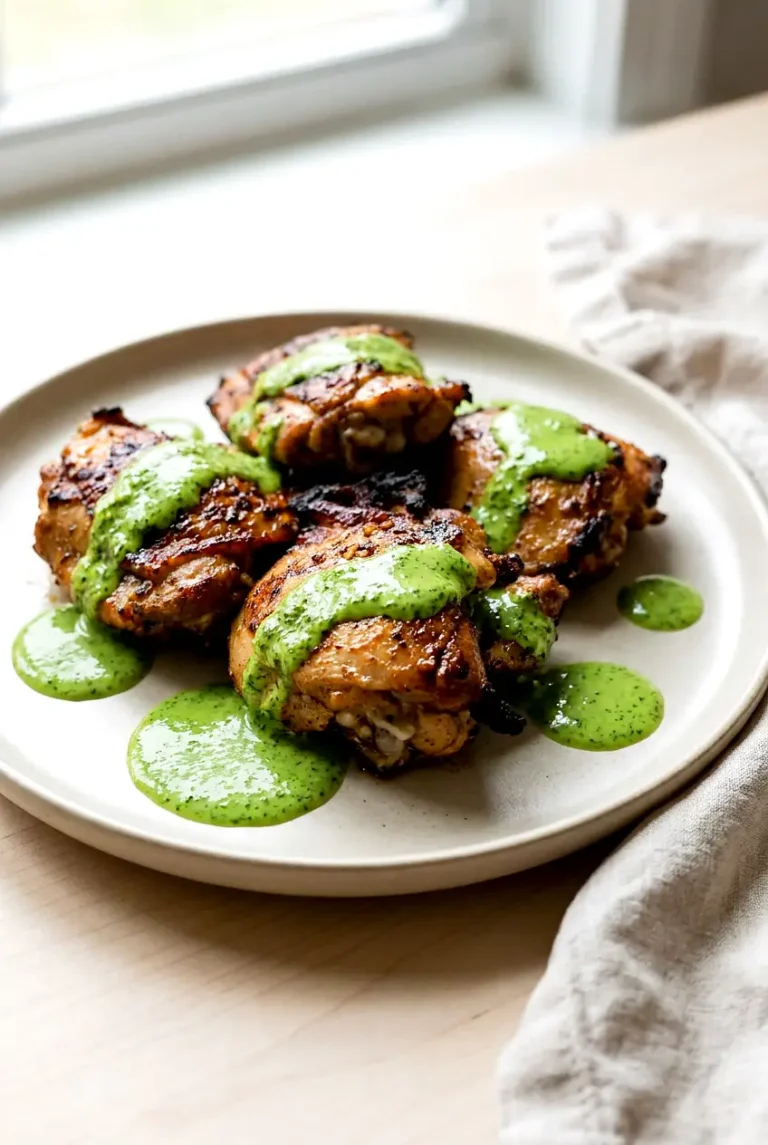
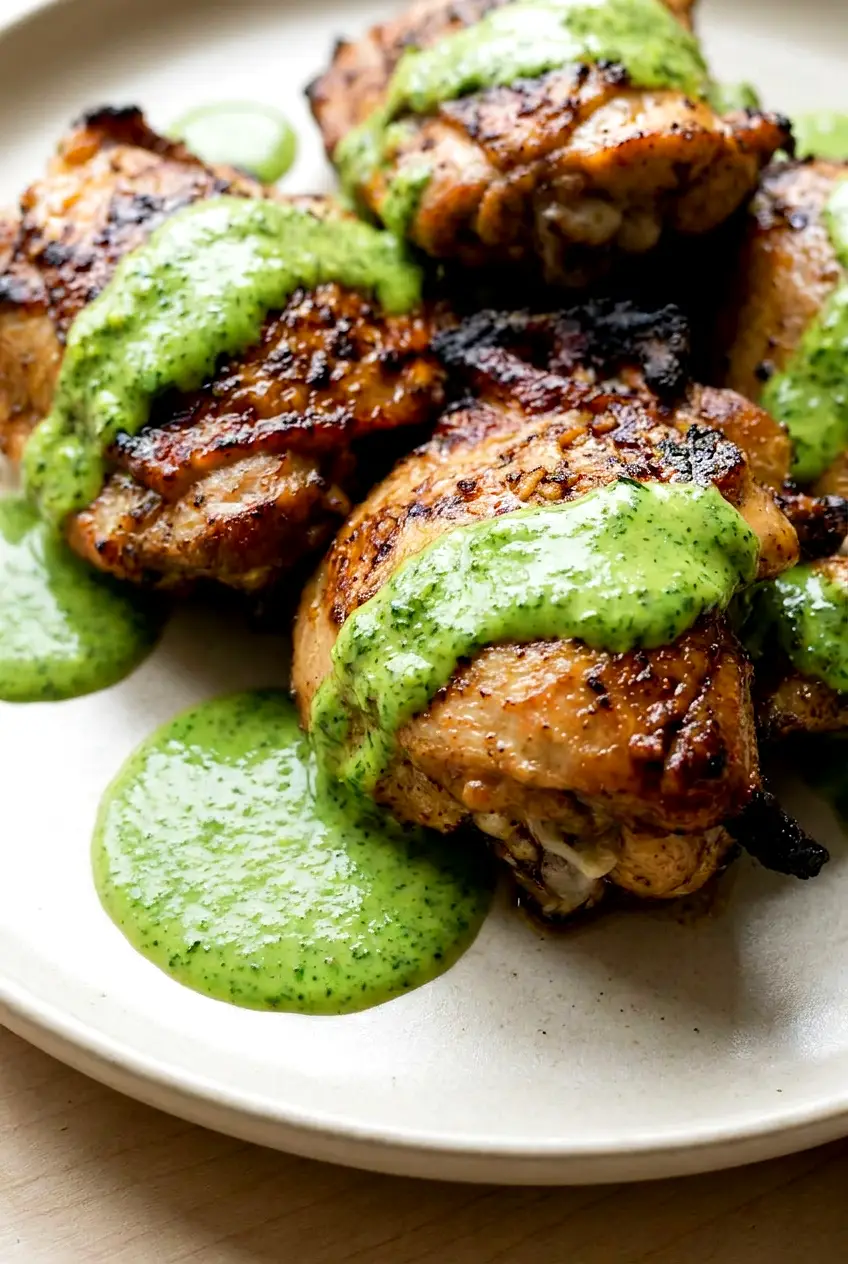
Close-up of grilled chicken with creamy green sauce showing browned edges and juicy texture
  • For the chicken:
  • 2 to 2 1/2 pounds boneless, skinless chicken thighs (about 1.1kg), trimmed if needed
  • 4 cloves garlic, minced or grated
  • 1/4 cup soy sauce
  • 1/4 cup lime juice
  • 2 tablespoons neutral oil
  • 2 teaspoons ground cumin
  • 2 teaspoons paprika
  • 1 teaspoon dried oregano
  • 1 teaspoon black pepper
  • For the creamy green sauce:
  • 2 medium jalapeños, ribs and seeds removed for less heat
  • 1 cup packed fresh cilantro (30g)
  • 4 green onions
  • 1 clove garlic
  • 1/2 cup mayonnaise (115g)
  • 1/2 cup Greek yogurt (115g)
  • 1 to 2 tablespoons olive oil
  • 1 tablespoon lime juice, or to taste
  • Salt, to taste
  • Black pepper, to taste

Boneless thighs are the easiest choice here because they cook quickly and stay moist. For a milder sauce, remove all the jalapeño seeds and ribs before blending.

How to Make Peruvian Grilled Chicken with Creamy Green Sauce

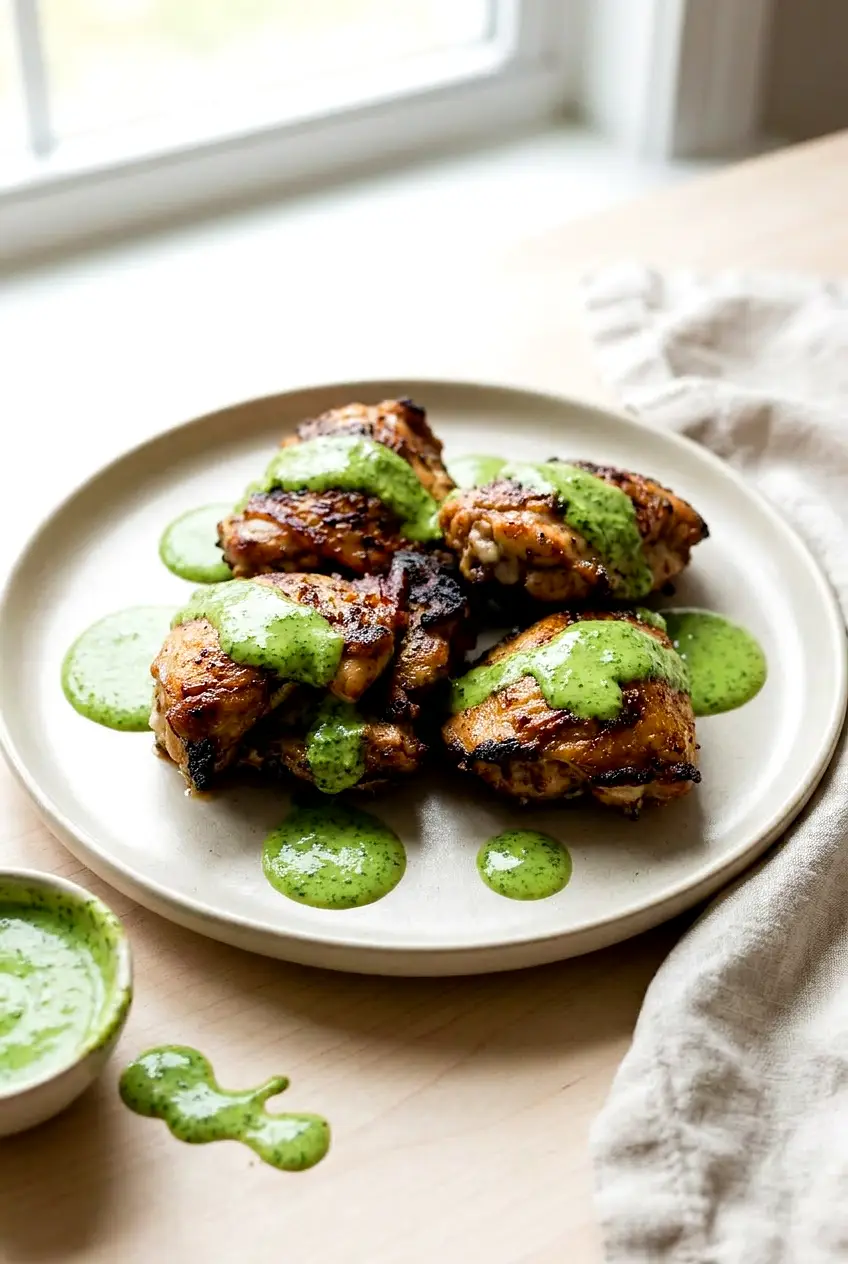
Peruvian grilled chicken served on a plate with green sauce spooned beside it
  1. Mix the marinade: In a large bowl, stir together the garlic, soy sauce, lime juice, neutral oil, cumin, paprika, oregano, and black pepper. Add the chicken thighs and turn to coat well.
  2. Marinate the chicken: Cover and refrigerate for at least 8 hours and up to 24 hours. Turn the chicken once if needed so the pieces stay evenly coated.
  3. Make the green sauce: In a blender or food processor, combine the jalapeños, cilantro, green onions, garlic, mayonnaise, Greek yogurt, lime juice, 1 tablespoon olive oil, a pinch of salt, and a little black pepper. Blend until smooth. If needed, add the remaining olive oil to loosen it. The sauce should be creamy and spoonable, not thin. Taste and adjust the salt, lime, or heat.
  4. Preheat the grill: Heat an outdoor grill or grill pan to medium-high, about 400°F to 450°F. Clean the grates and lightly oil them if needed.
  5. Grill the chicken: Let the excess marinade drip off, then place the chicken on the hot grill with space between the pieces. Grill for 12 to 20 minutes total, flipping once or twice as needed, until browned and the thickest piece reaches 165°F. If some thighs are much thicker than others, remove the thinner pieces first.
  6. Rest the chicken: Transfer the chicken to a plate and let it rest for 5 minutes before slicing or serving.
  7. Serve: Spoon or drizzle the creamy green sauce over the chicken, and serve extra sauce on the side.

How to Keep the Chicken Juicy

Try to keep the thighs close in thickness so they cook more evenly. If needed, lightly flatten the thickest parts before marinating.

Use a hot, clean grill and avoid crowding the pieces. The chicken should sear, not steam. Flip it when it releases easily from the grates, and use an instant-read thermometer instead of relying only on the clock.

Oven Method

You can use the same marinade and sauce if grilling is not an option. Arrange the marinated chicken on a sheet pan and roast until browned and cooked through to 165°F. Start checking early, since thickness and oven performance vary.

What to Serve with Peruvian Grilled Chicken

Serve it with simple sides that let the sauce stand out. Rice and peas are an easy choice, and grilled potato salad makes it a little heartier. Grilled peppers, shishito peppers, green beans, or a wedge salad also work well.

For another chicken dinner with a fresh, crunchy feel, try this Asian Chicken Crunch Salad.

How to Store and Reheat Peruvian Grilled Chicken

Let the chicken cool before storing. Refrigerate the chicken in an airtight container for up to 4 days. Store the green sauce separately in a covered container in the refrigerator for up to 4 days.

The sauce may thicken after chilling, so stir it before serving. Reheat the chicken gently in the oven, in a skillet, or in the microwave just until warmed through so it does not dry out.

This recipe also works well for make-ahead prep. The chicken can marinate up to 24 hours in advance, and the sauce can be blended a day ahead.

If you like cooking with chicken thighs, you may also enjoy Creamy Chicken Thigh Pasta. For another simple chicken dinner with a creamy finish, check out Creamy Chicken Breast Pasta.

Nutrition

Nutrition is approximate and will vary based on ingredient brands, exact amounts, and serving size.

  • Serving size: about 1/4 of the recipe
  • Calories: about 670
  • Protein: 43g
  • Fat: 49g
  • Carbohydrates: 11g
  • Per 100g: about 210 calories, 14g protein, 15g fat, 3g carbohydrates

Peruvian Grilled Chicken with Creamy Green Sauce

Smoky, garlicky marinated chicken thighs grilled and served with a creamy cilantro-jalapeño sauce.
Course: Main Course
Cuisine: Peruvian
Prep: 20 min
Cook: 20 min
Total: 525 min
Servings: 4 Calories: 670 kcal

Equipment

  • grill or grill pan
  • blender or food processor
  • instant-read thermometer
  • large bowl
  • sheet pan (optional for oven method)
  • tongs

Ingredients

For the chicken

  • 2 to 2 1/2 pounds boneless, skinless chicken thighs (about 1.1 kg), trimmed if needed
  • 4 cloves garlic, minced or grated
  • 1/4 cup soy sauce
  • 1/4 cup lime juice
  • 2 tablespoons neutral oil
  • 2 teaspoons ground cumin
  • 2 teaspoons paprika
  • 1 teaspoon dried oregano
  • 1 teaspoon black pepper

For the creamy green sauce

  • 2 medium jalapeños, ribs and seeds removed for less heat
  • 1 cup packed fresh cilantro (30g)
  • 4 green onions
  • 1 clove garlic
  • 1/2 cup mayonnaise (115g)
  • 1/2 cup Greek yogurt (115g)
  • 1 to 2 tablespoons olive oil
  • 1 tablespoon lime juice, or to taste
  • Salt, to taste
  • Black pepper, to taste

Instructions

  1. In a large bowl stir together the garlic, soy sauce, lime juice, neutral oil, cumin, paprika, oregano, and black pepper.
  2. Add the chicken thighs to the bowl and turn to coat well.
  3. Cover and refrigerate the chicken for at least 8 hours and up to 24 hours, turning once if needed.
  4. Combine the jalapeños, cilantro, green onions, garlic, mayonnaise, Greek yogurt, lime juice, 1 tablespoon olive oil, a pinch of salt, and a little black pepper in a blender or food processor and blend until smooth; add the remaining olive oil if needed to loosen the sauce and adjust seasoning to taste.
  5. Heat an outdoor grill or grill pan to medium-high, about 400°F to 450°F (204°C to 232°C); clean and lightly oil the grates if needed.
  6. Let excess marinade drip off the chicken, then place the pieces on the hot grill with space between them.
  7. Grill the chicken for 12 to 20 minutes total, flipping once or twice as needed, until browned and the thickest piece reaches 165°F (74°C); remove thinner pieces earlier if they finish first.
  8. Transfer the chicken to a plate and let it rest for 5 minutes before slicing or serving.
  9. Spoon or drizzle the creamy green sauce over the chicken and serve extra sauce on the side.
  10. Alternatively, arrange the marinated chicken on a sheet pan and roast in the oven until browned and cooked through to 165°F (74°C).

Tips

  • Keep thighs similar in thickness for even cooking; gently flatten the thickest parts if needed.
  • Use a hot, clean grill and avoid crowding the pieces so they sear rather than steam.
  • Flip the chicken when it releases easily from the grates.
  • Use an instant-read thermometer and remove chicken at 165°F (74°C).
  • Remove jalapeño seeds and ribs for a milder sauce.

Variations

  • Oven-Baked Peruvian Chicken: Use the same marinade and sauce and roast the marinated thighs on a sheet pan until they reach 165°F (74°C) instead of grilling.
  • Milder Green Sauce: Remove all jalapeño seeds and ribs before blending for a gentler heat.

Notes

Store cooled chicken and sauce separately in airtight containers in the refrigerator for up to 4 days; stir the sauce if it thickens after chilling and reheat chicken gently to avoid drying. Marinate up to 24 hours.

Nutrition

Calories: 670 kcal | Protein: 43 g | Fat: 49 g | Carbohydrates: 11 g | Per100g Calories: 210 kcal | Per100g Protein: 14 g | Per100g Fat: 15 g | Per100g Carbohydrates: 3 g

Asian Chicken Crunch Salad

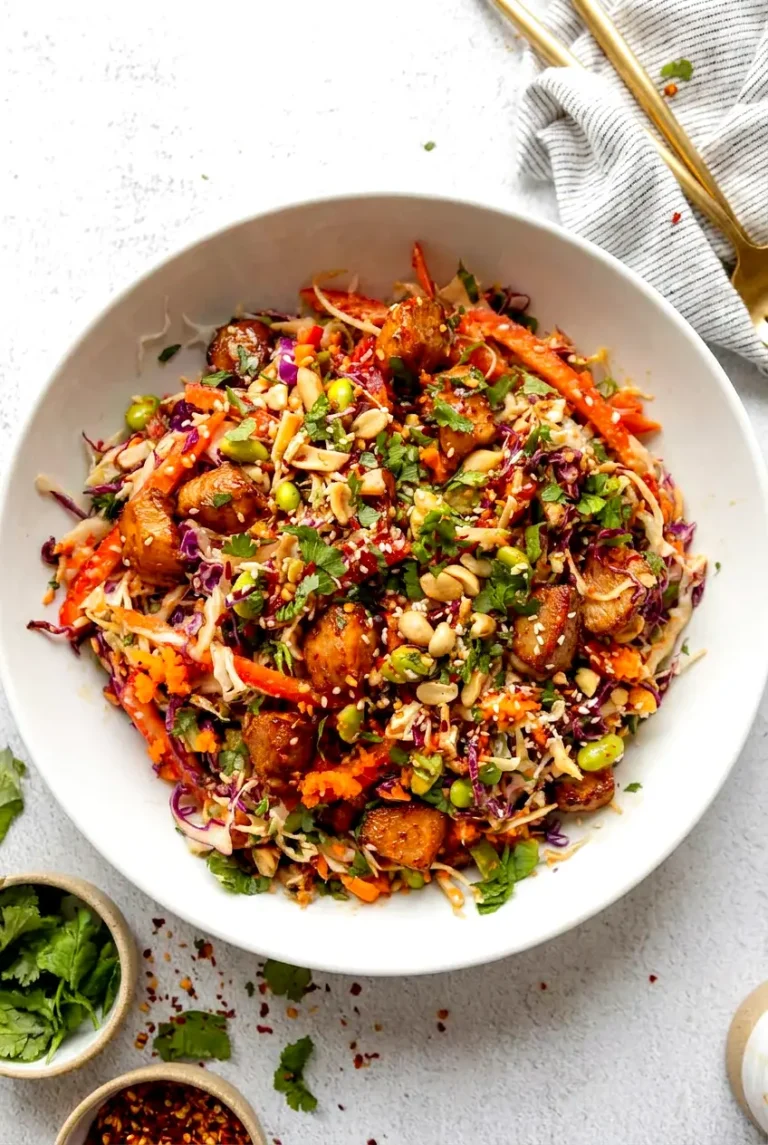
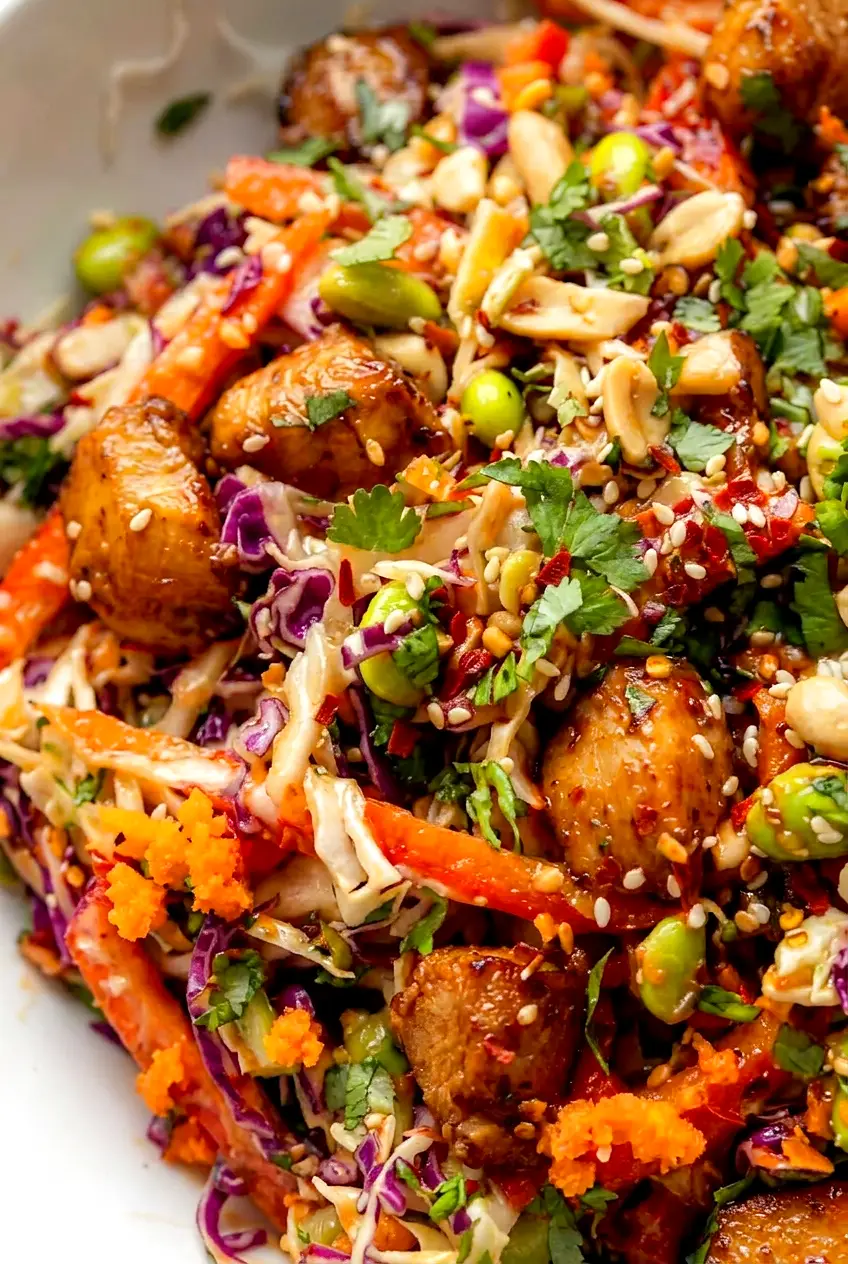
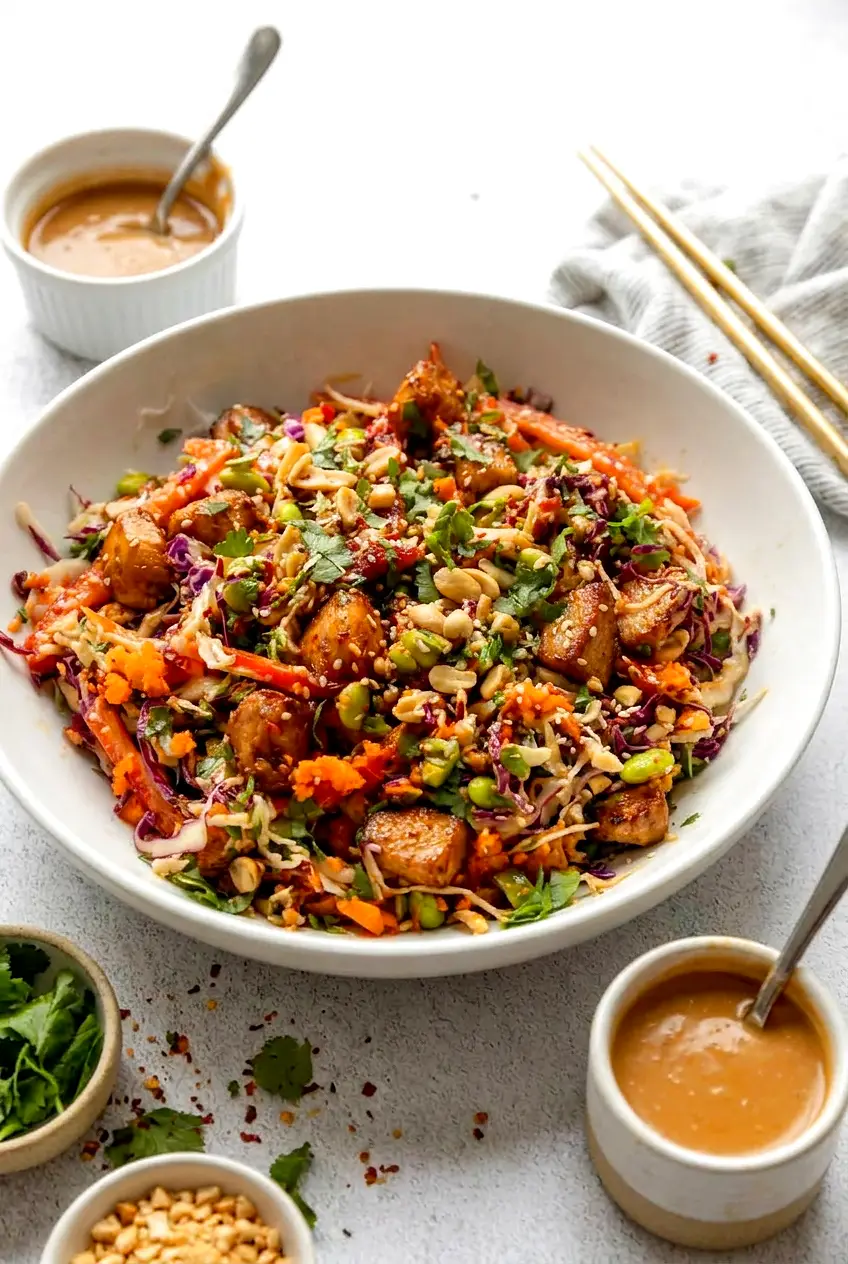
Asian chicken crunch salad is crisp, filling, and easy to pull together with a skillet and one big bowl. The mix of cabbage, carrots, bell pepper, edamame, and chicken gives it plenty of texture, and the creamy peanut dressing ties everything together.

The method is simple: marinate the chicken while you prep the vegetables, sear it in a skillet until browned and cooked through, then toss the salad just before serving. For the best crunch, keep the dressing separate until the last minute.

Ingredients for Asian Chicken Crunch Salad

Close-up of Asian chicken crunch salad with peanut dressing coating crisp cabbage and chicken
  • 1 1/2 pounds boneless, skinless chicken breasts or thighs (about 675g)
  • 3 tablespoons soy sauce or tamari
  • 1 tablespoon toasted sesame oil
  • 2 tablespoons rice vinegar
  • 1 tablespoon brown sugar
  • 1 tablespoon tahini
  • 1 to 2 teaspoons sriracha
  • 1/2 cup creamy peanut butter (about 130g)
  • 4 cups shredded green cabbage (about 280g)
  • 2 cups shredded purple cabbage (about 140g)
  • 1 1/2 cups shredded or julienned carrots (about 165g)
  • 1 cup thinly sliced bell pepper (about 120g)
  • 1 cup shelled edamame, thawed if frozen (about 155g)
  • 1/2 cup chopped cilantro (about 15g)
  • 1/4 cup sliced green onions (about 25g)
  • 1 to 2 tablespoons water, as needed for thinning the dressing
  • 1 to 2 teaspoons neutral oil for the skillet

Optional for serving: chopped peanuts or cashews, sesame seeds, wonton strips, or chopped almonds.

How to Make Asian Chicken Crunch Salad

Asian chicken crunch salad served in a wide bowl with colorful cabbage and sliced chicken
  1. Make the marinade base: In a medium bowl, whisk together the soy sauce or tamari, sesame oil, rice vinegar, brown sugar, tahini, and sriracha until smooth. Set aside about 1/4 cup for the dressing and optional glaze. Add the chicken to the remaining marinade and turn to coat. Let it sit while you prep the salad, about 10 to 15 minutes.
  2. Prep the vegetables: Add the green cabbage, purple cabbage, carrots, bell pepper, edamame, cilantro, and green onions to a large bowl. Leave the salad undressed for now so it stays crisp.
  3. Cook the chicken: Heat a large skillet over medium to medium-high heat and add the neutral oil. Arrange the chicken in a single layer, working in batches if needed. Cook until browned on both sides and the thickest piece reaches 165°F, about 10 to 15 minutes depending on thickness.
  4. Rest and slice: Transfer the chicken to a cutting board and let it rest for a few minutes. Slice into bite-size strips or pieces.
  5. Make the peanut dressing: Whisk the peanut butter into the reserved marinade mixture. Add water a little at a time until the dressing is smooth and pourable.
  6. Make the optional glaze: If you want a glaze for the chicken, simmer a few spoonfuls of the reserved marinade mixture in a small saucepan or the empty skillet over medium heat for 2 to 4 minutes, until bubbling and lightly thickened. Use it only after it has been fully simmered.
  7. Assemble the salad: Pour the dressing over the cabbage mixture and toss just until coated. Top with the sliced chicken and drizzle with the cooked glaze if using.
  8. Finish and serve: Add any optional toppings right before serving for the best texture.

How to Keep the Salad Crisp

Cabbage holds up much better than lettuce, which makes this a good choice for lunch prep or leftovers. Even so, it stays crunchiest when the dressing is added right before serving.

If you are making it ahead, store the chopped vegetables, cooked chicken, and dressing separately. Toss only the portion you plan to eat.

How to Cook the Chicken Without Drying It Out

Use a wide skillet and avoid crowding the pan so the chicken browns instead of steaming. Start checking the thickest piece early if your chicken pieces are small or thin.

Chicken thighs are a little more forgiving and stay juicier, while chicken breasts are leaner. Either works well here as long as you pull the chicken once it reaches 165°F and let it rest before slicing.

Simple Variations

Chicken Crunch Wrap

Use the finished salad as filling for tortillas or wraps. Dress the salad lightly so the wraps do not turn soggy.

Rice Noodle Crunch Salad

Add 4 to 6 ounces of cooked and cooled rice noodles for a more filling salad. Cool them fully before tossing so they do not soften the vegetables.

How to Store Asian Chicken Crunch Salad

Store leftovers in an airtight container in the refrigerator for up to 3 to 4 days. Let the chicken cool before storing. If possible, keep the dressing separate so the vegetables stay crisper.

If the salad is already dressed, the cabbage will soften some over time, but it still holds up better than a lettuce-based salad. Chilled cooked chicken can be added straight from the refrigerator, or you can reheat it gently just until warmed through so it does not dry out.

For make-ahead prep, cook the chicken and mix the dressing in advance, then refrigerate them separately from the chopped vegetables.

If you want more ideas for flavorful chicken, check out this Chicken Breast Marinade Recipe.

If you want a warmer chicken dinner after this salad, try Creamy Chicken Thigh Pasta.

For another easy chicken dinner, you might also like Creamy Chicken Breast Pasta.

Nutrition

Nutrition is approximate and will vary based on ingredient brands, exact amounts, and serving size.

  • Serving size: about 1/4 of the recipe
  • Calories: about 530
  • Protein: 43g
  • Fat: 28g
  • Carbohydrates: 24g
  • Per 100g: about 135 calories, 11g protein, 7g fat, 6g carbohydrates

Asian Chicken Crunch Salad

Crisp cabbage-based salad with seared marinated chicken and a creamy peanut dressing.
Course: Salad
Cuisine: Asian
Prep: 15 min
Cook: 15 min
Total: 45 min
Servings: 4 Calories: about 530 kcal

Equipment

  • large bowl
  • large skillet
  • small saucepan
  • cutting board
  • knife
  • whisk

Ingredients

For the chicken and marinade

  • 1 1/2 pounds boneless, skinless chicken breasts or thighs (about 675g)
  • 3 tablespoons soy sauce or tamari
  • 1 tablespoon toasted sesame oil
  • 2 tablespoons rice vinegar
  • 1 tablespoon brown sugar
  • 1 tablespoon tahini
  • 1 to 2 teaspoons sriracha
  • 1 to 2 teaspoons neutral oil for the skillet

For the salad

  • 4 cups shredded green cabbage (about 280g)
  • 2 cups shredded purple cabbage (about 140g)
  • 1 1/2 cups shredded or julienned carrots (about 165g)
  • 1 cup thinly sliced bell pepper (about 120g)
  • 1 cup shelled edamame, thawed if frozen (about 155g)
  • 1/2 cup chopped cilantro (about 15g)
  • 1/4 cup sliced green onions (about 25g)

For the peanut dressing

  • 1/2 cup creamy peanut butter (about 130g)
  • about 1/4 cup reserved marinade
  • 1 to 2 tablespoons water, as needed to thin

Optional toppings

  • chopped peanuts or cashews (optional)
  • sesame seeds (optional)
  • wonton strips (optional)
  • chopped almonds (optional)

Instructions

  1. Whisk together the soy sauce or tamari, sesame oil, rice vinegar, brown sugar, tahini, and sriracha until smooth.
  2. Reserve about 1/4 cup of the marinade for the dressing and optional glaze, then add the chicken to the remaining marinade and turn to coat; let sit 10 to 15 minutes while you prep.
  3. Add the green cabbage, purple cabbage, carrots, bell pepper, edamame, cilantro, and green onions to a large bowl and leave undressed.
  4. Heat a large skillet over medium to medium-high heat and add the neutral oil.
  5. Arrange the chicken in a single layer and cook, working in batches if needed, until browned and the thickest piece reaches 165°F (74°C), about 10 to 15 minutes depending on thickness.
  6. Transfer the chicken to a cutting board and let rest for a few minutes, then slice into bite-size strips or pieces.
  7. Whisk the peanut butter into the reserved marinade and add water a little at a time until the dressing is smooth and pourable.
  8. If using a glaze, simmer a few spoonfuls of the reserved marinade in a small saucepan or the empty skillet over medium heat for 2 to 4 minutes until bubbling and lightly thickened; cool slightly before using.
  9. Pour the dressing over the cabbage mixture and toss just until coated.
  10. Top the dressed salad with the sliced chicken and drizzle with the cooked glaze if using.
  11. Add any optional toppings right before serving for best texture.

Tips

  • Keep the dressing separate until just before serving to maintain maximum crunch.
  • Store chopped vegetables, cooked chicken, and dressing separately for make-ahead meals.
  • Avoid crowding the skillet so the chicken browns instead of steaming.
  • Use thighs for a juicier result or breasts for a leaner salad.
  • Let cooked chicken rest before slicing to retain juices.

Variations

  • Chicken Crunch Wrap: Use the finished salad as filling for tortillas or wraps; dress lightly to avoid soggy wraps.
  • Rice Noodle Crunch Salad: Add 4 to 6 ounces of cooked and cooled rice noodles for a more filling salad; cool fully before tossing to prevent softening the vegetables.

Notes

Store leftovers in an airtight container for up to 3–4 days; keep dressing separate to preserve crunch. Reheat chicken gently or serve chilled. Ensure chicken reaches 165°F (74°C) for safety.

Nutrition

Calories: about 530 kcal | Protein: 43 g | Fat: 28 g | Carbohydrates: 24 g

Creamy Chicken Thigh Pasta

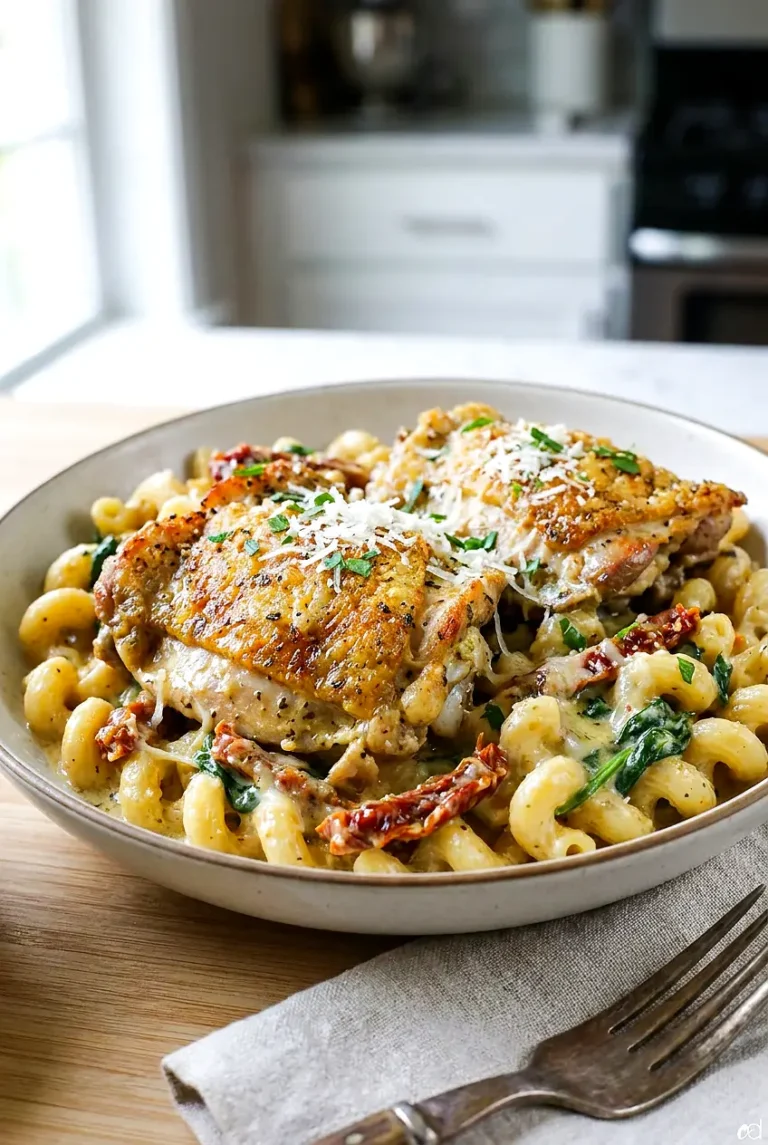
This skillet pasta is rich, savory, and practical enough for a weeknight dinner. Chicken thighs brown in the pan first, then the pasta cooks right in a garlicky sun-dried tomato cream sauce with spinach and Parmesan.

The method is straightforward and keeps cleanup simple. Use a wide skillet so the chicken browns instead of steams, then keep the sauce at a gentle simmer so the pasta turns tender without the cream reducing too fast.

Ingredients for Creamy Chicken Thigh Pasta

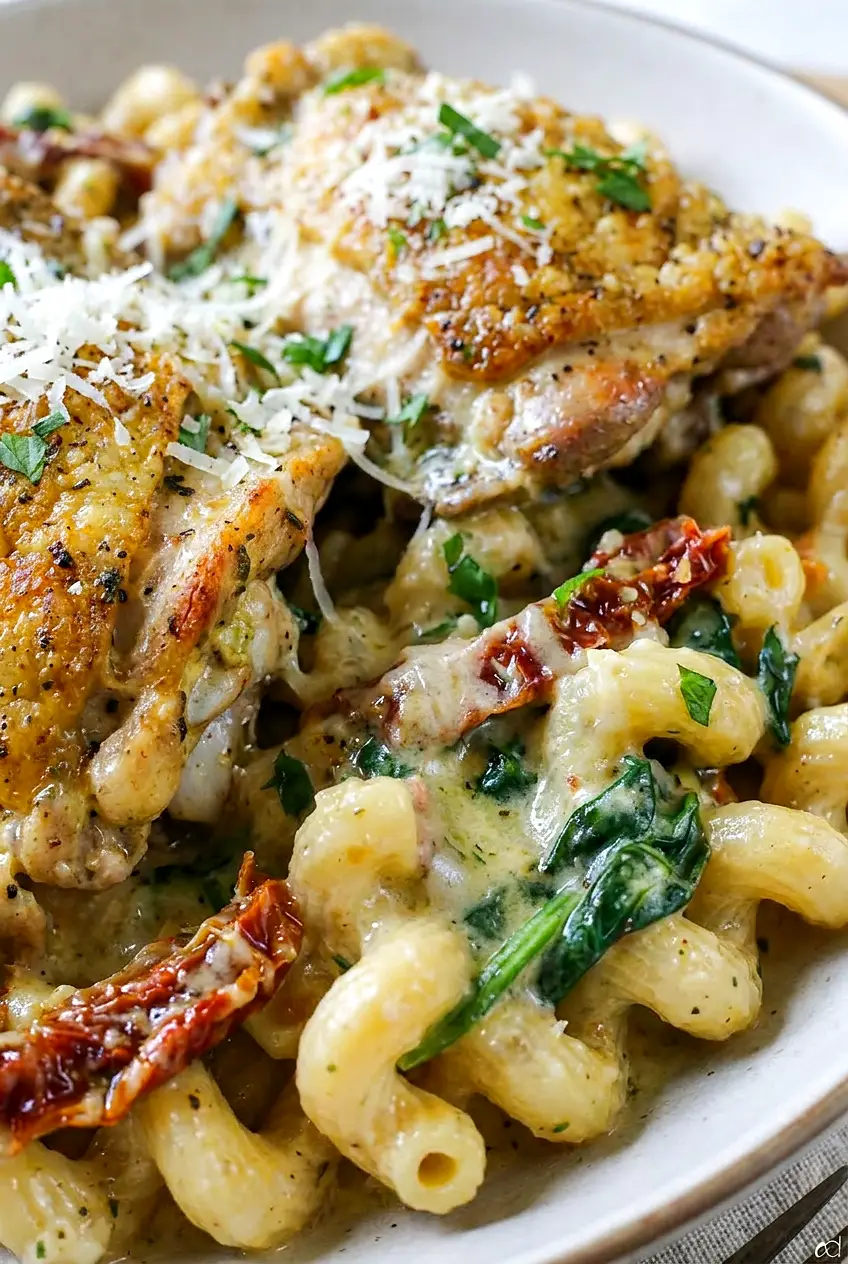
Close-up of creamy chicken thigh pasta showing glossy sauce, tender pasta, and grated Parmesan.
  • 1 1/2 to 2 pounds boneless skin-on chicken thighs (about 675g to 900g), patted dry
  • 1 to 1 1/2 teaspoons kosher salt, plus more to taste
  • 1/2 to 1 teaspoon black pepper
  • 1 to 2 tablespoons olive oil
  • 2 tablespoons butter
  • 1 small yellow onion, diced (about 150g)
  • 5 to 6 cloves garlic, minced (about 20g)
  • 1/2 cup chopped sun-dried tomatoes packed in oil (about 70g)
  • 1/2 cup dry white wine (about 120g)
  • 2 cups chicken stock (about 480g), plus more as needed
  • 1 1/2 cups half-and-half or heavy cream (about 360g)
  • 10 to 12 ounces cavatappi pasta (about 340g)
  • 3 to 4 cups baby spinach (about 90g)
  • 1/2 to 3/4 cup freshly grated Parmesan or Parmigiano-Reggiano (about 50g)
  • 2 to 3 tablespoons chopped fresh parsley or basil

Optional: 1/4 to 1/2 teaspoon red pepper flakes for a little heat.

How to Make Chicken Thigh Pasta

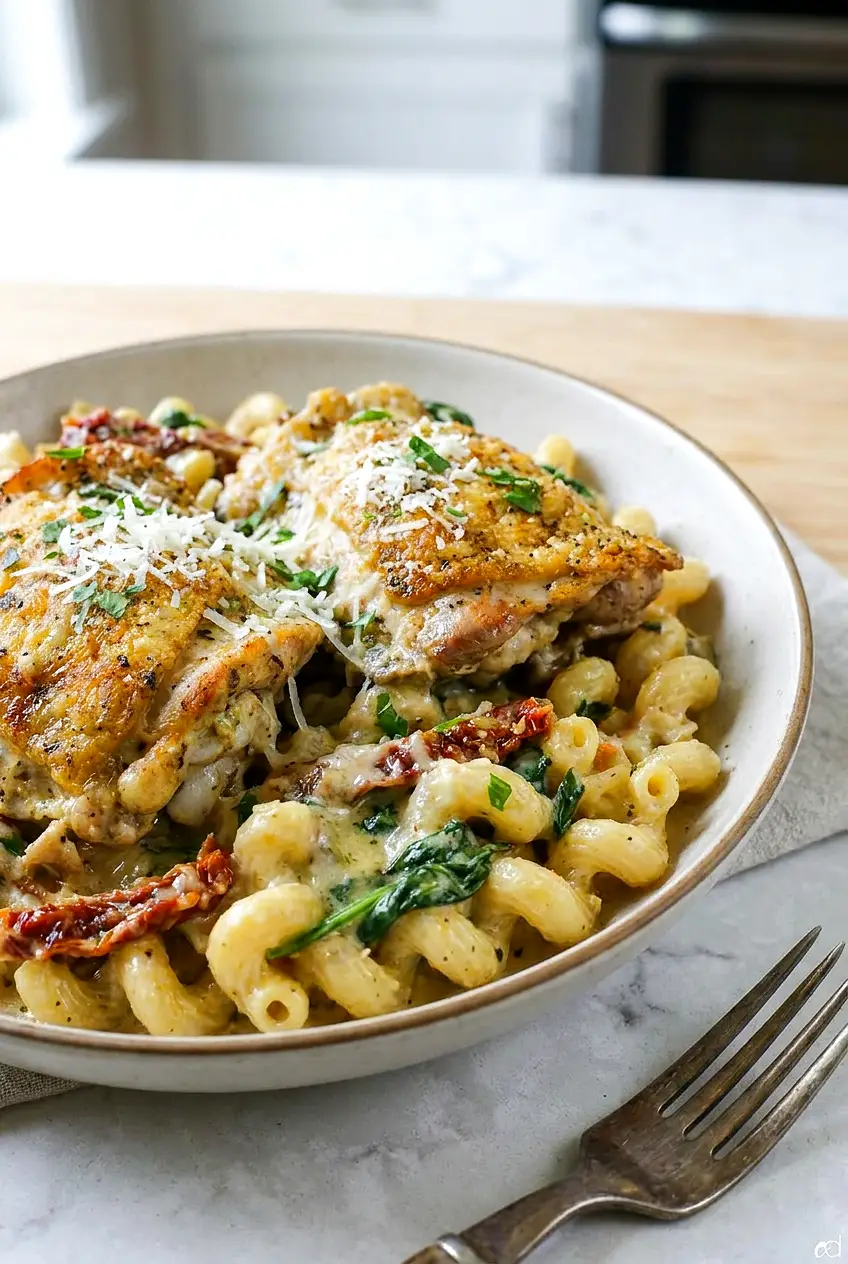
Creamy chicken thigh pasta in a shallow bowl with cavatappi, sun-dried tomatoes, and wilted spinach.
  1. Season the chicken: Pat the chicken thighs dry and season both sides with the salt and black pepper.
  2. Sear the chicken: Heat a large deep 12-inch skillet or sauté pan over medium-high heat. Add 1 tablespoon olive oil, then place the chicken skin-side down in the pan. Cook for 5 to 7 minutes, mostly undisturbed, until the skin is well browned and some fat has rendered. Flip and cook for 3 to 5 minutes more, until nearly cooked through. Transfer to a plate. If needed, cook in batches so the pan does not get crowded.
  3. Cook the aromatics: Reduce the heat to medium. If the skillet looks very greasy, spoon off some fat and leave enough to cook the onion. Add the butter and onion with a small pinch of salt. Cook for 3 to 4 minutes, stirring occasionally, until softened. Add the garlic and sun-dried tomatoes and cook for 30 to 60 seconds, just until fragrant. Stir in the red pepper flakes here if using.
  4. Deglaze the pan: Pour in the white wine and scrape up the browned bits with a wooden spoon. Simmer for 1 to 2 minutes, until the wine smells less sharp and reduces slightly.
  5. Add the liquids: Stir in the chicken stock and half-and-half or cream. Bring to a gentle simmer over medium heat.
  6. Cook the pasta: Add the cavatappi and stir so it is mostly submerged. Keep the sauce at a gentle simmer, not a hard boil, and cook for 10 to 15 minutes, stirring often so the pasta does not stick. If the skillet starts to look dry before the pasta is tender, add extra stock in small splashes.
  7. Finish the chicken: Nestle the chicken thighs back into the skillet. Simmer for 3 to 5 minutes more, until the chicken reaches 165°F in the thickest part and the pasta is tender with a little bite left.
  8. Add the spinach and cheese: Lower the heat to low or medium-low. Stir in the spinach a handful at a time until wilted. Add the Parmesan gradually, stirring between additions so it melts smoothly into the sauce.
  9. Taste and serve: Taste the sauce before adding more salt, since the stock, sun-dried tomatoes, and cheese all add seasoning. Add more pepper if needed, then finish with parsley or basil. Serve right away while the sauce is still loose and glossy.

How to Keep the Sauce Smooth

Once the cream is in the skillet, avoid a hard boil. If the heat is too high, the sauce can reduce too quickly or turn grainy when the cheese is added. Lower the heat before stirring in the Parmesan, and use freshly grated cheese if possible for the smoothest finish.

Easy Swaps

You can use boneless skinless chicken thighs if needed. They will still work well, but you will lose some rendered fat and the browned skin. Chicken breast also works with a shorter cooking time, but it dries out more easily, so check it closely and remove it once it reaches 165°F. If you want a similar pasta dinner made with chicken breast instead, try Creamy Chicken Breast Pasta. For a simple flavor boost before cooking chicken breast, this Chicken Breast Marinade Recipe can help.

Cavatappi can be replaced with another short pasta shape like penne, rotini, or fusilli. If you do not want to use wine, replace it with extra stock and finish the dish with a small splash of lemon juice.

Serving Ideas

  • A simple green salad with vinaigrette
  • Garlic bread or crusty bread
  • Extra Parmesan and fresh herbs at the table

How to Store and Reheat Chicken Thigh Pasta

Let leftovers cool, then refrigerate in an airtight container for up to 3 to 4 days. The pasta will absorb more sauce as it sits, so it will thicken in the fridge.

Reheat gently on the stovetop or in the microwave with a splash of chicken stock, water, or cream to loosen the sauce. Stir as it warms and avoid overheating, which can dry out the chicken and make the sauce separate.

If you want to prep ahead, chop the onion, garlic, herbs, and sun-dried tomatoes in advance. The finished pasta is best served fresh, but if you know you will reheat it later, leave the sauce slightly looser at the end.

Nutrition

Nutrition is approximate and will vary based on ingredient brands, exact amounts, and serving size.

  • Serving size: about 1/4 of the recipe
  • Calories: about 815
  • Protein: 39g
  • Fat: 46g
  • Carbohydrates: 49g
  • Per 100g: about 205 calories, 10g protein, 12g fat, 12g carbohydrates

Creamy Chicken Thigh Pasta

Skillet pasta with browned chicken thighs in a garlicky sun-dried tomato cream sauce with spinach and Parmesan.
Course: Main Course
Cuisine: Italian
Prep: 15 min
Cook: 35 min
Total: 50 min
Servings: 4 Calories: 815 kcal

Equipment

  • 12-inch skillet
  • wooden spoon
  • tongs
  • measuring cups
  • instant-read thermometer
  • cheese grater

Ingredients

For the chicken

  • 1 1/2 to 2 pounds boneless skin-on chicken thighs (about 675–900g), patted dry
  • 1 to 1 1/2 teaspoons kosher salt, plus more to taste
  • 1/2 to 1 teaspoon black pepper
  • 1 to 2 tablespoons olive oil

For the sauce and pasta

  • 2 tablespoons butter
  • 1 small yellow onion, diced (about 150g)
  • 5 to 6 cloves garlic, minced (about 20g)
  • 1/2 cup chopped sun-dried tomatoes packed in oil (about 70g)
  • 1/2 cup dry white wine (about 120g)
  • 2 cups chicken stock (about 480g), plus more as needed
  • 1 1/2 cups half-and-half or heavy cream (about 360g)
  • 10 to 12 ounces cavatappi pasta (about 340g)

To finish

  • 3 to 4 cups baby spinach (about 90g)
  • 1/2 to 3/4 cup freshly grated Parmesan or Parmigiano-Reggiano (about 50g)
  • 2 to 3 tablespoons chopped fresh parsley or basil
  • Optional: 1/4 to 1/2 teaspoon red pepper flakes

Instructions

  1. Pat the chicken thighs dry and season both sides with salt and black pepper.
  2. Heat a large deep 12-inch skillet over medium-high heat and add 1 tablespoon olive oil.
  3. Place the chicken skin-side down and cook for 5 to 7 minutes mostly undisturbed until well browned; flip and cook 3 to 5 minutes more until nearly cooked through. Transfer chicken to a plate and cook in batches if needed.
  4. Reduce heat to medium and, if the skillet is very greasy, spoon off excess fat leaving enough to cook the onion.
  5. Add the butter and diced onion with a small pinch of salt; cook 3 to 4 minutes until softened.
  6. Add the minced garlic and chopped sun-dried tomatoes and cook 30 to 60 seconds until fragrant; stir in red pepper flakes if using.
  7. Pour in the white wine and scrape up browned bits, then simmer 1 to 2 minutes until the wine reduces slightly.
  8. Stir in the chicken stock and half-and-half or cream and bring to a gentle simmer over medium heat.
  9. Add the cavatappi and stir so it is mostly submerged; maintain a gentle simmer and cook 10 to 15 minutes, stirring often so the pasta does not stick, adding extra stock in small splashes if the skillet looks dry before the pasta is tender.
  10. Nestle the chicken thighs back into the skillet and simmer 3 to 5 minutes more, until the chicken reaches 165°F (74°C) in the thickest part and the pasta is tender with a little bite left.
  11. Lower the heat to low or medium-low and stir in the spinach a handful at a time until wilted.
  12. Add the Parmesan gradually, stirring between additions so it melts smoothly into the sauce.
  13. Taste and adjust seasoning, add more pepper if needed, finish with chopped parsley or basil, and serve immediately while the sauce is loose and glossy.

Tips

  • Use a wide skillet so the chicken browns instead of steams.
  • Keep the sauce at a gentle simmer to prevent the cream from reducing too quickly or turning grainy.
  • Spoon off excess fat from the skillet if it looks very greasy before cooking the onion.
  • Add extra chicken stock in small splashes if the pasta looks dry before it’s tender.
  • Lower the heat and use freshly grated Parmesan before stirring it in for a smoother sauce.

Variations

  • Boneless skinless thighs: Use boneless skinless chicken thighs; expect less rendered fat and slightly different browning.
  • Chicken breast: Use chicken breast with shorter cooking time and remove once it reaches 165°F (74°C) to avoid drying.
  • No wine: Replace the white wine with extra chicken stock and finish with a small splash of lemon juice.
  • Different pasta shapes: Swap cavatappi for penne, rotini, or fusilli if preferred.

Notes

Store leftovers in an airtight container in the refrigerator for 3 to 4 days. Reheat gently with a splash of chicken stock, water, or cream to loosen the sauce. Ensure chicken reaches 165°F (74°C) for safety.

Nutrition

Calories: 815 kcal | Protein: 39 g | Fat: 46 g | Carbohydrates: 49 g

Creamy Chicken Breast Pasta

This creamy chicken pasta has tender sliced chicken, a simple garlic-Parmesan sauce, and enough lemon and herbs to keep it from feeling too heavy. It uses a short pasta shape that catches the sauce well and comes together in a practical stovetop method.

Cook the pasta first, brown the chicken in a wide skillet, then build the sauce in the same pan. The two main things to watch are the chicken thickness for even cooking and the sauce heat once the Parmesan goes in. Keep it at a gentle simmer so the sauce stays smooth.

Ingredients for Creamy Chicken Pasta

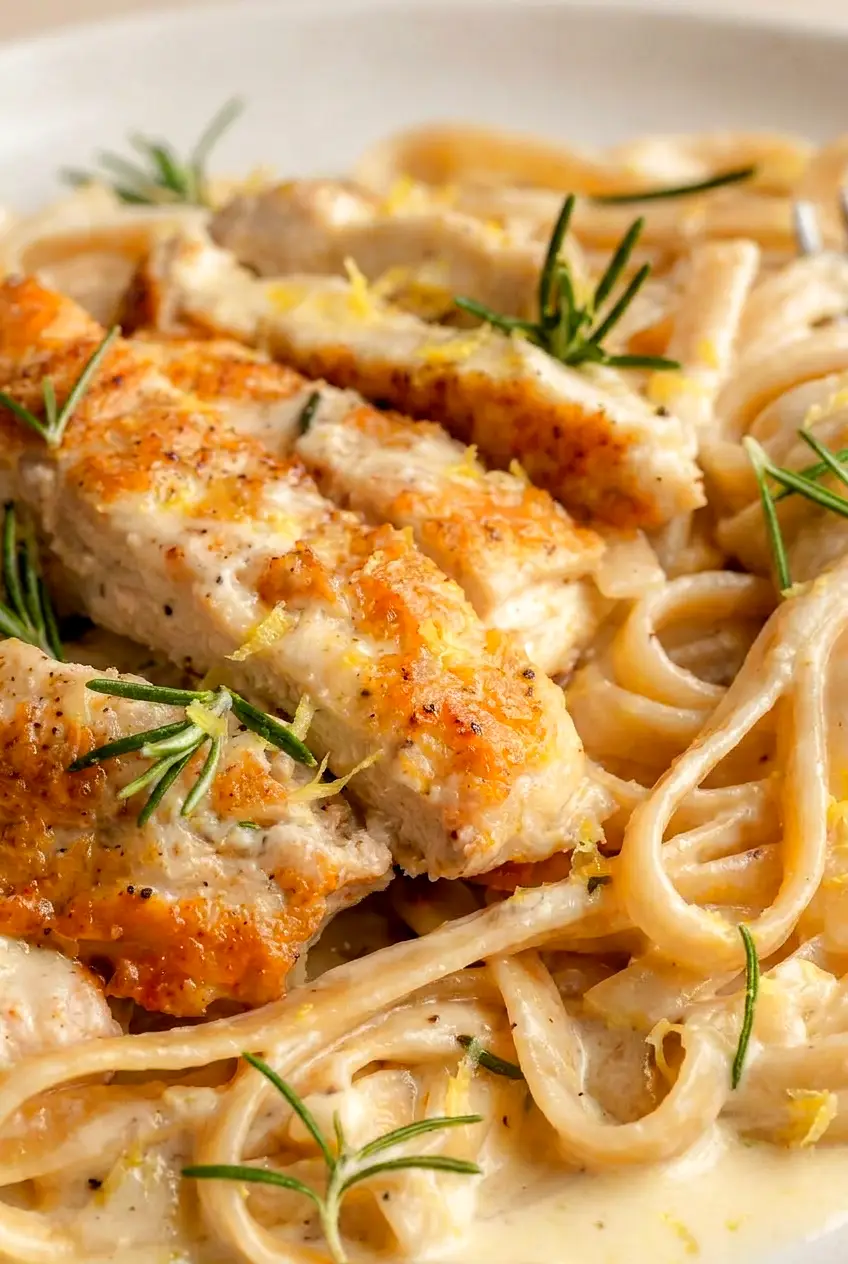
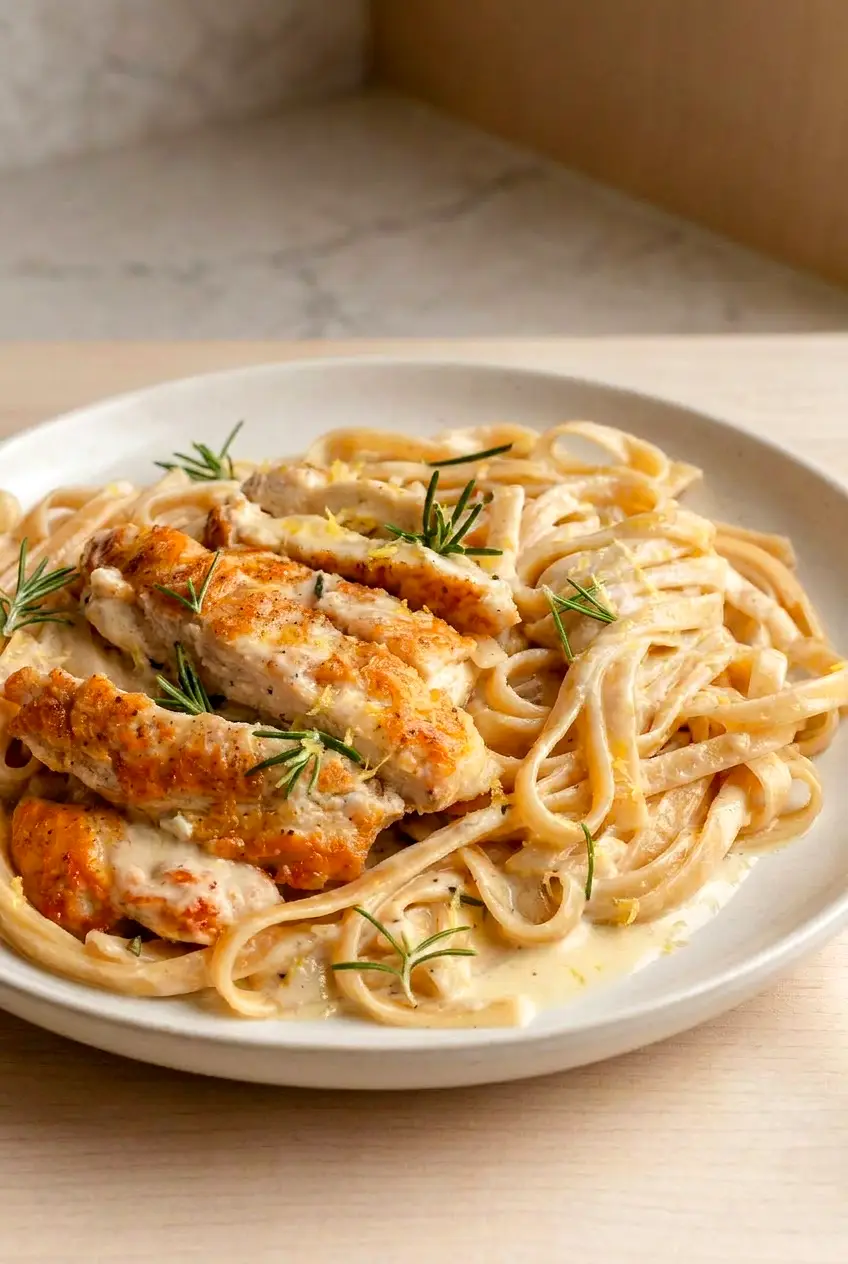
Close-up of creamy chicken pasta with glossy sauce, Parmesan, and tender sliced chicken
  • 1 1/2 pounds boneless skinless chicken breast (about 675g)
  • 12 ounces short pasta (about 340g)
  • 2 tablespoons olive oil
  • 2 tablespoons butter
  • 3 cloves garlic, minced
  • 1 cup heavy cream or light cream (about 240g)
  • 1 cup freshly grated Parmesan cheese (about 90g)
  • 1 to 2 tablespoons lemon juice
  • 1 to 2 teaspoons chopped fresh rosemary, thyme, or sage, or 1 small sprig
  • 2 tablespoons all-purpose flour (15g), optional
  • Salt, to taste
  • Black pepper, to taste
  • 1/2 to 1 cup reserved pasta water

Freshly grated Parmesan melts more smoothly than pre-shredded cheese in this sauce.

Chicken thighs can be used instead of chicken breast. Cook them to 165°F in the thickest part.

How to Make Chicken Breast Pasta

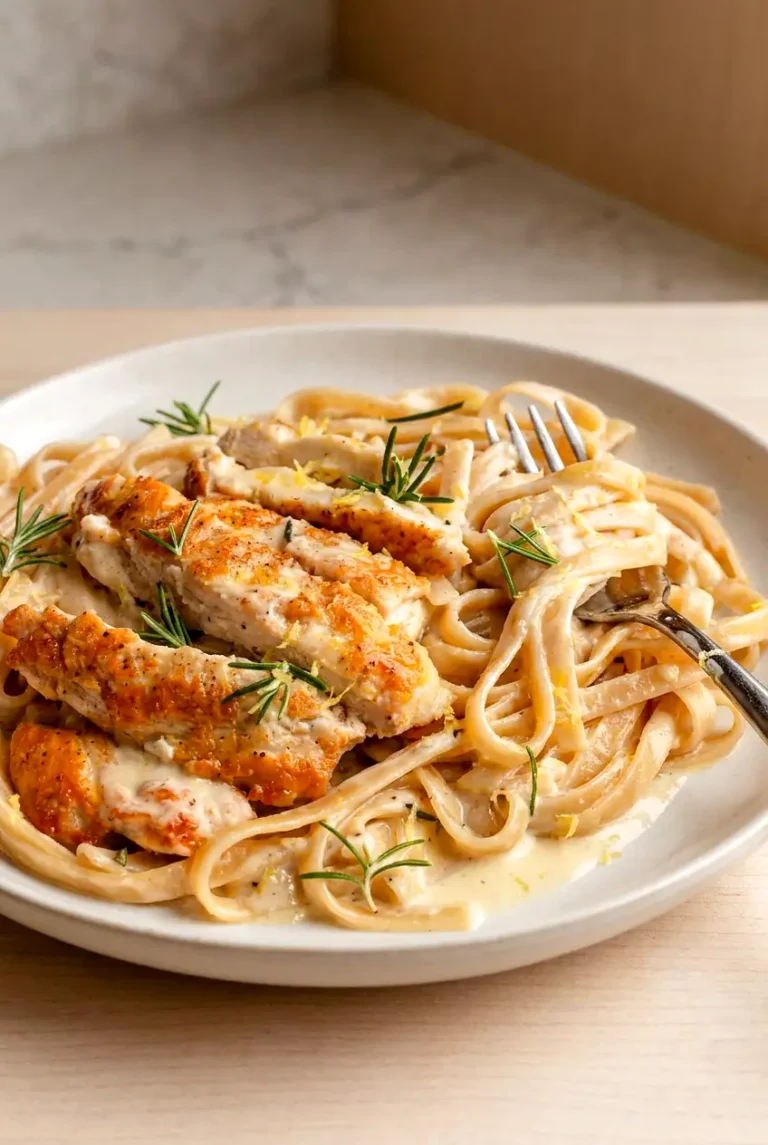
Creamy chicken pasta served in a shallow bowl with sliced chicken and herbs from a different angle
  1. Prep the chicken: Pat the chicken dry. If the pieces are thick or uneven, place them between sheets of plastic wrap or parchment and gently flatten them to an even thickness. Season both sides with salt and black pepper. If using the flour, coat the chicken lightly and shake off the excess.
  2. Cook the pasta: Bring a large pot of well-salted water to a boil over high heat. Cook the pasta until just shy of al dente, using the package time as a guide. Before draining, reserve 1 cup of the pasta water. Drain and set aside.
  3. Cook the chicken: Heat a large skillet or sauté pan over medium-high heat. Add the olive oil, then add the chicken in a single layer. Cook for 6 to 8 minutes per side, depending on thickness, until golden brown, easy to release from the pan, and cooked to 165°F in the thickest part. Transfer to a plate and let it rest.
  4. Start the sauce: Reduce the heat to medium. Add the butter to the same skillet. When melted, add the garlic and cook for about 30 seconds, stirring, until fragrant.
  5. Build the cream sauce: Pour in the cream and add a small splash of the reserved pasta water. Bring it to a gentle simmer over medium to medium-low heat. Add the Parmesan a little at a time, stirring gently after each addition until melted. Do not let the sauce boil hard.
  6. Finish the pasta: Add the drained pasta to the skillet and toss to coat. Add more reserved pasta water a little at a time until the sauce looks glossy and coats the pasta evenly. Stir in 1 tablespoon lemon juice and the herbs. Taste and add more lemon juice, salt, and black pepper if needed.
  7. Slice and serve: Slice the rested chicken against the grain. Arrange it over the pasta or toss it back into the skillet. Serve right away with extra Parmesan, more herbs, lemon zest, or red pepper flakes if you like.

How to Keep the Chicken Juicy

Flattening the chicken helps it cook evenly so the thinner end does not dry out before the center is done. Use medium-high heat so it browns instead of steaming, and pull it once the thickest part reaches 165°F. Let it rest briefly before slicing so the juices stay in the meat.

For extra flavor, you can marinate the chicken first with this Chicken Breast Marinade Recipe before cooking it for the pasta.

How to Keep the Sauce Smooth

If the sauce turns grainy or tight, the pan is usually too hot or the cheese was added too quickly. Lower the heat before adding the Parmesan, then stir it in gradually while the cream is only gently simmering. If the sauce gets too thick, loosen it with a little more pasta water.

Easy Vegetable Add-Ins

Mushrooms

Add 8 ounces sliced mushrooms after removing the chicken. Cook until softened and lightly browned, then add the garlic and continue with the sauce.

Broccoli

Add 2 cups small broccoli florets to the pasta pot during the last 1 to 2 minutes of cooking, or cook them separately until just tender.

Spinach

Stir in 2 to 3 cups spinach at the end. It wilts quickly in the warm sauce.

What to Serve With Creamy Chicken Pasta

Keep the sides simple here. A green salad adds contrast, and garlic bread or crusty bread works well with the extra sauce. Lemon wedges and extra Parmesan at the table are also a good fit.

How to Store and Reheat Chicken Pasta

Let the pasta cool slightly, then store leftovers in an airtight container in the refrigerator for up to 3 to 4 days. The sauce will thicken as it chills.

Reheat gently on the stovetop over low heat or in the microwave at medium power. Add a splash of water, milk, or cream to loosen the sauce as it warms. Avoid overheating, which can dry out the chicken and make the sauce too thick.

If you want to get ahead, cook the chicken and pasta earlier in the day, then make the sauce just before serving for the best texture.

Nutrition

Nutrition is approximate and will vary based on ingredient brands, exact amounts, and serving size.

  • Serving size: 1/4 of recipe
  • Calories: about 740
  • Protein: 60g
  • Fat: 30g
  • Carbohydrates: 50g
  • Per 100g: about 195 calories, 16g protein, 8g fat, 13g carbohydrates

Creamy Chicken Breast Pasta

Creamy pasta with sliced chicken, a garlic-Parmesan cream sauce, lemon, and fresh herbs.
Course: Main Course
Cuisine: Italian
Prep: 15 min
Cook: 30 min
Total: 45 min
Servings: 4 Calories: about 740 kcal

Equipment

  • large pot
  • large skillet or sauté pan
  • colander
  • measuring cups
  • measuring spoons
  • tongs or spatula
  • grater
  • instant-read thermometer

Ingredients

For the Chicken

  • 1 1/2 lb boneless skinless chicken breast (about 675 g)
  • Salt, to taste
  • Black pepper, to taste
  • 2 tablespoons olive oil
  • 2 tablespoons all-purpose flour (15 g), optional

For the Pasta

  • 12 ounces short pasta (about 340 g)
  • Salt for pasta water
  • 1/2 to 1 cup reserved pasta water

For the Sauce

  • 2 tablespoons butter
  • 3 cloves garlic, minced
  • 1 cup heavy cream or light cream (about 240 g)
  • 1 cup freshly grated Parmesan cheese (about 90 g)
  • 1 to 2 tablespoons lemon juice (start with 1 tbsp)
  • 1 to 2 teaspoons chopped fresh rosemary, thyme, or sage (or 1 small sprig)

Instructions

  1. Pat the chicken dry and, if needed, flatten between plastic wrap to an even thickness; season both sides with salt and black pepper and, if using, lightly coat with flour and shake off excess.
  2. Bring a large pot of well-salted water to a boil and cook the pasta until just shy of al dente according to package directions; before draining, reserve 1 cup of the pasta water, then drain and set aside.
  3. Heat a large skillet over medium-high heat, add the olive oil, and cook the chicken in a single layer for 6 to 8 minutes per side (depending on thickness) until golden and cooked to 165°F (74°C); transfer to a plate and let rest.
  4. Reduce the skillet heat to medium, add the butter, and when melted cook the garlic for about 30 seconds, stirring, until fragrant.
  5. Pour in the cream and add a small splash of the reserved pasta water; bring to a gentle simmer over medium to medium-low heat and add the Parmesan a little at a time, stirring gently until melted and smooth—do not let the sauce boil hard.
  6. Add the drained pasta to the skillet and toss to coat; add more reserved pasta water a little at a time until the sauce is glossy and coats the pasta evenly.
  7. Stir in 1 tablespoon lemon juice and the chopped herbs, taste, and adjust lemon, salt, and black pepper as needed.
  8. Slice the rested chicken against the grain and arrange over the pasta or toss it back into the skillet; serve immediately with extra Parmesan, more herbs, lemon zest, or red pepper flakes if desired.

Tips

  • Flatten chicken pieces to an even thickness so they cook evenly without drying out.
  • Use medium-high heat to brown the chicken rather than steaming it for better flavor.
  • Cook chicken to 165°F (74°C) and let it rest briefly before slicing to retain juices.
  • Add Parmesan gradually over gentle heat to keep the sauce smooth and avoid graininess.
  • Loosen a thick sauce with reserved pasta water a little at a time until glossy.

Variations

  • Chicken Thighs: Use boneless skinless chicken thighs instead of breasts and cook until the thickest part reaches 165°F (74°C).
  • Mushroom Add-In: Add 8 ounces sliced mushrooms to the skillet after removing the chicken, cook until softened and lightly browned, then proceed with the garlic and sauce.
  • Broccoli Add-In: Add 2 cups small broccoli florets to the pasta pot during the last 1 to 2 minutes of cooking or cook separately until just tender and toss into the finished pasta.
  • Spinach Add-In: Stir in 2 to 3 cups fresh spinach at the end; it will wilt quickly in the warm sauce.

Notes

Store leftovers in an airtight container in the refrigerator for 3 to 4 days. Reheat gently over low heat or in the microwave at medium power with a splash of water, milk, or cream to loosen the sauce. Cook chicken to 165°F (74°C) for safety.

Nutrition

Calories: about 740 kcal | Protein: 60 g | Fat: 30 g | Carbohydrates: 50 g

Chicken Breast Marinade

This chicken breast marinade makes the meat savory, bright, and well seasoned without a long ingredient list. The base works for simple weeknight dinners, meal prep, and sliced chicken for salads or bowls.

The method is easy: whisk the marinade, coat the chicken, and let it sit for a short time in the refrigerator. Chicken breasts do not need a long soak, especially when the marinade includes citrus juice or brine.

Ingredients for Chicken Breast Marinade

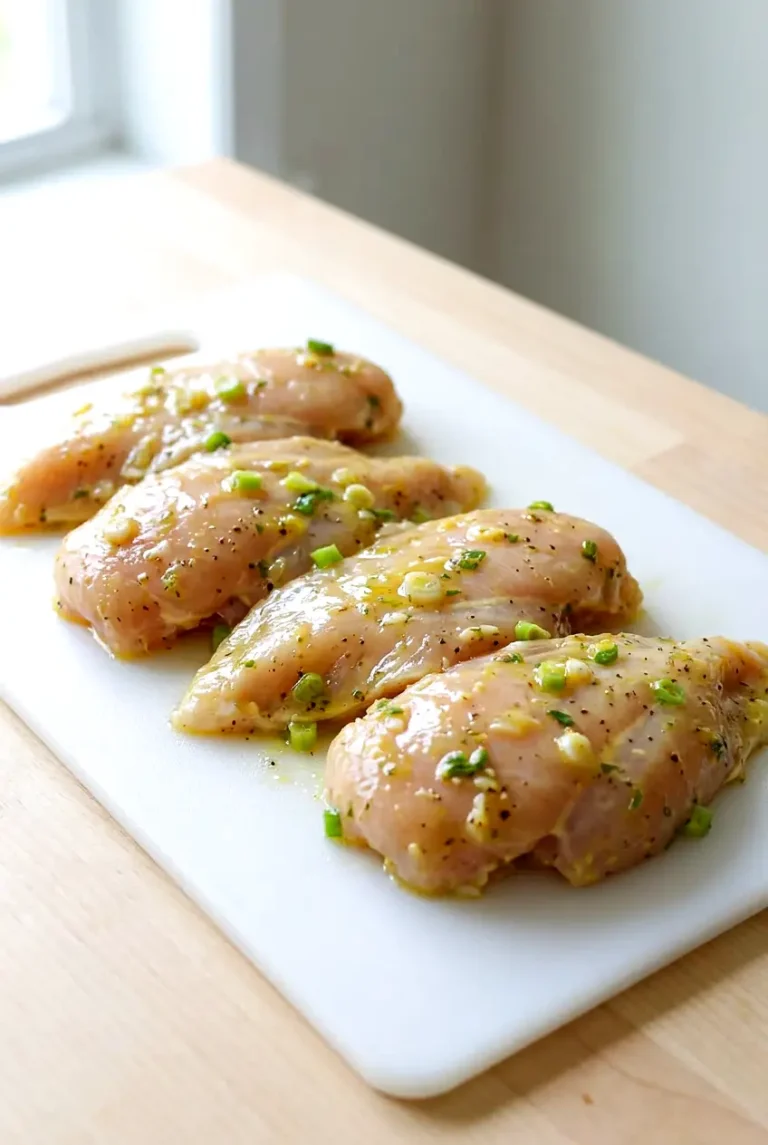
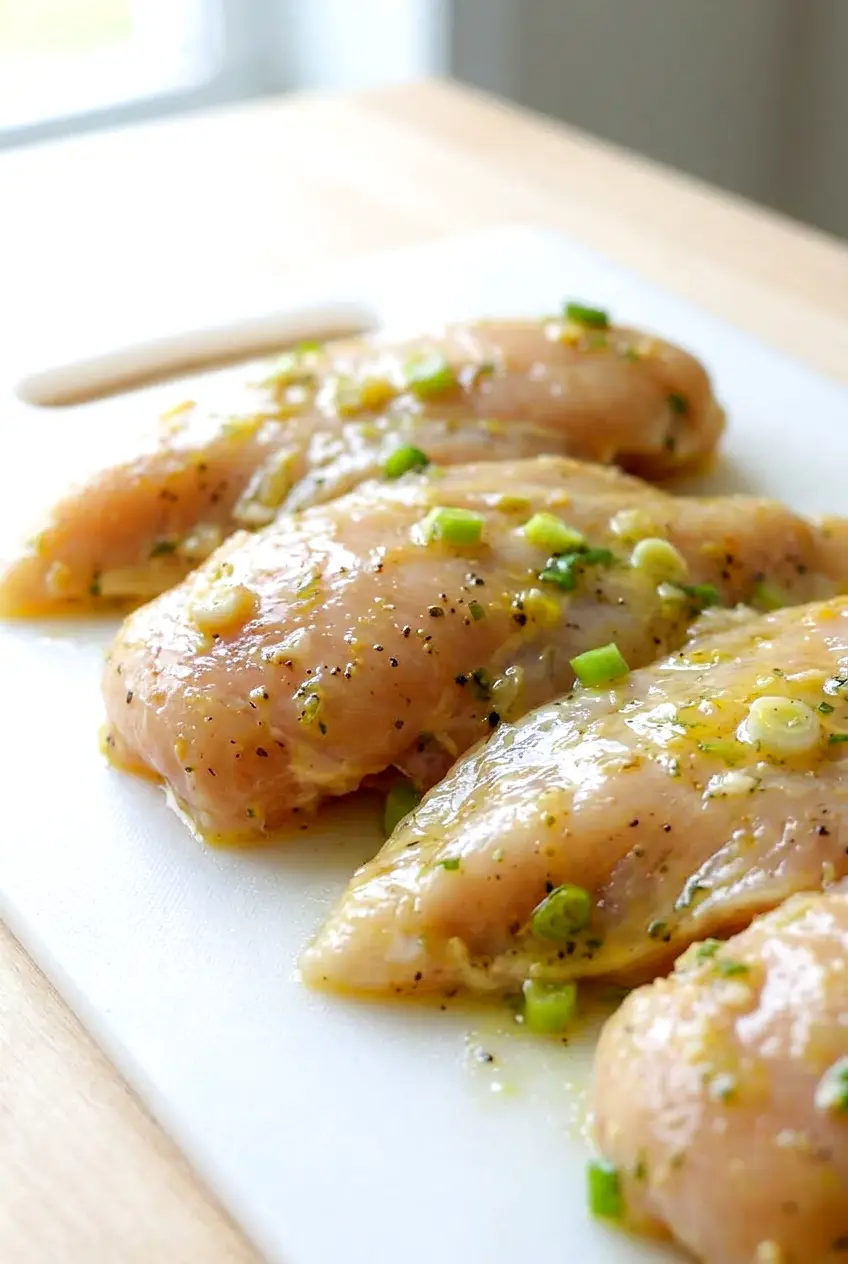
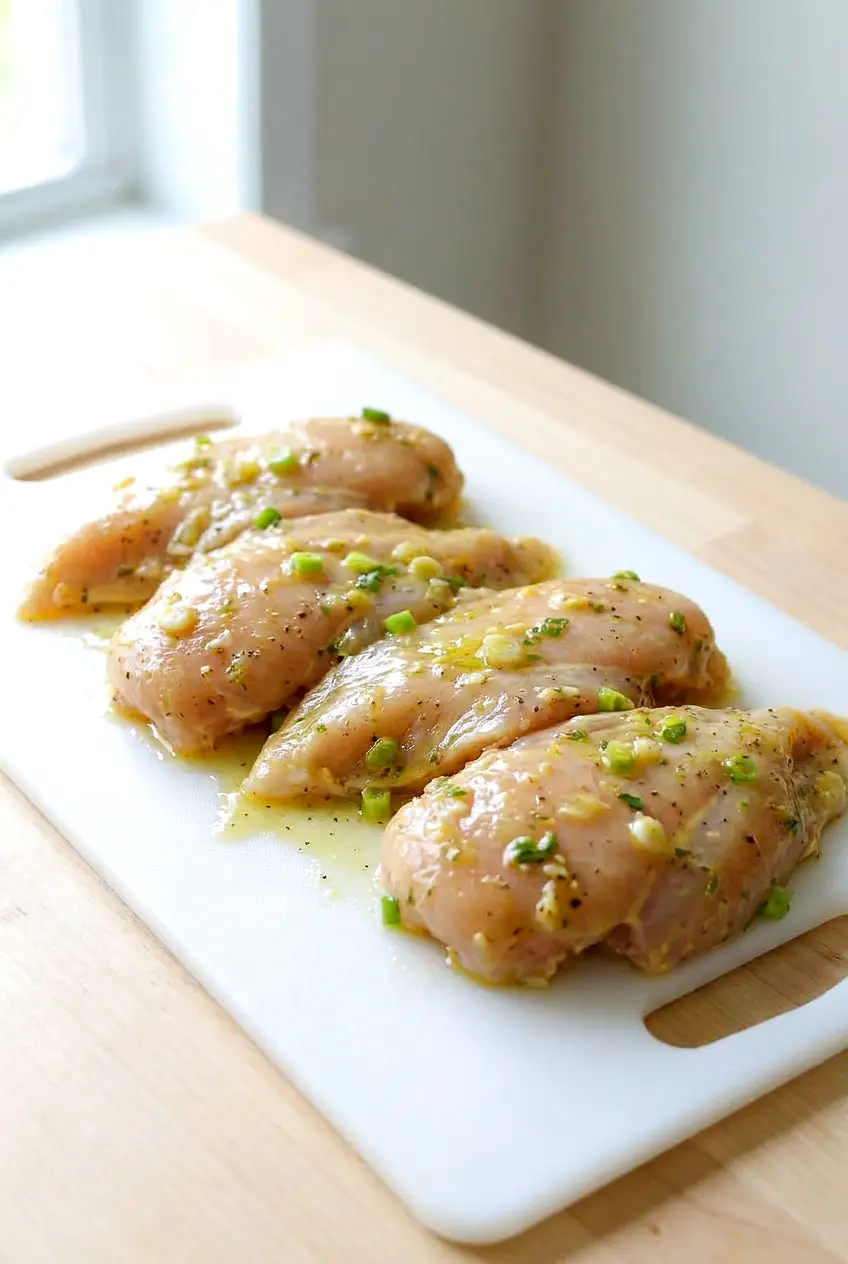
Close-up of chicken breasts coated in glossy citrus-garlic marinade
  • 1 1/2 to 2 pounds boneless, skinless chicken breasts (about 675g to 900g), pounded to a more even thickness if needed
  • 1/4 cup olive oil or avocado oil
  • 2 to 3 tablespoons lemon juice, lime juice, or orange juice
  • 2 to 3 cloves garlic, minced
  • 1 teaspoon salt
  • 1/2 teaspoon black pepper
  • 1 teaspoon ground cumin
  • 2 tablespoons coconut aminos or gluten-free tamari
  • 1 teaspoon fresh ginger, grated
  • 2 tablespoons green onion, thinly sliced

This base marinade is enough to coat the chicken well and works with several simple flavor variations.

How to Make Chicken Breast Marinade

Chicken breasts in marinade laid out in zip-top bags on a white board
  1. Mix the marinade: In a bowl or large measuring cup, whisk together the oil, citrus juice, garlic, salt, pepper, cumin, coconut aminos or tamari, ginger, and green onion. If you are using a variation, stir it in now. The marinade should look evenly combined and thick enough to cling lightly to the chicken.
  2. Coat the chicken: Place the chicken breasts in a zip-top bag or nonreactive dish and pour the marinade over them. Turn to coat well. If using a bag, press out the extra air and seal it.
  3. Marinate: Refrigerate for at least 30 minutes and up to 4 hours. If the marinade has extra citrus juice or pepperoncini brine, keep the time closer to 30 minutes to 2 hours so the surface does not turn soft.
  4. Get ready to cook: Remove the chicken from the marinade and let the excess drip off. Discard the used marinade. Cook the chicken in a single layer so it browns instead of steaming.
  5. Grill: Preheat the grill to medium-high heat and lightly oil the grates. Grill for 10 to 16 minutes total, depending on thickness, flipping once after the first side has good grill marks and releases easily.
  6. Bake: Heat the oven to 400°F. Arrange the chicken in a baking dish or on a sheet pan in a single layer. Bake for 15 to 25 minutes, flipping once if you want more even browning.
  7. Air fry: Preheat the air fryer to 375°F to 400°F if your model preheats. Lightly oil the basket if needed, then cook the chicken in a single layer for 10 to 18 minutes, flipping once. Start checking the thicker pieces early since air fryers vary.
  8. Cook in a skillet: Heat a skillet over medium-high heat and add a light film of oil if needed. Cook for 10 to 16 minutes total, flipping once, until the outside is browned and the center is nearly done. Leave the first side undisturbed long enough to get some color.
  9. Check for doneness: The chicken is done when the thickest part reaches 165°F on an instant-read thermometer. It should be opaque throughout, and the juices should run clear.
  10. Rest and serve: Let the chicken rest for 5 minutes before slicing, chopping, or shredding so the juices stay in the meat.

How Long to Marinate Chicken Breast

For chicken breast, 30 minutes is often enough to add good flavor. Less acidic marinades can sit for a few hours, but versions with more citrus juice or pepperoncini brine should stay on the shorter side. Always marinate in the refrigerator, not at room temperature.

Flavor Variations

Citrus Garlic Cumin

Use lemon, lime, or orange juice in the base marinade and leave the rest as written. This version works well with grilled or baked chicken.

Pepperoncini Mustard

Add 1 to 2 tablespoons chopped pepperoncini, 1 to 2 tablespoons pepperoncini brine, and 1 tablespoon whole-grain mustard. Keep the marinating time shorter since the brine adds extra acid and salt.

BBQ or Buffalo-Style

Stir 2 to 3 tablespoons BBQ sauce or buffalo sauce into the base marinade, or use 1 tablespoon ghee plus 1 to 2 tablespoons hot sauce for a simple buffalo-style option.

Pesto or Mango Jalapeño Cilantro

For a pesto version, add 2 tablespoons pesto. For a fruitier option, add 1/4 cup diced or pureed mango, 1 tablespoon minced jalapeño, and 2 tablespoons chopped cilantro.

How to Keep Chicken Breast from Drying Out

  • Even out thick pieces: Pound thicker ends lightly so the chicken cooks more evenly.
  • Do not over-marinate acidic versions: Too much time in citrus or brine can affect the texture before cooking.
  • Cook just to 165°F: Going much past that is where chicken breast starts drying out fast.
  • Rest before slicing: A short rest helps the juices stay in the meat instead of running onto the cutting board.

What to Serve With Marinated Chicken

Serve it with simple sides like zucchini, sautéed peppers with cauliflower rice, a green salad, or a rice bowl. Cooked chicken also works well sliced for lunch salads and bowls, or shredded if you make the buffalo-style version.

How to Store and Reheat Marinated Chicken

Let the cooked chicken cool slightly, then store it in an airtight container in the refrigerator for 3 to 4 days.

Reheat gently in the microwave in short bursts or in a low oven until warmed through so it does not dry out.

For make-ahead prep, place the raw chicken and marinade in a labeled freezer-safe zip-top bag and freeze. Thaw in the refrigerator before cooking. Do not reuse marinade that has touched raw chicken unless you boil it first.

Nutrition

Nutrition is approximate and will vary based on the size of the chicken breasts, the oil used, and how much marinade stays on the chicken after cooking.

  • Serving size: 1/4 of recipe
  • Calories: about 310
  • Protein: 39g
  • Fat: 16g
  • Carbohydrates: 3g
  • Per 100g: about 150 calories, 19g protein, 8g fat, 1g carbohydrates

Chicken Breast Marinade

A simple savory citrus-garlic marinade for boneless skinless chicken breasts that works for grilling, baking, air frying, or skillet cooking.
Course: Main Course
Cuisine: American
Prep: 10 min
Cook: 20 min
Total: 60 min
Servings: 4 Calories: about 310 kcal

Equipment

  • mixing bowl or measuring cup
  • zip-top bag or nonreactive dish
  • grill or grill pan
  • oven
  • air fryer
  • skillet
  • instant-read thermometer

Ingredients

Chicken

  • 1 1/2 to 2 pounds (675 to 900 g) boneless, skinless chicken breasts, pounded to even thickness if needed

Marinade

  • 1/4 cup olive oil or avocado oil
  • 2 to 3 tablespoons lemon juice, lime juice, or orange juice
  • 2 to 3 cloves garlic, minced
  • 1 teaspoon salt
  • 1/2 teaspoon black pepper
  • 1 teaspoon ground cumin
  • 2 tablespoons coconut aminos or gluten-free tamari
  • 1 teaspoon fresh ginger, grated
  • 2 tablespoons green onion, thinly sliced

Instructions

  1. Whisk together the oil, citrus juice, garlic, salt, pepper, cumin, coconut aminos or tamari, grated ginger, and sliced green onion in a bowl or large measuring cup until evenly combined.
  2. Place the chicken breasts in a zip-top bag or nonreactive dish and pour the marinade over them, turning to coat evenly; seal the bag or cover the dish.
  3. Refrigerate and marinate for at least 30 minutes and up to 4 hours (keep acidic marinades closer to 30 minutes to 2 hours).
  4. Remove the chicken from the marinade and let excess drip off; discard the used marinade or boil it before reusing.
  5. To grill: preheat the grill to medium-high and lightly oil the grates; grill chicken for 10 to 16 minutes total, flipping once after good grill marks form.
  6. To bake: preheat the oven to 400°F (204°C); arrange chicken in a single layer on a baking dish or sheet pan and bake 15 to 25 minutes, flipping once if desired for even browning.
  7. To air fry: preheat the air fryer to 375°F to 400°F (191°C to 204°C) if your model preheats; lightly oil the basket and cook chicken in a single layer 10 to 18 minutes, flipping once.
  8. To cook in a skillet: heat a skillet over medium-high and add a light film of oil if needed; cook chicken 10 to 16 minutes total, flipping once, allowing the first side to brown.
  9. Check doneness with an instant-read thermometer inserted into the thickest part; chicken is done at 165°F (74°C).
  10. Let the chicken rest for 5 minutes before slicing, chopping, or shredding, then serve.

Tips

  • Pound thicker ends lightly so the chicken cooks more evenly.
  • Keep marinating time shorter for citrus- or brine-heavy marinades to avoid a soft surface.
  • Cook chicken to 165°F (74°C) and avoid overshooting to prevent dryness.
  • Let chicken rest 5 minutes before slicing to retain juices.
  • Check thicker pieces early when air frying since cook times vary by model.

Variations

  • Citrus Garlic Cumin: Use lemon, lime, or orange juice in the base marinade and follow the recipe as written for a bright, grilled or baked flavor.
  • Pepperoncini Mustard: Add 1 to 2 tablespoons chopped pepperoncini, 1 to 2 tablespoons pepperoncini brine, and 1 tablespoon whole-grain mustard; shorten marinating time due to extra acid and salt.
  • BBQ or Buffalo-Style: Stir 2 to 3 tablespoons BBQ sauce or buffalo sauce into the marinade, or use 1 tablespoon ghee plus 1 to 2 tablespoons hot sauce for a simple buffalo option.
  • Pesto: Add 2 tablespoons pesto to the base marinade for an herb-forward option.
  • Mango Jalapeño Cilantro: Add 1/4 cup diced or pureed mango, 1 tablespoon minced jalapeño, and 2 tablespoons chopped cilantro for a fruity, spicy variation.

Notes

Store cooked chicken in an airtight container in the refrigerator for 3 to 4 days. Reheat gently to avoid drying out. For make-ahead prep, freeze raw chicken with the marinade in a labeled freezer-safe bag and thaw in the refrigerator before cooking. Do not reuse marinade that touched raw chicken unless boiled first.

Nutrition

Calories: about 310 kcal | Protein: 39 g | Fat: 16 g | Carbohydrates: 3 g

Simple Zucchini Muffins Recipe

These simple zucchini muffins are soft, lightly spiced, and easy to make with basic pantry ingredients. The shredded zucchini keeps them moist without making them taste overly vegetable-forward.

The method is straightforward: whisk the dry ingredients, whisk the wet ingredients, then fold everything together gently. A short start at 425°F helps the tops rise, then the muffins finish baking at 350°F so the centers cook through without the tops getting too dark.

Ingredients for Simple Zucchini Muffins

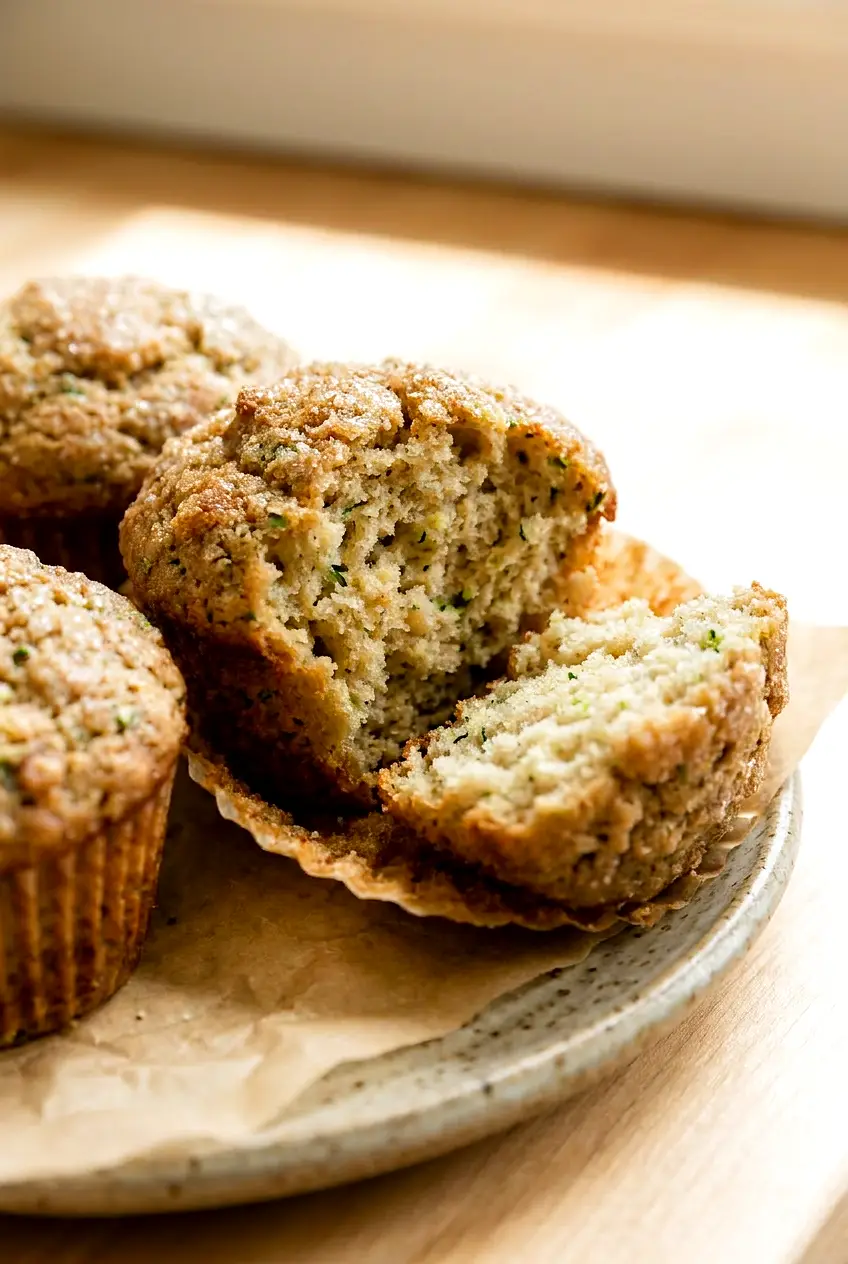
Close-up of a broken-open zucchini muffin showing a soft moist crumb
  • 1 3/4 cups all-purpose flour or whole wheat flour (220g)
  • 2 teaspoons baking powder
  • 1/2 teaspoon baking soda
  • 1/2 teaspoon fine salt
  • 1 teaspoon ground cinnamon
  • 1/4 teaspoon ground nutmeg
  • 1/3 cup granulated sugar (65g)
  • 1/3 cup packed brown sugar (75g)
  • 2 large eggs
  • 1/2 cup neutral oil (120g)
  • 1/2 cup milk or nondairy milk (120g)
  • 1 teaspoon vanilla extract
  • 1 1/2 cups shredded zucchini, lightly packed (180g)

Optional add-ins: 1/2 cup mini chocolate chips, 1/2 cup chopped walnuts or pecans, or 1/2 cup raisins.

Optional topping: 1 to 2 tablespoons coarse sugar.

If you want a softer texture, use all-purpose flour or a half whole wheat, half all-purpose mix. Whole wheat flour works, but the muffins will be a little heavier.

How to Make Zucchini Muffins

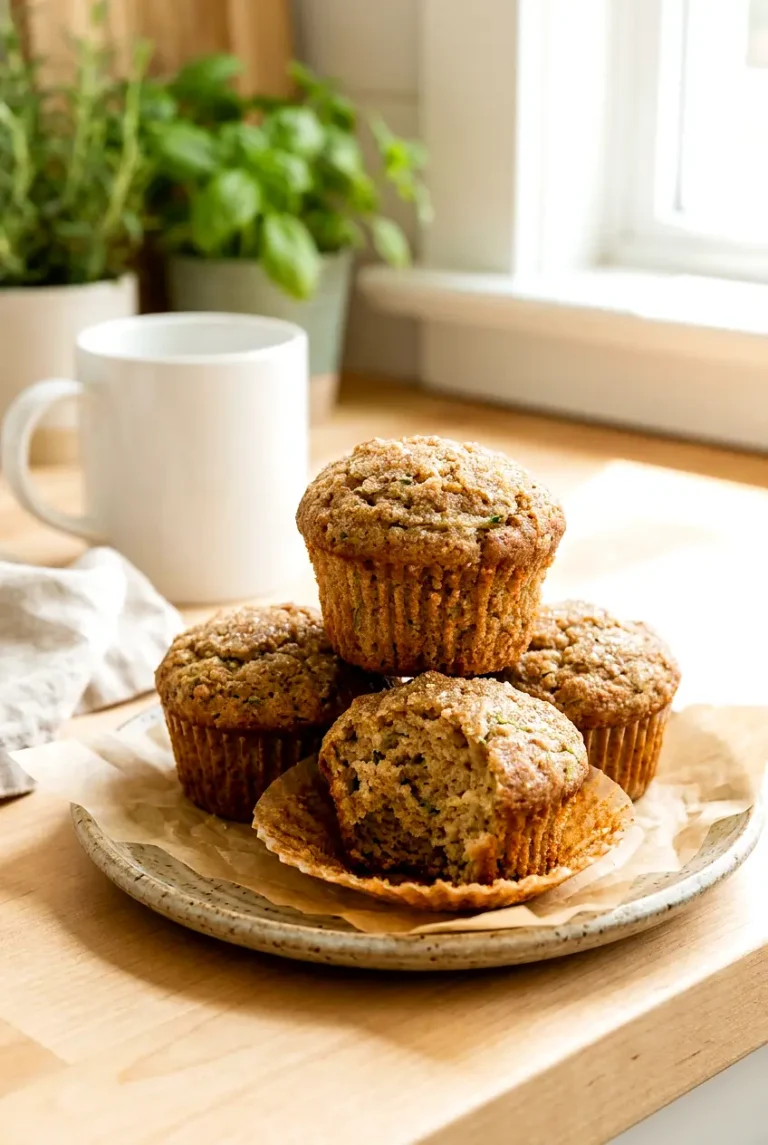
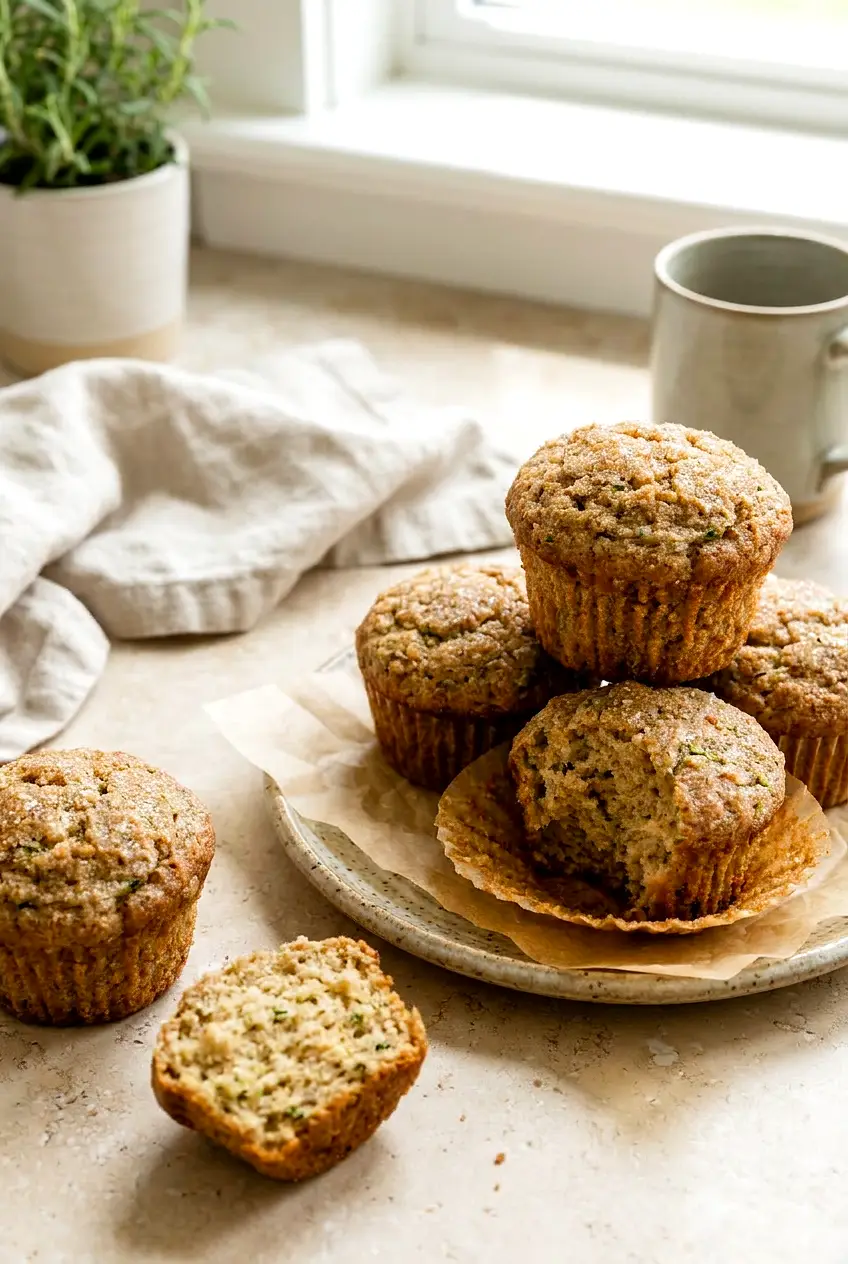
Simple zucchini muffins arranged on a plate in a different angle
  1. Preheat the oven: Heat the oven to 425°F. Line a standard 12-cup muffin pan with paper liners or grease the cups well.
  2. Mix the dry ingredients: In a medium bowl, whisk together the flour, baking powder, baking soda, salt, cinnamon, and nutmeg.
  3. Mix the wet ingredients: In a large bowl, whisk together the granulated sugar, brown sugar, eggs, oil, milk, and vanilla until smooth and evenly combined.
  4. Add the zucchini: Fold the shredded zucchini into the wet mixture. Do not squeeze or blot it dry; that moisture helps keep the muffins tender.
  5. Make the batter: Add the dry ingredients to the wet ingredients and stir with a spatula or wooden spoon just until no large dry streaks remain. The batter should be thick, not pourable. If using chocolate chips, nuts, or raisins, fold them in at the end.
  6. Fill the pan: Divide the batter evenly among the 12 muffin cups, filling each about 3/4 full. Sprinkle the tops with coarse sugar if using.
  7. Bake: Bake for 5 minutes at 425°F, then lower the oven temperature to 350°F without opening the door if possible. Continue baking for 13 to 19 minutes more, for a total of 18 to 24 minutes, until the muffins are domed, lightly golden, and the tops spring back lightly when pressed. A toothpick inserted in the center should come out with a few moist crumbs, not wet batter. Rotate the pan near the end only if your oven bakes unevenly.
  8. Cool: Let the muffins cool in the pan for 10 minutes, then transfer them to a wire rack to finish cooling.

Why Are My Zucchini Muffins Dense?

Dense muffins usually come from overmixing after the flour goes in. Stir only until the batter comes together. The zucchini also should not be blotted dry, since the recipe uses that moisture to keep the crumb soft. The finished batter should be thick.

Why Start at 425°F?

The higher heat at the start helps the muffin tops rise quickly and dome better. Lowering the oven to 350°F after 5 minutes gives the centers time to bake through more evenly. If your oven runs hot, start checking a little early.

Variations

Chocolate Chip Zucchini Muffins

Fold 1/2 cup mini chocolate chips into the batter. A few extra on top work well too.

Mini Zucchini Muffins

Use the same batter in a mini muffin pan and bake for less time. Start checking early, since mini muffins bake and brown faster than standard muffins.

Serving Ideas

Serve these muffins warm or at room temperature. They are good on their own or with butter or honey butter, and they pair well with coffee, tea, or fresh fruit.

For another easy homemade snack idea, try these Thick Soft Chocolate Chip Cookies.

If you want another baked treat to try next, these Sourdough Discard Brownies are a good dessert-style option.

How to Store and Reheat Zucchini Muffins

Let the muffins cool completely before storing so trapped steam does not soften the tops.

  • Room temperature: Store in an airtight container for up to 2 days.
  • Refrigerator: If your kitchen is very warm, refrigerate for short-term storage.
  • Freezer: Wrap the muffins individually and freeze in a freezer bag or airtight container.

To reheat, warm a muffin briefly in the microwave or in a low oven until heated through. If frozen, thaw at room temperature first or reheat gently straight from the freezer so the muffins do not dry out.

Nutrition

Nutrition is approximate and will vary based on ingredient brands, exact amounts, and serving size.

  • Serving size: 1 muffin
  • Calories: about 200
  • Protein: 3g
  • Fat: 10g
  • Carbohydrates: 25g
  • Per 100g: about 310 calories, 5g protein, 15g fat, 39g carbohydrates

Simple Zucchini Muffins

Soft, lightly spiced muffins made with shredded zucchini for moistness without a strong vegetable flavor.
Course: Breakfast
Cuisine: American
Prep: 15 min
Cook: 24 min
Total: 49 min
Servings: 12 Calories: about 200 kcal

Equipment

  • 12-cup muffin pan
  • paper liners (optional)
  • mixing bowls
  • whisk
  • spatula or wooden spoon
  • box grater
  • measuring cups and spoons
  • wire rack

Ingredients

Main

  • 1 3/4 cups all-purpose flour or whole wheat flour (220g)
  • 2 teaspoons baking powder
  • 1/2 teaspoon baking soda
  • 1/2 teaspoon fine salt
  • 1 teaspoon ground cinnamon
  • 1/4 teaspoon ground nutmeg
  • 1/3 cup granulated sugar (65g)
  • 1/3 cup packed brown sugar (75g)
  • 2 large eggs
  • 1/2 cup neutral oil (120g)
  • 1/2 cup milk or nondairy milk (120g)
  • 1 teaspoon vanilla extract
  • 1 1/2 cups shredded zucchini, lightly packed (180g)

Optional add-ins and topping

  • 1/2 cup mini chocolate chips (optional)
  • 1/2 cup chopped walnuts or pecans (optional)
  • 1/2 cup raisins (optional)
  • 1 to 2 tablespoons coarse sugar for topping (optional)

Instructions

  1. Preheat the oven to 425°F (218°C) and line a standard 12-cup muffin pan with paper liners or grease the cups well.
  2. In a medium bowl, whisk together the flour, baking powder, baking soda, salt, cinnamon, and nutmeg.
  3. In a large bowl, whisk the granulated sugar, brown sugar, eggs, oil, milk, and vanilla until smooth and combined.
  4. Fold the shredded zucchini into the wet mixture without squeezing it dry.
  5. Add the dry ingredients to the wet ingredients and stir with a spatula or wooden spoon just until no large dry streaks remain; the batter should be thick.
  6. If using chocolate chips, nuts, or raisins, fold them in gently at the end.
  7. Divide the batter evenly among the 12 muffin cups, filling each about 3/4 full, and sprinkle coarse sugar on top if using.
  8. Bake for 5 minutes at 425°F (218°C).
  9. Without opening the oven door if possible, lower the oven temperature to 350°F (177°C) and continue baking for 13 to 19 minutes more (total 18 to 24 minutes) until domed, lightly golden, and a toothpick inserted in the center comes out with a few moist crumbs.
  10. Let the muffins cool in the pan for 10 minutes, then transfer to a wire rack to finish cooling.

Tips

  • Stir the batter only until it comes together to avoid dense muffins.
  • Do not squeeze the shredded zucchini; its moisture keeps the crumb tender.
  • Start baking at a high temperature (425°F/218°C) for better domes, then lower to finish baking.
  • Use all-purpose flour or a half all-purpose/half whole wheat mix for a softer texture.
  • Check mini muffins and hot ovens earlier, as they bake faster and may brown sooner.

Variations

  • Chocolate Chip Zucchini Muffins: Fold 1/2 cup mini chocolate chips into the batter and add a few on top before baking.
  • Mini Zucchini Muffins: Use a mini muffin pan and bake for less time, checking early since mini muffins bake and brown faster.

Notes

Cool muffins completely before storing. Store at room temperature in an airtight container up to 2 days, refrigerate in very warm kitchens, or wrap individually and freeze; reheat gently from thawed or frozen.

Nutrition

Calories: about 200 kcal | Protein: 3 g | Fat: 10 g | Carbohydrates: 25 g

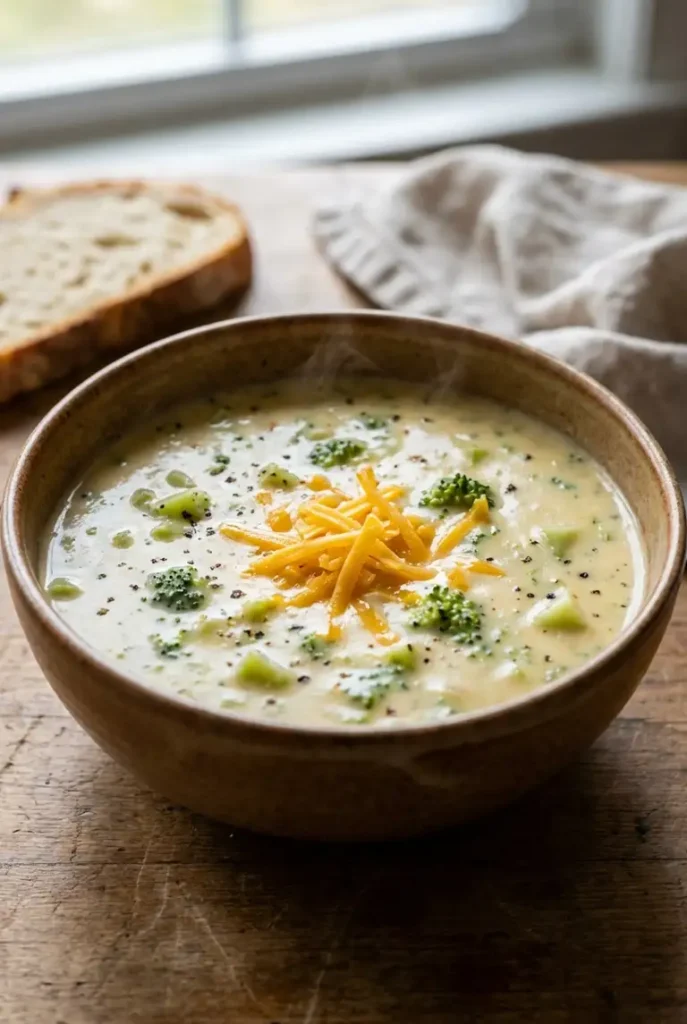
This soup usually goes wrong in one of two ways: the broccoli is left too big, so the spoonfuls feel clumsy, or the cheese goes into a pot that is still too hot and the whole thing turns grainy. Both problems are easy to avoid, but they make a big difference in the final texture.

If the broccoli is chopped small and the cheddar goes in only after the heat drops, the soup lands where it should. It gets thick enough to coat the spoon, the broccoli softens without turning mushy, and the cheese melts in smoothly instead of breaking into that separated, oily look.

It still tastes rich, but because the base is milk rather than heavy cream, it does not sit as heavily as some versions do.

Why This Broccoli Cheddar Soup Stays Smooth

  • The base starts with onion, garlic, and a light roux, which gives the soup body without making it feel pasty or heavy.
  • The broccoli is chopped small, so it softens on time and fits naturally into each spoonful instead of sitting in awkward chunks.
  • The milk is heated gently rather than boiled, which helps keep the texture smooth.
  • The cheddar goes in off the heat, a handful at a time, so it melts into the soup instead of clumping or breaking.

Ingredients for broccoli cheddar soup with milk

  • 4 tablespoons unsalted butter (55g)
  • 1 medium yellow onion, finely chopped (150g)
  • 2 garlic cloves, minced (10g)
  • 1/4 cup all-purpose flour (30g)
  • 2 cups chicken broth or vegetable broth (480g)
  • 3 cups whole milk (720g)
  • 1 pound broccoli, finely chopped, florets and peeled stems (450g)
  • 1 medium carrot, finely grated or minced (60g)
  • 8 ounces sharp cheddar cheese, freshly shredded (225g)
  • 1/2 teaspoon mustard powder
  • 1/4 teaspoon paprika
  • Salt, to taste
  • Black pepper, to taste

Freshly shredded cheddar matters

Bagged shredded cheese works in a pinch, but it usually contains anti-caking starches that keep it from melting as smoothly. Freshly shredded cheddar gives you a cleaner sharp-cheddar flavor and a better texture in the finished soup.

Use both florets and stems

The florets give you the familiar broccoli texture, but the stems add body and cut down on waste.

Peel the tough outer layer first, then chop the stems small so they soften at the same rate as the florets.


How to make broccoli cheddar soup

Close-up of a spoonful of smooth broccoli cheddar soup with milk, showing tender broccoli pieces, melted cheese gloss, and rising steam.

1. Build the onion and garlic base

  1. Melt the butter in a large pot over medium heat.
  2. Add the onion and cook for 4 to 5 minutes, stirring now and then, until softened and translucent, not browned.
  3. Add the garlic and cook for about 30 seconds, just until fragrant.

2. Make the roux

  1. Sprinkle in the flour and stir well so it coats the onions evenly.
  2. Cook for 1 to 2 minutes, stirring constantly, until the flour loses its raw smell.
  3. Slowly pour in the broth while whisking, adding a little at a time to keep the base smooth.

3. Simmer the broccoli until tender

  1. Add the chopped broccoli, carrot, mustard powder, and paprika.
  2. Bring the pot to a gentle simmer, not a hard boil.
  3. Cook for 10 to 12 minutes, stirring occasionally, until the broccoli stems are fork-tender and the soup looks slightly thickened.
  4. If you want a smoother texture, use an immersion blender now and blend part of the soup before adding the milk and cheese.
  5. For a Panera-style broccoli cheddar soup texture, blend just enough to thicken the base while leaving some broccoli pieces intact.

4. Add the milk and control the heat

  1. Pour in the milk and cook over medium-low heat for 4 to 6 minutes, until the soup is steaming but not boiling.
  2. At this point, it should lightly coat the back of a spoon.
  3. If it looks too thick, add a splash more milk or broth.
  4. If it still looks thin, let it simmer gently for another couple of minutes before moving on.

5. Stir in the cheddar off the heat

  1. Take the pot off the heat, or turn the burner to very low if your stove runs cool.
  2. Add the shredded cheddar a handful at a time, stirring until each addition is fully melted before adding the next.
  3. Taste before seasoning.
  4. Depending on your cheese and broth, you may not need much salt.
  5. Add black pepper to taste.

How to Keep Broccoli Cheddar Soup Smooth, Not Grainy

The usual cause is too much heat. Cheese does not melt well into a pot that is still actively boiling.

A few things make the difference:

  • Do not add cheddar while the soup is bubbling.
  • Use whole milk for a steadier texture.
  • Shred the cheese yourself if possible.
  • Add it gradually instead of all at once.

If the soup thickens as it sits, loosen it with a little warm milk when reheating rather than turning the heat up aggressively and hoping it smooths itself out.


Easy variations

Panera-style broccoli cheddar soup

For a more café-style finish, add an extra 1/2 cup milk and blend a little more of the soup before adding the cheese.

That gives you a smoother, more unified base while still keeping some broccoli texture.

Slightly chunkier or smoother

If you like a chunkier soup, leave it as is and make sure the broccoli is chopped fairly small from the start.

If you want it smoother, blend about half the soup before adding the cheddar.

Blend before the cheese goes in, not after, for the best texture.

If you love cheddar-heavy comfort food, this Shepherd’s Pie with Cheddar is a natural next dinner.


How to store and reheat broccoli cheddar soup

Let the soup cool, then refrigerate it in a sealed container for up to 4 days.

To reheat, warm it in a saucepan over low heat, stirring often.

Do not let it boil.

If it has thickened in the fridge, add a splash of milk or broth to loosen it.

I don’t recommend freezing it if smooth texture matters to you.

Milk-and-cheese soups often separate after thawing.


Broccoli cheddar soup FAQ

Why did my broccoli cheddar soup turn grainy?

Usually because the cheese got too hot. Add it only after the soup stops bubbling, and stir it in gradually rather than all at once.

Can I use frozen broccoli in broccoli cheddar soup?

Yes. It works fine, though the texture will usually be a little softer than fresh. You may also need slightly less simmering time.

Can I make broccoli cheddar soup with pre-shredded cheese?

You can, but it will not melt as neatly. Add it slowly and keep the heat very low.

How do I reheat broccoli cheddar soup without it separating?

Use low heat and stir often. If it seems too thick, loosen it with a splash of milk before it gets hot. Avoid blasting it with high heat and expecting it to smooth back out on its own.


Nutrition

  • Serving size: approximately 1/4 of the total recipe
  • Calories: 510 kcal
  • Protein: 24g
  • Fat: 34g
  • Carbohydrates: 28g
  • Per 100g: Calories: 101 kcal, Protein: 4.8g, Fat: 6.7g, Carbohydrates: 5.6g.

These nutritional values are approximate and can vary based on the specific ingredients and brands used.

Broccoli Cheddar Soup with Milk

A creamy, smooth broccoli cheddar soup made with milk instead of heavy cream for a lighter but rich taste. The broccoli is finely chopped and cheese is added off the heat to keep the soup thick and non-grainy.
Course: Soup
Cuisine: American
Prep: 20 min
Cook: 30 min
Total: 50 min
Servings: 4 Calories: 510 kcal Cost: —

Equipment

  • Large pot
  • Whisk
  • Cutting board
  • Chef’s knife
  • Immersion blender (optional)

Ingredients

  • 4 tablespoons unsalted butter (55g)
  • 1 medium yellow onion, finely chopped (150g)
  • 2 garlic cloves, minced (10g)
  • 1/4 cup all-purpose flour (30g)
  • 2 cups chicken broth or vegetable broth (480g)
  • 3 cups whole milk (720g)
  • 1 pound broccoli, finely chopped, florets and peeled stems (450g)
  • 1 medium carrot, finely grated or minced (60g)
  • 8 ounces sharp cheddar cheese, freshly shredded (225g)
  • 1/2 teaspoon mustard powder
  • 1/4 teaspoon paprika
  • Salt, to taste
  • Black pepper, to taste

Instructions

  1. Melt butter in a large pot over medium heat.
  2. Add onion and cook 4-5 minutes until softened and translucent, not browned.
  3. Add garlic and cook about 30 seconds until fragrant.
  4. Sprinkle in flour and stir to coat onions.
  5. Cook 1-2 minutes until raw smell is gone.
  6. Slowly whisk in broth a little at a time to keep base smooth.
  7. Add chopped broccoli, carrot, mustard powder, and paprika.
  8. Bring to a gentle simmer, not boiling.
  9. Cook 10-12 minutes until broccoli stems are fork-tender and soup is slightly thickened.
  10. Optional: Blend part of soup with immersion blender for smoother texture before adding milk and cheese.
  11. Pour in milk and cook over medium-low heat 4-6 minutes until steaming but not boiling, lightly coating back of spoon.
  12. Remove pot from heat or turn burner to very low.
  13. Add shredded cheddar a handful at a time, stirring until melted before adding more.
  14. Taste and season with salt and black pepper as needed.

Notes

Do not add cheese while soup is boiling to avoid graininess. Use freshly shredded cheddar for best melting and flavor. Broccoli stems add body and reduce waste; peel tough outer layer and chop small to match florets. To reheat, warm gently with occasional stirring; add warm milk or broth if too thick. Avoid freezing to maintain smooth texture.

Nutrition

Serving Size: 1/4 of recipe | Calories: 510 kcal | Protein: 24g | Fat: 34g | Carbohydrates: 28g

The difference between a flat coconut curry soup and a good one usually shows up right at the start. If the curry paste goes straight into the liquid and barely cooks, the broth tends to taste thin and a little raw. If you give that paste a short cook in the oil first, the whole pot deepens fast.

The other part that matters is the heat. This soup should sit at a gentle simmer, not a boil. Boiling tightens the chicken and can make the coconut milk look greasy instead of smooth.

When it lands where it should, the broth has enough body to lightly coat the spoon without turning into stew, the chicken stays tender, the peppers keep some bite, and the lime at the end keeps the whole bowl from tasting heavy.


Why This Coconut Curry Soup Stays Balanced

  • Cooking the curry paste in oil for a minute or so takes off the raw edge and gives the broth much more depth without needing a long simmer.
  • Thinly sliced chicken cooks directly in the broth in just a few minutes, so the soup stays weeknight-friendly.
  • Keeping the pot at a gentle simmer protects both the chicken and the coconut milk, so the broth stays smooth instead of greasy or split.
  • Adding the peppers later helps them soften without losing all their bite.

Ingredients for Thai Coconut Curry Soup with Chicken

  • 1 tablespoon neutral oil
  • 3 cloves garlic, minced
  • 2 to 3 tablespoons red curry paste
  • 1 can full-fat coconut milk (400g)
  • 2 cups chicken broth (480g)
  • 1 tablespoon fish sauce
  • 1 teaspoon brown sugar
  • 1 pound boneless skinless chicken breast or thighs, thinly sliced (450g)
  • 1 red bell pepper, thinly sliced (150g)
  • 1 yellow bell pepper, thinly sliced (150g)
  • 1 small onion, thinly sliced (110g)
  • 1 tablespoon lime juice
  • 1/4 cup chopped cilantro (15g)
  • Salt, to taste
  • Black pepper, to taste

Best coconut milk for a smooth broth

Use full-fat canned coconut milk. Light coconut milk gives you a broth that tastes noticeably thinner and less rounded.

Before opening, shake the can well. If the cream and liquid have separated, stir them together before adding them to the pot.

Choosing the red curry paste

Red curry paste brands vary a lot. Some are hotter, saltier, or more concentrated than others.

Start with 2 tablespoons if you don’t know the brand, then adjust next time. With a strong paste, that extra spoonful can swing the whole pot.


How to make Thai coconut curry soup

Close-up of a spoonful of creamy Thai coconut curry soup lifting tender chicken and bell pepper, with steam and glossy coconut broth.

1. Slice the chicken and prep the vegetables

  1. Thinly slice the chicken across the grain. If it feels slippery, place it in the freezer for 10 to 15 minutes first so it firms up and slices more evenly.
  2. Slice the onion and bell peppers. Mince the garlic.

2. Bloom the curry paste

  1. Heat the oil in a soup pot or Dutch oven over medium heat. Add the onion and cook for 3 to 4 minutes, until slightly softened and translucent.
  2. Add the garlic and cook for 30 seconds, until fragrant and just barely golden at the edges.
  3. Stir in the red curry paste and cook for 60 to 90 seconds, stirring constantly, until it darkens slightly and smells noticeably more fragrant.

3. Build the broth

  1. Pour in the coconut milk and chicken broth, stirring well to dissolve the curry paste fully. Add the fish sauce and brown sugar.
  2. Bring the pot to a gentle simmer. You want small bubbles around the edges and an occasional bubble in the center, not a rolling boil.

4. Cook the chicken gently

  1. Add the sliced chicken and simmer for 4 to 5 minutes, stirring once or twice, until the pieces are opaque and gently firm.
  2. If you’re unsure, pull out one piece and cut it open before the rest overcooks.

5. Add the peppers

  1. Add the bell peppers and simmer for 3 to 4 minutes, until slightly softened but still with a little crunch.
  2. Taste the broth. If it needs more salt, add a small splash of fish sauce or a pinch of salt. Let it simmer for 1 to 2 minutes after adjusting so the flavor settles before tasting again.

6. Finish with lime and cilantro

  1. Turn off the heat and stir in the lime juice and cilantro. Lime tastes brightest when added off heat or right before serving.
  2. Serve hot.

If you’re building out a cold-weather dinner rotation, this Easy Chicken Noodle Soup From Scratch is another cozy, broth-forward favorite.


Tips for the best Thai coconut curry soup with chicken

  • Keep the heat moderate. A hard boil can split the coconut milk and toughen the chicken.
  • Use chicken thighs if you want a little more forgiveness. They stay tender more easily if the soup goes a minute too long.
  • Do not overcook the peppers. Their slight bite gives the bowl better contrast against the rich broth.
  • Taste at the end for balance, not just salt. If the broth tastes flat, it often needs lime more than anything else.

Thai coconut curry soup variations

Thai coconut curry soup with shrimp

Use 1 pound peeled raw shrimp (450g) instead of chicken. Add the shrimp during the last 3 to 4 minutes of cooking, just until they turn pink and curled. Simmering past that point turns them rubbery.

Thai coconut curry soup with rice noodles

Cook rice noodles separately, then divide them into bowls and ladle the soup over the top. If you simmer the noodles directly in the soup and store leftovers, they keep absorbing broth and turn too soft.


What to serve with Thai coconut curry soup

Steamed jasmine rice works well if you want to stretch the broth into a fuller meal. Rice noodles are the better choice if you want something lighter that still makes the bowl feel substantial.

For a simple side, serve it with cucumber salad, sautéed greens, or extra lime wedges and herbs at the table.

For another fast comfort-food bowl, try this Chicken Ramen with Creamy Garlic Sauce on a night when you want noodles instead.


How to store and reheat coconut curry soup

Store cooled soup in an airtight container in the refrigerator for up to 3 days.

Reheat over low heat until just steaming. If the broth looks slightly split, whisk it gently off heat and it will usually come back together well enough for serving.

If you plan to add rice noodles, store them separately.


FAQ about Thai coconut curry soup

Why did my coconut curry soup separate?

Usually because the heat was too high and the soup boiled too hard. Coconut milk holds together better at a gentle simmer than at a rolling boil.

Can I use frozen vegetables or frozen shrimp?

Yes. Frozen shrimp work well if thawed first for more even cooking, and frozen vegetables are fine too, though they soften faster than fresh peppers.

Can I add rice noodles directly to the soup?

You can if you are serving the whole pot right away. For leftovers, it is better to cook them separately so they do not keep absorbing broth.

How do I make it milder or spicier?

For a milder soup, start with less curry paste and adjust upward next time. For more heat, add more curry paste or finish bowls with chile oil or fresh chiles rather than only adding more fish sauce.


Nutrition

  • Serving size: approximately 1/4 of the total recipe
  • Calories: 452 kcal
  • Protein: 31g
  • Fat: 29g
  • Carbohydrates: 16g
  • Per 100g: Calories: 84 kcal, Protein: 6g, Fat: 5g, Carbohydrates: 3g.

These nutritional values are approximate and can vary based on the specific ingredients and brands used.

Thai Coconut Curry Soup with Chicken

Rich and smooth Thai coconut curry soup with tender chicken, bell peppers, and a bright lime finish, ready in 30 minutes. A comforting weeknight soup with a gently simmered broth that balances sweetness, acidity, and spice.
Course: Dinner
Cuisine: Thai
Prep: 15 min
Cook: 15 min
Total: 30 min
Servings: 4 Calories: 452 kcal Cost: —

Equipment

  • Soup pot or Dutch oven
  • Knife
  • Cutting board
  • Measuring spoons
  • Can opener
  • Stirring spoon

Ingredients

  • 1 tablespoon neutral oil
  • 3 cloves garlic, minced
  • 2 to 3 tablespoons red curry paste
  • 1 can full-fat coconut milk (400g)
  • 2 cups chicken broth (480g)
  • 1 tablespoon fish sauce
  • 1 teaspoon brown sugar
  • 1 pound boneless skinless chicken breast or thighs, thinly sliced (450g)
  • 1 red bell pepper, thinly sliced (150g)
  • 1 yellow bell pepper, thinly sliced (150g)
  • 1 small onion, thinly sliced (110g)
  • 1 tablespoon lime juice
  • 1/4 cup chopped cilantro (15g)
  • Salt, to taste
  • Black pepper, to taste

Instructions

  1. Thinly slice chicken across the grain; chill for 10-15 minutes if slippery. Slice onion and bell peppers, mince garlic.
  2. Heat oil in soup pot over medium; cook onion 3-4 minutes until slightly softened and translucent.
  3. Add garlic; cook 30 seconds until fragrant and barely golden.
  4. Stir in red curry paste; cook 60-90 seconds stirring constantly until darkened and fragrant.
  5. Pour in coconut milk and chicken broth; stir to dissolve curry paste. Add fish sauce and brown sugar.
  6. Bring to a gentle simmer (small bubbles around edges, occasional bubble center).
  7. Add chicken; simmer 4-5 minutes stirring occasionally until opaque and gently firm.
  8. Add bell peppers; simmer 3-4 minutes until slightly softened but still crunchy.
  9. Adjust seasoning with salt or fish sauce; simmer 1-2 minutes to settle flavors.
  10. Turn off heat; stir in lime juice and chopped cilantro. Serve hot.

Notes

Keep heat moderate to avoid coconut milk splitting and chicken toughening. Chicken thighs can be used for more forgiving texture. Do not overcook peppers to maintain crunch. Taste at the end and adjust lime for balance.

Nutrition

Serving Size: 1/4 of recipe | Calories: 452 kcal | Protein: 31g | Fat: 29g | Carbohydrates: 16g