Author

Julia

Browsing

Pumpkin Roll

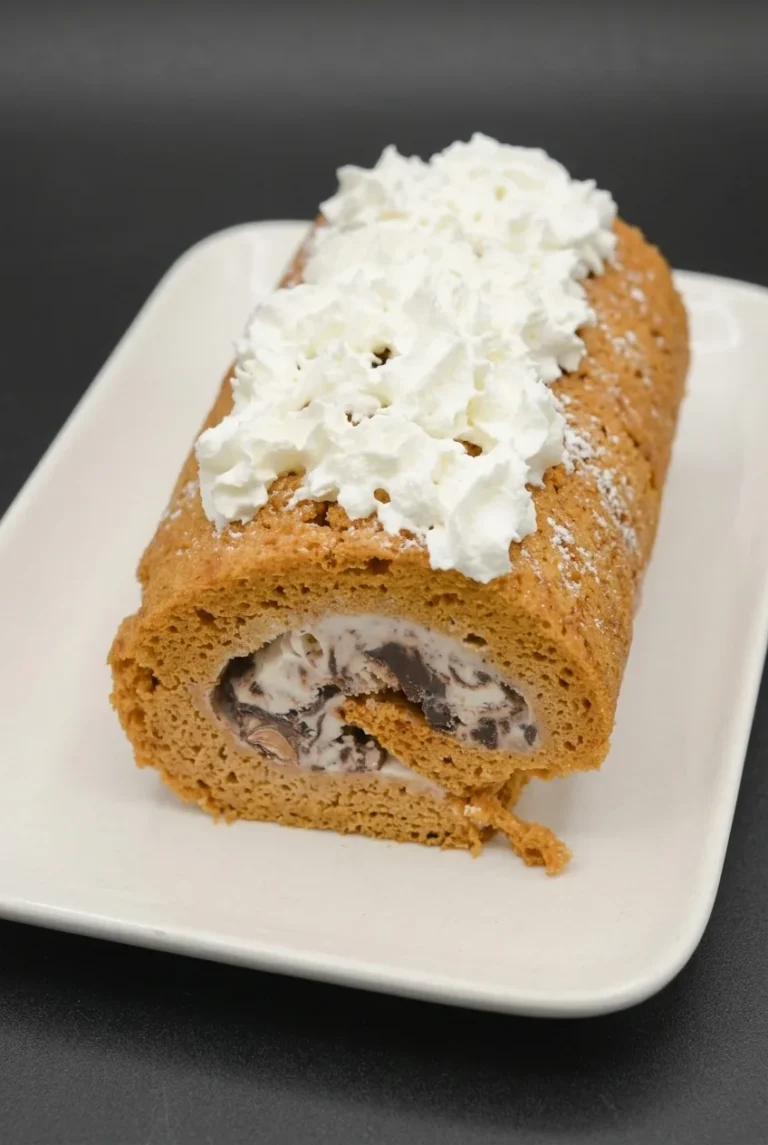
This frozen pumpkin roll wraps a soft, spiced cake around a thick swirl of chunky chocolate-and-peanut-butter-style ice cream. Unlike a cream-cheese-filled pumpkin roll, it needs a firm freeze before slicing so the pale filling and dark mix-ins stay distinct.

The key is to roll the thin cake in a sugared towel while it is still warm, then let it cool in that shape before adding the ice cream. A light dusting of powdered sugar and a generous spoonful of whipped cream finish each slice.

Ingredients for Pumpkin Roll
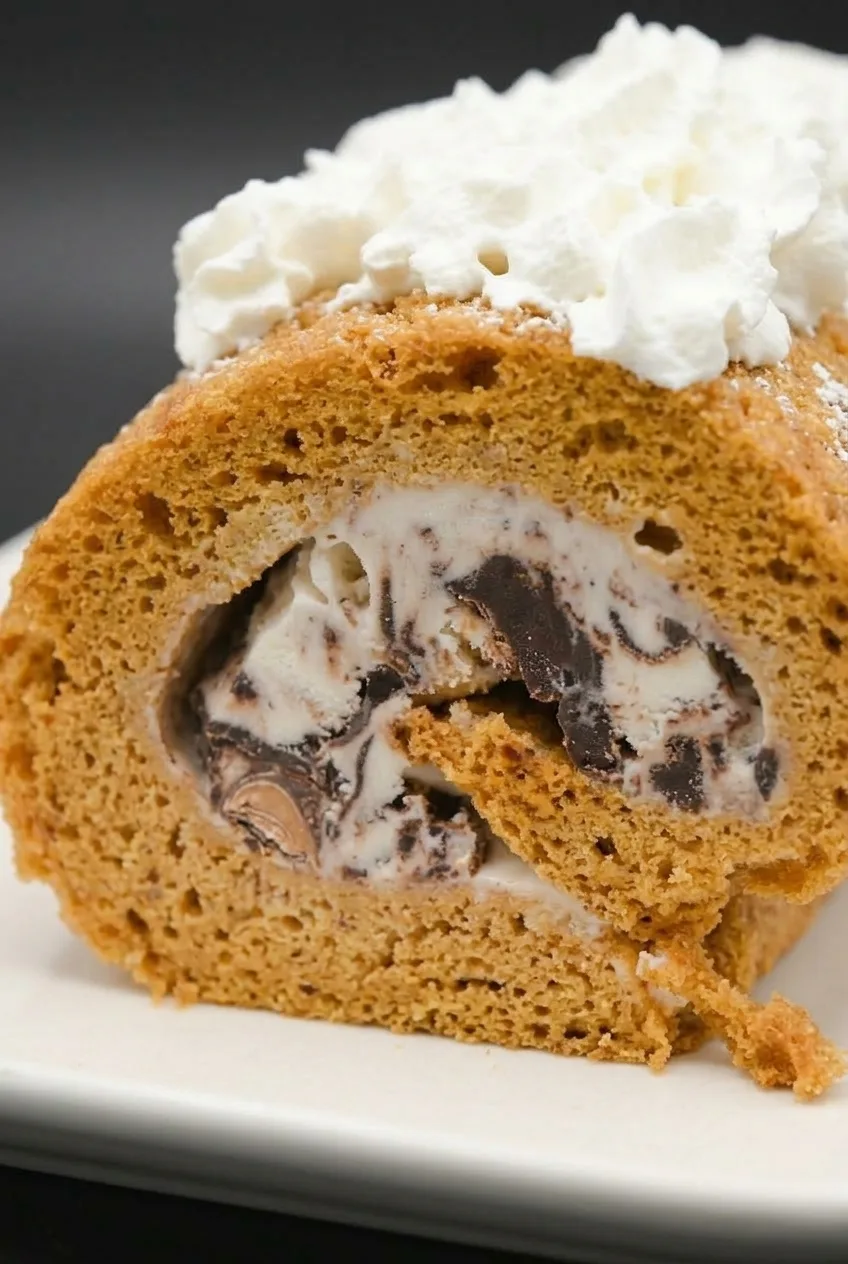
Close view of a pumpkin roll slice showing porous spiced cake and pale ice cream filling with dark chocolate chunks.
  • Nonstick spray or butter, for greasing the pan
  • 3/4 cup all-purpose flour (95g)
  • 1 teaspoon baking powder
  • 1 1/2 teaspoons pumpkin pie spice
  • 1/4 teaspoon fine salt
  • 3 large eggs
  • 2/3 cup granulated sugar (135g)
  • 2/3 cup pumpkin puree (160g), not pumpkin pie filling
  • 1 teaspoon lemon juice
  • 1/2 cup confectioners’ sugar (60g), divided
  • 1 quart chunky chocolate-and-peanut-butter-style ice cream, such as Moose Tracks, softened just until spreadable
  • 1 1/2 cups whipped topping or sweetened whipped cream, for serving

A similarly chunky, pale ice cream with chocolate pieces or peanut-butter cups also works. It should spread easily but still hold soft mounds; melted ice cream will leak as you roll the cake.

How to Make Pumpkin Roll
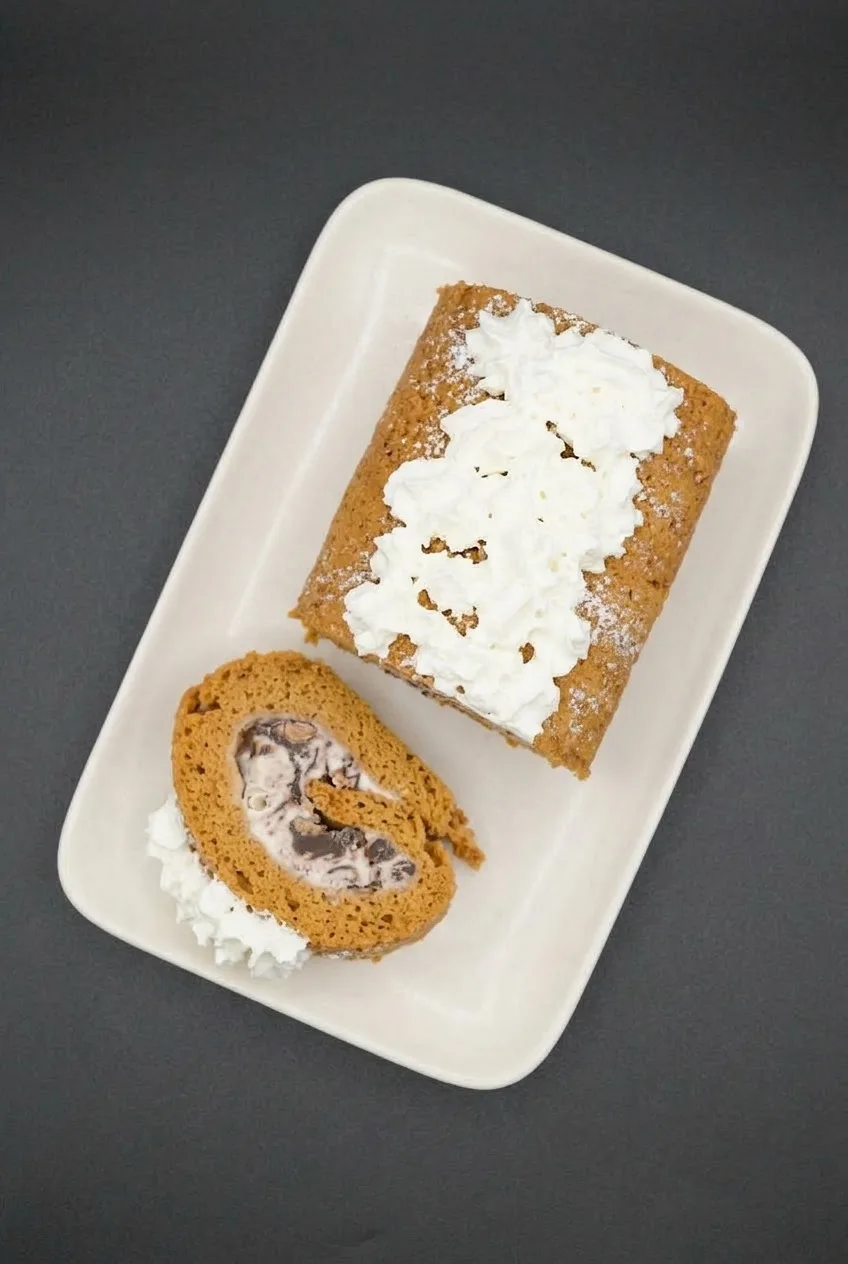
Overhead view of sliced frozen pumpkin roll with whipped cream and powdered sugar on a neutral platter.

Yield: 8 thick slices. Time: About 25 minutes active prep, 15 minutes baking, 1 hour cooling, and at least 4 hours freezing.

  1. Prepare the pan and towel: Preheat the oven to 375°F (190°C) with a rack in the center. Grease a 15-by-10-inch jelly-roll pan, line it with parchment with a short overhang, and lightly grease the parchment. Lay a clean, lint-free kitchen towel on the counter. Sift most of the confectioners’ sugar over an area larger than the cake; reserve the rest for finishing.
  2. Mix the batter: Whisk the flour, baking powder, pumpkin pie spice, and salt in a bowl. In a large bowl, beat the eggs and granulated sugar until thicker and lighter in color. Mix in the pumpkin puree and lemon juice, then fold in the dry ingredients just until no flour streaks remain.
  3. Bake the cake: Spread the batter evenly to the corners of the pan. Bake uncovered for 14 to 16 minutes, starting to check at 14 minutes. The center should no longer look wet, and the cake should spring back lightly when touched. Do not let the edges become dark or crisp; the sheet needs to stay flexible.
  4. Roll while warm: Let the cake rest in the pan for 3 to 5 minutes. Loosen the edges, invert it onto the sugared towel, and carefully peel off the parchment. Starting at a short side, roll the cake and towel together into a snug log. The towel supports the warm cake as it takes on its spiral shape, while the sugar helps keep it from sticking.
  5. Cool completely: Set the towel-wrapped roll seam-side down at room temperature for about 1 hour, until no longer warm to the touch. Keep it rolled as it cools; a warm cake will melt the filling.
  6. Add the ice cream: Gently unroll the cake. Spread the softened ice cream evenly over it, leaving a 1/2-inch border on all sides. Work quickly so the ice cream remains spreadable rather than runny.
  7. Reroll and freeze: Roll the filled cake from the same short side, this time without the towel. Place it seam-side down on a freezer-safe tray or platter. Wrap tightly in parchment and then plastic wrap. Freeze for at least 4 hours or overnight, until firm throughout.
  8. Slice and finish: Unwrap the frozen roll and dust it lightly with the reserved confectioners’ sugar. Cut into 8 thick rounds with a sharp knife, warming the blade and wiping it dry between cuts. Top each slice with a generous mound of whipped cream just before serving.

Pan Size and Clean Slices

Use a 15-by-10-inch jelly-roll pan for the specified 375°F baking time. A different pan changes the thickness of the cake and how readily it bakes and rolls. Judge doneness by a set center and light spring-back, not by deep browning.

Wait until the filled roll feels solid before cutting so the ice cream holds a defined spiral. If it is too hard to slice straight from the freezer, let it stand for about 5 minutes, then cut with a clean, sharp knife.

Make-Ahead and Freezer Storage

Keep this ice-cream-filled roll tightly wrapped and frozen until serving. Freezing it overnight can make slicing easier. Wrap leftover slices individually or place them in an airtight freezer-safe container to limit drying and freezer odors. Add whipped cream only when serving.

For another pumpkin dessert with a whipped cream finish, try these Mini Pumpkin Pies with Whipped Cream.

Nutrition

Approximate per thick slice (1/8 of the roll, including whipped cream): 500 calories, 9g protein, 21g fat, and 68g carbohydrates. Approximate per 100g: 245 calories, 4g protein, 10g fat, and 33g carbohydrates. Values vary substantially by ice cream and whipped topping brand.

Pumpkin Roll

A spiced pumpkin cake roll filled with chunky chocolate-and-peanut-butter-style ice cream, then frozen and served with whipped cream.
Course: Dessert
Cuisine: American
Prep: 85 min
Cook: 15 min
Total: 340 min
Servings: 8 Calories: 500 kcal

Equipment

  • 15-by-10-inch jelly-roll pan
  • parchment paper
  • clean lint-free kitchen towel
  • mixing bowls
  • whisk
  • electric mixer
  • fine-mesh sieve
  • sharp knife
  • freezer-safe tray

Ingredients

For the Pumpkin Cake

  • Nonstick spray or butter, for greasing the pan
  • 3/4 cup all-purpose flour (95g)
  • 1 teaspoon baking powder
  • 1 1/2 teaspoons pumpkin pie spice
  • 1/4 teaspoon fine salt
  • 3 large eggs
  • 2/3 cup granulated sugar (135g)
  • 2/3 cup pumpkin puree (160g), not pumpkin pie filling
  • 1 teaspoon lemon juice
  • 1/2 cup confectioners’ sugar (60g), divided

For the Filling and Serving

  • 1 quart chunky chocolate-and-peanut-butter-style ice cream, such as Moose Tracks, softened until spreadable
  • 1 1/2 cups whipped topping or sweetened whipped cream, for serving

Instructions

  1. Preheat the oven to 375°F (190°C) with a rack in the center.
  2. Grease a 15-by-10-inch jelly-roll pan, line it with parchment paper leaving a short overhang, and lightly grease the parchment.
  3. Lay a clean lint-free kitchen towel on the counter and sift most of the confectioners’ sugar over an area larger than the cake. Reserve the remaining sugar for finishing.
  4. Whisk the flour, baking powder, pumpkin pie spice, and salt in a bowl.
  5. Beat the eggs and granulated sugar in a large bowl until thickened and lighter in color.
  6. Mix in the pumpkin puree and lemon juice, then fold in the flour mixture just until no streaks of flour remain.
  7. Spread the batter evenly into the prepared pan and bake for 14 to 16 minutes, until the center is set and springs back lightly when touched.
  8. Let the cake rest in the pan for 3 to 5 minutes, then loosen the edges and invert it onto the sugared towel. Carefully peel away the parchment.
  9. Starting from a short side, roll the warm cake and towel together into a snug log. Set seam-side down and cool completely for about 1 hour.
  10. Gently unroll the cooled cake and spread the softened ice cream evenly over the surface, leaving a 1/2-inch border on all sides.
  11. Roll the cake back up from the same short side without the towel. Place seam-side down on a freezer-safe tray.
  12. Wrap tightly in parchment paper and then plastic wrap. Freeze for at least 4 hours or overnight, until firm.
  13. Unwrap the frozen roll, dust with the reserved confectioners’ sugar, and cut into 8 thick slices using a warmed, dry sharp knife.
  14. Top each slice with whipped topping or sweetened whipped cream just before serving.

Tips

  • Use a 15-by-10-inch jelly-roll pan so the cake is thin enough to roll easily.
  • Roll the cake in the sugared towel while warm to help prevent cracking.
  • Cool the cake completely before adding ice cream so the filling does not melt.
  • Soften the ice cream only until spreadable; melted ice cream can leak from the roll.
  • Freeze the filled roll until solid for clean, defined slices.
  • Warm and wipe the knife dry between cuts for neater slices.

Variations

  • Alternative Ice Cream Filling: Use another pale, chunky ice cream with chocolate pieces or peanut-butter cups in place of the chocolate-and-peanut-butter-style ice cream.
Notes

Keep tightly wrapped and frozen until serving. Freeze overnight for easier slicing, and store leftover slices individually wrapped or in an airtight freezer-safe container. Add whipped cream only when serving.

Nutrition

Calories: 500 kcal | Protein: 9 g | Fat: 21 g | Carbohydrates: 68 g

Roasted Garlic Mashed Potatoes

A whole head of roasted garlic gives these mashed potatoes a mellow savory flavor without the sharpness of raw garlic. Yukon Gold potatoes, warm cream, and butter make a creamy mash that still holds soft spoon swirls.

The key is to drain the potatoes well and mash them gently; too much mixing can make them gummy. Just before serving, mound them in a shallow bowl and add a visible well of melted butter and a light scattering of thyme.

Prep: 15 minutes | Cook: 35 to 40 minutes | Total: 50 to 55 minutes | Yield: 8 side-dish servings

Ingredients for Roasted Garlic Mashed Potatoes

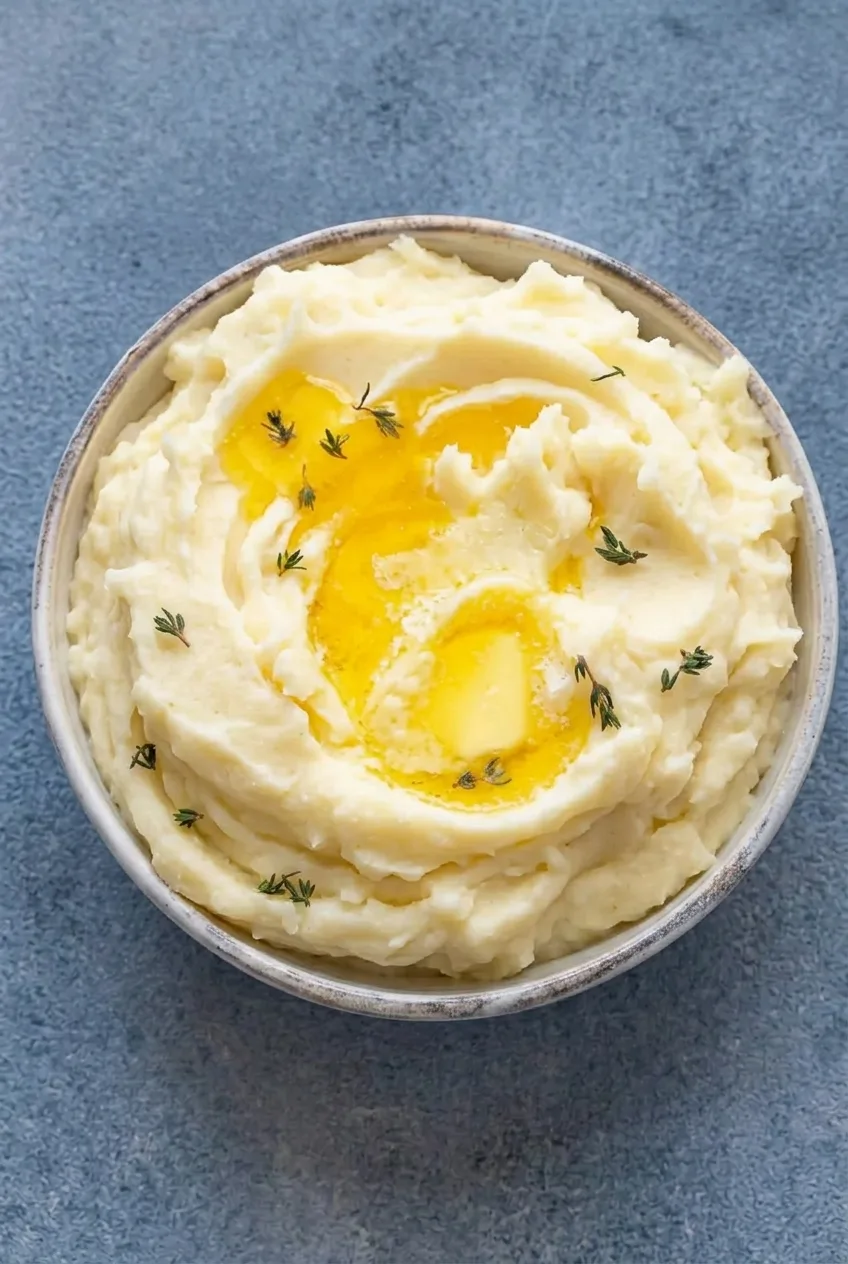
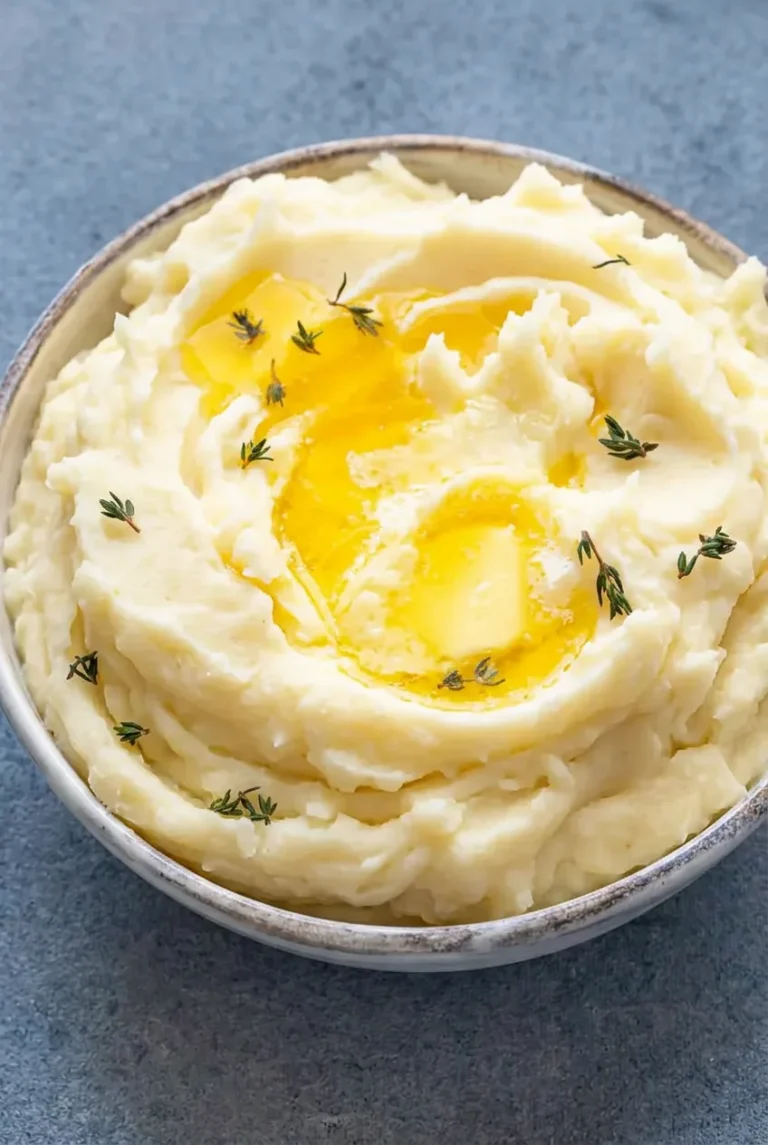
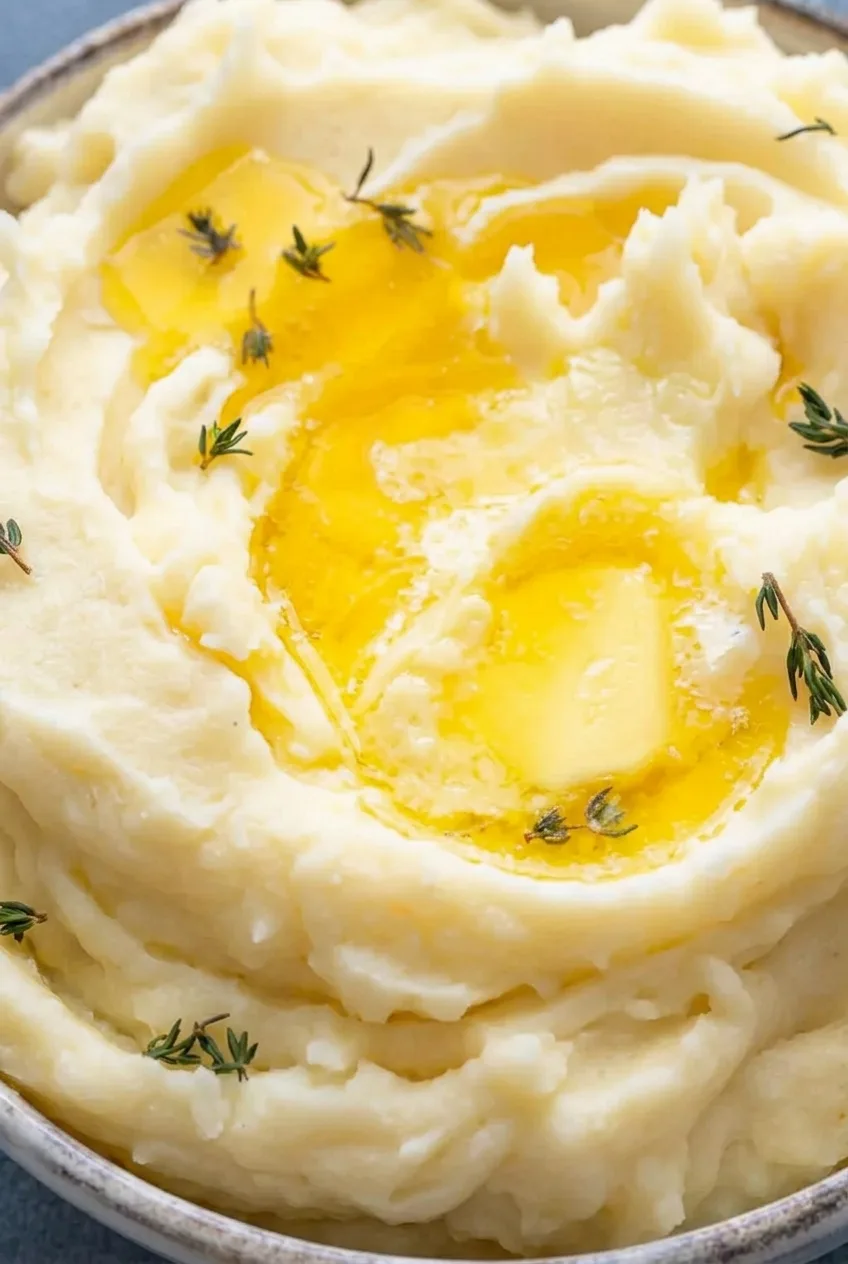
Close view of creamy roasted garlic mashed potato swirls with melted butter and fresh thyme
  • 3 pounds Yukon Gold potatoes, peeled and cut into 1 1/2-inch chunks (1,350g)
  • 1 large head garlic
  • 1 teaspoon olive oil
  • Kosher salt for the potato water, plus 2 teaspoons for the mash, or to taste
  • 8 tablespoons unsalted butter, divided (115g)
  • 3/4 cup heavy cream (180g)
  • Up to 1/4 cup warm whole milk, only if needed
  • 1/4 teaspoon freshly ground black pepper, plus more to taste
  • 1 teaspoon fresh thyme leaves or 4 to 6 small sprigs

For a fluffier mash, use the same weight of peeled russet potatoes instead of Yukon Golds. Add the warm dairy gradually, since russets may absorb a different amount.

How to Make Roasted Garlic Mashed Potatoes

Overhead view of roasted garlic mashed potatoes in a shallow bowl with a central butter well
  1. Roast the garlic: Heat the oven to 400°F (205°C). Slice the top off the garlic head to expose the cloves. Drizzle with olive oil, wrap loosely in foil, and place cut-side up on a small rimmed baking sheet. Roast for 35 to 40 minutes, checking at 35 minutes. The cloves should be lightly golden and soft enough to squeeze from their skins; a very large head may need a few extra minutes.
  2. Cook the potatoes: While the garlic roasts, put the potatoes in a large pot and cover with cold water by about 1 inch. Salt the water generously and bring to a boil over high heat. Reduce to a steady medium simmer and cook uncovered for 15 to 20 minutes. Start checking at 15 minutes: a fork should slide through the largest piece with little resistance.
  3. Warm the cream and butter: Near the end of the potato cooking time, warm the cream and 6 tablespoons of the butter in a small saucepan over low heat for 3 to 5 minutes. Once the butter has melted and the cream is steaming lightly, remove from the heat. Do not boil.
  4. Drain and dry: Drain the potatoes thoroughly and return them to the hot, empty pot. Set over low heat for 1 to 2 minutes, shaking the pot gently, until no water remains in the bottom and the potatoes look steamy rather than wet.
  5. Mash gently: Squeeze the soft garlic cloves into the potatoes, pressing any large cloves into a paste with the masher. Mash by hand until mostly smooth. Fold in the warm cream-butter mixture in a few additions, stopping when the potatoes are creamy. If they seem stiff, add warm milk 1 to 2 tablespoons at a time. Season with the 2 teaspoons salt and the pepper, adjusting to taste. Stop mixing once the mash holds soft ridges.
  6. Finish the bowl: Mound the potatoes in a shallow round serving bowl. Use the back of a spoon to make broad, loose swirls and a shallow well in the center. Melt the remaining 2 tablespoons butter and pour it into the well. Scatter the thyme lightly over the top and serve warm.

How to Keep Mashed Potatoes Creamy, Not Gummy

Use a hand masher, not a blender or food processor. Mash the hot, well-drained potatoes only until the garlic is distributed, then fold in the warm dairy gently. Extra mixing can turn the potatoes sticky.

For a smoother finish, pass the hot, drained potatoes through a ricer before folding in the roasted garlic and warm dairy.

Serving Suggestions

Serve alongside roast chicken, turkey, or steak. For a vegetable side, pair them with Parmesan Roasted Brussels Sprouts or Slow Cooker Maple Glazed Carrots.

Make-Ahead, Storage, and Reheating

To hold the potatoes briefly, keep them warm for up to 30 minutes over very low heat or in a covered heat-safe bowl set over barely simmering water. Stir as little as possible. Make fresh spoon swirls and add the melted butter and thyme just before serving.

Cool leftovers promptly and refrigerate in an airtight container for up to 4 days. Reheat gently over low heat with a splash of milk or cream and a little butter, stirring only until loosened and hot. Alternatively, reheat covered in a 350°F (175°C) oven with a few tablespoons of milk or cream and butter, stirring once if practical.

Mashed potatoes can be frozen airtight for 2 to 3 months. Thaw overnight in the refrigerator, then reheat gently, adding butter and milk or cream as needed to restore a creamy texture. Add a fresh butter well and thyme after reheating.

Nutrition

Approximate nutrition per serving, based on 8 side-dish servings and excluding the optional milk: 315 calories, 4g protein, 20g fat, and 31g carbohydrates. Approximate values per 100g of finished potatoes: 160 calories, 2g protein, 10g fat, and 16g carbohydrates. Values vary with potato moisture, the amount of edible garlic, and any milk added.

Roasted Garlic Mashed Potatoes

Creamy Yukon Gold mashed potatoes with mellow roasted garlic, warm cream, butter, and fresh thyme.
Course: Side Dish
Cuisine: American
Prep: 15 min
Cook: 40 min
Total: 55 min
Servings: 8 Calories: 315 kcal

Equipment

  • Oven
  • Small rimmed baking sheet
  • Aluminum foil
  • Large pot
  • Colander
  • Potato masher
  • Small saucepan
  • Shallow serving bowl

Ingredients

For the Mashed Potatoes

  • 3 pounds Yukon Gold potatoes, peeled and cut into 1 1/2-inch chunks (1,350g)
  • Kosher salt, for the potato water and 2 teaspoons for the mash, or to taste
  • 8 tablespoons unsalted butter, divided (115g)
  • 3/4 cup heavy cream (180g)
  • Up to 1/4 cup warm whole milk, if needed
  • 1/4 teaspoon freshly ground black pepper, plus more to taste

For the Roasted Garlic and Garnish

  • 1 large head garlic
  • 1 teaspoon olive oil
  • 1 teaspoon fresh thyme leaves or 4 to 6 small sprigs

Instructions

  1. Heat the oven to 400°F (205°C).
  2. Slice the top from the garlic head to expose the cloves. Drizzle with olive oil, wrap loosely in foil, and place cut-side up on a small rimmed baking sheet.
  3. Roast the garlic for 35 to 40 minutes, until the cloves are lightly golden and soft enough to squeeze from their skins.
  4. While the garlic roasts, place the potatoes in a large pot and cover with cold water by about 1 inch. Salt the water generously.
  5. Bring the potatoes to a boil over high heat, then reduce to a steady medium simmer. Cook uncovered for 15 to 20 minutes, until a fork slides easily through the largest pieces.
  6. Near the end of the potato cooking time, warm the cream and 6 tablespoons of butter in a small saucepan over low heat for 3 to 5 minutes, until the butter melts and the cream is lightly steaming. Do not boil.
  7. Drain the potatoes thoroughly and return them to the hot empty pot. Cook over low heat for 1 to 2 minutes, shaking gently, until the potatoes are steamy and dry.
  8. Squeeze the roasted garlic cloves into the potatoes and mash by hand until mostly smooth.
  9. Fold in the warm cream-butter mixture in a few additions until creamy. Add warm milk 1 to 2 tablespoons at a time if the potatoes are too stiff.
  10. Season with 2 teaspoons kosher salt and the black pepper, adjusting to taste. Stop mixing once the potatoes hold soft ridges.
  11. Mound the potatoes in a shallow serving bowl and make broad swirls and a shallow well in the center.
  12. Melt the remaining 2 tablespoons butter and pour it into the well. Scatter with thyme and serve warm.

Tips

  • Drain and dry the potatoes well before mashing to prevent watery mashed potatoes.
  • Use a hand masher rather than a blender or food processor to avoid a gummy texture.
  • Warm the cream and butter before adding them so the potatoes stay hot and absorb the dairy evenly.
  • Fold in the dairy gently and stop mixing as soon as the potatoes are creamy.
  • For an extra-smooth texture, pass the hot drained potatoes through a ricer before adding the garlic and dairy.

Variations

  • Russet Potato Mash: Use the same weight of peeled russet potatoes for a fluffier mash, adding the warm dairy gradually because russets may absorb a different amount.

Notes

Keep warm for up to 30 minutes over very low heat or over barely simmering water. Refrigerate leftovers airtight for up to 4 days, or freeze for 2 to 3 months. Reheat gently with a splash of milk or cream and a little butter.

Nutrition

Calories: 315 kcal | Protein: 4 g | Fat: 20 g | Carbohydrates: 31 g

Southern Squash Casserole

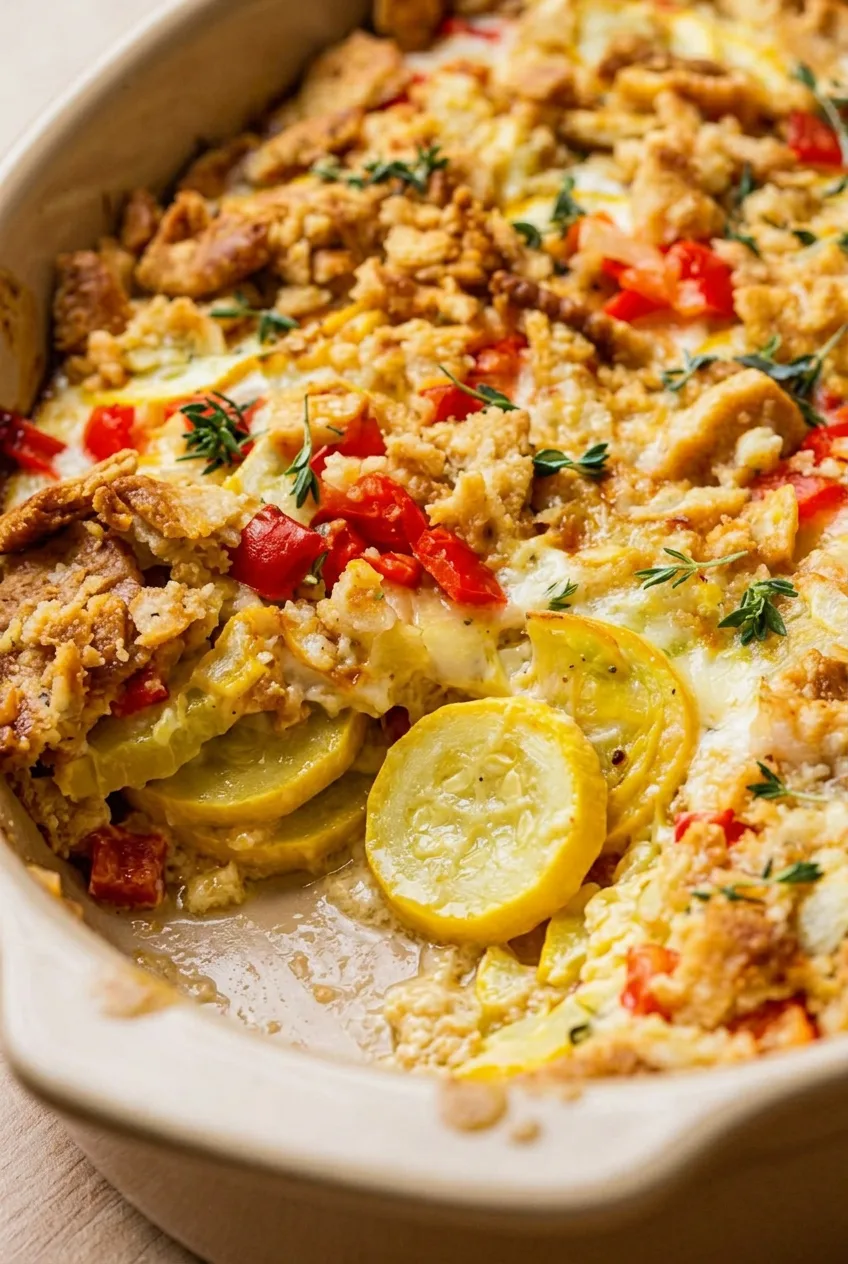
Southern squash casserole should be creamy and set, with tender yellow squash slices that still hold their shape. Sautéing the squash with onion and red bell pepper, then draining it before adding the egg-and-cheddar filling, keeps excess liquid out of the baking dish.

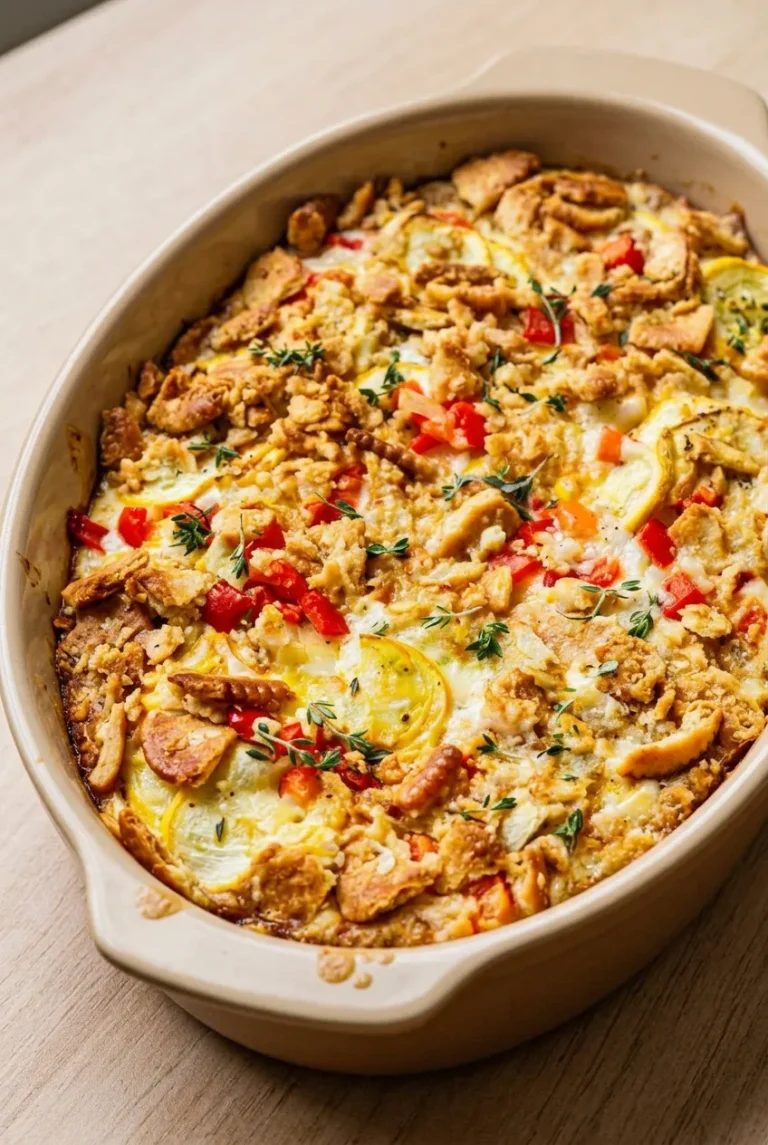
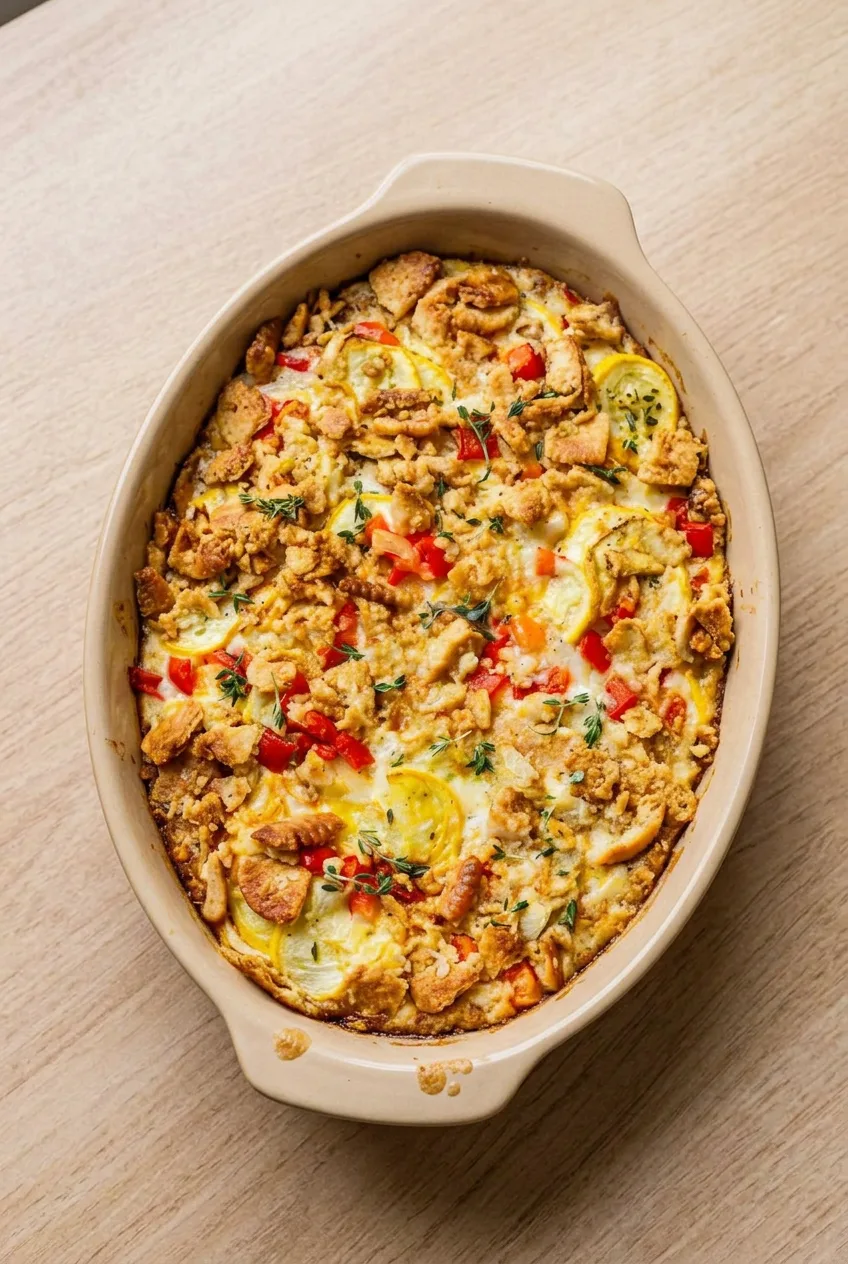
Coarsely crushed buttery crackers form an uneven golden topping, with patches of melted cheddar between the pieces. Add the topping just before baking to keep it crisp, then finish with a light scattering of fresh thyme.

Ingredients for Southern Squash Casserole

Close view of creamy Southern squash casserole with tender squash slices, melted cheddar, red pepper, and crisp cracker crumbs
  • 3 pounds yellow summer squash, sliced 1/4 inch thick (1,350g)
  • 1 medium yellow onion, finely diced (about 180g)
  • 1 small red bell pepper, finely diced (about 120g)
  • 6 tablespoons unsalted butter, divided (85g)
  • 1 teaspoon kosher salt, plus more as needed
  • 1/2 teaspoon black pepper
  • 2 large eggs, lightly beaten
  • 1/2 cup mayonnaise (120g)
  • 1/2 cup sour cream (120g)
  • 2 cups shredded sharp cheddar cheese, divided (225g)
  • 1 tablespoon fresh thyme leaves, plus a few small sprigs for serving
  • 2 cups coarsely crushed buttery round crackers (about 100g)

How to Make Southern Squash Casserole

Overhead view of Southern squash casserole in a shallow ceramic dish with golden cracker topping and fresh thyme
  1. Prepare the dish: Heat the oven to 350°F (175°C). Lightly grease a shallow 2 1/2- to 3-quart casserole dish or a 9-by-13-inch baking dish with a little of the butter.
  2. Cook the vegetables: Melt 2 tablespoons of the butter, minus the amount used to grease the dish, in a large 12-inch skillet over medium heat. Add the squash, onion, red bell pepper, salt, and black pepper. Cook for 10 to 12 minutes, stirring gently now and then, until the squash is tender and pliable but the slices remain intact.
  3. Drain the squash: Transfer the vegetables to a colander and let drain for about 5 minutes. If they are still dripping heavily, press gently with the back of a spoon without mashing the squash.
  4. Mix the filling: In a large bowl, stir together the eggs, mayonnaise, sour cream, 1 1/2 cups of the cheddar, and most of the thyme leaves. Gently fold in the drained vegetables. The mixture should be thick and spoonable, not watery. Spread it in the prepared dish.
  5. Add the topping: Melt the remaining 4 tablespoons butter and toss with the crushed crackers. Scatter them loosely over the filling, leaving the pieces uneven rather than pressing them into a smooth layer. Sprinkle the remaining 1/2 cup cheddar in small patches so some crackers and squash remain visible.
  6. Bake: Bake uncovered for about 28 to 35 minutes, starting to check at 25 minutes. The edges should bubble, the cracker ridges should be golden, and the center should no longer look loose when the dish is gently nudged. If the topping browns before the center sets, tent the dish loosely with foil while it finishes baking.
  7. Rest and serve: Let the casserole rest for 5 to 10 minutes so the filling firms up for scooping. Scatter the remaining thyme leaves and a few small sprigs over the top. Serve warm.

How to Keep Squash Casserole From Getting Watery

Yellow squash releases plenty of moisture as it cooks. A wide skillet gives some of that liquid room to evaporate, but draining the cooked vegetables is still important. They should look moist without dripping heavily before you fold them into the filling; this recipe does not need added milk.

Stop sautéing when the squash is tender but still holds its shape. A shallow baking dish helps the center set evenly and leaves more surface area for the cracker topping. A deeper dish may need longer in the oven, so rely on the bubbling edges and set center rather than the timer alone.

Serving Ideas

Serve the casserole beside roast chicken, ham, or pork. For a simple dinner, add soft garlic butter dinner rolls. It also works alongside classic green bean casserole with crispy onions on a larger holiday table.

Make-Ahead, Storage, and Reheating

Make ahead: Assemble the filling in the baking dish, cover, and refrigerate for up to 24 hours. Keep the crackers and reserved cheddar separate. Toss the crackers with melted butter and add both toppings immediately before baking. A chilled casserole may need extra oven time for the center to set.

Store leftovers: Cool, cover tightly, and refrigerate for up to 4 days. The cracker topping will soften in the refrigerator. Add any extra fresh thyme after reheating.

Reheat: Warm leftovers in a 325°F (165°C) oven until hot. For a crisper top, add a small handful of fresh buttered cracker crumbs before reheating. Individual portions can be microwaved, though the crackers will remain softer.

Freeze: For convenience, freeze the unbaked filling without the cracker topping. Thaw overnight in the refrigerator, then add the topping and bake until the center sets. Freezing can soften the squash, so a freshly assembled casserole will have the best texture.

Nutrition

Approximate nutrition per serving, based on 8 side-dish servings: 440 calories, 13g protein, 37g fat, and 18g carbohydrates. Approximate values per 100g of finished casserole: 175 calories, 5g protein, 15g fat, and 7g carbohydrates. Values will vary with the crackers, mayonnaise, cheese, and amount of moisture drained from the squash.

Southern Squash Casserole

A creamy baked squash casserole with tender yellow squash, cheddar cheese, and a crisp buttery cracker topping.
Course: Side Dish
Cuisine: American
Prep: 20 min
Cook: 47 min
Total: 77 min
Servings: 8 Calories: 440 kcal

Equipment

  • 2 1/2- to 3-quart casserole dish
  • 12-inch skillet
  • colander
  • large mixing bowl
  • wooden spoon

Ingredients

For the Casserole

  • 3 pounds yellow summer squash, sliced 1/4 inch thick (1,350g)
  • 1 medium yellow onion, finely diced (about 180g)
  • 1 small red bell pepper, finely diced (about 120g)
  • 6 tablespoons unsalted butter, divided (85g)
  • 1 teaspoon kosher salt, plus more as needed
  • 1/2 teaspoon black pepper
  • 2 large eggs, lightly beaten
  • 1/2 cup mayonnaise (120g)
  • 1/2 cup sour cream (120g)
  • 1 1/2 cups shredded sharp cheddar cheese

For the Topping

  • 2 cups coarsely crushed buttery round crackers (about 100g)
  • 1/2 cup shredded sharp cheddar cheese
  • 1 tablespoon fresh thyme leaves, divided
  • A few small fresh thyme sprigs, for serving

Instructions

  1. Preheat the oven to 350°F (175°C). Lightly grease a shallow 2 1/2- to 3-quart casserole dish or a 9-by-13-inch baking dish with a little butter.
  2. Melt the remaining butter from the first 2 tablespoons in a large 12-inch skillet over medium heat.
  3. Add the squash, onion, red bell pepper, salt, and black pepper. Cook for 10 to 12 minutes, stirring gently occasionally, until the squash is tender and pliable but still holds its shape.
  4. Transfer the vegetables to a colander and drain for about 5 minutes. Press gently with the back of a spoon if they are still dripping heavily, without mashing the squash.
  5. Stir together the eggs, mayonnaise, sour cream, 1 1/2 cups cheddar, and most of the thyme leaves in a large bowl.
  6. Gently fold the drained vegetables into the egg mixture. Spread the filling evenly in the prepared baking dish.
  7. Melt the remaining 4 tablespoons butter and toss with the crushed crackers. Scatter the buttered crackers loosely over the filling.
  8. Sprinkle the remaining 1/2 cup cheddar over the top in small patches, leaving some crackers and squash visible.
  9. Bake uncovered for 28 to 35 minutes, checking at 25 minutes, until the edges are bubbling, the cracker topping is golden, and the center no longer looks loose when gently nudged.
  10. Tent loosely with foil if the topping browns before the center has set.
  11. Rest for 5 to 10 minutes before serving. Garnish with the remaining thyme leaves and fresh thyme sprigs.

Tips

  • Use a wide skillet so moisture from the squash can evaporate as it cooks.
  • Drain the cooked squash well before mixing it with the filling to prevent a watery casserole.
  • Stop sautéing when the squash is tender but the slices still hold their shape.
  • Add the cracker topping immediately before baking so it stays crisp.
  • Use a shallow baking dish for more even setting and a crispier topping.
  • Judge doneness by bubbling edges and a set center rather than the timer alone.

Notes

Assemble the filling up to 24 hours ahead, but keep the crackers and reserved cheddar separate until baking. Refrigerate leftovers for up to 4 days. Reheat at 325°F (165°C) until hot; add fresh buttered cracker crumbs for a crisper top. Freeze unbaked filling without the cracker topping, thaw overnight, then top and bake.

Nutrition

Calories: 440 kcal | Protein: 13 g | Fat: 37 g | Carbohydrates: 18 g

Pecan Pie Cookies

Pecan pie cookies are thick brown sugar thumbprints with soft, pale-golden rims and exposed centers of chopped pecans. Brown sugar and heavy cream make the filling glossy as it bakes—no stovetop pie filling needed. The key is to press broad, deep wells and spoon in mostly coated pecans rather than excess liquid. That keeps the filling centered while the cookies bake.

Ingredients for Pecan Pie Cookies

Brown Sugar Cookie Dough

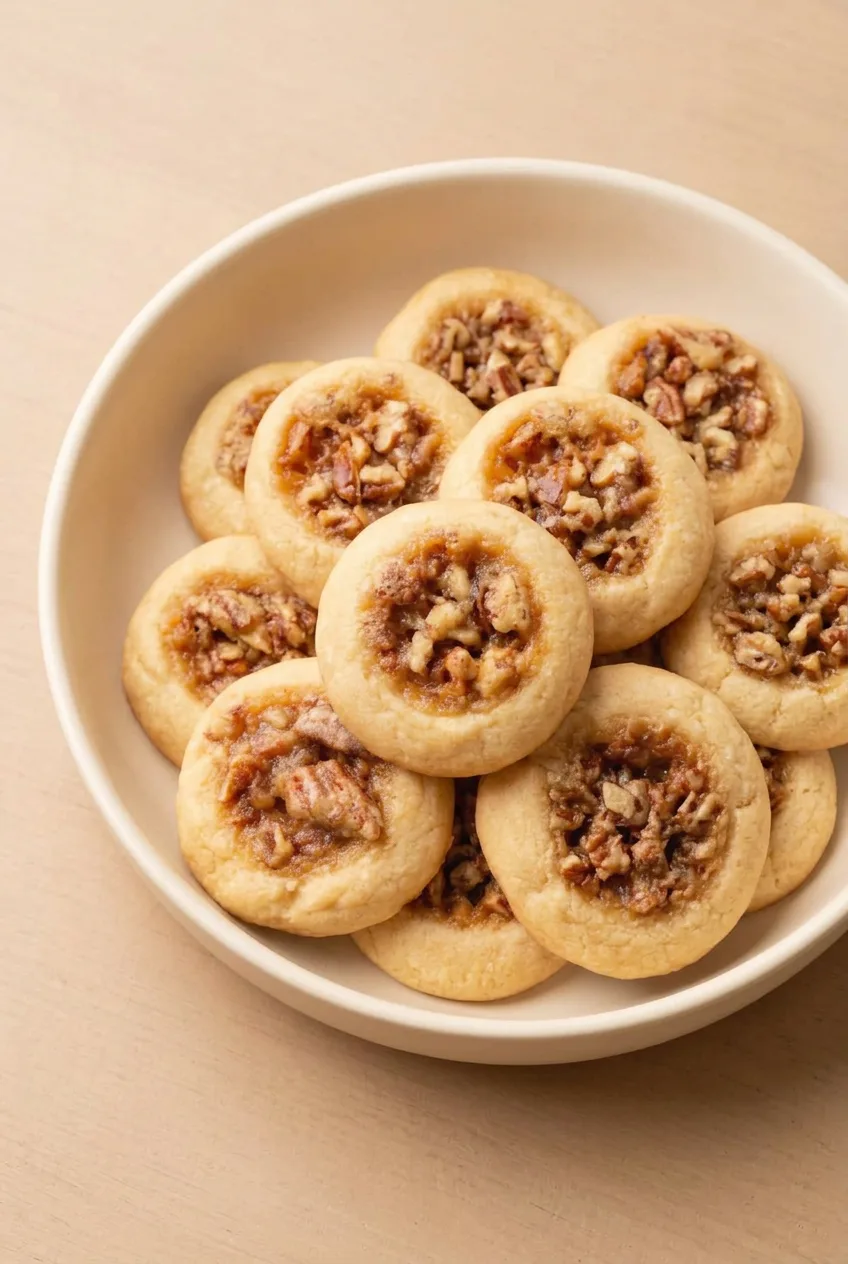
Overhead view of pecan pie thumbprint cookies arranged on a cream ceramic plate with exposed pecan centers.
  • 1/2 cup unsalted butter, softened (115g)
  • 3/4 cup packed light brown sugar (160g)
  • 1 large egg, at room temperature
  • 1 teaspoon vanilla extract
  • 1 3/4 cups all-purpose flour (210g)
  • 1 teaspoon baking powder
  • 1/4 teaspoon fine salt

Pecan Filling

  • 1 cup pecans, finely chopped but not ground (110g)
  • 1/3 cup packed light brown sugar (70g)
  • 3 tablespoons heavy whipping cream
  • 1 teaspoon vanilla extract
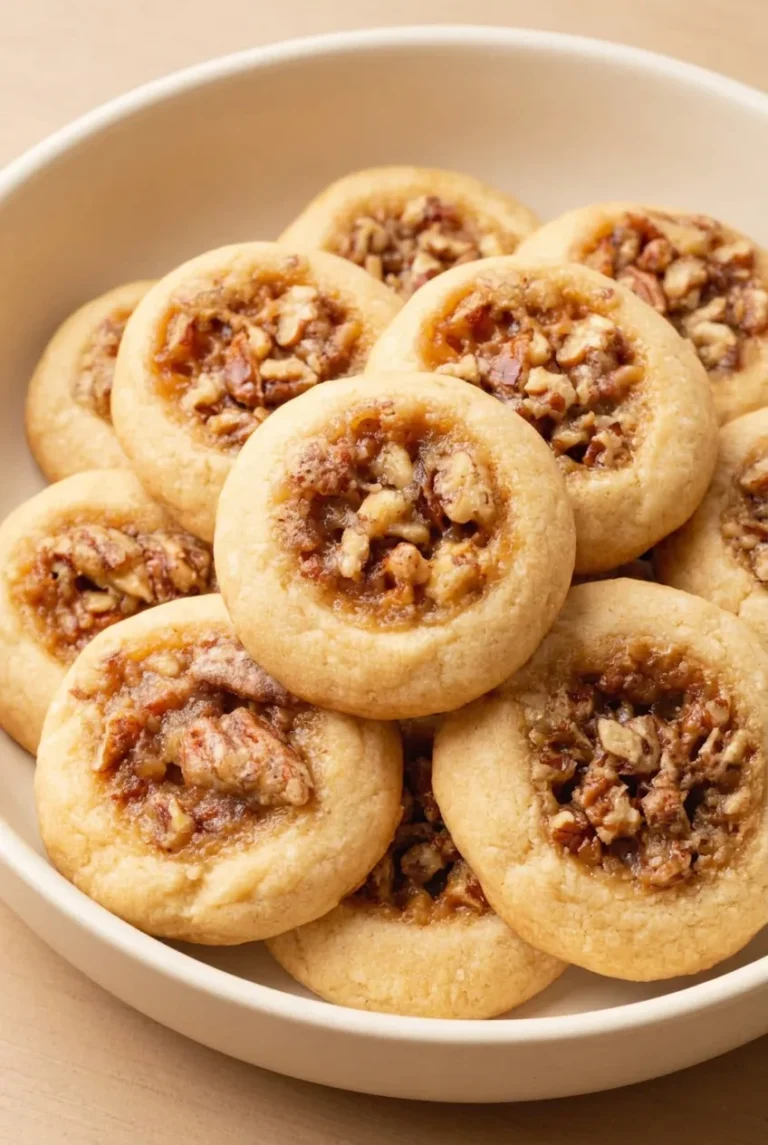
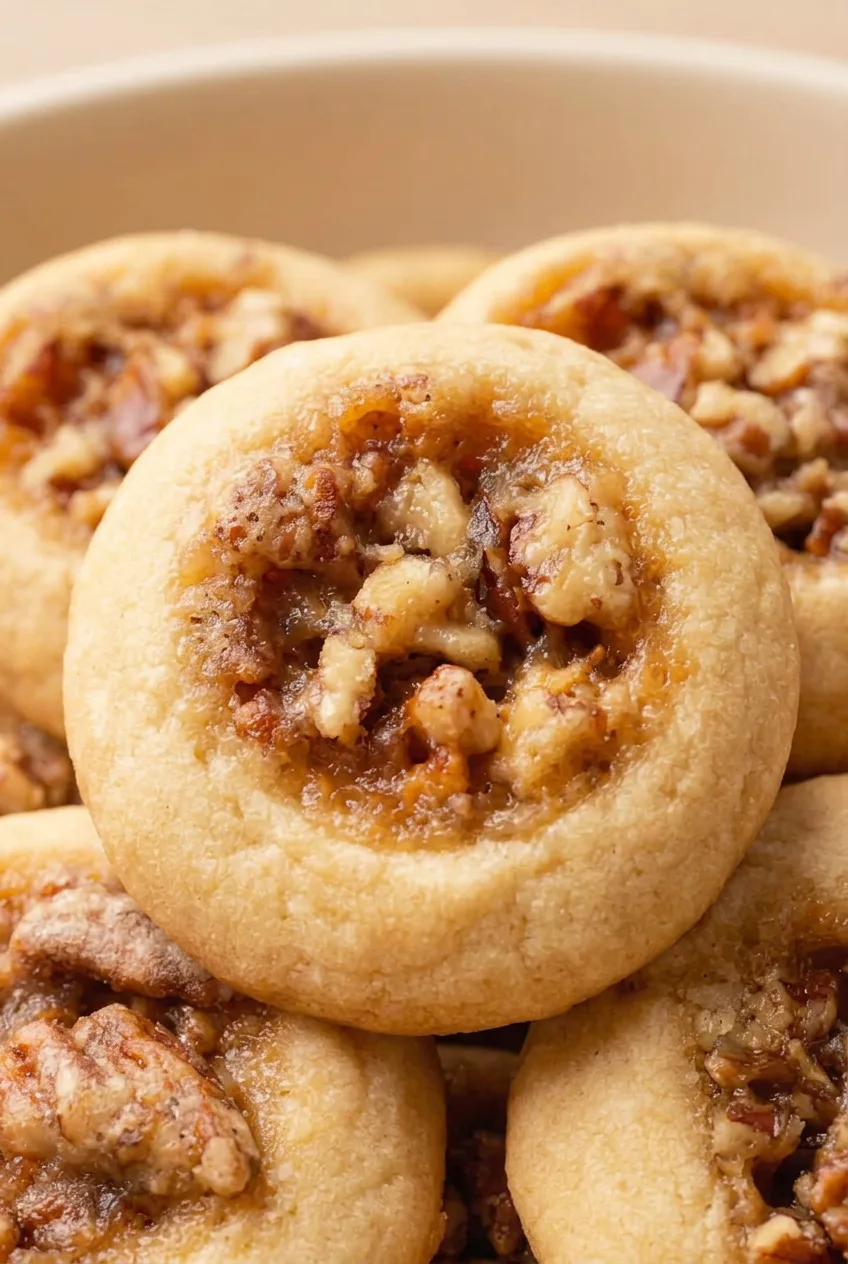
Close view of a pecan pie cookie showing its soft golden rim and sticky, chunky amber pecan filling.

How to Bake Pecan Pie Cookies

  1. Prepare the oven and pans: Preheat the oven to 350°F (175°C). Line baking sheets with parchment paper. Bake one sheet at a time on the center rack when possible for even color.
  2. Mix the filling: Stir the pecans, 1/3 cup brown sugar, heavy cream, and 1 teaspoon vanilla together. The pecans should look coated and glossy, not submerged in liquid.
  3. Make the dough: Beat the softened butter and 3/4 cup brown sugar until creamy. Beat in the egg and remaining 1 teaspoon vanilla until combined.
  4. Add the dry ingredients: Whisk together the flour, baking powder, and salt. Mix them into the butter mixture on low speed just until no dry streaks remain. Overmixing at this stage can make the cookies less tender.
  5. Shape the cookies: Roll about 1 1/2 tablespoons of dough per cookie into balls. Place them about 2 inches apart on the prepared sheets. Press a broad, deep well into each ball with your thumb or the rounded bottom of a measuring spoon, leaving a thick raised rim.
  6. Fill the wells: Spoon about a heaping teaspoon of filling into each well, scooping mostly coated pecans and leaving excess loose liquid in the bowl. Keep the filling inside the rims.
  7. Bake: Bake uncovered for 10 to 12 minutes per sheet, starting to check at 10 minutes. The edges should be lightly golden, the bottoms golden, and the filling glossy and softly bubbled. Do not wait for the cookie tops to turn dark brown.
  8. Cool: Leave the cookies on the sheet for 1 minute, then carefully transfer them to a wire rack. Cool completely before stacking so the soft cookies do not break and the sticky centers do not smear.

How to Keep the Pecan Filling in the Centers

Make each well wide enough to hold the chopped pecans without flattening the outer rim. If an indentation begins to close while you shape the remaining cookies, press it again just before filling. The brown sugar-cream mixture bubbles as it bakes, so use enough liquid to coat the pecans without pouring loose liquid into the wells.

Variations and Serving

Dark brown sugar can replace the light brown sugar in the dough, filling, or both for a deeper molasses flavor and darker cookies. If pecans are unavailable, use an equal amount of chopped walnuts; they will change the characteristic pecan flavor.

Serve the cooled cookies at room temperature with their filled centers facing up. For a contrasting cookie-tray option, try these Cranberry Orange Shortbread Cookies.

How to Store Pecan Pie Cookies

Store completely cooled cookies in an airtight container with parchment between layers. Keep them at room temperature for up to 5 days or refrigerated for 7 to 10 days. For longer storage, freeze them in a freezer-safe airtight container, separated with parchment, for up to 2 months. Thaw in the refrigerator or at room temperature before serving.

Nutrition

Approximate nutrition per cookie, based on a yield of about 18: 190 calories, 2g protein, 11g fat, and 22g carbohydrates. Per 100g: approximately 475 calories, 5g protein, 27g fat, and 55g carbohydrates. Values will vary with cookie size and the amount of filling used.

Pecan Pie Cookies

Thick brown sugar thumbprint cookies filled with glossy brown sugar cream and chopped pecans.
Course: Dessert
Cuisine: American
Prep: 25 min
Cook: 12 min
Total: 57 min
Servings: 18 Calories: 190 kcal

Equipment

  • Baking sheets
  • Parchment paper
  • Mixing bowls
  • Electric mixer
  • Measuring spoons
  • Wire rack

Ingredients

Brown Sugar Cookie Dough

  • 1/2 cup unsalted butter, softened (115g)
  • 3/4 cup packed light brown sugar (160g)
  • 1 large egg, room temperature
  • 1 teaspoon vanilla extract
  • 1 3/4 cups all-purpose flour (210g)
  • 1 teaspoon baking powder
  • 1/4 teaspoon fine salt

Pecan Filling

  • 1 cup pecans, finely chopped but not ground (110g)
  • 1/3 cup packed light brown sugar (70g)
  • 3 tablespoons heavy whipping cream
  • 1 teaspoon vanilla extract

Instructions

  1. Preheat the oven to 350°F (175°C) and line baking sheets with parchment paper.
  2. Stir the chopped pecans, 1/3 cup brown sugar, heavy cream, and 1 teaspoon vanilla extract in a bowl until the pecans are coated and glossy.
  3. Beat the softened butter and 3/4 cup brown sugar until creamy.
  4. Beat in the egg and remaining 1 teaspoon vanilla extract until combined.
  5. Whisk the flour, baking powder, and salt in a separate bowl.
  6. Mix the dry ingredients into the butter mixture on low speed just until no dry streaks remain.
  7. Roll about 1 1/2 tablespoons of dough into a ball for each cookie and arrange the balls 2 inches apart on the prepared baking sheets.
  8. Press a broad, deep well into each dough ball with your thumb or the rounded bottom of a measuring spoon, leaving a thick raised rim.
  9. Spoon a heaping teaspoon of filling into each well, using mostly coated pecans and leaving excess liquid in the bowl.
  10. Bake one sheet at a time on the center rack for 10 to 12 minutes, until the edges and bottoms are lightly golden and the filling is glossy and softly bubbled.
  11. Cool the cookies on the baking sheet for 1 minute, then carefully transfer them to a wire rack to cool completely.

Tips

  • Use finely chopped pecans, but do not grind them into a paste.
  • Make the wells wide and deep enough to hold the filling without flattening the outer rim.
  • Repress any wells that begin to close before adding the filling.
  • Spoon mostly pecans into the wells and leave excess loose liquid in the bowl.
  • Do not wait for the cookie tops to become dark brown; remove them when the edges are lightly golden.
  • Cool completely before stacking to prevent the soft cookies and sticky centers from smearing.

Variations

  • Dark Brown Sugar Pecan Pie Cookies: Replace light brown sugar in the dough, filling, or both with dark brown sugar for a deeper molasses flavor and darker cookies.
  • Walnut Pie Cookies: Use an equal amount of finely chopped walnuts in place of the pecans.

Notes

Store cooled cookies in an airtight container with parchment between layers for up to 5 days at room temperature or 7 to 10 days refrigerated. Freeze for up to 2 months and thaw in the refrigerator or at room temperature.

Nutrition

Calories: 190 kcal | Protein: 2 g | Fat: 11 g | Carbohydrates: 22 g

Classic Apple Pie

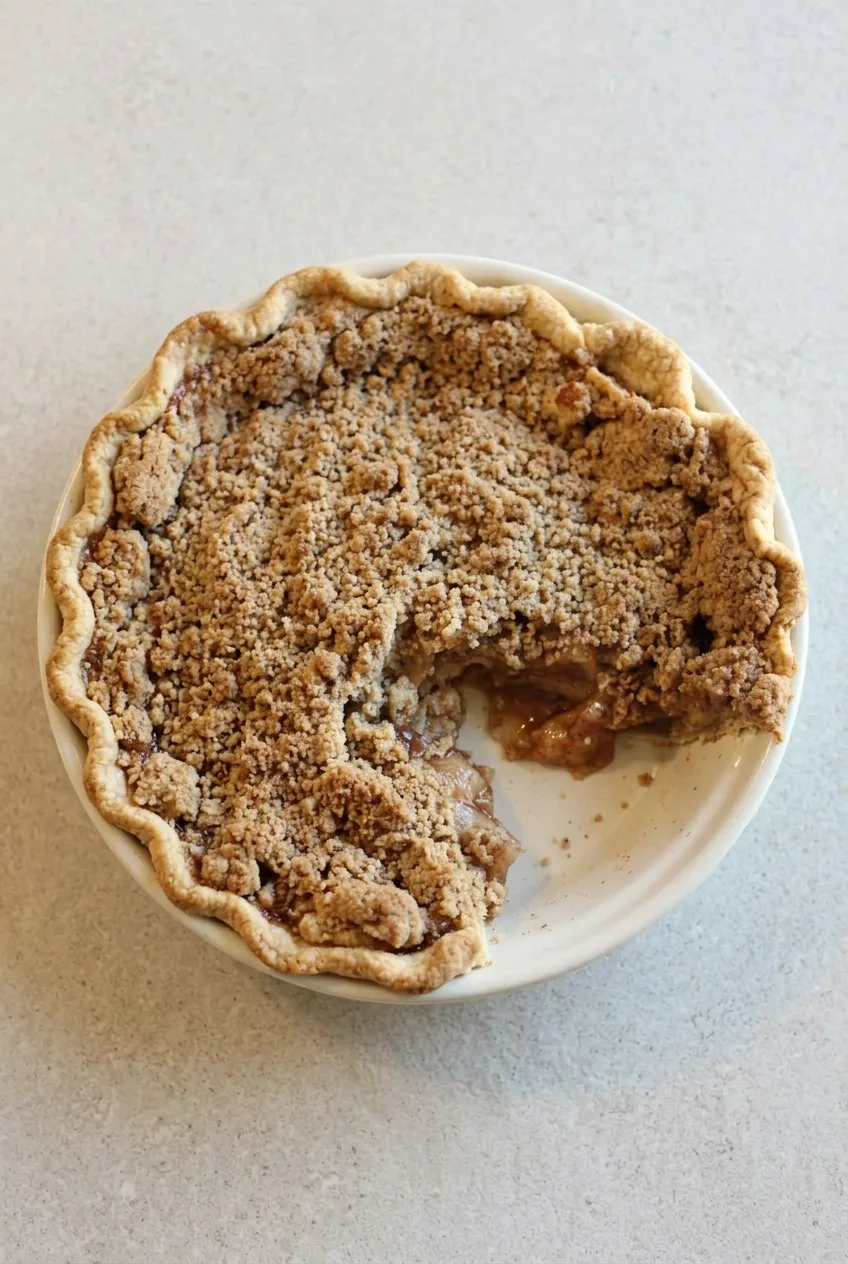
This Dutch-style apple pie has a single fluted bottom crust, tender cinnamon apples, and a thick brown-sugar crumble instead of a top pastry crust. The filling should be soft but still show distinct apple pieces when a wedge is cut.

A refrigerated crust keeps preparation simple, though a homemade single crust works too. Bake until the topping is deep golden and the filling bubbles near the center, then cool the pie for at least 2 hours so the juices can thicken before slicing.

Ingredients for Classic Apple Pie

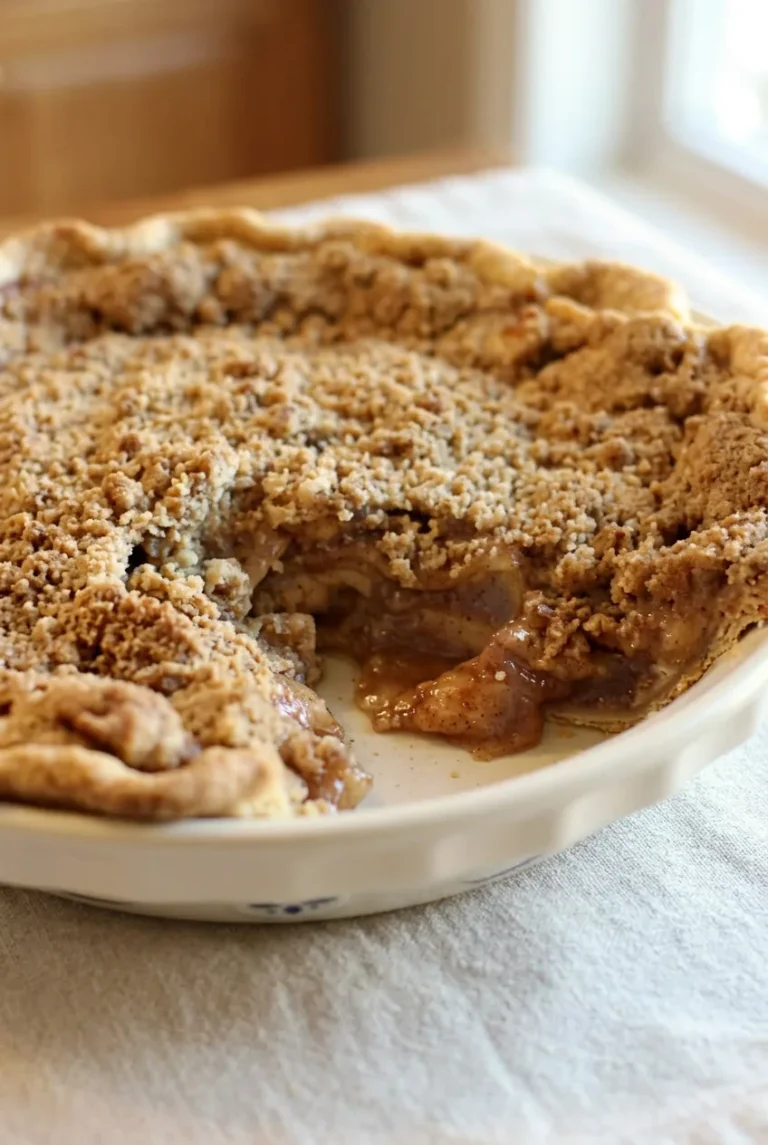
Overhead view of a round apple crumb pie in a ceramic dish with a wedge removed.

Crust and apple filling

  • 1 unbaked 9-inch deep-dish pie crust, refrigerated or homemade
  • 6 cups peeled, cored Granny Smith apples or other firm tart baking apples, sliced about 1/4 inch thick (about 6 medium apples or 900g prepared)
  • 1/2 cup granulated sugar (100g)
  • 1/4 cup all-purpose flour (30g)
  • 1 1/2 teaspoons ground cinnamon
  • 1/8 teaspoon ground nutmeg, optional

Crumb topping

  • 1 cup all-purpose flour (125g)
  • 3/4 cup packed light or dark brown sugar (160g)
  • 1/2 cup cold unsalted butter, cut into small cubes (113g)
  • 1/8 teaspoon fine salt, optional

Firm tart apples hold their shape as they bake. Sweetness and juiciness vary by variety, so the filling may vary slightly. Slices about 1/4 inch thick pack evenly into the crust; thicker pieces will stay firmer and may need more baking time.

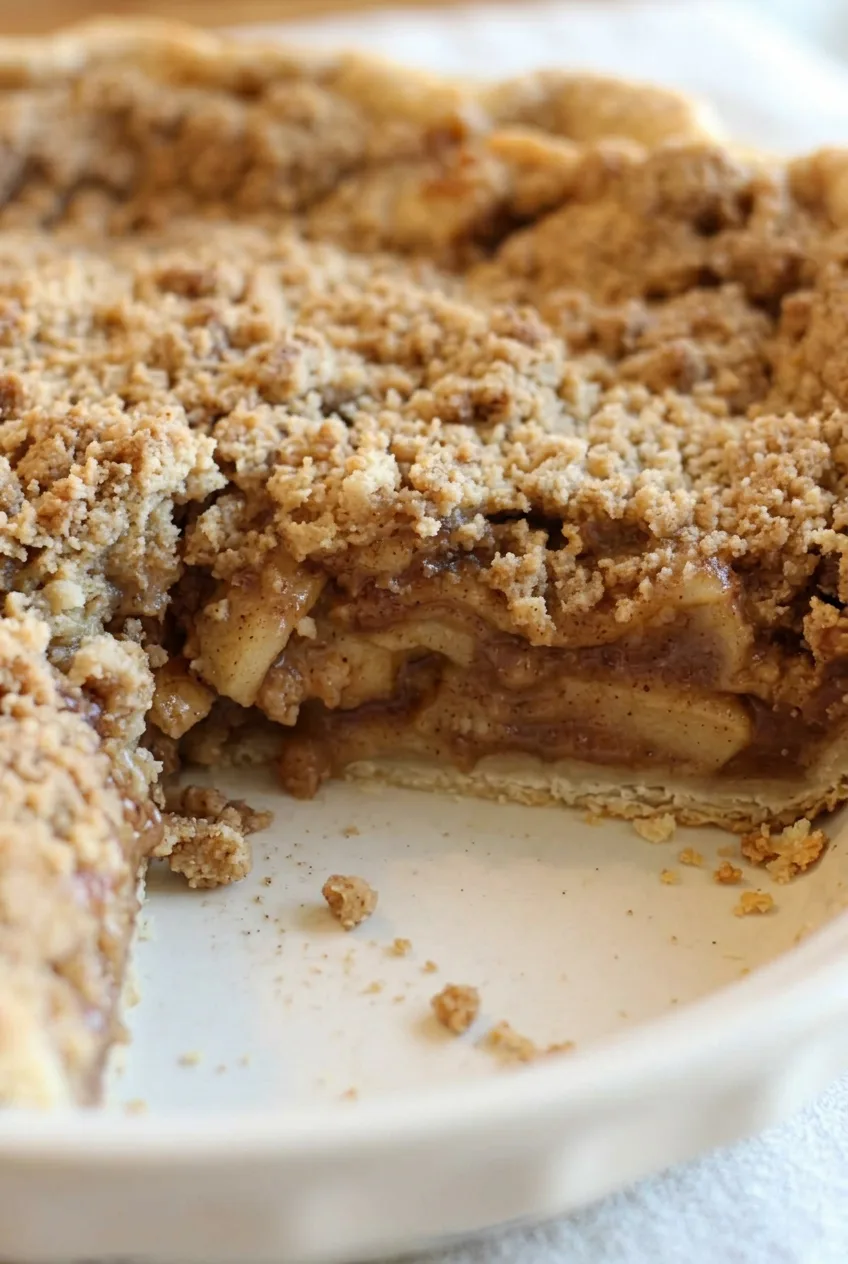
Close view of apple crumb pie filling with soft apple slices, golden crumble, and flaky bottom crust.

How to Bake Classic Apple Pie

  1. Prepare the oven and crust: Position a rack in the lower-middle part of the oven and preheat to 400°F (205°C). Fit the crust into a 9-inch deep-dish pie plate and flute the rim. Set the plate on a rimmed baking sheet to catch any juices that bubble over.
  2. Coat the apples: In a large bowl, toss the sliced apples with the granulated sugar, 1/4 cup flour, cinnamon, and optional nutmeg. Mix until evenly coated, with no dry flour pockets.
  3. Fill the crust: Transfer the apples and all their coating to the crust. Press gently into an even mound, leaving the fluted rim visible. The apples will shrink as they bake.
  4. Make the crumble: Combine the remaining 1 cup flour, brown sugar, and optional salt in a medium bowl. Cut in the cold butter with a pastry cutter, fork, or fingertips until the mixture has sandy crumbs and pea-sized to marble-sized clumps. It should hold together when squeezed but break apart easily; do not work it into a paste.
  5. Top and bake: Scatter the crumble over the apples, keeping the crust rim exposed. Bake uncovered on the rimmed sheet for 45 to 55 minutes, starting to check at 45 minutes. The topping should be deep golden brown, the crust edge golden, and the filling bubbling near the center as well as the edges. If the topping darkens before the filling bubbles, lay foil loosely over the top and continue baking. Rotate the pie around 35 to 40 minutes only if it is browning unevenly.
  6. Cool and serve: Transfer the pie plate to a cooling rack. Cool for at least 2 hours before cutting into 8 wedges so the thickened juices can settle.

How to Tell When the Filling Is Baked

Golden crumble alone does not mean the apples underneath are ready. Look for active bubbles coming through the topping closer to the center, not just juice escaping at the rim. Where the filling is visible, the apples should look tender rather than raw. Use these cues rather than the clock alone, especially if the apple slices are thicker or the pie dish is particularly deep.

Serving and Storing Apple Crumb Pie

Serve wedges slightly warm or at room temperature, directly from the pie dish. The topping is crispest on the day of baking. Cool leftovers fully, then cover and refrigerate them; the crumble will soften during covered storage.

For another fruit dessert with a crunchy topping, try this cranberry orange pecan crisp.

Nutrition

Approximate per slice (1/8 of the pie): 495 calories, 4g protein, 20g fat, and 76g carbohydrates. Approximate per 100g of baked pie: 265 calories, 2g protein, 11g fat, and 41g carbohydrates. Values are estimates; the crust used and the amount of moisture lost during baking will affect them.

Classic Apple Pie

A Dutch-style apple pie with tender cinnamon apples, a flaky bottom crust, and a thick brown-sugar crumble topping.
Course: Dessert
Cuisine: American
Prep: 25 min
Cook: 55 min
Total: 200 min
Servings: 8 Calories: 495 kcal

Equipment

  • 9-inch deep-dish pie plate
  • rimmed baking sheet
  • large bowl
  • medium bowl
  • pastry cutter or fork
  • cooling rack

Ingredients

Crust and Apple Filling

  • 1 unbaked 9-inch deep-dish pie crust, refrigerated or homemade
  • 6 cups peeled, cored Granny Smith apples or other firm tart baking apples, sliced 1/4 inch thick (about 6 medium apples or 900 g prepared)
  • 1/2 cup granulated sugar (100 g)
  • 1/4 cup all-purpose flour (30 g)
  • 1 1/2 teaspoons ground cinnamon
  • 1/8 teaspoon ground nutmeg, optional

Crumb Topping

  • 1 cup all-purpose flour (125 g)
  • 3/4 cup packed light or dark brown sugar (160 g)
  • 1/2 cup cold unsalted butter, cut into small cubes (113 g)
  • 1/8 teaspoon fine salt, optional

Instructions

  1. Position a rack in the lower-middle of the oven and preheat to 400°F (205°C).
  2. Fit the pie crust into a 9-inch deep-dish pie plate, flute the rim, and place the plate on a rimmed baking sheet.
  3. Toss the sliced apples with the granulated sugar, 1/4 cup flour, cinnamon, and optional nutmeg in a large bowl until evenly coated.
  4. Transfer the apple mixture and all of its coating into the crust. Press the apples gently into an even mound, keeping the fluted rim visible.
  5. Combine the remaining 1 cup flour, brown sugar, and optional salt in a medium bowl.
  6. Cut the cold butter into the flour mixture with a pastry cutter, fork, or fingertips until sandy crumbs and pea- to marble-sized clumps form.
  7. Scatter the crumble evenly over the apples, leaving the crust rim exposed.
  8. Bake uncovered for 45 to 55 minutes, until the topping is deep golden brown, the crust edge is golden, and the filling bubbles near the center and edges.
  9. Loosely cover the pie with foil if the topping browns before the filling begins bubbling. Rotate the pie after 35 to 40 minutes only if it is browning unevenly.
  10. Transfer the pie to a cooling rack and cool for at least 2 hours before cutting into 8 slices.

Tips

  • Use firm, tart apples such as Granny Smith so the slices hold their shape during baking.
  • Slice the apples about 1/4 inch thick for even packing and tender results.
  • Look for active bubbles near the center of the pie, not only around the rim, to confirm the filling is baked.
  • Cover loosely with foil if the crumble darkens before the filling is bubbling.
  • Cool the pie for at least 2 hours so the juices thicken before slicing.

Variations

  • Homemade Crust: Use a homemade single pie crust instead of a refrigerated crust.
  • Nutmeg Apple Filling: Add the optional ground nutmeg for a warmer spiced apple filling.

Notes

Serve slightly warm or at room temperature. Cool leftovers completely, cover, and refrigerate; the crumble topping will soften during storage.

Nutrition

Calories: 495 kcal | Protein: 4 g | Fat: 20 g | Carbohydrates: 76 g

Parmesan Roasted Brussels Sprouts

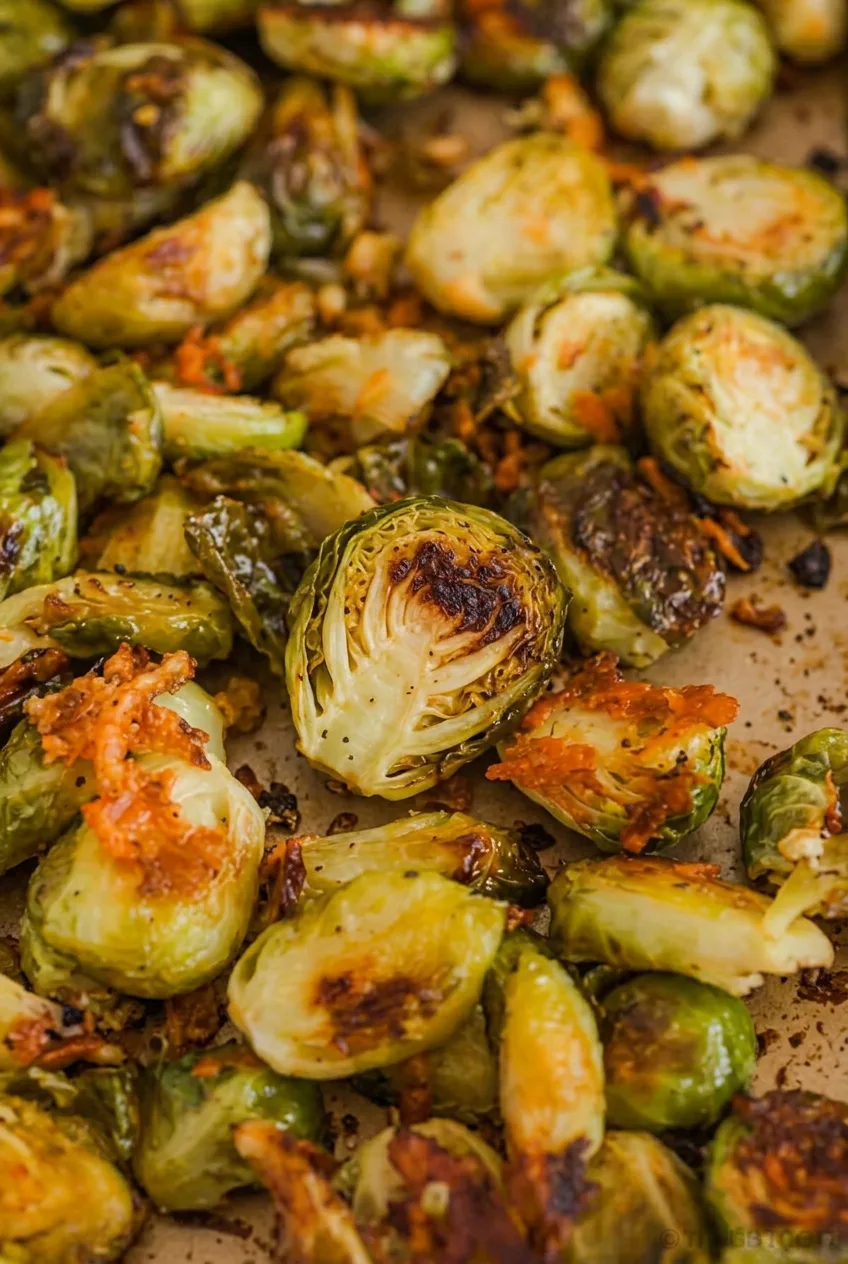
These Brussels sprout halves roast with garlic and finely grated Parmesan until their cut sides are deeply browned, their centers are tender, and their loose leaves turn crisp. The cheese forms scattered toasted bits rather than a uniform crust.

Dry sprouts and an uncrowded sheet pan make the difference between browning and steaming. Leave the halves mostly cut-side down, then start checking at 25 minutes: size and moisture affect the roasting time more than the clock alone.

Ingredients for Parmesan Roasted Brussels Sprouts

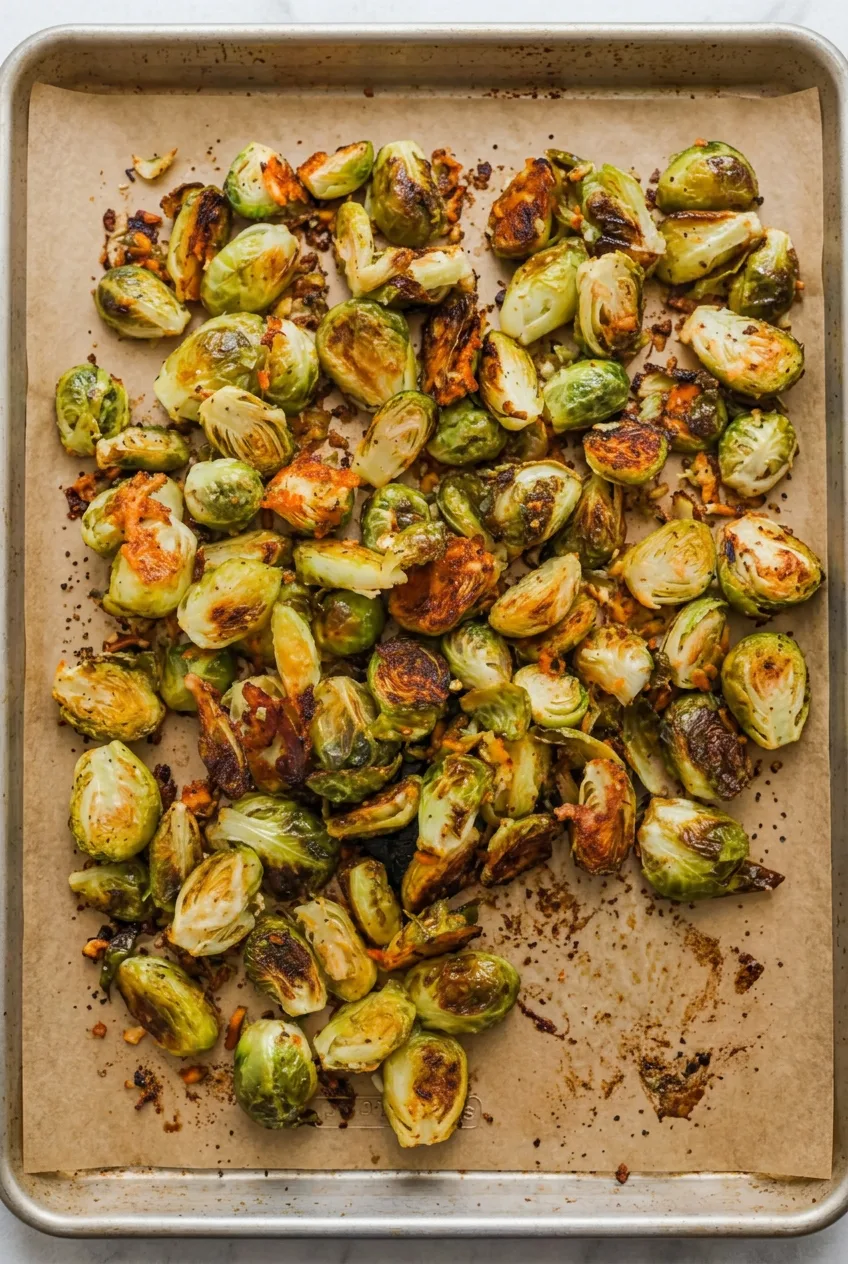
Overhead view of garlic Parmesan roasted Brussels sprouts scattered across a parchment-lined baking sheet.
  • 1 1/2 pounds fresh Brussels sprouts, trimmed and halved lengthwise (680g)
  • 2 tablespoons olive oil
  • 1/2 cup finely grated Parmesan cheese, divided (45g)
  • 3 garlic cloves, finely minced
  • 1/2 teaspoon kosher salt
  • 1/4 teaspoon freshly ground black pepper

Use fresh sprouts for crisp edges; frozen sprouts release more water as they roast. Dry washed sprouts thoroughly, and quarter exceptionally large ones so their centers cook through.

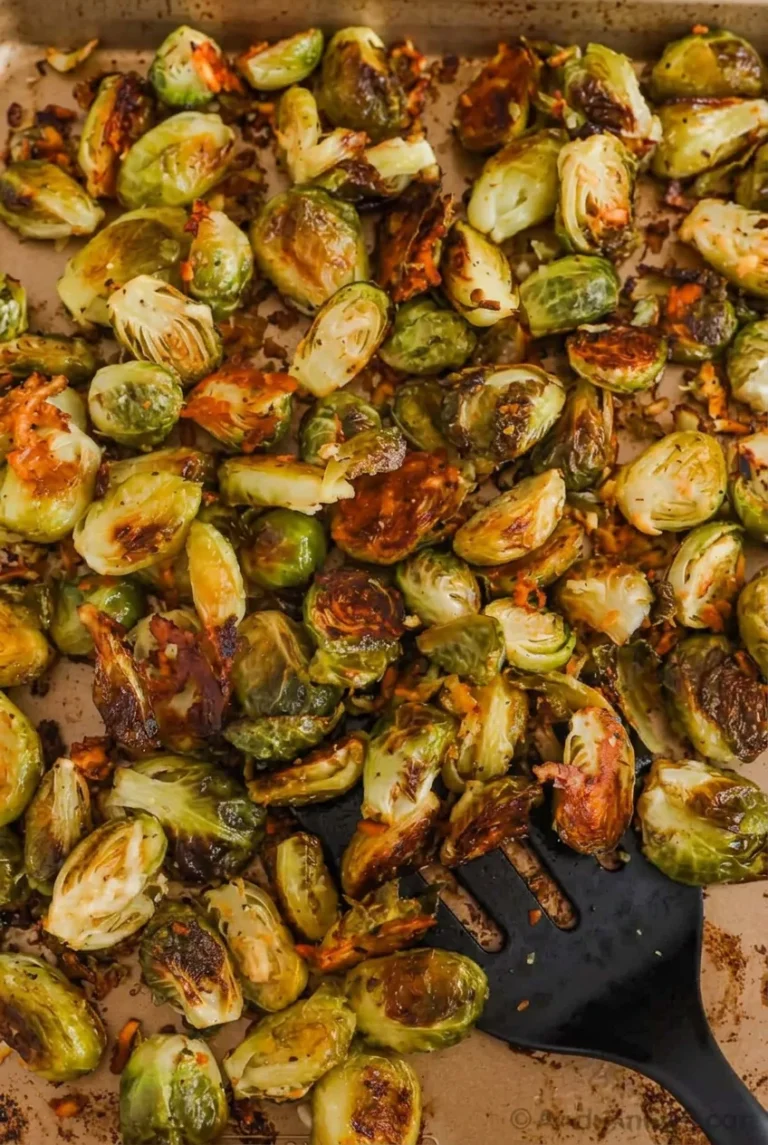
Close view of a tender roasted Brussels sprout half with caramelized layers and toasted Parmesan-garlic fragments.

How to Roast Brussels Sprouts with Parmesan

  1. Preheat the oven: Set a rack in the upper-middle position and fully preheat to 400°F (205°C). Line a large rimmed baking sheet, about 13 by 18 inches, with parchment paper.
  2. Prepare the sprouts: Trim the stem ends and halve the sprouts lengthwise. Keep any clean loose leaves; they will crisp as they roast. Make sure the sprouts are dry.
  3. Season: Toss the sprouts and loose leaves with the olive oil, 6 tablespoons Parmesan, garlic, salt, and pepper until lightly coated. Reserve the remaining 2 tablespoons Parmesan for the last 5 minutes of roasting, or add it all now.
  4. Arrange on the pan: Spread the sprouts in one layer with space between them, placing most halves cut-side down. Scatter loose leaves into open spots. Use a second pan if the pieces would overlap.
  5. Roast uncovered: Roast for 25 to 32 minutes without stirring, so the cut sides stay against the parchment. Check at 25 minutes and rotate the pan if browning is uneven. If reserved, add the remaining Parmesan during the last 5 minutes. The largest halves should be fork-tender near the core, with deeply browned cut sides and crisp, wrinkled leaf edges. The cheese and garlic should be toasted and fragrant, not blackened.
  6. Collect the crisp bits: Let the pan stand for 2 to 3 minutes so the browned Parmesan firms slightly. Scrape up the Parmesan-garlic fragments with a spatula and spoon them over the sprouts before serving.

When Are the Sprouts Done?

Sprout size, moisture, and how full the pan is can shift the roasting time. Check smaller sprouts a few minutes early, and give larger pieces time to become tender near the core. Look for browned cut faces and crisp leaf edges; if the garlic or cheese is darkening quickly, check the sprouts rather than waiting for the end of the time range.

Serving and Make-Ahead

Serve hot alongside chicken, pork, steak, or seafood. For a larger dinner spread, add soft garlic butter dinner rolls or 5-ingredient corn casserole.

Trim and halve the sprouts up to one day ahead. Refrigerate them covered and dry, then season and roast shortly before serving. Salting them well in advance can draw out moisture and reduce browning.

How to Store and Reheat Leftovers

Cool leftovers promptly and refrigerate in an airtight container for 3 to 4 days. The leaves and Parmesan bits will soften in storage. To restore some crispness, spread the sprouts on a sheet pan and reheat in a 400°F oven for about 5 to 8 minutes, until hot. A hot skillet also works; microwaving leaves them softer. Freezing is not recommended for this crisp roasted preparation.

Nutrition

Approximate nutrition per serving, based on 4 side-dish servings: 185 calories, 10g protein, 11g fat, and 17g carbohydrates. Per 100g of roasted sprouts: approximately 120 calories, 6g protein, 7g fat, and 11g carbohydrates. Values are estimates; the per-100g figures vary with moisture lost during roasting.

Parmesan Roasted Brussels Sprouts

Brussels sprout halves are roasted with garlic and Parmesan until tender, deeply browned, and crisp around the edges.
Course: Side Dish
Cuisine: American
Prep: 15 min
Cook: 32 min
Total: 50 min
Servings: 4 Calories: 185 kcal

Equipment

  • Large rimmed baking sheet
  • Parchment paper
  • Mixing bowl
  • Spatula

Ingredients

  • 1 1/2 pounds fresh Brussels sprouts, trimmed and halved lengthwise (680 g)
  • 2 tablespoons olive oil
  • 1/2 cup finely grated Parmesan cheese, divided (45 g)
  • 3 garlic cloves, finely minced
  • 1/2 teaspoon kosher salt
  • 1/4 teaspoon freshly ground black pepper

Instructions

  1. Set an oven rack in the upper-middle position and preheat the oven to 400°F (205°C). Line a large rimmed baking sheet with parchment paper.
  2. Trim the stem ends from the Brussels sprouts and halve them lengthwise. Keep any clean loose leaves and make sure the sprouts are thoroughly dry.
  3. Toss the sprouts and loose leaves with the olive oil, 6 tablespoons of the Parmesan, garlic, salt, and pepper until lightly coated. Reserve the remaining 2 tablespoons Parmesan for the last 5 minutes of roasting, if desired.
  4. Arrange the sprouts in a single layer on the baking sheet with space between them, placing most halves cut-side down. Scatter loose leaves into open spots.
  5. Roast uncovered for 25 to 32 minutes without stirring. Check at 25 minutes and rotate the pan if browning is uneven.
  6. Add the reserved Parmesan during the last 5 minutes of roasting, if using. Roast until the largest sprouts are fork-tender near the core, with deeply browned cut sides and crisp leaf edges.
  7. Let the pan stand for 2 to 3 minutes, then scrape up the browned Parmesan-garlic bits with a spatula and spoon them over the sprouts before serving.

Tips

  • Dry washed Brussels sprouts thoroughly to help them brown instead of steam.
  • Use fresh sprouts rather than frozen sprouts for crisp edges.
  • Avoid overcrowding the pan; use a second sheet pan if the sprouts overlap.
  • Keep most sprouts cut-side down and do not stir while roasting for deeper browning.
  • Quarter exceptionally large sprouts so their centers cook through.
  • Check smaller sprouts early, since sprout size and moisture affect roasting time.

Notes

Refrigerate leftovers in an airtight container for 3 to 4 days. Reheat on a sheet pan at 400°F for 5 to 8 minutes; freezing is not recommended because the leaves and Parmesan bits soften.

Nutrition

Calories: 185 kcal | Protein: 10 g | Fat: 11 g | Carbohydrates: 17 g

5-Ingredient Corn Casserole

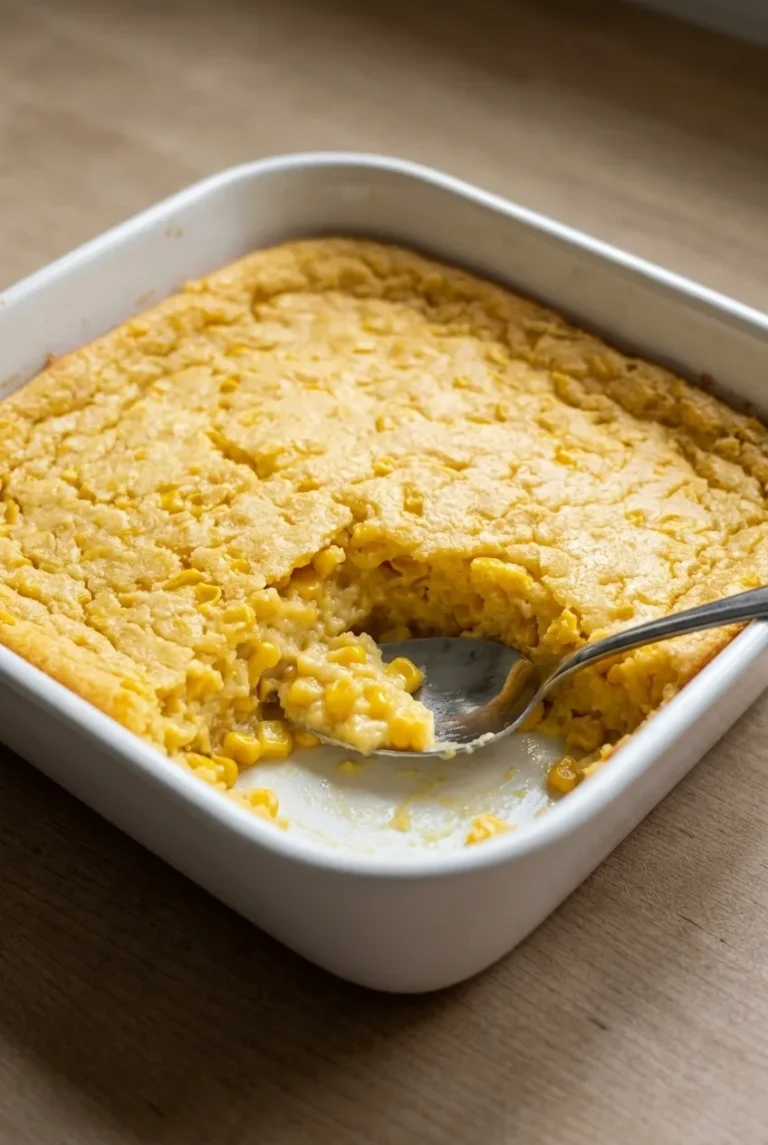
Frozen whole-kernel corn bakes in heavy cream and butter until the edges bubble and the top turns lightly golden. The kernels stay distinct in a creamy base, so serve this savory side in soft scoops rather than slices.

Baking it uncovered in an 8-inch square dish gives the cream room to thicken without spreading the corn too thin. Start checking at 30 minutes: this version has no eggs or dry thickener, and a longer bake can leave it dry or greasy.

Ingredients for 5-Ingredient Corn Casserole

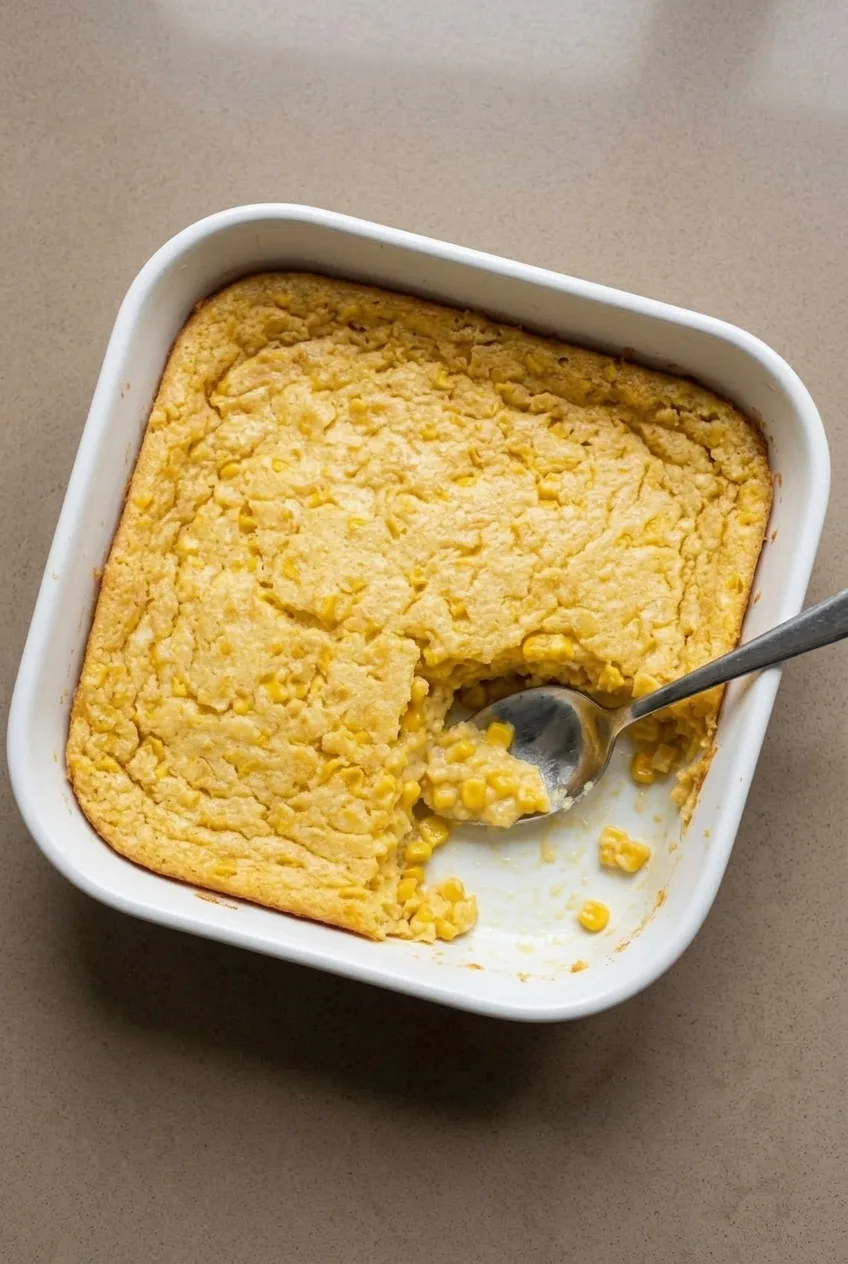
Overhead view of creamy whole-kernel corn casserole in a white square baking dish
  • 2 pounds frozen whole-kernel corn (32 ounces; about 900g), used directly from frozen
  • 1 cup heavy cream (about 240g)
  • 1/2 cup unsalted butter (1 stick; about 115g), melted
  • 1 teaspoon kosher salt
  • 1/2 teaspoon freshly ground black pepper

Use whole-kernel corn, not cream-style corn, which would change the liquid balance and texture. Heavy cream is important here; lower-fat milk is likely to make the casserole thinner. If using salted butter, reduce the added salt.

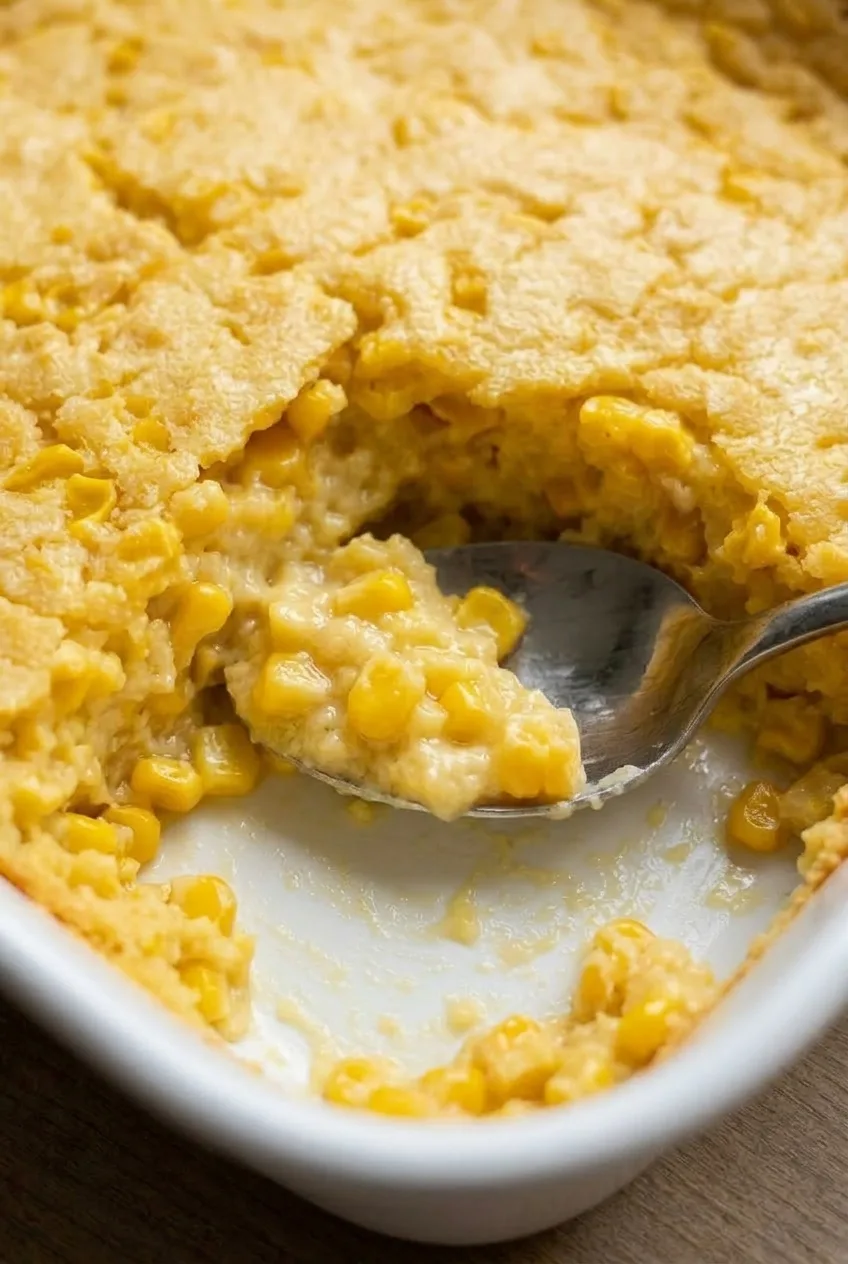
Close view of a spoonful of creamy corn casserole with glossy whole corn kernels

How to Bake Corn Casserole

  1. Preheat the oven: Place a rack in the center and heat the oven to 350°F (175°C). Set out an 8-inch square, approximately 2-quart ceramic or glass baking dish.
  2. Combine the ingredients: Stir the frozen corn, heavy cream, melted butter, salt, and pepper in a large bowl until the kernels are evenly coated. Transfer to the baking dish and spread into an even layer. Do not add extra liquid; the corn releases moisture as it heats.
  3. Bake uncovered: Bake for 30 to 35 minutes, starting to check at 30 minutes. The edges should be bubbling, the top lightly golden in spots, and the center creamy but visibly thickened rather than thin or soupy. Remove it before the top becomes deeply browned.
  4. Rest and serve: Let stand for 5 to 10 minutes so the bubbling cream settles and thickens slightly. Serve warm in soft scoops from the baking dish.

Why Is This Corn Casserole Scoopable?

With no eggs, corn muffin mix, or other dry thickener, this casserole stays creamy around the whole kernels rather than setting like a corn pudding. It will hold together softly on a serving spoon but will not cut into squares. Longer bake times used for firmer corn puddings do not apply to this cream-based version.

The 8-inch square dish keeps the mixture deep enough to remain moist. A much wider pan spreads it thin and can cause the cream to reduce too quickly.

Serving and Variations

Serve with roast chicken, turkey, ham, or pork chops. For a holiday meal, pair it with Classic Green Bean Casserole with Crispy Onions and Soft Garlic Butter Dinner Rolls.

For an optional six-ingredient variation, scatter 1/2 cup shredded cheddar or finely grated Parmesan over the top before baking. To make a larger batch, double all five main ingredients and use a 9-by-13-inch baking dish. Begin checking near the original bake window, but allow extra time if needed for bubbling edges and a thickened center.

Make-Ahead, Storage, and Reheating

To make it ahead, assemble the casserole in its baking dish, cover, and refrigerate for up to 24 hours. Bake uncovered at 350°F. A cold casserole may need a few extra minutes; use the bubbling edges and thickened center to judge when it is ready.

Cool leftovers, cover, and refrigerate for up to 3 days. Reheat at 325°F (165°C) until warmed through, covering loosely if the top browns before the center is warm.

Nutrition

Approximate nutrition per serving, based on 6 side-dish servings: 405 calories, 6g protein, 32g fat, and 30g carbohydrates. Per 100g: approximately 190 calories, 3g protein, 15g fat, and 14g carbohydrates. Values vary by ingredient brand and portion size.

5-Ingredient Corn Casserole

Frozen corn bakes with heavy cream, butter, salt, and pepper into a creamy, scoopable side dish with lightly golden edges.
Course: Side Dish
Cuisine: American
Prep: 10 min
Cook: 35 min
Total: 55 min
Servings: 6 Calories: 405 kcal

Equipment

  • 8-inch square baking dish
  • large mixing bowl
  • spoon or spatula

Ingredients

  • 2 pounds frozen whole-kernel corn (32 ounces; about 900 g)
  • 1 cup heavy cream (about 240 g)
  • 1/2 cup unsalted butter (1 stick; about 115 g), melted
  • 1 teaspoon kosher salt
  • 1/2 teaspoon freshly ground black pepper

Instructions

  1. Place a rack in the center of the oven and preheat to 350°F (175°C). Set out an 8-inch square, approximately 2-quart ceramic or glass baking dish.
  2. Stir the frozen corn, heavy cream, melted butter, salt, and pepper in a large bowl until the corn is evenly coated.
  3. Transfer the mixture to the baking dish and spread it into an even layer.
  4. Bake uncovered for 30 to 35 minutes, checking at 30 minutes. Remove when the edges are bubbling, the top is lightly golden in spots, and the center is creamy and thickened.
  5. Let the casserole rest for 5 to 10 minutes before serving warm in soft scoops.

Tips

  • Use frozen whole-kernel corn directly from the freezer; do not thaw it first.
  • Use heavy cream rather than lower-fat milk for the proper creamy texture.
  • Do not add extra liquid, as the corn releases moisture while baking.
  • Use an 8-inch square dish to keep the casserole deep and moist.
  • Avoid overbaking, which can make the casserole dry or greasy.
  • This casserole is scoopable and creamy rather than firm enough to cut into squares.

Variations

  • Cheesy Corn Casserole: Scatter 1/2 cup shredded cheddar or finely grated Parmesan over the top before baking.
  • Double Batch: Double all five main ingredients and bake in a 9-by-13-inch dish, adding time as needed until the edges bubble and the center thickens.

Notes

Assemble up to 24 hours ahead, cover, and refrigerate; bake uncovered at 350°F (175°C), allowing a few extra minutes if cold. Refrigerate leftovers for up to 3 days. Reheat at 325°F (165°C) until warmed through, loosely covering if the top browns too quickly.

Nutrition

Calories: 405 kcal | Protein: 6 g | Fat: 32 g | Carbohydrates: 30 g

Garlic Butter Dinner Rolls

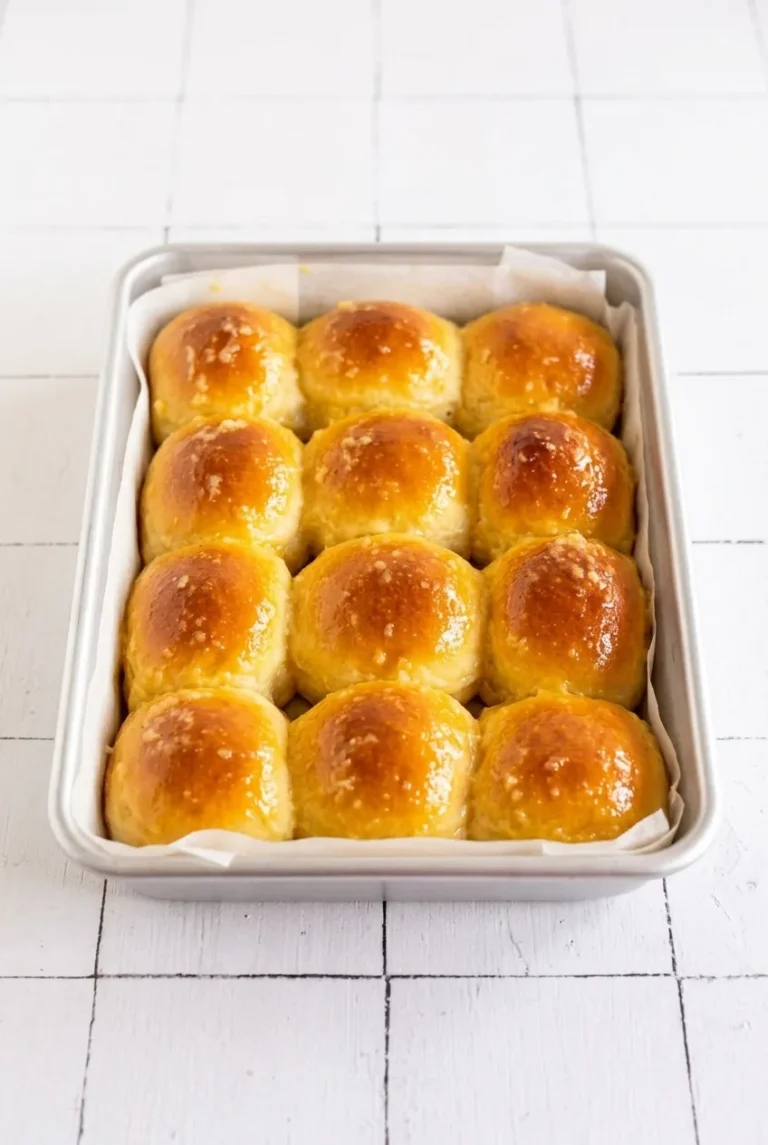
These soft yeast rolls bake close together in a 9-by-13-inch pan, so their golden tops stay rounded while their sides form tender pull-apart seams. The dough rises twice, then a light egg wash helps the tops brown. After baking, warm garlic butter adds the defining flavor and leaves small pieces of garlic on the glossy rolls.

Makes 12 rolls. Allow about 30 minutes of active preparation and 22 to 26 minutes of baking, or roughly 2½ to 3 hours total. Rise times depend on the warmth of the kitchen, so follow the dough cues as well as the clock.

Ingredients for Garlic Butter Dinner Rolls

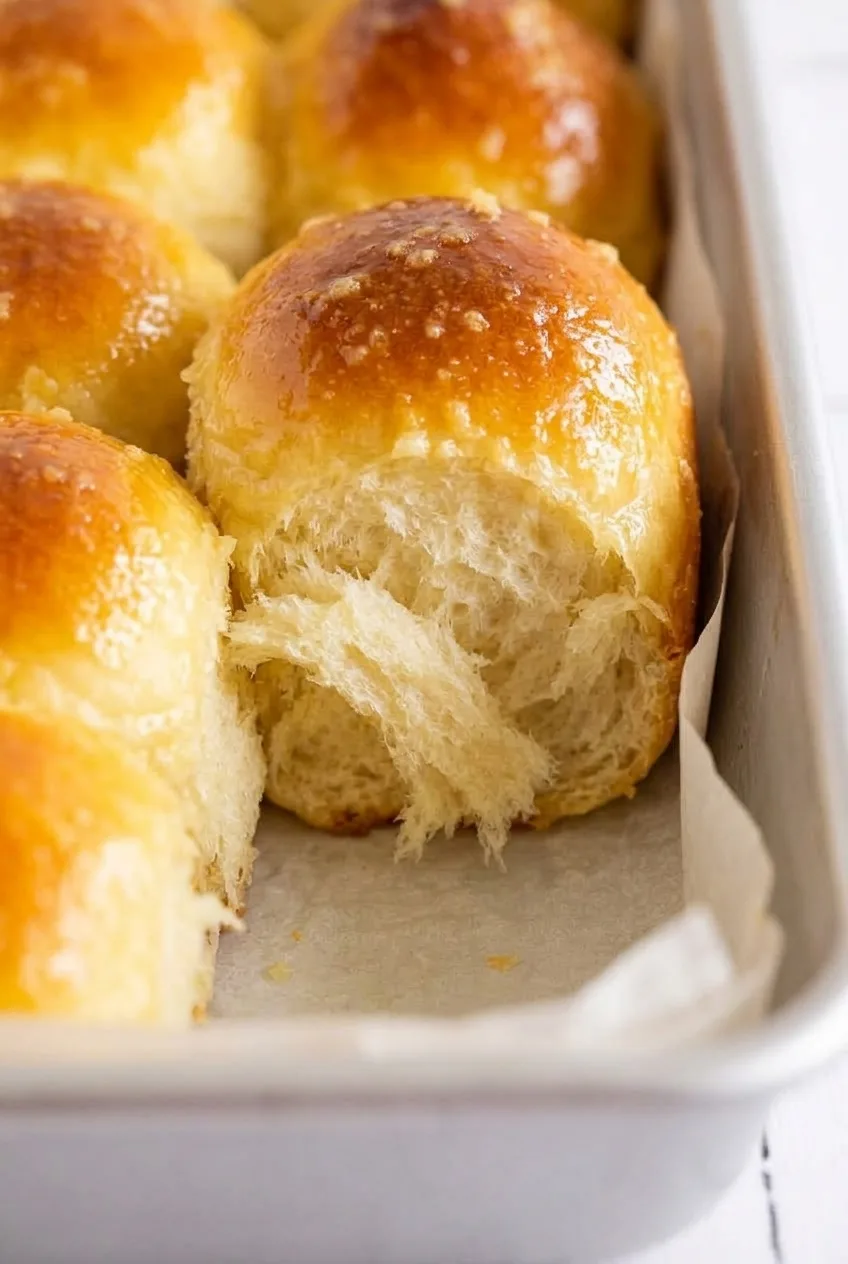
Close view of a pulled-apart garlic butter dinner roll showing its soft, fluffy interior and glossy garlic topping.

For the dough

  • 3/4 cup whole milk, lukewarm (180g)
  • 1/4 cup warm water (60g)
  • 2 tablespoons granulated sugar (25g)
  • 2 1/4 teaspoons active dry yeast (7g)
  • 1 large egg
  • 4 tablespoons unsalted butter, softened (55g)
  • 3 1/2 cups all-purpose flour (420g), plus more only as needed
  • 1 teaspoon fine salt

For the egg wash and garlic butter

  • 1 large egg beaten with 1 tablespoon water
  • 4 tablespoons unsalted butter (55g)
  • 3 garlic cloves, very finely minced
  • 1/4 teaspoon fine salt

Optional: A light sprinkle of flaky sea salt or up to 1 tablespoon finely chopped parsley for finishing.

How to Make Garlic Butter Dinner Rolls

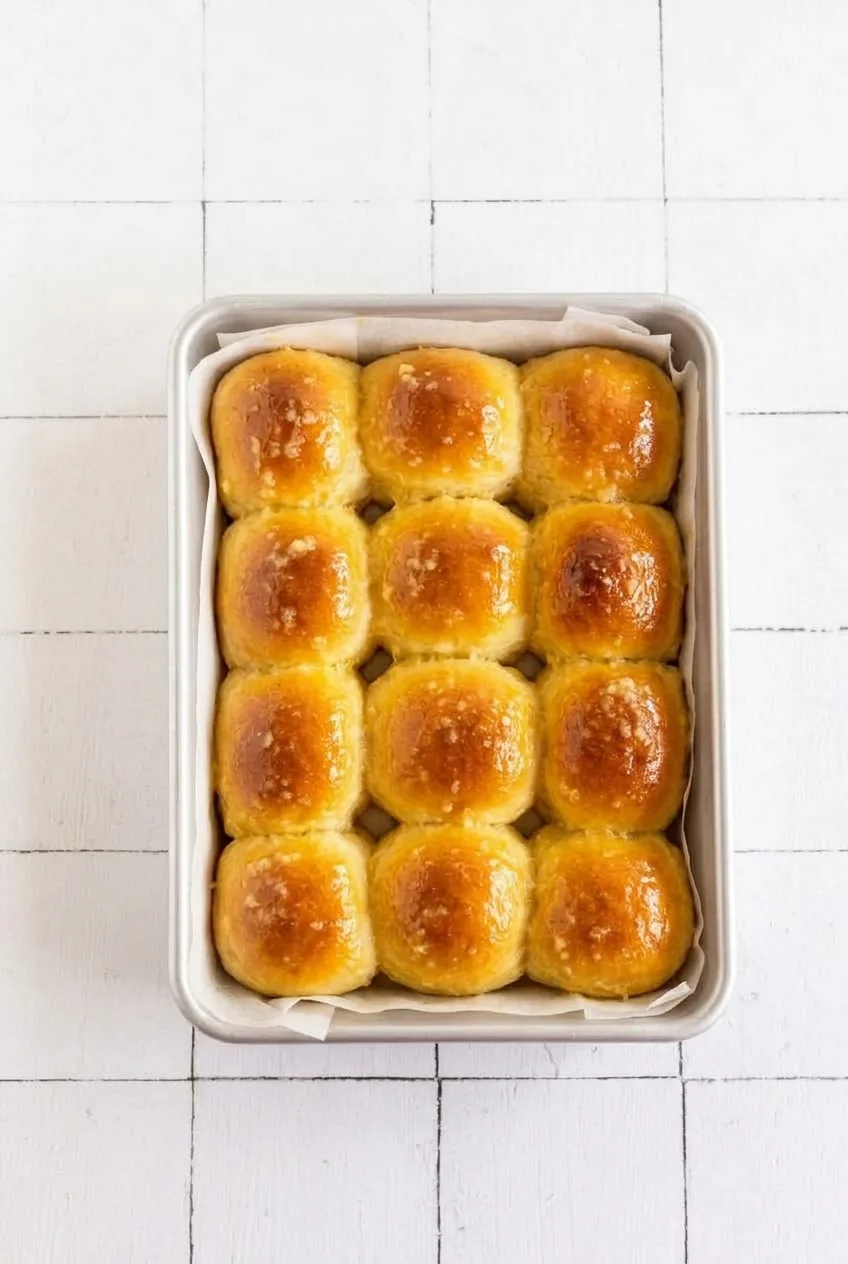
Overhead view of twelve golden garlic butter dinner rolls in a parchment-lined rectangular baking pan.
  1. Activate the yeast: Combine the milk, water, sugar, and yeast in a large bowl. The liquids should be lukewarm, about 105°F to 110°F (40°C to 45°C), not hot. Let stand for 5 to 10 minutes, until foamy. Mix in the egg and softened butter.
  2. Mix and knead: Add the flour and salt and mix until a shaggy dough forms. Knead with a dough hook for 8 to 10 minutes or by hand for 10 to 12 minutes. The dough should be smooth, elastic, and slightly tacky. Gently stretch a small piece; it should form a thin membrane before tearing. Add flour only if the dough is too sticky to handle—too much can make the rolls dry.
  3. Let the dough rise: Place it in a lightly buttered or oiled bowl and cover. Let rise in a warm, draft-free spot until doubled and airy, about 60 to 90 minutes.
  4. Shape the rolls: Lightly butter or spray a 9-by-13-inch metal pan, then line it with parchment, leaving a little overhang. Gently deflate the dough and divide it into 12 equal pieces. Pinch the seams underneath each piece and roll lightly on an unfloured surface to make a smooth ball with a taut top.
  5. Proof in the pan: Arrange the rolls in a 3-by-4 grid with small gaps between them. Cover loosely and let rise until puffy and touching, about 35 to 50 minutes. A gentle fingertip press should spring back slowly and leave a faint dimple. Preheat the oven to 350°F (175°C) during the last 15 to 20 minutes of the rise.
  6. Egg-wash and bake: Gently brush the tops with a thin layer of egg wash, without letting it pool between the rolls. Bake uncovered for 22 to 26 minutes, starting to check at 20 minutes. The domes should be deep golden brown and hold their rounded shape; the joined seams should be set but pale and soft. Tent loosely with foil if the tops brown before the rolls are baked through. Rotate the pan near the end only if your oven browns unevenly.
  7. Make the garlic butter: While the rolls bake, melt the remaining 4 tablespoons butter in a small saucepan over low heat. Add the garlic and 1/4 teaspoon salt. Cook for 2 to 3 minutes, until the garlic is fragrant and softened but not browned.
  8. Brush and serve: Brush the hot rolls with all the warm garlic butter, spreading the garlic pieces across the tops and letting some butter settle into the seams. Add flaky salt or parsley, if using. Rest in the pan for 5 to 10 minutes, then serve warm.

Why the Rolls Should Touch

The small gaps give the dough room to expand during the second rise. Once the rolls touch, their joined sides bake up pale and tender instead of forming crust all around. Keep the 9-by-13-inch pan rather than moving them to a large sheet pan if you want soft pull-apart rolls.

Pan material affects timing: a dark nonstick pan may brown the bottoms sooner, while a glass dish may need a little longer. Start checking at 20 minutes and use the golden, set tops as the main guide.

Serving Garlic Butter Dinner Rolls

Serve the rolls from the parchment-lined pan and pull them apart at the soft seams. They work alongside Baked Mac and Cheese with Bacon and Caramelized Onions or Classic Green Bean Casserole with Crispy Onions.

Storage, Reheating, and Make-Ahead

Cool leftover rolls completely, then store airtight at room temperature for up to 3 days. Sealing them while hot can leave the tops damp. To reheat, wrap them in foil and warm at 300°F (150°C) for about 10 minutes, or until warmed through.

For next-day serving, bake the rolls ahead, cool completely, and store well wrapped before reheating. You can also freeze shaped, unbaked rolls on a baking sheet until firm, then transfer them to a freezer bag. Place them in the prepared pan to thaw and rise before egg-washing and baking. Allow several hours, and wait until they are puffy and touching rather than relying on a fixed thaw time.

Nutrition

Approximate nutrition per roll, based on 12 rolls: 230 calories, 6g protein, 9g fat, and 30g carbohydrates. Approximate values per 100g of baked rolls: 340 calories, 8g protein, 14g fat, and 45g carbohydrates. Values vary with the amount of egg wash used and moisture lost during baking.

Garlic Butter Dinner Rolls

Soft pull-apart yeast rolls baked until golden, then brushed with warm garlic butter.
Course: Side Dish
Cuisine: American
Prep: 30 min
Cook: 26 min
Total: 180 min
Servings: 12 Calories: 230 kcal

Equipment

  • Large mixing bowl
  • Stand mixer with dough hook
  • 9-by-13-inch metal pan
  • Parchment paper
  • Pastry brush
  • Small saucepan

Ingredients

For the Dough

  • 3/4 cup whole milk, lukewarm (180g)
  • 1/4 cup warm water (60g)
  • 2 tablespoons granulated sugar (25g)
  • 2 1/4 teaspoons active dry yeast (7g)
  • 1 large egg
  • 4 tablespoons unsalted butter, softened (55g)
  • 3 1/2 cups all-purpose flour (420g), plus more as needed
  • 1 teaspoon fine salt

For the Egg Wash and Garlic Butter

  • 1 large egg, beaten with 1 tablespoon water
  • 4 tablespoons unsalted butter (55g)
  • 3 garlic cloves, very finely minced
  • 1/4 teaspoon fine salt
  • Flaky sea salt, optional
  • Up to 1 tablespoon finely chopped parsley, optional

Instructions

  1. Combine the lukewarm milk, warm water, sugar, and yeast in a large bowl. Let stand for 5 to 10 minutes, until foamy.
  2. Mix the egg and softened butter into the yeast mixture.
  3. Add the flour and salt and mix until a shaggy dough forms.
  4. Knead with a dough hook for 8 to 10 minutes or by hand for 10 to 12 minutes, until the dough is smooth, elastic, and slightly tacky.
  5. Place the dough in a lightly buttered or oiled bowl, cover, and let rise in a warm spot for 60 to 90 minutes, until doubled and airy.
  6. Lightly butter or spray a 9-by-13-inch metal pan and line it with parchment paper, leaving overhang on the sides.
  7. Gently deflate the dough and divide it into 12 equal pieces. Shape each piece into a smooth ball with the seams pinched underneath.
  8. Arrange the rolls in a 3-by-4 grid in the prepared pan, leaving small gaps between them. Cover loosely and let rise for 35 to 50 minutes, until puffy and touching.
  9. Preheat the oven to 350°F (175°C) during the last 15 to 20 minutes of the second rise.
  10. Brush the roll tops lightly with the egg wash, taking care not to let it pool between the rolls.
  11. Bake for 22 to 26 minutes, checking at 20 minutes, until the tops are deep golden brown and the seams are set. Tent loosely with foil if the tops brown too quickly.
  12. While the rolls bake, melt the remaining butter in a small saucepan over low heat. Add the garlic and 1/4 teaspoon salt and cook for 2 to 3 minutes, until fragrant and softened but not browned.
  13. Brush the hot rolls with all of the warm garlic butter. Finish with flaky salt or parsley, if desired.
  14. Rest the rolls in the pan for 5 to 10 minutes before serving warm.

Tips

  • Use liquids at 105°F to 110°F (40°C to 45°C) so the yeast activates without being damaged.
  • Add extra flour only if the dough is too sticky to handle; too much flour can make the rolls dry.
  • The dough is sufficiently kneaded when a small piece stretches into a thin membrane before tearing.
  • Keep the rolls in a 9-by-13-inch pan so they touch and develop soft pull-apart seams.
  • Check the rolls at 20 minutes, especially when using a dark nonstick pan or glass baking dish.
  • Tent the pan loosely with foil if the tops brown before the rolls are fully baked.

Notes

Store cooled rolls airtight at room temperature for up to 3 days. Reheat foil-wrapped rolls at 300°F (150°C) for about 10 minutes. Shaped unbaked rolls can be frozen, then thawed and proofed in the prepared pan before baking.

Nutrition

Calories: 230 kcal | Protein: 6 g | Fat: 9 g | Carbohydrates: 30 g

Baked Mac and Cheese

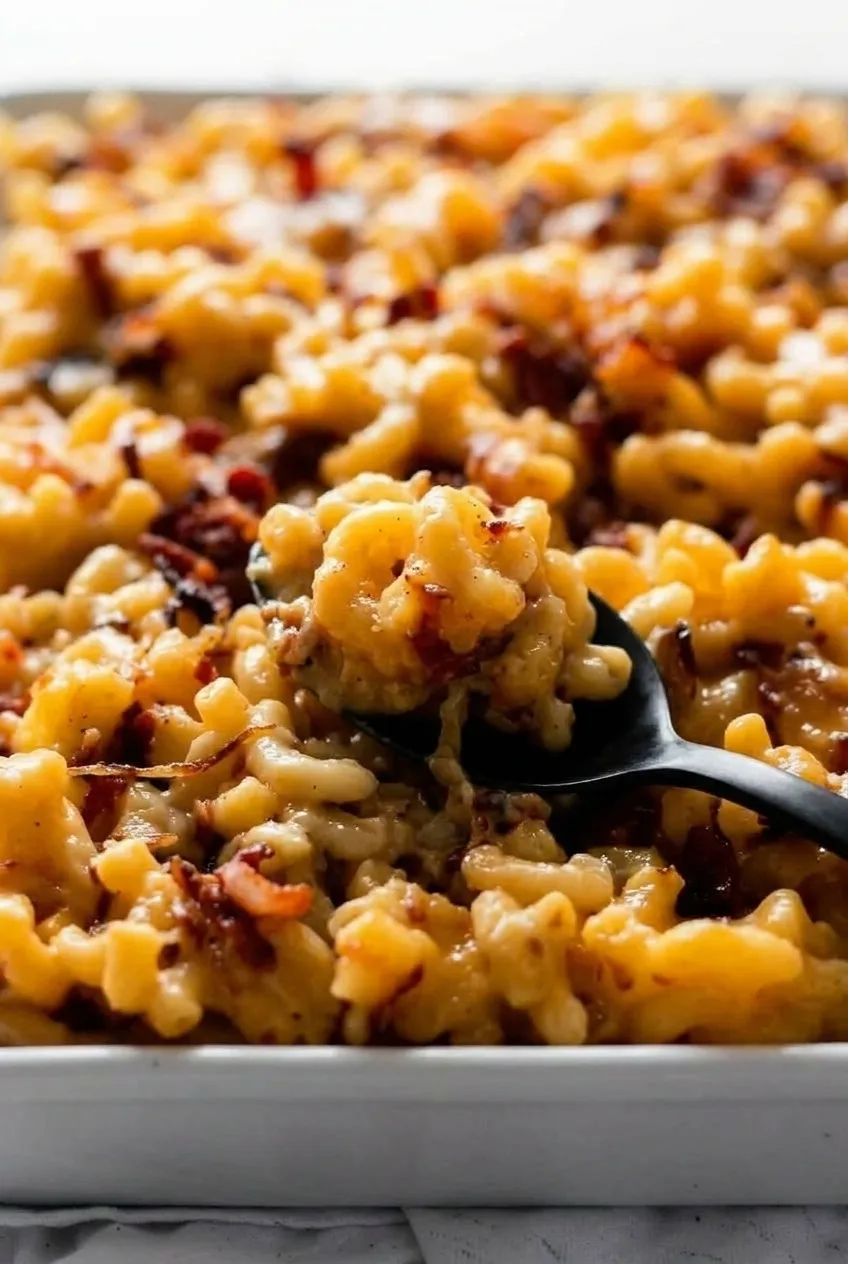
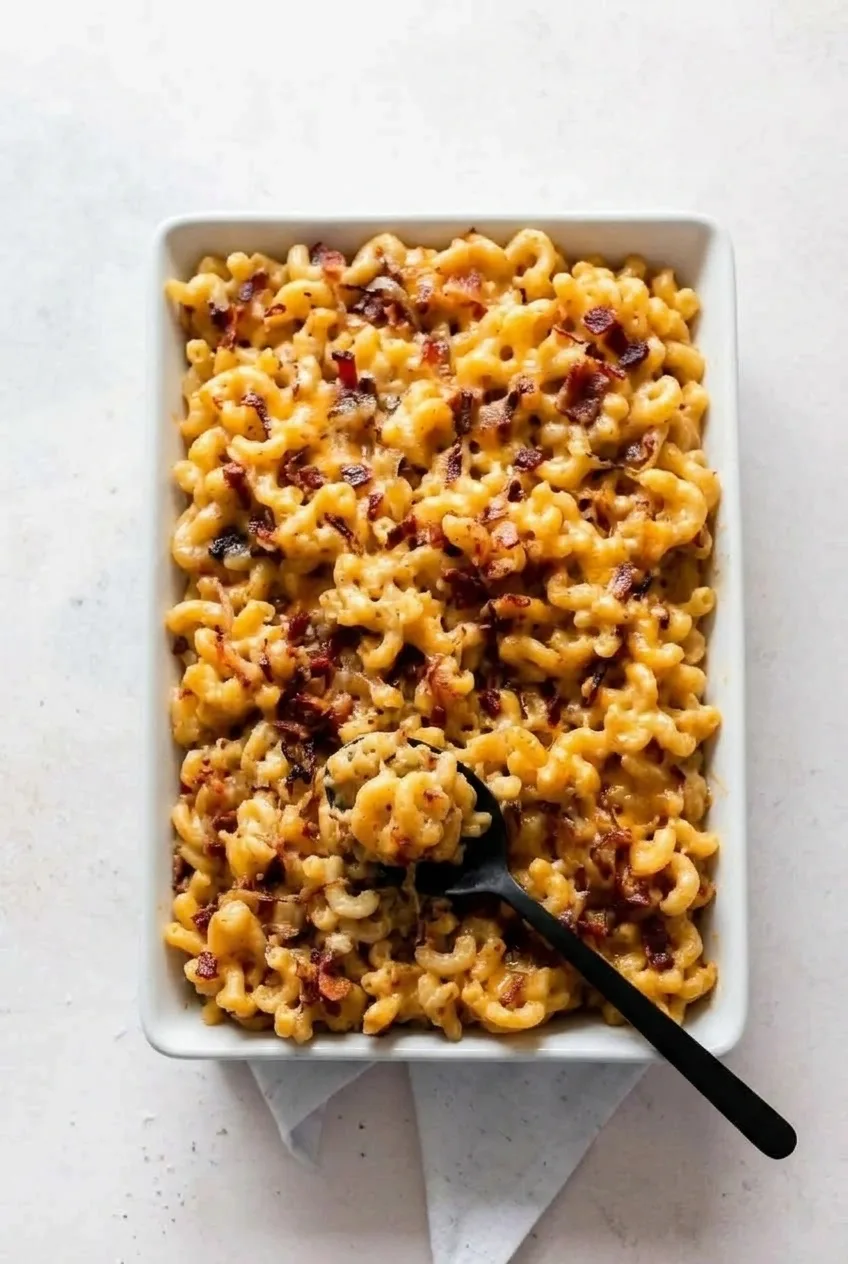
This baked mac and cheese combines sharp Cheddar sauce with crisp bacon and slowly browned onion. It should come out of the oven bubbling at the edges and lightly golden on top, but still creamy enough to spoon from the dish. Cooking the pasta just shy of al dente and keeping the sauce slightly loose help it stay that way. Some bacon goes into the casserole; the rest is added after baking so it stays crisp.

Ingredients for Baked Mac and Cheese

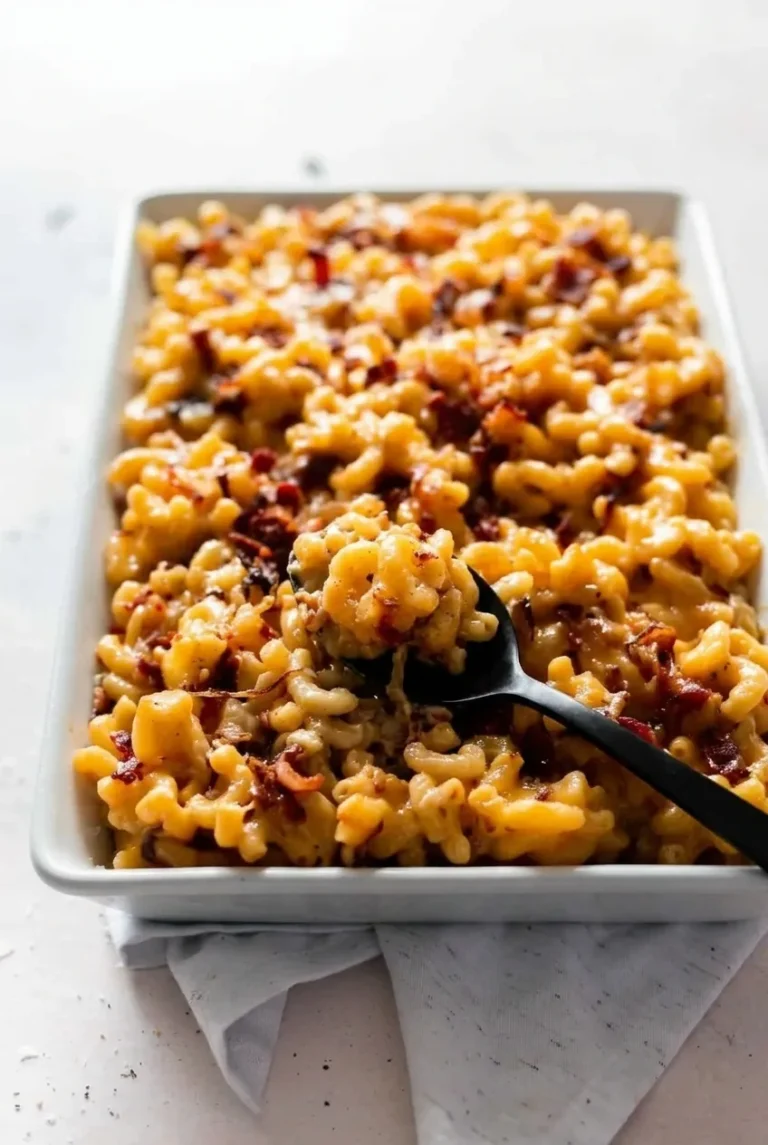
Close view of creamy Cheddar-coated cavatappi with crisp bacon and caramelized onion strands.
  • 1 pound cavatappi or elbow macaroni (450g)
  • 8 ounces thick-cut bacon, chopped (225g)
  • 1 large yellow onion, thinly sliced (about 250g)
  • 4 tablespoons unsalted butter (about 55g), divided
  • 1/4 cup all-purpose flour (30g)
  • 3 1/2 cups whole milk, plus up to 1/2 cup more if needed
  • 4 cups freshly shredded sharp yellow Cheddar (about 450g), divided
  • 1 1/2 teaspoons kosher salt, plus more for the pasta water
  • 1/2 teaspoon black pepper
  • 1/2 teaspoon dry mustard

Optional finish: 1 tablespoon chopped parsley. Cavatappi holds sauce in its curls; elbow macaroni also works. Freshly shredded Cheddar melts more smoothly than pre-shredded cheese.

Yield: 8 side-dish servings or 6 main-dish servings. Time: About 20 minutes prep, 45 minutes cooking, and 5 to 10 minutes resting.

How to Make Baked Mac and Cheese

Overhead view of bacon and caramelized onion baked mac and cheese in a rectangular casserole dish.
  1. Prepare the dish: Preheat the oven to 375°F (190°C). Use a little of the measured butter to lightly coat a 9-by-13-inch ceramic or glass baking dish.
  2. Cook the bacon and onion: Cook the bacon in a large skillet over medium heat until crisp. Transfer it to a paper towel-lined plate. Pour off all but about 1 tablespoon of the bacon fat. Add the onion, 1 tablespoon butter, and a pinch of the measured salt. Cook over medium-low heat for 18 to 22 minutes, stirring regularly, until soft and deeply golden. Stir more often near the end to prevent burning.
  3. Cook the pasta: Boil the pasta in well-salted water. Drain it 1 to 2 minutes before the package’s al dente time, usually after about 7 to 9 minutes. Do not rinse; the pasta will finish softening in the sauce and oven.
  4. Make the Cheddar sauce: Melt the remaining butter, about 3 tablespoons, in a 3- to 4-quart saucepan or Dutch oven over medium heat. Whisk in the flour and dry mustard and cook for 1 minute without browning. Gradually whisk in 3 1/2 cups milk. Cook, stirring, for about 8 to 10 minutes, until the sauce coats a spoon but still pours easily. Remove from the heat and stir in 3 cups Cheddar by handfuls. Stir in the remaining measured salt and the black pepper. Do not boil the sauce after adding the cheese.
  5. Assemble: Fold the pasta, onion, and about two-thirds of the bacon into the sauce. The mixture should spread easily; if it looks thick, stir in a splash of the extra milk. Transfer to the prepared dish and scatter the remaining 1 cup Cheddar over the top.
  6. Bake: Bake uncovered for 20 to 25 minutes. Start checking at 20 minutes. Remove the dish when the edges bubble and the cheese has melted with scattered light golden spots. The center should still look moist and creamy when spooned.
  7. Rest and serve: Let stand for 5 to 10 minutes. Scatter the reserved bacon over the top, add parsley sparingly if using, and spoon portions from the dish.

How to Keep Baked Mac and Cheese Creamy

Pasta continues to absorb liquid after draining, so leave it slightly firm before baking and keep the assembled casserole a little looser than you want it at the table. Bake just until the edges bubble rather than waiting for the surface to dry out. Adding the Cheddar off heat helps it melt smoothly instead of turning grainy or greasy.

What to Serve with Baked Mac and Cheese

Serve it as a main dish with a green salad or as a hearty side. Slow Cooker Maple Glazed Carrots add a vegetable side, while Sourdough Discard Focaccia works alongside it for dinner.

How to Store and Reheat Baked Mac and Cheese

Cool leftovers and refrigerate in shallow, airtight containers for up to 5 days. For a head start, cook the bacon and onion and shred the cheese up to 1 day ahead; cook the pasta and make the sauce close to baking time.

To reheat one portion, add a splash of milk and microwave for 1 minute. Stir, then heat in 30-second intervals until steaming hot. For a full dish, add milk as needed, cover, and reheat at 350°F (175°C) for 15 to 20 minutes, or until hot throughout. The milk loosens the sauce the pasta absorbed during storage.

Freeze cooled portions in airtight freezer-safe containers for up to 3 months. Thaw overnight in the refrigerator when possible, then add a little milk and reheat gently until steaming.

Nutrition

Approximate nutrition per serving, based on 8 side-dish servings: 710 calories, 30g protein, 42g fat, and 55g carbohydrates. Approximate values per 100g of prepared casserole: 225 calories, 9g protein, 13g fat, and 17g carbohydrates. Values vary with the bacon, cheese, and amount of rendered fat discarded.

Baked Mac and Cheese

Creamy baked macaroni and cheese with sharp Cheddar, crisp bacon, and slowly browned onion.
Course: Main Course
Cuisine: American
Prep: 20 min
Cook: 45 min
Total: 75 min
Servings: 8 Calories: 710 kcal

Equipment

  • 9-by-13-inch baking dish
  • large skillet
  • large pot
  • colander
  • 3- to 4-quart saucepan or Dutch oven
  • whisk

Ingredients

For the Mac and Cheese

  • 1 pound cavatappi or elbow macaroni (450g)
  • 8 ounces thick-cut bacon, chopped (225g)
  • 1 large yellow onion, thinly sliced (about 250g)
  • 4 tablespoons unsalted butter (about 55g), divided
  • 1/4 cup all-purpose flour (30g)
  • 3 1/2 cups whole milk, plus up to 1/2 cup more as needed
  • 4 cups freshly shredded sharp yellow Cheddar (about 450g), divided
  • 1 1/2 teaspoons kosher salt, plus more for pasta water
  • 1/2 teaspoon black pepper
  • 1/2 teaspoon dry mustard

Optional Finish

  • 1 tablespoon chopped parsley

Instructions

  1. Preheat the oven to 375°F (190°C). Lightly butter a 9-by-13-inch ceramic or glass baking dish using a little of the measured butter.
  2. Cook the bacon in a large skillet over medium heat until crisp. Transfer it to a paper towel-lined plate and reserve.
  3. Pour off all but about 1 tablespoon bacon fat from the skillet. Add the onion, 1 tablespoon butter, and a pinch of the measured salt. Cook over medium-low heat for 18 to 22 minutes, stirring regularly, until soft and deeply golden.
  4. Boil the pasta in well-salted water until 1 to 2 minutes shy of the package’s al dente time, about 7 to 9 minutes. Drain without rinsing.
  5. Melt the remaining 3 tablespoons butter in a 3- to 4-quart saucepan or Dutch oven over medium heat. Whisk in the flour and dry mustard, then cook for 1 minute without browning.
  6. Gradually whisk in 3 1/2 cups milk. Cook, stirring, for 8 to 10 minutes, until the sauce coats a spoon but still pours easily.
  7. Remove the sauce from the heat. Stir in 3 cups Cheddar by handfuls, then stir in the remaining measured salt and black pepper. Do not boil after adding the cheese.
  8. Fold the drained pasta, browned onion, and about two-thirds of the bacon into the cheese sauce. If the mixture seems thick, stir in a splash of the remaining milk.
  9. Transfer the mixture to the prepared baking dish and scatter the remaining 1 cup Cheddar over the top.
  10. Bake uncovered for 20 to 25 minutes, until the edges are bubbling and the top has scattered light golden spots.
  11. Rest for 5 to 10 minutes. Top with the reserved bacon and parsley, if using, before serving.

Tips

  • Cook the pasta slightly under al dente so it does not become soft during baking.
  • Use freshly shredded Cheddar for a smoother sauce.
  • Add the cheese off heat and do not boil the sauce afterward to prevent graininess.
  • Keep the assembled casserole slightly loose by adding extra milk if needed.
  • Remove the dish when the edges bubble; overbaking can dry out the center.
  • Add the reserved bacon after baking so it remains crisp.

Variations

  • Elbow Macaroni Version: Use elbow macaroni in place of cavatappi for a classic-style baked mac and cheese.

Notes

Refrigerate cooled leftovers in shallow airtight containers for up to 5 days. Reheat with a splash of milk until steaming hot. Freeze cooled portions for up to 3 months and thaw overnight before reheating when possible.

Nutrition

Calories: 710 kcal | Protein: 30 g | Fat: 42 g | Carbohydrates: 55 g

Slow Cooker Maple Glazed Carrots

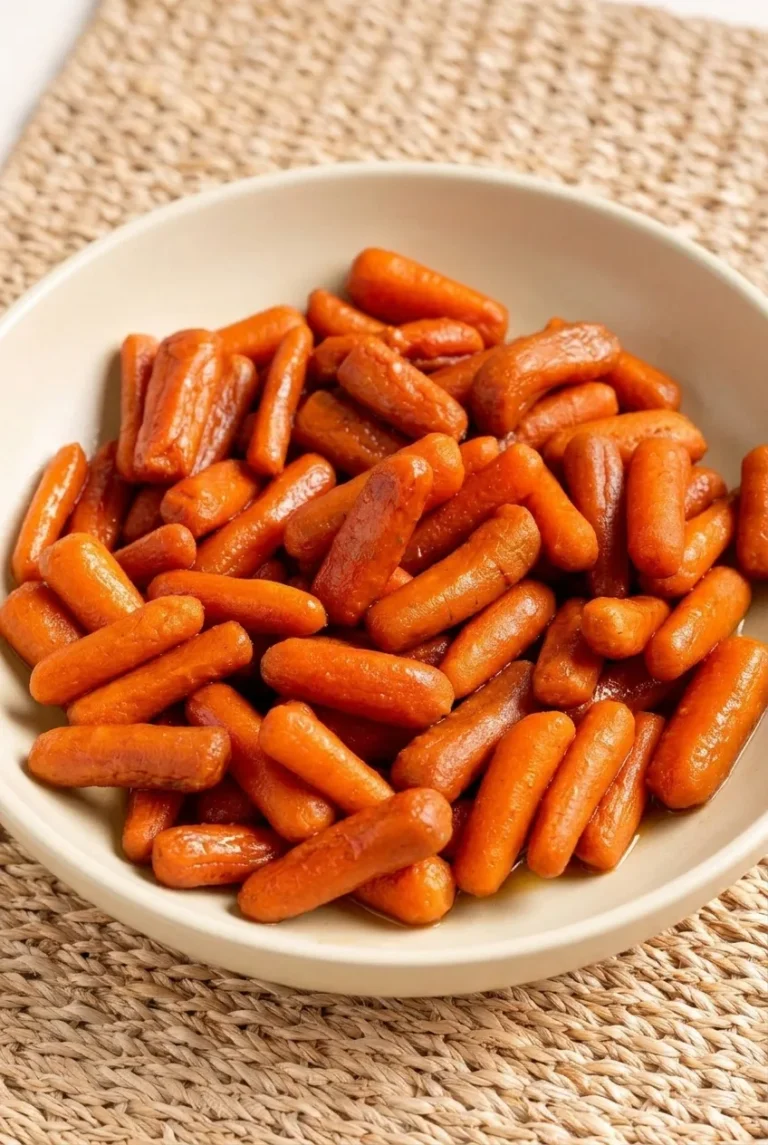
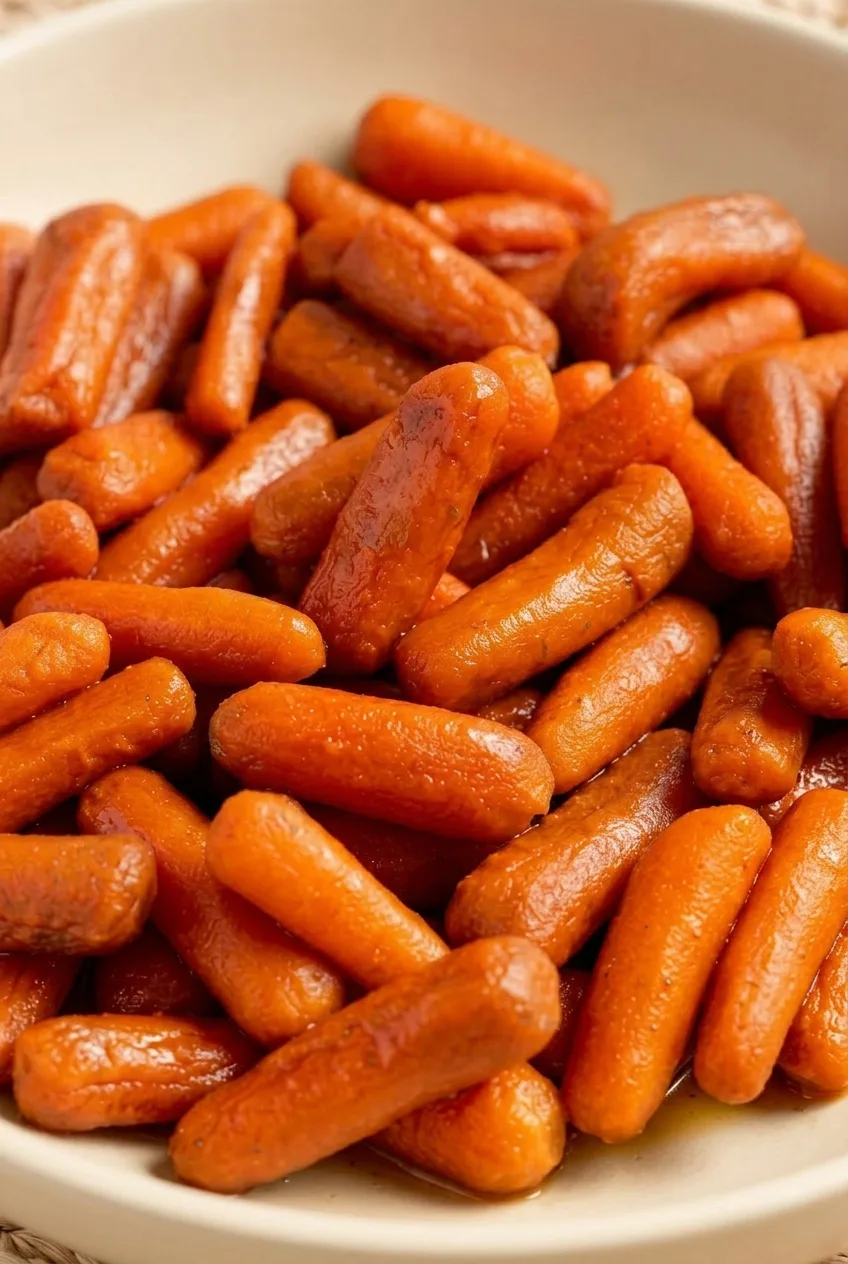
Whole baby carrots cook with maple syrup, brown sugar, butter, and a little cinnamon until tender but still intact. The slow cooker keeps the oven free, though it also traps the moisture the carrots release. To get a glaze that clings instead of a thin sauce, lift out the cooked carrots and briefly simmer the cooking liquid in a saucepan before tossing everything together.

This recipe makes 6 side-dish servings. Allow 10 minutes to prepare it, 2 1/2 to 3 1/2 hours on HIGH, and another 5 to 8 minutes to reduce the glaze. Check the carrots early in the cooking window; their tenderness matters more than the clock.

Ingredients for Slow Cooker Maple Glazed Carrots

Close view of tender whole baby carrots coated in shiny maple-butter glaze
  • 2 pounds baby carrots (about 900g)
  • 1/4 cup pure maple syrup (80g)
  • 1/4 cup packed light brown sugar (55g)
  • 4 tablespoons unsalted butter, cut into pieces (55g)
  • 1/2 teaspoon ground cinnamon
  • 1/2 teaspoon kosher salt, plus more to taste

Use pure maple syrup rather than pancake syrup for the intended maple flavor. Do not add water or broth; the carrots release liquid as they cook.

How to Make Slow Cooker Maple Glazed Carrots

Overhead view of maple glazed baby carrots in a shallow bowl with glossy glaze pooling lightly below
  1. Season the carrots: Add the baby carrots to a 5- to 6-quart slow cooker. Add the maple syrup, brown sugar, cinnamon, and salt, and toss lightly. Scatter the butter over the top.
  2. Cook until just tender: Cover and cook on HIGH for 2 1/2 to 3 1/2 hours, stirring gently once halfway through if convenient. Start checking at 2 1/2 hours. A fork or thin knife should enter the thickest carrots easily, with slight resistance but no crunch; the carrots should still hold their shape. Alternatively, cook on LOW for 5 to 6 hours, beginning to check at 5 hours.
  3. Remove the carrots: Transfer the tender carrots to a serving bowl or covered dish with a slotted spoon. Carefully pour the cooking liquid, including the melted butter, into a small-to-medium saucepan. Removing the carrots keeps them from softening further while the glaze reduces.
  4. Reduce the glaze: Bring the liquid to a brisk simmer over medium to medium-high heat. Stir often for about 5 to 8 minutes, until glossy and lightly syrupy. It should coat a spoon and briefly leave a trail when stirred across the pan. Taste carefully and add a pinch more salt if needed. Stop before it becomes very thick; the glaze will tighten slightly as it cools.
  5. Glaze and serve: Pour the reduced glaze over the warm carrots and toss gently to coat. Serve in a shallow bowl with only a little glaze pooled beneath them.

Baby Carrots, Whole Carrots, and Cook Time

Baby carrots keep the finished dish as a bowl of distinct, whole carrots. Peeled full-size carrots also work: cut them into evenly sized, 1 1/2- to 2-inch diagonal pieces. Thicker pieces may take longer, so test the center of a few pieces rather than extending the time automatically.

Slow cookers heat differently, and carrots can turn mushy if left cooking after they become tender. A noticeable amount of thin liquid under the lid is normal; it becomes the glaze after reduction. A wider saucepan will reduce it faster than a narrow, deep one.

Maple Glazed Carrot Variations

  • Less sweet: Reduce the brown sugar to 2 tablespoons. Keep the maple syrup at 1/4 cup for a clear maple flavor.
  • Dairy-free: Replace the butter with a dairy-free butter substitute that tastes good on its own.
  • No saucepan: Once the carrots are tender, leave the slow cooker uncovered on HIGH for 20 to 30 minutes, stirring once or twice. This reduces the liquid less predictably, so watch the carrots closely to avoid overcooking them.

Serving, Make-Ahead, and Storage

Serve the carrots warm with roast chicken, ham, meatloaf, or steak. For a larger meal, they also pair with Classic Green Bean Casserole with Crispy Onions or Slow Cooker Cheesy Scalloped Potatoes.

The uncooked ingredients can be assembled the day before and refrigerated. Cold ingredients may add about 30 minutes to the slow-cooker time, so check for tenderness before reducing the glaze.

Cool leftovers promptly and refrigerate them with their glaze in an airtight container for 3 to 4 days. Reheat gently in a saucepan over low heat or in the microwave. If the glaze has thickened too much, loosen it with a small splash of water or a little butter.

Nutrition

Approximate nutrition per serving, based on 6 side-dish servings: 195 calories, 1g protein, 8g fat, and 31g carbohydrates. Per 100g of finished carrots: approximately 110 calories, 1g protein, 5g fat, and 18g carbohydrates. Values vary with the carrots and the amount of liquid reduced.

Slow Cooker Maple Glazed Carrots

Tender baby carrots are slow-cooked with maple syrup, brown sugar, butter, and cinnamon, then tossed in a reduced glossy glaze.
Course: Side Dish
Cuisine: American
Prep: 10 min
Cook: 218 min
Total: 228 min
Servings: 6 Calories: 195 kcal

Equipment

  • 5- to 6-quart slow cooker
  • slotted spoon
  • small-to-medium saucepan
  • serving bowl

Ingredients

For the Carrots

  • 2 pounds baby carrots (about 900 g)
  • 1/4 cup pure maple syrup (80 g)
  • 1/4 cup packed light brown sugar (55 g)
  • 4 tablespoons unsalted butter, cut into pieces (55 g)
  • 1/2 teaspoon ground cinnamon
  • 1/2 teaspoon kosher salt, plus more to taste

Instructions

  1. Add the baby carrots to a 5- to 6-quart slow cooker.
  2. Add the maple syrup, brown sugar, cinnamon, and salt, then toss lightly to coat the carrots.
  3. Scatter the butter over the carrots.
  4. Cover and cook on HIGH for 2 1/2 to 3 1/2 hours, stirring gently once halfway through if convenient. Begin checking for tenderness at 2 1/2 hours.
  5. Transfer the tender carrots to a serving bowl with a slotted spoon.
  6. Carefully pour the cooking liquid and melted butter into a small-to-medium saucepan.
  7. Bring the liquid to a brisk simmer over medium to medium-high heat. Stir often for 5 to 8 minutes, until glossy, lightly syrupy, and able to coat a spoon.
  8. Taste the glaze and add a pinch more salt if needed.
  9. Pour the reduced glaze over the warm carrots and toss gently to coat before serving.

Tips

  • Use pure maple syrup rather than pancake syrup for the best maple flavor.
  • Do not add water or broth; the carrots release enough liquid while cooking.
  • Start checking the carrots at 2 1/2 hours to prevent them from becoming mushy.
  • Remove the carrots before reducing the liquid so they do not continue softening.
  • Use a wide saucepan to reduce the glaze more quickly.
  • Stop reducing while the glaze is lightly syrupy, since it thickens further as it cools.

Variations

  • Less Sweet: Reduce the brown sugar to 2 tablespoons while keeping the maple syrup at 1/4 cup.
  • Dairy-Free: Replace the butter with a dairy-free butter substitute.
  • No Saucepan: After the carrots are tender, leave the slow cooker uncovered on HIGH for 20 to 30 minutes, stirring once or twice, to reduce the liquid.
  • Whole Carrots: Use peeled full-size carrots cut into even 1 1/2- to 2-inch diagonal pieces, checking for tenderness as thicker pieces may need longer.

Notes

For the LOW setting, cook for 5 to 6 hours and begin checking at 5 hours. Refrigerate leftovers with the glaze in an airtight container for 3 to 4 days. Reheat gently; loosen an overly thick glaze with a small splash of water or a little butter.

Nutrition

Calories: 195 kcal | Protein: 1 g | Fat: 8 g | Carbohydrates: 31 g