Author

Julia

Browsing

French Lemon Tart

A French lemon tart pairs a thin, golden pastry shell with a smooth filling made from fresh lemon juice and zest. Fully blind-baking the shell before adding the custard helps it stay firm beneath the filling. Bake until the edges are set but the center still jiggles slightly, then chill the tart until it cuts into clean wedges. Leave the whole tart plain and add whipped cream and zest to individual slices.

Yield: One 9-inch tart, about 8 slices. Time: About 35 minutes active preparation, 45 minutes to chill the pastry, 45–55 minutes baking, plus cooling and at least 4 hours of refrigeration. Allow about 7 hours overall.

Ingredients for French Lemon Tart
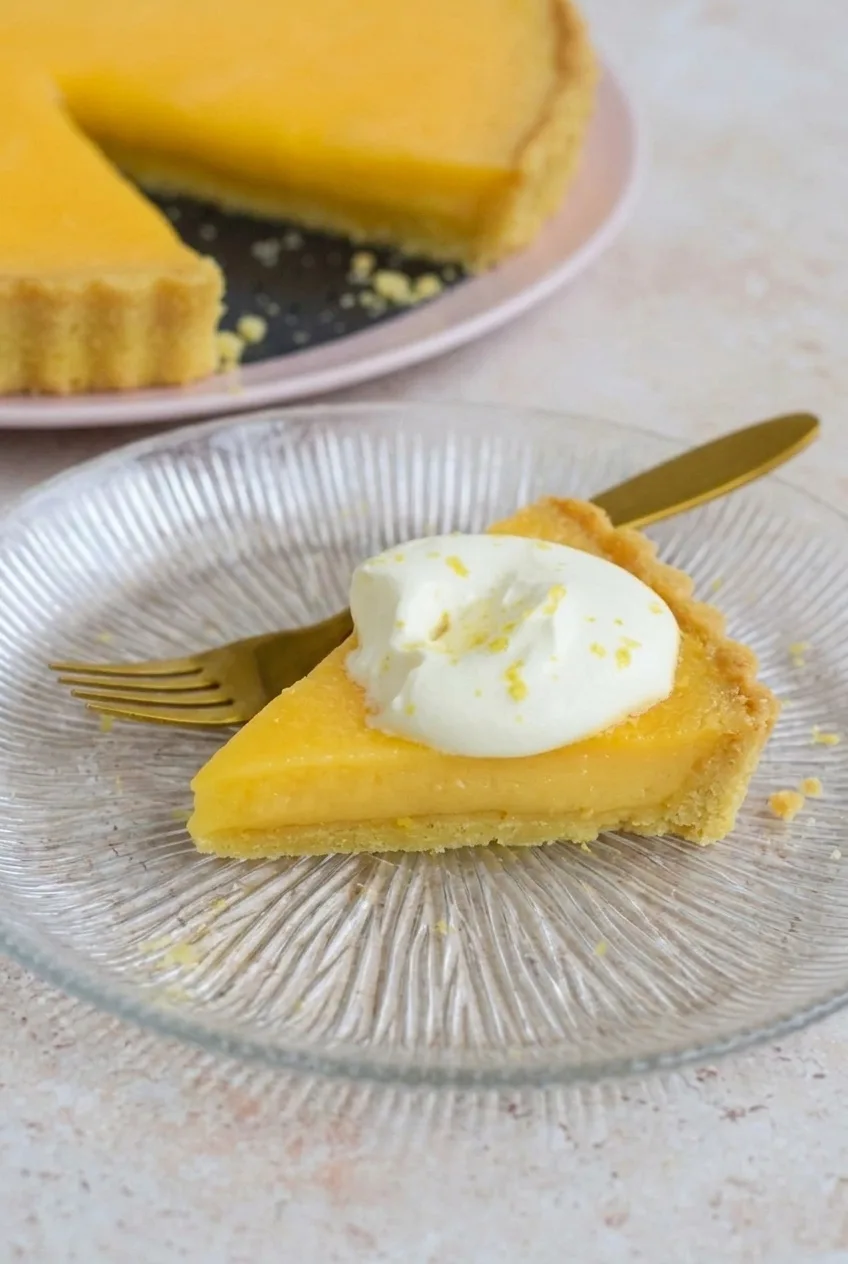
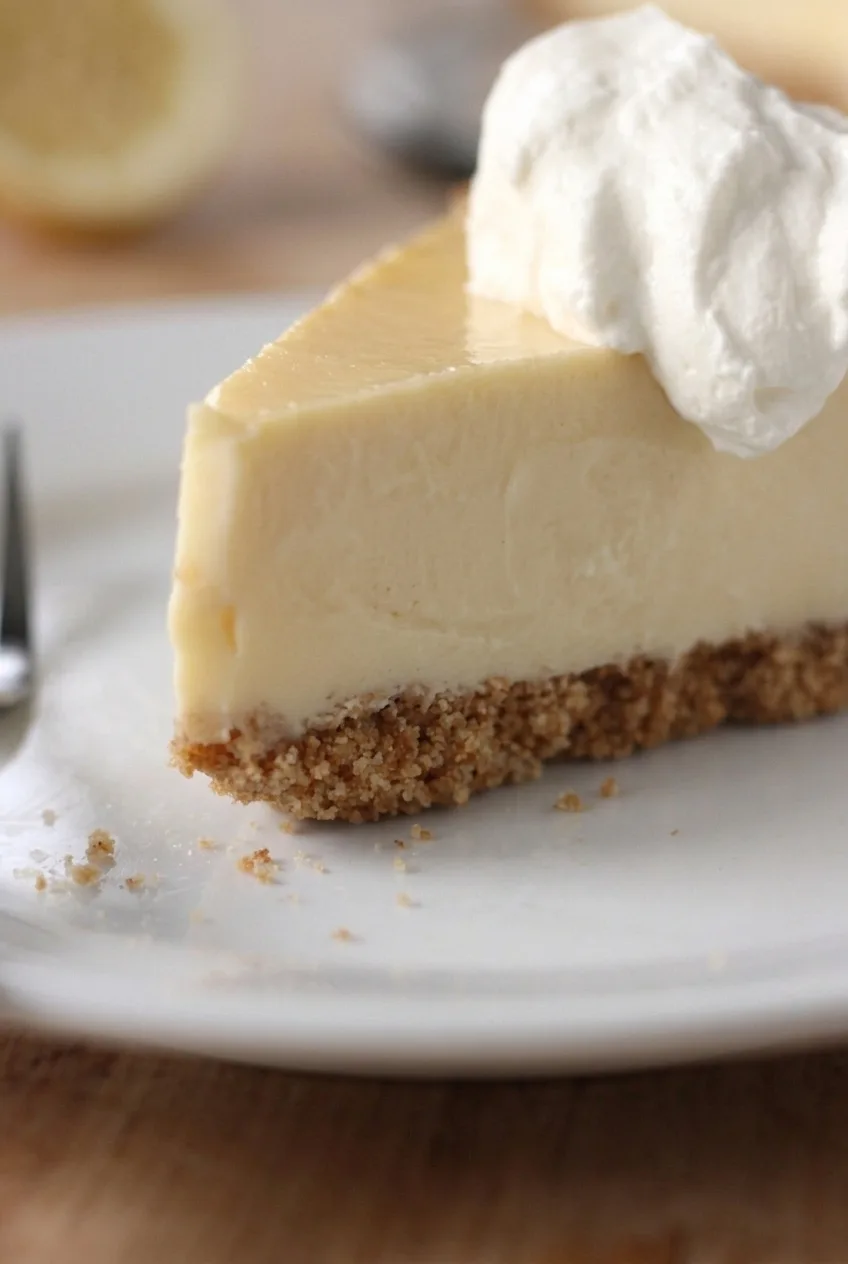
Close view of a French lemon tart slice showing smooth filling, thin pastry and whipped cream

Sweet pastry shell

  • 1 1/4 cups all-purpose flour (155g)
  • 1/4 cup powdered sugar (30g)
  • 1/4 teaspoon fine salt
  • 1/2 cup cold unsalted butter, cubed (115g)
  • 1 large egg yolk
  • 1–2 tablespoons ice water, only as needed

Lemon filling

  • 3/4 cup granulated sugar (150g)
  • 2 tablespoons finely grated fresh lemon zest, plus a little extra for serving
  • 1/2 cup fresh lemon juice, measured after juicing (about 3–4 lemons)
  • 3 large eggs
  • 2 additional large egg yolks
  • 1/2 cup heavy cream

For serving

  • 1/2 cup heavy cream
  • 1–2 teaspoons powdered sugar, optional

How to Make French Lemon Tart
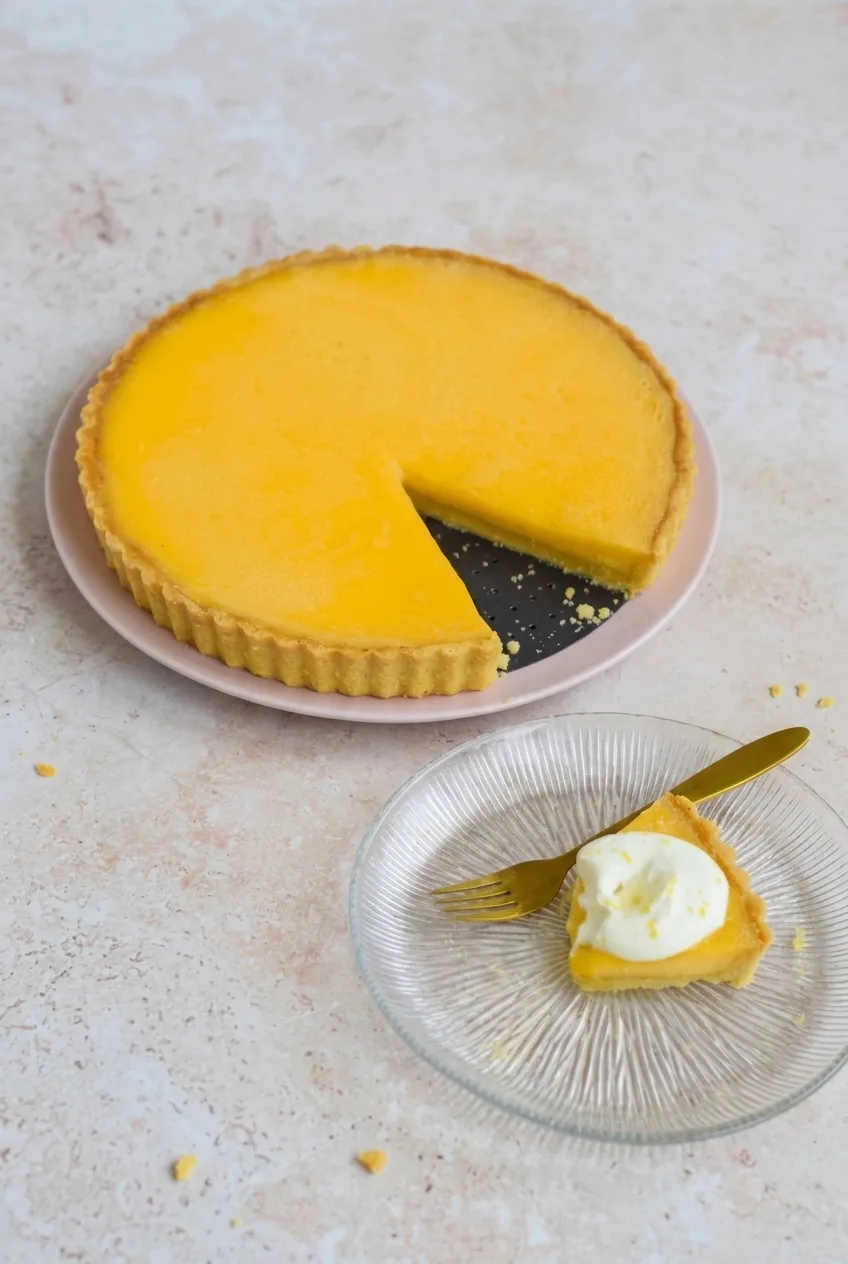
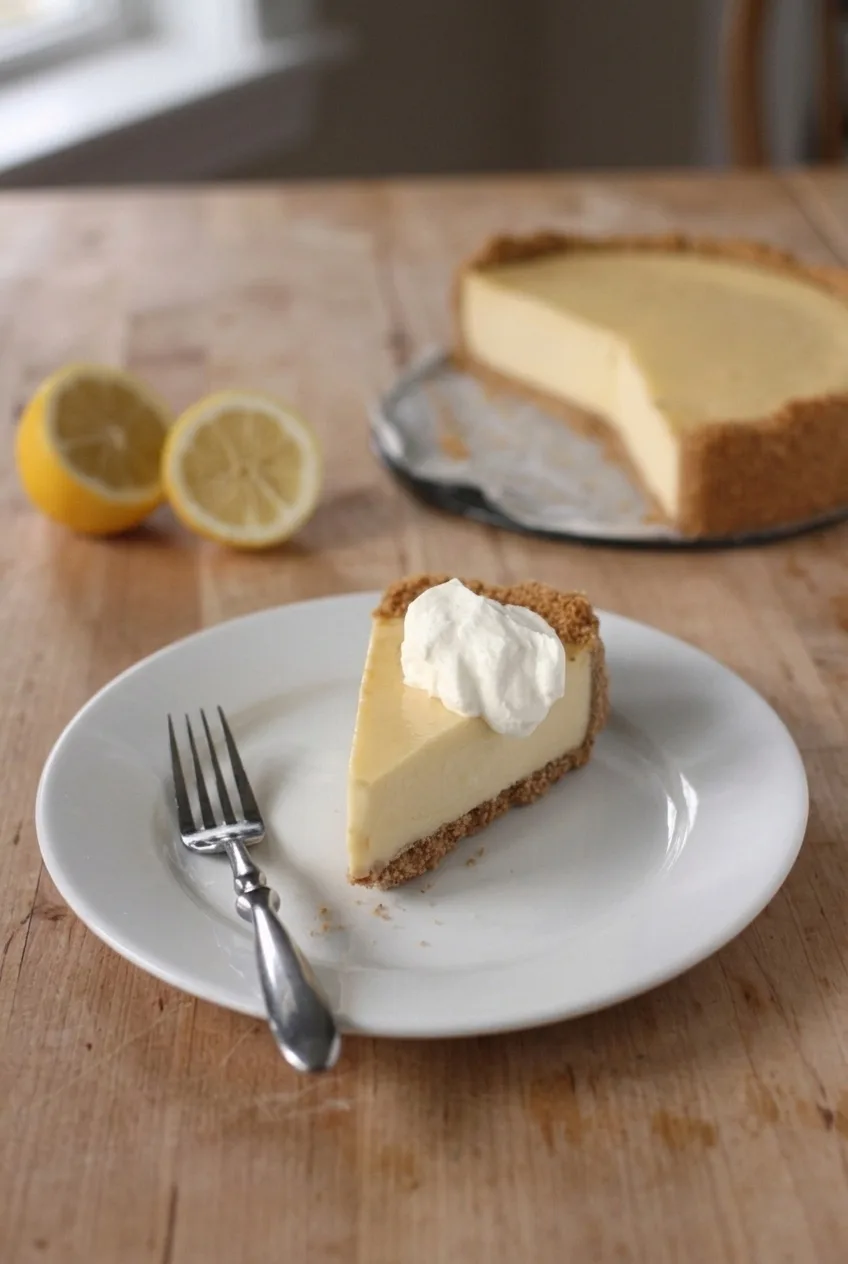
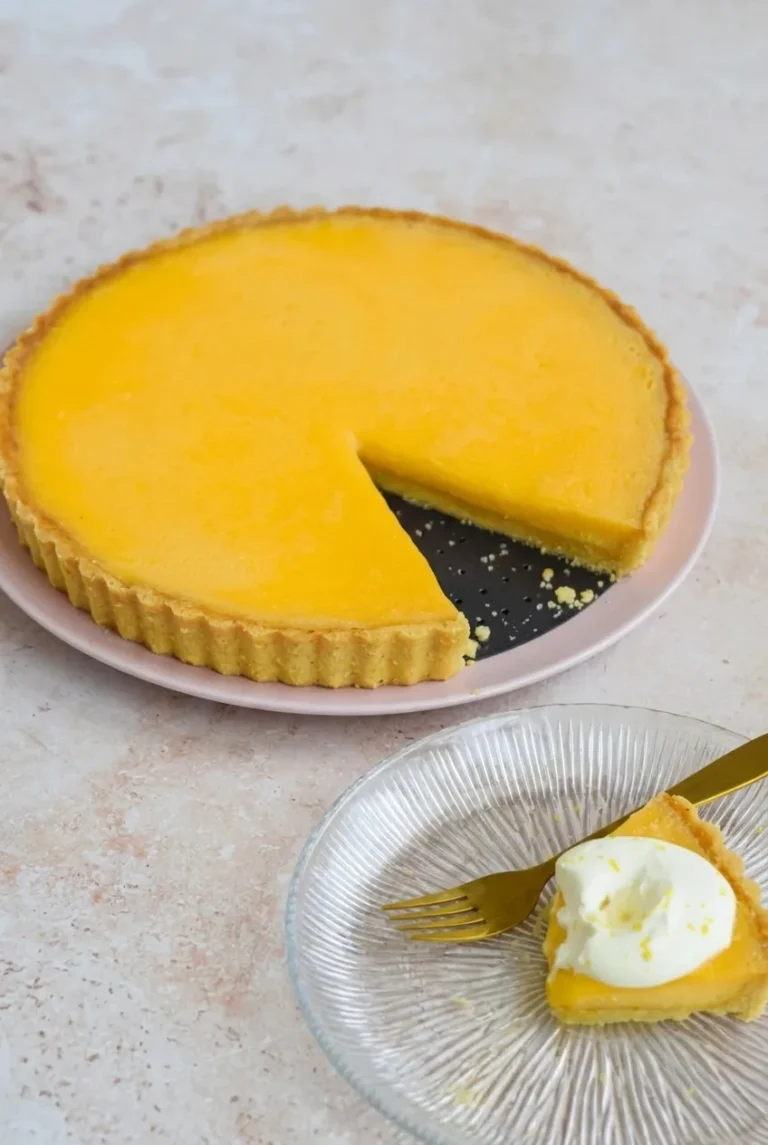
French lemon tart and a separate cream-topped slice on a light tabletop
  1. Make the pastry: Combine the flour, powdered sugar, and salt. Work in the cold butter until the mixture is crumbly, then mix in the egg yolk. Add 1 tablespoon ice water and a little more only if the dough does not hold together when pressed. It should not be sticky.
  2. Line and chill the pan: Roll out the dough and fit it into a 9-inch removable-bottom fluted tart pan. Press it gently into the flutes without stretching it, then trim the edge. Refrigerate the lined pan for 45 minutes.
  3. Blind-bake the shell: Preheat the oven to 350°F (175°C). Set the tart pan on a flat baking sheet and lightly prick the pastry base with a fork. Line with parchment and fill with pie weights or dried beans, reaching the edges. Bake for about 15 minutes. Remove the parchment and weights, then bake for another 10–15 minutes, checking after 10. The base should look dry and lightly golden.
  4. Mix the filling: Reduce the oven to 300°F (150°C) and let it settle at that temperature. Rub the 2 tablespoons lemon zest into the granulated sugar. Gently whisk in the eggs, additional yolks, measured lemon juice, and 1/2 cup heavy cream until combined without becoming foamy. If you see egg strands, pour the filling through a fine-mesh strainer.
  5. Fill and bake: Keep the tart pan on its baking sheet while pouring the custard into the fully baked shell. Stop below the pastry rim; leave behind any filling that will not fit. Move the baking sheet, not the removable-bottom pan by its base. Bake uncovered for about 20–30 minutes, checking at 20. The edges should be set and the center should have a small, cohesive jiggle rather than slosh. The top should remain smooth and unbrowned.
  6. Cool and chill: Let the tart cool in its pan for about 45–60 minutes. Refrigerate for at least 4 hours, preferably overnight, until thoroughly cold and firm. Carefully remove the tart ring before cutting.
  7. Finish individual slices: Whip the remaining 1/2 cup cream to soft peaks, adding the optional powdered sugar before whipping if desired. Top each plated slice with a dollop of cream and a little fresh lemon zest. Leave the rest of the tart plain.

How to Keep the Pastry Shell Crisp

Chilling the lined pan and placing weights all the way to the edges help the fluted sides hold their shape. Do not stretch the dough into the pan; it can pull back as it bakes. Once the weights are removed, continue baking until the base is dry and lightly golden. The brief bake with the moist filling will not make an underbaked shell crisp.

A prepared pastry shell can be used if it fits a 9-inch tart pan and is fully blind-baked. Check its capacity before adding the filling, and follow its own baking instructions.

How to Tell When the Lemon Filling Is Set

The center should still jiggle slightly when the tart comes out of the oven, while the edges look set. Look for one small movement, not liquid rippling or sloshing. Baking until the center is rigid or the top browns can leave the custard grainy or cracked.

Chilling completes the set. If the filling still flows after it is thoroughly cold, it did not bake long enough. This recipe uses a custard baked in the shell; a saucepan-cooked lemon curd requires different proportions and instructions.

Serving and Storing French Lemon Tart

The tart can be baked a day ahead and chilled overnight for easier slicing. Whip the serving cream and add the zest shortly before serving. For a chilled lemon dessert with a graham-cracker crust instead, see this creamy lemon icebox pie.

Refrigerate the undecorated tart loosely covered, without pressing wrap against the filling, and use within about 2–3 days. Store whipped cream separately. Serve the tart chilled rather than reheating it. Freezing may change the texture of this baked cream custard.

Nutrition

Approximate nutrition per slice, based on 8 slices and including the serving cream: 420 calories, 6g protein, 26g fat, and 40g carbohydrates. Approximate values per 100g: 350 calories, 5g protein, 22g fat, and 33g carbohydrates. Values vary with slice size, ingredients, and moisture lost during baking. Optional sugar for the cream is not included.

French Lemon Tart

A crisp, blind-baked pastry shell holds a smooth lemon custard made with fresh juice and zest.
Course: Dessert
Cuisine: French
Prep: 80 min
Cook: 50 min
Total: 420 min
Servings: 8 Calories: 420 kcal

Equipment

  • Mixing bowl
  • Rolling pin
  • 9-inch removable-bottom fluted tart pan
  • Baking sheet
  • Parchment paper
  • Pie weights or dried beans
  • Fine-mesh strainer
  • Whisk
  • Zester
  • Electric mixer or whisk

Ingredients

Sweet pastry shell

  • 1 1/4 cups all-purpose flour (155g)
  • 1/4 cup powdered sugar (30g)
  • 1/4 teaspoon fine salt
  • 1/2 cup cold unsalted butter, cubed (115g)
  • 1 large egg yolk
  • 1–2 tablespoons ice water, as needed

Lemon filling

  • 3/4 cup granulated sugar (150g)
  • 2 tablespoons finely grated fresh lemon zest, plus extra for serving
  • 1/2 cup fresh lemon juice, measured after juicing (about 3–4 lemons)
  • 3 large eggs
  • 2 additional large egg yolks
  • 1/2 cup heavy cream

For serving

  • 1/2 cup heavy cream
  • 1–2 teaspoons powdered sugar, optional

Instructions

  1. Combine the flour, powdered sugar, and salt. Work in the cold butter until crumbly, then mix in the egg yolk.
  2. Add 1 tablespoon ice water. Add a little more only if needed for the dough to hold together when pressed; do not let it become sticky.
  3. Roll out the dough and fit it into a 9-inch removable-bottom fluted tart pan. Press it gently into the flutes without stretching, then trim the edge.
  4. Refrigerate the lined pan for 45 minutes.
  5. Preheat the oven to 350°F (175°C). Set the tart pan on a flat baking sheet and lightly prick the pastry base with a fork.
  6. Line the shell with parchment and fill with pie weights or dried beans, reaching the edges. Bake for about 15 minutes.
  7. Remove the parchment and weights. Bake for another 10–15 minutes, checking after 10 minutes, until the base is dry and lightly golden.
  8. Reduce the oven to 300°F (150°C) and let it settle at that temperature.
  9. Rub the lemon zest into the granulated sugar. Gently whisk in the eggs, additional yolks, lemon juice, and 1/2 cup heavy cream without making the mixture foamy. Strain through a fine-mesh strainer if egg strands are visible.
  10. Keep the tart pan on the baking sheet and pour the filling into the baked shell, stopping below the pastry rim. Leave behind any filling that will not fit.
  11. Bake uncovered for about 20–30 minutes, checking at 20 minutes. Remove the tart when the edges are set and the center has a small, cohesive jiggle. Keep the top smooth and unbrowned.
  12. Cool the tart in its pan for about 45–60 minutes, then refrigerate for at least 4 hours, preferably overnight, until cold and firm.
  13. Carefully remove the tart ring before cutting.
  14. Whip the remaining 1/2 cup cream to soft peaks, adding the optional powdered sugar before whipping if desired. Top each slice with a dollop of cream and fresh lemon zest.

Tips

  • Chill the lined tart pan before baking to help the pastry hold its shape.
  • Do not stretch the dough when fitting it into the pan, or it may pull back as it bakes.
  • Fill the pastry shell with weights all the way to the edges during blind-baking.
  • Bake the shell until its base is dry and lightly golden before adding the filling.
  • Remove the tart while the center still jiggles slightly; chilling completes the set.
Notes

Refrigerate the undecorated tart loosely covered and use within 2–3 days. Store whipped cream separately. Serve chilled; reheating is not recommended. Freezing may change the custard’s texture.

Nutrition

Calories: 420 kcal | Protein: 6 g | Fat: 26 g | Carbohydrates: 40 g

Lemon Icebox Pie

Lemon icebox pie should slice into a tall wedge with a smooth, tart filling and a graham cracker crust that holds along the bottom and sides. Fresh lemon juice and zest balance the sweetened condensed milk, while a dollop of whipped cream finishes each slice.

This egg-yolk filling gets a short bake, then sets fully in the refrigerator—that’s the “icebox” part. For an egg-free, oven-free dessert with a different filling, try the no-bake lemon cream cheese pie.

Ingredients for Lemon Icebox Pie

Close view of smooth lemon icebox pie filling above a compact graham cracker crust

Makes one 9-inch deep-dish pie, or 8 slices. Allow about 25 minutes to prepare, 32–38 minutes to bake, 1 hour to cool, and at least 6 hours to chill—about 8 hours 30 minutes overall.

Graham Cracker Crust

  • 1 3/4 cups graham cracker crumbs (185g)
  • 2 tablespoons granulated sugar (25g)
  • 6 tablespoons unsalted butter, melted (85g)

Lemon Filling

  • 5 large egg yolks
  • 2 cans sweetened condensed milk, 14 ounces each (about 795g total)
  • 3/4 cup fresh lemon juice
  • 1 tablespoon finely grated lemon zest

Whipped Cream

  • 3/4 cup cold heavy whipping cream (180g)
  • 1 tablespoon powdered sugar

Fresh juice and zest give the filling its clearest lemon flavor. Bottled juice can stand in for fresh juice, though the flavor may be less vivid.

How to Make Lemon Icebox Pie

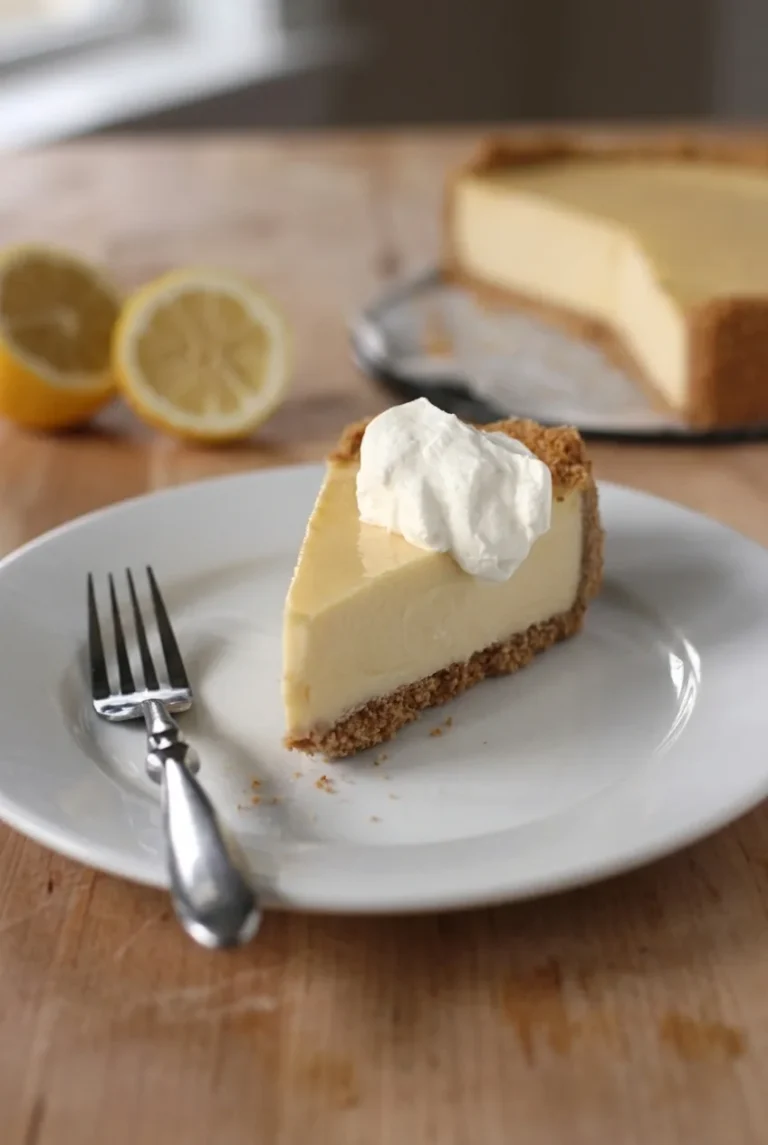
Plated lemon icebox pie slice with whipped cream and the remaining pie behind it
  1. Build the crust: Preheat the oven to 325°F (165°C). Mix the graham cracker crumbs, granulated sugar, and melted butter until the crumbs are evenly damp. Press firmly across the bottom and up the sides of a 9-inch deep-dish pie plate at least 2 inches deep. A flat-bottom measuring cup helps compact the crumbs so the crust holds together when sliced.
  2. Prebake the crust: Bake the empty crust, uncovered, for 9–10 minutes, until lightly toasted. Set it on a rack to cool briefly while you make the filling.
  3. Mix the filling: Whisk the egg yolks until no streaks remain. Add the sweetened condensed milk, lemon juice, and zest; whisk gently until smooth without beating in excess air.
  4. Bake the pie: Pour the filling into the crust and bake uncovered. Start checking at 20 minutes; it will take approximately 22–28 minutes. Remove the pie when the edges are set and the center moves with a small, unified jiggle rather than a liquid slosh. The surface should remain pale, without browning or cracks.
  5. Cool and chill: Cool on a rack for about 1 hour. Once the pie is no longer warm, cover it without touching the filling and refrigerate for at least 6 hours, preferably overnight.
  6. Slice and top: Whip the cold cream with the powdered sugar until it holds soft or medium peaks. Cut the cold pie into 8 wedges with a warm knife, wiping the blade between cuts. Add one generous dollop of whipped cream to each slice.

How to Tell When the Filling Is Set

Do not wait for the center to become rigid in the oven. The edges should be set, but a gentle nudge should move the center slightly as one piece. Refrigeration finishes firming the filling while keeping it creamy.

Filling depth and pie-plate material can shift the bake time, so use that soft-set cue rather than the clock alone. A deep-dish plate also matters for capacity: a shallow prepared graham cracker crust may overflow with this filling.

Cooling and Chilling for Clean Slices

Covering a warm pie traps condensation. Let it cool first, then give it the full refrigerator chill before cutting; an early slice may be too soft to hold its shape. The pie can be made a day ahead and chilled overnight.

How to Store Lemon Icebox Pie

Keep the pie covered in the refrigerator for up to 5 days. Store the whipped cream separately and top individual slices when serving. Serve the pie cold; do not reheat it.

For a firmer variation, the cooled, baked pie can be frozen. Let it soften in the refrigerator before serving if you prefer a creamier texture.

Nutrition

Approximate nutrition per slice, based on 8 slices: 630 calories, 12g protein, 31g fat, and 78g carbohydrates. Per 100g: approximately 330 calories, 6g protein, 16g fat, and 41g carbohydrates. Values will vary with ingredients and slice size.

Lemon Icebox Pie

A tart, creamy lemon filling baked in a graham cracker crust and chilled until set.
Course: Dessert
Cuisine: American
Prep: 25 min
Cook: 38 min
Total: 510 min
Servings: 8 Calories: 630 kcal

Equipment

  • 9-inch deep-dish pie plate
  • Oven
  • Mixing bowls
  • Whisk
  • Cooling rack
  • Electric mixer or whisk
  • Knife

Ingredients

Graham Cracker Crust

  • 1 3/4 cups graham cracker crumbs (185 g)
  • 2 tablespoons granulated sugar (25 g)
  • 6 tablespoons unsalted butter, melted (85 g)

Lemon Filling

  • 5 large egg yolks
  • 2 cans sweetened condensed milk, 14 ounces each (about 795 g total)
  • 3/4 cup fresh lemon juice
  • 1 tablespoon finely grated lemon zest

Whipped Cream

  • 3/4 cup cold heavy whipping cream (180 g)
  • 1 tablespoon powdered sugar

Instructions

  1. Preheat the oven to 325°F (165°C).
  2. Mix the graham cracker crumbs, granulated sugar, and melted butter until evenly damp.
  3. Press the crumbs firmly across the bottom and up the sides of a 9-inch deep-dish pie plate at least 2 inches deep.
  4. Bake the crust uncovered for 9–10 minutes, until lightly toasted. Set it on a rack to cool briefly.
  5. Whisk the egg yolks until no streaks remain. Add the sweetened condensed milk, lemon juice, and zest, and whisk gently until smooth.
  6. Pour the filling into the crust and bake uncovered for approximately 22–28 minutes, checking from 20 minutes. Remove it when the edges are set and the center moves with a small, unified jiggle.
  7. Cool the pie on a rack for about 1 hour. Once it is no longer warm, cover it without touching the filling and refrigerate for at least 6 hours, preferably overnight.
  8. Whip the cold cream with the powdered sugar until it holds soft or medium peaks.
  9. Cut the cold pie into 8 wedges with a warm knife, wiping the blade between cuts. Top each slice with a dollop of whipped cream.

Tips

  • Use a deep-dish pie plate at least 2 inches deep; a shallow crust may overflow.
  • Press the crust firmly into the plate so it holds together when sliced.
  • Look for a slight, unified jiggle in the center rather than waiting for it to become rigid in the oven.
  • Cool the pie before covering it to prevent condensation from forming on the filling.
  • Use a warm knife and wipe it between cuts for clean slices.

Variations

  • Frozen Lemon Icebox Pie: Freeze the cooled, baked pie for a firmer texture; soften it in the refrigerator before serving for a creamier slice.

Notes

Keep covered in the refrigerator for up to 5 days. Store whipped cream separately, serve the pie cold, and do not reheat. Nutrition is approximate per slice.

Nutrition

Calories: 630 kcal | Protein: 12 g | Fat: 31 g | Carbohydrates: 78 g

Old-Fashioned Lemon Chess Pie

Lemon chess pie has a dense, sweet-tart filling, a thin browned top, and a crimped pastry crust. Fresh lemon juice and zest provide the flavor; cornmeal and flour help give the custard its characteristic sliceable texture. This version bakes in a chilled, unbaked shell. The center can still wobble slightly when the pie leaves the oven, but it needs several hours to cool before you cut it into wedges.

Yield: One 9-inch pie, 8 slices. Prep: 20 minutes, plus 15 minutes to chill the crust. Bake: 45 to 55 minutes. Cool: 3 to 4 hours.

Ingredients for Lemon Chess Pie

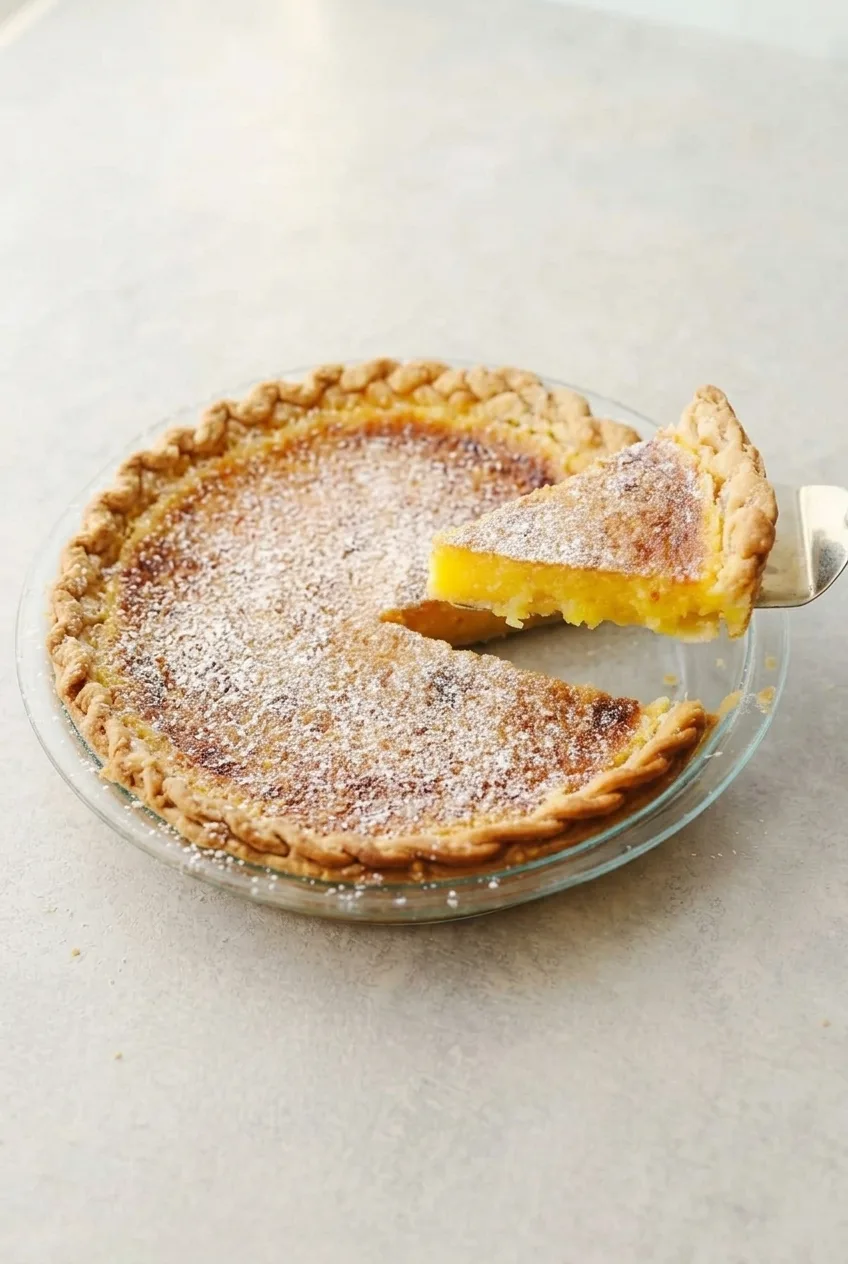
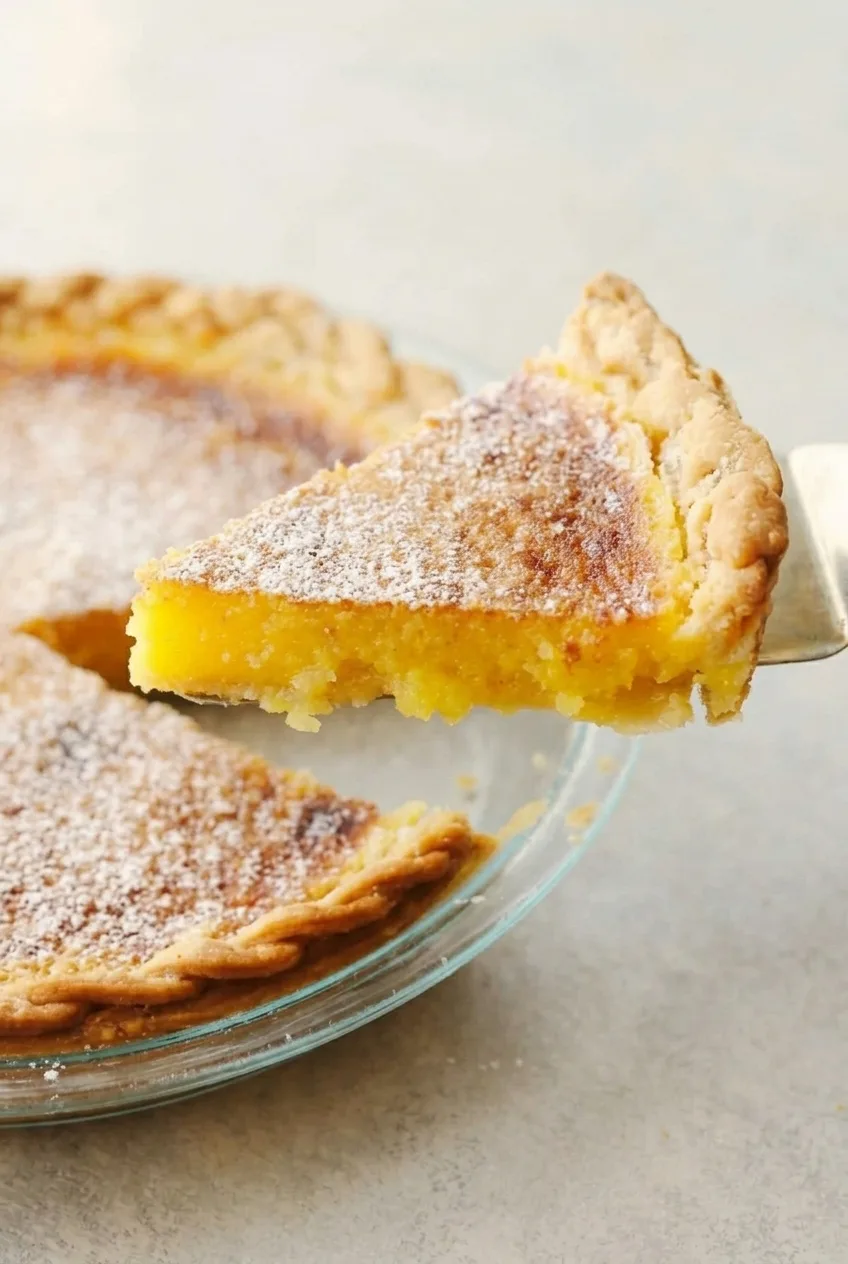
Wider view of lemon chess pie in a glass plate with one wedge lifted beside the cut opening
  • 1 unbaked 9-inch pastry pie crust, fitted in a pie plate and crimped
  • 1 1/2 cups granulated sugar (300g)
  • 2 tablespoons fine yellow cornmeal (about 20g)
  • 1 tablespoon all-purpose flour (8g)
  • 1/4 teaspoon fine salt
  • 4 large eggs
  • 1/2 cup unsalted butter, melted and slightly cooled (about 115g)
  • 1/4 cup fresh lemon juice
  • 1 tablespoon finely grated lemon zest
  • 1/4 cup whole milk
  • 1 to 2 teaspoons confectioners’ sugar, for dusting

Use a standard 9-inch shell with enough room for the filling. A properly sized store-bought pastry shell works; keep it unbaked and chilled for this method.

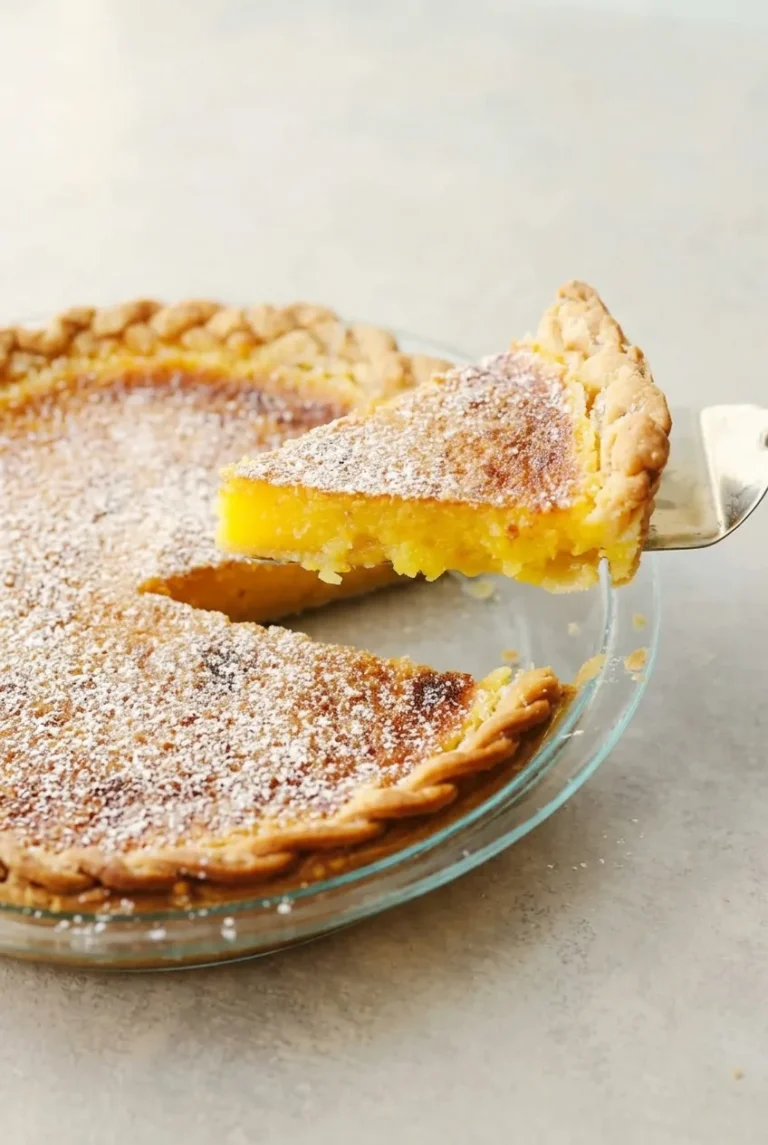
Close view of a lemon chess pie wedge showing thick yellow custard, a browned top, and pastry crust

How to Bake Lemon Chess Pie

  1. Chill the crust: Fit the pastry into a standard 9-inch pie plate without stretching it, and crimp the rim. Chill for about 15 minutes. Set an oven rack in the lower third and fully preheat the oven to 350°F (175°C).
  2. Mix the dry ingredients: Whisk the sugar, cornmeal, flour, and salt in a bowl, breaking up any lumps.
  3. Make the filling: Whisk in the eggs until combined. Add the slightly cooled melted butter, lemon juice, zest, and milk. Whisk until the filling is evenly yellow, with no streaks of egg or pooled butter. It should be pourable, not whipped airy.
  4. Fill and bake: Set the chilled crust on a baking sheet and pour in the filling. Carefully transfer it to the lower-third rack. Bake uncovered for about 45 to 55 minutes, starting to check at 40 minutes. The top should be golden with light brown mottling, and the center should wobble only slightly as one piece. If the crimped edge darkens too quickly, loosely shield just the edge with foil.
  5. Cool completely: Move the pie to a wire rack and cool in its plate for about 3 to 4 hours, until the custard is firm enough to slice.
  6. Dust and serve: Shortly before serving, sift a light layer of confectioners’ sugar over the cooled pie. Cut into wedges and lift with a pie server.

How to Tell When Lemon Chess Pie Is Done

Gently nudge the plate. The outer filling should be set, while the center may have a small, unified wobble. If it ripples like liquid, bake it longer and check again. Use these cues rather than the clock alone, especially if baking in a heavy glass pie plate.

Why the Crust and Cooling Matter

Fine cornmeal is part of the characteristic chess-pie filling; together with the flour, it contributes to the custard’s set texture. This recipe fills a chilled, unbaked crust. Blind-baking first would require a different baking schedule, and the direct-bake method does not guarantee a deeply browned bottom crust.

The filling continues to firm as it cools, so cutting a warm pie can leave the center loose. Wait until it is completely cool before slicing. Add the confectioners’ sugar shortly before serving so the fine dusting stays visible on the browned top.

Storing and Serving Leftovers

Once completely cool, cover the pie and refrigerate leftovers for up to about 3 days. For a less-cold custard texture, let individual slices stand briefly before serving. To make the pie ahead, bake and cool it fully, then refrigerate it covered and dust with sugar just before serving.

For a chilled lemon dessert, try this no-bake lemon cream cheese pie. For a different baked pie with a fluffy topping, see this classic lemon meringue pie.

Nutrition

Approximate per slice (1/8 pie): 420 calories, 5g protein, 20g fat, and 54g carbohydrates. Approximate per 100g: 390 calories, 5g protein, 19g fat, and 50g carbohydrates. Values vary with the pastry crust used and the finished pie’s weight.

Old-Fashioned Lemon Chess Pie

A sweet-tart lemon custard pie with a lightly browned top and a chilled, unbaked pastry crust.
Course: Dessert
Cuisine: American
Prep: 20 min
Cook: 50 min
Total: 295 min
Servings: 8 Calories: 420 kcal

Equipment

  • 9-inch pie plate
  • Mixing bowl
  • Whisk
  • Baking sheet
  • Wire rack
  • Citrus zester
  • Fine-mesh sieve

Ingredients

  • 1 unbaked 9-inch pastry pie crust, fitted in a pie plate and crimped
  • 1 1/2 cups granulated sugar (300g)
  • 2 tablespoons fine yellow cornmeal (about 20g)
  • 1 tablespoon all-purpose flour (8g)
  • 1/4 teaspoon fine salt
  • 4 large eggs
  • 1/2 cup unsalted butter, melted and slightly cooled (about 115g)
  • 1/4 cup fresh lemon juice
  • 1 tablespoon finely grated lemon zest
  • 1/4 cup whole milk
  • 1 to 2 teaspoons confectioners’ sugar, for dusting

Instructions

  1. Fit the pastry into a standard 9-inch pie plate without stretching it, then crimp the rim. Chill for about 15 minutes.
  2. Set an oven rack in the lower third and preheat the oven to 350°F (175°C).
  3. Whisk the sugar, cornmeal, flour, and salt in a bowl, breaking up any lumps.
  4. Whisk in the eggs until combined. Add the melted butter, lemon juice, lemon zest, and milk. Whisk until evenly yellow, with no egg streaks or pooled butter; do not whip it airy.
  5. Set the chilled crust on a baking sheet and pour in the filling.
  6. Bake uncovered on the lower-third rack for about 45 to 55 minutes, starting to check at 40 minutes. The top should be golden with light brown mottling, and the center should wobble only slightly as one piece. Loosely shield the crimped edge with foil if it darkens too quickly.
  7. Transfer the pie to a wire rack and cool in its plate for 3 to 4 hours, until firm enough to slice.
  8. Shortly before serving, sift a light layer of confectioners’ sugar over the cooled pie. Cut into wedges and serve.

Tips

  • Keep the pastry shell unbaked and chilled before adding the filling.
  • Use a standard 9-inch shell with enough room for the filling.
  • Check for doneness by gently nudging the plate: the edges should be set and the center should have a small, unified wobble.
  • If the center ripples like liquid, bake the pie longer and check again.
  • Cool the pie completely before slicing so the custard can firm up.
  • Dust with confectioners’ sugar shortly before serving so it stays visible.

Notes

Cover and refrigerate completely cooled leftovers for up to about 3 days. Let slices stand briefly before serving for a less-cold custard texture.

Nutrition

Calories: 420 kcal | Protein: 5 g | Fat: 20 g | Carbohydrates: 54 g

No-Bake Lemon Cream Cheese Pie

This pie has a pale lemon cream cheese filling that holds a thick wedge but stays soft enough to yield to a fork. Fresh lemon juice and zest flavor the filling, and folded-in whipped topping keeps it light. The graham cracker crust gets its raised, rustic edge from firmly packed crumbs—no baking required.

Plan on a 30-minute crust chill before filling the pie, then at least 6 hours in the refrigerator for the filling to set. An overnight chill gives you neater slices.

Ingredients for No-Bake Lemon Cream Cheese Pie

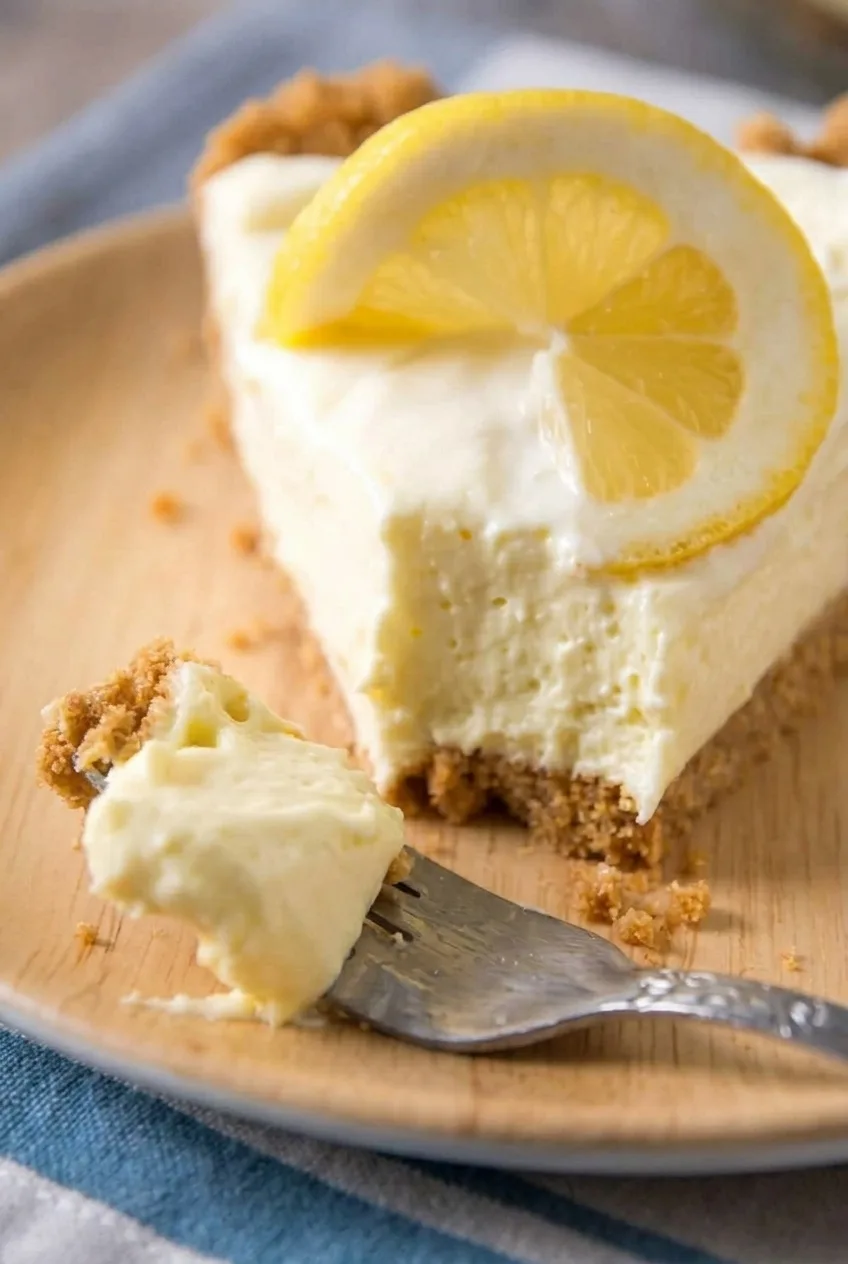
Close view of creamy lemon pie filling broken open above its coarse golden graham crust

Graham cracker crust

  • 1 1/2 cups graham cracker crumbs (165g)
  • 6 tablespoons unsalted butter, melted (85g)
  • 2 tablespoons granulated sugar (25g)

Lemon cream cheese filling

  • 1 (8-ounce) block full-fat cream cheese, softened (about 225g)
  • 1 (14-ounce) can sweetened condensed milk (about 395g)
  • 1/3 cup fresh lemon juice
  • 1 tablespoon finely grated fresh lemon zest
  • 4 ounces thawed prepared whipped topping, about half an 8-ounce tub (about 115g)

For serving

  • 1 small fresh lemon, cut into thin half-wheels as needed

Yield: One 9-inch pie, about 8 slices. Prep: 25 minutes. Cook: 0 minutes. Total: About 6 hours 30 minutes, including chilling.

How to Make No-Bake Lemon Cream Cheese Pie

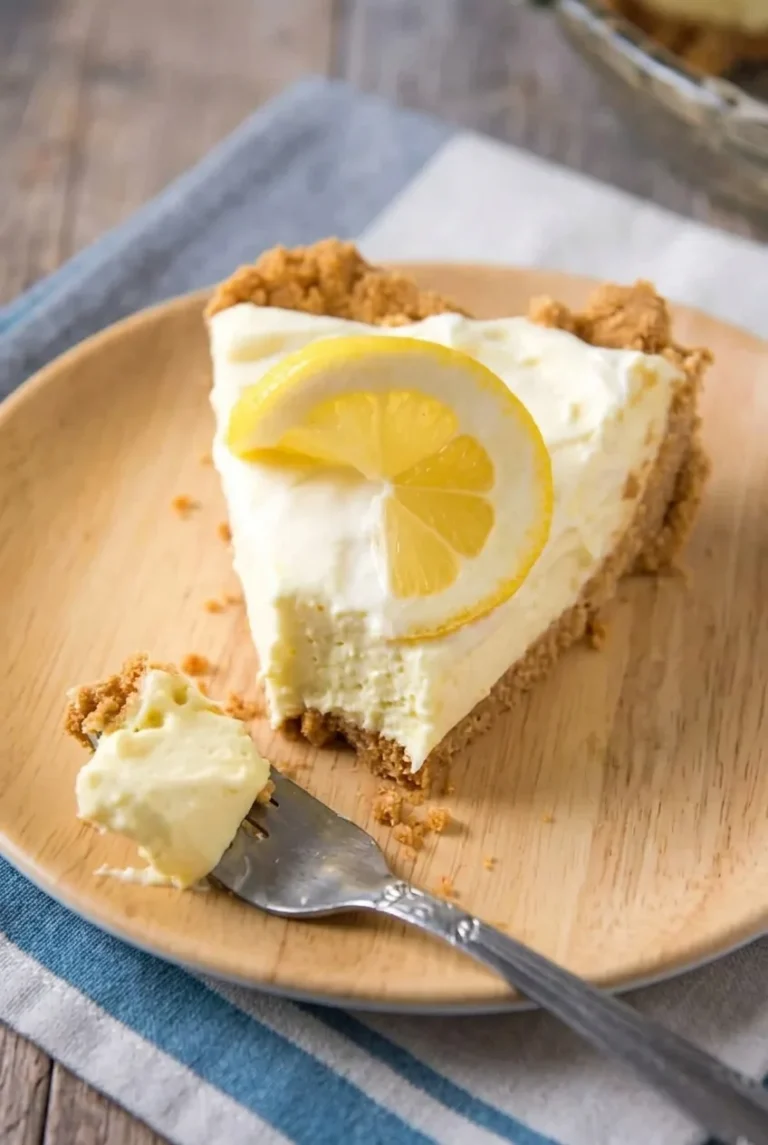
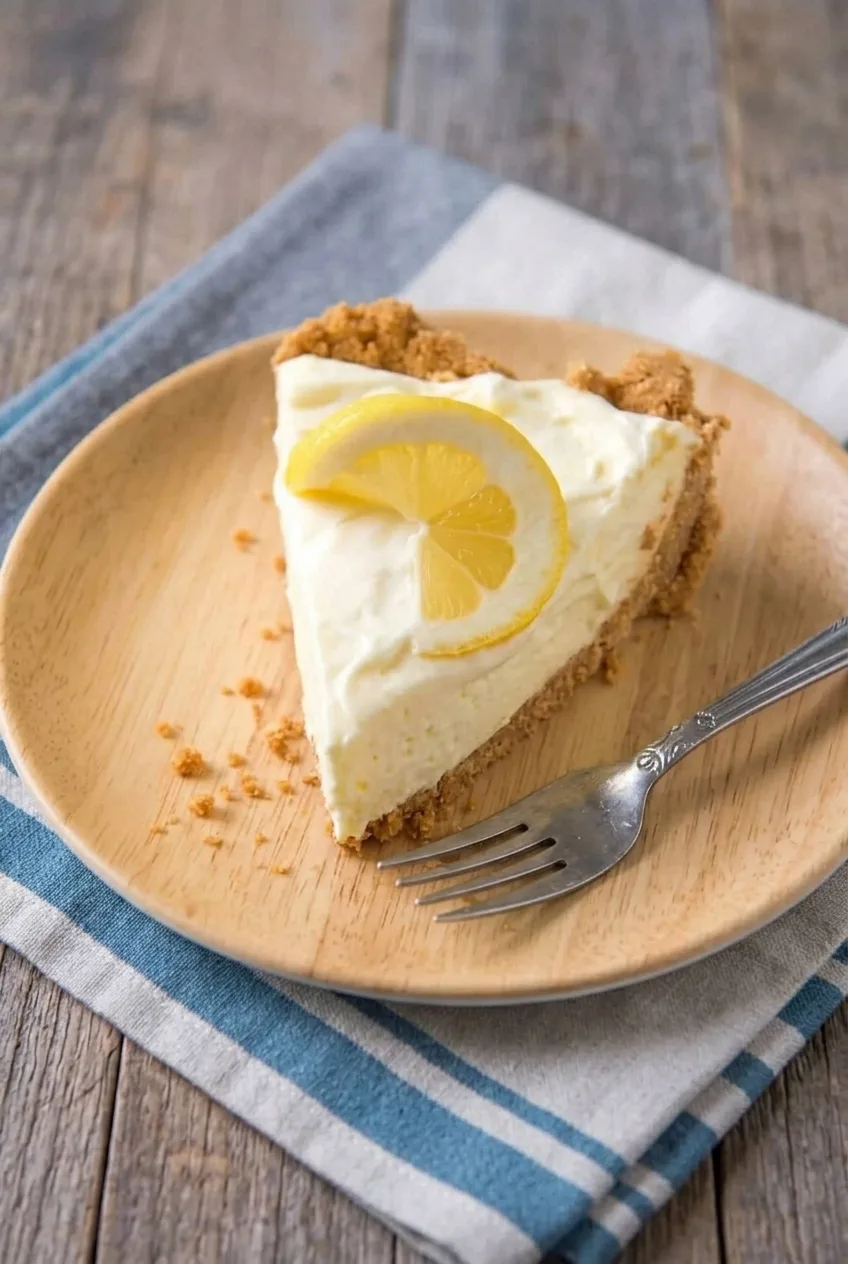
Full plate with a thick lemon cream cheese pie wedge, raised graham crust, and lemon half-wheel
  1. Press the crust: Mix the graham cracker crumbs, sugar, and melted butter until evenly moistened. The crumbs should cling together when pressed. Pack them firmly across the bottom and up the sides of a standard or deep 9-inch pie plate, leaving a slightly uneven raised rim. A flat-bottomed measuring cup helps pack the crumbs.
  2. Chill the crust: Refrigerate uncovered for at least 30 minutes, until firm to a light touch. Prepare the filling while the crust chills.
  3. Beat the lemon base: Beat the softened cream cheese with an electric mixer until smooth. Gradually beat in the sweetened condensed milk, then mix in the measured lemon juice and zest. The base should be uniformly pale, with no cream cheese lumps.
  4. Fold and fill: Gently fold in the thawed whipped topping until no streaks remain. Spoon the filling into the chilled crust without pushing against its raised edge. Smooth the top into shallow swirls.
  5. Chill until sliceable: Loosely cover the pie without letting the covering touch the filling. Refrigerate for at least 6 hours, preferably overnight. Start checking after 6 hours: the center should hold its shape when the plate is moved gently, and a cut wedge should lift from the plate. If it slumps, chill it longer.
  6. Slice and garnish: Cut into 8 thick wedges, wiping the knife between cuts if desired. Place a thin lemon half-wheel upright on each plated slice just before serving. Serve cold.

How to Keep the No-Bake Crust Together

Evenly moistened crumbs and firm packing matter more than a perfectly smooth edge. Press the crumbs across the base and well up the sides, then give the crust its full 30-minute chill before adding the filling. The chilled butter helps the raised rim stay in place.

When Is the Pie Ready to Slice?

This fresh-lemon and condensed-milk filling needs a longer chill than a quick-setting pudding pie; it does not use pudding mix or added milk. After at least 6 hours, the center should hold its shape when the plate moves, and a wedge should lift without immediately slumping. The filling will still be creamy and fork-tender. Chill overnight for cleaner cuts.

How to Avoid a Lumpy or Loose Filling

Beat the cream cheese smooth before adding the condensed milk; cold cream cheese can leave lumps that are difficult to remove later. Measure the 1/3 cup lemon juice rather than adding extra, use fully thawed whipped topping, and allow the complete chilling time. Full-fat cream cheese helps the pie hold a wedge.

Using a Prepared Crust or Freezing the Pie

A ready-to-fill 9-inch graham crust can save prep time, but check that it has room for the filling. A shallow shell may not hold it all, and its rim will be thinner than the homemade crust.

For a firmer frozen dessert, freeze the assembled pie before garnishing. This is a different serving texture from the soft refrigerated pie, and the texture may change after thawing.

Make-Ahead and Storage

Make the pie a day ahead for neater wedges. Cover it without touching the filling and refrigerate for up to 3 days. Add fresh lemon half-wheels to individual slices just before serving.

For a baked lemon-pie alternative, try classic lemon meringue pie. For another cream-cheese pie, see apple cream cheese pie.

Nutrition

Approximate per slice, based on 8 slices: 470 calories, 7g protein, 27g fat, and 52g carbohydrates. Approximate per 100g: 345 calories, 5g protein, 20g fat, and 38g carbohydrates. Values exclude the lemon garnish and will vary with ingredient brands and slice size.

No-Bake Lemon Cream Cheese Pie

A graham cracker crust holds a soft lemon cream cheese filling folded with whipped topping.
Course: Dessert
Cuisine: American
Prep: 25 min
Total: 390 min
Servings: 8 Calories: 470 kcal

Equipment

  • 9-inch pie plate
  • Mixing bowl
  • Electric mixer
  • Flat-bottom measuring cup
  • Fine grater

Ingredients

Graham Cracker Crust

  • 1 1/2 cups graham cracker crumbs (165 g)
  • 6 tablespoons unsalted butter, melted (85 g)
  • 2 tablespoons granulated sugar (25 g)

Lemon Cream Cheese Filling

  • 1 (8-ounce) block full-fat cream cheese, softened (about 225 g)
  • 1 (14-ounce) can sweetened condensed milk (about 395 g)
  • 1/3 cup fresh lemon juice
  • 1 tablespoon finely grated fresh lemon zest
  • 4 ounces prepared whipped topping, thawed (about 115 g)

For Serving

  • 1 small fresh lemon, cut into thin half-wheels as needed

Instructions

  1. Mix the graham cracker crumbs, sugar, and melted butter until evenly moistened and able to hold together when pressed.
  2. Firmly pack the crumb mixture across the bottom and up the sides of a 9-inch pie plate, forming a raised rim.
  3. Refrigerate the crust uncovered for at least 30 minutes, until firm.
  4. Beat the softened cream cheese with an electric mixer until smooth.
  5. Gradually beat in the sweetened condensed milk, then mix in the lemon juice and zest until smooth.
  6. Gently fold in the thawed whipped topping until no streaks remain.
  7. Spoon the filling into the chilled crust without pressing against the raised edge, then smooth the top.
  8. Loosely cover the pie without touching the filling and refrigerate for at least 6 hours, preferably overnight, until sliceable.
  9. Cut into 8 wedges. Garnish each slice with a lemon half-wheel just before serving, and serve cold.

Tips

  • Pack the crumbs firmly across the base and up the sides so the crust holds together.
  • Let the crust chill for the full 30 minutes before adding the filling.
  • Use softened cream cheese and beat it smooth before adding the condensed milk.
  • Measure the lemon juice and use fully thawed whipped topping for a smooth, set filling.
  • Chill overnight for cleaner slices, and wipe the knife between cuts if desired.

Variations

  • Prepared Graham Cracker Crust: Use a ready-to-fill 9-inch graham cracker crust; check that it is deep enough to hold the filling.
  • Frozen Lemon Pie: Freeze the assembled pie before garnishing for a firmer frozen dessert.

Notes

Cover without touching the filling and refrigerate for up to 3 days. Add fresh lemon garnish just before serving. Frozen pie has a different texture, which may change after thawing.

Nutrition

Calories: 470 kcal | Protein: 7 g | Fat: 27 g | Carbohydrates: 52 g

Classic Lemon Meringue Pie

Classic lemon meringue pie needs three distinct layers: a lightly golden pastry crust, a thick lemon filling that holds its shape, and lofty white meringue with toasted peaks. Fully bake the crust before adding the stovetop filling; the short final bake will not finish a damp pastry base. Spread the meringue over the filling while it is hot, then allow enough time for the pie to cool and chill before cutting.

Yield: One 9-inch pie, 8 generous slices. Prep: 30 minutes. Cook: About 45–55 minutes. Total: About 4½–5 hours, including cooling and chilling.

Ingredients for Lemon Meringue Pie

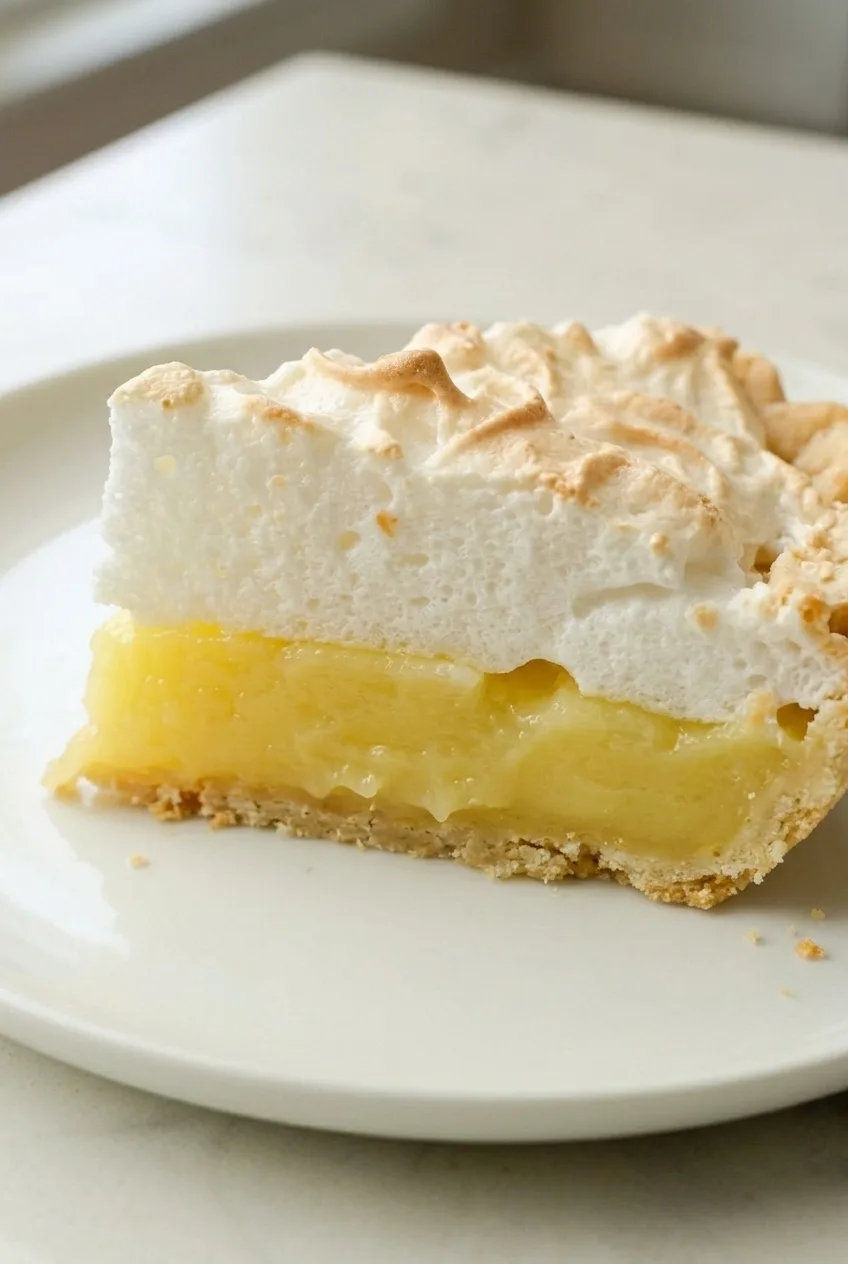
Close view of lemon meringue pie layers: thin pastry, set yellow filling, and airy white meringue

Pastry crust

  • 1 refrigerated pastry crust for a 9-inch pie, unbaked (about 200g)

Lemon filling

  • 1 cup granulated sugar (200g)
  • 1/3 cup cornstarch (40g)
  • 1/4 teaspoon fine salt
  • 1½ cups water
  • 4 large egg yolks, from the eggs separated for the meringue
  • 1/2 cup fresh lemon juice, measured after squeezing
  • 1 tablespoon finely grated lemon zest
  • 2 tablespoons unsalted butter (about 30g)

Meringue

  • 4 large egg whites, completely free of yolk
  • 1/4 teaspoon cream of tartar
  • 1/2 cup granulated sugar (100g)

How to Make Lemon Meringue Pie

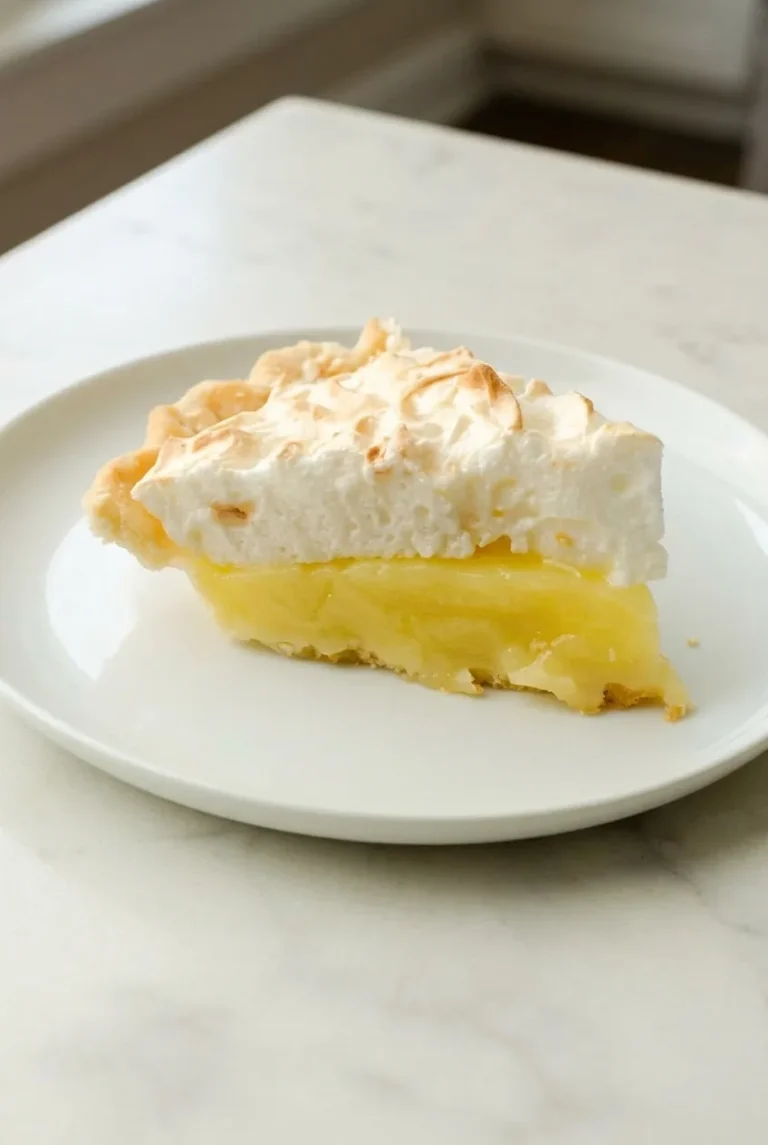
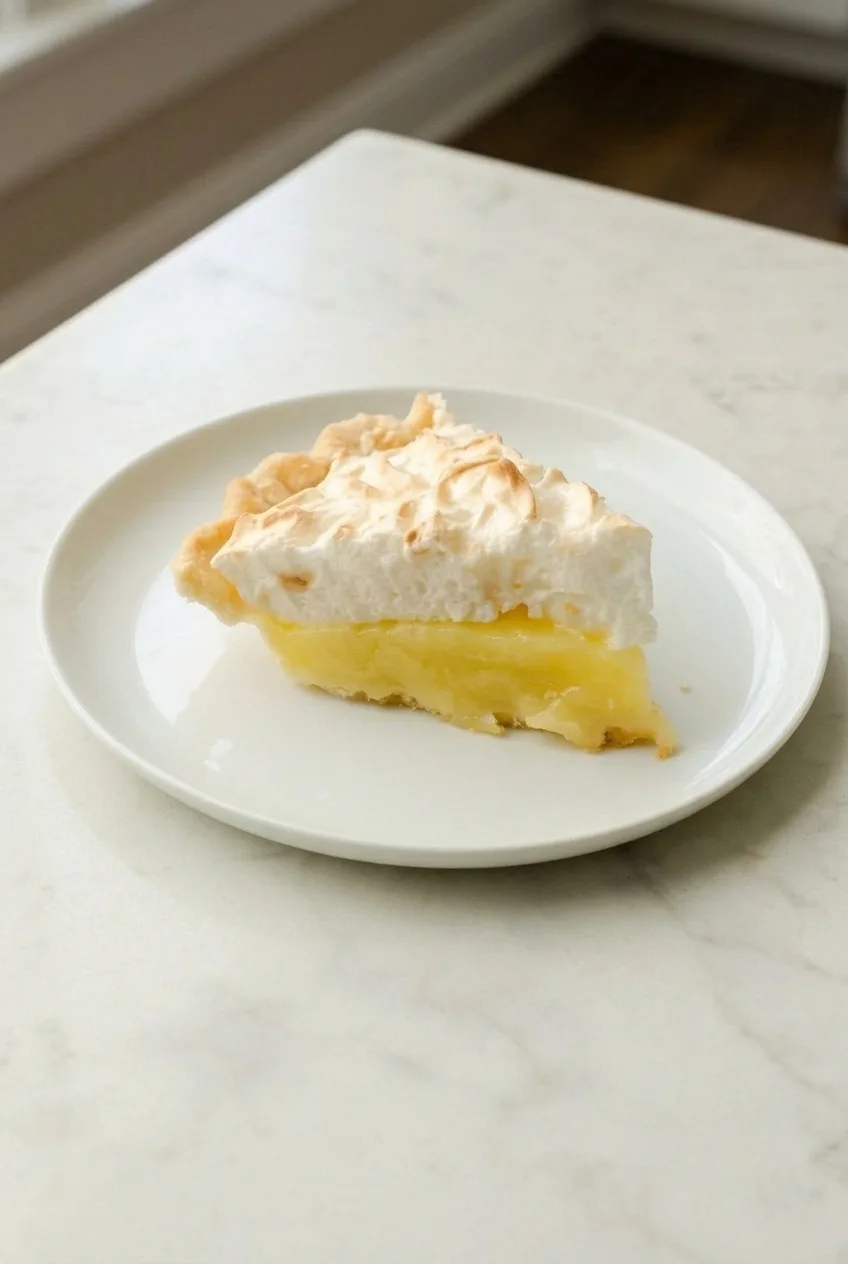
Single lemon meringue pie slice on a complete white plate, with its three layers visible
  1. Fully bake the crust: Preheat the oven to 425°F (220°C). Fit the dough into a 9-inch pie plate and crimp the edge. Line with parchment and fill with pie weights or dried beans. Bake for 15–18 minutes, then carefully remove the parchment and weights. Bake uncovered for another 7–10 minutes, checking after 7 minutes, until the base and sides look dry and lightly golden rather than damp or translucent.
  2. Prepare the eggs and lemons: Separate the eggs, placing the whites in a clean, grease-free mixing bowl. Whisk the yolks in a separate heat-safe bowl. Zest and juice the lemons, measuring out 1/2 cup juice. Lower the oven temperature to 350°F (175°C).
  3. Thicken the starch base: In a medium heavy-bottomed saucepan, whisk together the filling sugar, cornstarch, and salt. Gradually whisk in the water until smooth. Cook over medium heat, whisking constantly, for about 5–8 minutes, until thick and visibly bubbling.
  4. Temper and finish the filling: Slowly whisk about 1/2 cup of the hot starch mixture into the yolks to warm them without scrambling. Whisk the yolks back into the saucepan. Cook over medium-low to medium heat, whisking constantly, until thick and gently bubbling again; continue stirring for about 1 minute. Remove from the heat and stir in the lemon juice, zest, and butter until smooth. Pour into the baked crust while hot, keeping the filling below the rim if your pie plate is shallow.
  5. Whip and seal the meringue: Beat the whites and cream of tartar with an electric mixer until foamy. Add the meringue sugar gradually and beat until the whites are glossy and hold stiff peaks. Immediately spread the meringue over the hot filling, pressing it against the pastry edge all the way around so no filling shows at the perimeter. Lift the topping into tall, irregular peaks.
  6. Bake the topping: Bake uncovered on the middle rack for approximately 15–20 minutes. Start checking at 12 minutes, or sooner if the peaks brown quickly. The meringue should remain mostly white with scattered pale-golden tips. Check its thickest portion with a clean instant-read thermometer for 160°F (70°C); browned peaks alone do not show whether the center of this tall, raw-egg-white topping is heated through. If the peaks brown first, loosely shield them with foil and continue baking as needed.
  7. Cool and slice: Cool on a wire rack for about 1½–2 hours, then refrigerate for about 1½–2 hours, until the filling holds its cut edge. Do not leave the egg-based pie at room temperature for more than 2 hours. Cut generous wedges with a hot knife, wiping the blade between slices.

How to Tell When the Layers Are Ready

The pastry base needs to look dry and lightly golden after the weights come out. The starch mixture must thicken and visibly bubble, then bubble gently again after the yolks are added; stopping short can leave the filling loose. Whipped meringue should hold stiff, glossy peaks. Let the finished pie set before slicing rather than judging the filling by the color of the topping.

How to Limit Meringue Shrinking and Weeping

Spreading the meringue over hot filling and sealing it to the crust edge helps it stay attached as the pie cools. Let the pie cool before loosely covering it, and serve it the day it is made when possible. Some moisture beads or shrinkage can still develop, particularly during longer storage.

Make-Ahead and Storage

The empty pastry shell can be fully baked ahead. A purchased, fully baked 9-inch pastry shell also works; an unbaked purchased shell still needs blind-baking. Make the filling and meringue close to serving day for the best crust texture and topping appearance.

Refrigerate leftovers once cooled, loosely covered without pressing wrap against the meringue, and aim to eat them within 1–2 days. The crust may soften and the meringue may weep over time. Do not reheat or freeze the finished pie.

For another pastry-crust dessert, try this rustic apple pie.

Nutrition

Approximate nutrition per generous slice (1/8 of the pie): 335 calories, 5g protein, 11g fat, and 55g carbohydrates. Per 100g: approximately 225 calories, 3g protein, 7g fat, and 37g carbohydrates. Values vary with the pastry crust used and the finished weight of the pie.

Classic Lemon Meringue Pie

A fully baked pastry crust is filled with tangy lemon custard and topped with glossy toasted meringue.
Course: Dessert
Cuisine: American
Prep: 30 min
Cook: 50 min
Total: 285 min
Servings: 8 Calories: 335 kcal per slice

Equipment

  • 9-inch pie plate
  • Parchment paper
  • Pie weights or dried beans
  • Medium heavy-bottomed saucepan
  • Mixing bowls
  • Whisk
  • Electric mixer
  • Instant-read thermometer
  • Wire rack

Ingredients

Pastry crust

  • 1 refrigerated pastry crust for a 9-inch pie, unbaked (about 200g)

Lemon filling

  • 1 cup granulated sugar (200g)
  • 1/3 cup cornstarch (40g)
  • 1/4 teaspoon fine salt
  • 1½ cups water
  • 4 large egg yolks
  • 1/2 cup fresh lemon juice
  • 1 tablespoon finely grated lemon zest
  • 2 tablespoons unsalted butter (about 30g)

Meringue

  • 4 large egg whites, completely free of yolk
  • 1/4 teaspoon cream of tartar
  • 1/2 cup granulated sugar (100g)

Instructions

  1. Preheat the oven to 425°F (220°C). Fit the pastry dough into a 9-inch pie plate and crimp the edge.
  2. Line the crust with parchment and fill with pie weights or dried beans. Bake for 15–18 minutes, then carefully remove the parchment and weights. Bake uncovered for another 7–10 minutes, checking after 7 minutes, until the crust is dry and lightly golden. Lower the oven temperature to 350°F (175°C).
  3. Separate the eggs, placing the whites in a clean, grease-free bowl and the yolks in a separate heat-safe bowl. Zest and juice the lemons, measuring out 1/2 cup of juice.
  4. In a medium heavy-bottomed saucepan, whisk together the filling sugar, cornstarch, and salt. Gradually whisk in the water until smooth. Cook over medium heat, whisking constantly, for about 5–8 minutes, until thick and visibly bubbling.
  5. Slowly whisk about 1/2 cup of the hot starch mixture into the yolks. Whisk the warmed yolks back into the saucepan. Cook over medium-low to medium heat, whisking constantly, until thick and gently bubbling again. Stir for about 1 minute, then remove from the heat and stir in the lemon juice, zest, and butter until smooth.
  6. Pour the hot filling into the baked crust, keeping it below the rim if the pie plate is shallow.
  7. Beat the egg whites and cream of tartar with an electric mixer until foamy. Gradually add the meringue sugar and beat until glossy, stiff peaks form.
  8. Immediately spread the meringue over the hot filling, pressing it against the pastry edge all the way around to seal it. Lift the topping into tall peaks.
  9. Bake uncovered on the middle rack for approximately 15–20 minutes. Start checking at 12 minutes, or sooner if the peaks brown quickly. The meringue should be mostly white with pale-golden tips. Check the thickest portion with a clean instant-read thermometer for 160°F (70°C). If the peaks brown first, loosely shield them with foil and continue baking as needed.
  10. Cool on a wire rack for about 1½–2 hours, then refrigerate for about 1½–2 hours, until the filling holds its cut edge. Slice with a hot knife, wiping the blade between slices.

Tips

  • Bake the crust fully before adding the filling; the short final bake will not finish a damp pastry base.
  • Let the starch mixture visibly bubble, and let the filling bubble gently again after adding the yolks, so it thickens properly.
  • Spread the meringue over the filling while it is hot and seal it to the pastry edge to help limit shrinking and weeping.
  • Use an instant-read thermometer to check that the thickest part of the meringue reaches 160°F (70°C); browned peaks alone do not confirm doneness.
  • If the meringue peaks brown before the center is heated through, loosely cover them with foil.

Notes

Refrigerate cooled leftovers loosely covered and eat within 1–2 days. Do not leave the egg-based pie at room temperature for more than 2 hours. Do not reheat or freeze. Approximate nutrition per 100g: 225 calories, 3g protein, 7g fat, and 37g carbohydrates.

Nutrition

Calories: 335 kcal per slice | Protein: 5 g per slice | Fat: 11 g per slice | Carbohydrates: 55 g per slice

Low Sugar Apple Pie

Firm, sweet apples and tart Granny Smith apples fill this double-crust pie, with just 1/4 cup of added brown sugar in the filling. The mostly solid top crust bakes golden and rustic, while cornstarch thickens the apple juices. Bake until the filling bubbles and the apples are tender, then cool the pie for at least 3 hours so it cuts into thick wedges. “Low sugar” here means reduced added sugar, not sugar-free.

Allow about 30 minutes to prepare the pie, 55 to 65 minutes to bake it, and at least 3 hours for cooling. It makes 8 slices.

Ingredients for Low Sugar Apple Pie

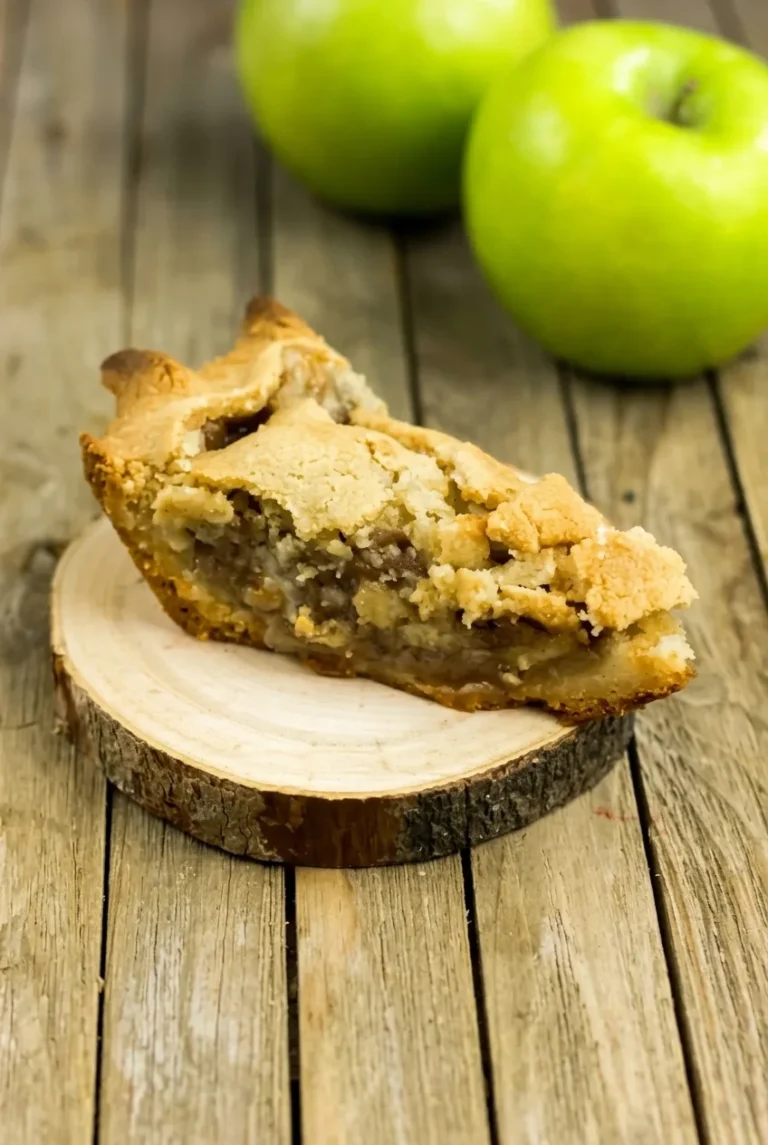
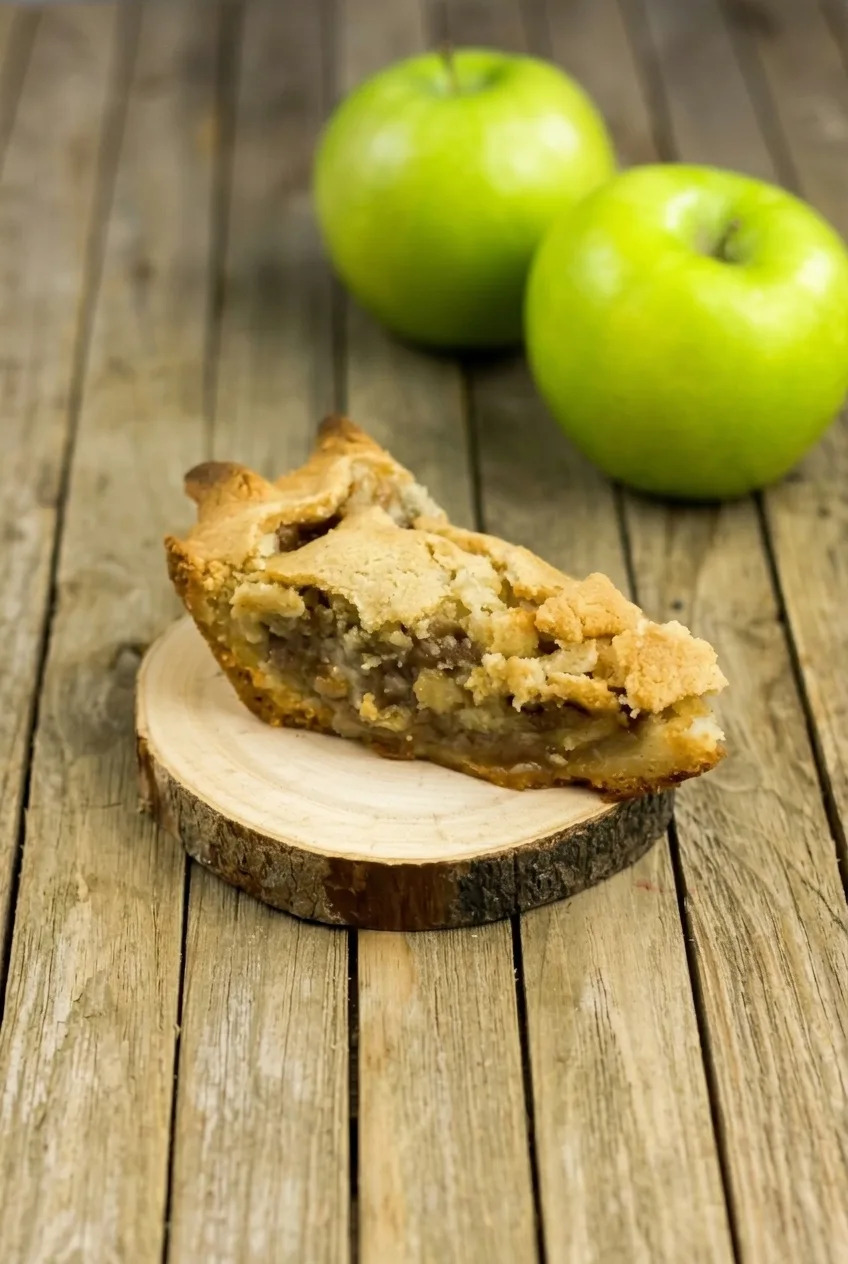
Wider view of a low sugar apple pie wedge on a circular wood board over a wooden table
  • 2 ready-to-roll refrigerated pie crust rounds, enough for one 9-inch double-crust pie (about 400g total)
  • About 1 1/2 lb firm sweet apples, such as Honeycrisp or Gala, weighed before peeling and coring (675g)
  • About 1 lb Granny Smith apples, weighed before peeling and coring (450g)
  • 1/4 cup packed light brown sugar (50g)
  • 3 tablespoons cornstarch (25g)
  • 1 1/2 teaspoons ground cinnamon
  • 1 tablespoon lemon juice
  • 1/4 teaspoon fine salt
  • Optional: 1/8 teaspoon ground nutmeg

The apples should yield about 6 to 7 cups after peeling, coring, and slicing.

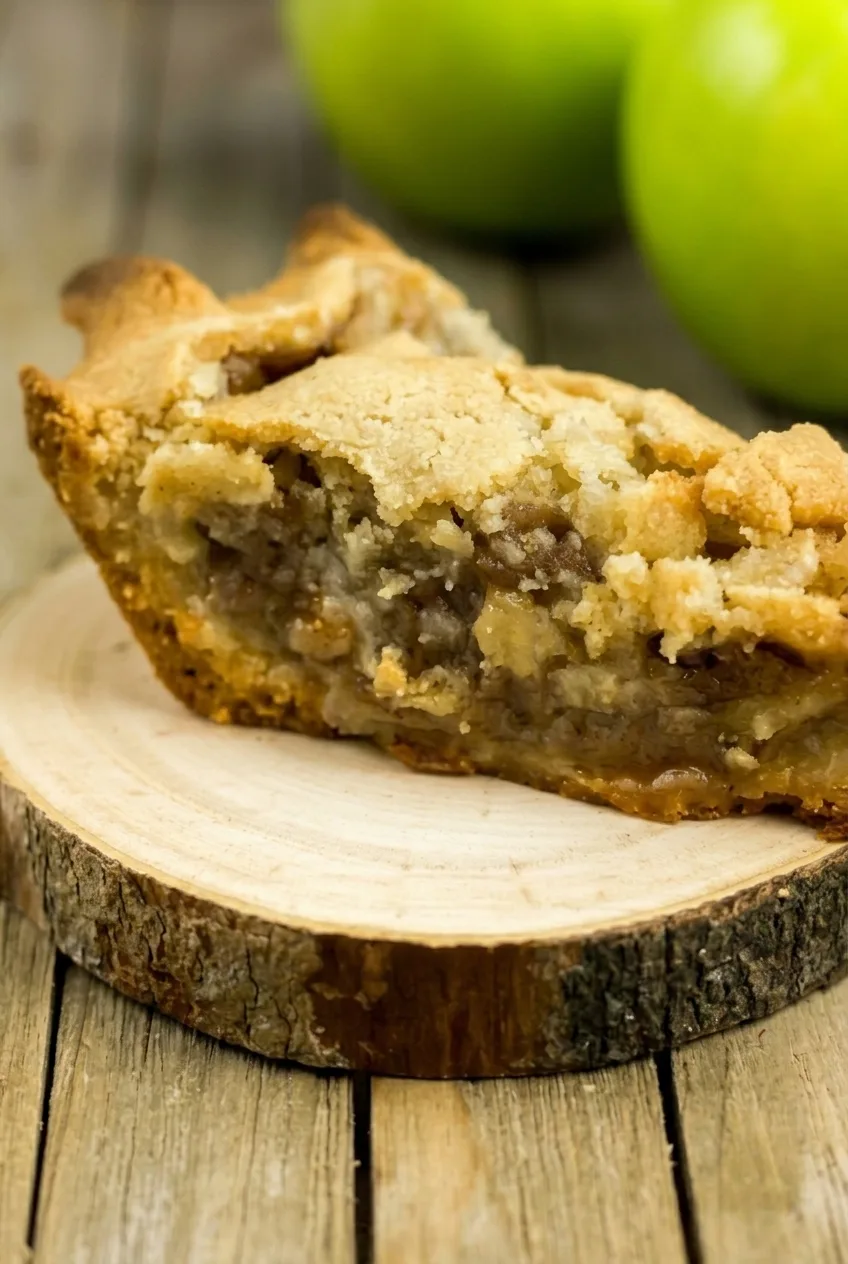
Close view of tender apple filling between the top and bottom crusts of a low sugar apple pie slice

How to Bake Low Sugar Apple Pie

  1. Preheat and line the plate: Place a rimmed baking sheet on a lower-third oven rack and preheat to 425°F (220°C). Fit one pastry round into a 9-inch pie plate without stretching it, leaving enough overhang to seal the top crust.
  2. Prepare the filling: Peel and core the apples, then cut them into approximately 1/4-inch slices. Toss with the brown sugar, cornstarch, cinnamon, lemon juice, salt, and optional nutmeg until evenly coated, with no pockets of dry cornstarch.
  3. Assemble the pie: Pile the apples into the bottom crust and settle them into an even mound. Cover with the second pastry round, trim and crimp the edges to seal, and cut several generous steam slits through the mostly solid top crust.
  4. Start baking: Carefully set the pie plate on the hot baking sheet. Bake uncovered for 15 minutes at 425°F.
  5. Finish baking: Without removing the pie, reduce the oven to 350°F (175°C). Bake for about 40 to 50 minutes more. Check the crust edges after 25 to 30 minutes of total baking and shield them with foil if they darken too quickly. Begin checking the filling around 50 minutes total. The crust should be golden, juices should bubble through the vents, and a thin knife inserted through a vent should meet little resistance from the apples. Continue baking if needed, protecting the crust with foil.
  6. Cool and slice: Transfer the pie to a rack and cool for at least 3 hours before cutting into 8 wedges. The cooling time helps the filling stay between the pastry layers when sliced.

Choosing Apples for a Less-Sweet Pie

Firm sweet apples provide much of the filling’s sweetness, while Granny Smith apples add tartness and help the slices keep their shape. Honeycrisp or Gala work for the sweet portion; Pink Lady or Fuji are other options. Sweetness will vary with the variety and ripeness of the apples.

For another double-crust fruit dessert, try this apple pear pie.

How to Tell When the Pie Is Done

A golden crust alone does not mean the filling is ready. Look for bubbling juices through the vents and test an apple slice with a thin knife inserted through a vent. If the apples are still firm, keep baking and shield any darkening pastry edges with foil.

The preheated sheet supplies heat beneath the pie and catches drips. A deep-dish plate or thicker apple slices may need more time; use the bubbling and tenderness cues rather than the clock alone.

Storing and Warming Leftovers

Once the pie is fully cool, cover and refrigerate leftovers for 3 to 4 days. Warm individual slices in a 350°F oven until heated through; oven reheating can also help crisp pastry that has softened in storage.

Nutrition

Approximate per slice, based on 8 slices: 310 calories, 3g protein, 12g fat, and 51g carbohydrates. Approximate per 100g of baked pie: 190 calories, 2g protein, 7g fat, and 31g carbohydrates. Values vary with the pastry brand, apples, and moisture lost during baking. The pie contains added brown sugar and naturally occurring sugar from the apples.

Low Sugar Apple Pie

A double-crust apple pie filled with sweet and tart apples and just 1/4 cup of added brown sugar.
Course: Dessert
Cuisine: American
Prep: 30 min
Cook: 65 min
Total: 275 min
Servings: 8 Calories: 310 kcal

Equipment

  • Oven
  • 9-inch pie plate
  • Rimmed baking sheet
  • Cooling rack
  • Aluminum foil
  • Thin knife

Ingredients

For the crust

  • 2 ready-to-roll refrigerated pie crust rounds, enough for one 9-inch double-crust pie (about 400 g total)

For the filling

  • About 1 1/2 lb firm sweet apples, such as Honeycrisp or Gala, weighed before peeling and coring (675 g)
  • About 1 lb Granny Smith apples, weighed before peeling and coring (450 g)
  • 1/4 cup packed light brown sugar (50 g)
  • 3 tablespoons cornstarch (25 g)
  • 1 1/2 teaspoons ground cinnamon
  • 1 tablespoon lemon juice
  • 1/4 teaspoon fine salt
  • Optional: 1/8 teaspoon ground nutmeg

Instructions

  1. Place a rimmed baking sheet on a lower-third oven rack and preheat the oven to 425°F (220°C).
  2. Fit one pastry round into a 9-inch pie plate without stretching it, leaving enough overhang to seal the top crust.
  3. Peel and core the apples, then cut them into approximately 1/4-inch slices.
  4. Toss the apples with the brown sugar, cornstarch, cinnamon, lemon juice, salt, and optional nutmeg until evenly coated.
  5. Pile the apples into the bottom crust and settle them into an even mound.
  6. Cover with the second pastry round, trim and crimp the edges to seal, and cut several generous steam slits in the top crust.
  7. Set the pie plate on the hot baking sheet and bake uncovered for 15 minutes at 425°F (220°C).
  8. Reduce the oven to 350°F (175°C) without removing the pie. Bake for about 40 to 50 minutes more.
  9. Check the crust edges after 25 to 30 minutes of total baking and shield them with foil if they darken too quickly.
  10. Begin checking the filling around 50 minutes of total baking. The crust should be golden, juices should bubble through the vents, and a thin knife inserted through a vent should meet little resistance from the apples. Continue baking if needed, shielding the crust with foil.
  11. Transfer the pie to a rack and cool for at least 3 hours before slicing into 8 wedges.

Tips

  • Use about 6 to 7 cups of apples after peeling, coring, and slicing.
  • Coat the apple slices thoroughly so no dry cornstarch remains.
  • Use bubbling juices and tender apples to judge doneness rather than relying on the baking time alone.
  • A deep-dish pie plate or thicker apple slices may need additional baking time.
  • Cool the pie for at least 3 hours to help the filling hold between the pastry layers.

Variations

  • Pink Lady or Fuji Apple Pie: Use Pink Lady or Fuji apples for the sweet portion in place of Honeycrisp or Gala.

Notes

The pie contains added brown sugar and naturally occurring sugar from the apples. Once fully cool, cover and refrigerate leftovers for 3 to 4 days. Warm slices in a 350°F oven until heated through.

Nutrition

Calories: 310 kcal | Protein: 3 g | Fat: 12 g | Carbohydrates: 51 g

Apple Tarte Tatin

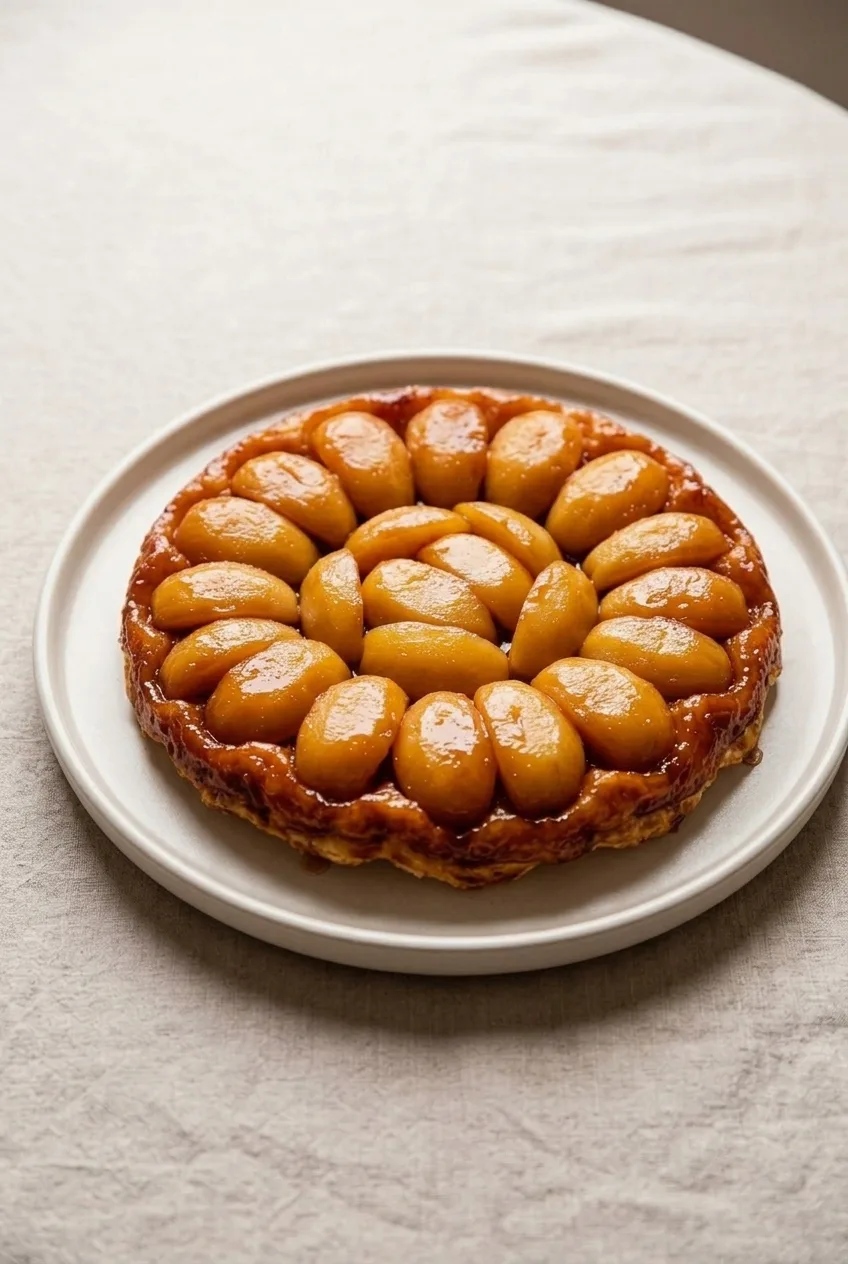
Apple tarte Tatin bakes upside down: apple quarters cook in butter caramel beneath a pastry lid, then become the glossy top when the tart is inverted. This version uses a refrigerated pie crust for a sturdy base beneath the warm fruit.

Watch the caramel rather than relying only on the clock, and stop cooking the apples while the quarters still hold their shape. After baking, invert the tart while the caramel is still mobile, using oven mitts and a lipped platter to contain the hot syrup.

Yield: One approximately 9-inch tart, or 8 wedges. Prep: 25 minutes. Cook: 40–50 minutes. Total: About 1 hour 15 minutes to 1 hour 30 minutes, including the rest before inversion.

Ingredients for Apple Tarte Tatin

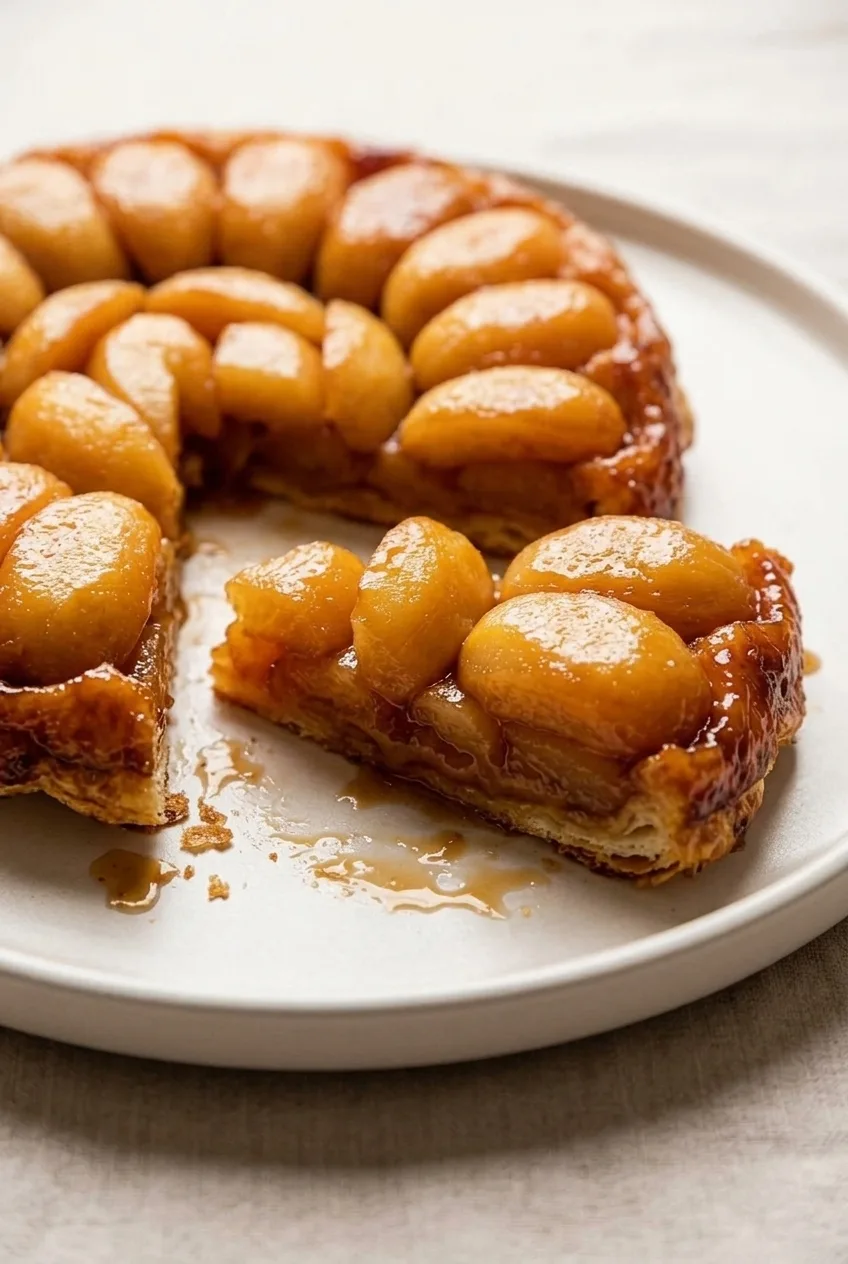
Cut wedge of apple tarte Tatin showing caramelized apple quarters above the golden crust
  • About 2 1/2 lb firm apples, such as Braeburn or a mix of Braeburn and Granny Smith (about 6 medium; about 1,150g before peeling and coring)
  • 3/4 cup granulated sugar (150g)
  • 2 tablespoons water
  • 4 tablespoons unsalted butter, cut into pieces (55g)
  • 1 refrigerated pie crust, large enough to cover a 9-inch skillet and tuck around the apples (about 200g; package weights vary)
  • About 1 pint vanilla ice cream, optional, for serving

How to Make Apple Tarte Tatin

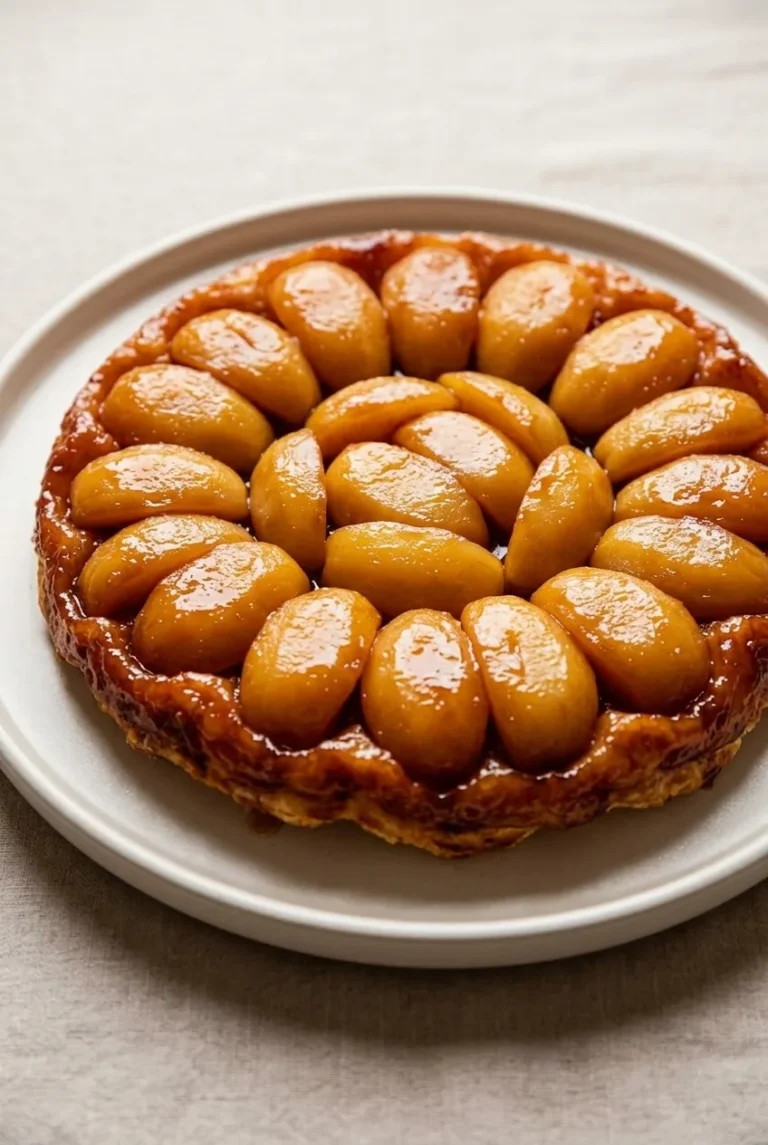
Whole apple tarte Tatin on a round platter with its caramelized apple top fully visible
  1. Prepare the apples and oven: Preheat the oven to 400°F (205°C) with a rack near the center. Peel, core, and quarter the apples. Keep the crust chilled and the measured butter beside the stove. Use a 9-inch oven-safe skillet, preferably light-colored so the caramel is easier to judge, and confirm that its handle is rated for 400°F.
  2. Make the caramel: Spread the sugar and water in the skillet. Cook over medium heat for about 7–10 minutes, gently swirling the pan as the sugar colors. Watch continuously once it turns golden. At an even medium amber, reduce the heat and carefully add the butter; it may bubble vigorously. Swirl to combine. If the caramel smells acrid, start again rather than adding the apples.
  3. Cook the apples: Using heat-safe tongs, arrange the quarters snugly in a circular pattern in the caramel. Cook over medium-low heat for about 8–12 minutes, carefully nudging or turning pieces if needed. Stop when the edges begin to look translucent but the quarters still hold their shape. If a noticeable pool of thin apple juice collects, simmer briefly to reduce it before adding the pastry.
  4. Add the pastry: Remove the skillet from the heat. Lay the chilled crust over the apples and carefully tuck its edge between the fruit and skillet; do not leave pastry hanging over the pan. Cut a few small steam vents.
  5. Bake: Set the skillet on a rimmed baking sheet to catch drips. Bake uncovered for about 25–35 minutes, checking at 25 minutes. The pastry should be deeply golden, with caramel bubbling at the edges.
  6. Rest and invert: Let the skillet rest for about 8–12 minutes. Wearing sturdy oven mitts, gently tilt it to check that the caramel still moves at the edge. Place a heat-safe, lipped platter wider than the skillet over the tart. Hold the platter and skillet firmly together, invert carefully, and lift off the skillet, keeping your hands clear of hot caramel. Return any apples left in the pan to their places on the tart.
  7. Serve: Cut into wedges while warm or lukewarm. Add vanilla ice cream to individual servings just before eating, if desired.

Choosing Apples That Hold Their Shape

Braeburn and Granny Smith hold up well to the stovetop cook and the bake. Pink Lady or Honeycrisp can also work; especially juicy apples may need a little more reduction before the pastry goes on.

Use quarters rather than thin slices, and pack them tightly in the skillet because they shrink as they cook. A skillet larger than 9 inches will spread the fruit into a shallower layer.

Caramel Color and Apple Juices

Medium amber gives the apples a caramel coating without the bitterness of a very dark caramel. Sugar darkens quickly near the end, so have the butter ready to add as soon as the color is right. A dark skillet makes that color harder to see.

Apple moisture varies. Reducing a noticeable pool of thin juice before covering the fruit helps keep excess liquid away from the pastry, which becomes the tart’s base after inversion.

If the Tart Sticks During Inversion

The 8–12-minute rest is a starting point, not a guaranteed release time. If the caramel has cooled and set, do not force the flip. Warm the skillet over low heat for 30–60 seconds, then retry with oven mitts and the lipped platter. Use tongs to reposition any quarters left in the pan.

Pie Crust or Puff Pastry?

Pie crust makes a sturdy base for the caramel-coated apples. Puff pastry can replace it for a flakier base: keep the same upside-down assembly, bake until deeply golden, and serve promptly because it can soften against the fruit juices. For caramel apples in a conventional pie format, try this caramel apple pie.

Storage and Reheating

Refrigerate leftovers in an airtight container for up to 3 days; the pastry will soften as it sits. If desired, warm portions in a 300°F (150°C) oven or toaster oven for about 10 minutes. For the best pastry texture, bake and invert the tart near serving time.

Nutrition

Approximate nutrition per wedge, based on 8 wedges and excluding optional ice cream: 290 calories, 2g protein, 12g fat, and 46g carbohydrates. Approximate values per 100g of finished tart: 210 calories, 2g protein, 9g fat, and 33g carbohydrates. Values vary with apple trimming, caramel reduction, and pie crust brand.

Apple Tarte Tatin

Apples cook in butter caramel beneath a pie crust, then are inverted to make a glossy upside-down tart.
Course: Dessert
Cuisine: French
Prep: 25 min
Cook: 45 min
Total: 80 min
Servings: 8 Calories: 290 kcal

Equipment

  • 9-inch oven-safe skillet
  • Rimmed baking sheet
  • Heat-safe tongs
  • Lipped heat-safe platter
  • Oven mitts

Ingredients

  • About 2 1/2 lb firm apples, such as Braeburn or a mix of Braeburn and Granny Smith (about 6 medium; about 1,150g before peeling and coring)
  • 3/4 cup granulated sugar (150g)
  • 2 tablespoons water
  • 4 tablespoons unsalted butter, cut into pieces (55g)
  • 1 refrigerated pie crust, large enough to cover a 9-inch skillet and tuck around the apples (about 200g; package weights vary)
  • About 1 pint vanilla ice cream, optional, for serving

Instructions

  1. Preheat the oven to 400°F (205°C) with a rack near the center. Peel, core, and quarter the apples, and keep the pie crust chilled.
  2. Spread the sugar and water in a 9-inch oven-safe skillet. Cook over medium heat for 7–10 minutes, gently swirling the pan as the sugar colors.
  3. When the caramel reaches an even medium amber, reduce the heat and carefully add the butter. Swirl to combine.
  4. Arrange the apple quarters snugly in the caramel with heat-safe tongs. Cook over medium-low heat for 8–12 minutes, nudging or turning the pieces as needed, until the edges begin to look translucent but the quarters still hold their shape.
  5. If a noticeable pool of thin apple juice collects, simmer briefly to reduce it. Remove the skillet from the heat.
  6. Lay the chilled crust over the apples and tuck its edges between the fruit and skillet. Cut a few small steam vents.
  7. Set the skillet on a rimmed baking sheet. Bake uncovered for 25–35 minutes, checking at 25 minutes, until the pastry is deeply golden and caramel bubbles at the edges.
  8. Let the skillet rest for 8–12 minutes. Wearing sturdy oven mitts, gently tilt it to check that the caramel still moves at the edge.
  9. Place a heat-safe, lipped platter wider than the skillet over the tart. Hold the platter and skillet firmly together, invert carefully, and lift off the skillet with your hands clear of the hot caramel. Return any apples left in the pan to the tart.
  10. Cut into wedges while warm or lukewarm. Serve with vanilla ice cream if desired.

Tips

  • Use a light-colored skillet so you can judge the caramel color more easily.
  • Watch the caramel continuously as it turns golden; it darkens quickly near the end.
  • Pack apple quarters tightly because they shrink as they cook.
  • Reduce excess apple juice before adding the pastry to help keep the crust from becoming soggy.
  • Check that the skillet handle is rated for 400°F (205°C).

Variations

  • Puff Pastry Tarte Tatin: Replace the pie crust with puff pastry, bake until deeply golden, and serve promptly because it can soften against the fruit juices.
  • Pink Lady or Honeycrisp Tarte Tatin: Use Pink Lady or Honeycrisp apples; reduce any extra juice before covering the fruit with pastry.

Notes

Refrigerate leftovers in an airtight container for up to 3 days. Warm portions in a 300°F (150°C) oven or toaster oven for about 10 minutes. Invert while the caramel is still mobile; if it sets, warm the skillet over low heat for 30–60 seconds before trying again. Per 100g, approximate nutrition is 210 calories, 2g protein, 9g fat, and 33g carbohydrates.

Nutrition

Calories: 290 kcal | Protein: 2 g | Fat: 12 g | Carbohydrates: 46 g

Apple Cobbler

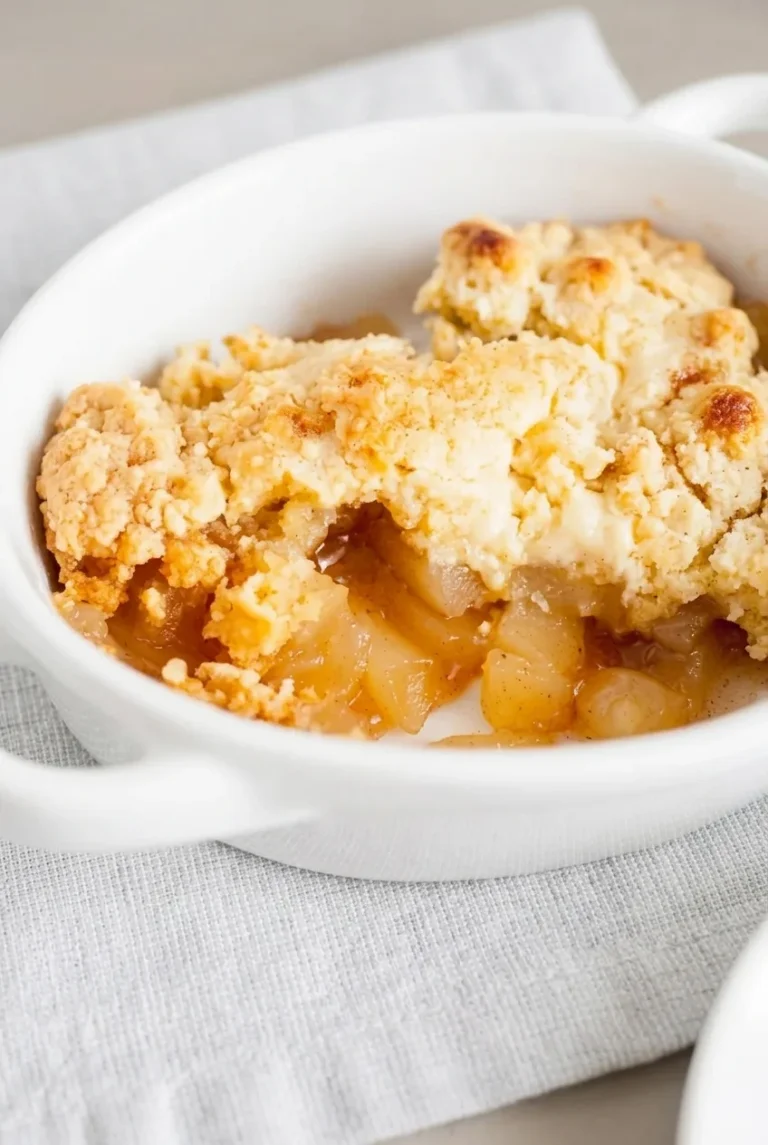
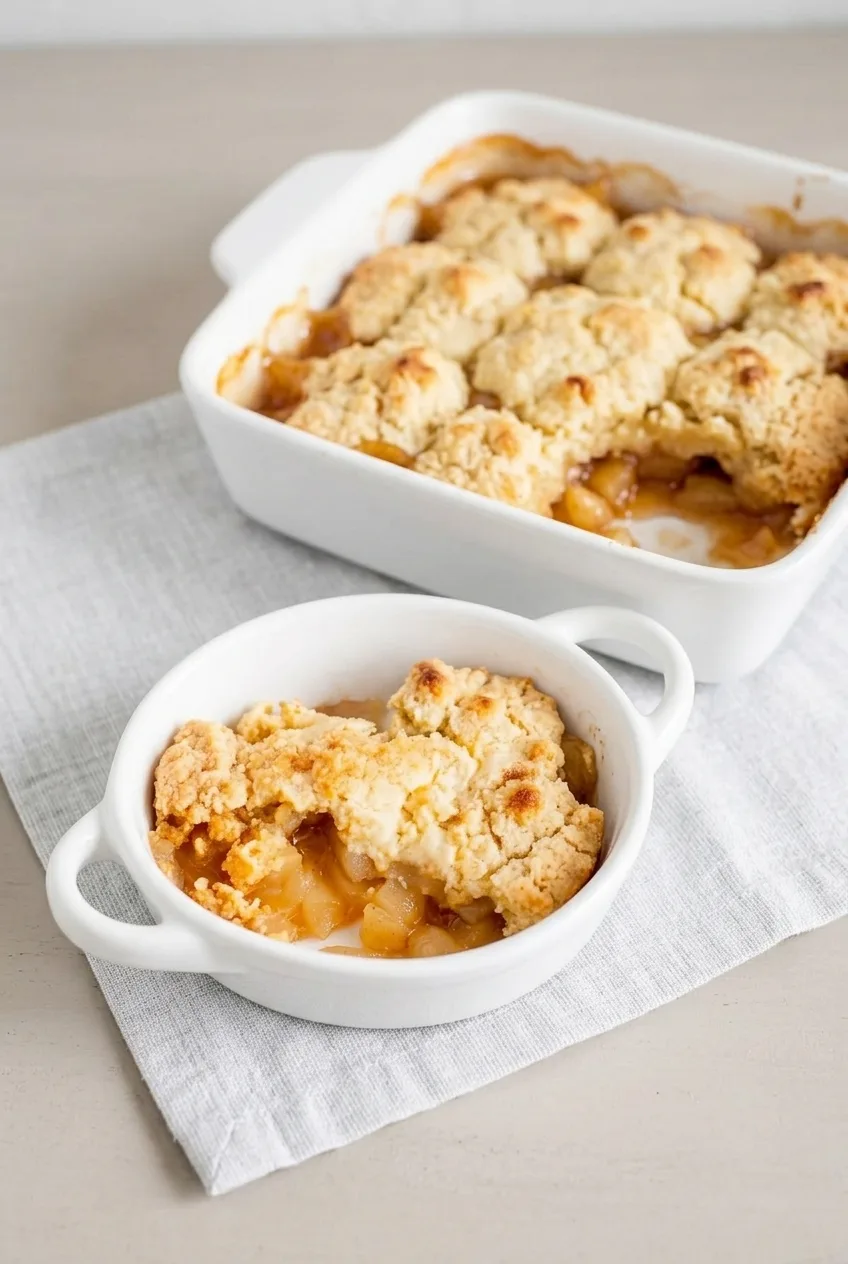
Fresh apples bake in cinnamon-brown sugar juices beneath a buttery drop-biscuit topping. The dough goes on in rough pieces, leaving gaps where the filling can bubble and the apples remain visible. Bake until the topping is cooked through and an apple beneath it is tender; a golden surface alone does not mean the fruit is done. A short rest gives the juices time to thicken before serving.

Servings: 8 | Prep: 25 minutes | Bake: about 50–60 minutes | Rest: 15 minutes

Ingredients for Apple Cobbler

Apple cobbler in its baking dish with a rustic serving in a white bowl

Apple filling

  • 2½ pounds firm baking apples, such as Granny Smith and Honeycrisp, yielding about 6–7 cups peeled, cored, ¼-inch-thick slices (about 1,150g whole)
  • ½ cup packed light brown sugar (100g)
  • 2 tablespoons cornstarch (about 15g)
  • 1½ teaspoons ground cinnamon
  • 1 tablespoon lemon juice
  • ¼ teaspoon fine salt

Drop-biscuit topping

  • 1½ cups all-purpose flour (180g)
  • ⅓ cup granulated sugar (about 65g)
  • 2 teaspoons baking powder
  • ¼ teaspoon fine salt
  • 6 tablespoons cold unsalted butter, cut into small pieces (about 85g), plus about 1 teaspoon for the dish
  • ½ cup whole milk (120g)
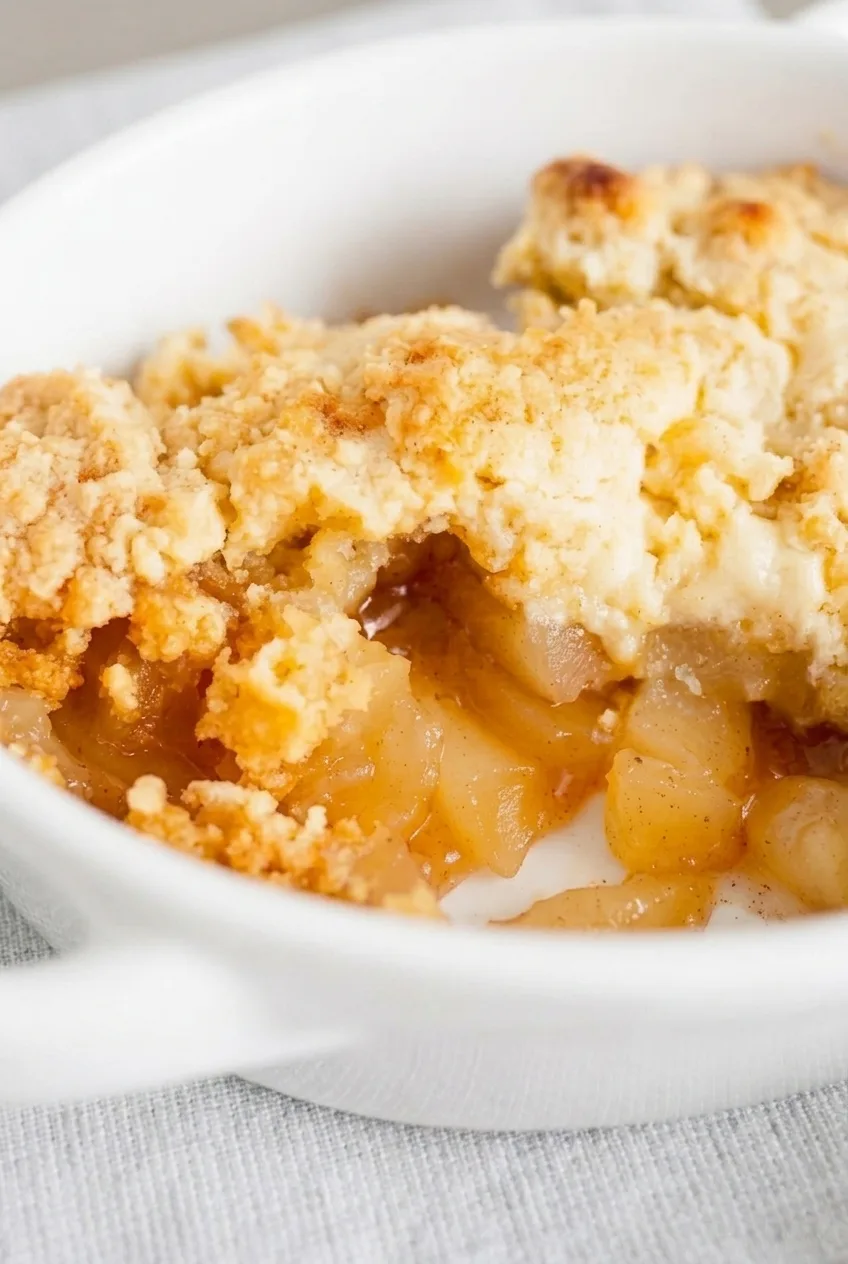
Close view of tender apples and thickened juices beneath the broken biscuit topping

How to Bake Apple Cobbler

  1. Prepare the oven and dish: Preheat the oven to 350°F (175°C). Lightly butter an 8-inch-square, approximately 2-quart baking dish. Set it on a rimmed sheet pan if the filling might bubble over.
  2. Season the apples: Peel, core, and slice the apples about ¼ inch thick. Toss with the brown sugar, cornstarch, cinnamon, lemon juice, and ¼ teaspoon salt until no dry cornstarch remains. Spread the apples in the dish.
  3. Make the topping: Combine the flour, granulated sugar, baking powder, and remaining ¼ teaspoon salt in a separate bowl. Cut in the cold butter with a pastry cutter or fork until the mixture has uneven crumbs. Stir in the milk just until a shaggy dough forms; overmixing can make the topping dense.
  4. Top the apples: Drop roughly tablespoon-sized pieces of dough over the fruit. Leave small gaps where the apples show through rather than pressing the dough into a solid layer.
  5. Bake: Bake uncovered for about 50–60 minutes, starting checks at 45 minutes. The topping should be lightly golden and cooked through in its thicker centers, and the filling should bubble around the edges and through the gaps. Pierce an apple beneath the topping to check that it is fork-tender. If the top browns first, tent the dish loosely with foil and continue baking.
  6. Rest and serve: Let the cobbler stand for about 15 minutes so the juices thicken slightly. Scoop into bowls with both apples and topping visible. Add a small scoop of vanilla ice cream alongside, if desired.

Best Apples and Slice Size

A mix of tart Granny Smith and sweeter Honeycrisp works well, but other firm baking apples can be used. Peel them for a softer baked texture and keep the slices close to ¼ inch thick so they soften evenly. Thicker slices or a deeper dish may need more time; a wider, shallower dish may bake faster.

How to Tell When Apple Cobbler Is Done

Check beneath the topping, not just on top of it. The filling should bubble visibly, the thicker pieces of biscuit should no longer look wet or raw, and an apple should yield easily to a fork. If the fruit is still firm, keep baking even if the topping is golden, using a loose foil tent to protect it.

Can I Use Canned Apple Pie Filling?

Not as a direct swap. Canned pie filling is already sweetened and thickened, so adding this recipe’s brown sugar and cornstarch unchanged would change the filling. A canned-filling cobbler needs its own ingredient amounts and baking guidance.

Storing and Reheating

Cool leftovers, cover, and refrigerate for up to 4 days. Microwave individual portions in short increments until warm, or warm the baking dish in a 350°F oven until heated through.

For longer storage, cool the cobbler completely and wrap it airtight. Freeze for up to 2 months for best quality, then thaw in the refrigerator before reheating.

Nutrition

Approximate per serving, based on 8 servings without optional ice cream: 325 calories, 3g protein, 10g fat, and 58g carbohydrates. Approximate per 100g of finished cobbler: 185 calories, 2g protein, 6g fat, and 33g carbohydrates. Values vary with apple yield and moisture lost during baking.

Apple Cobbler

Sliced apples bake in cinnamon-brown sugar filling beneath a buttery drop-biscuit topping.
Course: Dessert
Cuisine: American
Prep: 25 min
Cook: 60 min
Total: 100 min
Servings: 8 Calories: 325 kcal

Equipment

  • Oven
  • 8-inch-square baking dish
  • Rimmed sheet pan
  • Mixing bowls
  • Pastry cutter or fork

Ingredients

Apple filling

  • 2½ pounds firm baking apples, such as Granny Smith and Honeycrisp, yielding about 6–7 cups peeled, cored, ¼-inch-thick slices (about 1,150 g whole)
  • ½ cup packed light brown sugar (100 g)
  • 2 tablespoons cornstarch (about 15 g)
  • 1½ teaspoons ground cinnamon
  • 1 tablespoon lemon juice
  • ¼ teaspoon fine salt

Drop-biscuit topping

  • 1½ cups all-purpose flour (180 g)
  • ⅓ cup granulated sugar (about 65 g)
  • 2 teaspoons baking powder
  • ¼ teaspoon fine salt
  • 6 tablespoons cold unsalted butter, cut into small pieces (about 85 g), plus about 1 teaspoon for the dish
  • ½ cup whole milk (120 g)

For serving (optional)

  • Vanilla ice cream

Instructions

  1. Preheat the oven to 350°F (175°C). Lightly butter an 8-inch-square, approximately 2-quart baking dish. Set it on a rimmed sheet pan if the filling may bubble over.
  2. Peel, core, and slice the apples about ¼ inch thick. Toss them with the brown sugar, cornstarch, cinnamon, lemon juice, and ¼ teaspoon salt until no dry cornstarch remains. Spread the apples in the dish.
  3. In a separate bowl, combine the flour, granulated sugar, baking powder, and remaining ¼ teaspoon salt. Cut in the cold butter until the mixture has uneven crumbs. Stir in the milk just until a shaggy dough forms.
  4. Drop roughly tablespoon-sized pieces of dough over the apples, leaving small gaps where the fruit shows through.
  5. Bake uncovered for about 50–60 minutes, starting checks at 45 minutes. Bake until the topping is lightly golden and cooked through in its thicker centers, the filling bubbles around the edges and through the gaps, and an apple beneath the topping is fork-tender. If the top browns first, tent loosely with foil and continue baking.
  6. Rest the cobbler for about 15 minutes before serving. Serve with a scoop of vanilla ice cream, if desired.

Tips

  • Use firm baking apples; a mix of tart Granny Smith and sweeter Honeycrisp works well.
  • Keep apple slices close to ¼ inch thick so they soften evenly.
  • Leave gaps between the biscuit pieces so the filling can bubble and the apples remain visible.
  • Check an apple beneath the topping for tenderness; a golden surface alone does not mean the cobbler is done.
  • Thicker apple slices or a deeper dish may need more baking time; a wider, shallower dish may bake faster.

Variations

  • Other firm baking apples: Use another firm baking apple or a different mix of tart and sweet varieties.

Notes

Cool leftovers, cover, and refrigerate for up to 4 days. Reheat individual portions in short microwave increments or warm the dish in a 350°F oven. For longer storage, freeze airtight for up to 2 months and thaw in the refrigerator before reheating. Nutrition is approximate per serving without optional ice cream.

Nutrition

Calories: 325 kcal | Protein: 3 g | Fat: 10 g | Carbohydrates: 58 g

Apple Crisp

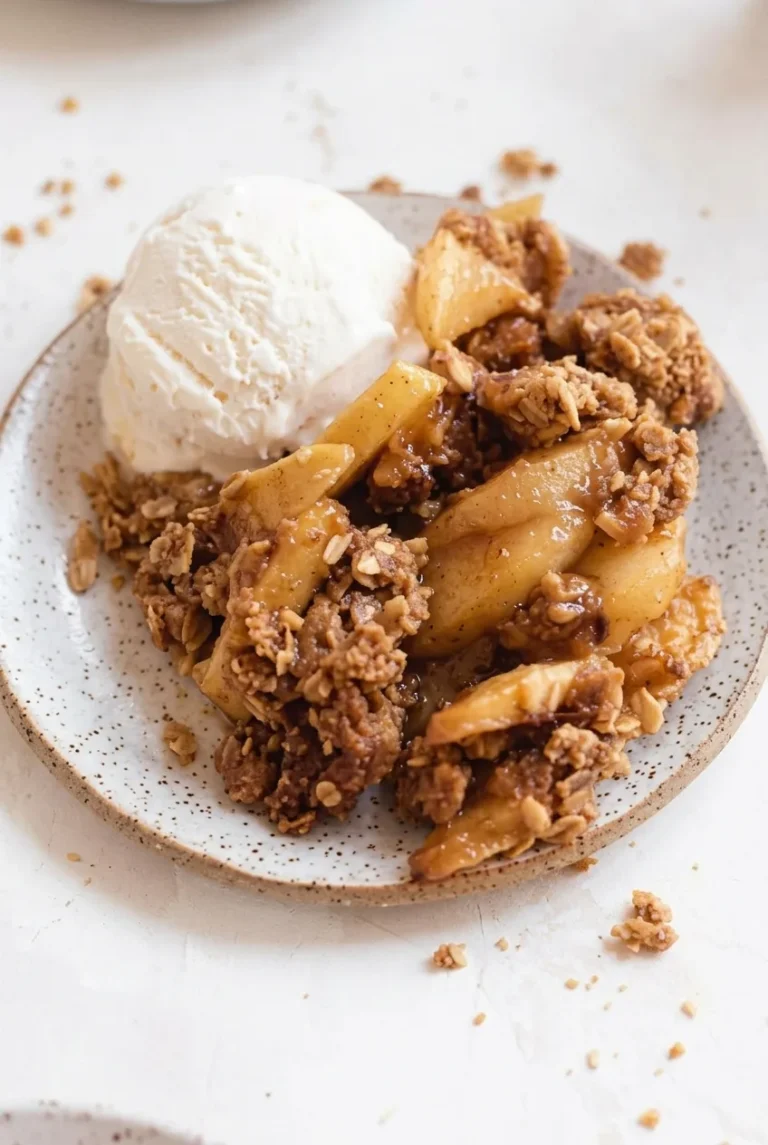
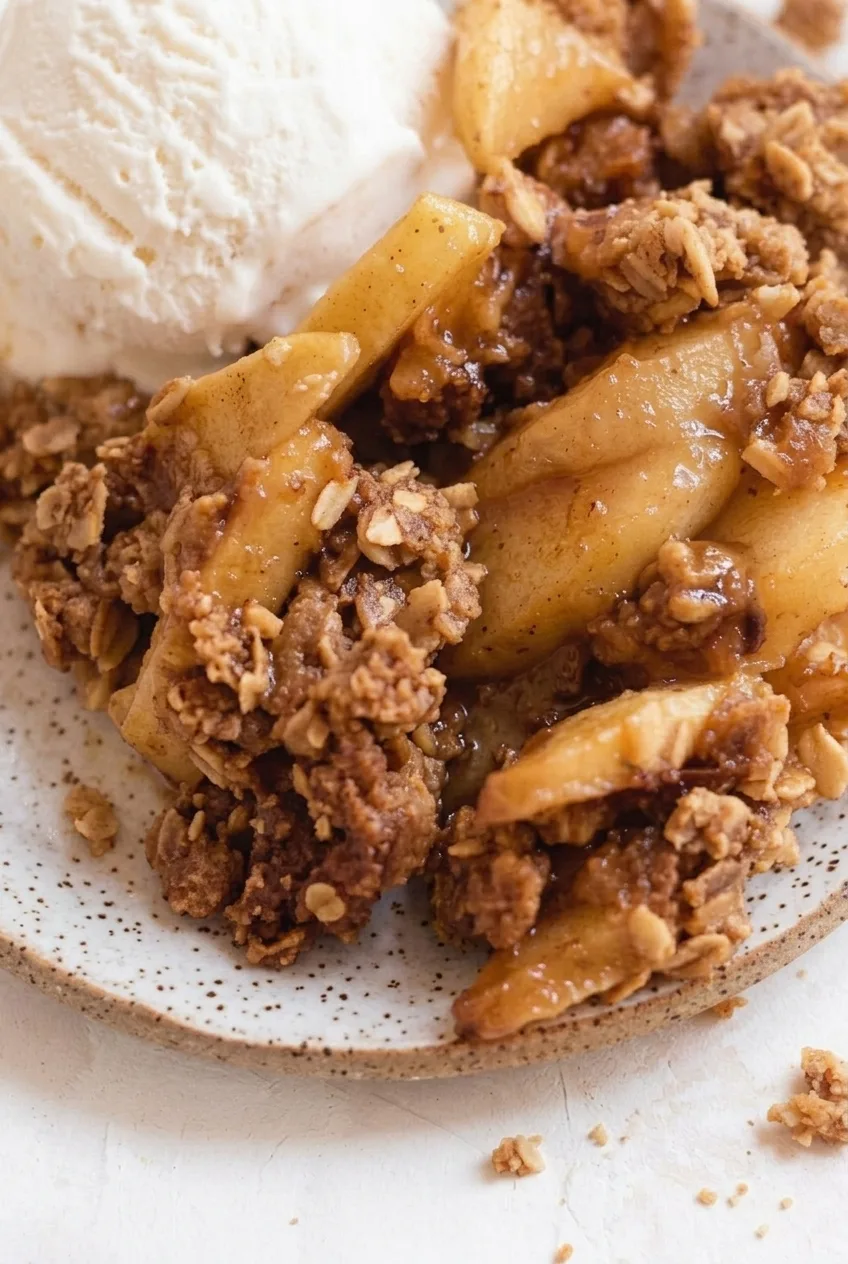
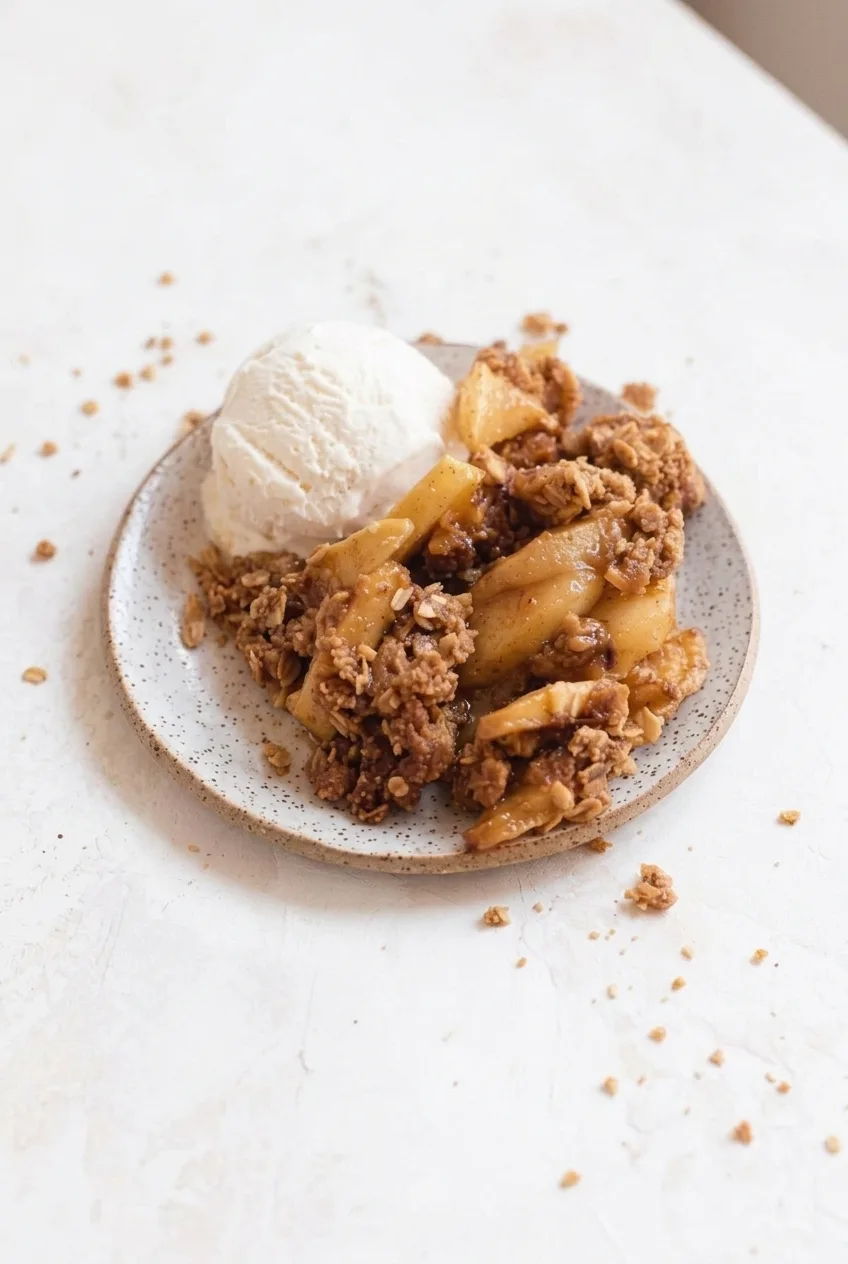
This apple crisp bakes tender cinnamon-spiced apple slices beneath a loose layer of buttery oat crumbs. Scoop it onto plates while warm, with the slices and browned clusters still visible, and add a scoop of vanilla ice cream beside each serving.

Don’t rely on topping color alone to judge when it’s done. The apple juices should bubble near the center, and a knife should slip easily into the fruit. A 15-minute rest lets the juices settle before scooping.

Ingredients for Apple Crisp

Close view of glossy apple slices and coarse oat crumbs beside vanilla ice cream

Apple filling

  • 2 1/2 lb firm baking apples, such as Granny Smith and Honeycrisp (about 1,150g whole apples; about 6 cups prepared slices)
  • 3 tablespoons granulated sugar (40g)
  • 1 tablespoon lemon juice
  • 2 tablespoons all-purpose flour (15g)
  • 1 teaspoon ground cinnamon

Oat topping and serving

  • 3/4 cup old-fashioned rolled oats (60g)
  • 3/4 cup all-purpose flour (90g)
  • 1/2 cup packed light brown sugar (100g)
  • 1/4 teaspoon fine salt
  • 1/2 cup (1 stick) cold unsalted butter, cubed (115g), plus a little more for the dish
  • 6 small scoops vanilla ice cream, about 1 pint

How to Make Apple Crisp

Complete plate of apple crisp and vanilla ice cream on a light tabletop
  1. Preheat and prepare the dish: Heat the oven to 375°F (190°C) with a rack near the center. Lightly butter an 8-inch square baking dish.
  2. Season the apples: Peel and core the apples, then cut them into even slices about 1/4 inch thick. Toss with the granulated sugar, lemon juice, 2 tablespoons flour, and cinnamon until no dry flour remains. Spread evenly in the dish.
  3. Make the topping: Combine the oats, 3/4 cup flour, brown sugar, and salt in a separate bowl. Cut in the cold butter with a pastry cutter or your fingertips until coarse crumbs form, leaving some larger clusters that hold together when squeezed. Stop before the mixture becomes a smooth dough.
  4. Bake: Scatter the topping loosely over the apples without pressing it down. Bake uncovered for 40 to 50 minutes, beginning to check at 40 minutes. The topping should be golden brown, juices should bubble at the edges and toward the center, and a knife should slip easily into an apple slice. If the topping browns before the apples soften, tent the dish loosely with foil and continue baking.
  5. Rest and serve: Let the crisp stand for about 15 minutes so the juices settle. Scoop loose portions onto small plates, keeping apple slices and crumb clusters visible. Add one scoop of vanilla ice cream beside each portion just before serving.

Choosing and Cutting the Apples

Firm baking apples soften without losing their shape; a mix of tart and sweet varieties works well. Even, roughly 1/4-inch slices cook within the stated window in an 8-inch dish. Thicker pieces or a deeper dish may need longer, so check the fruit rather than relying only on the clock.

Peeling gives this filling a softer, more uniform texture. You can leave the skins on if you prefer them.

Keeping the Topping Crumbly

Cut the cold butter into the dry ingredients only until coarse crumbs and a few larger clumps form. Scatter them lightly over the apples. Working the mixture into a dough or packing it down makes the baked topping denser.

How to Tell When Apple Crisp Is Done

A browned topping can hide firm apples. Slip a knife beneath the crumbs to test a slice, and look for bubbling juice beyond the outer edge of the dish. The bubbling shows that the flour-thickened juices have cooked; the rest gives them time to settle before serving.

Storage and Reheating

Cool leftovers, cover, and refrigerate for up to 4 days without ice cream. Reheat smaller portions uncovered in a 350°F (175°C) oven for about 15 to 20 minutes, until warmed through. A microwave is quicker but softens the topping. Add fresh ice cream when serving.

The unbaked crumb topping can be frozen airtight for up to 1 month. Baked crisp can be cooled, covered, and frozen without ice cream for up to 3 months; thaw overnight in the refrigerator before reheating.

For a baked apple dessert with a pastry crust instead, try this rustic apple galette.

Nutrition

Approximate per serving, based on 6 servings including a small scoop of vanilla ice cream: 575 calories, 7g protein, 25g fat, and 84g carbohydrates. Approximate per 100g: 220 calories, 3g protein, 10g fat, and 32g carbohydrates. Values vary with the apples, ice cream, and portion size.

Apple Crisp

Cinnamon-spiced apples bake beneath a loose, buttery oat topping and are served warm with vanilla ice cream.
Course: Dessert
Cuisine: American
Prep: 25 min
Cook: 45 min
Total: 85 min
Servings: 6 Calories: 575 kcal

Equipment

  • 8-inch square baking dish
  • Mixing bowls
  • Pastry cutter
  • Knife

Ingredients

Apple filling

  • 2 1/2 lb firm baking apples, such as Granny Smith and Honeycrisp (about 1,150g whole apples; about 6 cups prepared slices)
  • 3 tablespoons granulated sugar (40g)
  • 1 tablespoon lemon juice
  • 2 tablespoons all-purpose flour (15g)
  • 1 teaspoon ground cinnamon

Oat topping and serving

  • 3/4 cup old-fashioned rolled oats (60g)
  • 3/4 cup all-purpose flour (90g)
  • 1/2 cup packed light brown sugar (100g)
  • 1/4 teaspoon fine salt
  • 1/2 cup (1 stick) cold unsalted butter, cubed (115g), plus a little more for the dish
  • 6 small scoops vanilla ice cream, about 1 pint

Instructions

  1. Preheat the oven to 375°F (190°C) with a rack near the center. Lightly butter an 8-inch square baking dish.
  2. Peel and core the apples, then cut them into even slices about 1/4 inch thick.
  3. Toss the apples with the granulated sugar, lemon juice, 2 tablespoons flour, and cinnamon until no dry flour remains. Spread them evenly in the prepared dish.
  4. Combine the oats, 3/4 cup flour, brown sugar, and salt in a bowl. Cut in the cold butter until coarse crumbs form, leaving some larger clusters. Do not mix into a smooth dough.
  5. Scatter the topping loosely over the apples without pressing it down.
  6. Bake uncovered for 40 to 50 minutes, beginning to check at 40 minutes. The topping should be golden brown, the juices should bubble near the center, and a knife should slip easily into an apple slice. If the topping browns before the apples soften, tent loosely with foil and continue baking.
  7. Rest for about 15 minutes. Scoop onto plates and serve with a scoop of vanilla ice cream beside each portion.

Tips

  • Use firm baking apples, or combine tart and sweet varieties.
  • Cut apples into even slices about 1/4 inch thick so they cook evenly.
  • Keep the butter cold and stop mixing when coarse crumbs and larger clumps form.
  • Scatter the topping loosely rather than packing it down.
  • Check the apples with a knife and look for bubbling juices near the center; topping color alone is not a reliable doneness test.

Variations

  • Unpeeled Apple Crisp: Leave the apple skins on for a slightly more textured filling.

Notes

Refrigerate covered leftovers without ice cream for up to 4 days. Reheat uncovered at 350°F (175°C) for 15 to 20 minutes. Freeze unbaked topping airtight for up to 1 month or baked crisp without ice cream for up to 3 months; thaw baked crisp overnight in the refrigerator before reheating.

Nutrition

Calories: 575 kcal | Protein: 7 g | Fat: 25 g | Carbohydrates: 84 g

Apple Strudel

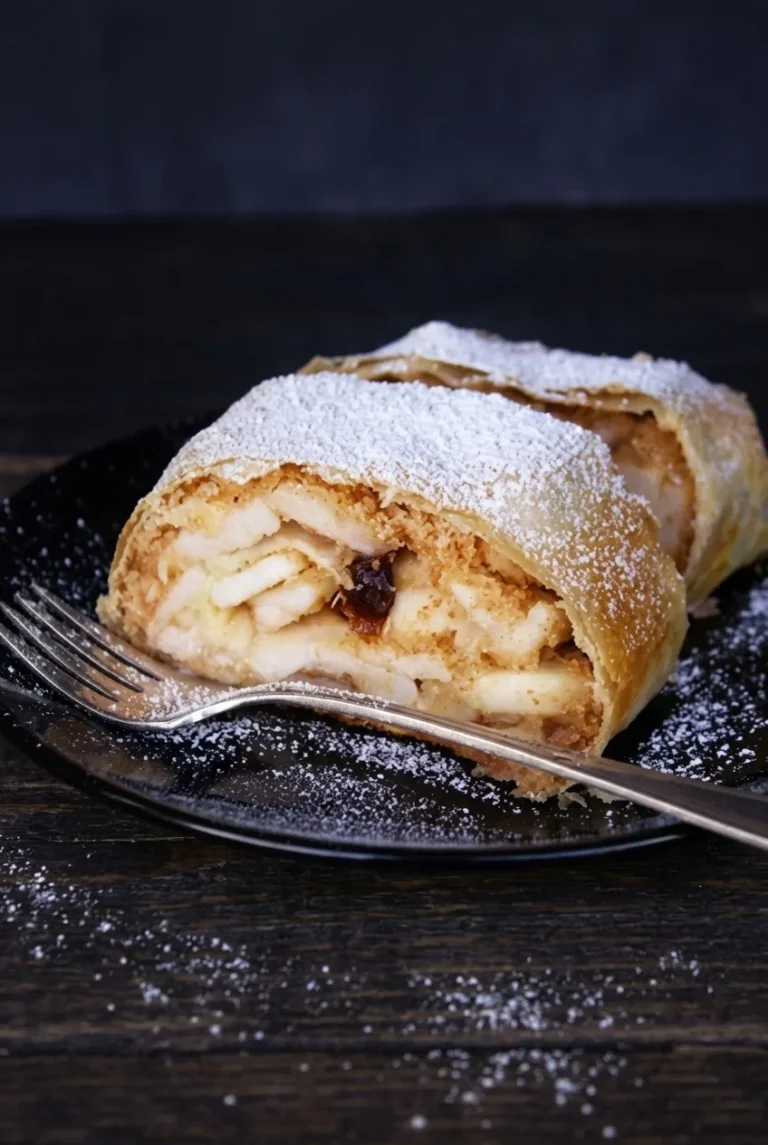
This apple strudel is one enclosed puff-pastry roll, cut into thick slices that show tender apple layers and a few raisins. Store-bought puff pastry makes it a shortcut rather than a hand-stretched strudel. A narrow strip of filling gives the pastry room to overlap, while breadcrumbs beneath the apples absorb some of their juice. Cool the baked roll before dusting it with powdered sugar and slicing it so the filling holds together.

Makes 8 thick slices. Allow about 20 minutes to prepare, 30–40 minutes to bake, and 20 minutes to cool, plus time to thaw the pastry.

Ingredients for Apple Strudel

Close view of sliced apples and a few raisins inside the golden pastry crust of apple strudel
  • 1 sheet puff pastry, thawed according to the package but still cool, about 10 by 12 inches (245g)
  • About 2 medium sweet-tart baking apples, peeled, cored, and thinly sliced to yield 2 1/2 cups (330g)
  • 1/4 cup granulated sugar (50g)
  • 1 teaspoon ground cinnamon
  • 1 teaspoon lemon juice
  • 3 tablespoons raisins (25g)
  • 3 tablespoons plain dry breadcrumbs (15g)
  • 1 large egg, beaten
  • 1–2 tablespoons powdered sugar, for dusting (about 15g)

Use unseasoned breadcrumbs; fine crumbs or panko will work. If the pastry sheet is smaller than 10 by 12 inches, gently roll it to about that size.

How to Make Apple Strudel

Wider view of powdered-sugar-dusted apple strudel and a thick cut slice on a dark plate
  1. Prepare the oven and pastry: Preheat the oven to 400°F (205°C) with a rack in the middle position. Line a rimmed baking sheet large enough to hold the roll with parchment paper. Unfold the cool pastry on the parchment and gently roll it to about 10 by 12 inches if needed.
  2. Mix the filling: Cut the apples into even slices about 1/8 inch thick. Just before assembling, toss them with the granulated sugar, cinnamon, lemon juice, and raisins. Mixing late gives the sugar less time to draw out juice.
  3. Add the breadcrumbs and apples: Sprinkle the breadcrumbs in a strip about 3 inches wide down the 12-inch length of the pastry, leaving about 1 inch clear at each short end. Spoon the apples over the crumbs, leaving any pooled juice in the bowl. Keep the mound narrow enough for the long pastry sides to overlap.
  4. Fold and seal: Fold the long sides over the filling. Brush a little beaten egg where they overlap, then press to seal. Tuck and press both short ends closed so no apples protrude. Carefully turn the roll seam-side down, using the parchment to help move it. Cut 4 or 5 small vents in the top and brush the exposed pastry with egg.
  5. Bake: Bake uncovered for 30–40 minutes, beginning to check at 28–30 minutes. The pastry should be puffed and deep golden, including near the bottom edge. Gently test an apple slice through a vent with the tip of a knife; it should feel tender. Rotate the sheet only if your oven browns unevenly. If the top browns well before the apples soften, loosely shield it with foil while it finishes baking.
  6. Cool and slice: Let the strudel cool on the baking sheet for about 20 minutes. Dust generously with powdered sugar, then cut crosswise into roughly 1 1/2-inch slices with a serrated knife. Use a gentle sawing motion to keep the pastry and apple layers together.

How to Keep Apple Strudel from Getting Soggy

Place the breadcrumbs directly beneath the apples, where they can absorb some juice before it reaches the bottom crust. Stick to the measured 2 1/2 cups of sliced apples and leave any liquid collected in the bowl behind. Extra filling also makes the roll harder to seal. For the crispest pastry, serve the strudel the day it is baked.

How to Tell When the Strudel Is Done

A golden top alone does not mean the apples are ready. Check that the pastry near the bottom edge is golden and that an apple slice feels tender through a vent. Thin, even slices are especially important here: thick pieces may still be firm when the pastry has browned.

Apple Strudel Questions

Can I leave out the raisins?

Yes. Omit them without adding more apples. The roll will still work, though it will not have the dark pieces visible among the apples in this version.

Can I substitute phyllo for puff pastry?

Not directly. Phyllo requires layered sheets brushed with fat and a different assembly method; it will not work as a one-sheet swap.

For an open-faced apple dessert, try this rustic apple galette. If you prefer apples arranged on top, see this French apple tart.

Storage and Reheating

Once completely cool, cover leftovers and keep them at room temperature for up to 2 days, or refrigerate in an airtight container for up to 4 days. The pastry will soften in storage. Warm refrigerated slices briefly in a moderate oven until heated through to improve the crust.

To freeze, wrap the completely cooled baked strudel tightly and freeze for up to 3 months. Thaw overnight in the refrigerator, then warm in a 325°F (165°C) oven until heated through. Add a fresh dusting of powdered sugar before serving.

Nutrition

Approximate nutrition per thick slice, based on 8 slices: 210 calories, 3g protein, 9g fat, and 32g carbohydrates. Approximate values per 100g of finished strudel: 260 calories, 4g protein, 11g fat, and 39g carbohydrates. Values vary with the puff pastry brand, slice size, and moisture lost during baking.

Apple Strudel

A puff pastry roll filled with cinnamon apples and raisins, baked until golden and dusted with powdered sugar.
Course: Dessert
Cuisine: Austrian
Prep: 20 min
Cook: 40 min
Total: 80 min
Servings: 8 Calories: 210 kcal per slice; 260 kcal per 100 g

Equipment

  • Oven
  • Rimmed baking sheet
  • Parchment paper
  • Mixing bowl
  • Pastry brush
  • Serrated knife

Ingredients

  • 1 sheet puff pastry, thawed but still cool, about 10 by 12 inches (245 g)
  • About 2 medium sweet-tart baking apples, peeled, cored, and thinly sliced to yield 2 1/2 cups (330 g)
  • 1/4 cup granulated sugar (50 g)
  • 1 teaspoon ground cinnamon
  • 1 teaspoon lemon juice
  • 3 tablespoons raisins (25 g)
  • 3 tablespoons plain dry breadcrumbs (15 g)
  • 1 large egg, beaten
  • 1–2 tablespoons powdered sugar, for dusting (about 15 g)

Instructions

  1. Preheat the oven to 400°F (205°C) with a rack in the middle position. Line a rimmed baking sheet with parchment paper.
  2. Unfold the cool pastry on the parchment. If needed, gently roll it to about 10 by 12 inches.
  3. Slice the apples evenly, about 1/8 inch thick. Just before assembling, toss them with the granulated sugar, cinnamon, lemon juice, and raisins.
  4. Sprinkle the breadcrumbs in a strip about 3 inches wide down the 12-inch length of the pastry, leaving about 1 inch clear at each short end. Spoon the apples over the crumbs, leaving any pooled juice behind.
  5. Fold the long sides of the pastry over the filling. Brush beaten egg where they overlap and press to seal. Close both short ends, turn the roll seam-side down, cut 4 or 5 small vents in the top, and brush the exposed pastry with egg.
  6. Bake uncovered for 30–40 minutes, beginning to check at 28–30 minutes. Bake until the pastry is puffed and deep golden, including near the bottom edge, and an apple slice feels tender when tested through a vent.
  7. Cool the strudel on the baking sheet for about 20 minutes. Dust with powdered sugar and cut crosswise into roughly 1 1/2-inch slices using a gentle sawing motion.

Tips

  • Use unseasoned breadcrumbs; fine crumbs or panko both work.
  • Leave any liquid collected with the apples in the bowl to help prevent a soggy bottom.
  • Keep the filling strip narrow enough for the long pastry sides to overlap and seal.
  • If the top browns before the apples soften, loosely cover it with foil while it finishes baking.
  • Use thin, even apple slices so they become tender before the pastry overbrowns.

Variations

  • Strudel Without Raisins: Omit the raisins without adding extra apples.

Notes

For the crispest pastry, serve the day it is baked. Store covered at room temperature for up to 2 days or refrigerate airtight for up to 4 days; reheat refrigerated slices in a moderate oven. Freeze tightly wrapped for up to 3 months, thaw overnight in the refrigerator, and warm at 325°F (165°C).

Nutrition

Calories: 210 kcal per slice; 260 kcal per 100 g | Protein: 3 g per slice; 4 g per 100 g | Fat: 9 g per slice; 11 g per 100 g | Carbohydrates: 32 g per slice; 39 g per 100 g