Author

Julia

Browsing

Deep Dish Apple Pie

Four pounds of sliced apples make this deep-dish pie tall enough for substantial wedges, even after the filling shrinks in the oven. A rustic lattice leaves openings for the cinnamon-spiced juices to bubble and thicken around the apple layers.

The crust can turn golden before the center apples are tender, so check the filling rather than relying on bake time alone. Cool the whole pie before cutting, then add vanilla ice cream to each slice just before serving.

Ingredients for Deep Dish Apple Pie
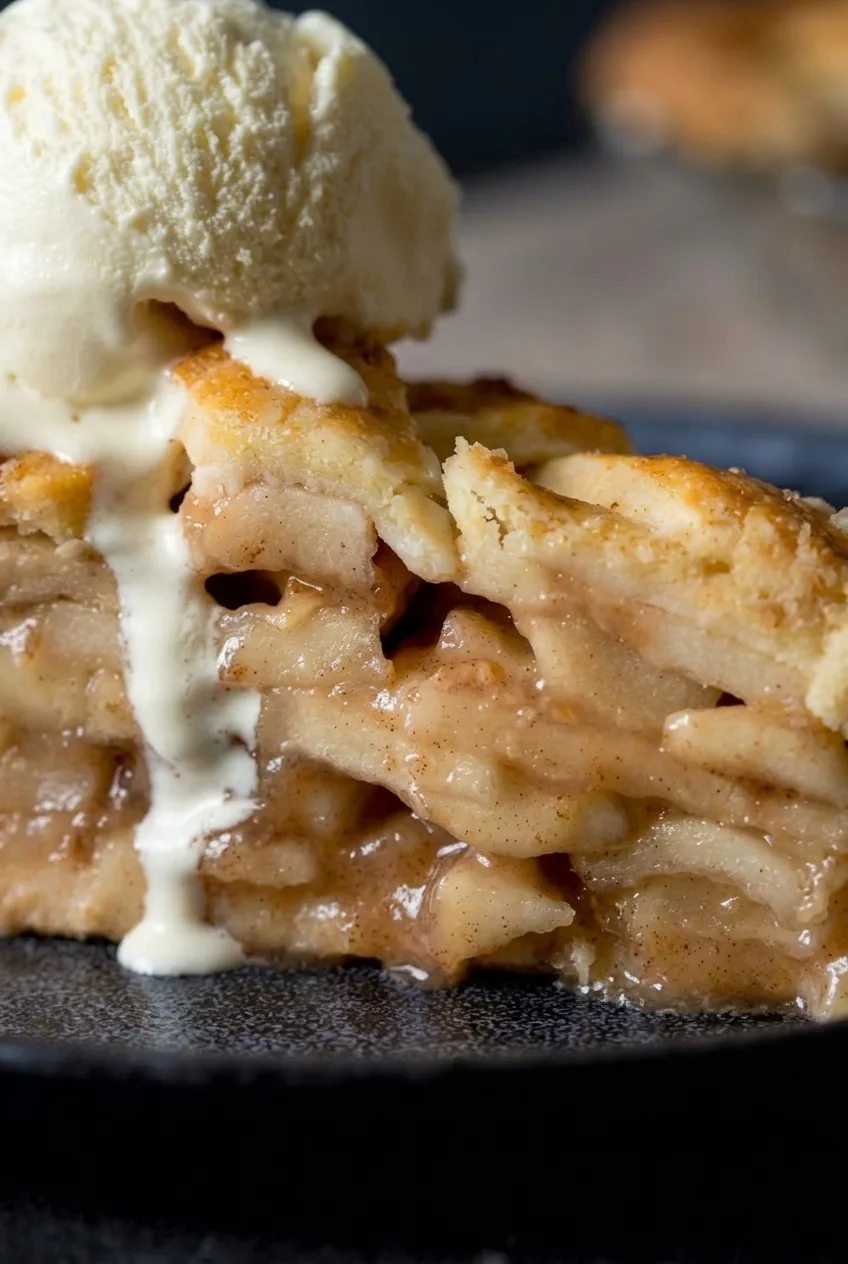
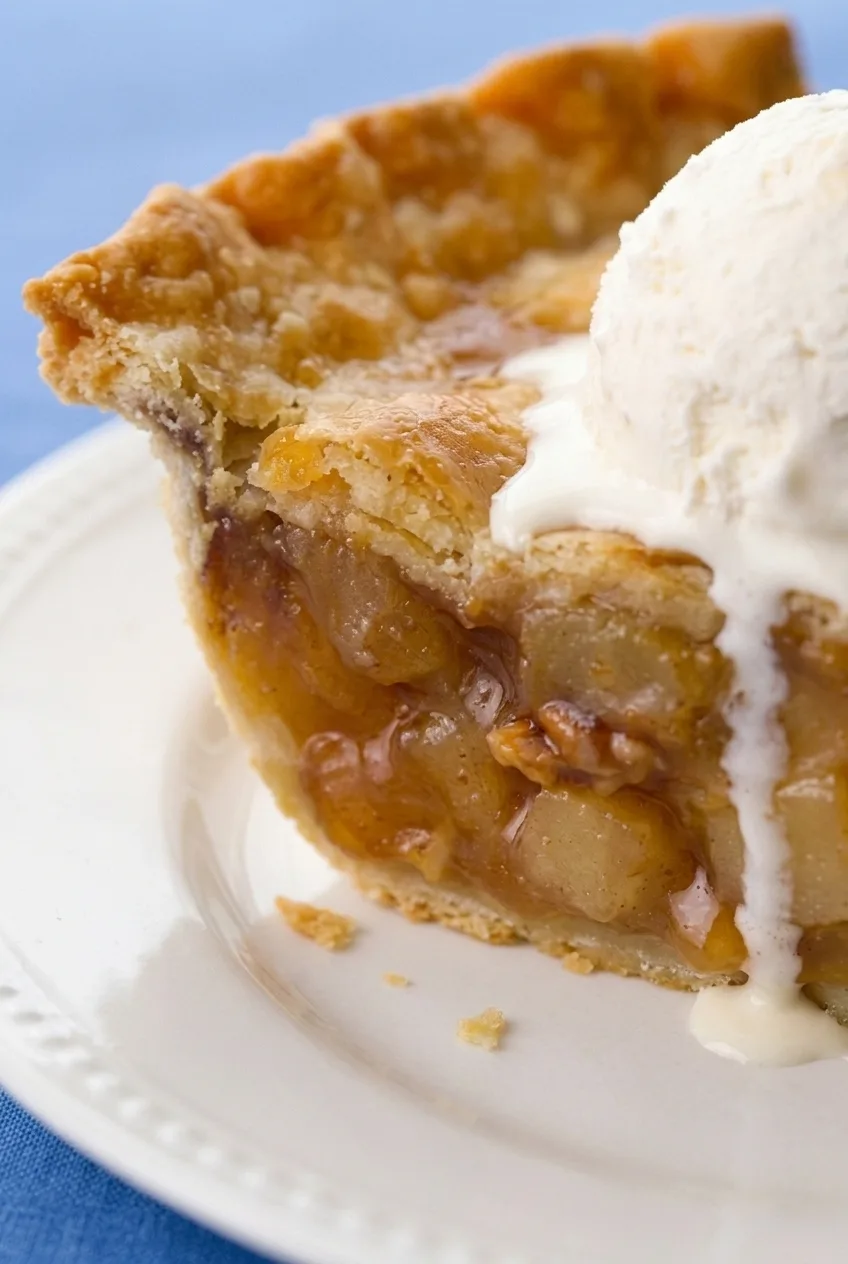
Close view of glossy apple layers and flaky crust beneath melting ice cream in deep dish apple pie

Makes one 9-inch deep-dish pie, about 8 large slices.

  • Double-crust pie dough, refrigerated or homemade, enough for a 12- to 13-inch bottom round and a 12-inch lattice round (about 14–16 oz or 400–450g total)
  • 2 lb Granny Smith apples, weighed before peeling and coring (about 900g)
  • 2 lb Honeycrisp or Pink Lady apples, weighed before peeling and coring (about 900g)
  • 3/4 cup granulated sugar (150g)
  • 1/4 cup cornstarch (about 30g)
  • 2 teaspoons ground cinnamon
  • 1/4 teaspoon ground nutmeg
  • 1/4 teaspoon fine salt
  • 1 tablespoon lemon juice
  • 1 tablespoon unsalted butter, cut into small pieces (about 15g)
  • 1 large egg, beaten with 1 tablespoon water
  • Vanilla ice cream, 1 scoop per served slice
  • Optional: 1–2 teaspoons coarse sugar for the crust

How to Make Deep Dish Apple Pie
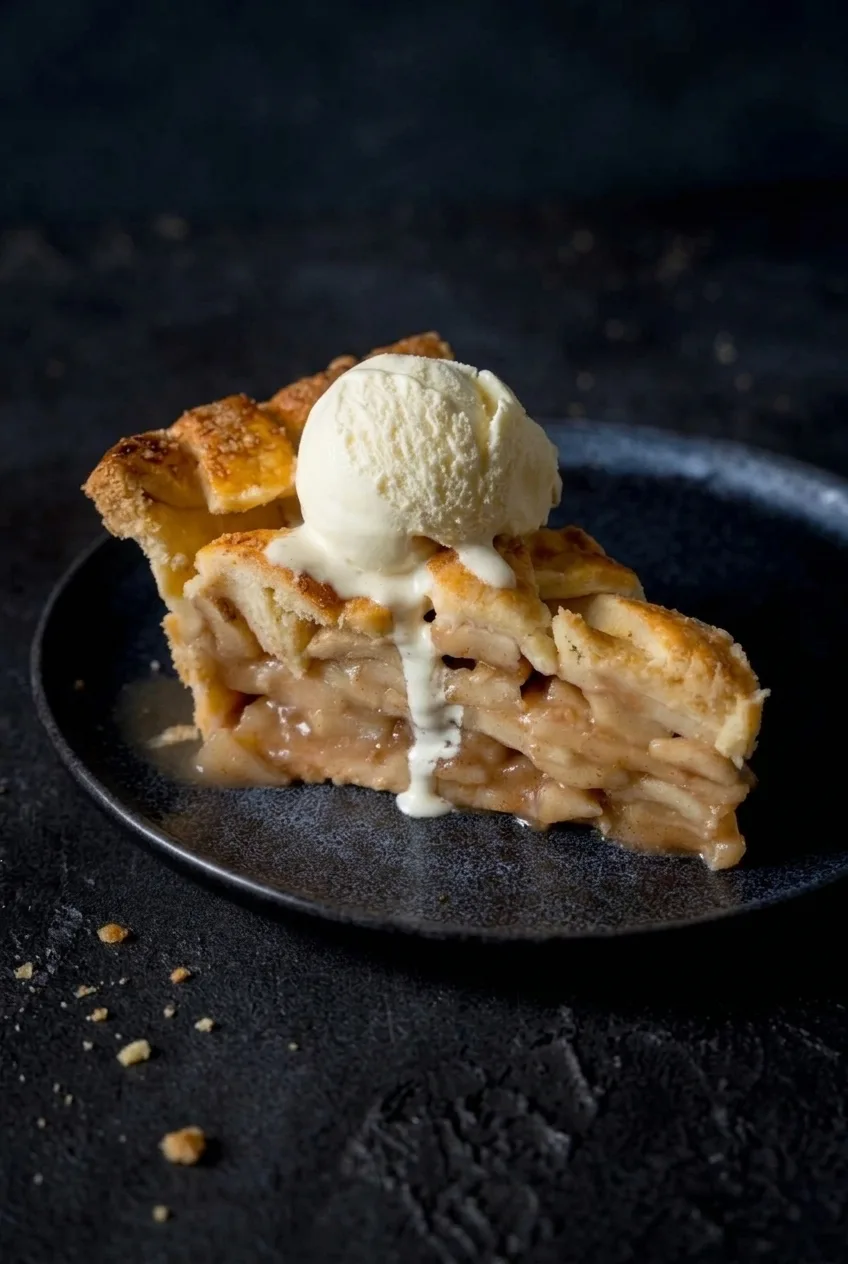
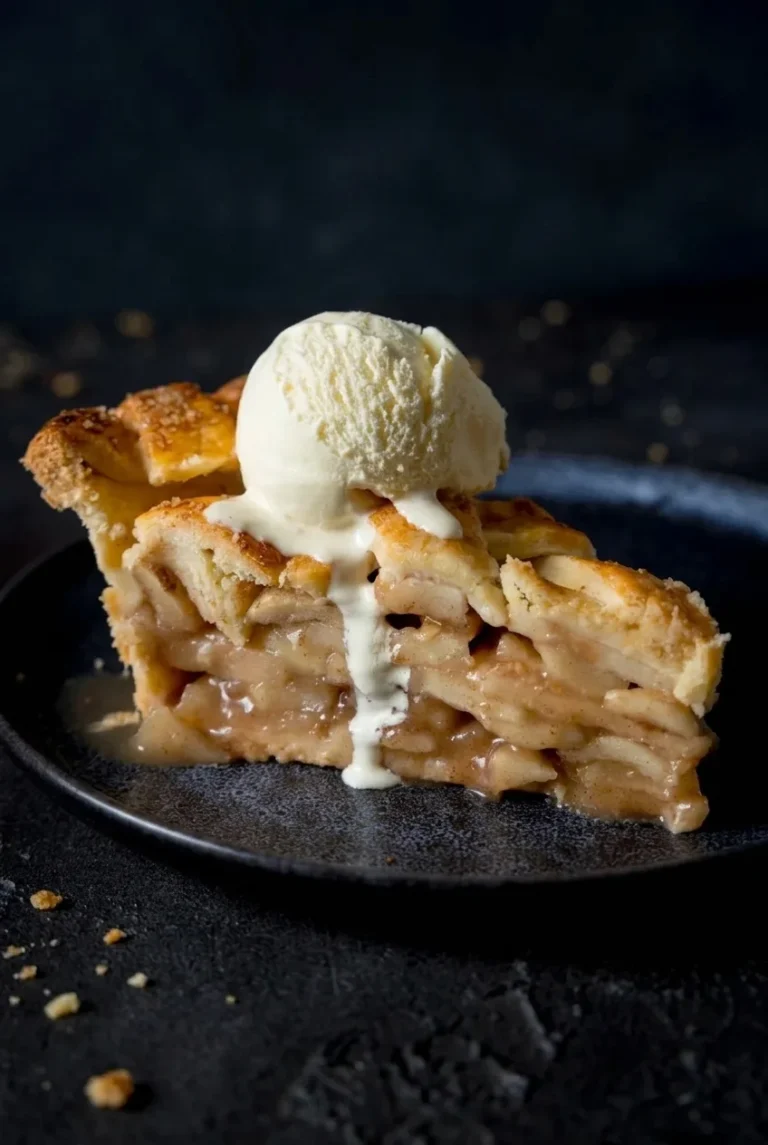
Wider view of a deep dish apple pie slice with vanilla ice cream on a dark plate
  1. Prepare the crust: Preheat the oven to 425°F (220°C) with a rack in the lower third. Roll one dough round to 12–13 inches and fit it into a 9-inch pie plate about 2 inches deep, leaving a little overhang. Do not stretch the dough to reach the rim. Refrigerate the lined plate while you prepare the apples.
  2. Season the apples: Peel and core the apples, then cut them into slices about 1/4 inch thick. Toss with the sugar, cornstarch, cinnamon, nutmeg, salt, and lemon juice until no dry pockets of cornstarch remain.
  3. Fill the pie: Transfer the apples and any seasoned juices to the crust. Arrange and gently press the slices into a snug mound above the rim; close packing helps prevent large gaps as the apples shrink. Dot with the butter.
  4. Make the lattice: Roll the second dough round to about 12 inches and cut it into relatively wide strips. Loosely weave them over the apples, leaving openings for steam and bubbling juices. Trim and secure the strips to the bottom crust, then crimp the rim. Brush the exposed pastry with egg wash and sprinkle with coarse sugar, if using. Refrigerate the assembled pie for 20 minutes.
  5. Bake: Set the pie on a rimmed baking sheet to catch drips. Bake uncovered for 20 minutes at 425°F. Reduce the oven temperature to 350°F (175°C) and bake for about 55–70 minutes more. Check the pastry for overbrowning after about 35–40 minutes total; loosely tent the top or shield the rim with foil if needed. Gently rotate the sheet pan if the oven browns unevenly.
  6. Check and cool: Begin checking the filling at about 65 minutes total. The pie is done when the pastry is deep golden, juices bubble actively through several lattice openings, including near the center, and a thin knife passes through central apple slices without firm resistance. Bake beyond the estimated 75–90 minutes if needed, shielding the pastry as it finishes. Cool the whole pie on a rack for at least 3 hours before slicing.
  7. Serve: Cut into tall wedges. If desired, gently warm individual slices in a low oven, then add a scoop of vanilla ice cream to each one immediately before serving.

Choosing Apples for a Deep Pie

Granny Smith apples bring tartness; Honeycrisp or Pink Lady adds sweetness while keeping visible slices in the filling. Cut both varieties to roughly the same thickness so they soften at a similar rate. Use a genuinely deep plate—a standard shallow 9-inch plate may not hold all four pounds of apples.

How to Tell When the Center Is Done

Golden lattice strips alone do not mean the deep filling has cooked through. Look for active bubbling near the center, then test a central apple slice with a thin knife. If it still feels firm, protect browned pastry with foil and keep baking. Fully bubbling juices can thicken around the apples; cooling the pie gives the filling time to settle before cutting.

Cooling and Serving

Cool the whole pie for at least 3 hours to help the wedges hold their apple layers. For a slice with melting ice cream, gently warm the cut slice rather than cutting into a hot pie. Add the ice cream just before serving.

For another pastry-topped option, try this classic lattice apple pie. If you prefer a crumb topping, see this Dutch apple pie with streusel.

How to Store and Reheat Deep Dish Apple Pie

Cover leftover pie and refrigerate for up to 3 days. The crust will soften somewhat over time. Gently warm individual slices in a low oven if desired, and add ice cream only when serving.

For longer storage, wrap a fully cooled baked pie tightly and freeze for up to 1 month. Thaw before gently reheating; the lattice may be softer than it was when freshly baked.

Nutrition

Approximate nutrition per large slice, including one scoop of vanilla ice cream: 540 calories, 7g protein, 20g fat, and 89g carbohydrates. Approximate values per 100g of served pie and ice cream: 180 calories, 2g protein, 7g fat, and 30g carbohydrates. Values vary with the pastry, ice cream scoop size, and moisture lost during baking.

Deep Dish Apple Pie

A tall lattice-topped apple pie filled with cinnamon-spiced Granny Smith and Honeycrisp or Pink Lady apples.
Course: Dessert
Cuisine: American
Prep: 45 min
Cook: 90 min
Total: 335 min
Servings: 8

Equipment

  • 9-inch deep-dish pie plate
  • Rolling pin
  • Rimmed baking sheet
  • Wire cooling rack
  • Pastry brush
  • Aluminum foil

Ingredients

For the Pie

  • Double-crust pie dough, refrigerated or homemade, enough for a 12- to 13-inch bottom round and a 12-inch lattice round (about 14–16 oz or 400–450 g total)
  • 2 lb Granny Smith apples, weighed before peeling and coring (about 900 g)
  • 2 lb Honeycrisp or Pink Lady apples, weighed before peeling and coring (about 900 g)
  • 3/4 cup granulated sugar (150 g)
  • 1/4 cup cornstarch (about 30 g)
  • 2 teaspoons ground cinnamon
  • 1/4 teaspoon ground nutmeg
  • 1/4 teaspoon fine salt
  • 1 tablespoon lemon juice
  • 1 tablespoon unsalted butter, cut into small pieces (about 15 g)

For the Egg Wash and Serving

  • 1 large egg, beaten with 1 tablespoon water
  • Vanilla ice cream, 1 scoop per served slice
  • Optional: 1–2 teaspoons coarse sugar for the crust

Instructions

  1. Preheat the oven to 425°F (220°C) with a rack in the lower third.
  2. Roll one dough round to 12–13 inches. Fit it into a 9-inch pie plate about 2 inches deep, leaving a little overhang without stretching the dough. Refrigerate while you prepare the apples.
  3. Peel and core the apples, then slice them about 1/4 inch thick.
  4. Toss the apples with the sugar, cornstarch, cinnamon, nutmeg, salt, and lemon juice until evenly coated.
  5. Transfer the apples and any juices to the crust. Arrange and gently press them into a snug mound above the rim, then dot with butter.
  6. Roll the second dough round to about 12 inches and cut it into wide strips. Loosely weave the strips over the apples, leaving openings for steam and bubbling juices.
  7. Trim and secure the lattice strips to the bottom crust, then crimp the rim. Brush the exposed pastry with egg wash and sprinkle with coarse sugar, if using.
  8. Refrigerate the assembled pie for 20 minutes.
  9. Set the pie on a rimmed baking sheet. Bake uncovered for 20 minutes at 425°F (220°C).
  10. Reduce the oven temperature to 350°F (175°C) and bake for about 55–70 minutes more. Check for overbrowning after 35–40 minutes total; loosely tent the top or shield the rim with foil as needed.
  11. Begin checking for doneness at about 65 minutes total. Bake until the pastry is deep golden, juices bubble actively through several lattice openings near the center, and a thin knife passes through central apple slices without firm resistance. Continue baking beyond 75–90 minutes if needed, shielding the pastry.
  12. Cool the pie on a rack for at least 3 hours before slicing. Serve in tall wedges with a scoop of vanilla ice cream, if desired.

Tips

  • Use a genuinely deep pie plate; a standard shallow 9-inch plate may not hold all the apples.
  • Cut both apple varieties to roughly the same thickness so they soften at a similar rate.
  • Pack the apple slices snugly to reduce large gaps as they shrink during baking.
  • Judge doneness by bubbling juices and tender central apples, not by the color of the lattice alone.
  • Shield browned pastry with foil if the center needs more time.
Notes

Cover and refrigerate leftovers for up to 3 days. For longer storage, wrap the fully cooled pie tightly and freeze for up to 1 month; thaw before gently reheating. Add ice cream just before serving.

Nutrition

Per Serving Calories: 540 kcal | Per Serving Protein: 7 g | Per Serving Fat: 20 g | Per Serving Carbohydrates: 89 g | Per 100g Calories: 180 kcal | Per 100g Protein: 2 g | Per 100g Fat: 7 g | Per 100g Carbohydrates: 30 g

Caramel Apple Pie

This double-crust caramel apple pie has a flaky pastry top, a crimped rim, and distinct apple slices in a thick amber filling. Spoonable caramel goes between the apples rather than over the finished pie, so it flavors the filling without adding a thin syrup.

Bake until the filling bubbles through the center vents and the apples are tender, then let the pie cool before cutting. Add vanilla ice cream to each plated slice just before serving.

Ingredients for Caramel Apple Pie

  • 2 refrigerated pie crusts, sized for a 9-inch pie
  • 2 1/2 to 3 pounds firm apples, yielding about 6 cups peeled, cored, 1/4-inch slices
  • 1/3 cup packed light brown sugar (70g)
  • 3 tablespoons cornstarch (25g)
  • 1 teaspoon ground cinnamon
  • 1/4 teaspoon fine salt
  • 1 tablespoon lemon juice
  • 1/2 cup thick caramel sauce or dulce de leche (160g)
  • 1 large egg, beaten with 1 tablespoon water
  • About 1 pint vanilla ice cream, for serving
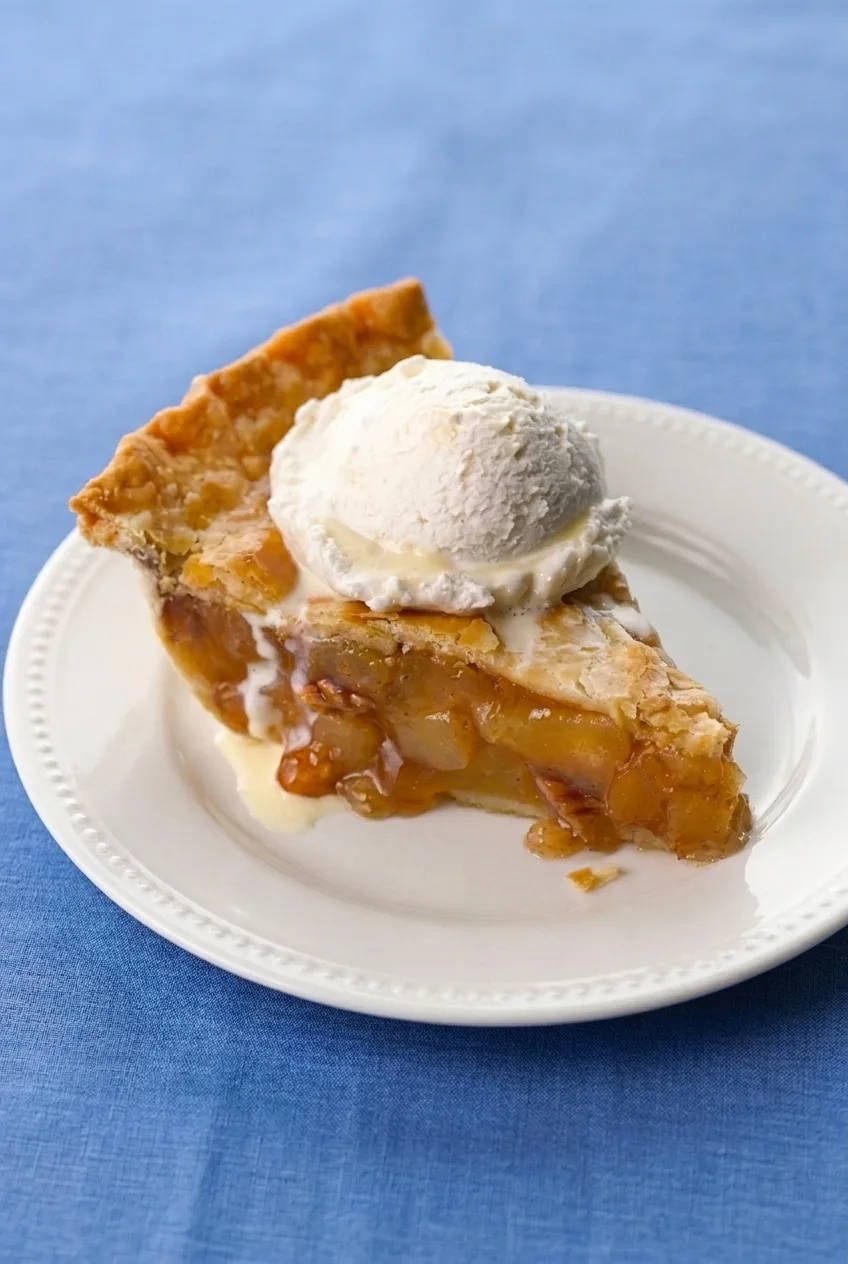
Close view of sliced apples in thick caramel beneath flaky pie crust and softening vanilla ice cream

Choose Apples and Caramel That Hold Up

Use firm tart apples, such as Granny Smith, or a mix of tart and sweeter baking apples. Cut the slices to a similar 1/4-inch thickness so they soften together. The caramel should be thick enough to spoon in dollops; thin, watery ice cream syrup can make the filling loose.

How to Make Caramel Apple Pie

Full white plate holding a slice of double-crust caramel apple pie topped with vanilla ice cream

Yield: One standard-depth 9-inch pie, about 8 slices. Allow 35 to 40 minutes to prepare, 60 to 70 minutes to bake, and about 3 hours to cool.

  1. Preheat and line the dish: Heat the oven to 400°F (205°C) with a rimmed baking sheet on a lower-middle rack. Fit one crust into a standard-depth 9-inch pie dish without stretching it, leaving enough overhang to seal the top.
  2. Season the apples: Peel, core, and slice the apples about 1/4 inch thick. Toss with the brown sugar, cornstarch, cinnamon, salt, and lemon juice until evenly coated, with no pockets of dry cornstarch.
  3. Layer the filling: Add half the apples to the bottom crust and spoon half the caramel over them in small dollops. Add the remaining apples and caramel, spreading the filling evenly without overfilling the dish.
  4. Seal and vent: Lay the second crust over the filling. Seal and crimp the edges, then cut several vents all the way through the top crust near the center. Lightly brush the exposed pastry with the egg wash.
  5. Bake: Carefully set the pie dish on the hot baking sheet. Bake uncovered for 20 minutes at 400°F. Check the crust color, then reduce the oven to 350°F (175°C) and bake for another 40 to 50 minutes. If the crimped edge darkens too quickly, loosely shield just the edge with foil. Begin checking the filling around 55 minutes total. The pie is done when the crust is golden brown, thick filling bubbles through the center vents, and an apple slice yields easily to a thin knife inserted through a vent.
  6. Cool and serve: Cool the pie on a rack for about 3 hours so the filling can hold together when sliced. Cut into wedges and place a scoop of vanilla ice cream on each plated slice just before serving.

How to Tell When the Pie Is Done

Bubbling at the crimped edge alone does not show that the center is cooked. Look for thick bubbles through the center vents and check an apple there for tenderness. If the rim is brown but the apples are still firm, shield the edge and keep baking. Pie dish depth, oven heat, and apple size can all shift the bake time; an oversized deep-dish pan needs a separate quantity and bake assessment.

Cutting the pie while hot can let the filling run out. Cooling it first makes it easier to lift a wedge with recognizable apple pieces, even if you briefly warm an individual slice before serving.

Other Apple Pie Styles

Homemade pastry can replace the refrigerated crusts if you make two crusts sized for the same dish; keep the full top, vents, and crimped edge. For a different top crust, try classic homemade apple pie with a lattice. Dutch apple pie with buttery streusel uses a crumb topping and has its own baking directions.

Storage and Reheating

Once fully cool, cover the pie and refrigerate it without ice cream for up to 4 days. To serve a slice warm, heat the already-cut slice in a 325°F (165°C) oven for about 8 to 10 minutes, then add ice cream.

A fully baked, cooled pie can be wrapped well and frozen without ice cream for up to 3 months. Thaw it in the refrigerator before warming.

Nutrition

Approximate nutrition per slice, including one scoop of vanilla ice cream, based on 8 slices: 500 calories, 6g protein, 23g fat, and 70g carbohydrates. Approximate values per 100g of served pie and ice cream: 260 calories, 3g protein, 12g fat, and 37g carbohydrates. Values vary with the crust, caramel, apples, and size of the ice cream scoop.

Caramel Apple Pie

A double-crust apple pie filled with cinnamon-seasoned apples and thick caramel, served with vanilla ice cream.
Course: Dessert
Cuisine: American
Prep: 40 min
Cook: 65 min
Total: 285 min
Servings: 8 Calories: 500 kcal

Equipment

  • 9-inch pie dish
  • Rimmed baking sheet
  • Cooling rack
  • Pastry brush
  • Thin knife

Ingredients

For the pie

  • 2 refrigerated pie crusts, sized for a 9-inch pie
  • 2 1/2 to 3 pounds firm apples, yielding about 6 cups peeled, cored, and sliced 1/4 inch thick
  • 1/3 cup packed light brown sugar (70 g)
  • 3 tablespoons cornstarch (25 g)
  • 1 teaspoon ground cinnamon
  • 1/4 teaspoon fine salt
  • 1 tablespoon lemon juice
  • 1/2 cup thick caramel sauce or dulce de leche (160 g)

For the egg wash and serving

  • 1 large egg, beaten with 1 tablespoon water
  • About 1 pint vanilla ice cream

Instructions

  1. Preheat the oven to 400°F (205°C) with a rimmed baking sheet on a lower-middle rack.
  2. Fit one pie crust into a standard-depth 9-inch pie dish without stretching it, leaving enough overhang to seal the top.
  3. Peel, core, and slice the apples about 1/4 inch thick.
  4. Toss the apples with the brown sugar, cornstarch, cinnamon, salt, and lemon juice until evenly coated.
  5. Arrange half the apples in the bottom crust and spoon half the caramel over them in small dollops. Repeat with the remaining apples and caramel, spreading the filling evenly without overfilling the dish.
  6. Lay the second crust over the filling. Seal and crimp the edges, then cut several vents through the top crust near the center.
  7. Lightly brush the exposed pastry with the egg wash.
  8. Set the pie dish on the hot baking sheet and bake uncovered for 20 minutes at 400°F (205°C).
  9. Reduce the oven to 350°F (175°C) and bake for another 40 to 50 minutes. If the crimped edge darkens too quickly, loosely cover just the edge with foil.
  10. Check for doneness starting around 55 minutes total. The crust should be golden brown, thick filling should bubble through the center vents, and an apple slice near the center should yield easily to a thin knife.
  11. Cool the pie on a rack for about 3 hours before slicing. Serve each slice with a scoop of vanilla ice cream.

Tips

  • Use firm tart apples, such as Granny Smith, or a mix of tart and sweeter baking apples.
  • Slice the apples to a consistent 1/4-inch thickness so they soften evenly.
  • Choose thick caramel that can be spooned in dollops; thin syrup can make the filling loose.
  • Check for thick bubbles through the center vents and test an apple there; bubbling at the edge alone does not mean the center is done.
  • If the rim browns before the apples are tender, shield the edge with foil and continue baking.

Variations

  • Homemade Pastry Crust: Replace the refrigerated crusts with homemade pastry sized for the same 9-inch dish.
  • Lattice Top: Use a lattice top crust instead of a full top crust, while keeping a crimped edge.
  • Dutch Apple Pie: Replace the top crust with a buttery streusel topping and follow a suitable baking method for that style.

Notes

Refrigerate the fully cooled pie, covered and without ice cream, for up to 4 days. Reheat individual slices at 325°F (165°C) for 8 to 10 minutes. Freeze a fully baked, cooled pie for up to 3 months; thaw in the refrigerator before warming.

Nutrition

Calories: 500 kcal | Protein: 6 g | Fat: 23 g | Carbohydrates: 70 g

Dutch Apple Pie with Streusel Topping

Dutch apple pie has one bottom pastry crust and a generous layer of buttery streusel instead of a pastry lid. A thick filling of cinnamon-spiced apple slices stays visible in each wedge beneath the coarse golden crumbs. The topping may brown before the apples are tender, so check for bubbling juices and pierce an apple near the center before taking the pie out. Cool it for at least 3 hours so the filling can set enough to slice.

For a pastry-topped version, try this classic homemade apple pie.

Ingredients for Dutch Apple Pie

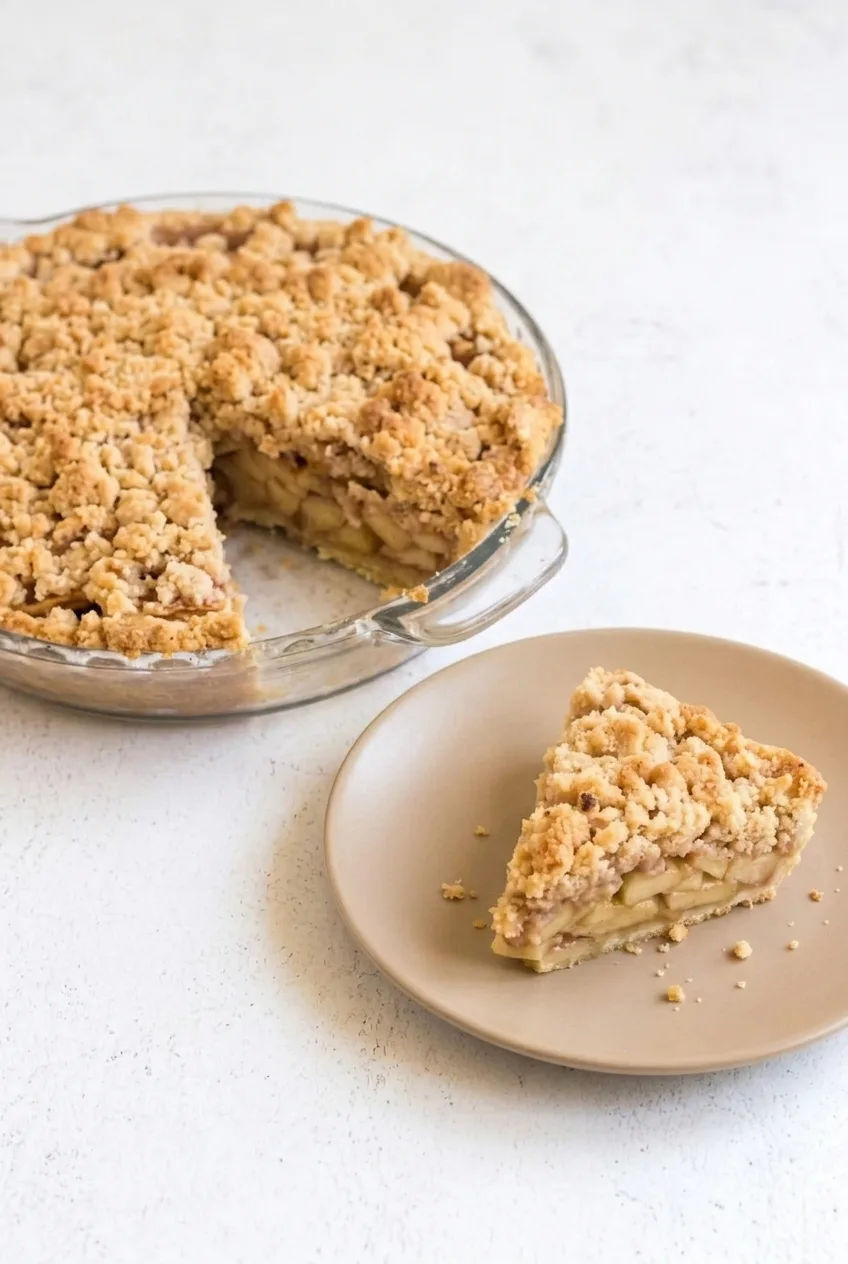
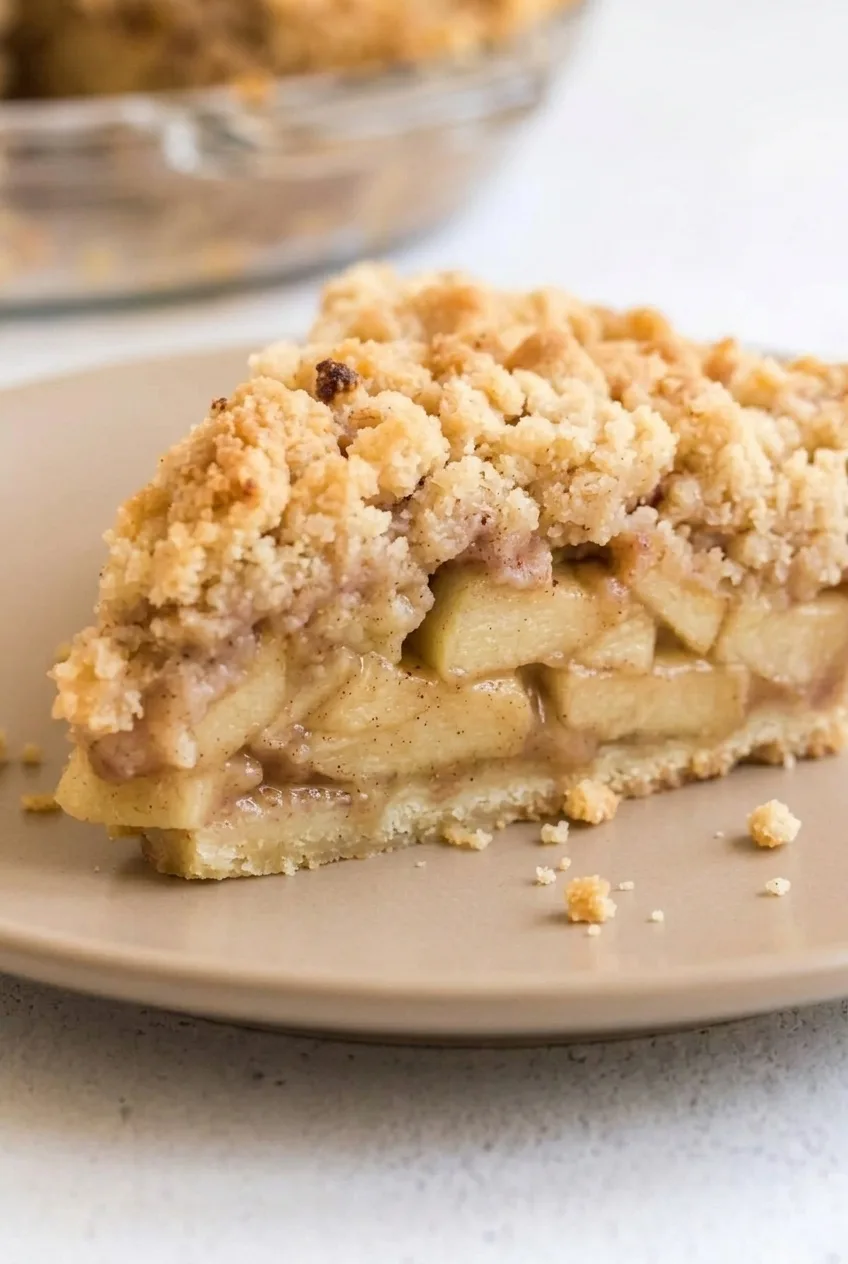
Dutch apple pie in a glass dish with one wedge removed and served on a nearby plate.

Makes one standard 9-inch pie, or 8 wedges. Prep time: about 30 minutes. Bake time: about 55–70 minutes. Total time: about 4 hours 25 minutes to 4 hours 40 minutes, including at least 3 hours of cooling.

Crust and apple filling

  • 1 unbaked 9-inch pie crust, fitted into a standard pie dish
  • 2 1/2 to 3 lb firm apples (about 1.15–1.35kg whole), yielding 6–7 cups peeled, cored, and sliced
  • 1/2 cup granulated sugar (100g)
  • 1/4 cup all-purpose flour (30g)
  • 1 1/2 teaspoons ground cinnamon
  • 1 tablespoon lemon juice
  • 1/4 teaspoon fine salt

Streusel topping

  • 3/4 cup all-purpose flour (90g)
  • 1/2 cup packed light brown sugar (100g)
  • 6 tablespoons cold unsalted butter, cubed (85g)
  • 1/8 teaspoon fine salt
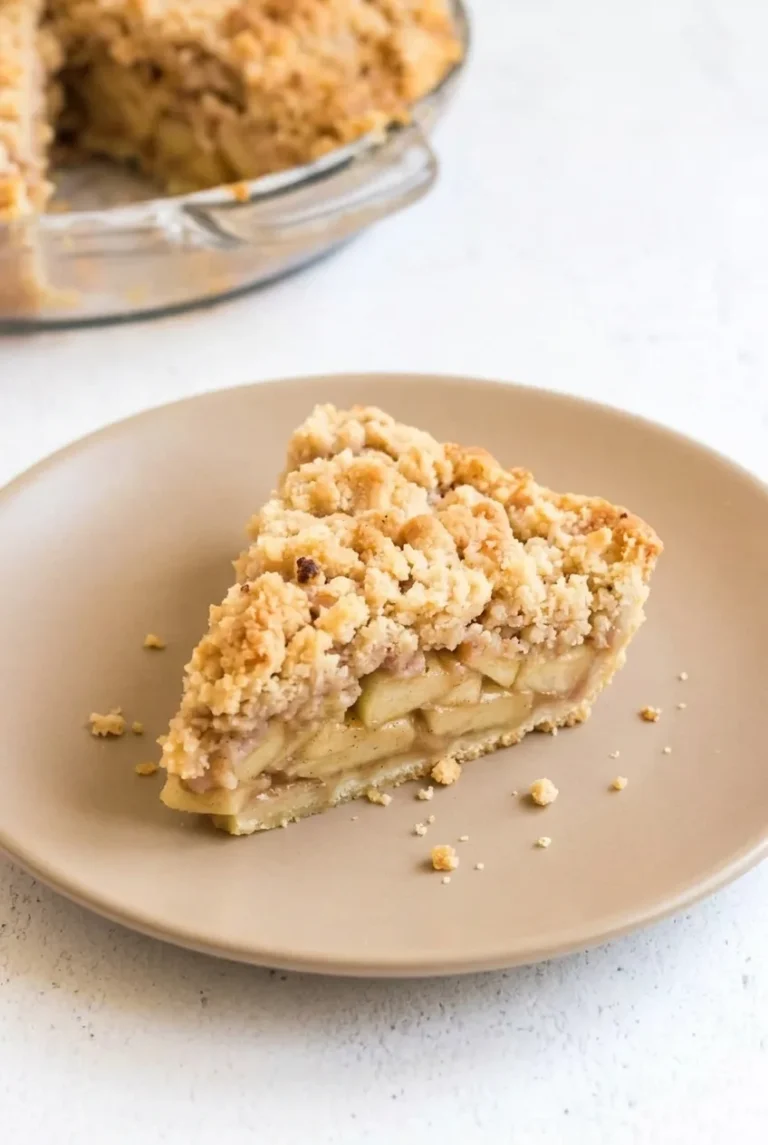
Close view of apple slices and thin pastry beneath the coarse streusel on a Dutch apple pie wedge.

How to Bake Dutch Apple Pie

  1. Prepare the crust: Preheat the oven to 375°F (190°C) with a rack in the lower-middle position. Press the unbaked crust into a standard 9-inch pie dish without leaving large air pockets. Crimp the edge and chill the crust while you prepare the topping and filling.
  2. Make the streusel: Mix the topping flour, brown sugar, and 1/8 teaspoon salt. Cut in the cold butter with a pastry cutter or your fingertips until uneven pea-size and smaller crumbs form. The mixture should clump when squeezed, not become a smooth paste. Refrigerate it while you prepare the apples.
  3. Season the apples: Peel and core the apples, then cut them into even 1/4-inch slices. Toss with the granulated sugar, filling flour, cinnamon, lemon juice, and 1/4 teaspoon salt until coated, with no dry pockets of flour.
  4. Fill and top the pie: Mound the apples in the chilled crust. If they have released an unusually large puddle of liquid, leave the excess in the bowl. Scatter the streusel over the apples without pressing the crumbs flat. Set the pie dish on a room-temperature rimmed baking sheet to catch drips.
  5. Bake: Bake uncovered for about 55–70 minutes, or longer if needed. Check browning after 35–40 minutes and begin checking the filling around 55 minutes. If the pastry rim browns too quickly, cover just the rim with foil or a pie shield; if the streusel darkens early, loosely tent the top with foil. The pie is done when juices bubble in several spots, an apple near the center yields easily to a thin knife, the streusel is golden, and the exposed pastry rim is browned. Rotate the pie only if your oven browns unevenly.
  6. Cool and slice: Transfer the pie to a rack and cool for at least 3 hours before cutting into 8 substantial wedges. Serve plain to show the apple filling, pastry base, and crumb topping.

Choosing and Cutting the Apples

Use firm apples that will remain distinct after baking. A mix of tart Granny Smith and sweeter Honeycrisp works well, but one firm variety is fine. Aim for 6–7 cups of prepared apples rather than relying on whole-apple weight alone; sizes and trimming vary. Even 1/4-inch slices cook more consistently, while thicker pieces may need more time in the oven.

How to Tell When the Pie Is Done

Golden streusel alone does not mean the apples underneath are cooked. Look for filling bubbling through the crumbs in more than one spot, then pierce an apple near the center with a thin knife. If it resists, protect any browned areas with foil and keep baking. Pie depth, apple variety, and dish material can all affect the time needed.

How to Avoid a Runny Filling or Soggy Bottom

Fill the chilled crust just before baking so the raw apples do not sit on the pastry. The flour thickens the juices, but the filling must bubble during baking to set properly. If you use a glass dish, check the visible bottom crust as well as the topping; continue baking if the pastry still looks pale and the filling is not done.

A hot pie can look loose even when fully baked. Cooling for at least 3 hours gives the filling time to become more cohesive before slicing.

Storage and Reheating

Cool the pie completely, then cover and refrigerate it for up to 3–4 days. Warm refrigerated pie in a 350°F (175°C) oven for about 15–20 minutes, loosely covering the topping with foil if it is already dark. Vanilla ice cream or whipped cream can be served alongside individual wedges, if desired.

Nutrition

Approximate nutrition per wedge, based on 8 servings: 420 calories, 4g protein, 16g fat, and 66g carbohydrates. Approximate values per 100g of baked pie: 230 calories, 2g protein, 9g fat, and 36g carbohydrates. Values vary with the pie crust, apple yield, and moisture lost during baking; optional accompaniments are not included.

Dutch Apple Pie with Streusel Topping

Cinnamon-spiced apples bake in a pastry crust beneath a buttery streusel topping.
Course: Dessert
Cuisine: American
Prep: 30 min
Cook: 70 min
Total: 280 min
Servings: 8 Calories: 420 kcal

Equipment

  • 9-inch pie dish
  • Rimmed baking sheet
  • Pastry cutter
  • Thin knife
  • Cooling rack
  • Foil or pie shield

Ingredients

Crust and apple filling

  • 1 unbaked 9-inch pie crust, fitted into a standard pie dish
  • 2 1/2 to 3 lb firm apples (about 1.15–1.35 kg whole), yielding 6–7 cups peeled, cored, and sliced
  • 1/2 cup granulated sugar (100 g)
  • 1/4 cup all-purpose flour (30 g)
  • 1 1/2 teaspoons ground cinnamon
  • 1 tablespoon lemon juice
  • 1/4 teaspoon fine salt

Streusel topping

  • 3/4 cup all-purpose flour (90 g)
  • 1/2 cup packed light brown sugar (100 g)
  • 6 tablespoons cold unsalted butter, cubed (85 g)
  • 1/8 teaspoon fine salt

Instructions

  1. Preheat the oven to 375°F (190°C) with a rack in the lower-middle position.
  2. Press the unbaked crust into a standard 9-inch pie dish, crimp the edge, and chill while preparing the filling and topping.
  3. Mix the topping flour, brown sugar, and 1/8 teaspoon salt. Cut in the cold butter until uneven pea-size and smaller crumbs form. Refrigerate the streusel.
  4. Peel and core the apples, then cut them into even 1/4-inch slices.
  5. Toss the apples with the granulated sugar, filling flour, cinnamon, lemon juice, and 1/4 teaspoon salt until evenly coated.
  6. Mound the apples in the chilled crust. Leave any unusually large puddle of released liquid in the bowl.
  7. Scatter the streusel over the apples without pressing it flat. Set the pie dish on a room-temperature rimmed baking sheet.
  8. Bake uncovered for about 55–70 minutes, or longer if needed. Check browning after 35–40 minutes and begin checking the filling around 55 minutes.
  9. If the pastry rim browns too quickly, cover the rim with foil or a pie shield. If the streusel darkens early, loosely tent the pie with foil.
  10. Bake until juices bubble in several spots, an apple near the center yields easily to a thin knife, the streusel is golden, and the exposed pastry rim is browned.
  11. Transfer the pie to a rack and cool for at least 3 hours before slicing into 8 wedges.

Tips

  • Use firm apples, such as Granny Smith or Honeycrisp, and aim for 6–7 cups prepared.
  • Cut the apples into even 1/4-inch slices so they cook consistently.
  • Check that the filling bubbles and a center apple yields easily; a golden topping alone does not mean the pie is done.
  • Protect the crust rim or topping with foil if either browns before the filling is tender.
  • Cool the pie for at least 3 hours to help the filling set before slicing.

Variations

  • Mixed-Apple Dutch Pie: Use a mix of tart Granny Smith and sweeter Honeycrisp apples.

Notes

Cool completely, cover, and refrigerate for up to 3–4 days. Reheat at 350°F (175°C) for about 15–20 minutes, tenting the topping with foil if it is already dark.

Nutrition

Calories: 420 kcal | Protein: 4 g | Fat: 16 g | Carbohydrates: 66 g

Classic Homemade Apple Pie

This 9-inch apple pie has an all-butter crust, a wide woven lattice, and firm apple slices visible between the strips. A mix of tart and sweeter apples gives the raw filling a balanced flavor while keeping the slices recognizable after baking.

The crust may turn golden before the filling is done. Look for juices bubbling through several lattice openings and apples that pierce easily, then let the pie cool for at least 3 hours so the filling can set.

Ingredients for Classic Homemade Apple Pie

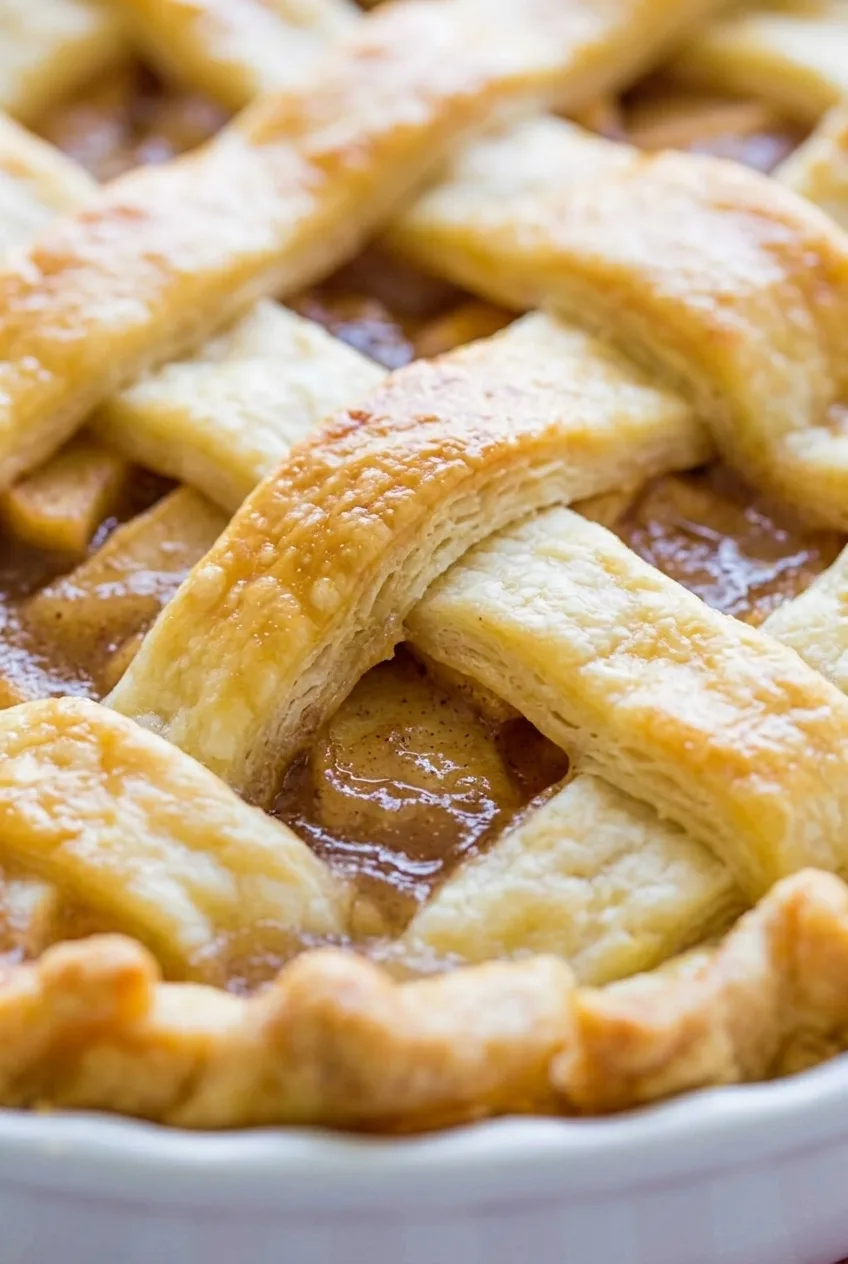
Close view of flaky lattice crossings and spiced apple slices in homemade apple pie

All-butter crust

  • 2 1/2 cups all-purpose flour (300g)
  • 1 tablespoon granulated sugar (12g)
  • 1 teaspoon fine salt
  • 1 cup (2 sticks) cold unsalted butter, cubed (225g)
  • 6 to 8 tablespoons ice water, as needed

Apple filling

  • About 3 pounds firm baking apples, such as half Granny Smith and half Honeycrisp, yielding roughly 7 cups peeled, cored, 1/4-inch slices
  • 1/2 cup granulated sugar (100g)
  • 1/4 cup packed light brown sugar (50g)
  • 1/4 cup all-purpose flour (30g)
  • 1 1/2 teaspoons ground cinnamon
  • 1/4 teaspoon ground nutmeg
  • 1/4 teaspoon fine salt
  • 1 tablespoon lemon juice

For the crust finish

  • 1 large egg, beaten with 1 tablespoon water
  • 1 tablespoon coarse sugar, optional

Yield: One 9-inch pie, or 8 slices. Allow about 50 minutes of active preparation, at least 1 hour to chill the dough, 20 minutes to chill the assembled pie, approximately 55 to 70 minutes to bake, and at least 3 hours to cool. Total elapsed time is about 6 to 6 1/2 hours.

How to Make Classic Homemade Apple Pie

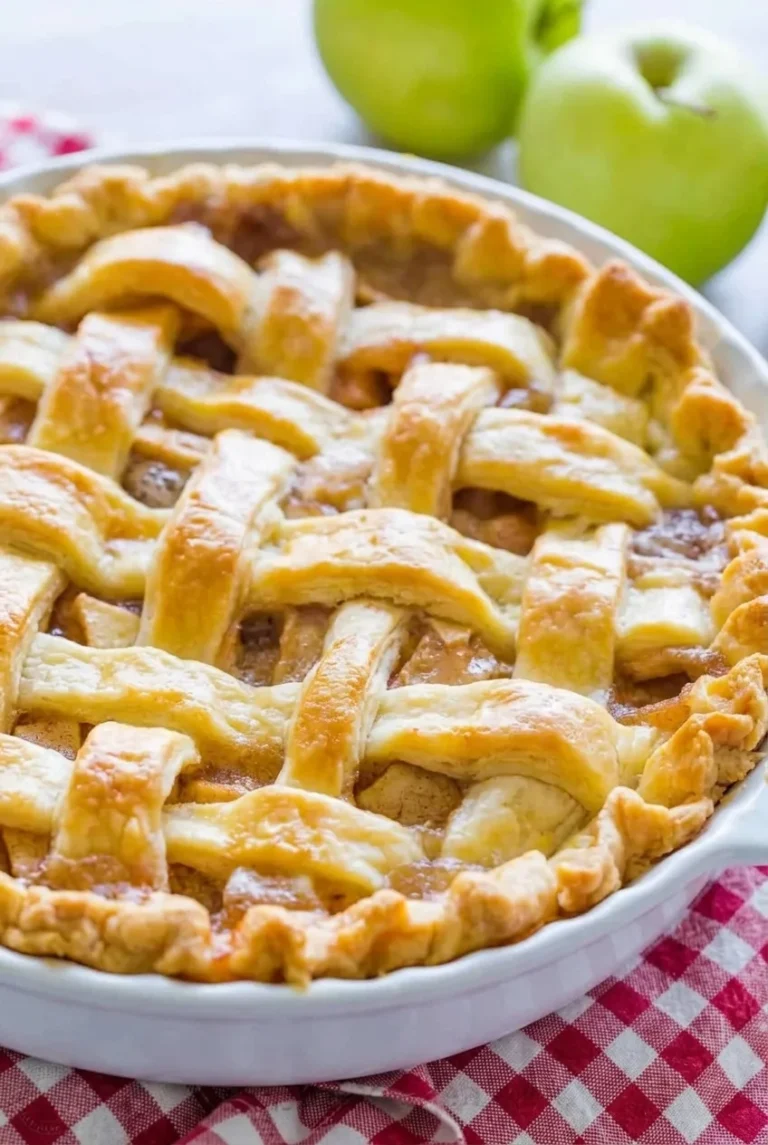
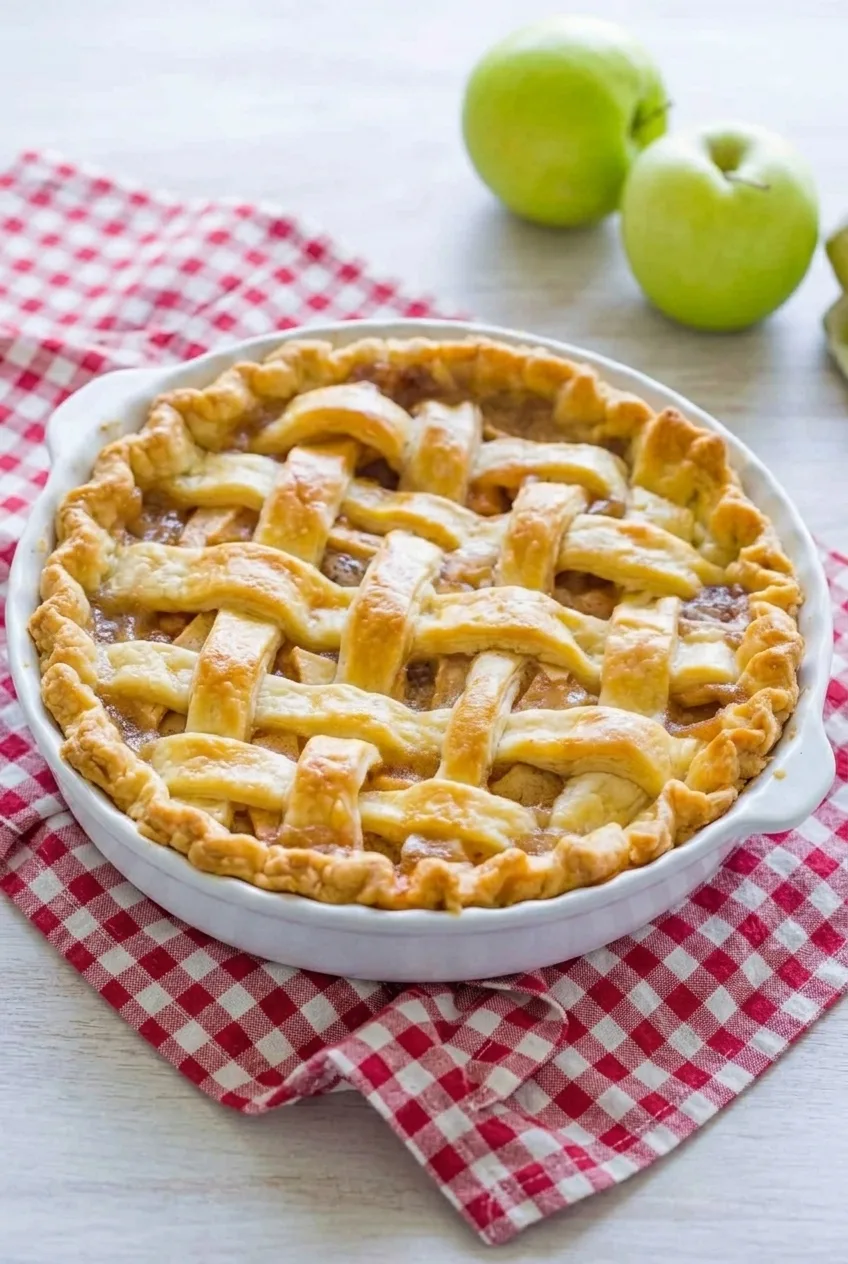
Whole lattice apple pie in its white fluted dish, shown with the surrounding table surface
  1. Make and chill the dough: Mix the crust flour, sugar, and salt in a large bowl. Cut in the cold butter with a pastry blender or your fingertips, leaving some visible butter pieces. Add ice water 1 tablespoon at a time, mixing just until the dough holds together when pressed. Divide into two disks, cover, and refrigerate for at least 1 hour, until firm.
  2. Line the dish: Roll one disk large enough to line a 9-inch white fluted ceramic pie dish with some overhang. Set the pastry in the dish without stretching it. Refrigerate the shell while you prepare the filling.
  3. Fill the pie: Peel, core, and slice the apples uniformly about 1/4 inch thick. Toss with both filling sugars, the flour, cinnamon, nutmeg, salt, and lemon juice until evenly coated, with no pockets of dry flour. Promptly mound the apples in the chilled shell, keeping the pastry rim clear for sealing.
  4. Weave the lattice: Roll the second dough disk and cut it into strips about 3/4 to 1 inch wide. Lay several strips across the filling, leaving spaces between them. Fold back alternating strips, lay a strip across in the other direction, and unfold them. Repeat, alternating which strips you fold back, to make an over-and-under weave. If the pastry becomes sticky, refrigerate the strips briefly before continuing. Trim and seal the lattice ends to the bottom crust, then fold and crimp the edge into a substantial, rustic rim.
  5. Chill and finish: Refrigerate the assembled pie for about 20 minutes while the oven fully preheats to 425°F (220°C), with a rack in the lower third. Brush the exposed pastry with egg wash without letting it pool on the filling. Sprinkle with coarse sugar if using.
  6. Bake: Set the chilled ceramic dish on an unheated rimmed baking sheet to catch drips; do not place it on a preheated sheet. Bake uncovered for 20 minutes, then reduce the oven to 375°F (190°C). Check the crust color as you lower the heat. Bake for approximately 35 to 50 minutes more, beginning to check the filling around 55 minutes total. The pie is done when the lattice and rim are deeply golden, thickened juices bubble through several openings, and a thin knife inserted through an opening pierces an apple slice with little resistance. If the pastry darkens before the filling is ready, shield the rim or loosely tent the dark areas with foil and keep baking.
  7. Cool: Set the pie dish on a rack and cool for at least 3 hours before cutting into 8 slices. The juices will thicken further as the pie cools.

Choosing and Slicing Apples

Granny Smith apples bring tartness; Honeycrisp or another firm, crisp apple adds sweetness. Avoid mealy apples, which are less likely to hold recognizable slices. Aim for roughly 7 cups after peeling and coring. Keeping the slices close to 1/4 inch thick helps the raw apples cook evenly before the crust gets too dark.

How to Tell When Apple Pie Is Done

Golden pastry alone does not mean the apples have softened. Look for bubbling juices in several lattice openings and test an apple slice with a thin knife. If it still feels firm, continue baking and protect any pastry that is getting too dark with foil. Filling that runs freely when sliced may not have bubbled enough in the oven or may need more time to cool.

Pastry and Thickener Substitutions

Refrigerated double-crust pastry can replace the homemade dough. Keep it chilled and cut the top portion into the same broad woven strips. For the filling, approximately 2 tablespoons cornstarch can replace the 1/4 cup flour; the wheat-flour crust still remains part of the pie.

Make-Ahead and Storage

The dough can be made ahead and kept chilled until you are ready to roll it. Cool the baked pie completely before covering. Keep it covered at room temperature for up to 1 to 2 days, or refrigerate for about 4 days.

Serve slices plain or with vanilla ice cream or whipped cream. Refrigerated slices can be gently warmed, though a microwave will soften the pastry.

For longer keeping, wrap a fully cooled baked pie tightly and freeze for roughly 3 months. Thaw before gently reheating in the oven, protecting the crust if it begins to brown too much.

Nutrition

Approximate nutrition per slice, based on 8 slices: 500 calories, 6g protein, 24g fat, and 67g carbohydrates. Approximate nutrition per 100g of baked pie: 265 calories, 3g protein, 13g fat, and 36g carbohydrates. Values exclude optional coarse sugar and will vary with apple yield, egg wash used, and moisture lost during baking.

Classic Homemade Apple Pie

A 9-inch apple pie with a buttery woven lattice crust and a cinnamon-spiced filling made with firm apples.
Course: Dessert
Cuisine: American
Prep: 130 min
Cook: 70 min
Total: 380 min
Servings: 8 Calories: 500 kcal

Equipment

  • Mixing bowl
  • Pastry blender
  • Rolling pin
  • 9-inch pie dish
  • Rimmed baking sheet
  • Wire cooling rack

Ingredients

All-Butter Crust

  • 2 1/2 cups all-purpose flour (300g)
  • 1 tablespoon granulated sugar (12g)
  • 1 teaspoon fine salt
  • 1 cup (2 sticks) cold unsalted butter, cubed (225g)
  • 6 to 8 tablespoons ice water, as needed

Apple Filling

  • About 3 pounds firm baking apples, such as half Granny Smith and half Honeycrisp, yielding roughly 7 cups peeled, cored, 1/4-inch slices
  • 1/2 cup granulated sugar (100g)
  • 1/4 cup packed light brown sugar (50g)
  • 1/4 cup all-purpose flour (30g)
  • 1 1/2 teaspoons ground cinnamon
  • 1/4 teaspoon ground nutmeg
  • 1/4 teaspoon fine salt
  • 1 tablespoon lemon juice

For the Crust Finish

  • 1 large egg, beaten with 1 tablespoon water
  • 1 tablespoon coarse sugar, optional

Instructions

  1. Mix the crust flour, sugar, and salt in a large bowl.
  2. Cut in the cold butter with a pastry blender or your fingertips, leaving some visible pieces.
  3. Add ice water 1 tablespoon at a time, mixing just until the dough holds together when pressed.
  4. Divide the dough into two disks, cover, and refrigerate for at least 1 hour, until firm.
  5. Roll one disk to line a 9-inch pie dish with some overhang. Set it in the dish without stretching, then refrigerate the shell.
  6. Peel, core, and slice the apples about 1/4 inch thick.
  7. Toss the apples with both sugars, flour, cinnamon, nutmeg, salt, and lemon juice until evenly coated.
  8. Mound the filling promptly in the chilled shell, keeping the pastry rim clear.
  9. Roll the second dough disk and cut it into strips about 3/4 to 1 inch wide.
  10. Weave the strips over the filling in an over-and-under lattice. If the pastry becomes sticky, chill the strips briefly.
  11. Trim and seal the lattice ends to the bottom crust, then fold and crimp the edge.
  12. Refrigerate the assembled pie for about 20 minutes while the oven preheats to 425°F (220°C), with a rack in the lower third.
  13. Brush the exposed pastry with egg wash, avoiding the filling. Sprinkle with coarse sugar if desired.
  14. Set the chilled pie dish on an unheated rimmed baking sheet and bake uncovered for 20 minutes.
  15. Reduce the oven to 375°F (190°C), checking the crust color as you lower the heat.
  16. Bake for approximately 35 to 50 minutes more. Check from about 55 minutes total; the pie is done when juices bubble through several openings and a thin knife easily pierces an apple slice.
  17. Shield the rim or loosely tent dark areas with foil if the pastry browns before the filling is done.
  18. Cool on a rack for at least 3 hours before slicing.

Tips

  • Use firm apples and aim for about 7 cups of peeled, cored slices.
  • Cut the apples to a uniform thickness of about 1/4 inch so they cook evenly.
  • Keep the pastry chilled; briefly refrigerate lattice strips if they become sticky.
  • Look for bubbling juices and test an apple slice with a thin knife rather than relying on crust color alone.
  • Place the ceramic pie dish on an unheated baking sheet to catch drips.

Variations

  • Refrigerated Pastry Crust: Replace the homemade dough with refrigerated double-crust pastry and cut the top crust into lattice strips.
  • Cornstarch-Thickened Filling: Replace the 1/4 cup all-purpose flour in the filling with approximately 2 tablespoons cornstarch.

Notes

Cool completely before covering. Store covered at room temperature for 1 to 2 days or refrigerate for about 4 days. Freeze tightly wrapped for roughly 3 months; thaw before reheating.

Nutrition

Calories: 500 kcal | Protein: 6 g | Fat: 24 g | Carbohydrates: 67 g

Quick 10-Minute Ramen Noodles

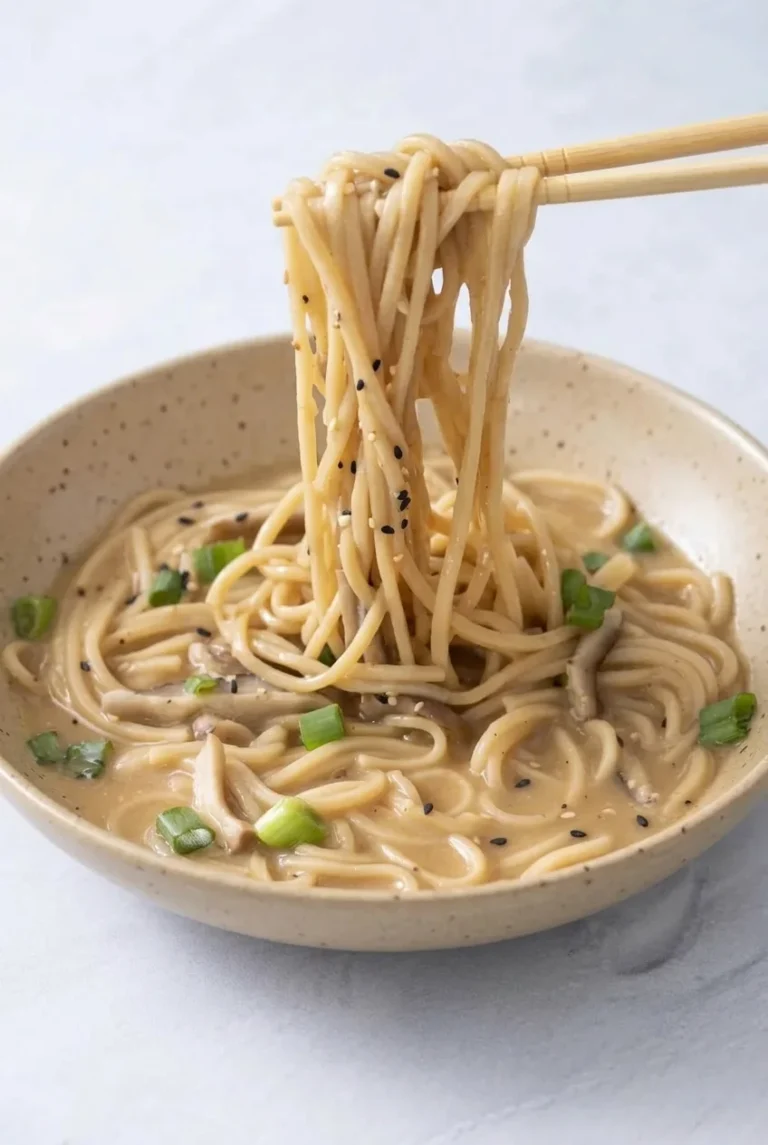
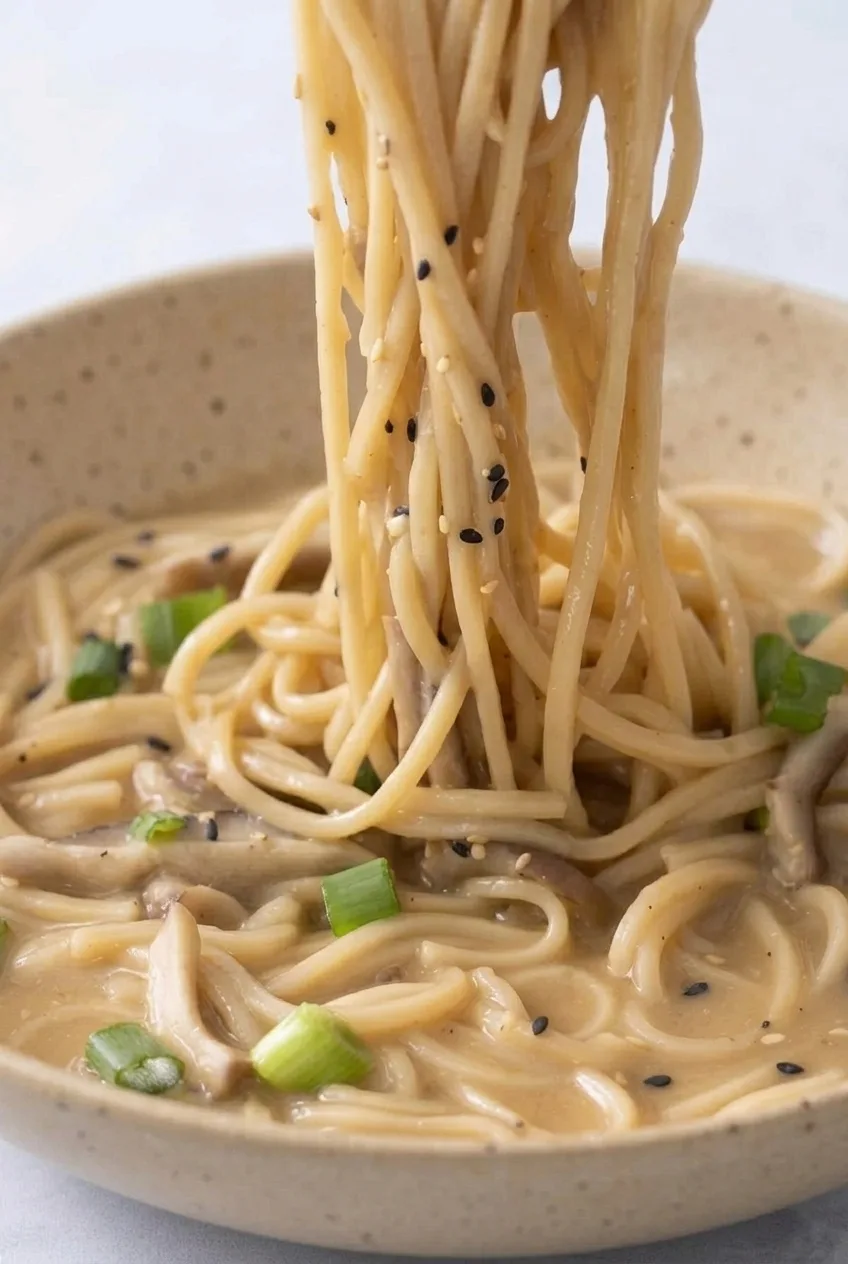
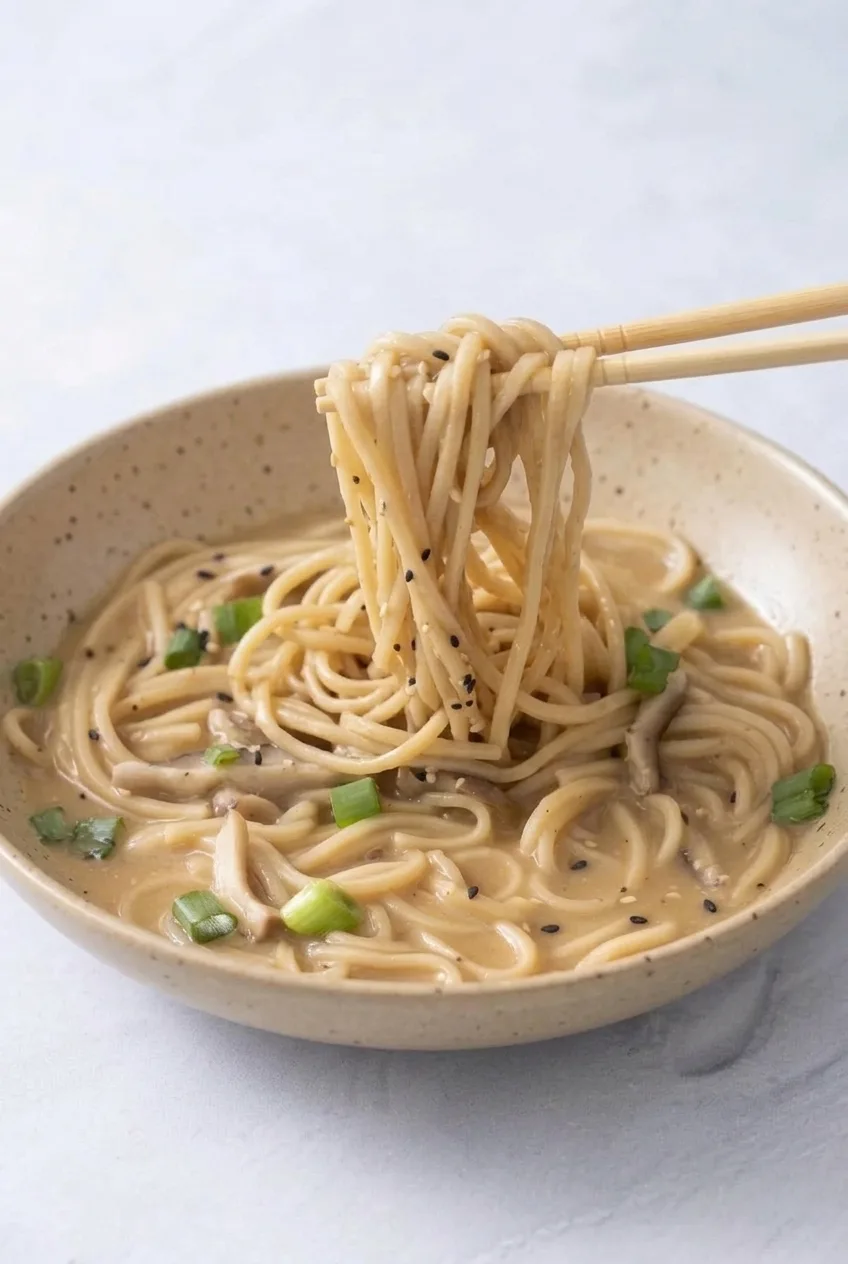
These sesame-garlic ramen noodles are coated in a light tan sauce that clings to the strands and pools a little in the bowl—without becoming soup. Thin mushrooms cook with scallion whites and garlic, then fresh scallion greens and black-and-white sesame seeds finish each serving.

Boil the noodles without their seasoning packets and toss them into the skillet sauce as soon as they’re drained. The meal can take about 10 minutes if you use pre-sliced mushrooms, 2- to 3-minute ramen, and a pot of water that boils promptly.

Ingredients for Sesame-Garlic Ramen

Close view of glossy ramen strands, sliced mushrooms, and sesame seeds in light tan sauce
  • 2 packages quick-cooking ramen noodles, about 3 oz each (170g total); discard the seasoning packets
  • 3 oz thinly sliced mushrooms (85g)
  • 2 scallions, whites and greens separated and chopped
  • 2 garlic cloves, minced
  • 1 teaspoon neutral cooking oil
  • 3 tablespoons tahini, stirred until smooth (45g)
  • 1 tablespoon reduced-sodium soy sauce
  • 2 teaspoons oyster sauce
  • 1 teaspoon brown sugar
  • 2 teaspoons toasted sesame oil
  • 1/2 to 3/4 cup reserved hot noodle water, as needed
  • 1 teaspoon pre-toasted black and white sesame seeds

Straight-strand quick-cooking ramen gives you long, loose strands, but standard instant ramen works too. Leave out the seasoning packets: the soy sauce, oyster sauce, garlic, and sesame provide the seasoning here.

How to Make Quick 10-Minute Ramen Noodles

Wider view of a shallow sesame-garlic ramen bowl with lifted noodles and visible mushrooms
  1. Start the water and sauce: Bring a saucepan of water to a boil over high heat. In a small bowl, whisk the tahini, soy sauce, oyster sauce, and brown sugar until smooth. The mixture will be thick.
  2. Cook the mushrooms: Heat the neutral oil in a 10-inch skillet over medium heat. Add the mushrooms and scallion whites. Stir for about 2 minutes, until the mushrooms soften. Reduce the heat to medium-low, add the garlic, and stir for about 30 seconds, until fragrant but not browned.
  3. Boil the noodles: While the mushrooms cook, add the ramen to the boiling water. Start checking at the earliest package-specified time; quick-cooking noodles usually take 2 to 3 minutes. When the strands have separated and are just tender, reserve 3/4 cup cooking water and drain promptly.
  4. Make the sauce: Whisk 1/2 cup of the hot reserved water into the tahini mixture until smooth. Pour it into the skillet and warm briefly over medium-low heat. The sauce should be smooth and pourable, not watery.
  5. Toss and serve: Add the drained noodles and gently toss until coated. If the sauce is too thick, add reserved water a tablespoon at a time. If it is too thin, keep tossing briefly over medium-low heat. Turn off the heat and stir in the toasted sesame oil. Divide between two shallow bowls, spooning the remaining sauce and mushrooms around the noodles. Top with scallion greens and sesame seeds; serve immediately.

How to Keep the Sauce Silky, Not Soupy

Tahini varies in thickness, so start with 1/2 cup of noodle water rather than using the full amount. Add more only until the sauce clings to lifted strands while leaving a little visible around the noodles. Whisking the hot water into the tahini before it reaches the skillet helps keep the sauce smooth.

What Makes the 10-Minute Timing Work?

Use pre-sliced mushrooms and ramen with a 2- to 3-minute package cook time. Mix the sauce while the water heats, then cook the mushrooms while the noodles boil. If the water takes longer to boil or the noodles need more time, allow extra minutes rather than leaving cooked ramen to soften while the skillet catches up.

Small Changes to the Bowl

For heat, add a pinch of chili flakes or a little chili sauce to an individual serving. Vegetarian oyster sauce can replace regular oyster sauce in the same amount. For another take on these flavors, try sesame garlic ramen noodles; for a different creamy sauce, see peanut sesame ramen noodles.

Storing and Reheating

These noodles are best served right after tossing; they soften as they sit. Refrigerate leftovers promptly in a covered container and use within 2 to 3 days. Reheat gently with a splash of water to loosen the sauce. The noodles will be softer than when freshly made, so freezing is not recommended for texture.

Nutrition

Approximate nutrition per serving, based on 2 light main-dish servings: 620 calories, 15g protein, 33g fat, and 66g carbohydrates. Approximate values per 100g of finished noodles: 180 calories, 4g protein, 9g fat, and 19g carbohydrates. Values vary with the ramen brand and the amount of water retained in the sauce.

Quick 10-Minute Ramen Noodles

Quick-cooking ramen is tossed with mushrooms in a smooth sesame-garlic tahini sauce and finished with scallions and sesame seeds.
Course: Main Course
Cuisine: Global
Prep: 5 min
Cook: 5 min
Total: 10 min
Servings: 2 Calories: 620 kcal

Equipment

  • Saucepan
  • 10-inch skillet
  • Small bowl
  • Whisk
  • Colander

Ingredients

For the noodles and vegetables

  • 2 packages quick-cooking ramen noodles, about 3 oz each (170g total), seasoning packets discarded
  • 3 oz thinly sliced mushrooms (85g)
  • 2 scallions, whites and greens separated and chopped
  • 2 garlic cloves, minced
  • 1 teaspoon neutral cooking oil

For the sauce and topping

  • 3 tablespoons tahini, stirred until smooth (45g)
  • 1 tablespoon reduced-sodium soy sauce
  • 2 teaspoons oyster sauce
  • 1 teaspoon brown sugar
  • 2 teaspoons toasted sesame oil
  • 1/2 to 3/4 cup reserved hot noodle water, as needed
  • 1 teaspoon pre-toasted black and white sesame seeds

Instructions

  1. Bring a saucepan of water to a boil over high heat.
  2. Whisk the tahini, soy sauce, oyster sauce, and brown sugar in a small bowl until smooth and thick.
  3. Heat the neutral oil in a 10-inch skillet over medium heat. Add the mushrooms and scallion whites and cook, stirring, for about 2 minutes, until softened.
  4. Reduce the heat to medium-low. Add the garlic and stir for about 30 seconds, until fragrant but not browned.
  5. While the mushrooms cook, add the ramen to the boiling water. Cook until the strands separate and are just tender, checking at the earliest package-specified time.
  6. Reserve 3/4 cup of noodle water, then drain the noodles promptly.
  7. Whisk 1/2 cup of hot noodle water into the tahini mixture until smooth. Pour the sauce into the skillet and warm briefly over medium-low heat.
  8. Add the drained noodles and toss gently until coated. Add reserved noodle water a tablespoon at a time if the sauce is too thick, or toss briefly over medium-low heat if it is too thin.
  9. Turn off the heat and stir in the toasted sesame oil. Divide the noodles between two shallow bowls, spoon the remaining sauce and mushrooms around them, and top with scallion greens and sesame seeds. Serve immediately.

Tips

  • Use pre-sliced mushrooms and ramen with a 2- to 3-minute cook time to help the meal come together quickly.
  • Start with 1/2 cup of noodle water and add more gradually until the sauce clings to the noodles.
  • Whisk the hot noodle water into the tahini mixture before adding it to the skillet to help keep the sauce smooth.
  • Drain the noodles as soon as they are just tender so they do not soften while waiting for the sauce.

Variations

  • Spicy Sesame-Garlic Ramen: Add a pinch of chili flakes or a little chili sauce to an individual serving.
  • Vegetarian Sesame-Garlic Ramen: Replace the oyster sauce with vegetarian oyster sauce in the same amount.

Notes

Refrigerate leftovers promptly in a covered container and use within 2 to 3 days. Reheat gently with a splash of water; freezing is not recommended because the noodles soften.

Nutrition

Calories: 620 kcal | Protein: 15 g | Fat: 33 g | Carbohydrates: 66 g

Peanut Sesame Ramen Noodles

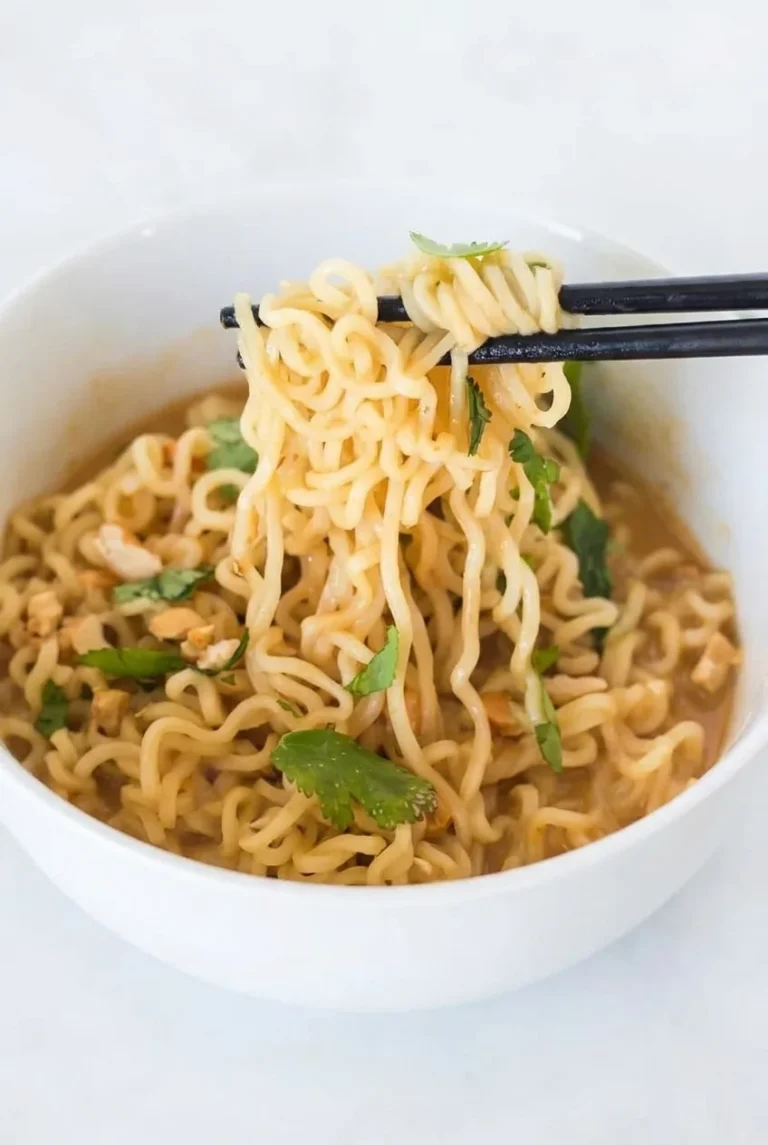
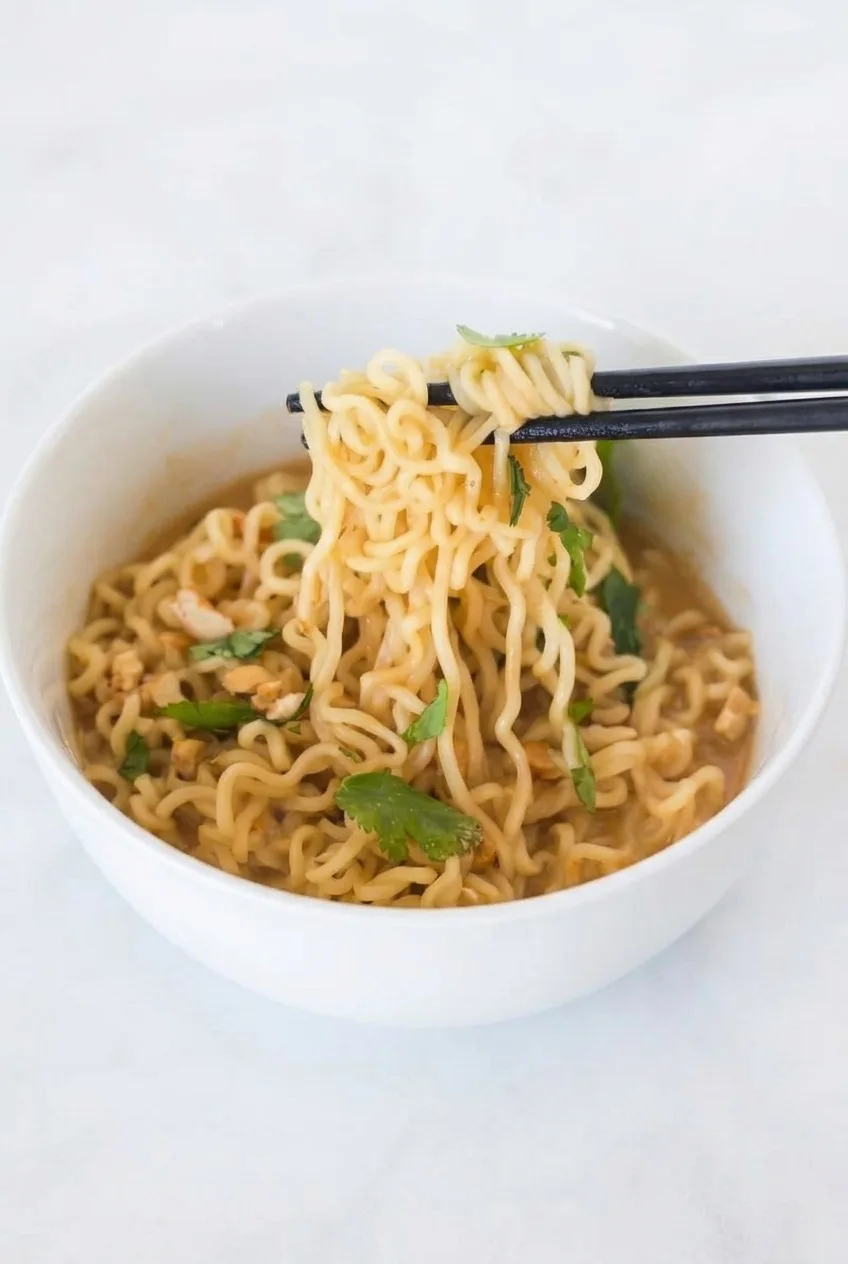
Curly ramen noodles are coated in a creamy peanut-sesame sauce that stays loose enough to pool lightly at the bottom of the bowl. It is a sauced noodle dish, not ramen soup: the sauce should cling to lifted strands without filling the bowl like broth.

Boil the ramen until just tender, then toss it briefly with garlic and sauce in a skillet. Peanut butter and noodles vary in how much water they absorb, so use reserved cooking water to adjust the sauce before finishing with cilantro and chopped peanuts.

Ingredients for Peanut Sesame Ramen Noodles

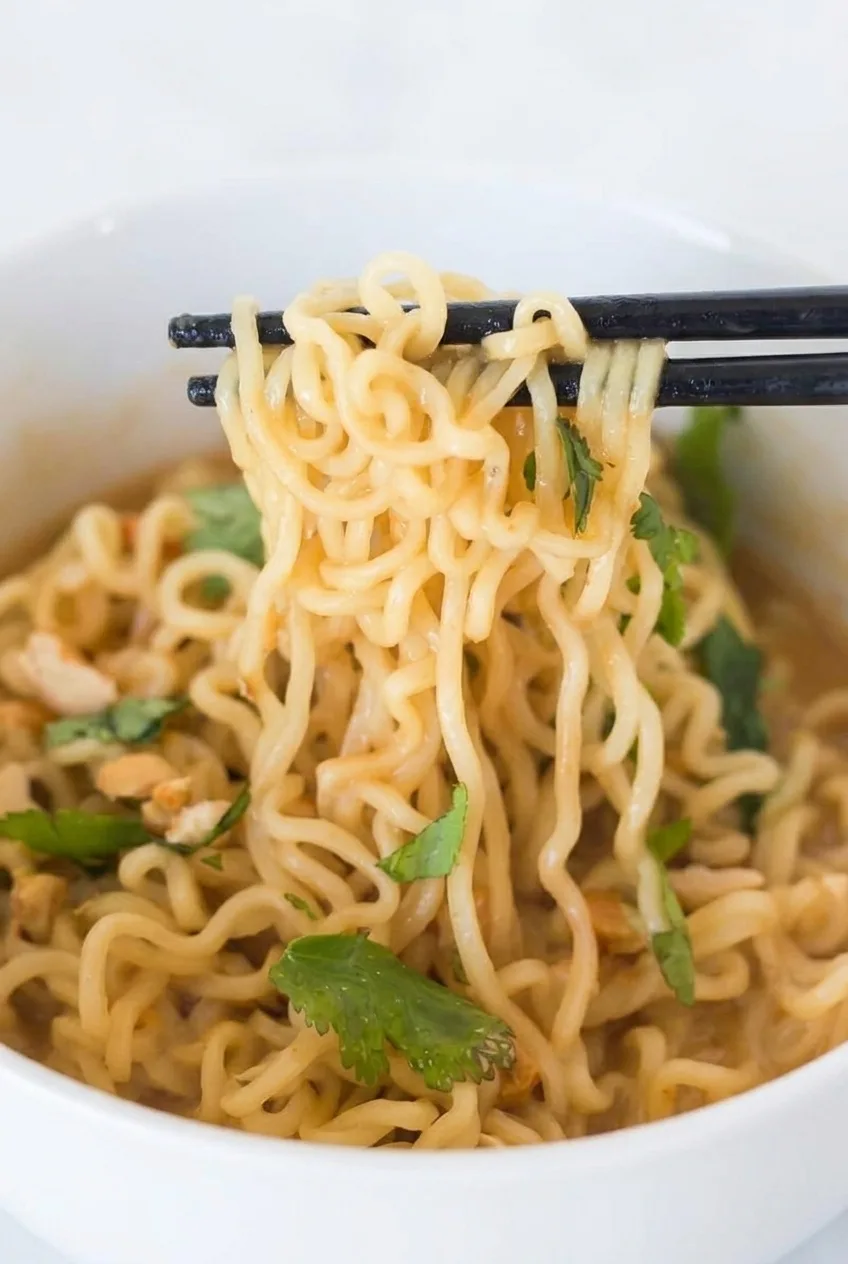
Close view of glossy peanut sesame ramen strands with chopped peanuts and cilantro
  • 2 packages instant ramen noodles, about 3 ounces each (170g); discard the seasoning packets
  • 1/4 cup creamy unsalted peanut butter (65g)
  • 1 tablespoon reduced-sodium soy sauce
  • 2 teaspoons toasted sesame oil
  • 1 tablespoon fresh lime juice
  • 1 teaspoon honey
  • 1/3 to 2/3 cup hot ramen cooking water, as needed
  • 1 teaspoon neutral cooking oil
  • 1 garlic clove, minced
  • 1/4 cup loosely packed fresh cilantro leaves
  • 2 tablespoons chopped peanuts

Discard the ramen seasoning packets; the soy sauce seasons this dish. Unsalted peanut butter and reduced-sodium soy sauce help keep the sauce from becoming too salty.

How to Make Peanut Sesame Ramen Noodles

Full white bowl of peanut sesame ramen with a shallow sauce pool and noodles lifted by chopsticks
  1. Whisk the sauce: Bring a medium saucepan of water to a boil. In a small bowl, whisk the peanut butter, soy sauce, sesame oil, lime juice, honey, and 1/3 cup hot water from the pot until smooth and pourable.
  2. Cook the ramen: Add the noodles to the boiling water and stir to separate them. Follow the package timing, usually about 3 to 4 minutes, but start checking shortly before the stated endpoint. Drain when the noodles are just tender, before they become soft or break apart. Reserve at least 1 cup of cooking water before draining.
  3. Cook the garlic: Warm the neutral oil in a 10- to 12-inch skillet over medium-low heat. Add the garlic and stir for about 30 seconds, until fragrant but not browned.
  4. Toss with the sauce: Add the drained ramen and peanut sauce to the skillet. Toss continuously over medium-low heat for 1 to 2 minutes. If the strands clump or the sauce looks thick, add reserved water 1 to 2 tablespoons at a time. Stop when the noodles separate easily and a little fluid tan sauce remains in the skillet. You may need up to about 2/3 cup water total, including the water whisked into the sauce.
  5. Serve: Divide the noodles and remaining sauce between two deep bowls. Scatter the cilantro and chopped peanuts over each bowl and serve warm immediately.

How to Get the Sauce Consistency Right

The noodles should look glossy, with sauce coating the strands and a shallow pool beneath them. If the sauce turns pasty as you toss, add a little more warm reserved water. Stop before there is enough liquid to make the dish soupy; the noodles will continue absorbing sauce as they sit.

Peanut Sesame Ramen Variations

For heat: Add sriracha or chili crisp to individual bowls. For a different spicy ramen dish, see Chili Oil Ramen Noodles with a Sunny-Side-Up Egg.

For more vegetables: Briefly cook thinly sliced bell pepper or snap peas before adding the noodles. For a vegetable-forward alternative, try Soy Garlic Ramen Noodles with Crisp Vegetables.

How to Store and Reheat

Refrigerate leftovers in an airtight container for up to 3 days. The noodles will absorb sauce and soften, so they have the best texture when freshly made. Reheat gently in a skillet with a splash of water, stirring until the sauce loosens. Alternatively, microwave in short intervals, stirring and adding water as needed.

For advance prep, mix the sauce separately and cook the ramen shortly before serving. Freezing is not recommended; thawed noodles can soften and the sauce may separate.

Nutrition

Approximate nutrition per bowl, based on 2 bowls: 695 calories, 19g protein, 41g fat, and 65g carbohydrates. Approximate nutrition per 100g of finished noodles: 200 calories, 5g protein, 12g fat, and 18g carbohydrates. Values vary with the ramen and peanut butter used; the per-100g estimate also depends on how much water is added.

Peanut Sesame Ramen Noodles

Curly ramen noodles are tossed with a creamy peanut-sesame sauce, then topped with cilantro and chopped peanuts.
Course: Main Course
Cuisine: Global
Prep: 5 min
Cook: 8 min
Total: 13 min
Servings: 2 Calories: 695 kcal

Equipment

  • Medium saucepan
  • Small bowl
  • Whisk
  • 10- to 12-inch skillet
  • Colander

Ingredients

Noodles and Sauce

  • 2 packages instant ramen noodles, about 3 ounces each (170g); discard the seasoning packets
  • 1/4 cup creamy unsalted peanut butter (65g)
  • 1 tablespoon reduced-sodium soy sauce
  • 2 teaspoons toasted sesame oil
  • 1 tablespoon fresh lime juice
  • 1 teaspoon honey
  • 1/3 to 2/3 cup hot ramen cooking water, as needed

For Cooking and Serving

  • 1 teaspoon neutral cooking oil
  • 1 garlic clove, minced
  • 1/4 cup loosely packed fresh cilantro leaves
  • 2 tablespoons chopped peanuts

Instructions

  1. Bring a medium saucepan of water to a boil.
  2. In a small bowl, whisk the peanut butter, soy sauce, sesame oil, lime juice, honey, and 1/3 cup hot water from the pot until smooth and pourable.
  3. Add the ramen noodles to the boiling water and stir to separate. Cook according to the package timing, usually 3 to 4 minutes, checking shortly before the stated endpoint.
  4. Drain the noodles when just tender, before they become soft or break apart. Reserve at least 1 cup of cooking water.
  5. Warm the neutral oil in a 10- to 12-inch skillet over medium-low heat. Add the garlic and stir for about 30 seconds, until fragrant but not browned.
  6. Add the drained noodles and peanut sauce to the skillet. Toss continuously over medium-low heat for 1 to 2 minutes.
  7. If the noodles clump or the sauce looks thick, add reserved cooking water 1 to 2 tablespoons at a time. Stop when the strands separate easily and a little fluid sauce remains in the skillet; use up to about 2/3 cup water total, including the water mixed into the sauce.
  8. Divide the noodles and remaining sauce between two deep bowls. Top with cilantro and chopped peanuts, and serve warm immediately.

Tips

  • Discard the ramen seasoning packets; the soy sauce seasons the dish.
  • Use unsalted peanut butter and reduced-sodium soy sauce to help control saltiness.
  • Check the noodles shortly before the package’s suggested cooking time ends and drain them while just tender.
  • Add reserved cooking water gradually to loosen the sauce without making the noodles soupy.
  • Serve promptly; the noodles continue to absorb sauce as they sit.

Variations

  • Spicy Peanut Sesame Ramen: Add sriracha or chili crisp to individual bowls.
  • Vegetable Peanut Sesame Ramen: Briefly cook thinly sliced bell pepper or snap peas before adding the noodles.

Notes

Refrigerate leftovers in an airtight container for up to 3 days. Reheat gently in a skillet or microwave with a splash of water, stirring until the sauce loosens. Freezing is not recommended.

Nutrition

Calories: 695 kcal | Protein: 19 g | Fat: 41 g | Carbohydrates: 65 g

Vegetarian Miso Ramen

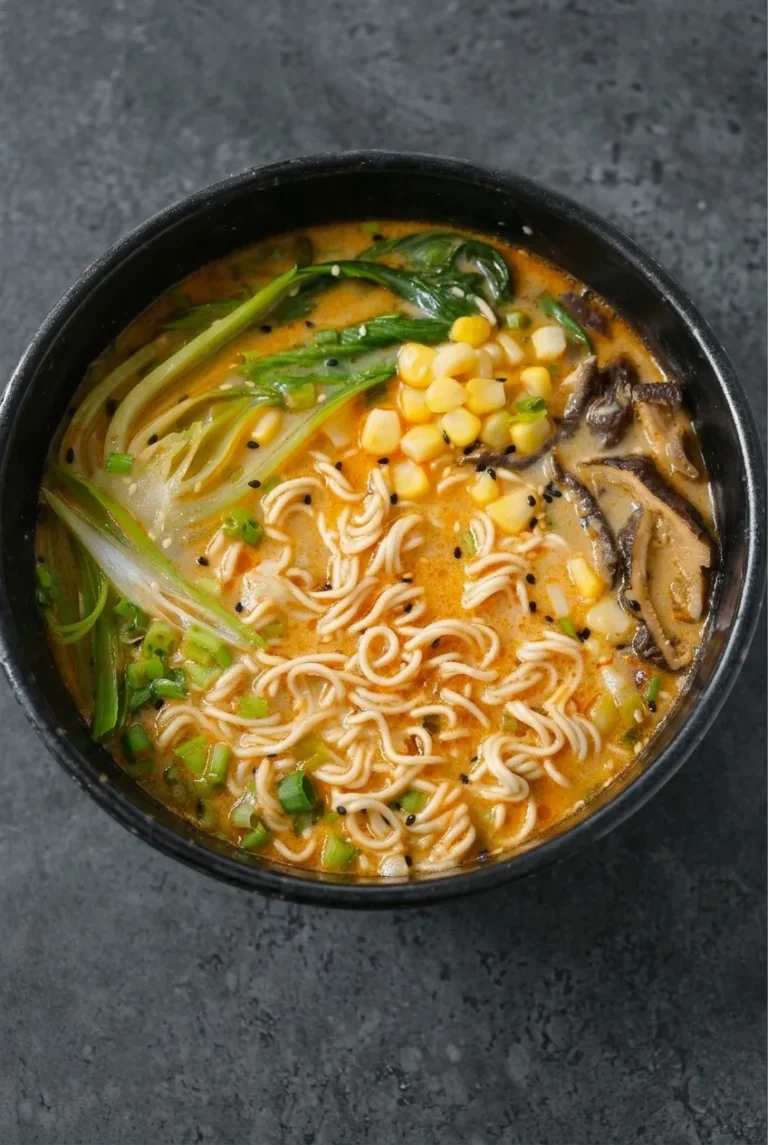
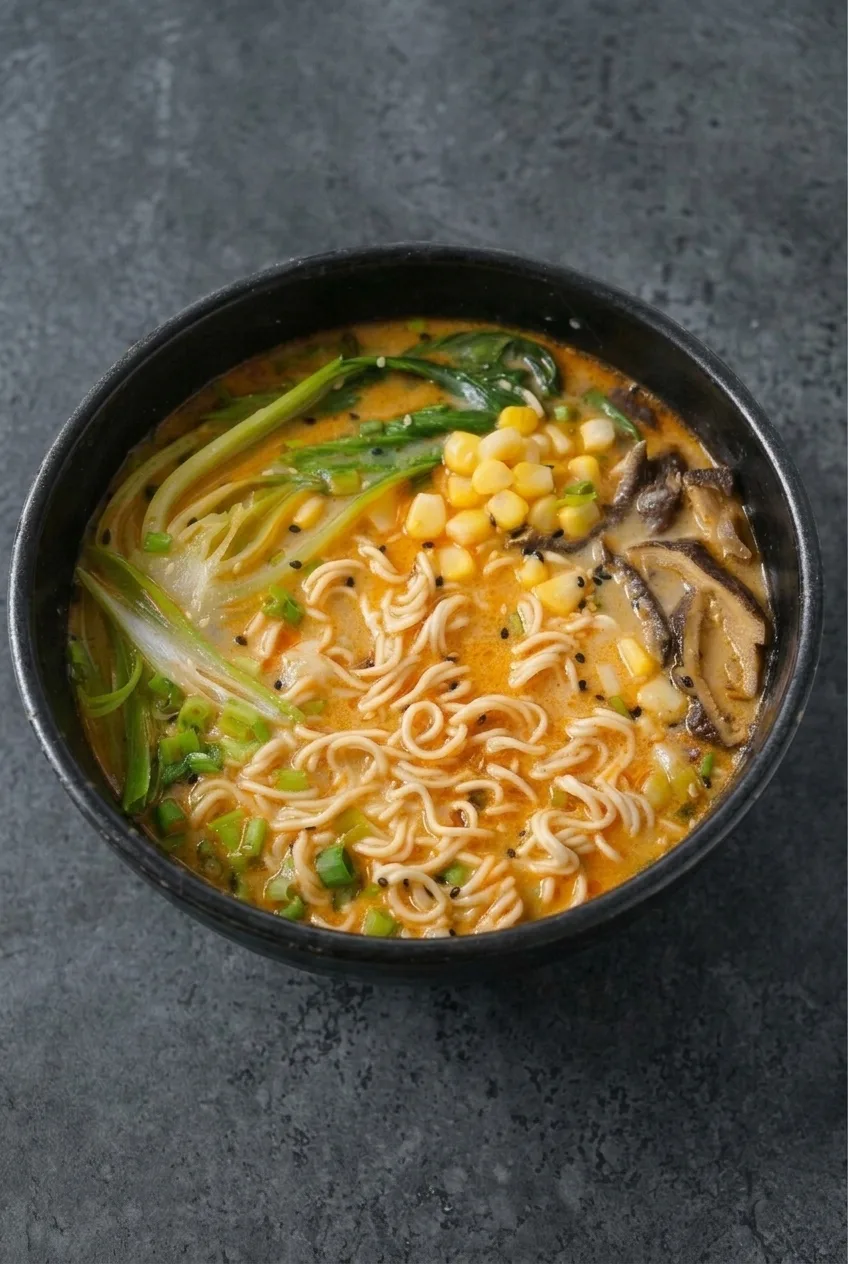
For a creamy take on vegetarian miso ramen, vegetable broth and unsweetened soy milk make a silky base for white miso, garlic, ginger, and shiitake mushrooms. Curly noodles sit partly above the broth, with bok choy, corn, and mushrooms arranged in distinct groups. Keep the broth below a hard boil after adding the soy milk, stir in the miso off heat, and cook the noodles separately so they stay springy without diluting the soup.

Prep: 10 minutes | Cook: 20 minutes | Total: 30 minutes | Yield: 2 generous bowls

Ingredients for Vegetarian Miso Ramen

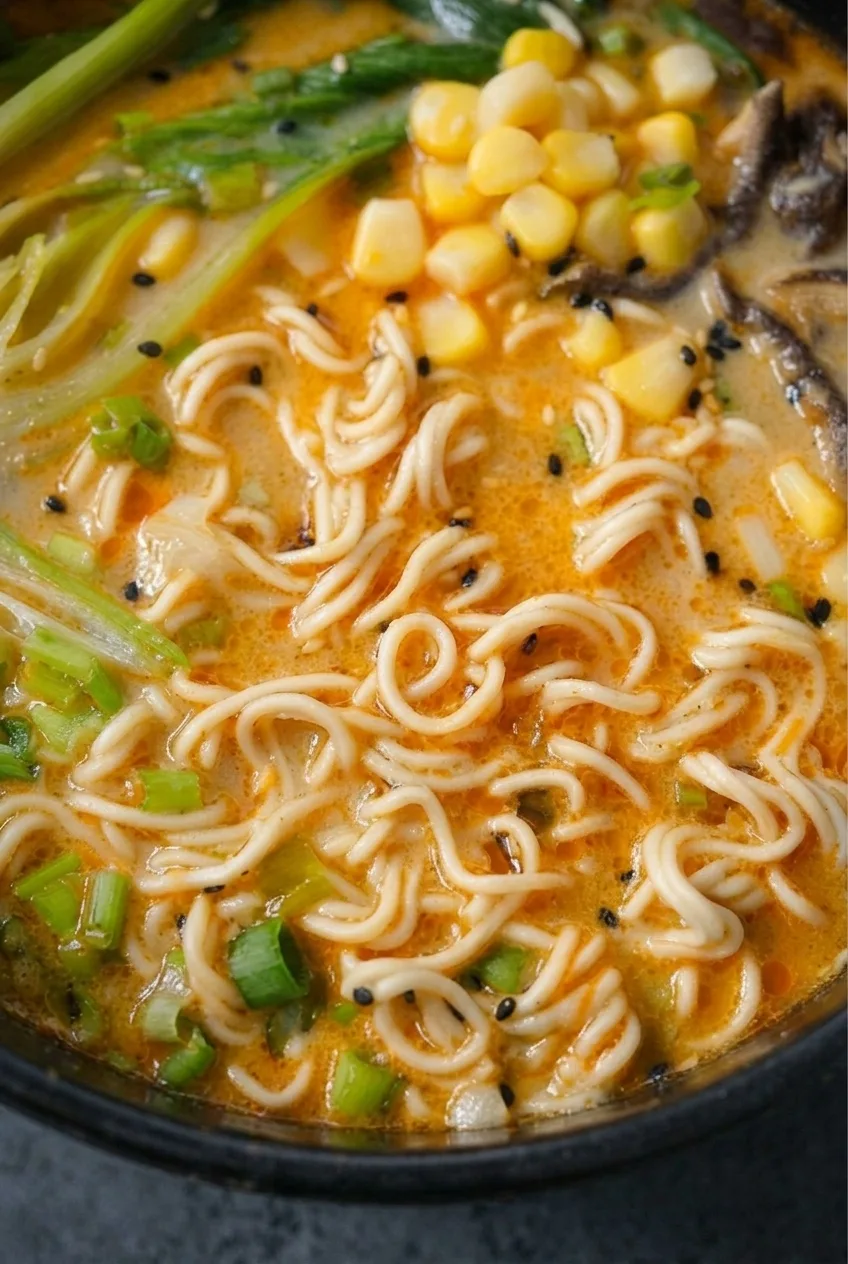
Close view of curly ramen noodles in creamy miso broth with chili-oil droplets and sesame seeds
  • 2 portions plain curly ramen noodles, about 6 oz total (170g); discard any seasoning packets
  • 1 tablespoon neutral cooking oil
  • 3 scallions, white and green parts separated and chopped
  • 3 garlic cloves, minced
  • 1 tablespoon grated fresh ginger
  • 4 oz shiitake mushrooms, sliced (about 115g)
  • 3 cups low-sodium vegetable broth
  • 1 cup unsweetened, unflavored soy milk
  • 1/2 cup corn kernels, thawed if frozen (80g)
  • 1 teaspoon soy sauce, plus more only after tasting
  • 2 small heads baby bok choy, halved lengthwise
  • 3 tablespoons white miso paste (about 55g)
  • 2 teaspoons chili oil, divided
  • 1 teaspoon mixed black and white sesame seeds

How to Make Vegetarian Miso Ramen

Full black bowl of vegetarian miso ramen with bok choy, corn, and mushrooms on a gray tabletop
  1. Prepare the toppings: Rinse between the bok choy stalks to remove any grit. Set the scallion greens aside for serving. Bring a separate pot of water to a boil for the bok choy and noodles.
  2. Cook the aromatics and mushrooms: Heat the neutral oil in an uncovered 3- to 4-quart saucepan over medium heat. Add the scallion whites, garlic, and ginger; stir briefly until fragrant without letting the garlic brown. Add the shiitakes and cook, stirring occasionally, until softened and lightly browned, about 4 minutes.
  3. Warm the broth: Add the vegetable broth and bring to a gentle simmer over medium-low heat. Stir in the soy milk, corn, and 1 teaspoon soy sauce. Reduce the heat to low and warm for about 5 minutes, until steaming and the corn is heated through. Do not let the broth boil hard.
  4. Cook the bok choy and noodles: Blanch the bok choy in the boiling water for 1 to 2 minutes, checking after 1 minute. The stalks should be just tender and the leaves bright green. Lift it out with tongs or a slotted spoon. Cook the noodles in the same water according to the package directions, loosening them as they cook. Start checking at the earliest package time; drain thoroughly when the noodles are separated and springy.
  5. Add the miso: Turn off the heat under the broth. In a small bowl, whisk the miso with a ladleful of hot broth until smooth, then stir it into the saucepan. Taste before adding more soy sauce, since broth and miso vary in saltiness.
  6. Assemble: Divide the noodles between two deep bowls. Ladle in the broth, leaving some noodle curls exposed. Place the bok choy along one side, lift the mushrooms onto the other, and spoon the corn into a small mound. Finish each bowl with scallion greens, sesame seeds, and about 1 teaspoon chili oil in small droplets. Serve immediately.

How to Keep the Miso Broth Smooth

Once the soy milk goes in, the broth should steam with only occasional small bubbles. A rapid boil can make it look separated or grainy. Whisking the miso with a little hot broth off heat helps it disperse without clumps. Taste the finished broth before adding more soy sauce.

Why Cook the Noodles Separately?

Cooking the noodles in water keeps them from absorbing the creamy broth as they cook. Drain them well so clinging noodle water does not thin the soup, then assemble the bowls right away. Fresh, dried, and instant noodles have different cooking times, so follow the package and use their springy texture as the final cue.

Ingredient Swaps and Protein Options

Cremini mushrooms can replace shiitakes, though the flavor will differ. Unsweetened, unflavored oat milk can replace soy milk, with a change in the broth’s body and flavor. Chili oils vary in heat; use less at first if yours is especially spicy and offer more at the table.

For a more substantial bowl, add about 7 oz separately prepared firm tofu at serving. Two soft-boiled eggs are another vegetarian option, but they are not vegan. For an egg-topped version, see easy vegetable ramen with miso broth and jammy eggs. The main recipe contains no egg; check the labels on the noodles, broth, miso, and chili oil before calling the complete dish vegan.

For a different creamy noodle bowl, try Thai coconut curry ramen with tofu and vegetables.

Make-Ahead and Leftovers

Refrigerate leftover broth in an airtight container for up to 3 days, keeping any noodles separate. Reheat the broth gently on the stovetop until steaming, without a rapid boil. For the springiest texture, cook fresh noodles and blanch the bok choy near serving time. Fully assembled bowls lose noodle texture as they sit, and freezing the complete creamy noodle soup is not recommended.

Nutrition

Approximate per serving (1 generous bowl): 650 calories, 24g protein, 23g fat, and 88g carbohydrates. Approximate per 100g: 80 calories, 3g protein, 3g fat, and 11g carbohydrates. Estimates are based on two servings and will vary with the noodles, broth, soy milk, and chili oil used.

Vegetarian Miso Ramen

Curly ramen noodles are served with bok choy, corn, and shiitake mushrooms in a creamy miso and soy milk broth.
Course: Soup
Cuisine: Japanese
Prep: 10 min
Cook: 20 min
Total: 30 min
Servings: 2 Calories: 650 kcal

Equipment

  • 3- to 4-quart saucepan
  • Pot for blanching and noodles
  • Small bowl
  • Whisk
  • Tongs or slotted spoon

Ingredients

For the ramen

  • 2 portions plain curly ramen noodles, about 6 oz total (170 g); discard seasoning packets
  • 1 tablespoon neutral cooking oil
  • 3 scallions, white and green parts separated and chopped
  • 3 garlic cloves, minced
  • 1 tablespoon grated fresh ginger
  • 4 oz shiitake mushrooms, sliced (about 115 g)
  • 3 cups low-sodium vegetable broth
  • 1 cup unsweetened, unflavored soy milk
  • 1/2 cup corn kernels, thawed if frozen (80 g)
  • 1 teaspoon soy sauce, plus more only after tasting
  • 2 small heads baby bok choy, halved lengthwise
  • 3 tablespoons white miso paste (about 55 g)
  • 2 teaspoons chili oil, divided
  • 1 teaspoon mixed black and white sesame seeds

Instructions

  1. Rinse between the bok choy stalks to remove grit. Set the scallion greens aside for serving.
  2. Bring a pot of water to a boil for the bok choy and noodles.
  3. Heat the neutral oil in an uncovered 3- to 4-quart saucepan over medium heat. Add the scallion whites, garlic, and ginger, and stir briefly until fragrant without browning the garlic.
  4. Add the shiitake mushrooms and cook, stirring occasionally, until softened and lightly browned, about 4 minutes.
  5. Add the vegetable broth and bring to a gentle simmer over medium-low heat.
  6. Stir in the soy milk, corn, and 1 teaspoon soy sauce. Reduce the heat to low and warm for about 5 minutes, until steaming and the corn is heated through. Do not let the broth boil hard.
  7. Blanch the bok choy in the boiling water for 1 to 2 minutes, checking after 1 minute. Remove it when the stalks are just tender and the leaves are bright green.
  8. Cook the noodles in the same water according to the package directions, loosening them as they cook. Start checking at the earliest package time, then drain thoroughly when they are separated and springy.
  9. Turn off the heat under the broth. In a small bowl, whisk the miso with a ladleful of hot broth until smooth, then stir it into the saucepan.
  10. Taste the broth before adding more soy sauce.
  11. Divide the noodles between two deep bowls. Ladle in the broth, leaving some noodle curls exposed.
  12. Arrange the bok choy, mushrooms, and corn in separate areas of each bowl. Finish with scallion greens, sesame seeds, and about 1 teaspoon chili oil per bowl. Serve immediately.

Tips

  • Keep the broth below a hard boil after adding the soy milk to help prevent separation.
  • Whisk the miso with hot broth off the heat before adding it to the saucepan to prevent clumps.
  • Cook the noodles separately and drain them well so they do not absorb or dilute the broth.
  • Follow the noodle package timing and check for a springy texture.
  • Taste the broth before adding extra soy sauce, since miso and broth vary in saltiness.

Variations

  • Cremini Mushroom Ramen: Replace the shiitake mushrooms with cremini mushrooms; the flavor will be different.
  • Oat Milk Miso Ramen: Replace the soy milk with unsweetened, unflavored oat milk.
  • Tofu Miso Ramen: Add about 7 oz separately prepared firm tofu when serving.
  • Egg-Topped Miso Ramen: Top each bowl with a soft-boiled egg; this variation is vegetarian but not vegan.

Notes

Refrigerate leftover broth in an airtight container for up to 3 days and store noodles separately. Reheat the broth gently until steaming without bringing it to a rapid boil. Fully assembled bowls lose noodle texture as they sit; freezing the complete soup is not recommended. Check ingredient labels before calling the dish vegan.

Nutrition

Calories: 650 kcal | Protein: 24 g | Fat: 23 g | Carbohydrates: 88 g

Ginger Garlic Chicken Ramen

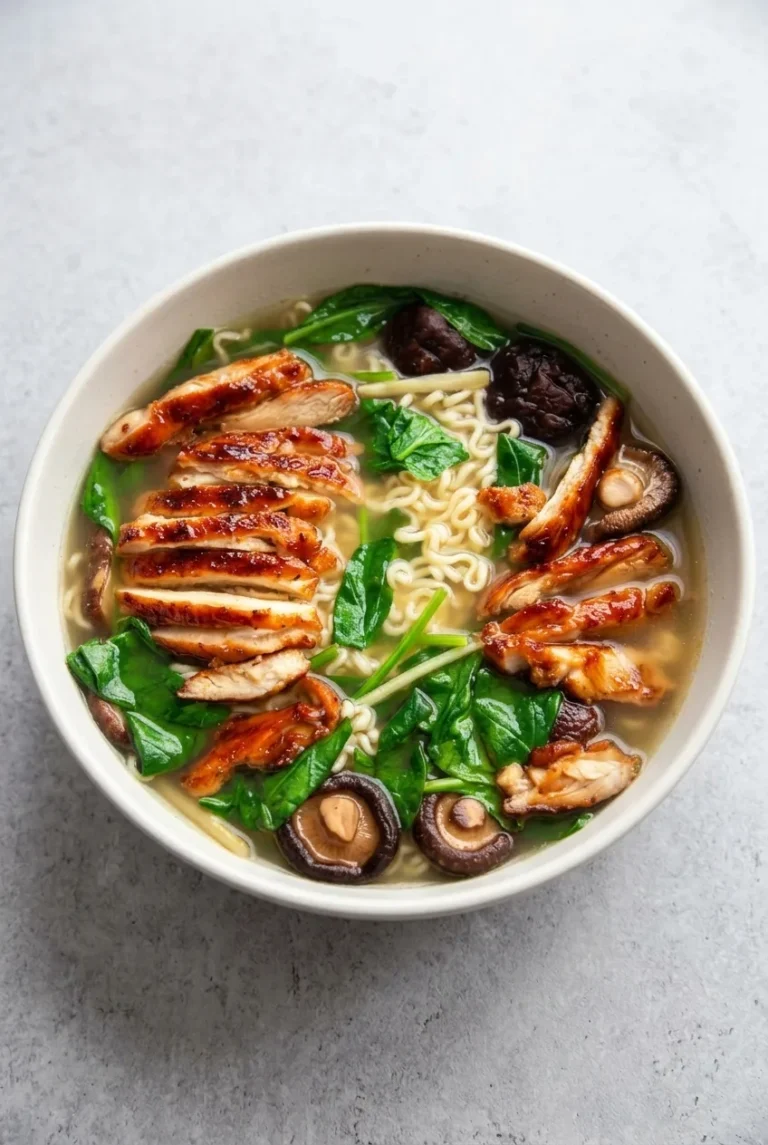
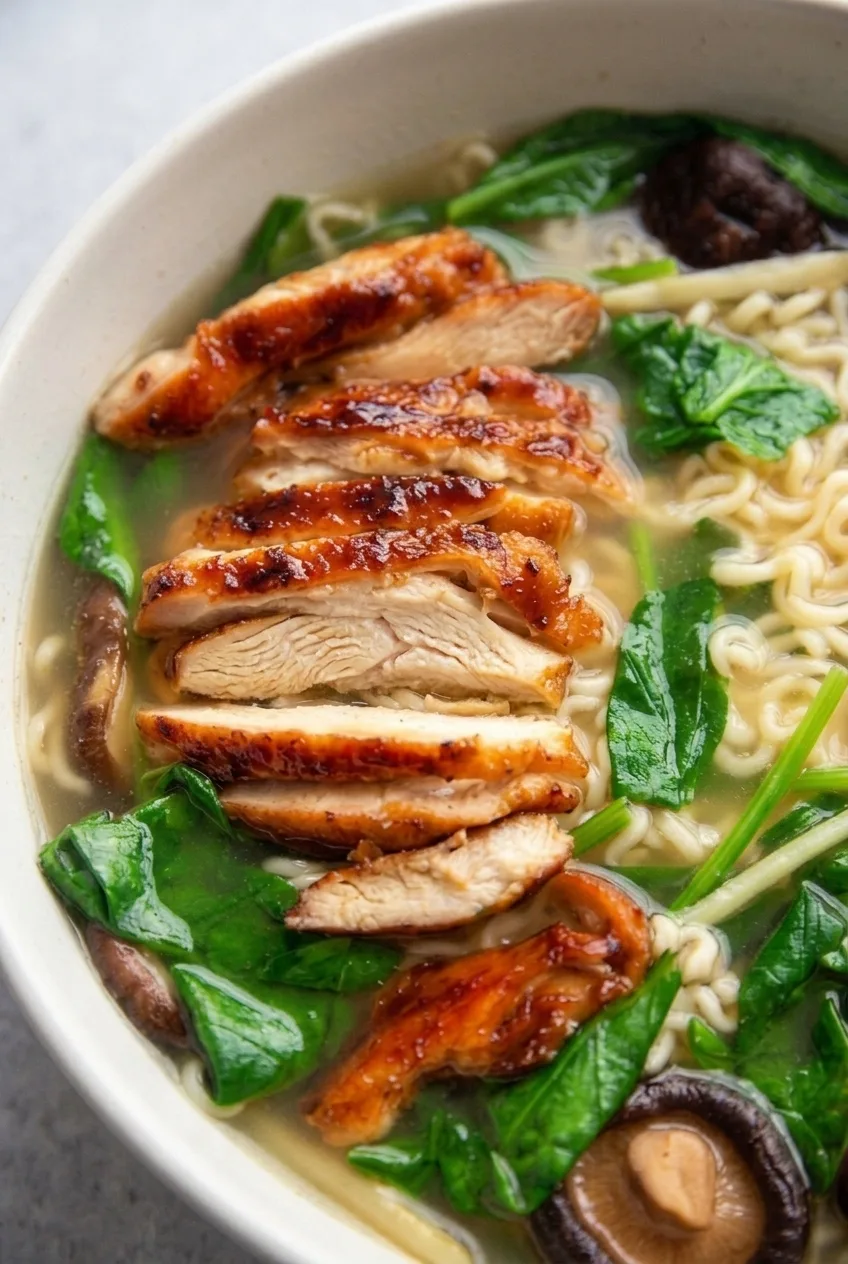
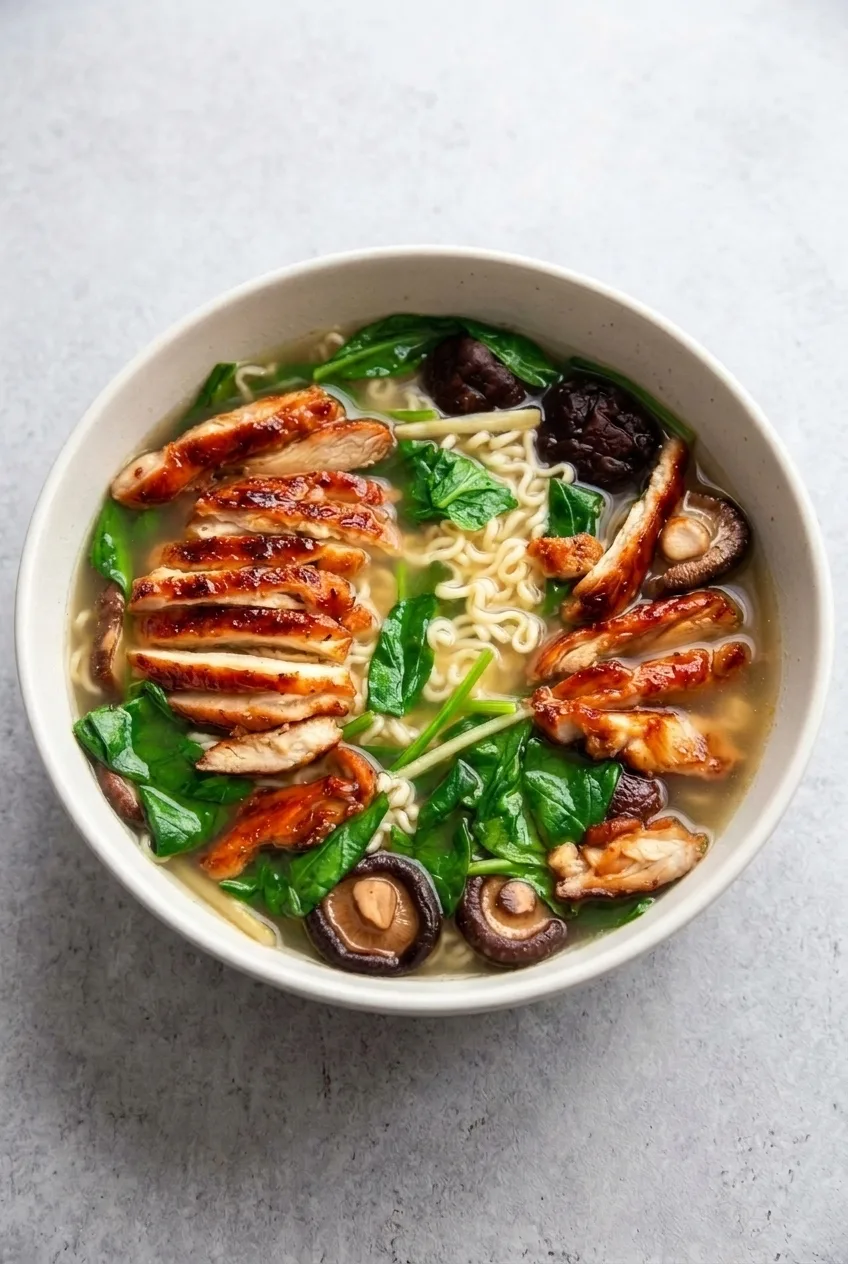
This brothy ramen combines ginger-garlic chicken broth, curly noodles, shiitake mushrooms, and just-wilted spinach. Slices of browned chicken sit on top with a light soy glaze that gives them shine without sweetening the soup.

The chicken sears while the broth infuses. Cooking the noodles separately takes another pot, but lets you add them to the bowls at the last minute, while they are still springy.

Ingredients for Ginger Garlic Chicken Ramen

Close view of browned chicken slices, curly noodles, shiitake caps, and spinach in light broth

Serves: 4 bowls | Prep: 15 minutes | Cook: 25–30 minutes | Total: 40–45 minutes

  • 1¼ pounds boneless skinless chicken thighs (about 570g)
  • 3 packages plain instant ramen noodles, about 9 ounces total (255g); discard the seasoning packets
  • 6 cups reduced-sodium chicken broth
  • 2 tablespoons thinly sliced fresh ginger (about 12g)
  • 4 garlic cloves, lightly smashed
  • 3 tablespoons reduced-sodium soy sauce, divided
  • 6 ounces small shiitake mushrooms, stems removed (about 170g)
  • 4 ounces baby spinach, about 4 loosely packed cups (about 115g)
  • 1 tablespoon neutral cooking oil
  • 2 teaspoons packed brown sugar
  • 1 tablespoon water for the glaze, plus water for boiling the noodles

Optional for serving: Thinly sliced green onions, 1–2 tablespoons per bowl, or chili crisp, sriracha, or red pepper flakes to taste.

Tamari can replace the soy sauce; check its sodium level before adding any extra seasoning. Similarly sized cremini mushrooms can replace the shiitakes, though they will look different in the finished bowls.

How to Make Ginger Garlic Chicken Ramen

Complete bowl of ginger garlic chicken ramen on a pale stone surface
  1. Prepare the ingredients: Pat the chicken dry. Leave small shiitake caps whole and halve any large ones. Set aside 2 tablespoons of the soy sauce for the broth and 1 tablespoon for the glaze.
  2. Infuse the broth: Bring the chicken broth, ginger, garlic, and 2 tablespoons soy sauce to a gentle simmer in a medium soup pot. Partially cover, reduce the heat to medium-low, and simmer for 12–15 minutes. Remove the ginger and garlic with a strainer or slotted spoon.
  3. Sear the chicken while the broth infuses: Heat the oil in a 10- to 12-inch skillet over medium-high heat. Add the thighs in one layer; cook in batches if necessary so they brown rather than steam. Turn once and cook until browned and the thickest part of each thigh reaches 165°F (75°C), about 10–14 minutes total depending on thickness. Begin checking roughly 5 minutes after turning. Lower the heat if the outside browns before the center is cooked.
  4. Glaze and rest: Return any chicken cooked in batches to the skillet and reduce the heat to medium-low. Add the remaining 1 tablespoon soy sauce, brown sugar, and 1 tablespoon water. Turn the chicken for 1–2 minutes, just until lightly coated and glossy. Transfer to a board and rest for about 5 minutes before slicing.
  5. Finish the broth: Add the shiitake caps to the broth and simmer uncovered for 5–7 minutes, until tender. Stir in the spinach during the last minute, just until wilted. Taste before adding any more seasoning: the broth and soy sauce already contribute salt.
  6. Cook the noodles and serve: While the mushrooms simmer, boil the ramen in a separate pot of plain water for about 1 minute less than the package directs. Drain and divide among four deep bowls. Add the hot broth, mushrooms, and spinach, leaving some broth visible. Arrange overlapping chicken slices on top and serve immediately with optional garnishes at the table.

How to Keep Ramen Noodles from Getting Mushy

Ramen continues to soften once hot broth is poured over it. Stopping about a minute short of the package time leaves room for the noodles to finish in the bowl. If preparing bowls for later, keep the noodles out of the broth until serving.

If fewer pots matter more than controlling noodle texture, one-pot chicken ramen with broccoli uses a different method.

Getting Glossy Chicken Without Sweetening the Broth

The soy-and-brown-sugar glaze goes into the skillet after the chicken is cooked, not into the soup pot. Turn the chicken over reduced heat only until the glaze clings lightly; cooking it longer can leave the sugar scorched or sticky and dry. A short rest makes the thighs easier to slice for serving.

Make-Ahead and Leftover Bowls

The infused broth and cooked chicken can be made ahead. Refrigerate the chicken, broth with vegetables, and any cooked noodles separately in airtight containers within 2 hours; use refrigerated leftovers within 3–4 days.

Reheat the broth to a simmer and heat the chicken thoroughly before assembling bowls. Freshly boiled noodles give leftover bowls the best texture. Stored noodles can be reheated briefly, but they will be softer. Do not freeze assembled bowls; the noodles tend to soften. The broth and cooked chicken can be frozen separately if desired.

Nutrition

Approximate per bowl, based on 4 bowls: 570 calories, 38g protein, 24g fat, and 46g carbohydrates. Approximate per 100g of prepared ramen: 80 calories, 5g protein, 3g fat, and 6g carbohydrates. Values exclude optional toppings and vary with noodle and broth brands, cooking loss, and the amount of broth served in each bowl.

Ginger Garlic Chicken Ramen

Chicken thighs with a light soy glaze are served over ramen noodles in ginger-garlic broth with shiitake mushrooms and spinach.
Course: Soup
Cuisine: Global
Prep: 15 min
Cook: 30 min
Total: 45 min
Servings: 4 Calories: 570 kcal

Equipment

  • Medium soup pot
  • 10- to 12-inch skillet
  • Separate pot for noodles
  • Strainer or slotted spoon
  • Cutting board

Ingredients

For the Ramen

  • 1¼ pounds boneless skinless chicken thighs (about 570 g)
  • 3 packages plain instant ramen noodles, about 9 ounces total (255 g); discard seasoning packets
  • 6 cups reduced-sodium chicken broth
  • 2 tablespoons thinly sliced fresh ginger (about 12 g)
  • 4 garlic cloves, lightly smashed
  • 3 tablespoons reduced-sodium soy sauce, divided
  • 6 ounces small shiitake mushrooms, stems removed (about 170 g)
  • 4 ounces baby spinach, about 4 loosely packed cups (about 115 g)
  • 1 tablespoon neutral cooking oil
  • Water for boiling the noodles

For the Chicken Glaze

  • 2 teaspoons packed brown sugar
  • 1 tablespoon water

Optional for Serving

  • Thinly sliced green onions, 1–2 tablespoons per bowl
  • Chili crisp, sriracha, or red pepper flakes, to taste

Instructions

  1. Pat the chicken dry. Leave small shiitake caps whole and halve any large ones.
  2. Set aside 2 tablespoons soy sauce for the broth and 1 tablespoon for the glaze.
  3. Bring the chicken broth, ginger, garlic, and 2 tablespoons soy sauce to a gentle simmer in a medium soup pot. Partially cover and simmer over medium-low heat for 12–15 minutes.
  4. Remove the ginger and garlic with a strainer or slotted spoon.
  5. While the broth simmers, heat the oil in a 10- to 12-inch skillet over medium-high heat. Add the chicken in one layer, working in batches if needed.
  6. Turn the chicken once and cook until browned and the thickest part reaches 165°F (75°C), about 10–14 minutes total. Begin checking about 5 minutes after turning, and lower the heat if the outside browns too quickly.
  7. Return any chicken cooked in batches to the skillet and reduce the heat to medium-low. Add the remaining 1 tablespoon soy sauce, brown sugar, and 1 tablespoon water. Turn the chicken for 1–2 minutes, until lightly coated and glossy.
  8. Transfer the chicken to a cutting board and rest for about 5 minutes before slicing.
  9. Add the shiitake caps to the broth and simmer uncovered for 5–7 minutes, until tender. Stir in the spinach during the last minute, just until wilted. Taste before adding more seasoning.
  10. While the mushrooms simmer, boil the ramen in a separate pot of plain water for about 1 minute less than the package directs. Drain and divide among four deep bowls.
  11. Add the hot broth, mushrooms, and spinach to the bowls. Arrange sliced chicken on top and serve immediately with optional garnishes.

Tips

  • Cook the noodles about 1 minute less than the package directs so they finish softening in the hot broth.
  • Keep noodles separate from the broth if preparing bowls ahead.
  • Cook chicken in batches if needed so it browns instead of steaming.
  • Glaze the cooked chicken over reduced heat only until the glaze lightly clings.
  • Taste the broth before adding extra seasoning because the broth and soy sauce already provide salt.

Variations

  • Tamari Ramen: Replace the soy sauce with tamari and check its sodium level before adding extra seasoning.
  • Cremini Mushroom Ramen: Replace the shiitake mushrooms with similarly sized cremini mushrooms.

Notes

Refrigerate the chicken, broth with vegetables, and cooked noodles separately within 2 hours; use within 3–4 days. Reheat the broth to a simmer and heat the chicken thoroughly. The broth and chicken can be frozen separately; do not freeze assembled bowls.

Nutrition

Calories: 570 kcal | Protein: 38 g | Fat: 24 g | Carbohydrates: 46 g

Sweet and Spicy Ramen Noodles

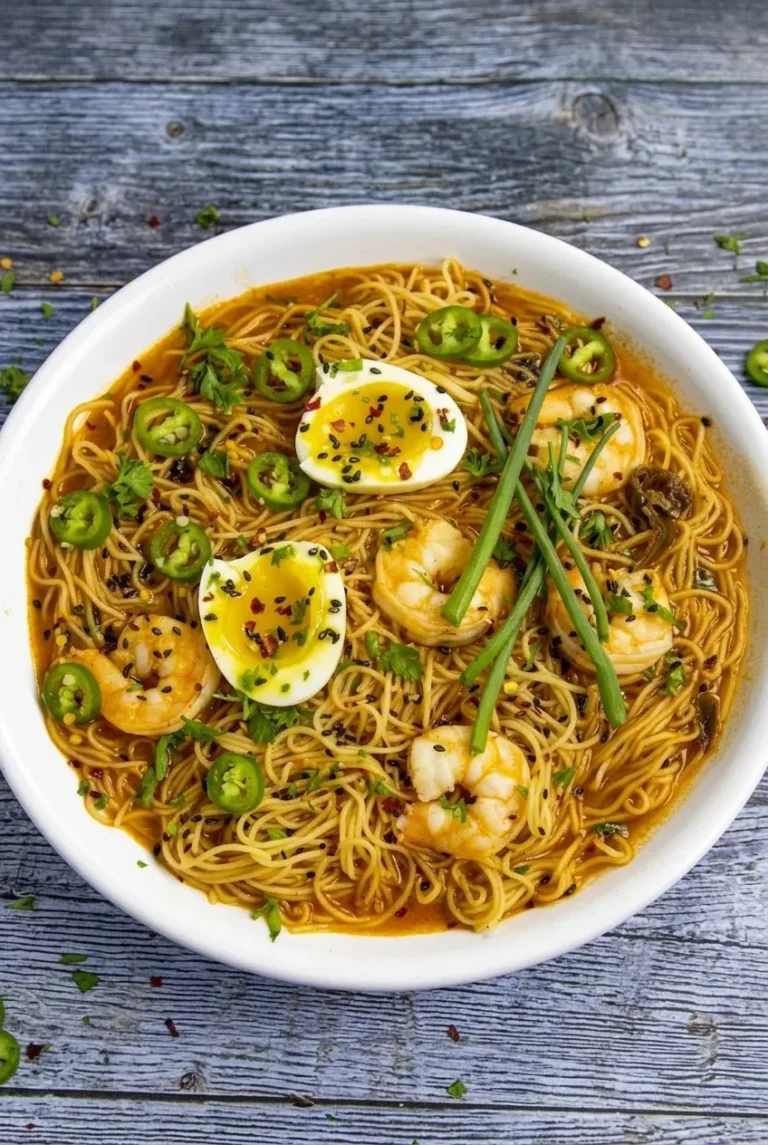
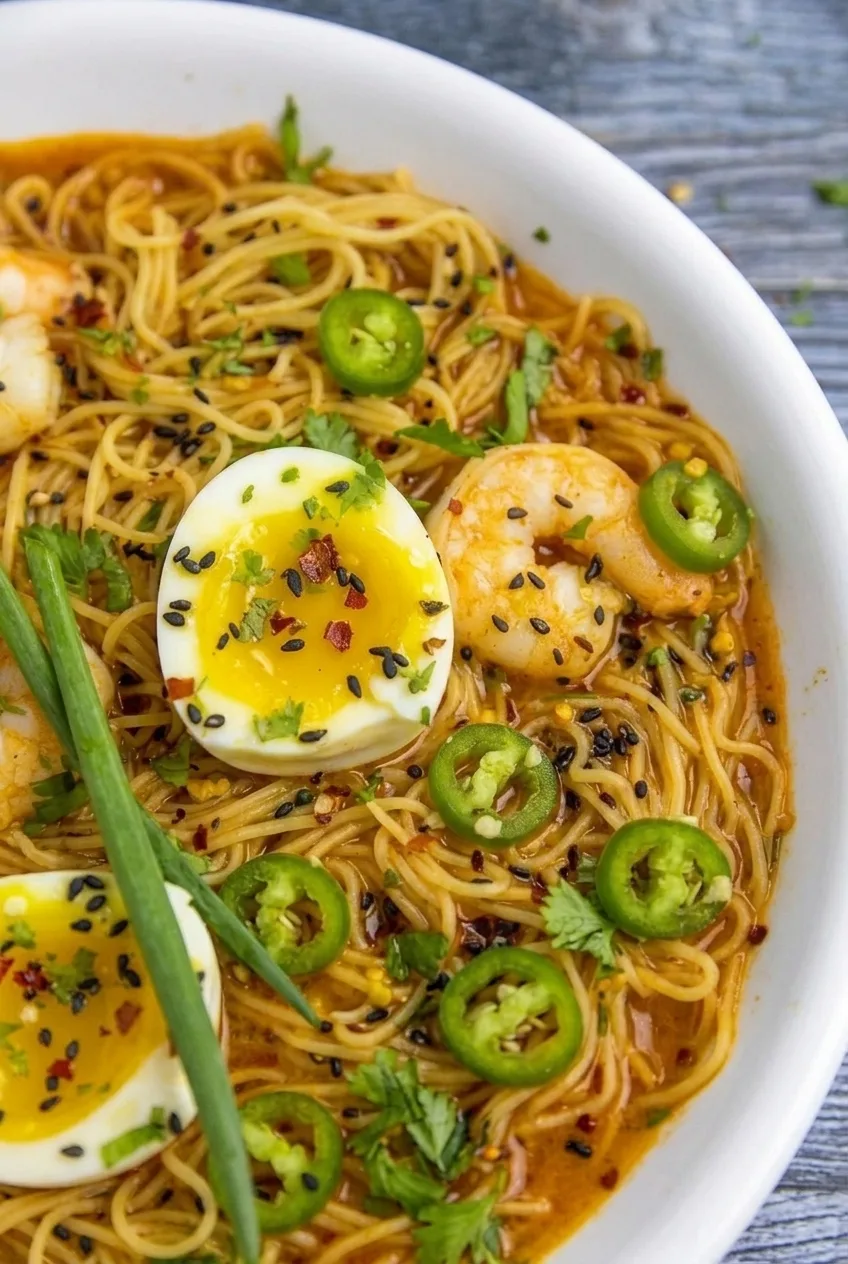
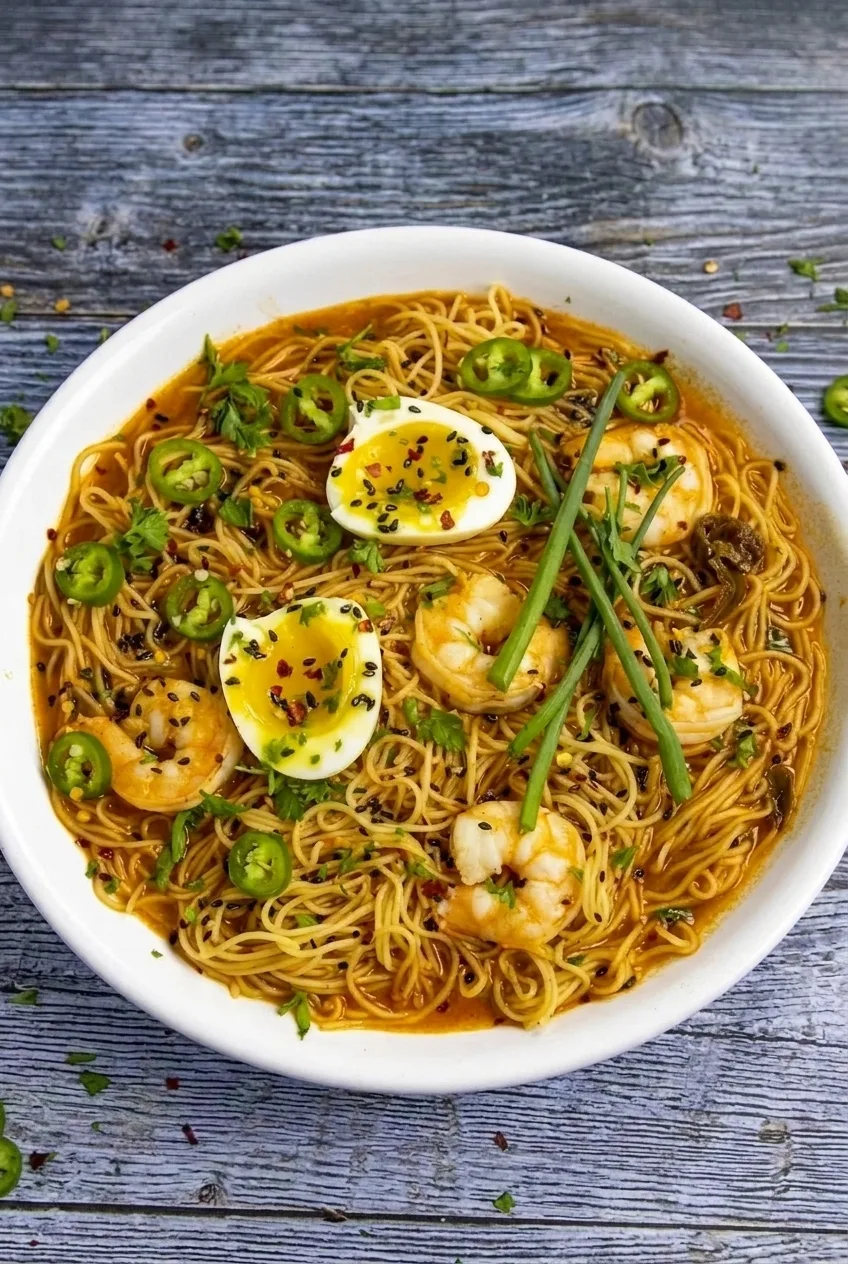
These ramen noodles sit in an orange-red, sweet-and-spicy broth rather than a dry sauce. Shrimp, halved jammy eggs, jalapeño rings, scallion greens, and black sesame make two generously filled bowls. Cook the eggs and noodles separately, then simmer the shrimp briefly in the broth. That order keeps the yolks soft, the noodles chewy, and the shrimp tender.

Ingredients for Sweet and Spicy Ramen Noodles

Close view of soft egg yolk, shrimp, and distinct ramen strands in glossy orange-red broth
  • 2 packages dried ramen noodles, about 6 ounces total (170g), seasoning packets discarded
  • 8 ounces peeled and deveined shrimp (225g)
  • 2 large eggs
  • 3 cups low-sodium chicken or vegetable broth
  • 1 teaspoon neutral oil
  • 3 garlic cloves, minced
  • 1 tablespoon gochujang
  • 2 tablespoons low-sodium soy sauce
  • 1 tablespoon packed brown sugar
  • 1 teaspoon rice vinegar
  • 1 small jalapeño, thinly sliced
  • 2 scallions, greens cut into long pieces
  • 1 teaspoon black sesame seeds

How to Make Sweet and Spicy Ramen Noodles

Complete bowl of shrimp and jammy egg ramen on a gray wooden table
  1. Boil the eggs: Bring a saucepan of water to a boil. Gently lower in the eggs and cook for about 7 minutes, until the whites are set and the yolks are still soft. Transfer to cold water to stop the cooking. Peel and halve once cool enough to handle.
  2. Mix the seasonings: Stir the gochujang, soy sauce, brown sugar, and rice vinegar together in a small bowl until no large lumps of chile paste remain.
  3. Make the broth: Heat the oil in a 3- to 4-quart saucepan over medium heat. Stir in the garlic briefly, just until fragrant; do not let it brown. Add the broth and seasoning mixture, stirring until the paste disperses. Bring to a boil, then simmer uncovered for several minutes. Taste before adding the shrimp. Add a little brown sugar or gochujang if needed, or a little water if the broth tastes too salty or intense.
  4. Cook the noodles: Bring fresh water to a boil in the egg saucepan. Cook the ramen according to its package, checking before the full suggested time. Drain when the strands have loosened but still have slight resistance when bitten. Divide between two wide bowls.
  5. Simmer the shrimp: Add the shrimp to the gently simmering broth. Turn as needed and cook for about 2 to 4 minutes, checking after 2 minutes. The shrimp should be opaque and firm, with no translucent centers. Avoid a vigorous simmer, which can make them tough. If using a thermometer, cook to 145°F (65°C).
  6. Fill the bowls: Ladle the broth around and between the noodles, leaving liquid visible and the noodles prominent. Arrange the shrimp and egg halves on top, then add the jalapeño rings, long scallion greens, and black sesame seeds. Serve immediately.

How to Keep the Noodles Chewy

Ramen continues to soften in hot broth. Stop cooking it just shy of tender and assemble the bowls only when ready to eat. Fresh ramen also works, but follow its package instructions rather than the dried noodles’ cooking time.

Adjusting the Sweetness and Heat

Gochujang and broth vary in heat and saltiness, so taste the broth before the shrimp goes in. Add more gochujang a little at a time for extra heat, or offer chile flakes at the table. Use fewer jalapeño slices in a milder bowl while keeping a few rings on top.

For another brothy bowl, try spicy ramen noodles with jammy eggs and miso broth. For a different chile-forward noodle dish, see chili oil ramen noodles with an egg.

Make-Ahead and Leftovers

The eggs and broth can be prepared ahead, but cook the noodles close to serving. Refrigerate leftovers promptly in airtight containers for up to 3 days. When practical, keep the noodles apart from the broth and refrigerate the eggs separately.

Reheat the broth and shrimp gently until heated through. Add the noodles just long enough to warm them, then top with the eggs. Prolonged simmering will soften the noodles and toughen the shrimp.

Nutrition

Approximate nutrition per generous bowl (1 of 2 servings): 680 calories, 42g protein, 25g fat, and 73g carbohydrates. Approximate values per 100g of prepared ramen: 95 calories, 6g protein, 3g fat, and 10g carbohydrates. Values vary with the ramen, broth, and amount of liquid in each bowl.

Sweet and Spicy Ramen Noodles

Ramen noodles are served in a sweet-and-spicy broth with shrimp, soft-boiled eggs, jalapeño, scallions, and black sesame.
Course: Soup
Cuisine: Asian
Prep: 10 min
Cook: 20 min
Total: 30 min
Servings: 2 Calories: 680 kcal

Equipment

  • 3- to 4-quart saucepan
  • Small bowl
  • Colander
  • Knife and cutting board

Ingredients

  • 2 packages dried ramen noodles, about 6 ounces total (170g), seasoning packets discarded
  • 8 ounces peeled and deveined shrimp (225g)
  • 2 large eggs
  • 3 cups low-sodium chicken or vegetable broth
  • 1 teaspoon neutral oil
  • 3 garlic cloves, minced
  • 1 tablespoon gochujang
  • 2 tablespoons low-sodium soy sauce
  • 1 tablespoon packed brown sugar
  • 1 teaspoon rice vinegar
  • 1 small jalapeño, thinly sliced
  • 2 scallions, greens cut into long pieces
  • 1 teaspoon black sesame seeds

Instructions

  1. Bring a saucepan of water to a boil. Gently lower in the eggs and cook for about 7 minutes, until the whites are set and the yolks are still soft.
  2. Transfer the eggs to cold water to stop the cooking. Peel and halve once cool enough to handle.
  3. In a small bowl, stir together the gochujang, soy sauce, brown sugar, and rice vinegar until the chile paste is mostly smooth.
  4. Heat the oil in a 3- to 4-quart saucepan over medium heat. Stir in the garlic just until fragrant, without letting it brown.
  5. Add the broth and seasoning mixture, stirring until the paste disperses. Bring to a boil, then simmer uncovered for several minutes. Taste and adjust with a little brown sugar, gochujang, or water as needed.
  6. Bring fresh water to a boil in the egg saucepan. Cook the ramen according to the package, checking before the full suggested time. Drain when the noodles have loosened but still have slight resistance, then divide between two wide bowls.
  7. Add the shrimp to the gently simmering broth. Turn as needed and cook for about 2 to 4 minutes, checking after 2 minutes, until opaque and firm with no translucent centers. If using a thermometer, cook to 145°F (65°C).
  8. Ladle the broth around and between the noodles. Arrange the shrimp and egg halves on top, then add the jalapeño, scallion greens, and black sesame seeds. Serve immediately.

Tips

  • Stop cooking the noodles just shy of tender; they will continue to soften in the hot broth.
  • Taste the broth before adding the shrimp because gochujang and broth vary in heat and saltiness.
  • Keep the broth at a gentle simmer while cooking the shrimp to help prevent them from becoming tough.
  • Assemble the bowls just before serving to keep the noodles chewy.

Variations

  • Milder Ramen: Use fewer jalapeño slices and add only a little gochujang to the broth.
  • Extra-Spicy Ramen: Add more gochujang a little at a time or offer chile flakes at the table.
  • Fresh Ramen: Use fresh ramen and follow its package cooking instructions.

Notes

Prepare the eggs and broth ahead, but cook the noodles close to serving. Refrigerate leftovers in airtight containers for up to 3 days; keep noodles and eggs separate when practical. Reheat the broth and shrimp gently, then warm the noodles briefly.

Nutrition

Calories: 680 kcal | Protein: 42 g | Fat: 25 g | Carbohydrates: 73 g | Per 100g Calories: 95 kcal | Per 100g Protein: 6 g | Per 100g Fat: 3 g | Per 100g Carbohydrates: 10 g

Ramen with Crispy Chicken

Golden panko-crusted chicken sits over noodles in a light soy-seasoned broth, with corn, green onions, and a halved boiled egg in each bowl. The chicken is pan-fried separately, then sliced and added at the last moment so most of its crust stays above the liquid.

Cook the noodles separately, too. They can go straight from the pot into the bowls without waiting in hot broth, where they would continue to soften.

Ingredients for Ramen with Crispy Chicken

Close view of golden panko crust and white chicken interior above ramen noodles

Makes 2 generous bowls. Prep time: 15–20 minutes. Cook time: 20–25 minutes with overlapping tasks. Total time: about 40 minutes.

  • 2 small boneless, skinless chicken breasts, about 12 oz total (340g)
  • 1/4 teaspoon salt, plus more to taste
  • 1/4 teaspoon black pepper
  • 1/4 cup all-purpose flour (30g)
  • 3 large eggs: 1 for breading and 2 for serving
  • 3/4 cup panko breadcrumbs (45g)
  • About 1/3 cup neutral cooking oil for frying, plus 1 teaspoon for the broth
  • 2 garlic cloves, minced
  • 1 teaspoon grated fresh ginger
  • 3 cups low-sodium chicken broth
  • 1 tablespoon low-sodium soy sauce, plus more to taste
  • 2 portions plain ramen noodles, about 3 oz each (170g total); discard the seasoning packets if using instant ramen
  • 3/4 cup corn kernels, thawed if frozen (120g)
  • 3 green onions, cut on a bias into short, substantial pieces

Optional for serving: a few drops of chili oil per bowl.

How to Make Ramen with Crispy Chicken

Complete bowl of crispy chicken ramen on a wooden table, with corn, green onions, and egg visible
  1. Boil the topping eggs: Lower 2 eggs into boiling water and cook for about 8–9 minutes, until the whites are set and the yolks are golden and mostly set. Cool briefly in cold water, then peel and halve. Reserve the third egg for breading.
  2. Bread the chicken: Pound each breast to an even 1/2-inch thickness and season both sides with the salt and pepper. Put the flour, the remaining egg (beaten), and the panko in three separate shallow dishes. Coat each cutlet in flour, then egg, then panko, pressing gently to help the crumbs adhere.
  3. Fry the cutlets: Heat about 1/3 cup oil in a 10- to 12-inch skillet over medium heat until shimmering. Fry uncovered for approximately 3–4 minutes per side, turning when the underside is golden. Cook one at a time if both will not fit without crowding, adding a little more oil if needed. Start checking the browning near 3 minutes per side. The crust should be deeply golden, and the thickest part of the chicken must reach 165°F (75°C). If the crumbs darken before the center is done, reduce the heat. Transfer to a wire rack and rest for about 3 minutes.
  4. Simmer the broth: While the chicken cooks, heat 1 teaspoon oil in a saucepan over medium heat. Cook the garlic and ginger briefly until fragrant, without browning. Add the broth and soy sauce, bring to a simmer, then reduce the heat to low. Simmer gently for 8–10 minutes, stirring occasionally; partially cover if needed to limit reduction. Taste before adding more soy sauce or salt.
  5. Cook the noodles and warm the corn: Near serving time, cook the noodles in a separate pot of water according to package directions. Check at the early end of the suggested time and drain as soon as they are tender. Warm the corn in the hot broth for 1–2 minutes, then lift it out to use as a separate topping.
  6. Assemble the bowls: Slice the chicken into thick strips. Divide the noodles between two wide bowls and ladle the broth around them, leaving some noodles visible. Arrange the corn, green onions, and two egg halves in distinct areas of each bowl. Add the chicken last, laying the slices in overlapping rows with most of the crust above the broth. Serve immediately.

How to Keep the Chicken Crisp

Even, thin cutlets can cook through before the panko gets too dark. Leave space around them in the skillet so the coating browns rather than steams, and use a rack after frying so steam does not collect underneath. Keep the chicken whole until just before assembly. The crust will soften where it touches broth, even when the slices are added last.

Getting the Timing and Broth Level Right

Boil the eggs first; they can wait while the cutlets and broth cook. Hold the broth at a gentle simmer and save the noodles for the end. Noodle packages differ, and cutlet thickness and skillet heat affect frying time, so use the package directions and the chicken’s golden crust and 165°F reading rather than the clock alone.

Three cups of broth gives these generously topped bowls a modest broth level, though depth depends on the bowls. Pour around the noodles, not over the chicken, and offer any extra hot broth separately.

For a version with fewer separate cooking steps, try one-pot chicken ramen with broccoli.

Storing and Reheating Leftovers

Refrigerate leftover chicken, broth, and noodles in separate covered containers when possible; refrigerate leftover corn and egg as well. Prompt refrigeration and use within 3–4 days are general food-safety guidance, not a promise that the breading will stay crisp.

Reheat the broth until steaming hot and heat the chicken separately until hot throughout, then assemble the bowl. Broth and eggs can be prepared ahead, but cook the noodles near serving. Assembled leftovers will be softer, and freezing assembled ramen is not recommended for its noodle and breading texture.

Nutrition

Approximate nutrition per generous bowl: 1,000 calories, 65g protein, 34g fat, and 105g carbohydrates. Approximate values per 100g of prepared ramen: 100 calories, 7g protein, 3g fat, and 11g carbohydrates. Values vary with the noodles, broth, portion sizes, and how much frying oil the chicken absorbs; the estimate does not count all the oil left in the skillet.

Ramen with Crispy Chicken

Panko-crusted chicken is served over ramen noodles in a light soy-seasoned broth with corn, green onions, and boiled egg.
Course: Soup
Cuisine: Japanese
Prep: 20 min
Cook: 25 min
Total: 40 min
Servings: 2 Calories: 1,000 kcal

Equipment

  • Saucepan
  • Skillet
  • Pot
  • Shallow dishes
  • Wire rack
  • Meat thermometer

Ingredients

For the Chicken

  • 2 small boneless, skinless chicken breasts, about 12 oz (340 g) total
  • 1/4 teaspoon salt, plus more to taste
  • 1/4 teaspoon black pepper
  • 1/4 cup all-purpose flour (30 g)
  • 1 large egg, beaten
  • 3/4 cup panko breadcrumbs (45 g)
  • About 1/3 cup neutral cooking oil, plus more if needed

For the Broth and Noodles

  • 1 teaspoon neutral cooking oil
  • 2 garlic cloves, minced
  • 1 teaspoon grated fresh ginger
  • 3 cups low-sodium chicken broth
  • 1 tablespoon low-sodium soy sauce, plus more to taste
  • 2 portions plain ramen noodles, about 3 oz each (170 g total); discard seasoning packets if using instant ramen
  • 3/4 cup corn kernels (120 g), thawed if frozen

For Serving

  • 2 large eggs
  • 3 green onions, cut on a bias into short pieces
  • Chili oil, optional

Instructions

  1. Bring a pot of water to a boil. Lower in 2 eggs and cook for 8–9 minutes, until the whites are set and the yolks are mostly set.
  2. Cool the eggs briefly in cold water, peel, and halve. Set aside the remaining egg for breading.
  3. Pound the chicken breasts to an even 1/2-inch thickness and season both sides with salt and pepper.
  4. Set the flour, beaten remaining egg, and panko in separate shallow dishes. Coat each chicken breast in flour, then egg, then panko, pressing gently so the crumbs adhere.
  5. Heat about 1/3 cup oil in a 10- to 12-inch skillet over medium heat until shimmering. Fry the chicken uncovered for about 3–4 minutes per side, cooking one piece at a time if needed.
  6. Check the chicken’s browning starting at about 3 minutes per side. Cook until deeply golden and the thickest part reaches 165°F (75°C). Reduce the heat if the crumbs darken before the chicken is cooked through.
  7. Transfer the chicken to a wire rack and rest for about 3 minutes.
  8. While the chicken cooks, heat 1 teaspoon oil in a saucepan over medium heat. Briefly cook the garlic and ginger until fragrant, without browning.
  9. Add the chicken broth and soy sauce. Bring to a simmer, reduce the heat to low, and simmer gently for 8–10 minutes, partially covering if needed. Taste and adjust with more soy sauce or salt.
  10. Near serving time, cook the noodles in a separate pot according to package directions. Check them at the early end of the suggested time and drain as soon as tender.
  11. Warm the corn in the hot broth for 1–2 minutes, then lift it out and set aside as a topping.
  12. Slice the chicken into thick strips. Divide the noodles between two wide bowls and ladle broth around them, leaving some noodles visible.
  13. Arrange the corn, green onions, and two egg halves in each bowl. Add the chicken last, keeping most of the crust above the broth. Serve immediately.

Tips

  • Leave space around the chicken in the skillet so the coating browns instead of steaming.
  • Rest fried chicken on a wire rack to prevent steam from collecting underneath.
  • Keep the chicken whole until just before assembly to help preserve its crust.
  • Cook noodles separately and add them to the bowls just before serving to prevent them from softening in the broth.
  • Pour broth around the noodles rather than over the chicken, and serve any extra broth separately.

Notes

Refrigerate leftovers in separate covered containers and use within 3–4 days. Reheat broth until steaming hot and heat chicken separately until hot throughout. Approximate nutrition per 100 g: 100 calories, 7 g protein, 3 g fat, and 11 g carbohydrates.

Nutrition

Calories: 1,000 kcal | Protein: 65 g | Fat: 34 g | Carbohydrates: 105 g